RickRollerLT1
-
Posts
607 -
Joined
-
Last visited
1 Follower
Recent Profile Visitors


RickRollerLT1's Achievements
MCM Ohana (6/6)
-
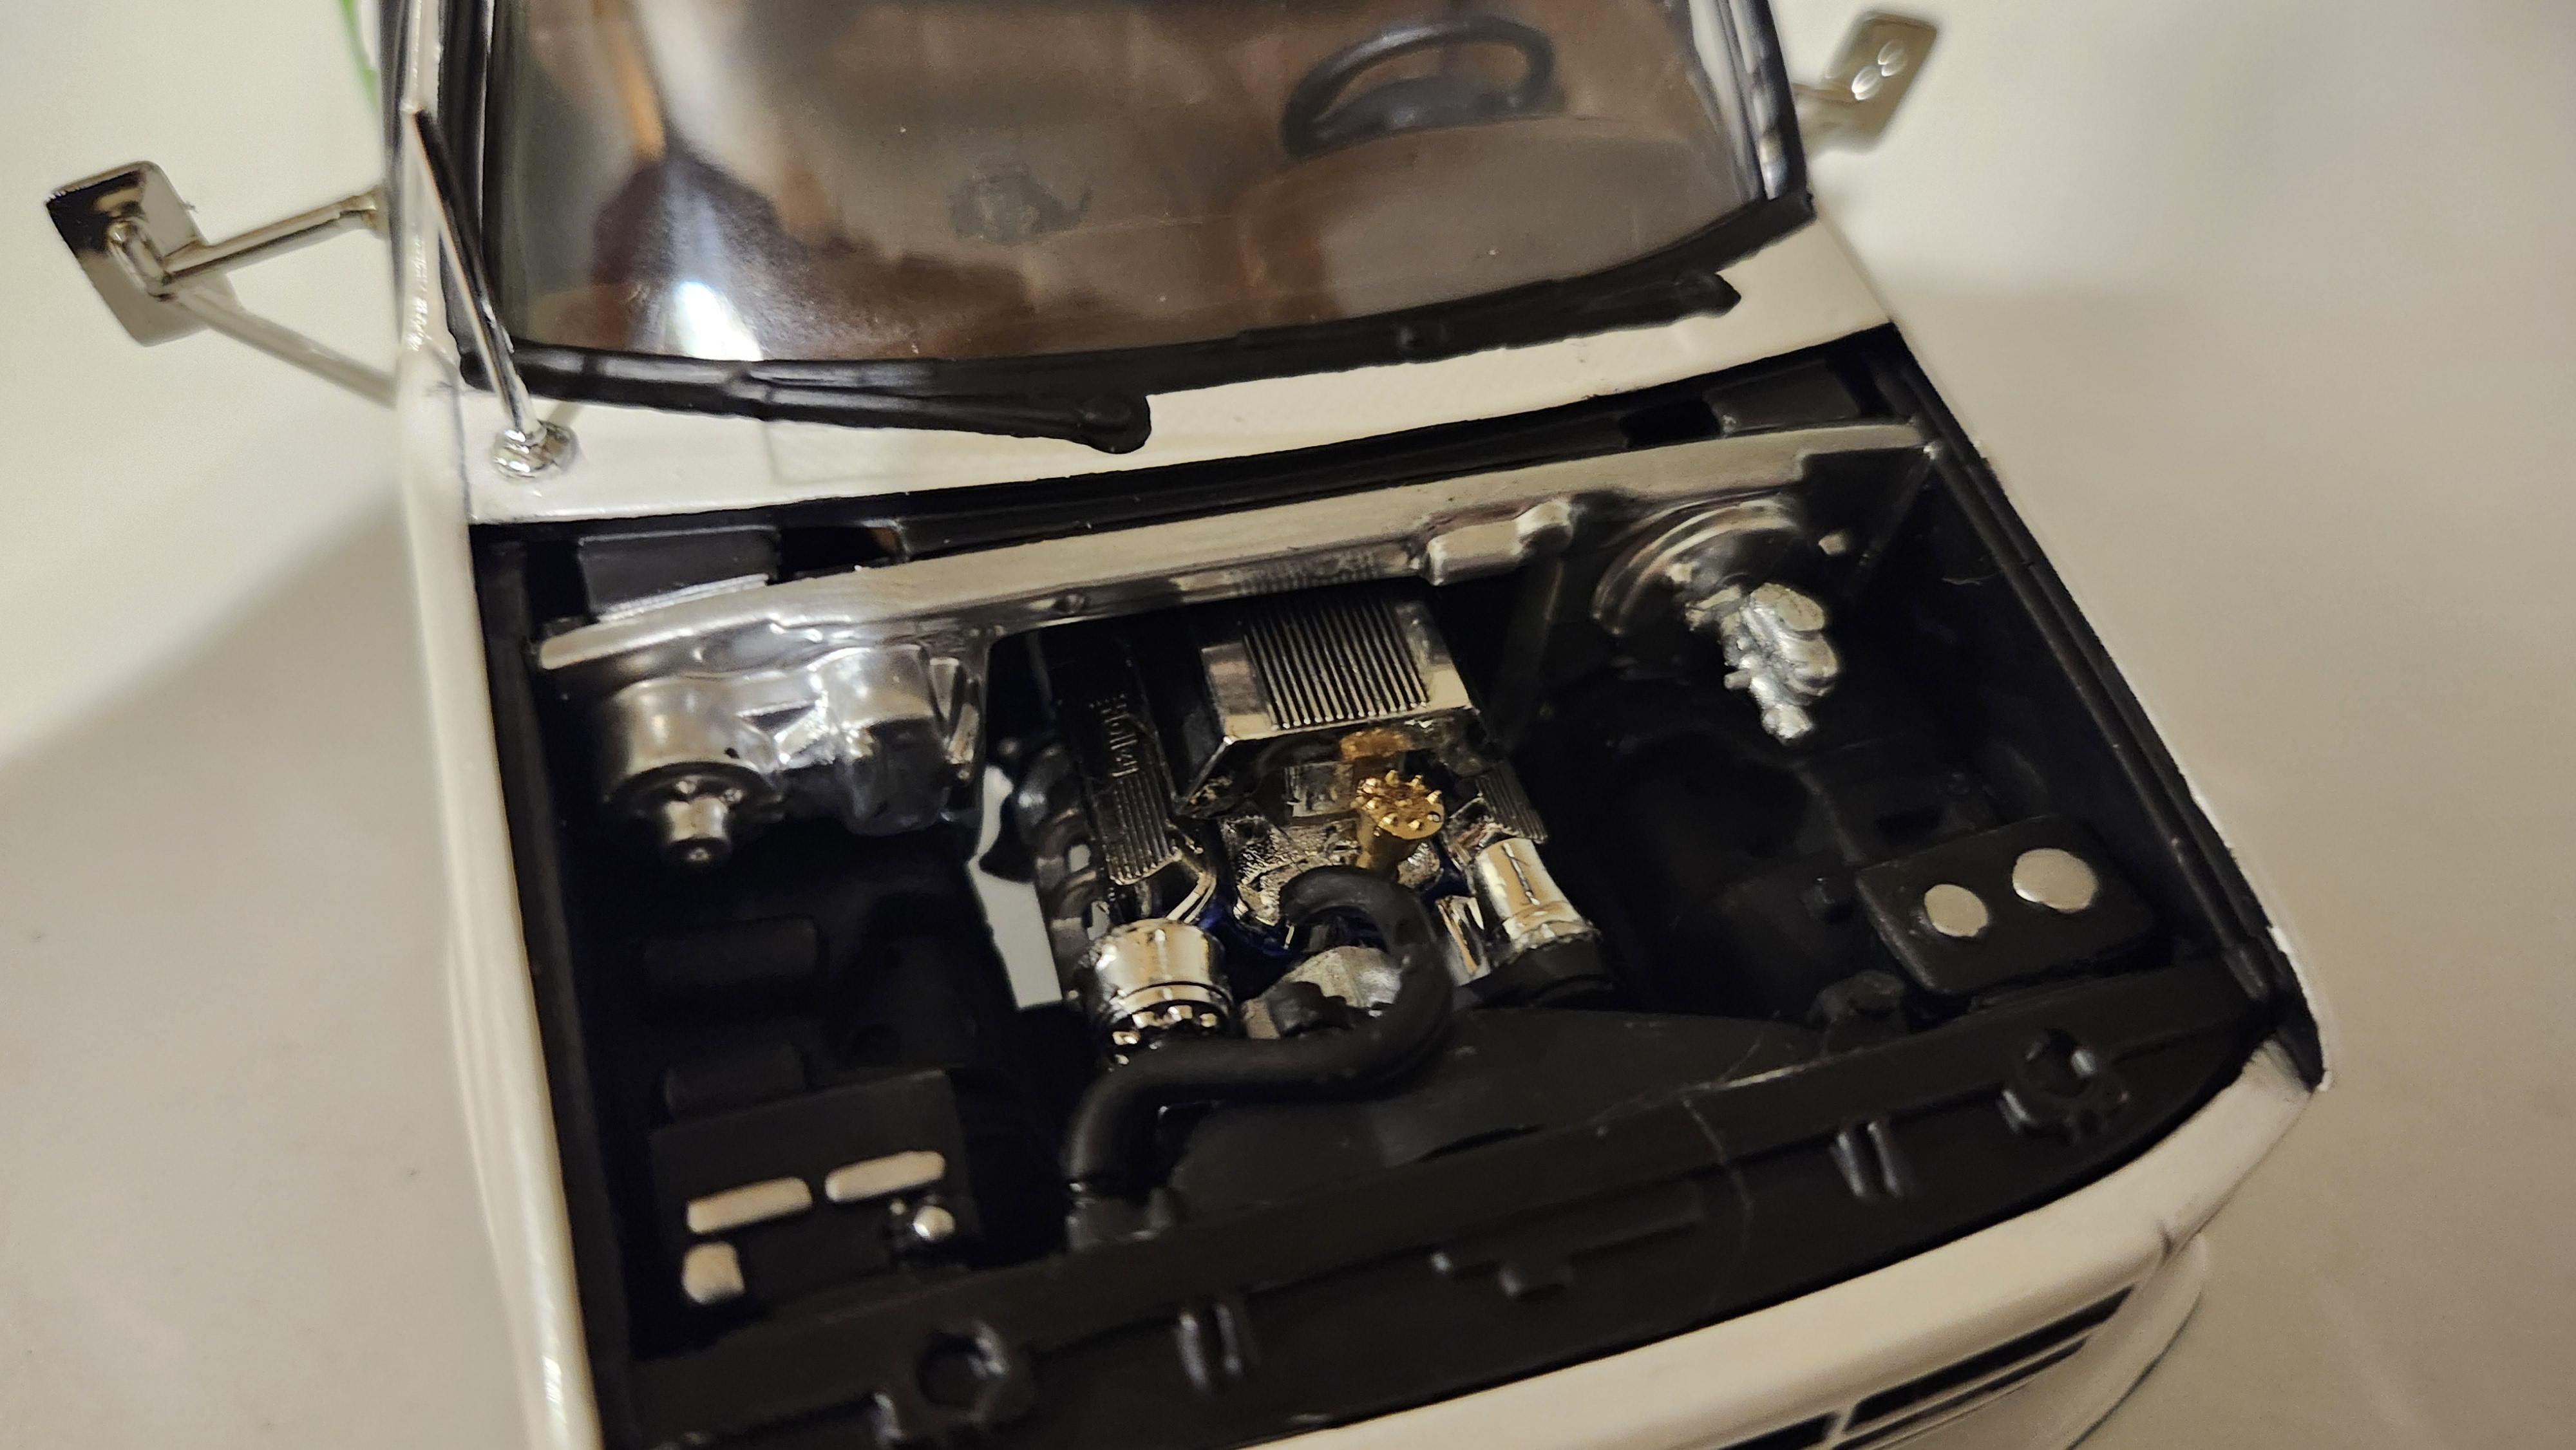
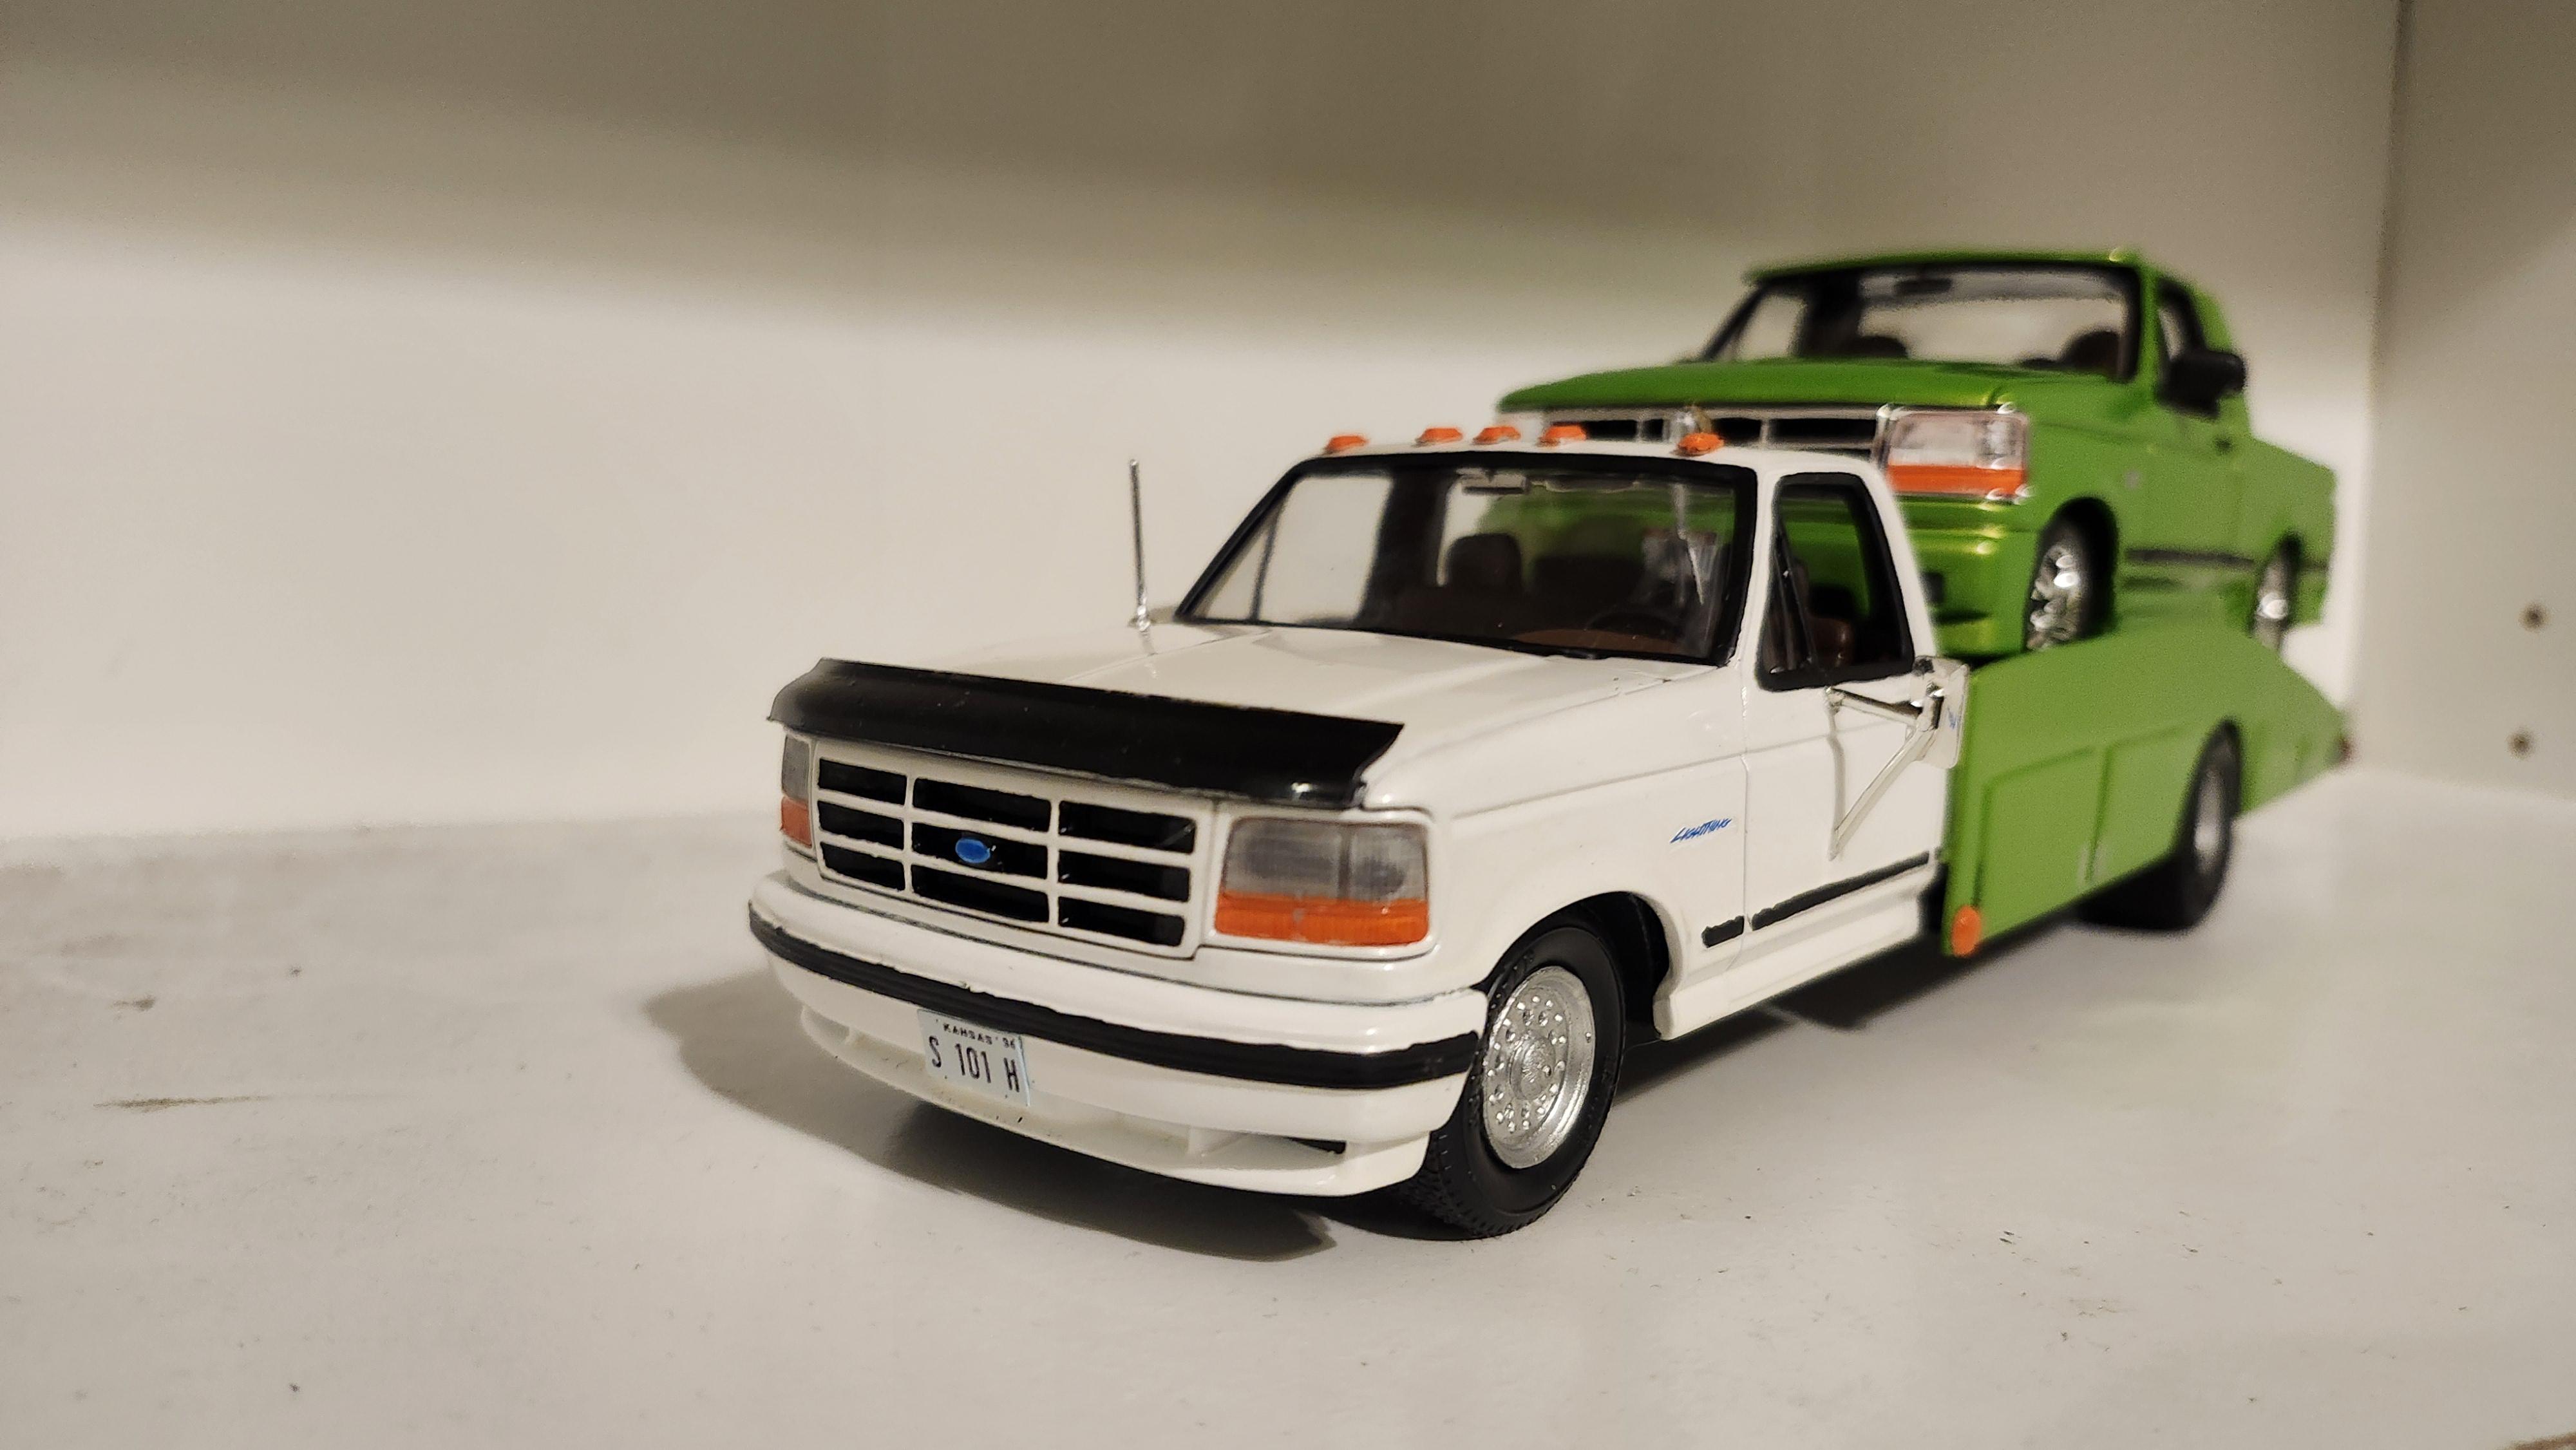
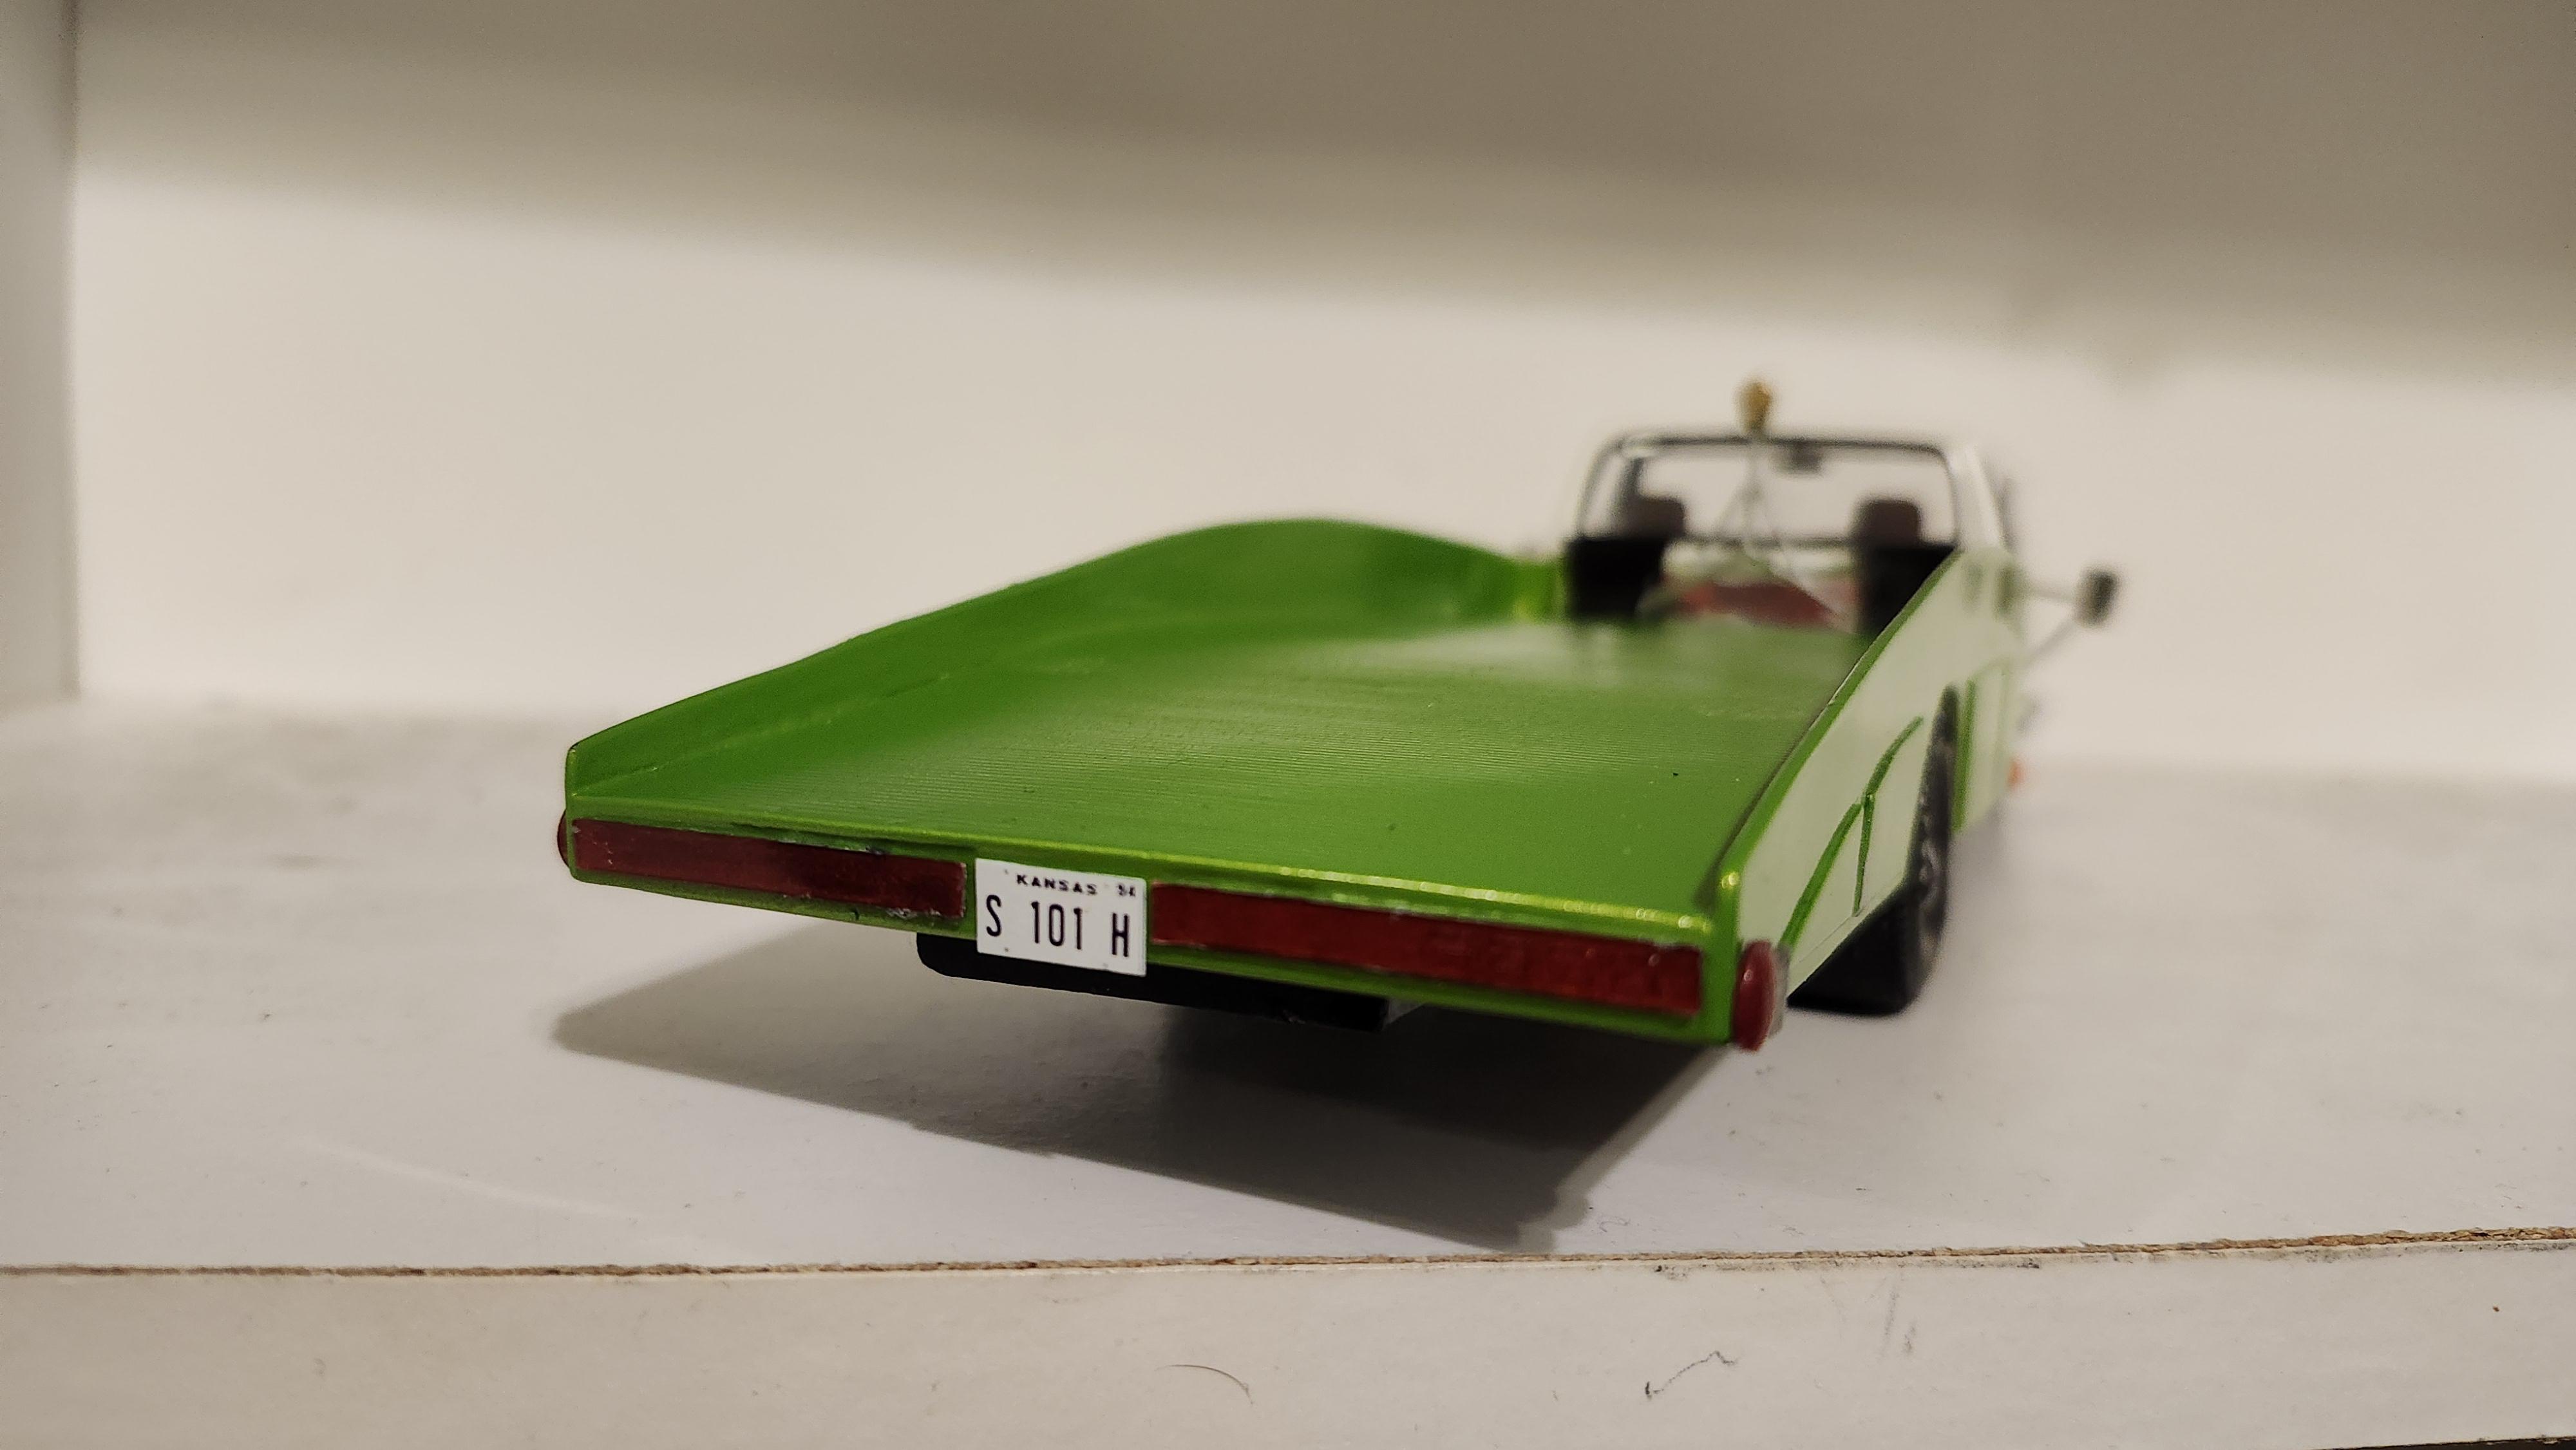
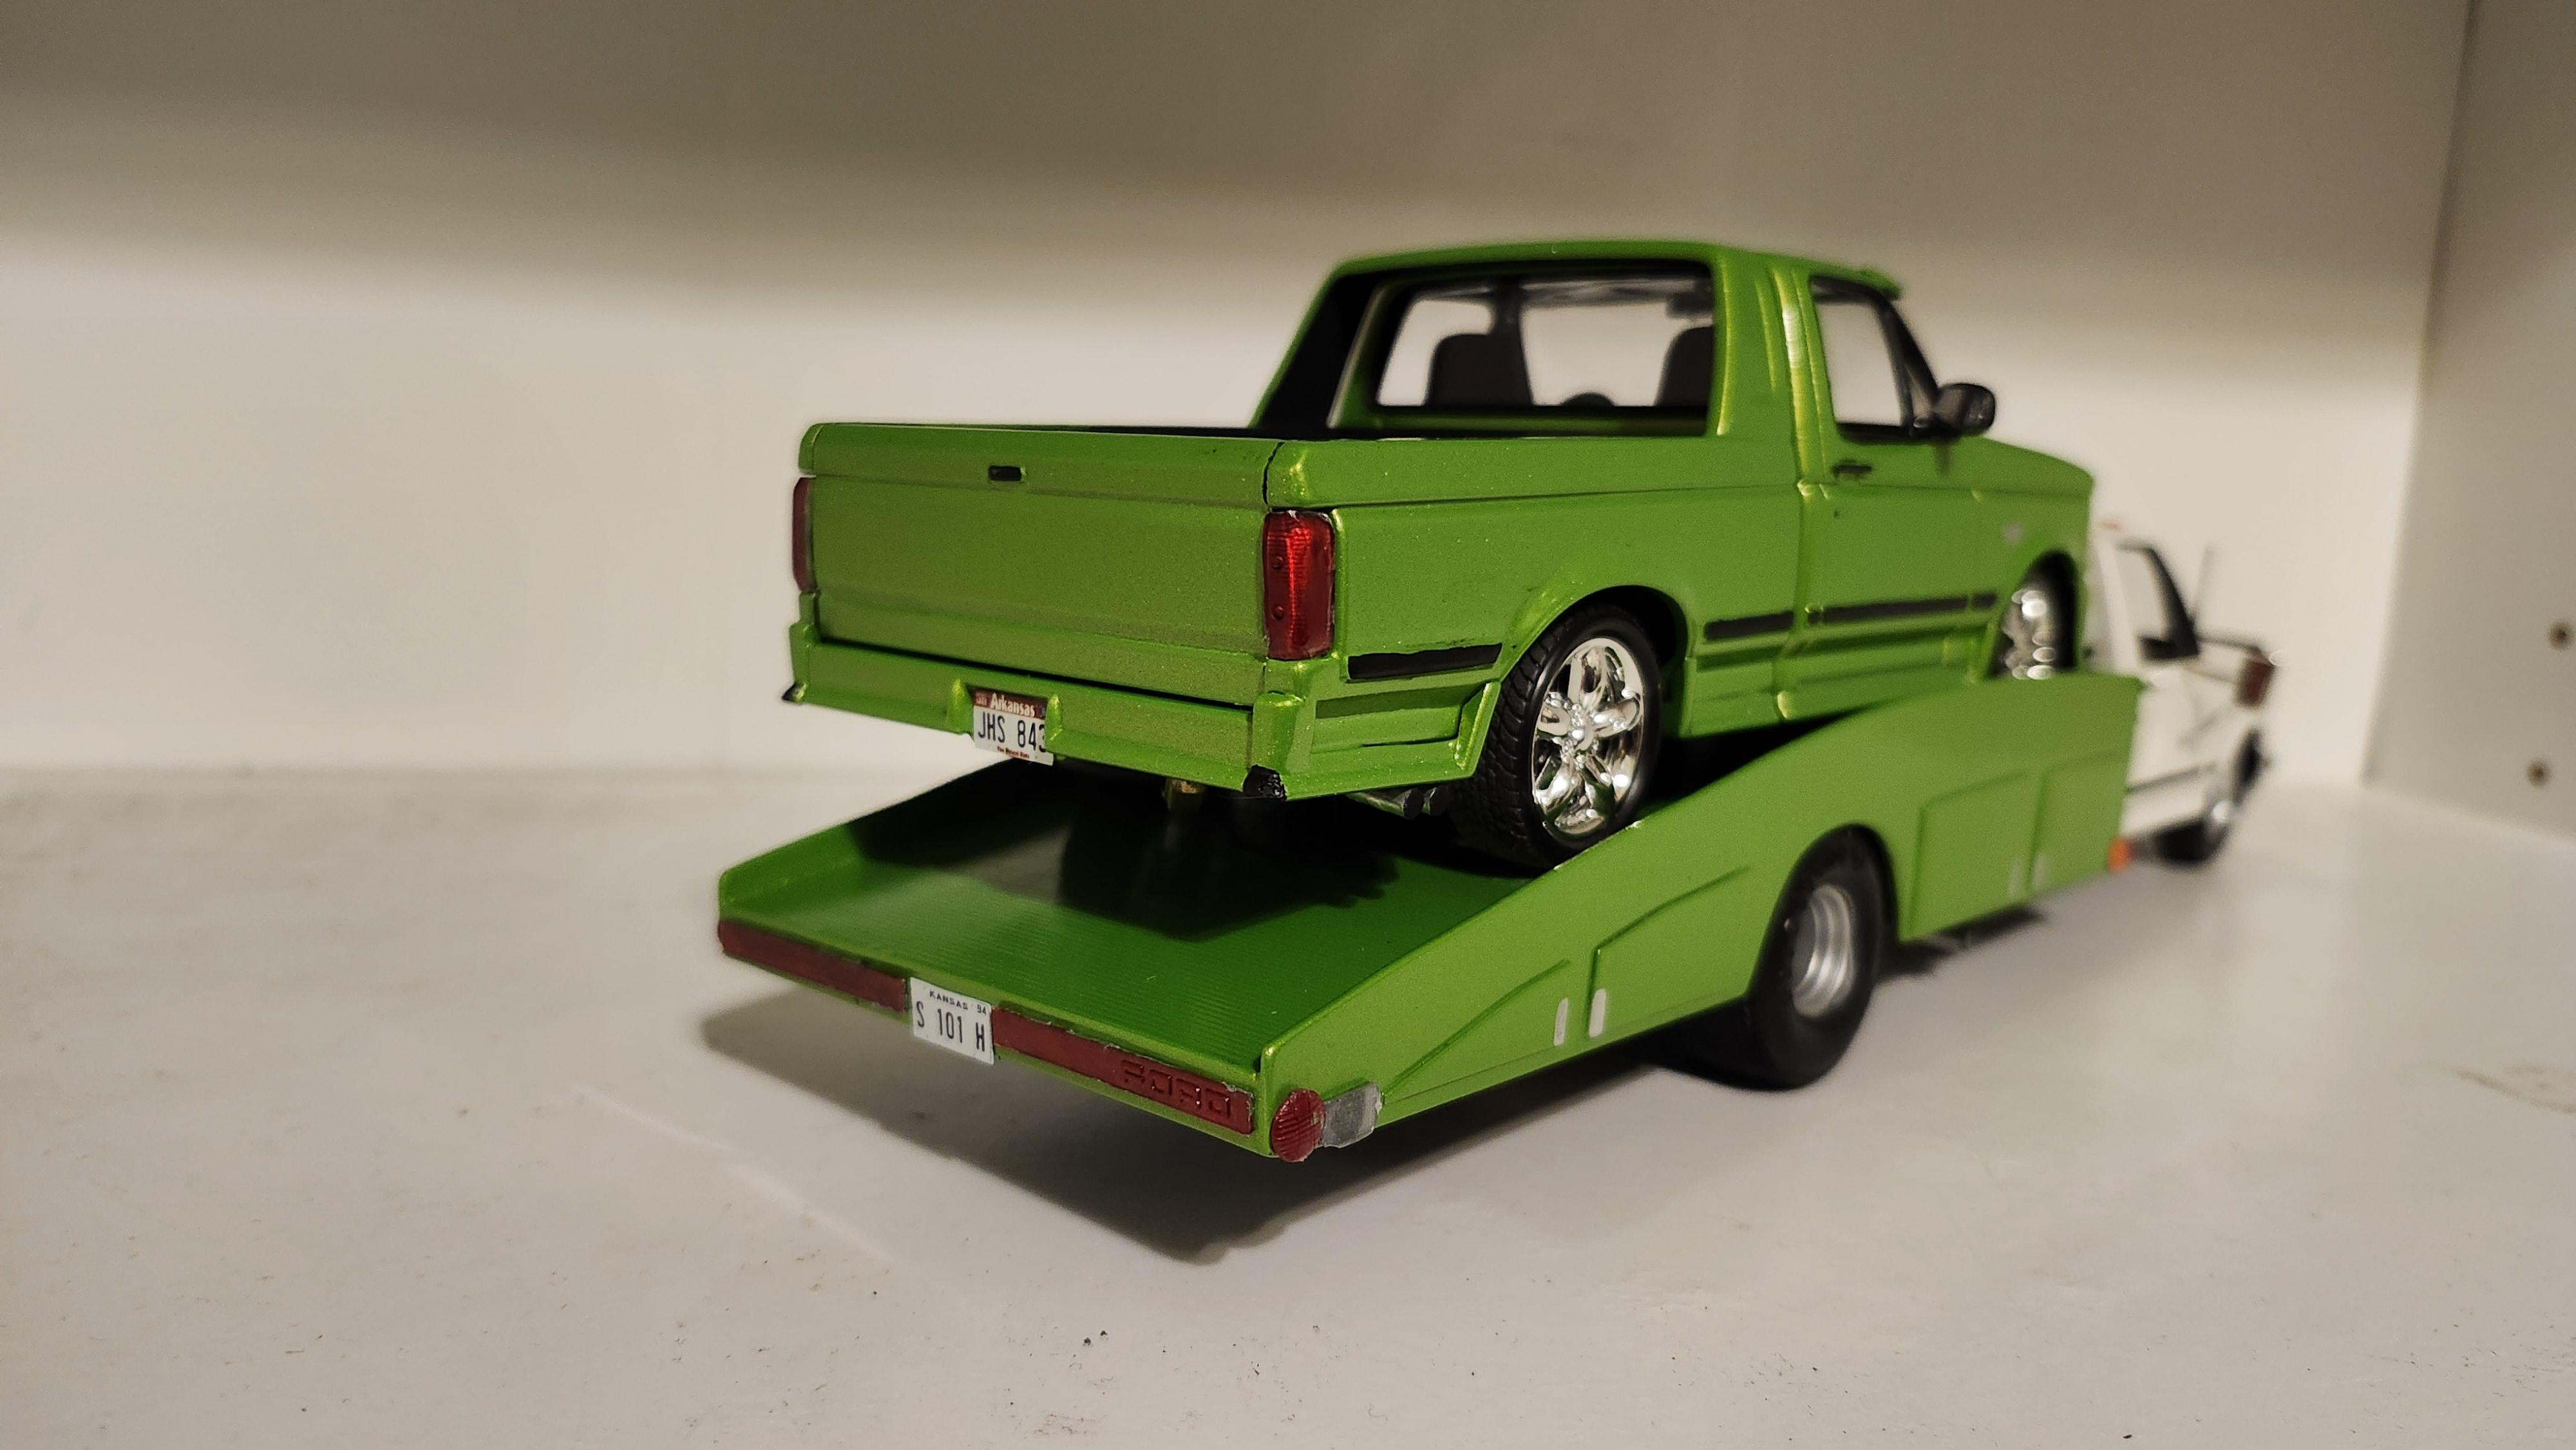
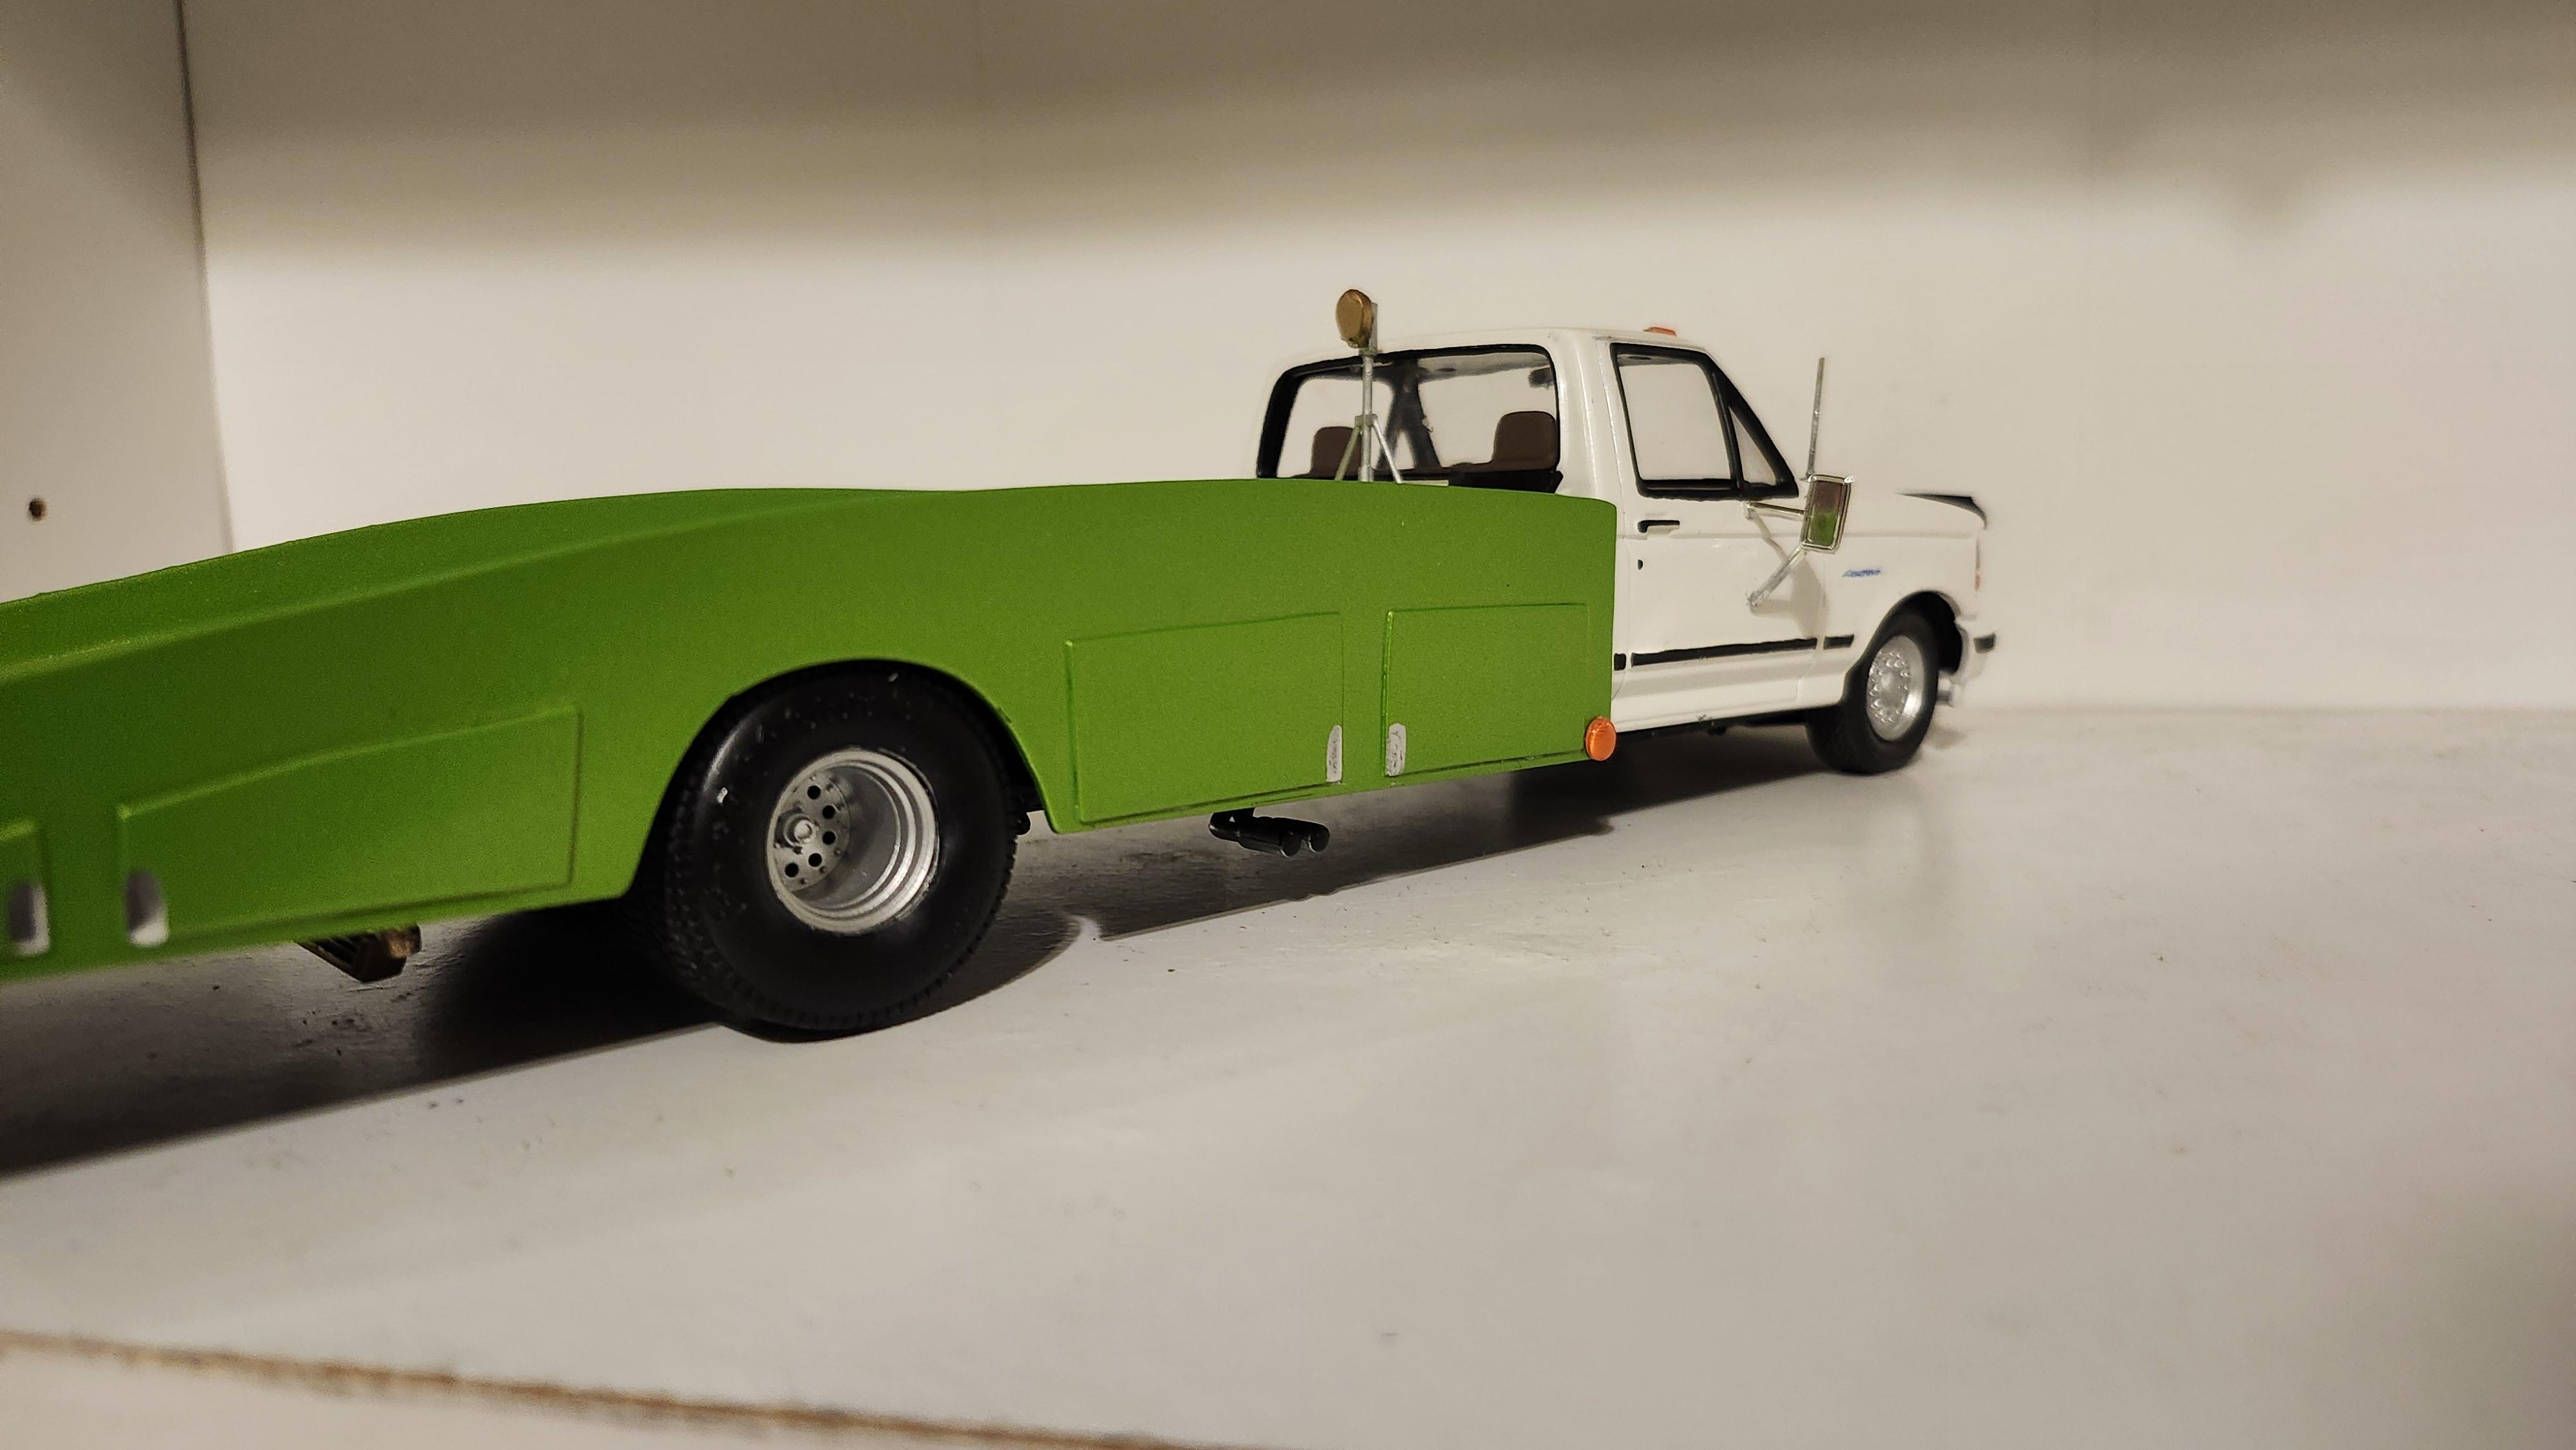
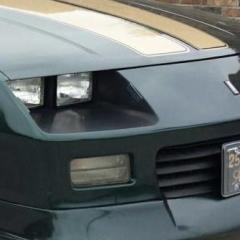
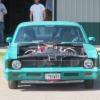
 Fresh off the bench! Started out as a AMT Ford F-150 Lightning, final product reflects the 350 because of lengthened and extended frame, among other changes. Several modifications and parts from other kits, beefy rear tires come off a Revell Pro Street Thunderbird. Major mods include stretched frame using Evergreen tubing and scratchbuilt ramp bed from Evergreen Styrene sheets. Cab is Tamiya TS-45 Pearl White and bed is in TS-52 Candy Lime Green, all cleared with Pledge Pared with '93 F-150 Shortbed in simluar color schem Pared with '93 F-150 Shortbed in simluar color scheme. Its own thread
-
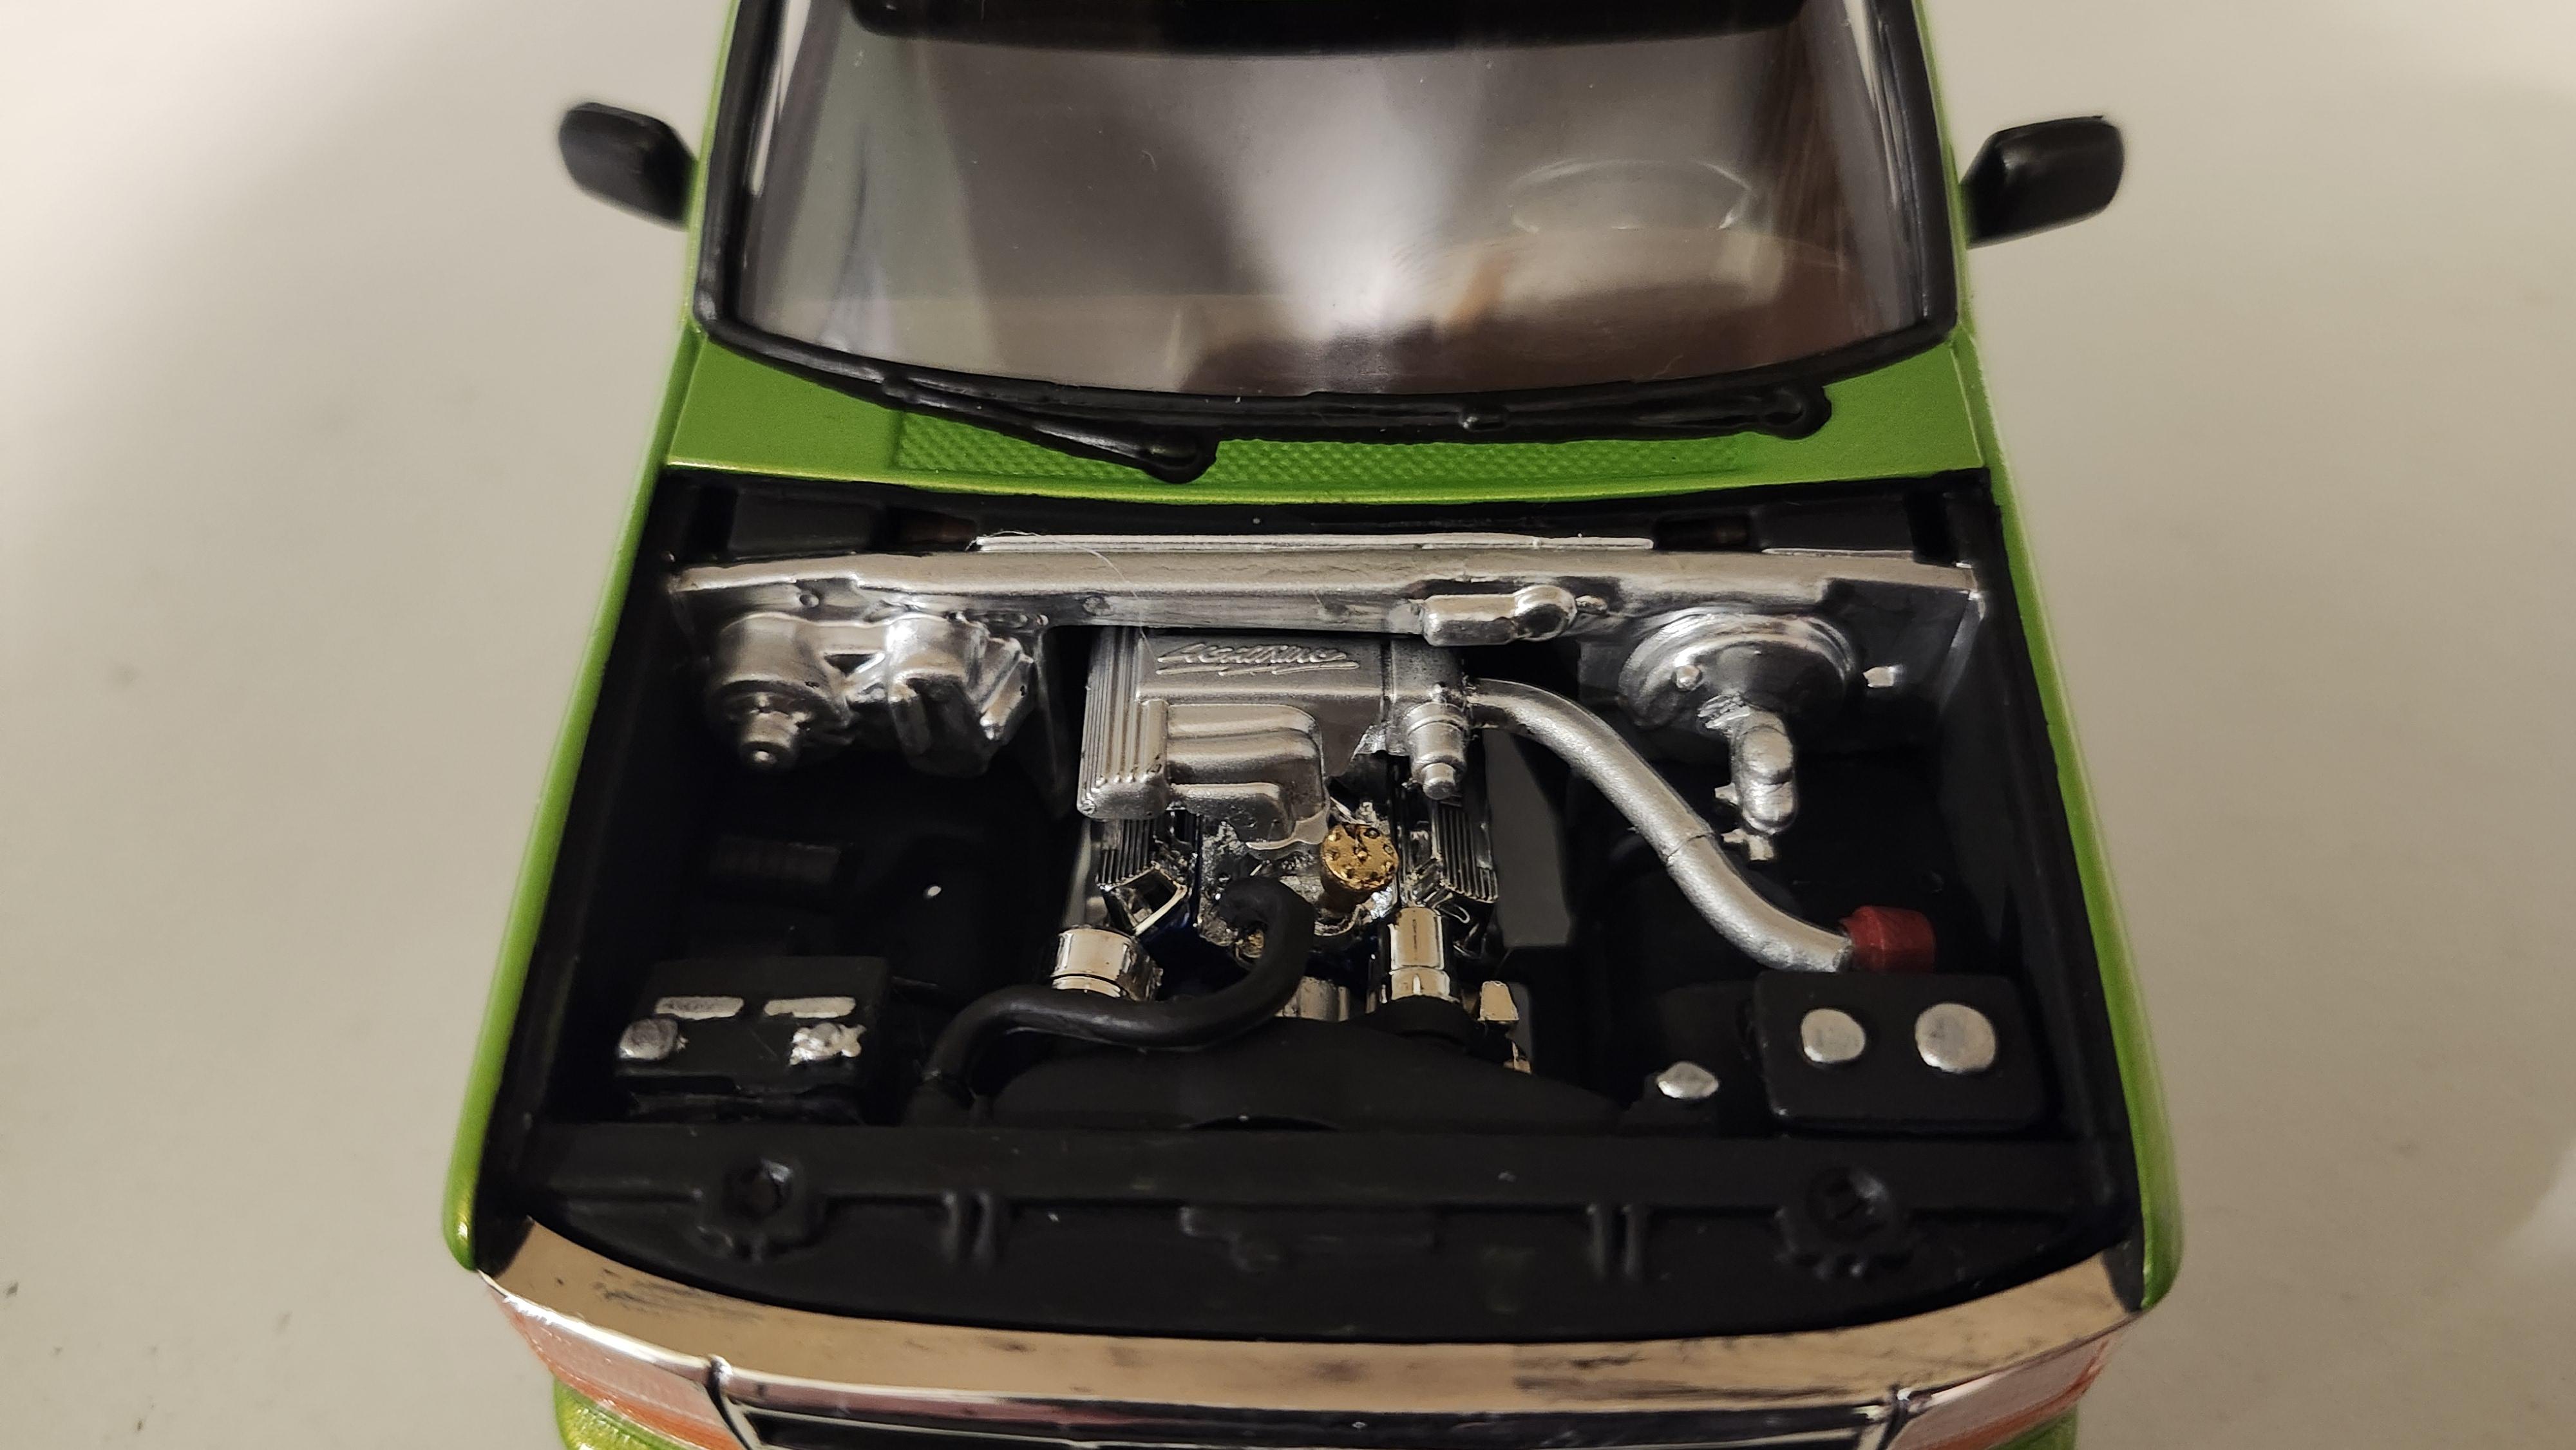
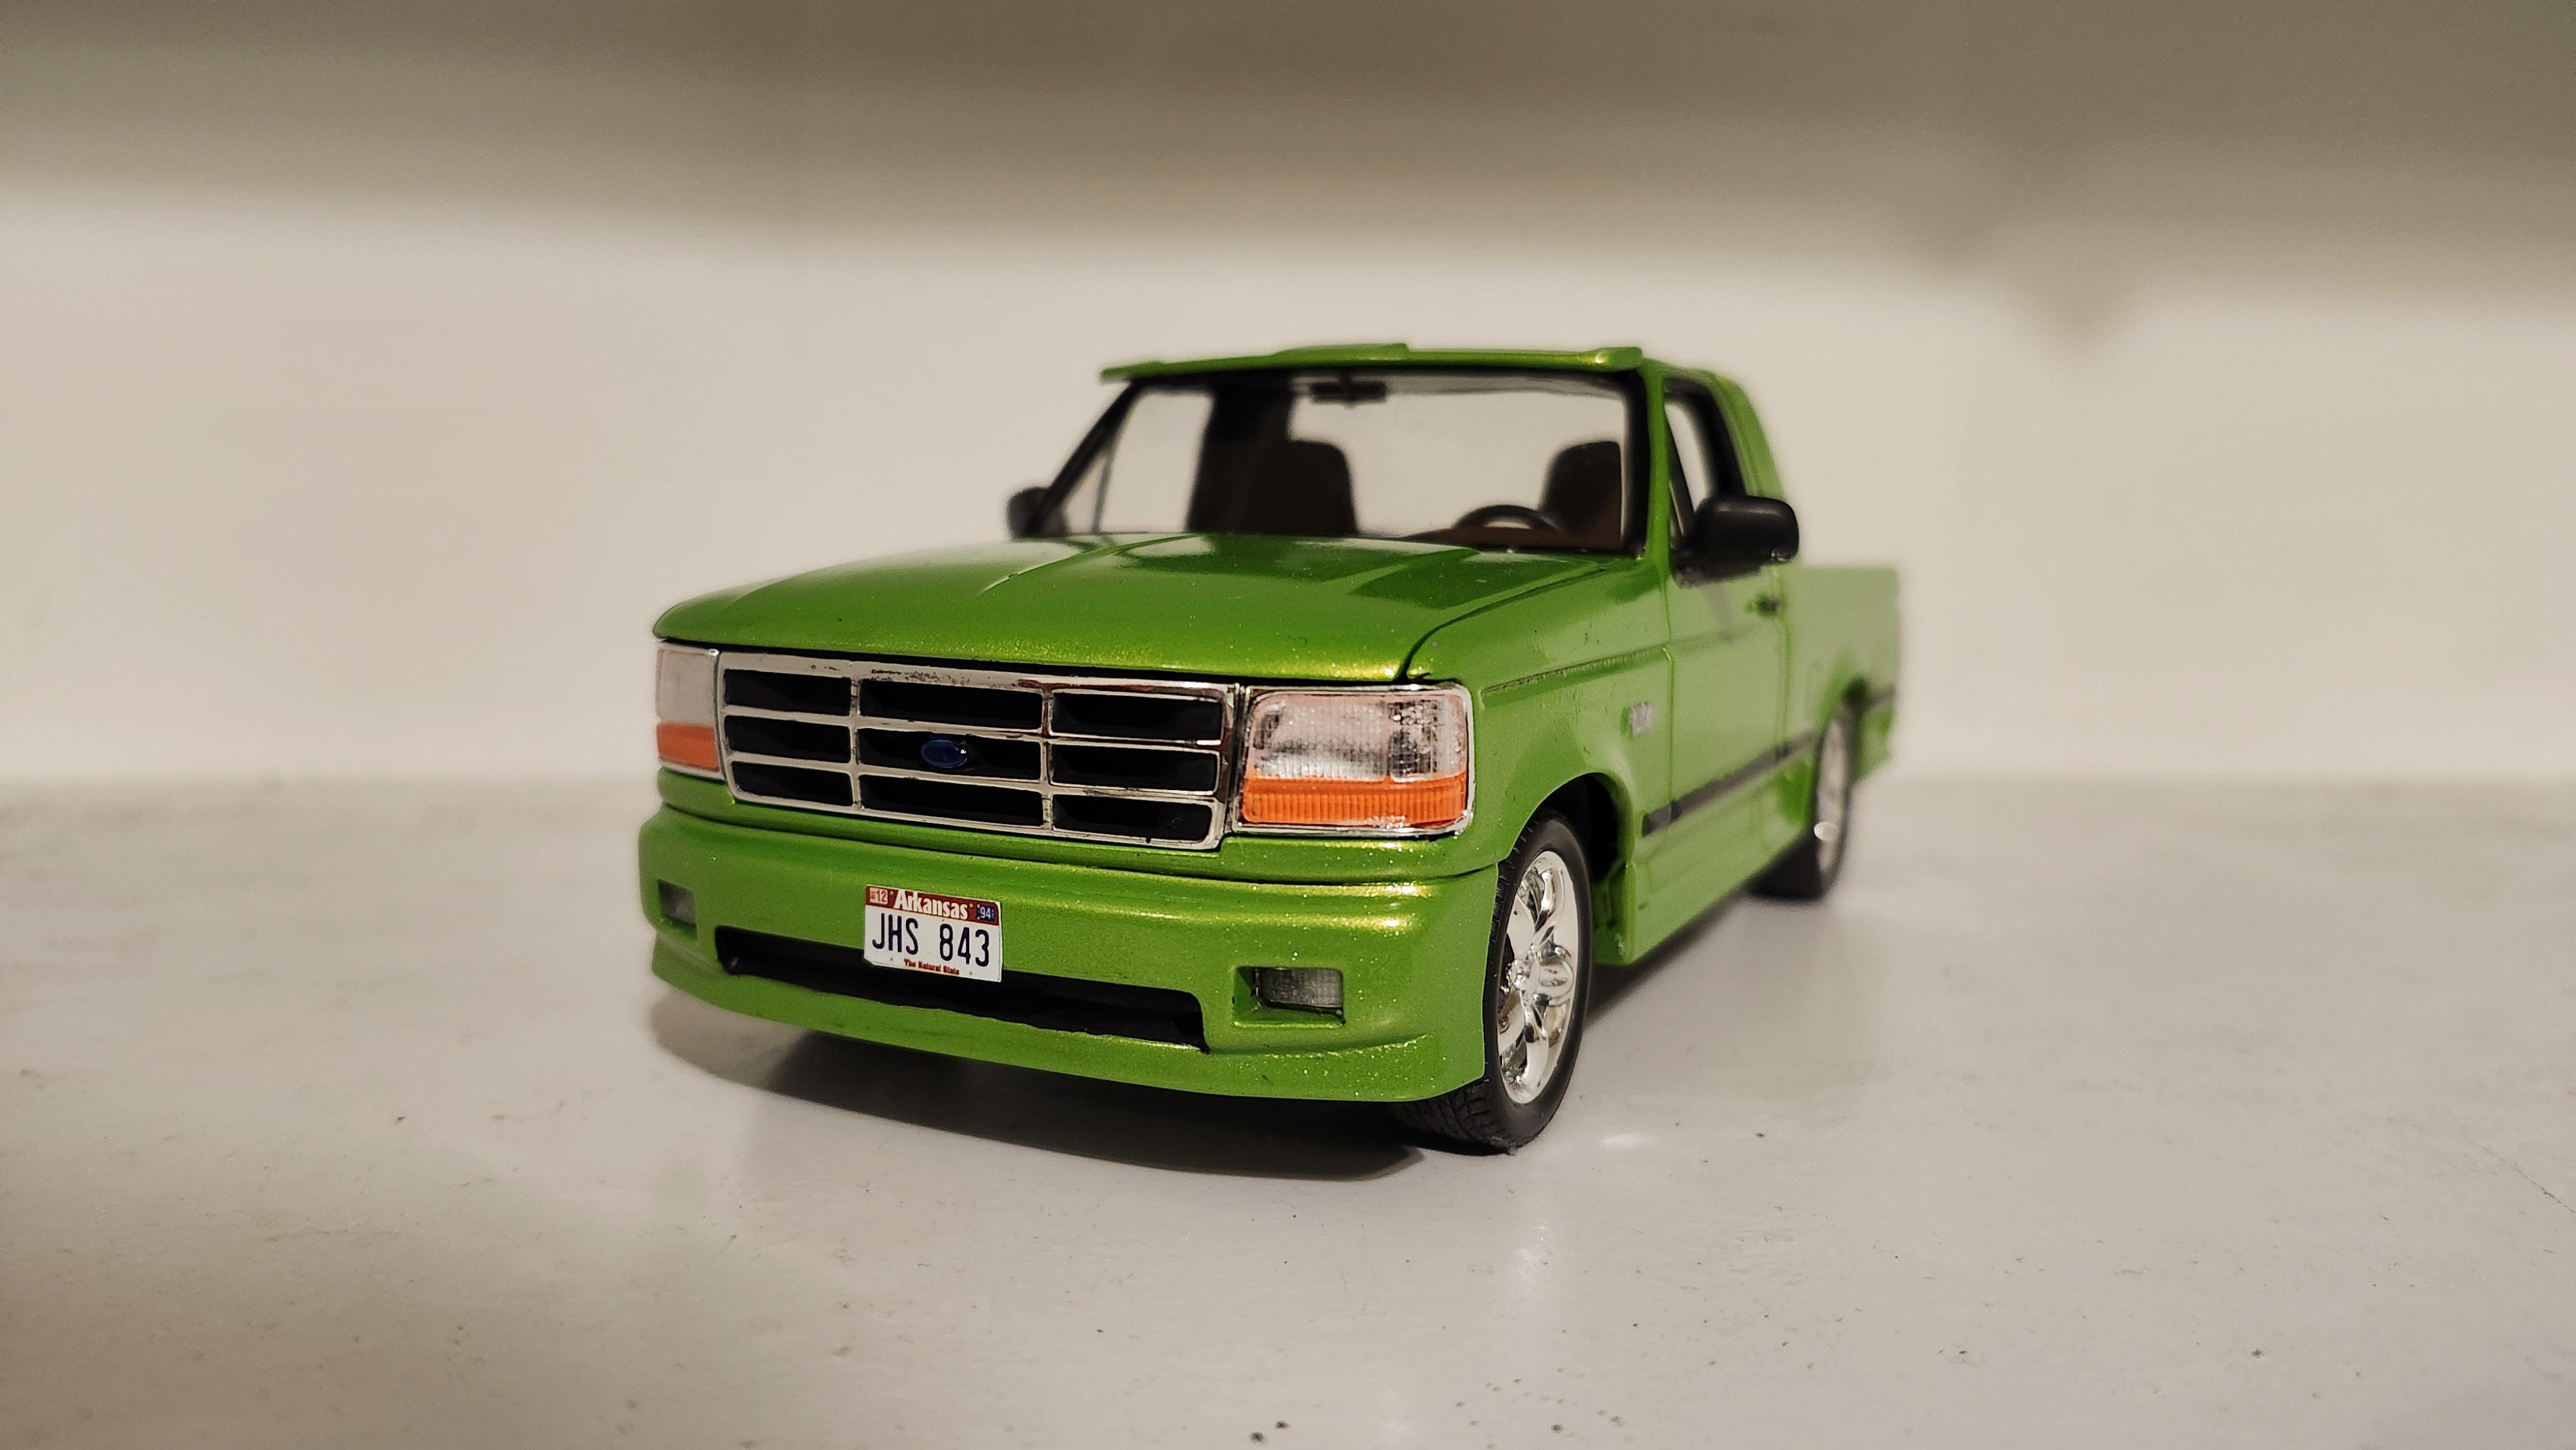
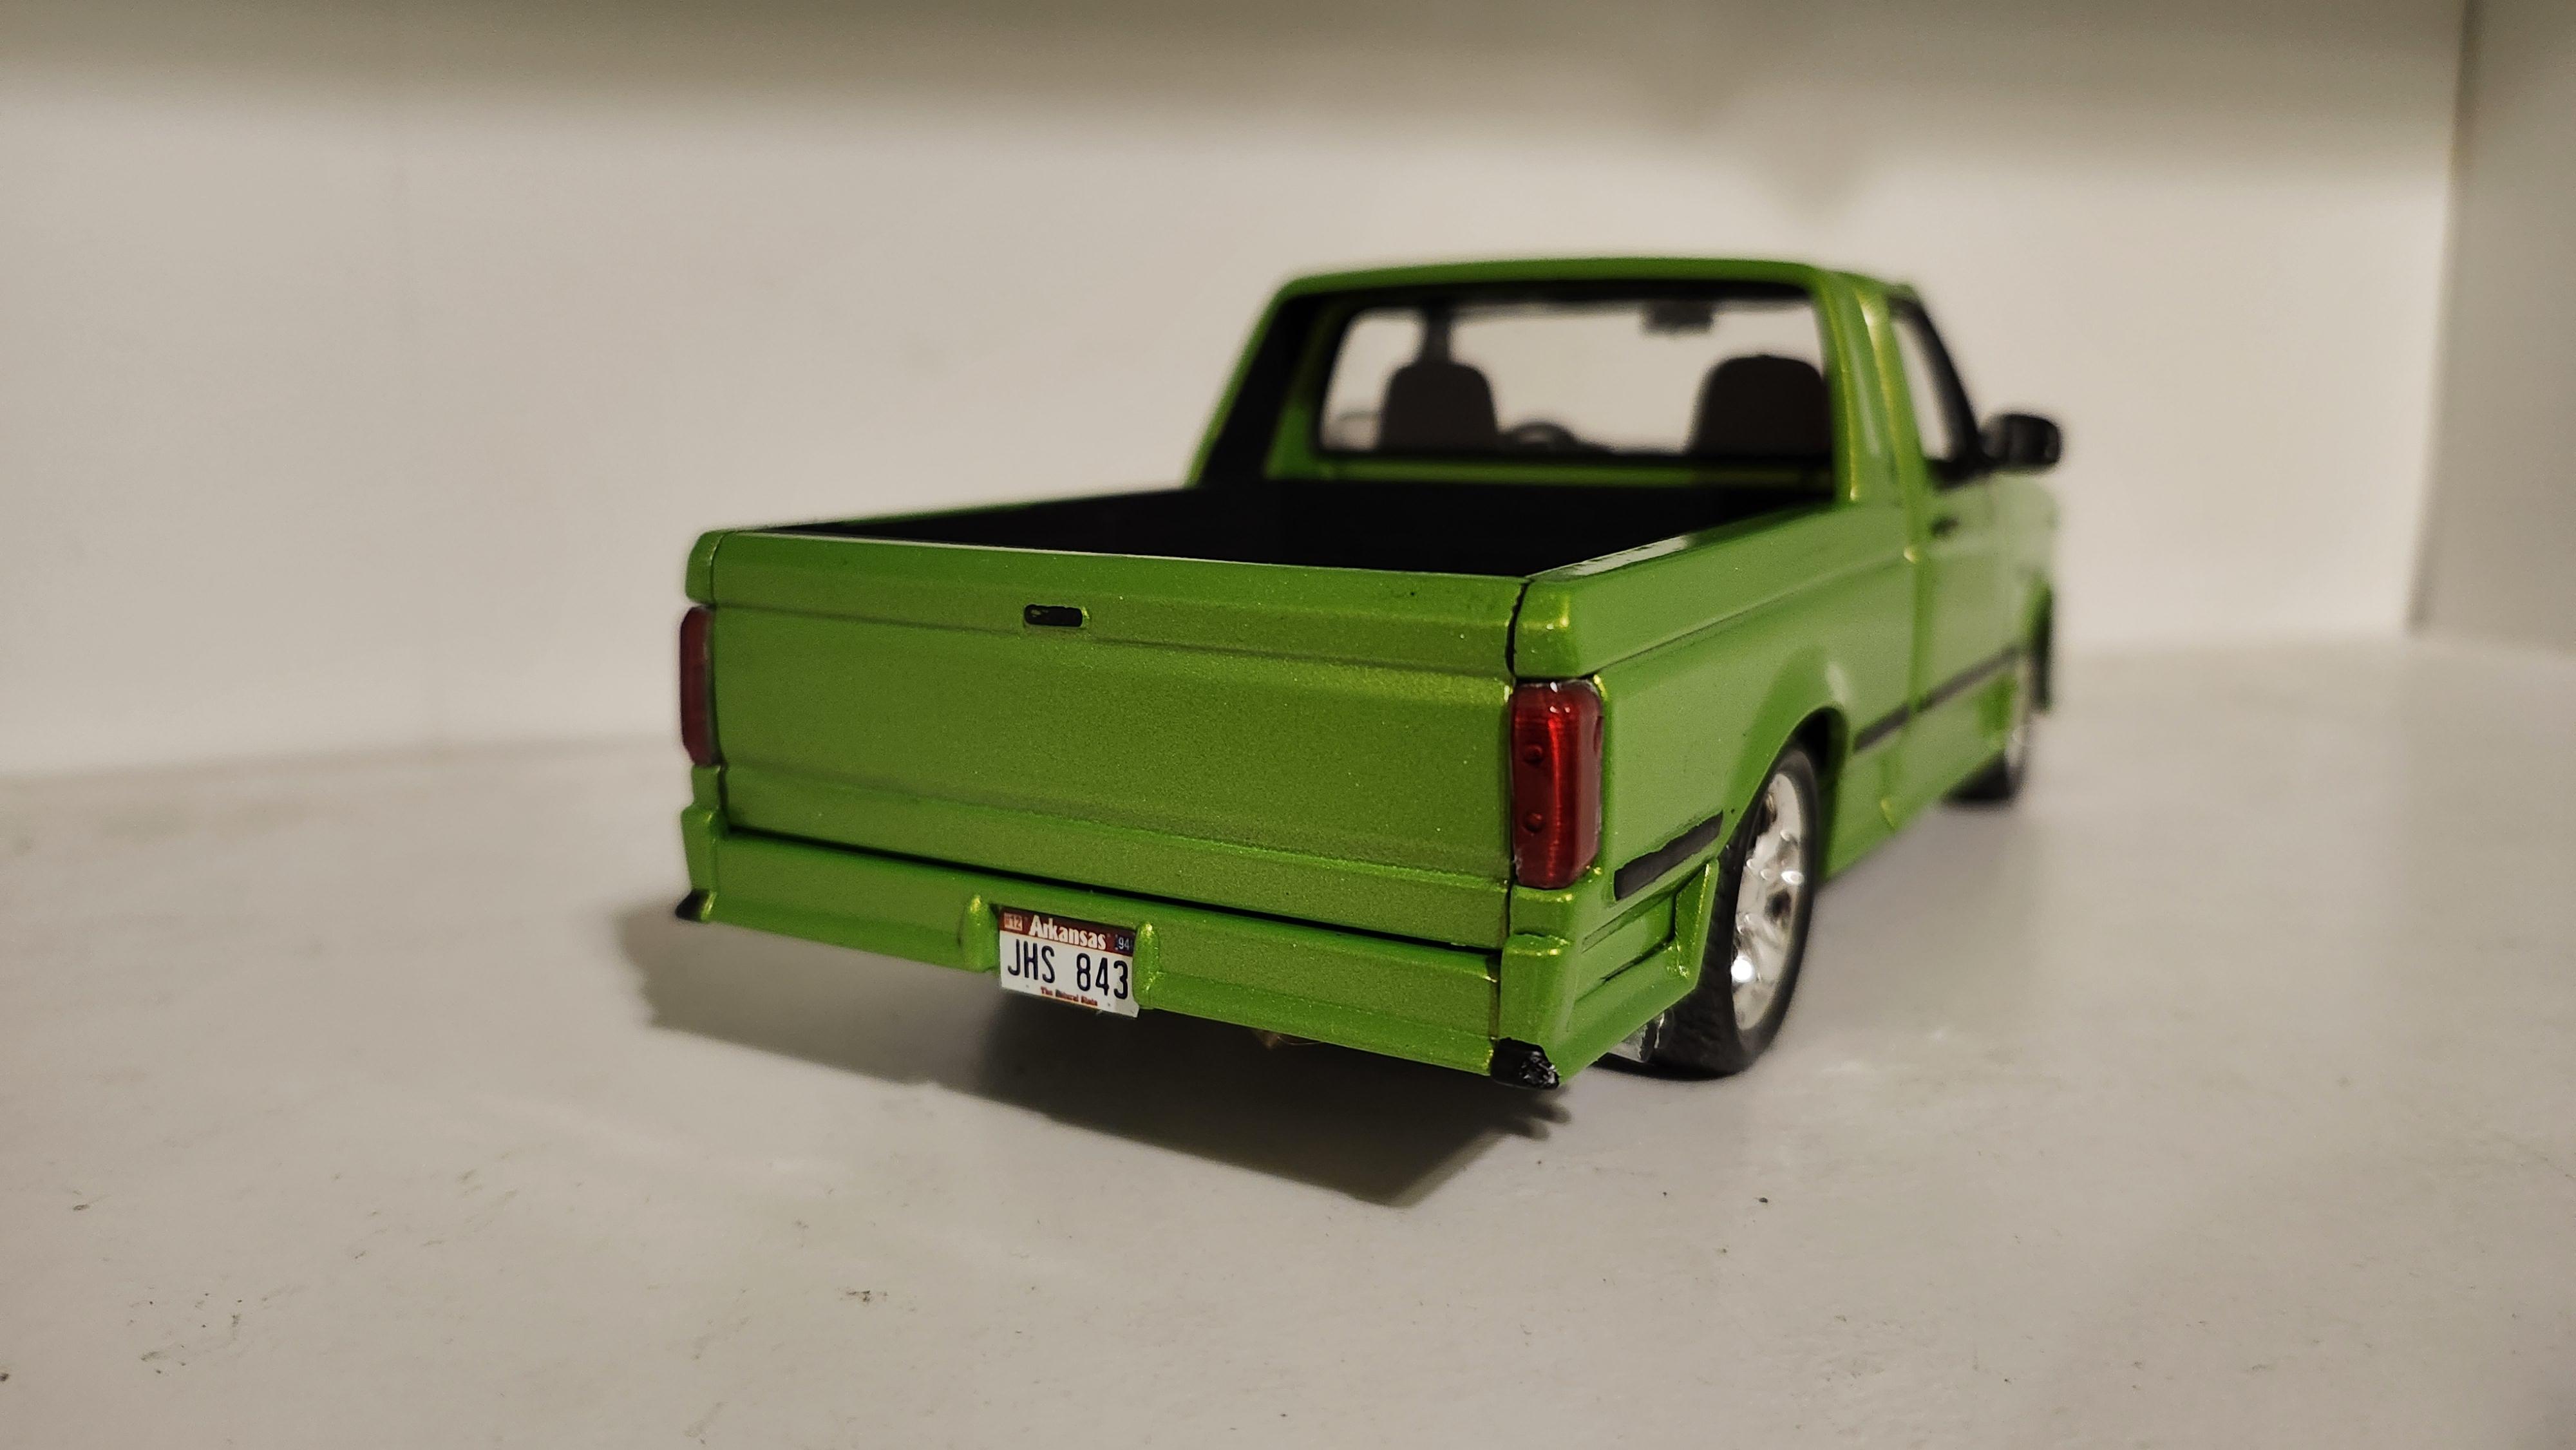
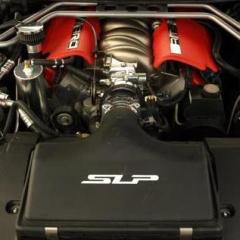
Vintage AMT kit crica 1994. Built mostly OOB with supplie d custom body kit (that's what originally grabbed my attention and knew I had to have this one). Only additions are custom wheels/tires/brakes from the Revell Custom Silverado, custom air filter, and seats and intake from the Lightning F-150 (of which supplied itself to a bigger, more ambitious piece coming up next). Exterior is Tamiya TS-52 Candy Lime Green cleared with Pledge.
-
What was the last actual AMT kit issued?
RickRollerLT1 replied to Monty's topic in General Automotive Talk (Trucks and Cars)
I believe when Round 2 finalized the AMT/MPC purchase, they only got the Ertl non-tractor molds. I believe the reason was companies like John Deere had exclusive merchandising contracts with Ertl/Tomy that couldn't be transferred to R2. Not sure what are of the Tractor tools now or if R2 got them later, but I do know many of them haven't been reissued since 2007 and currently go for stoopid money in the marketplaces. In addition to the all styrene trucks and 4x4s that have been recently reissued, Ertl also did various trucks and kits with die cast bodies. '65 Mustang '80 Trans Am '80 Camaro '81 Bronco '75 Corvette Peterbilt 359? Mack DM Series? It's possible the tooling still exists for some of these, but the odds are unlikely since R2 had to remake the International Transtar tool from the ground up. -
The MPC kits are different than the AMTs. AMT's started with the '65 year which was completely different tooling with molded in front suspension and exhaust, and then they did a new tool for '67 that was updated up to the 1970 year (the current form reissued to this day). The MPC tool started in '65 and underwent cosmetic/body changes throughout the years. Unlike AMT, MPC did annuals up to 1976 with the Caprice being the last and the most recent form reissued today. I doubt they'd modify the 1990s tool '67 again since they had difficulties converting that to the 4 door "Baby' for Supernatural.
-
Anybody know what happened to the tools for them? There were 6 in the line, Chezoom, Aluma-Coupe, Boyd's Coupster, Boyd's Vantastic, Boyd's Hauler, and Boyd's Smoothster. I know Lindberg got the 37's (Vantastic, Coupster, and Smoothster) as they kept reissuing them and reside with Round 2, but I heard Testors/Rustoluem corp kept the others like the '06 Charger tool. They also reportedly have the Johan tools they repoped in the '90s like the '72 Cuda, '70 Olds 442, AMC Rebel and AMX, and the Mercury Comet. Hopefully Round 2 has or can acquire them, as the Testors side aren't doing much aside rehashing paint schemes to make a buck.
-
1961 Lincoln Continental convertible restoration
RickRollerLT1 replied to Paul Payne's topic in WIP: Model Cars
Since you have essentials to the '61 year it might be wise to pick up a reissue AMT '65. I believe the windshield is the exact same piece plus the windshield frame and all should graft on cleanly. -
Nice work! Love the color scheme. Not to hijack, but I built one of these not long ago and one of the issues I had but forgot to mention was the ride height. Turns out the side tops of the firewall were causing it to make the frame stick out and the interior tub not fit. Had to trim lots of the firewall mainly the sides that curve up inside the front fenders, and glue it to the engine bay. That mostly solved the frame sticking out and lowering the height to where I wanted. Also, if the issue you built is the recent 2 in 1 release, I believe it had a custom front suspension option that had the spindles lower than the stock one.
-
Rustoleum paints are terrible.
RickRollerLT1 replied to James Maynard's topic in General Automotive Talk (Trucks and Cars)
Regular Rustoleum primer can be used on Styrene, maybe the 2x Primers. Depending on how strong the molding and styrene is, use a light mist coat and then go heavier otherwise if you go heavy at once you'll def get crazing. Ether washing the body/parts in solvent or light sanding between 800-1200 grit will also make the primer coat stick better and lay out smoother. Regular Rustoleum gloss and flat/satin sprays can be used, but a PRIMER barrier coat is a MUST or YOU WILL GET MAJOR CRAZING. Rustoluem 2x Flat, Gloss, and Satin colors have Paint+Primer built in and it's combined solvents WILL ATTACK primered base coat, even one primed with 2x Grey/White oddly enough. The 2x Flat and Satin colors are OK to use on bare styrene parts like frames and components and the crazing is almost non-existent or minimal. Some Krylon paints also have paint+primer versions and the same methods apply. All paints, even Rustoluem, can have bad batches (powdery spray with solvent not mixed well enough, ect.) so it'd be best to test on a scrap piece or object first. I hear many use Tamiya primers (which are formulated for plastics), but I had bad experience with a brand new can of the Fine Grey primer. Had two 82 Night Rider hoods from the same kit, same 2012 R2 issue. One was sprayed Tamiya Grey and the other True Value brand Grey. The Tamiya crazed and rippled like mad, while the True Value paint was a little coarse but smoothed out after the last 2 heavier coats. I assume the molding of the R2 kits wasn't so good, but I have a suspicion ether the Tamiya Primer was a bad batch produced during COVID or they silently reformulated it (for the worse) to comply with US regulations and reduce costs. I personally think the latter because the new Tamiya color spray cans I've bought dry much faster than the ones I used between 2013-18, so they're probably using more thinner/solvent in place of pigments to make it seem like there's more spray for less color, but also hotter than it was for some plastics. -
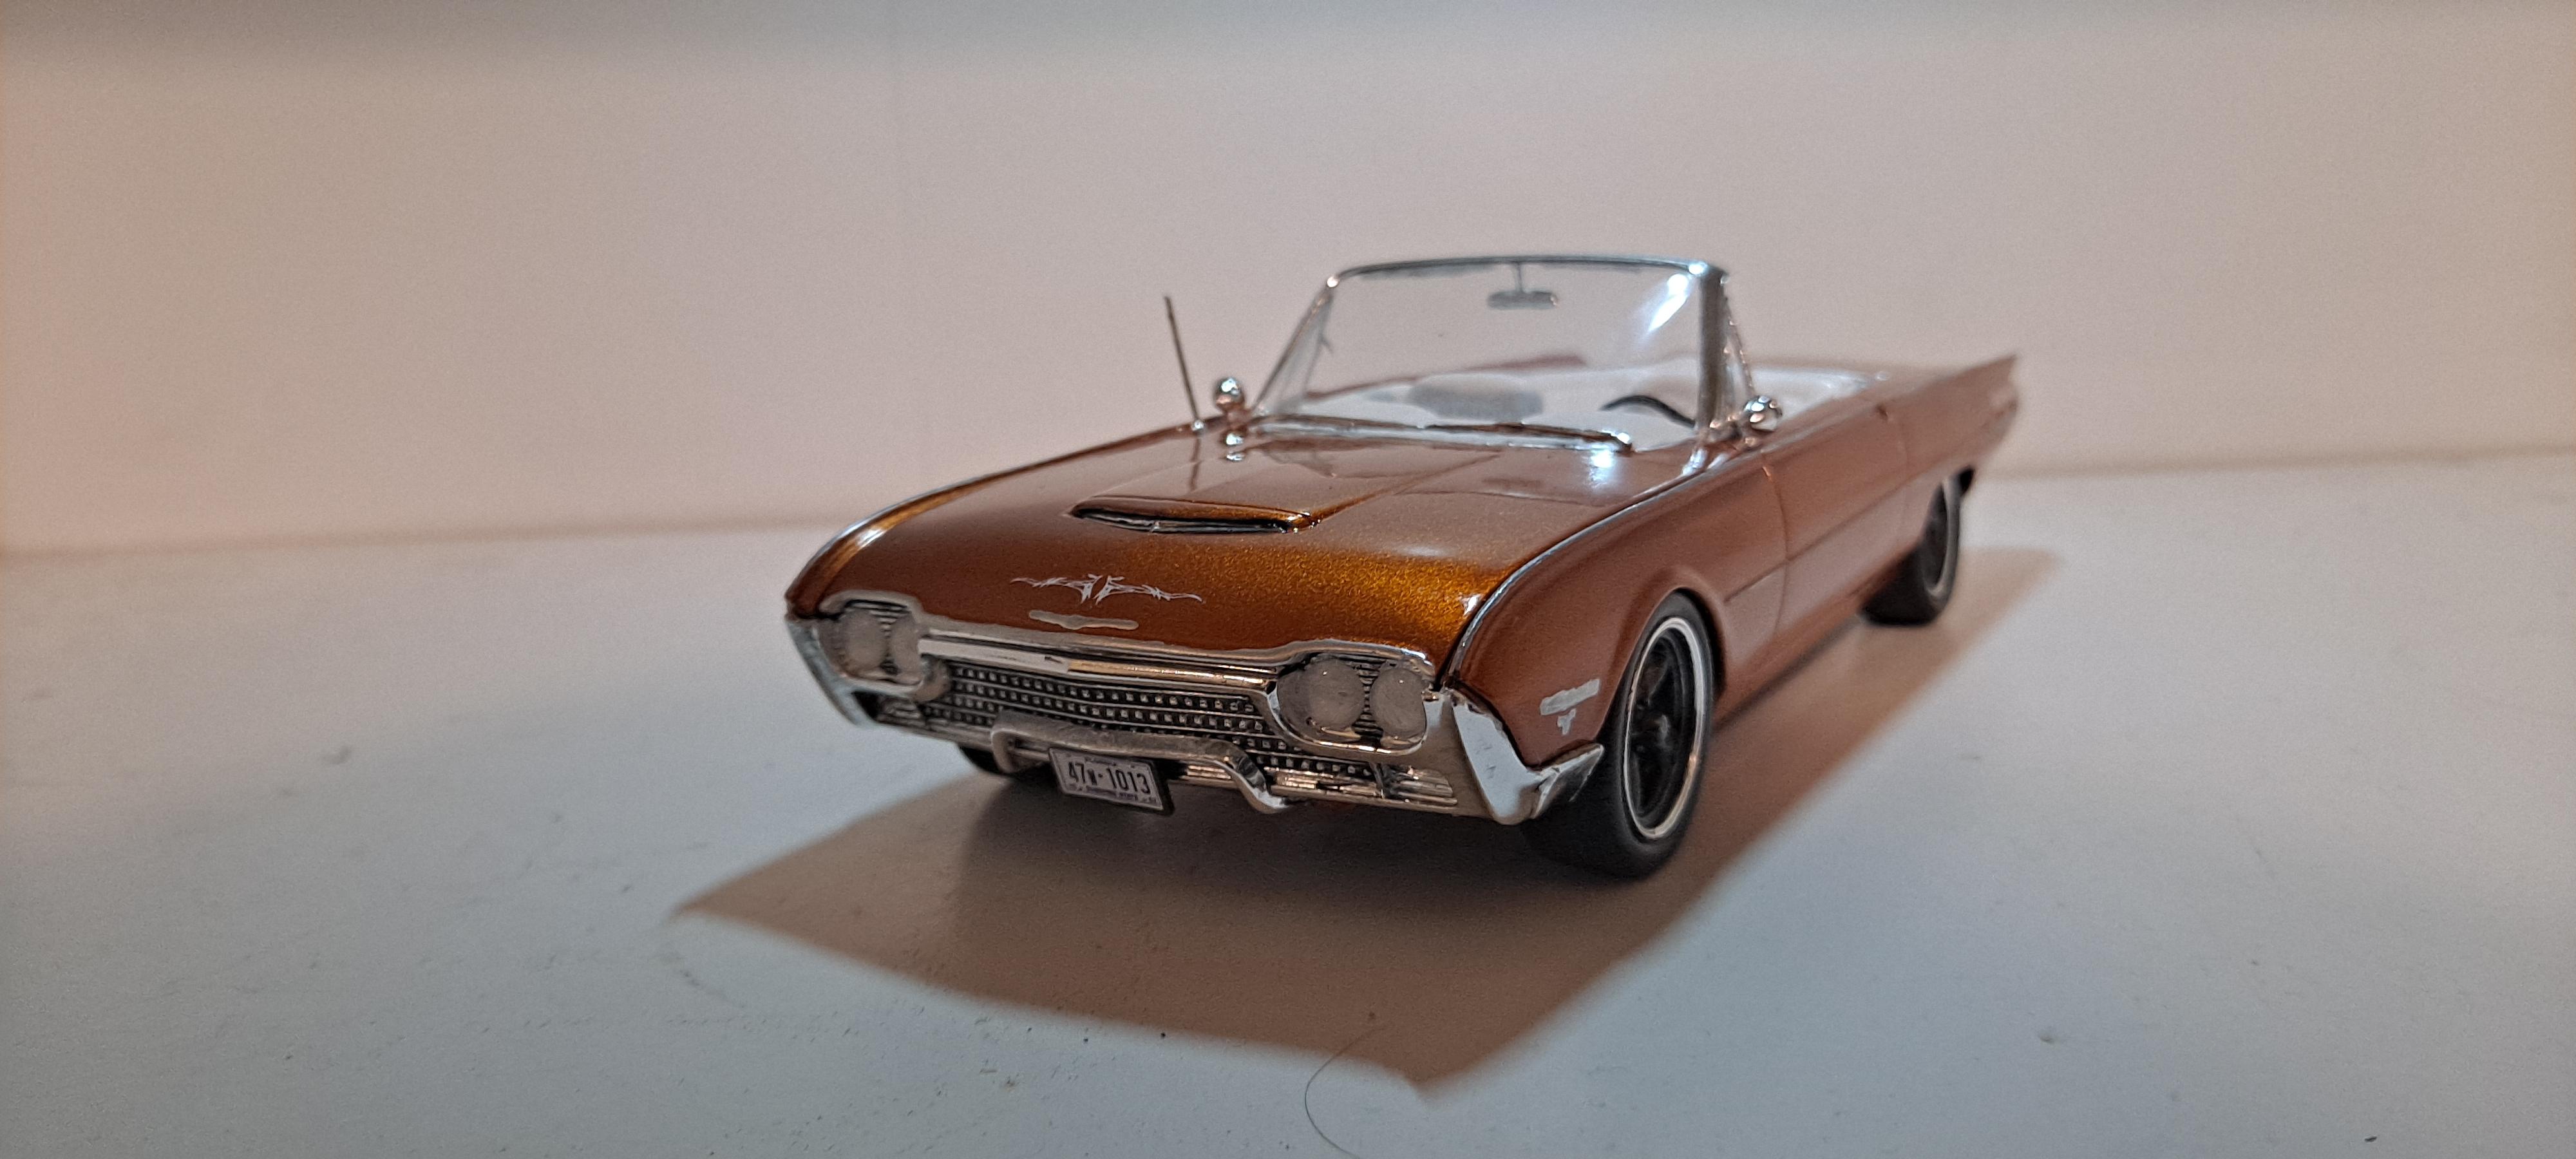
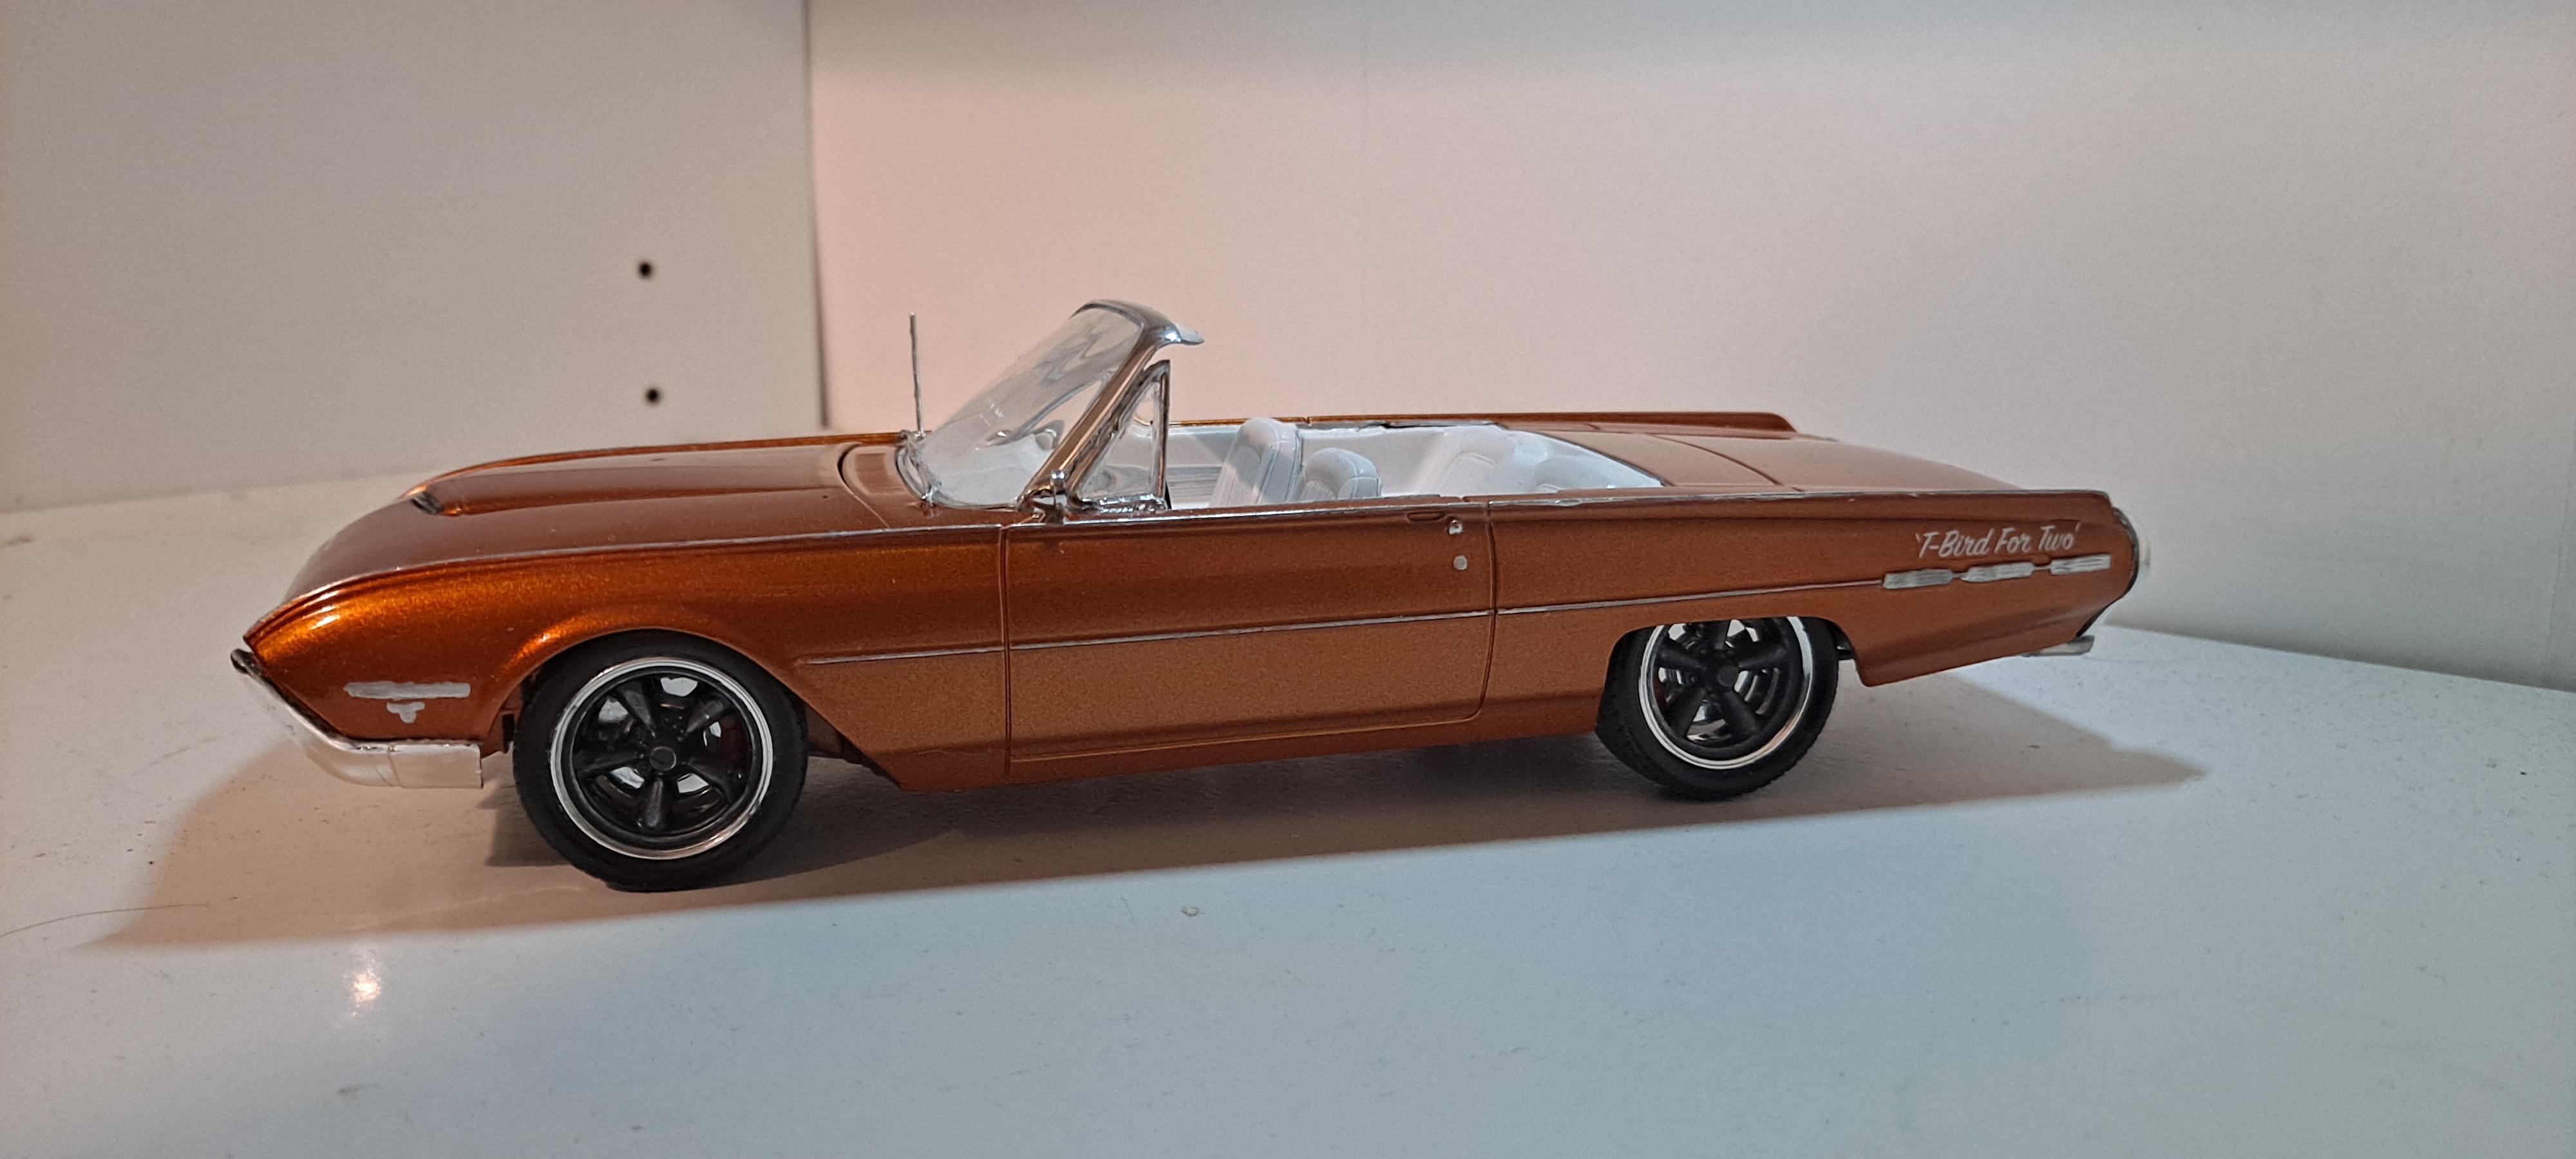
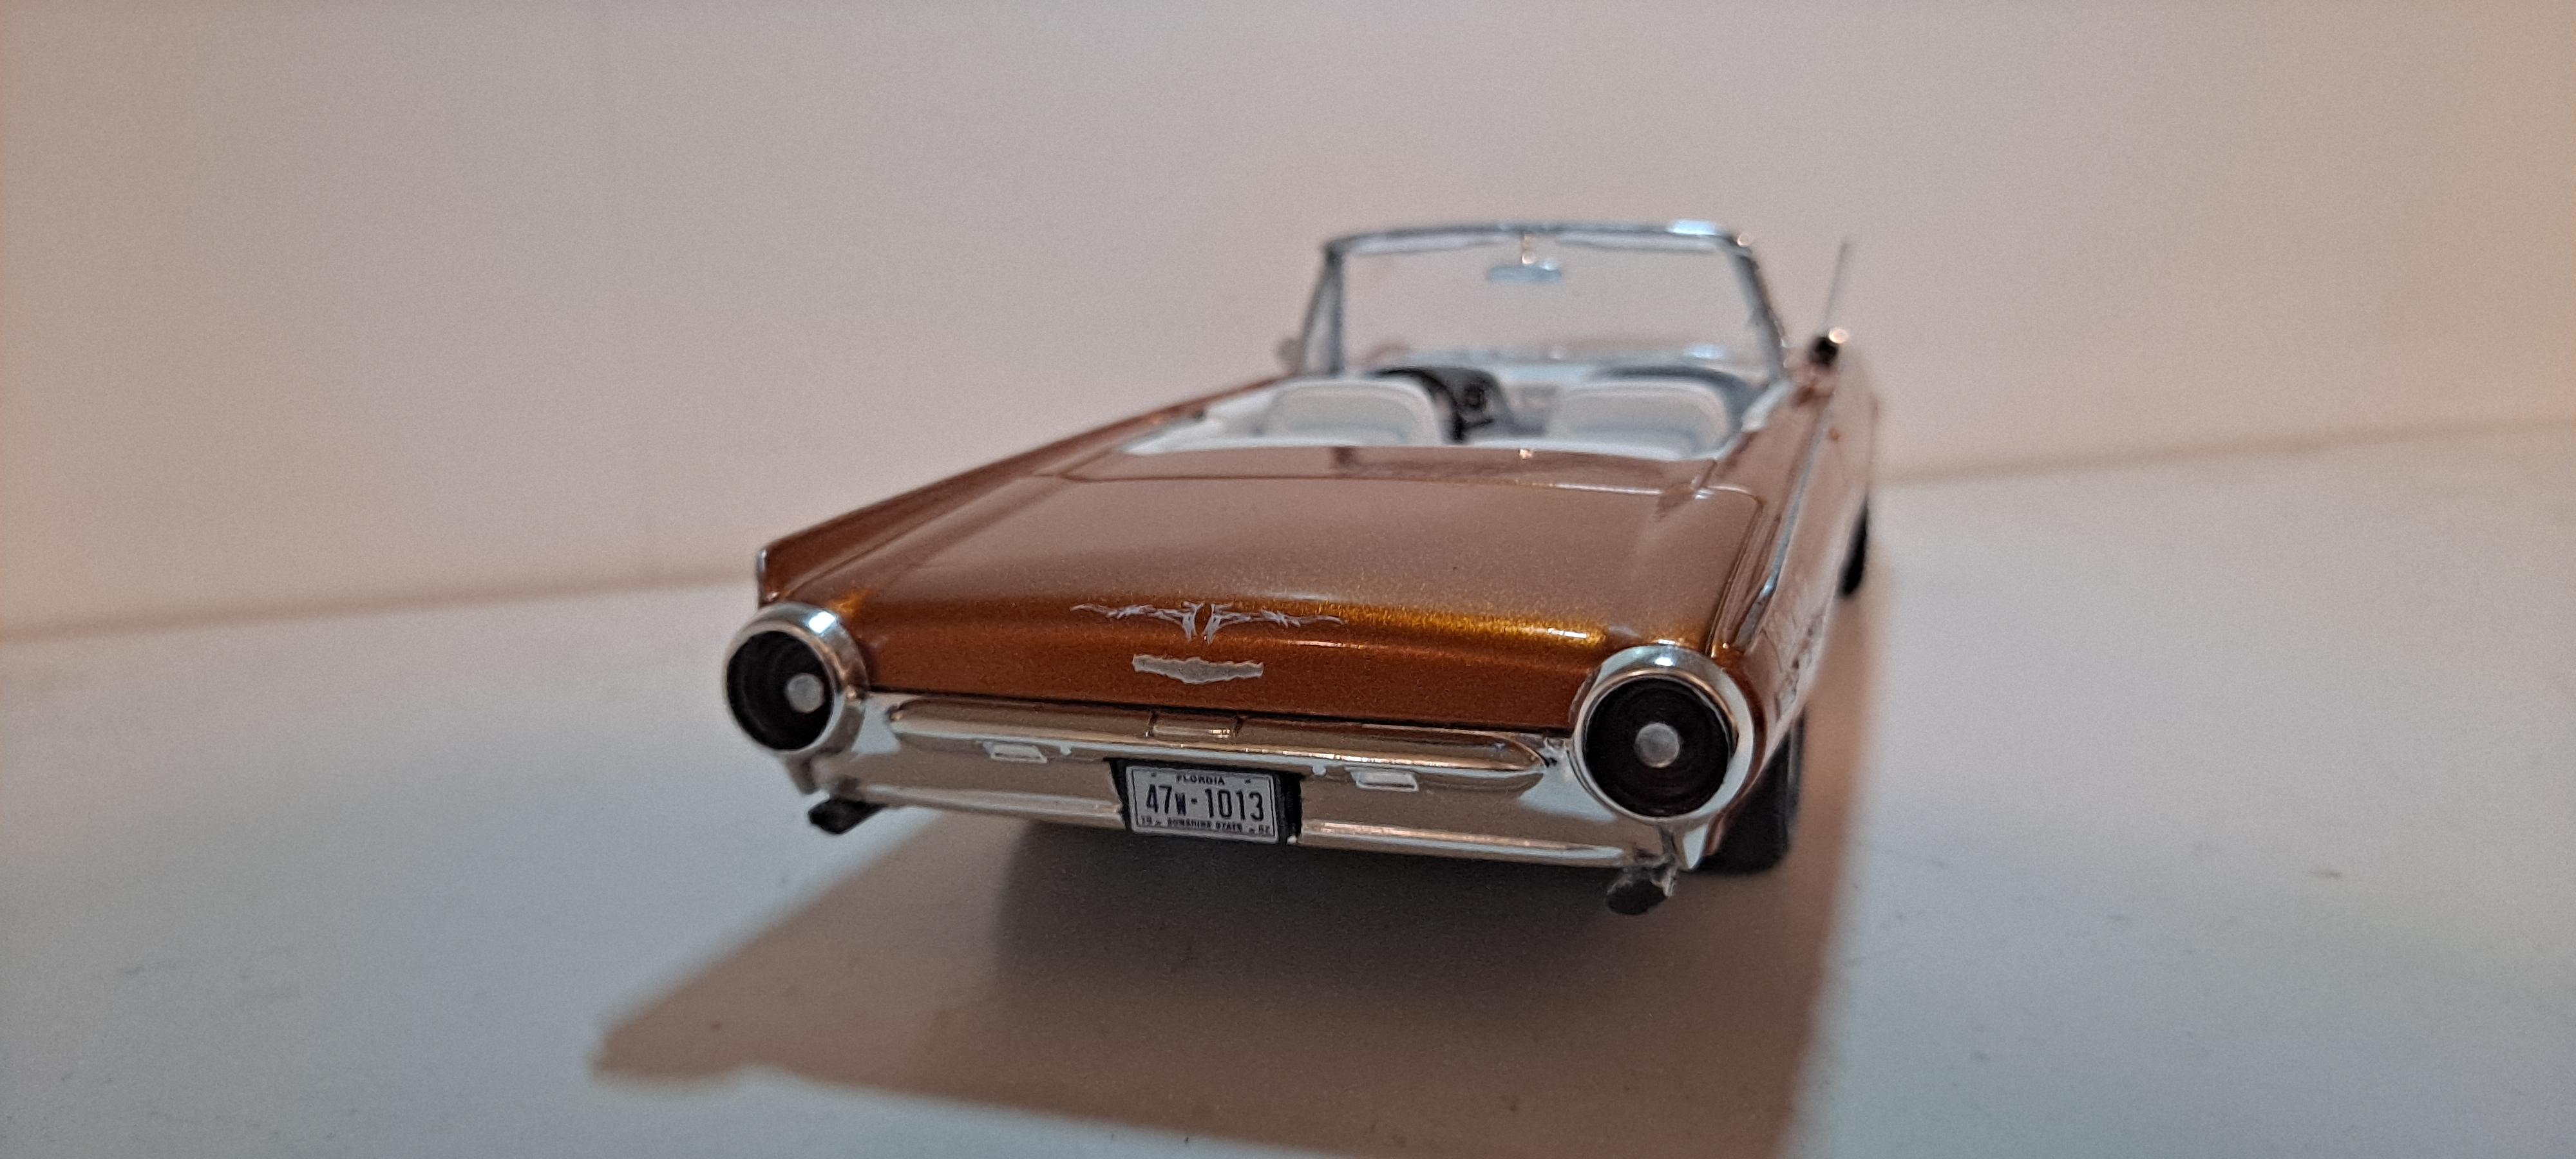
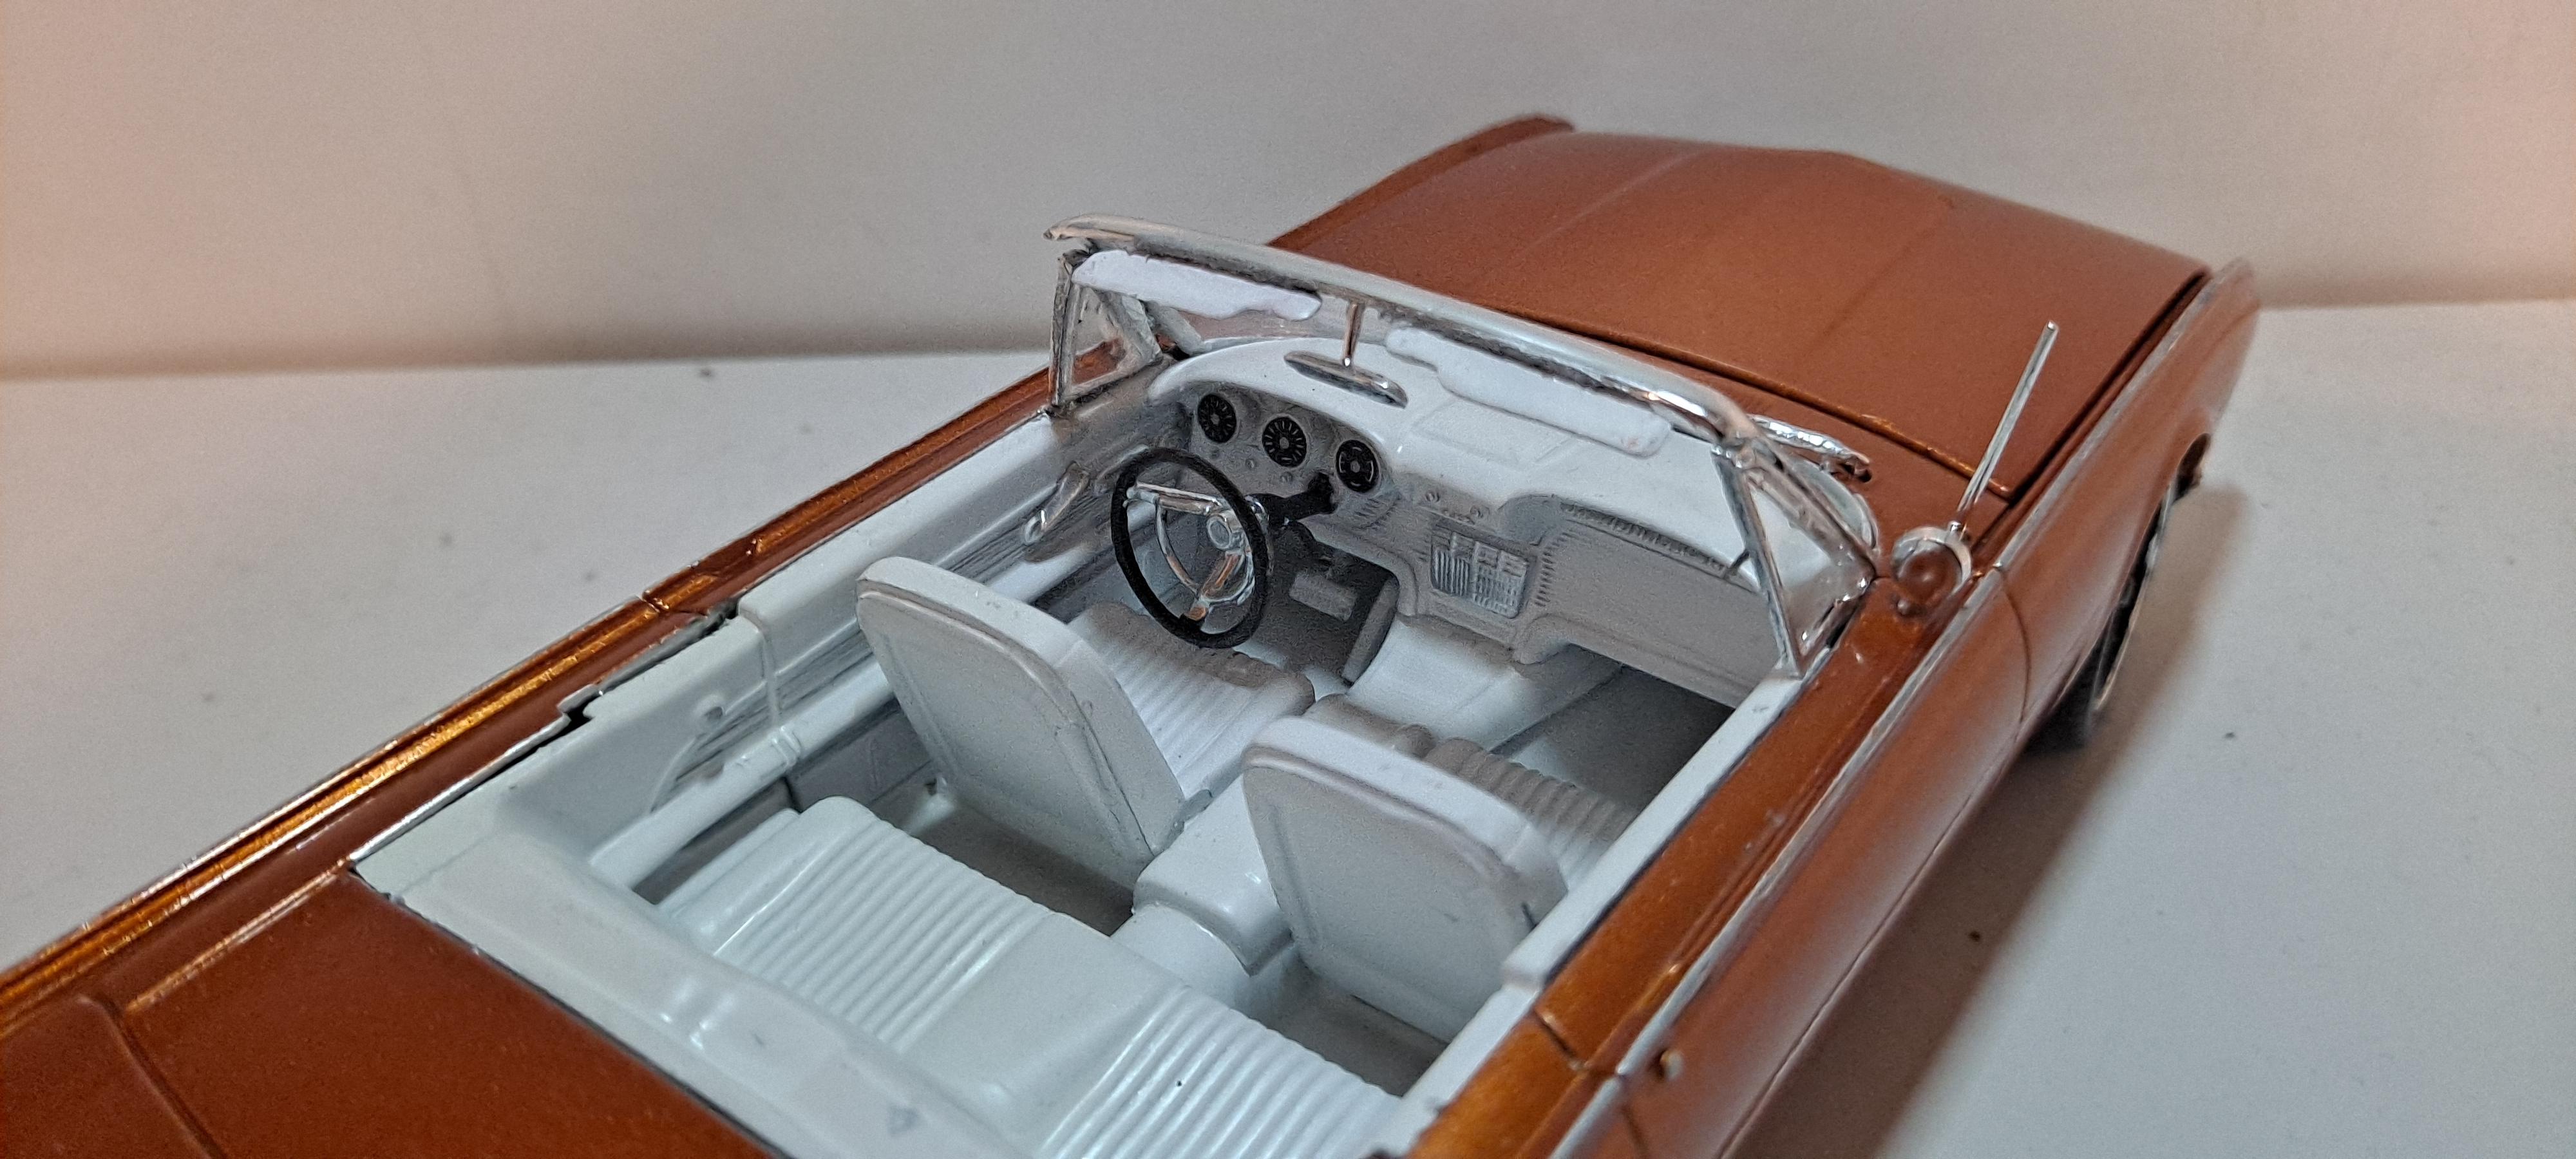
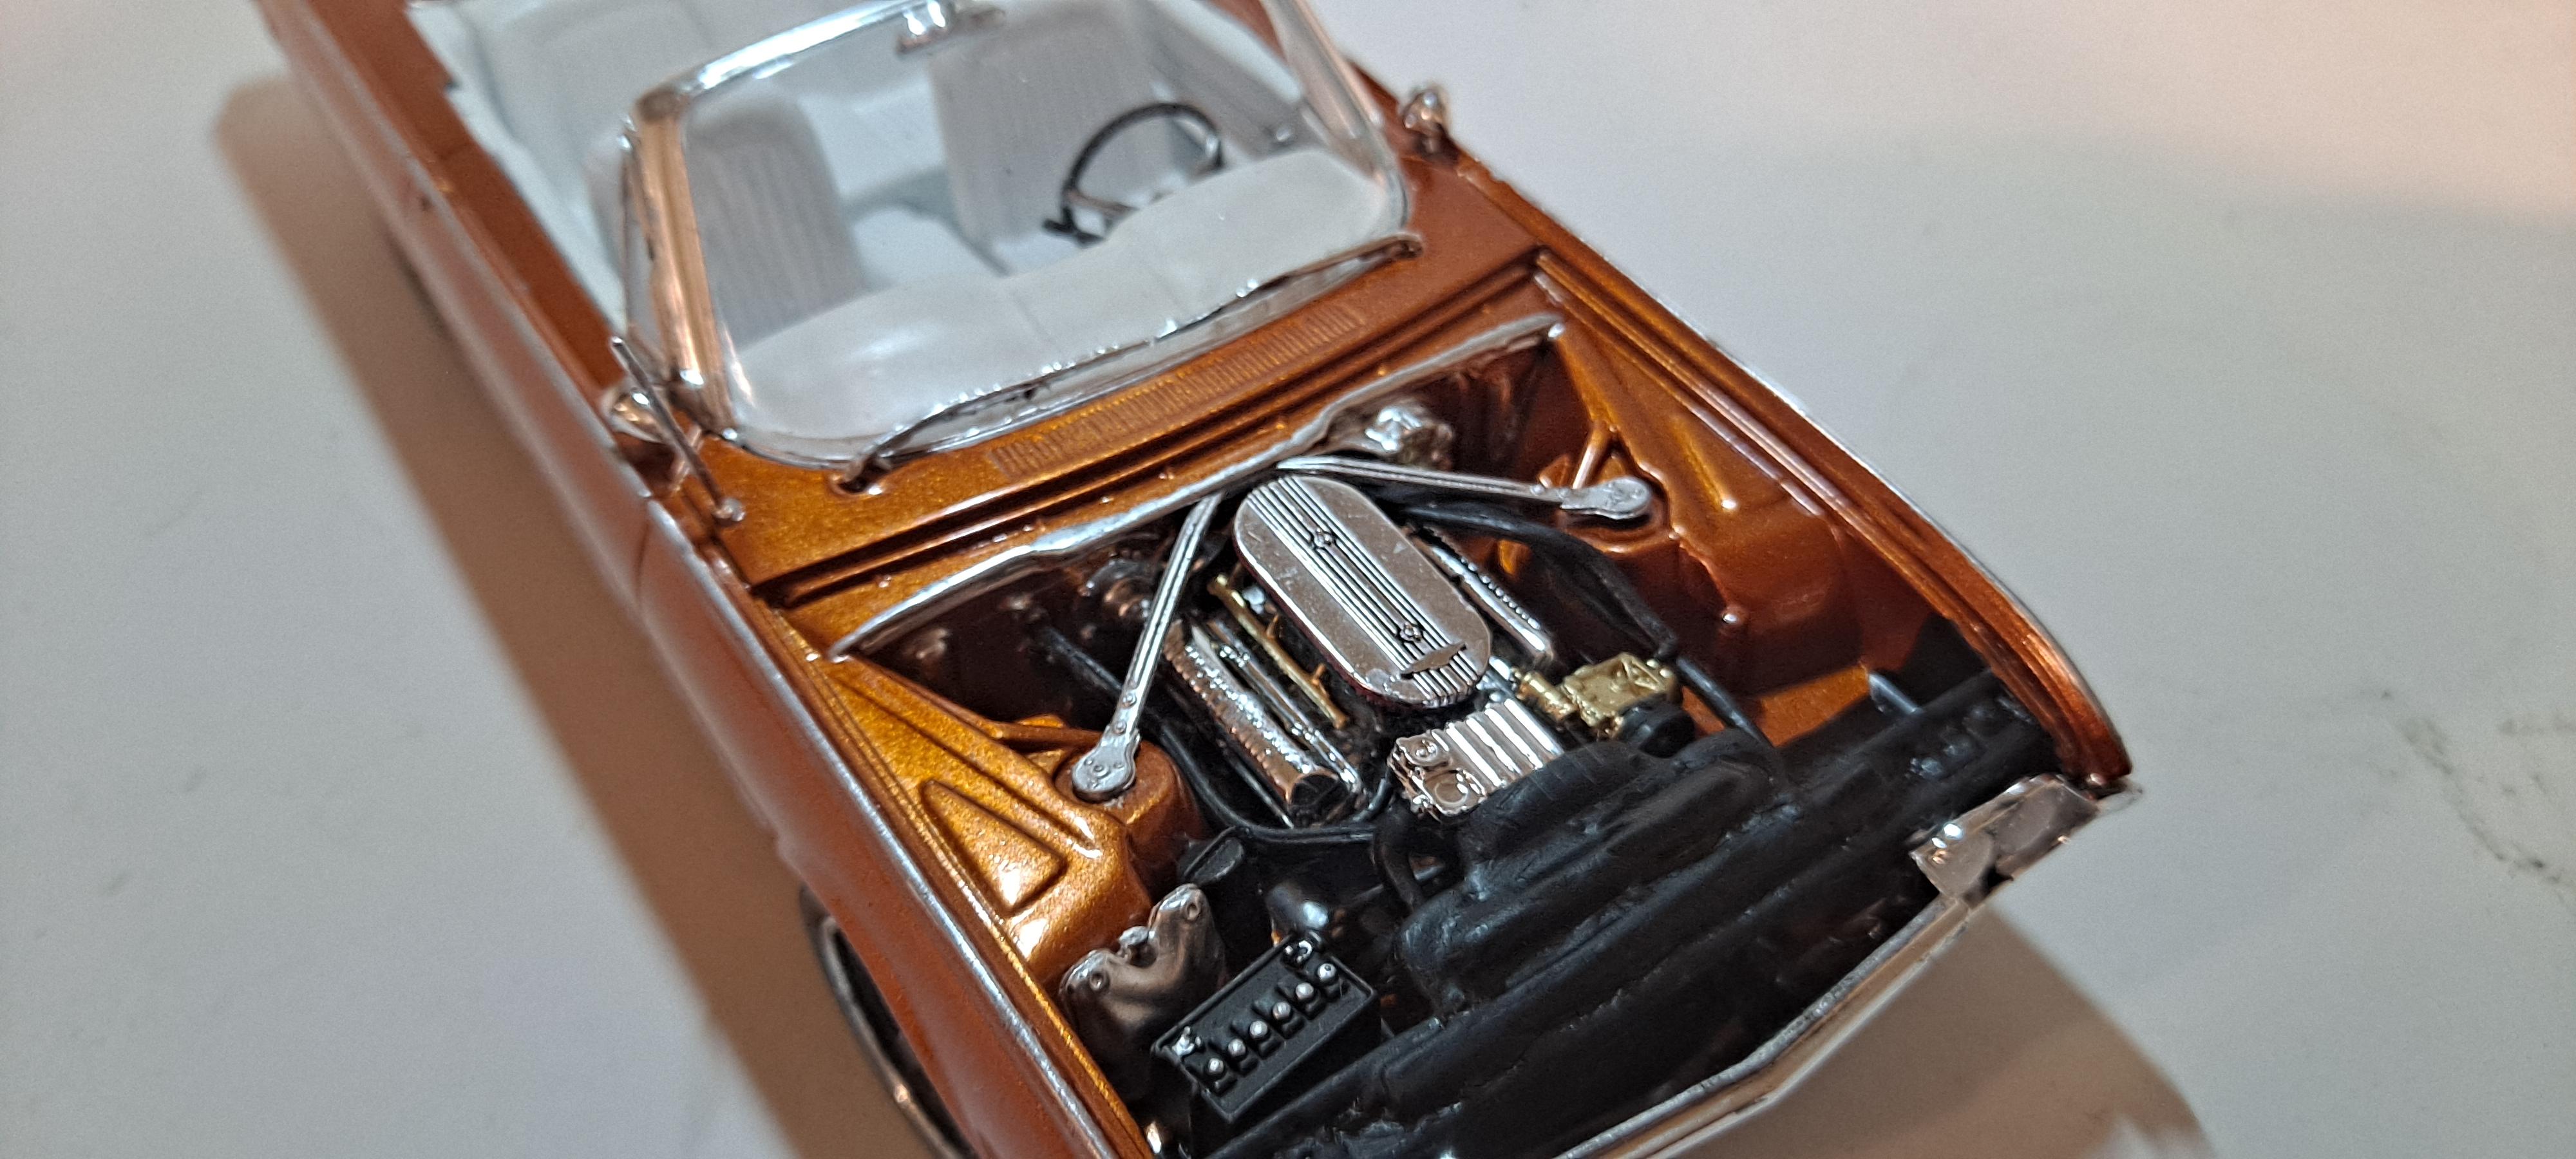
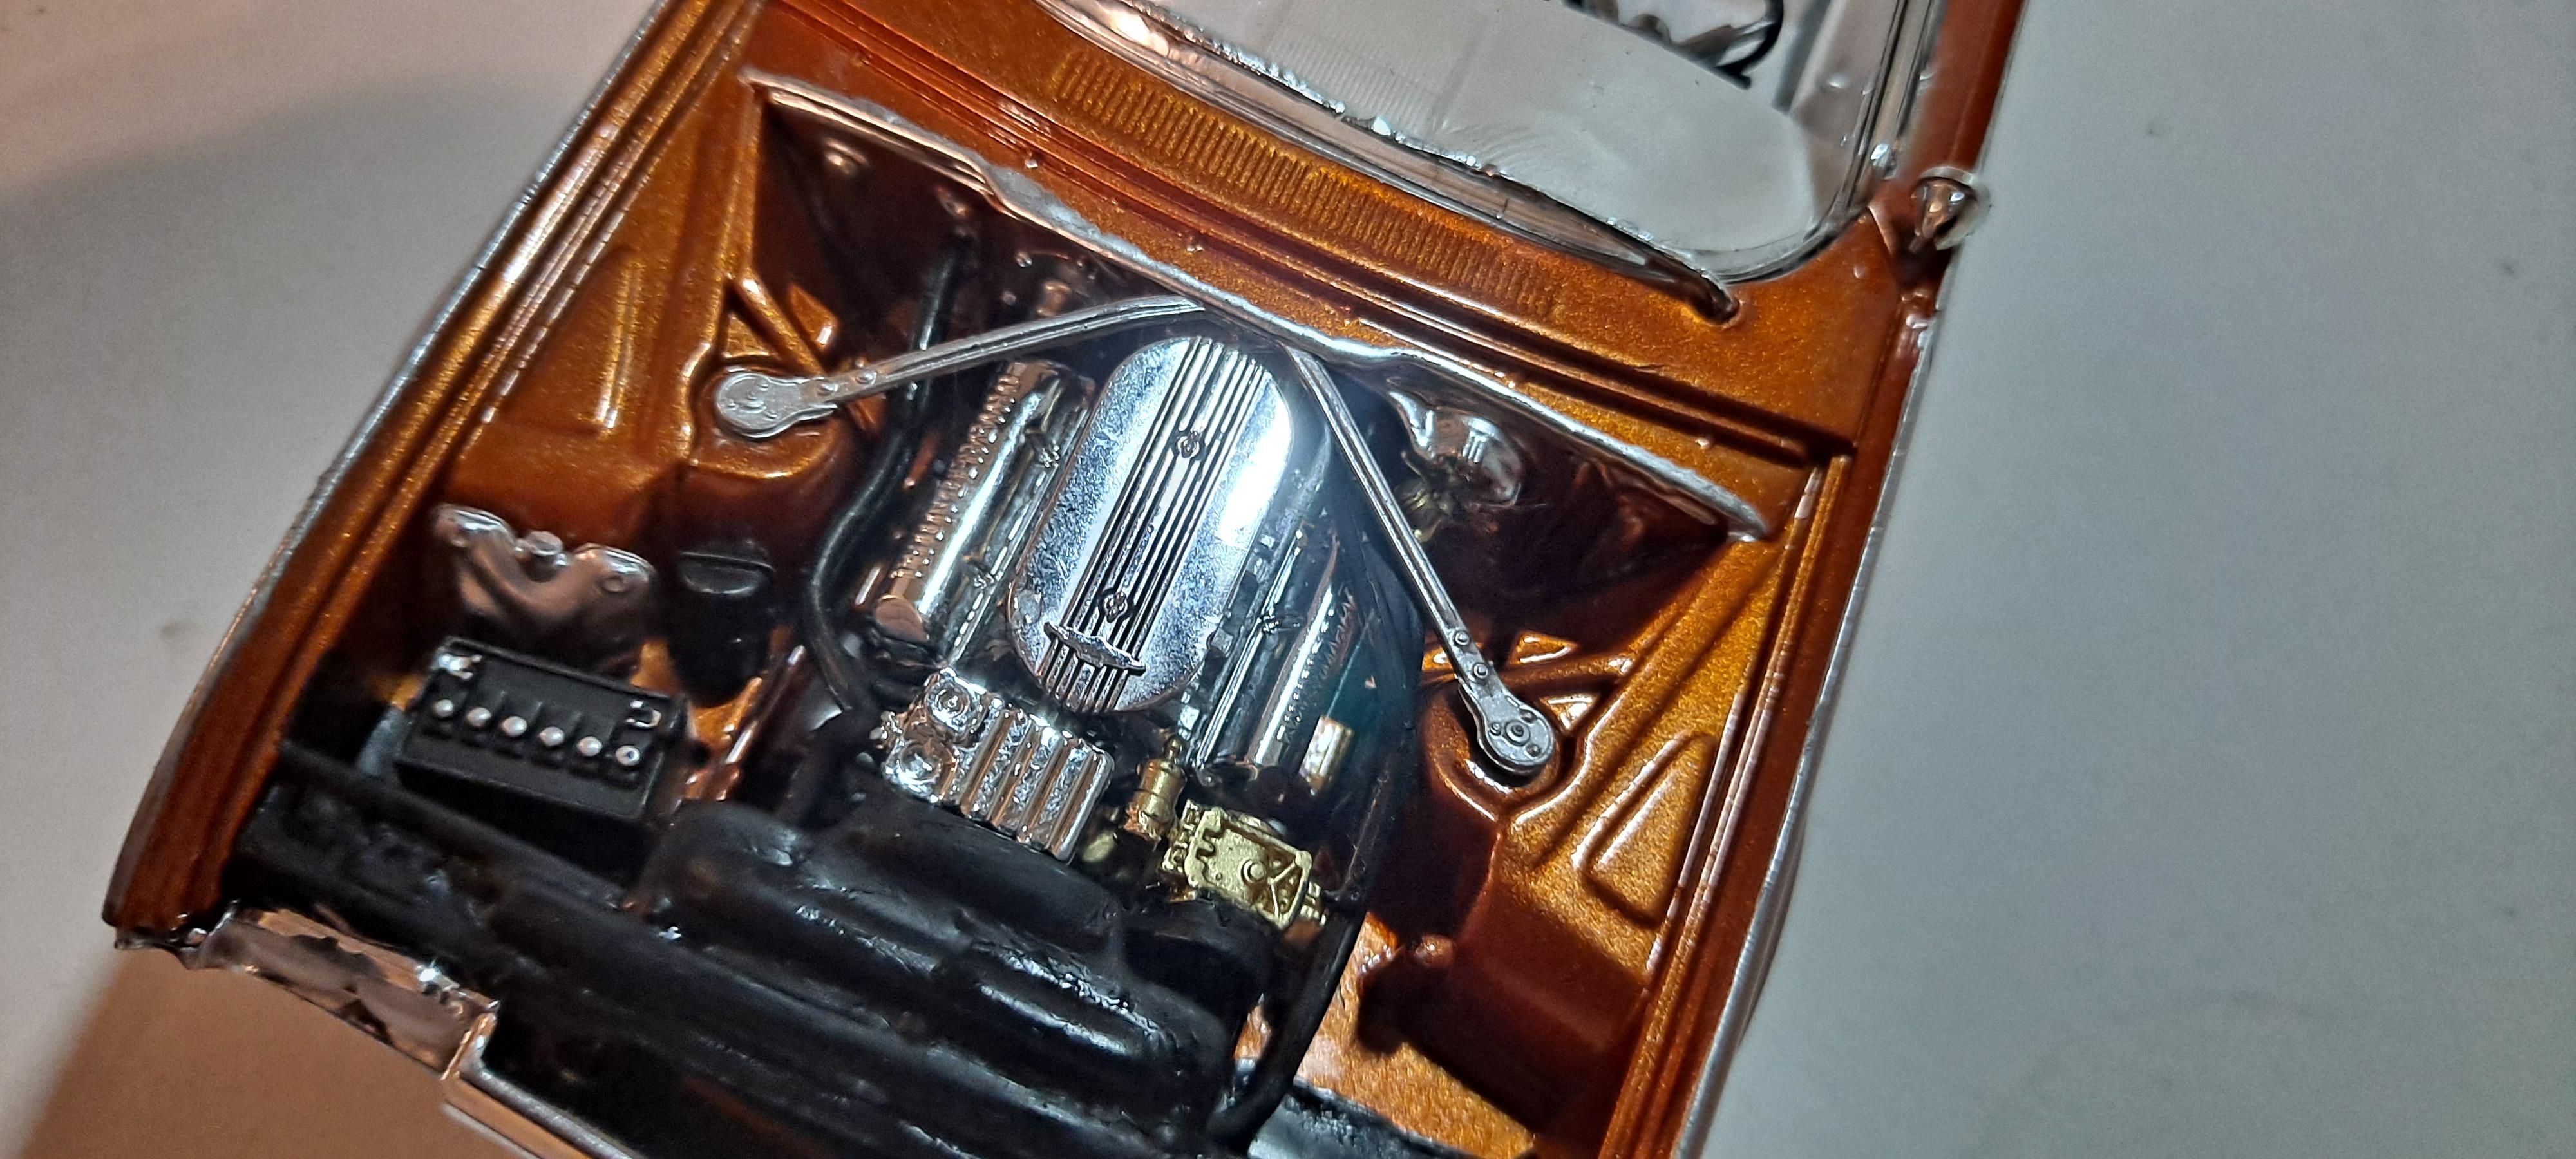
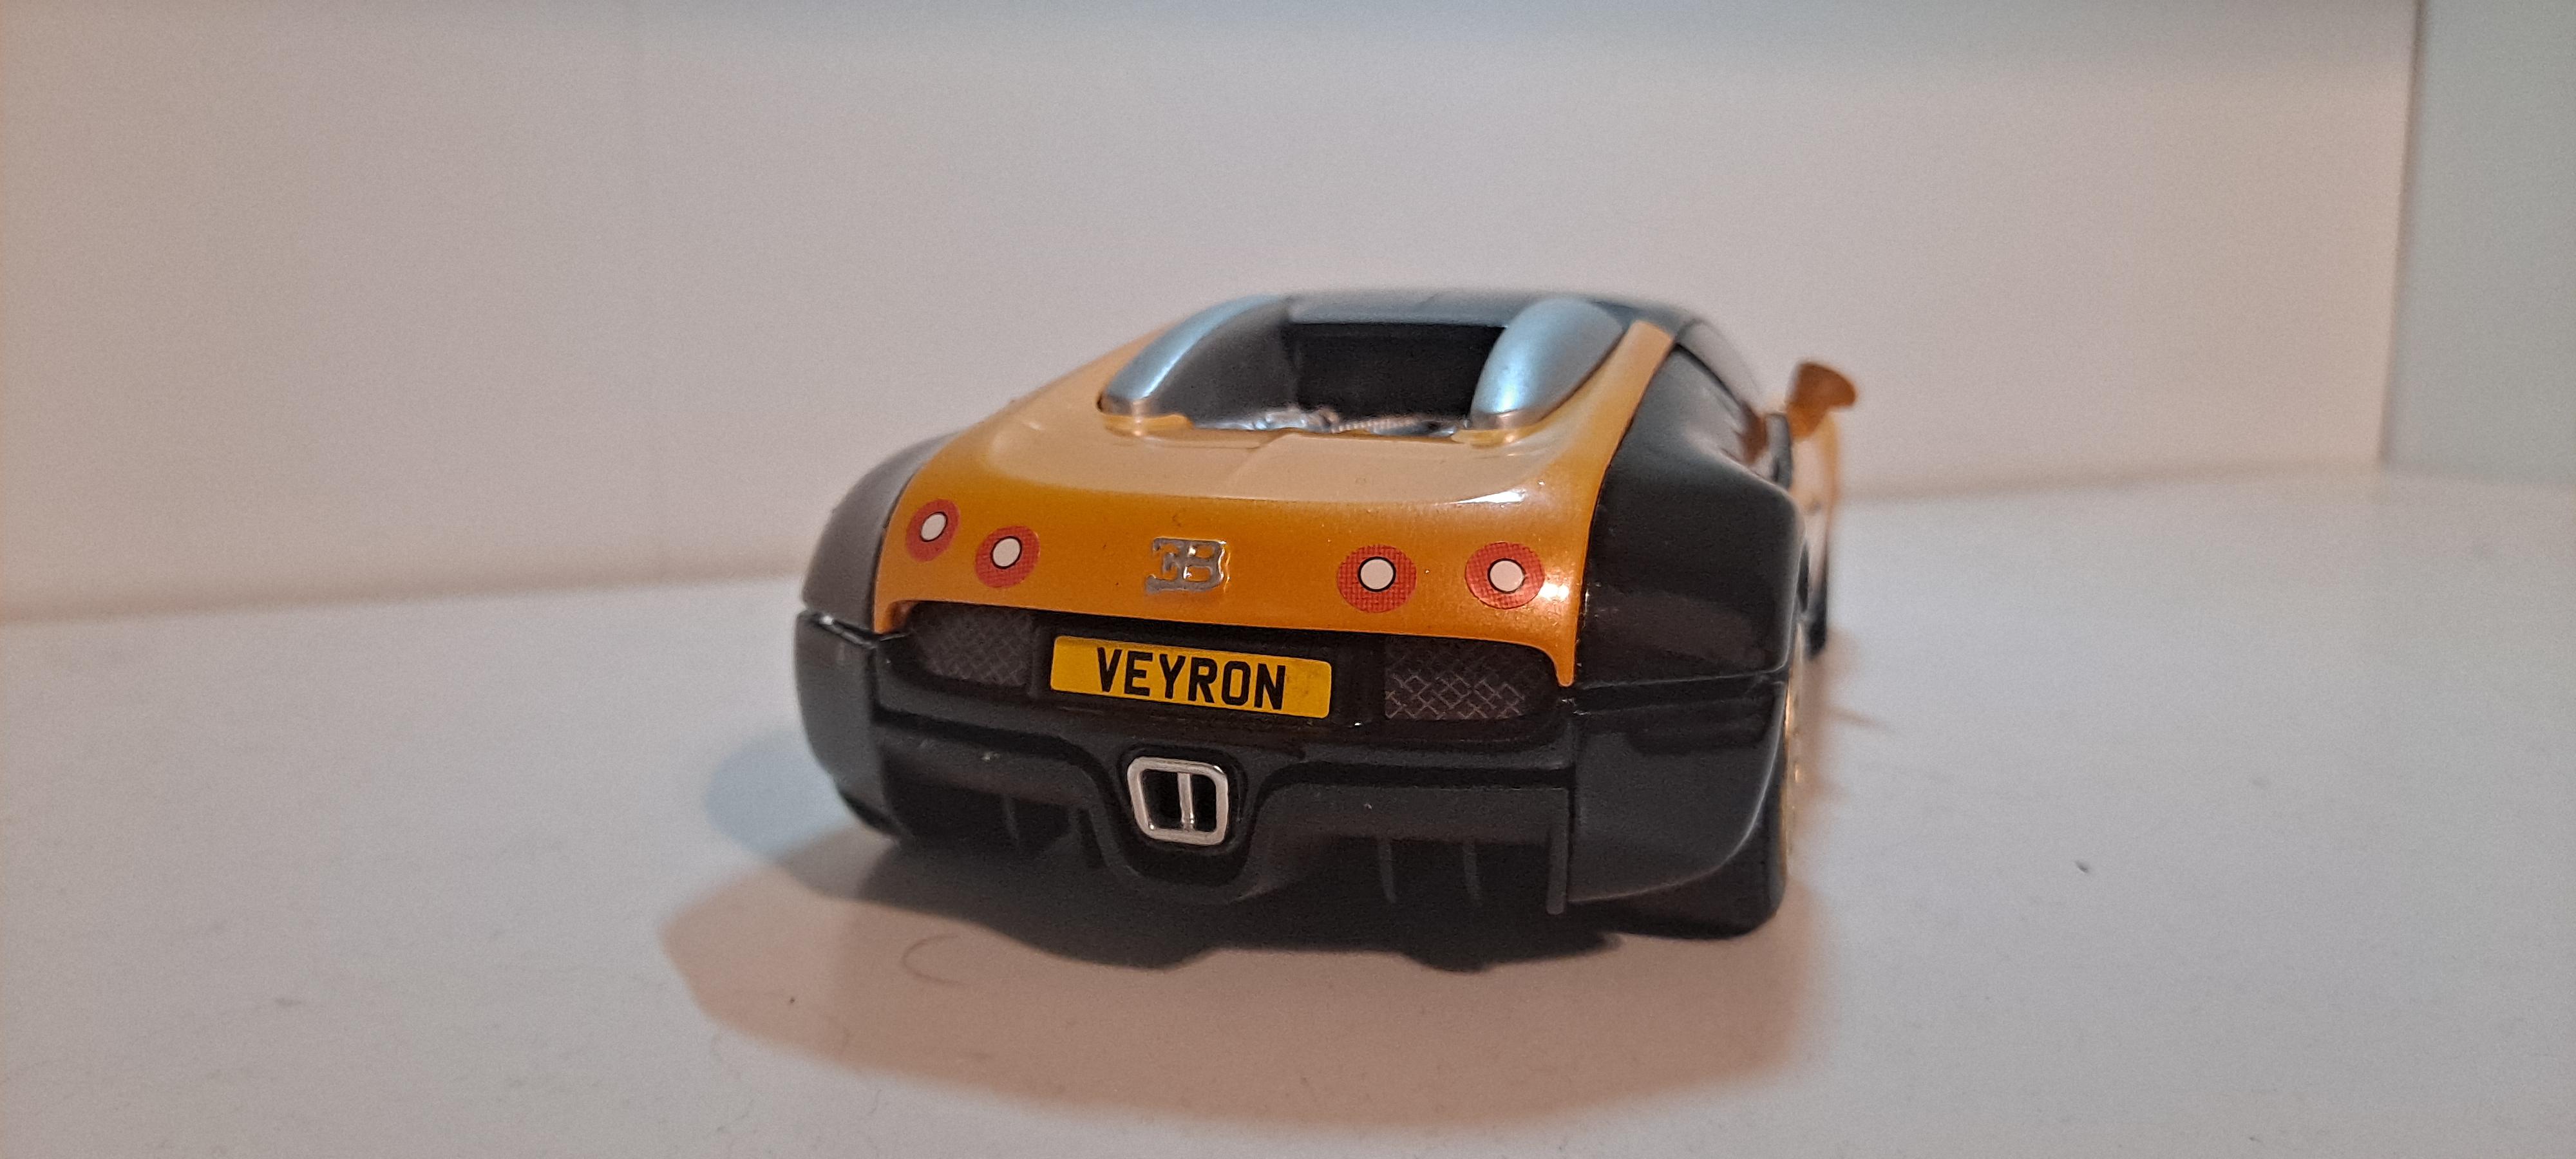
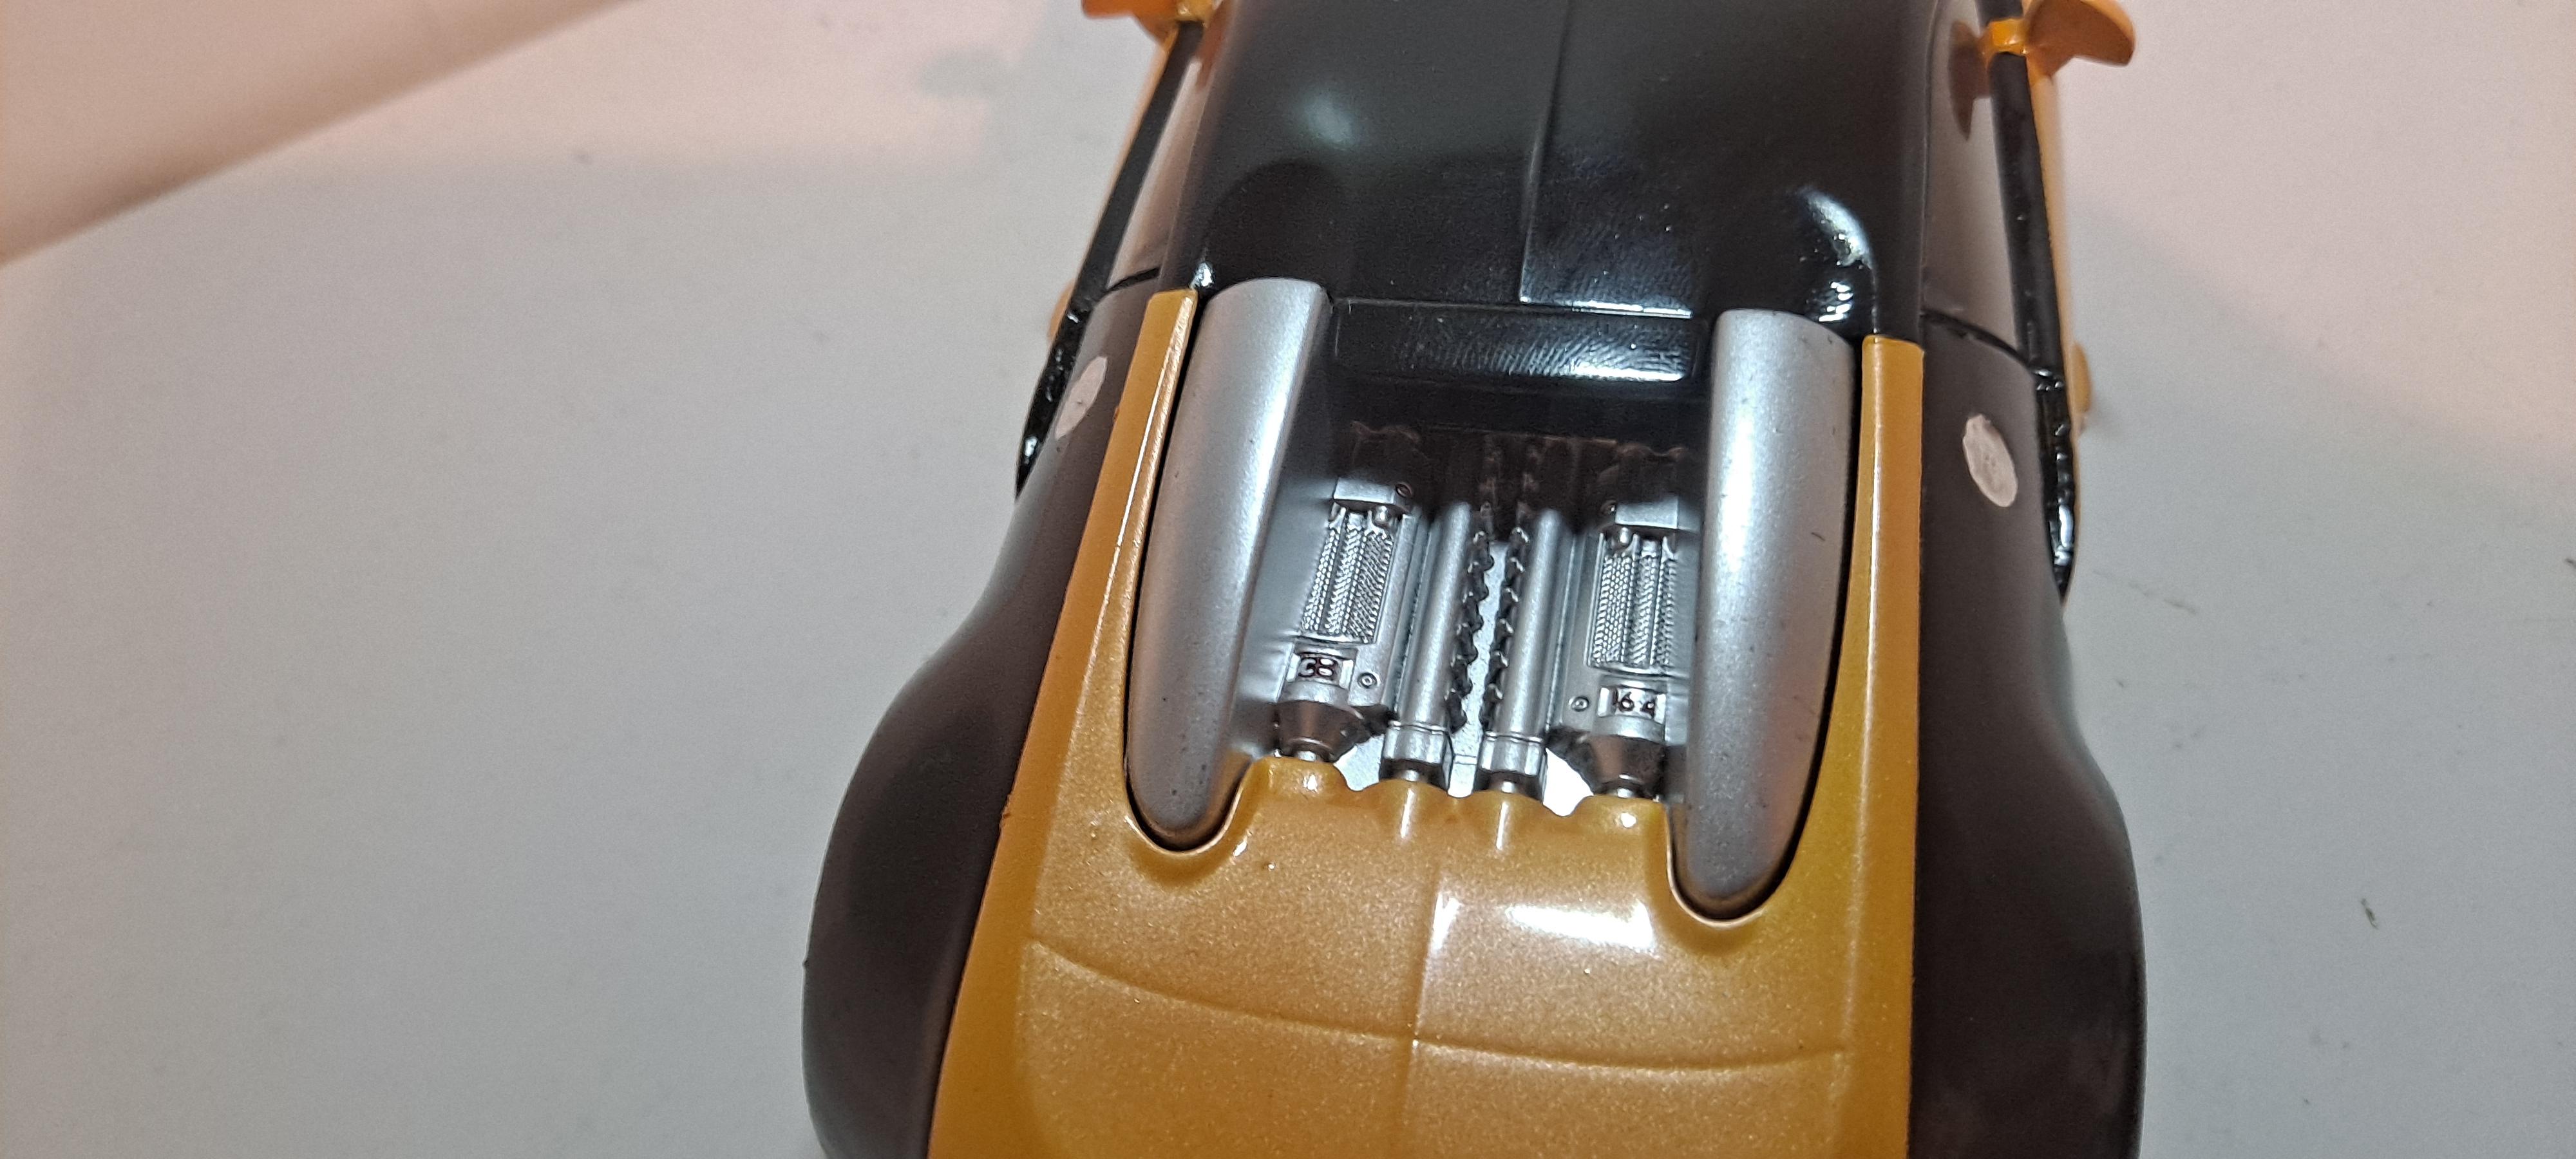
Fresh off 'da bench! Built from the 2011 issue of the pre-RC2 era AMT kit. Very nicely detailed kit for the time, and better than the original 1962 annual in the interior/frame department (the body is said to be better on the annual, but who has the monies to spend on a gluebomb/beater 1962 original era kit). However with recent Round 2 quality control issues, nothing is ever a "shake and drop" as several parts were severely warped and torqued. The windshield especially was an absolutely twisted mess and required lots of careful bending and sanding down joints to hold in place, not to mention lots of glue. Interior had serious fitment issues come lining up to the body and lower frame. Dashboard had to be shaved on the sides and the front of the door panels had to be shortened to fit around the firewall. Some of the body lettering had super weak molding and the folks at Round 2 gave decals for everything but those. Only changes were the custom wheels/tires/brake from the Revell '66 Chevy Stepside and exhaust tips from the spares bin. Exterior is Tamiya TS-92 Metallic Orange cleared with Pledge.
-
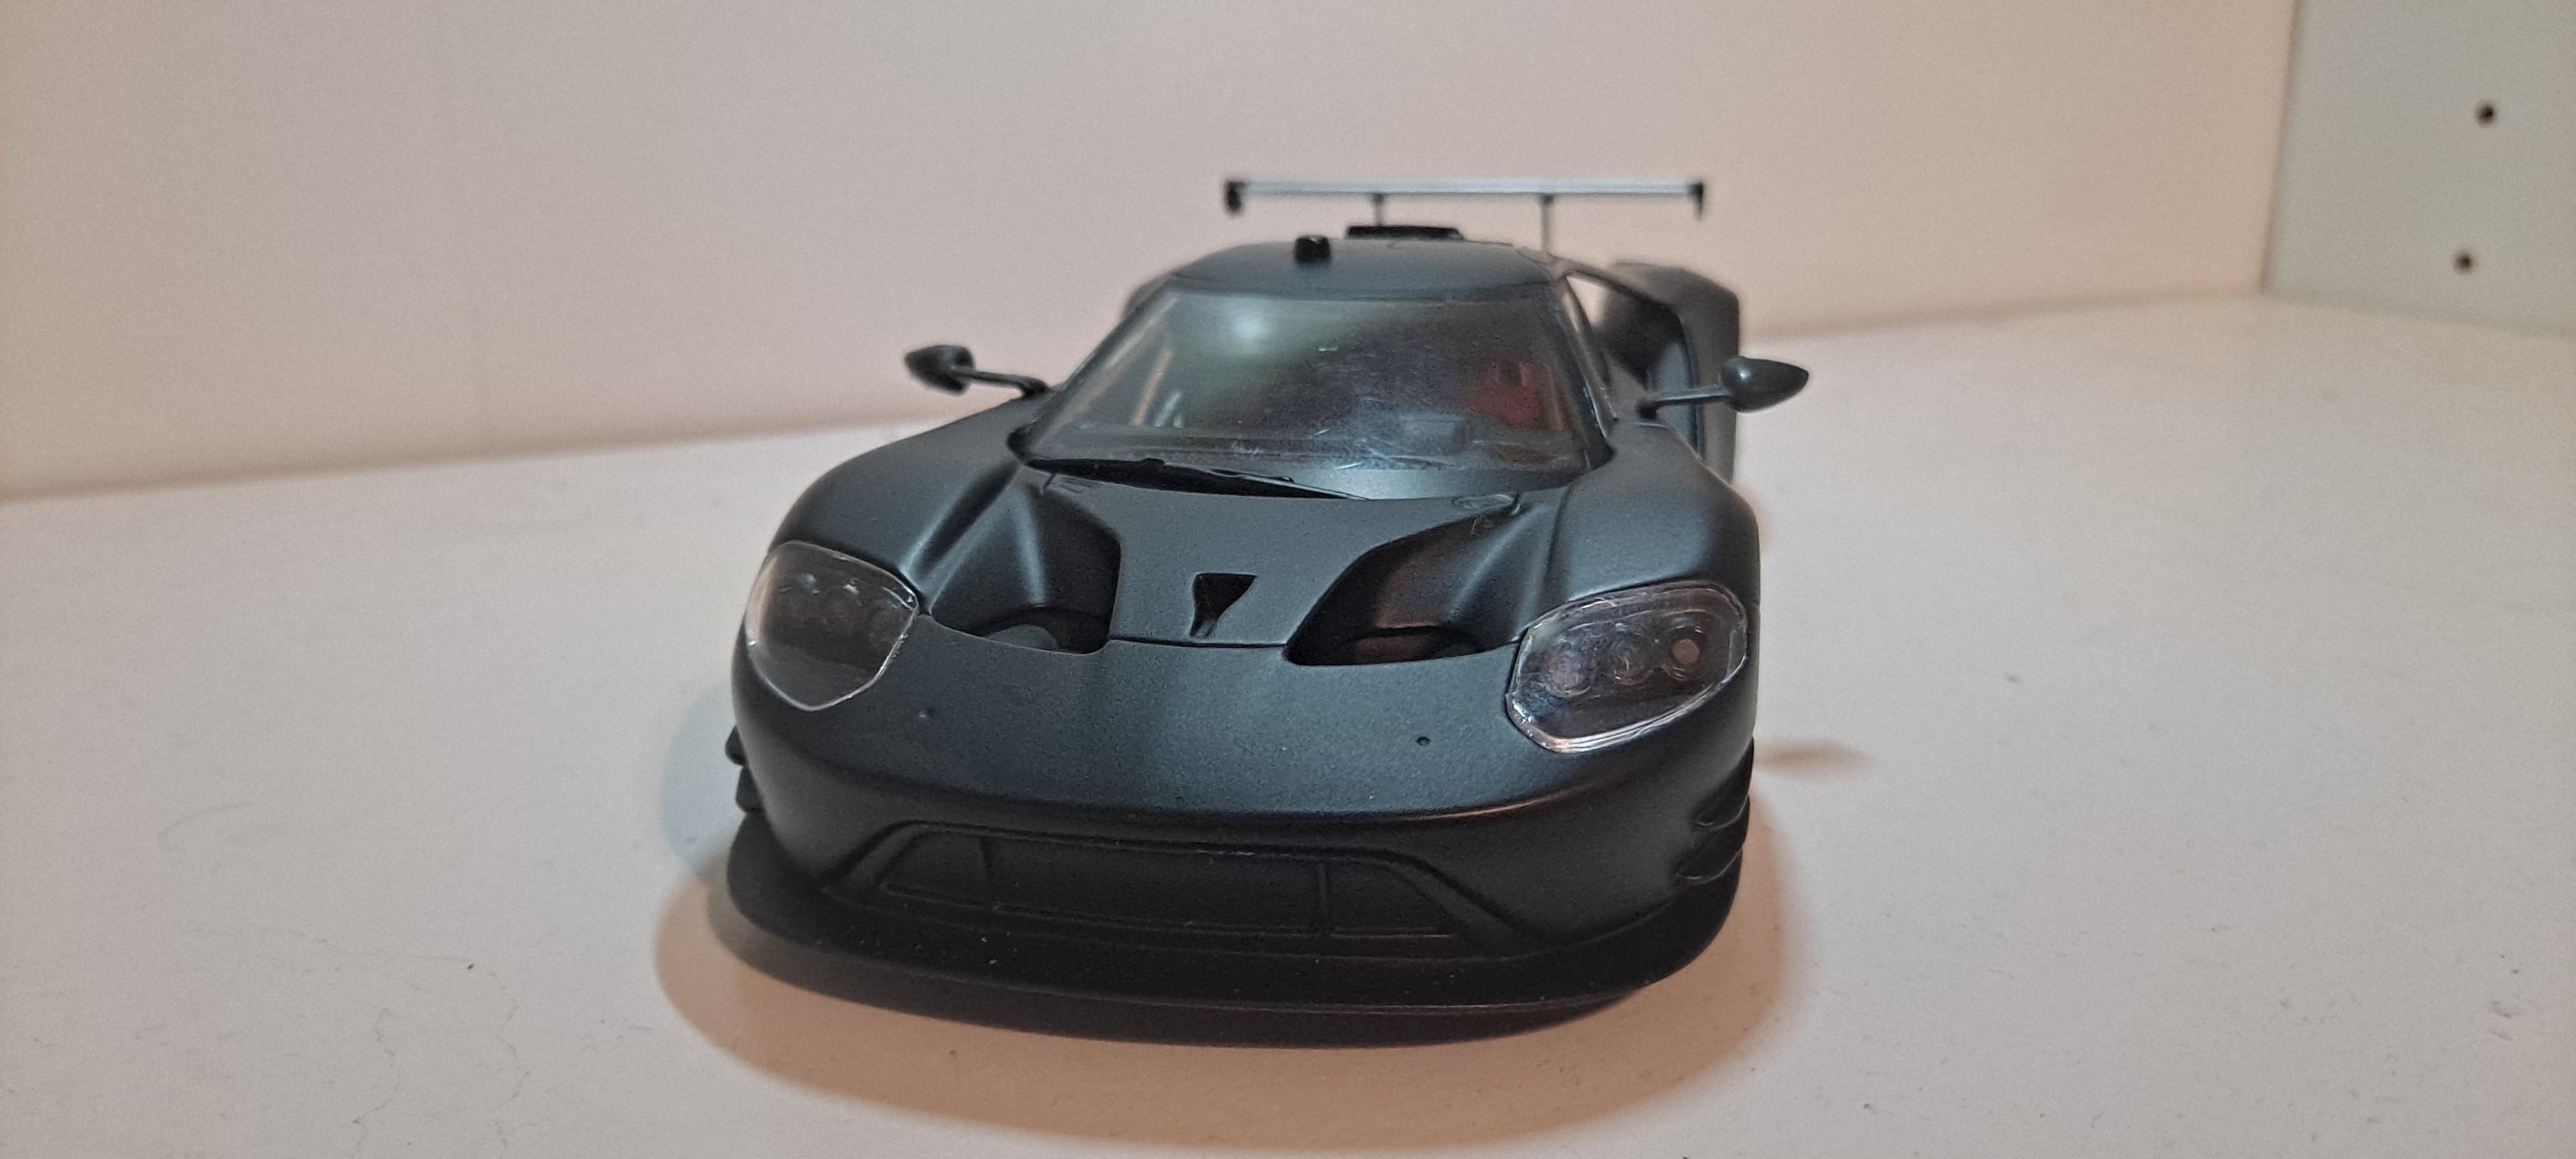
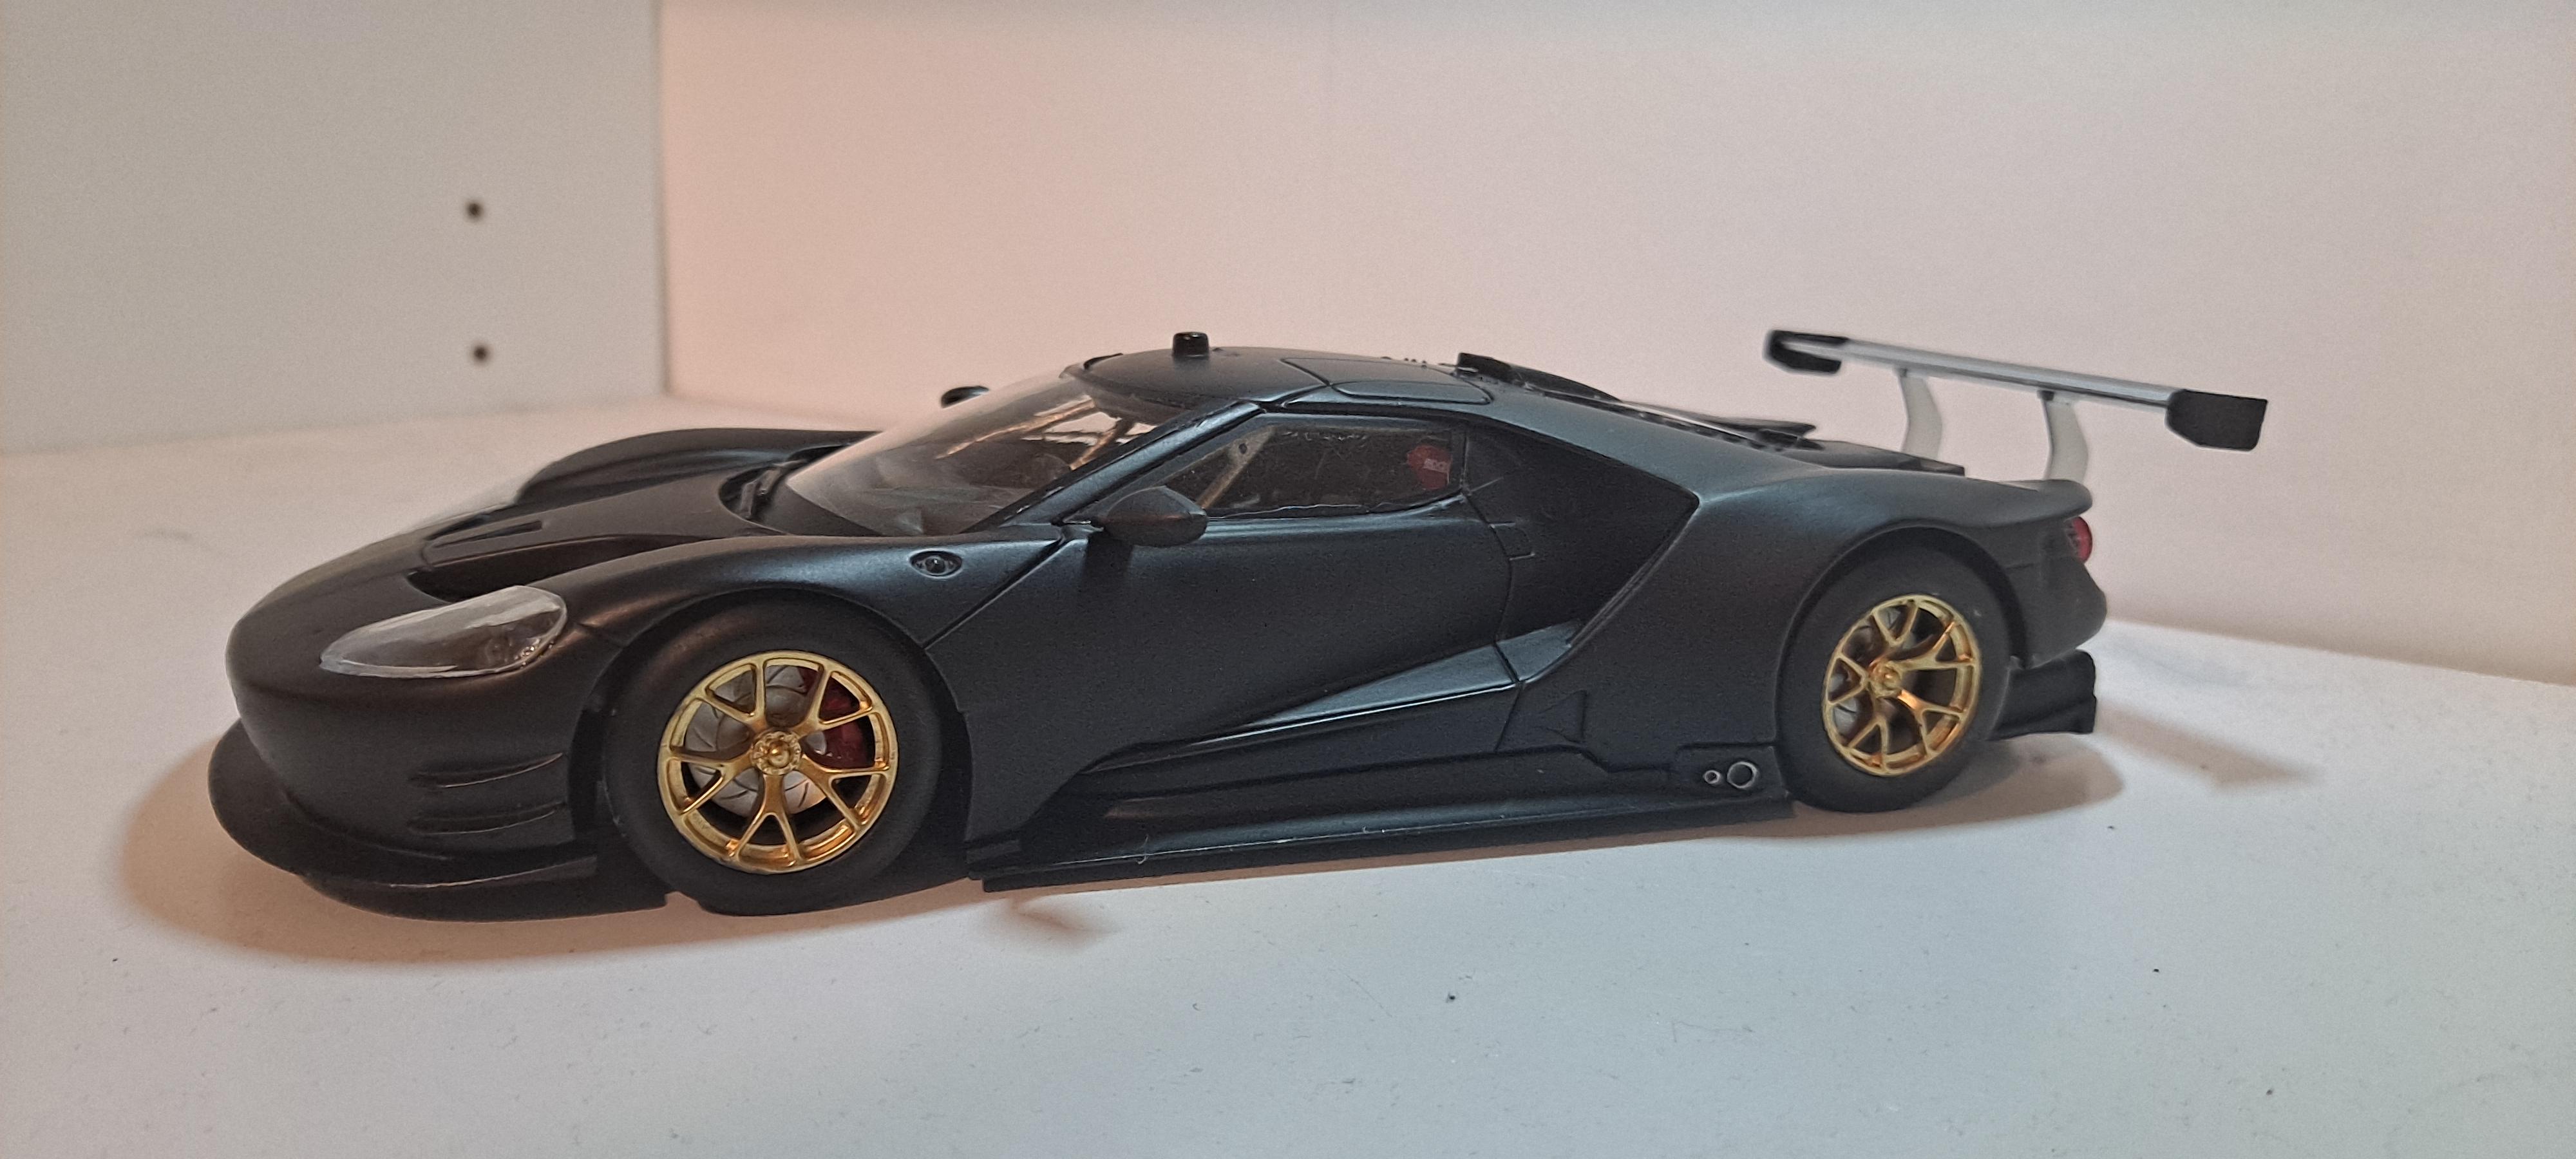
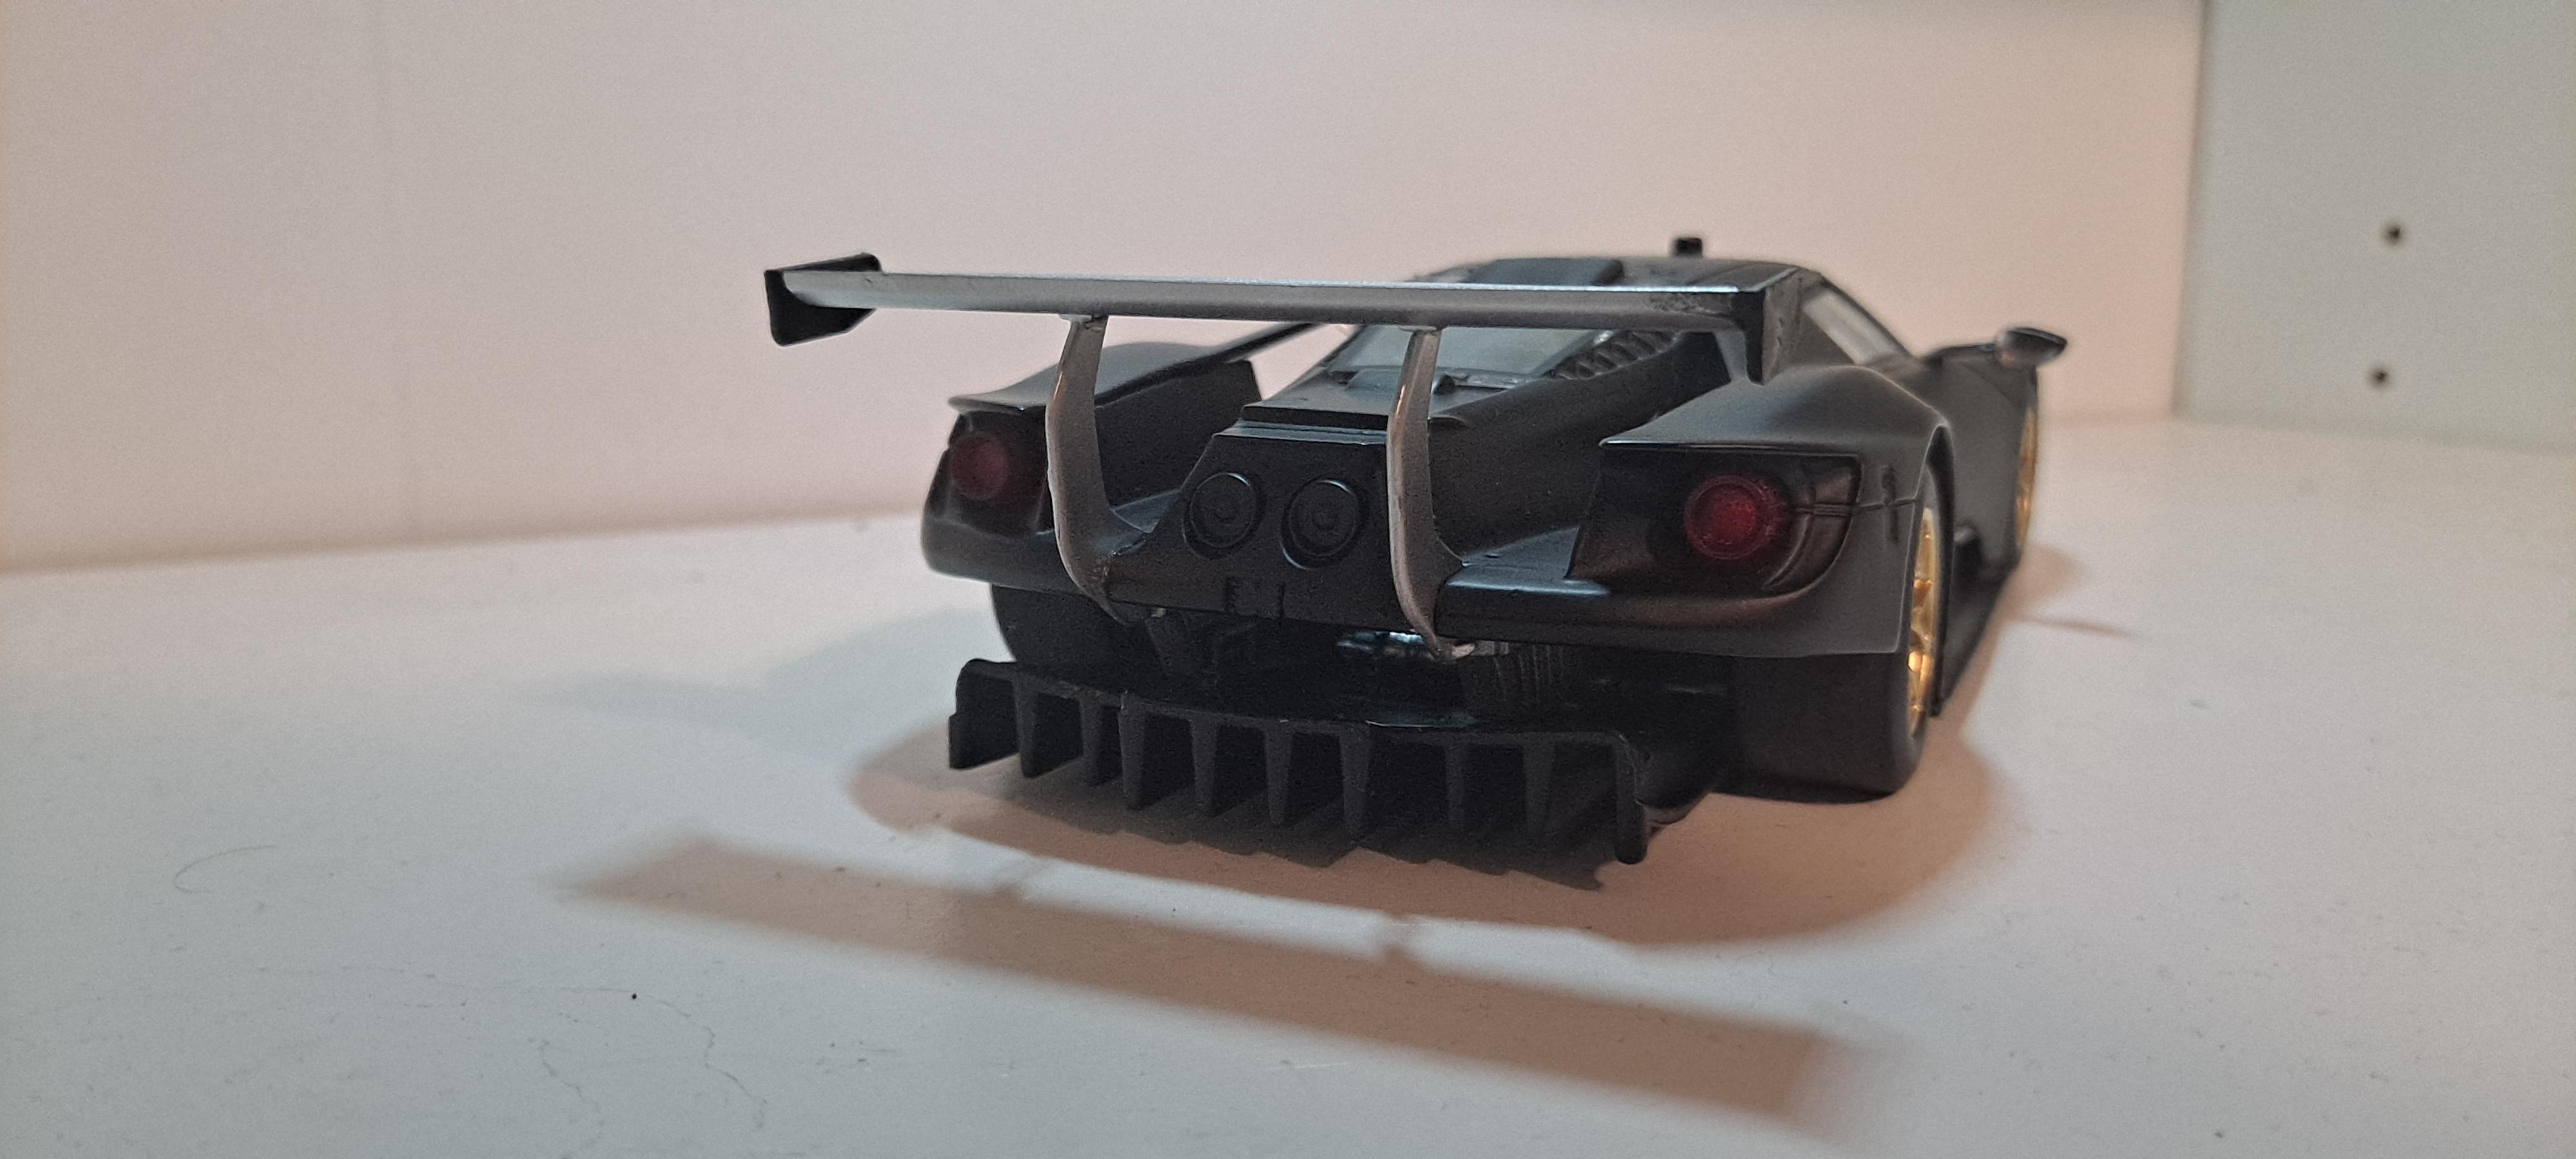
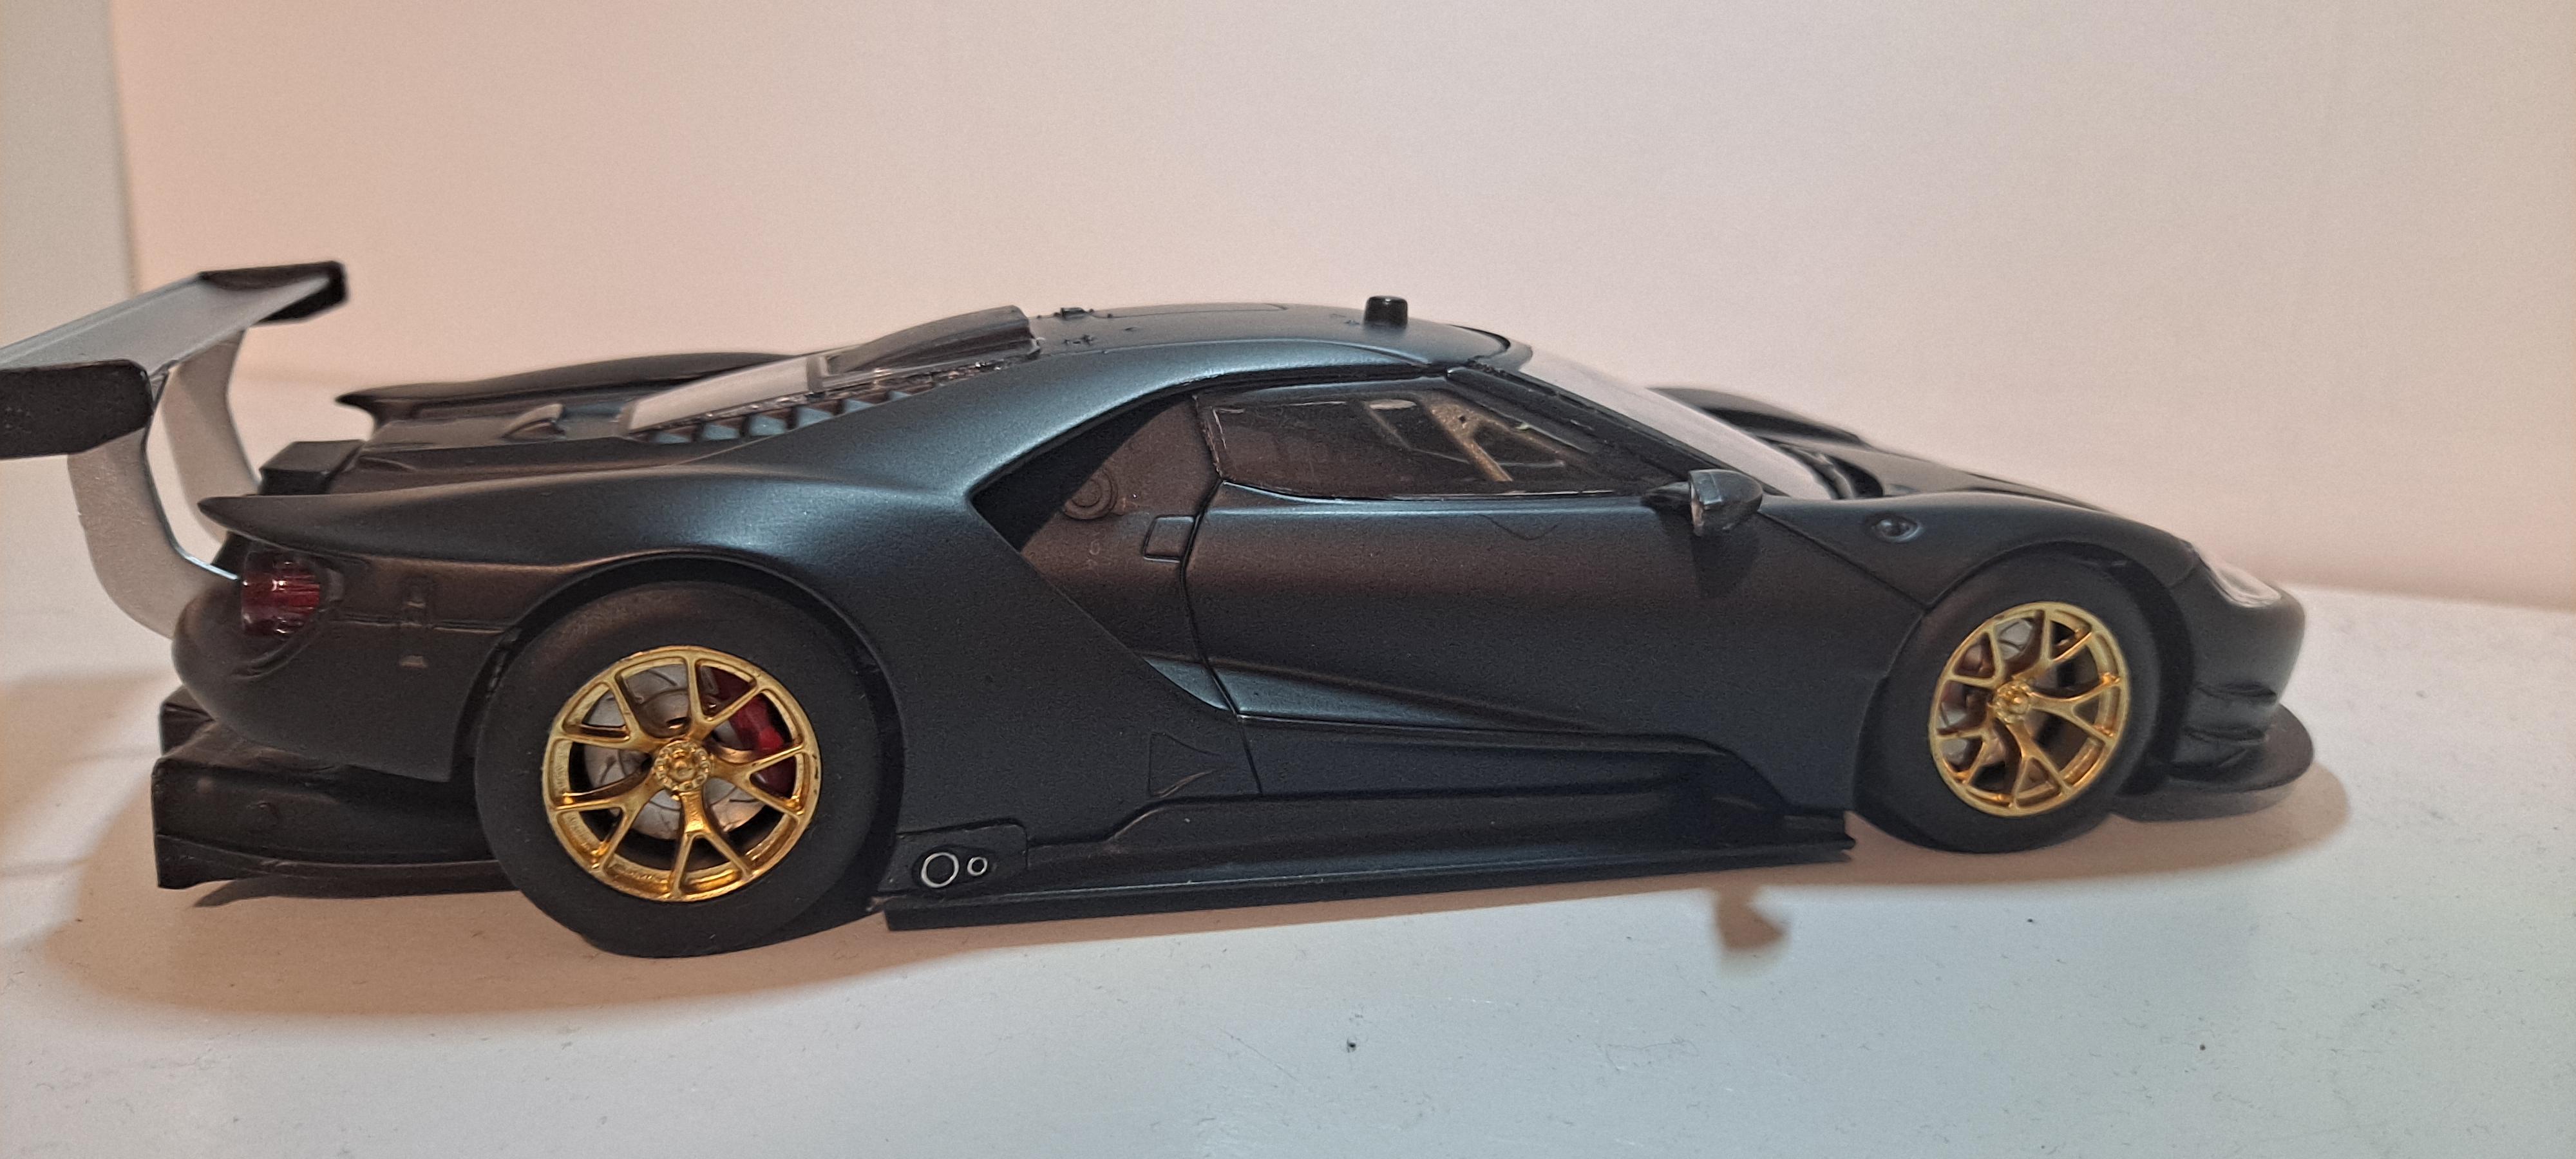
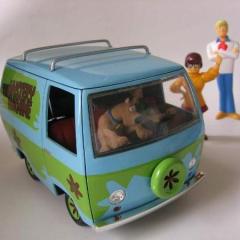
Fresh off da bench! Completely OOB. Body decals and paint scheme were way too difficult and cumbersome to replicate, went for a stealth fighter/Batmobile approach with this one. Exterior is Rustoluem Professional Flat Black.
-
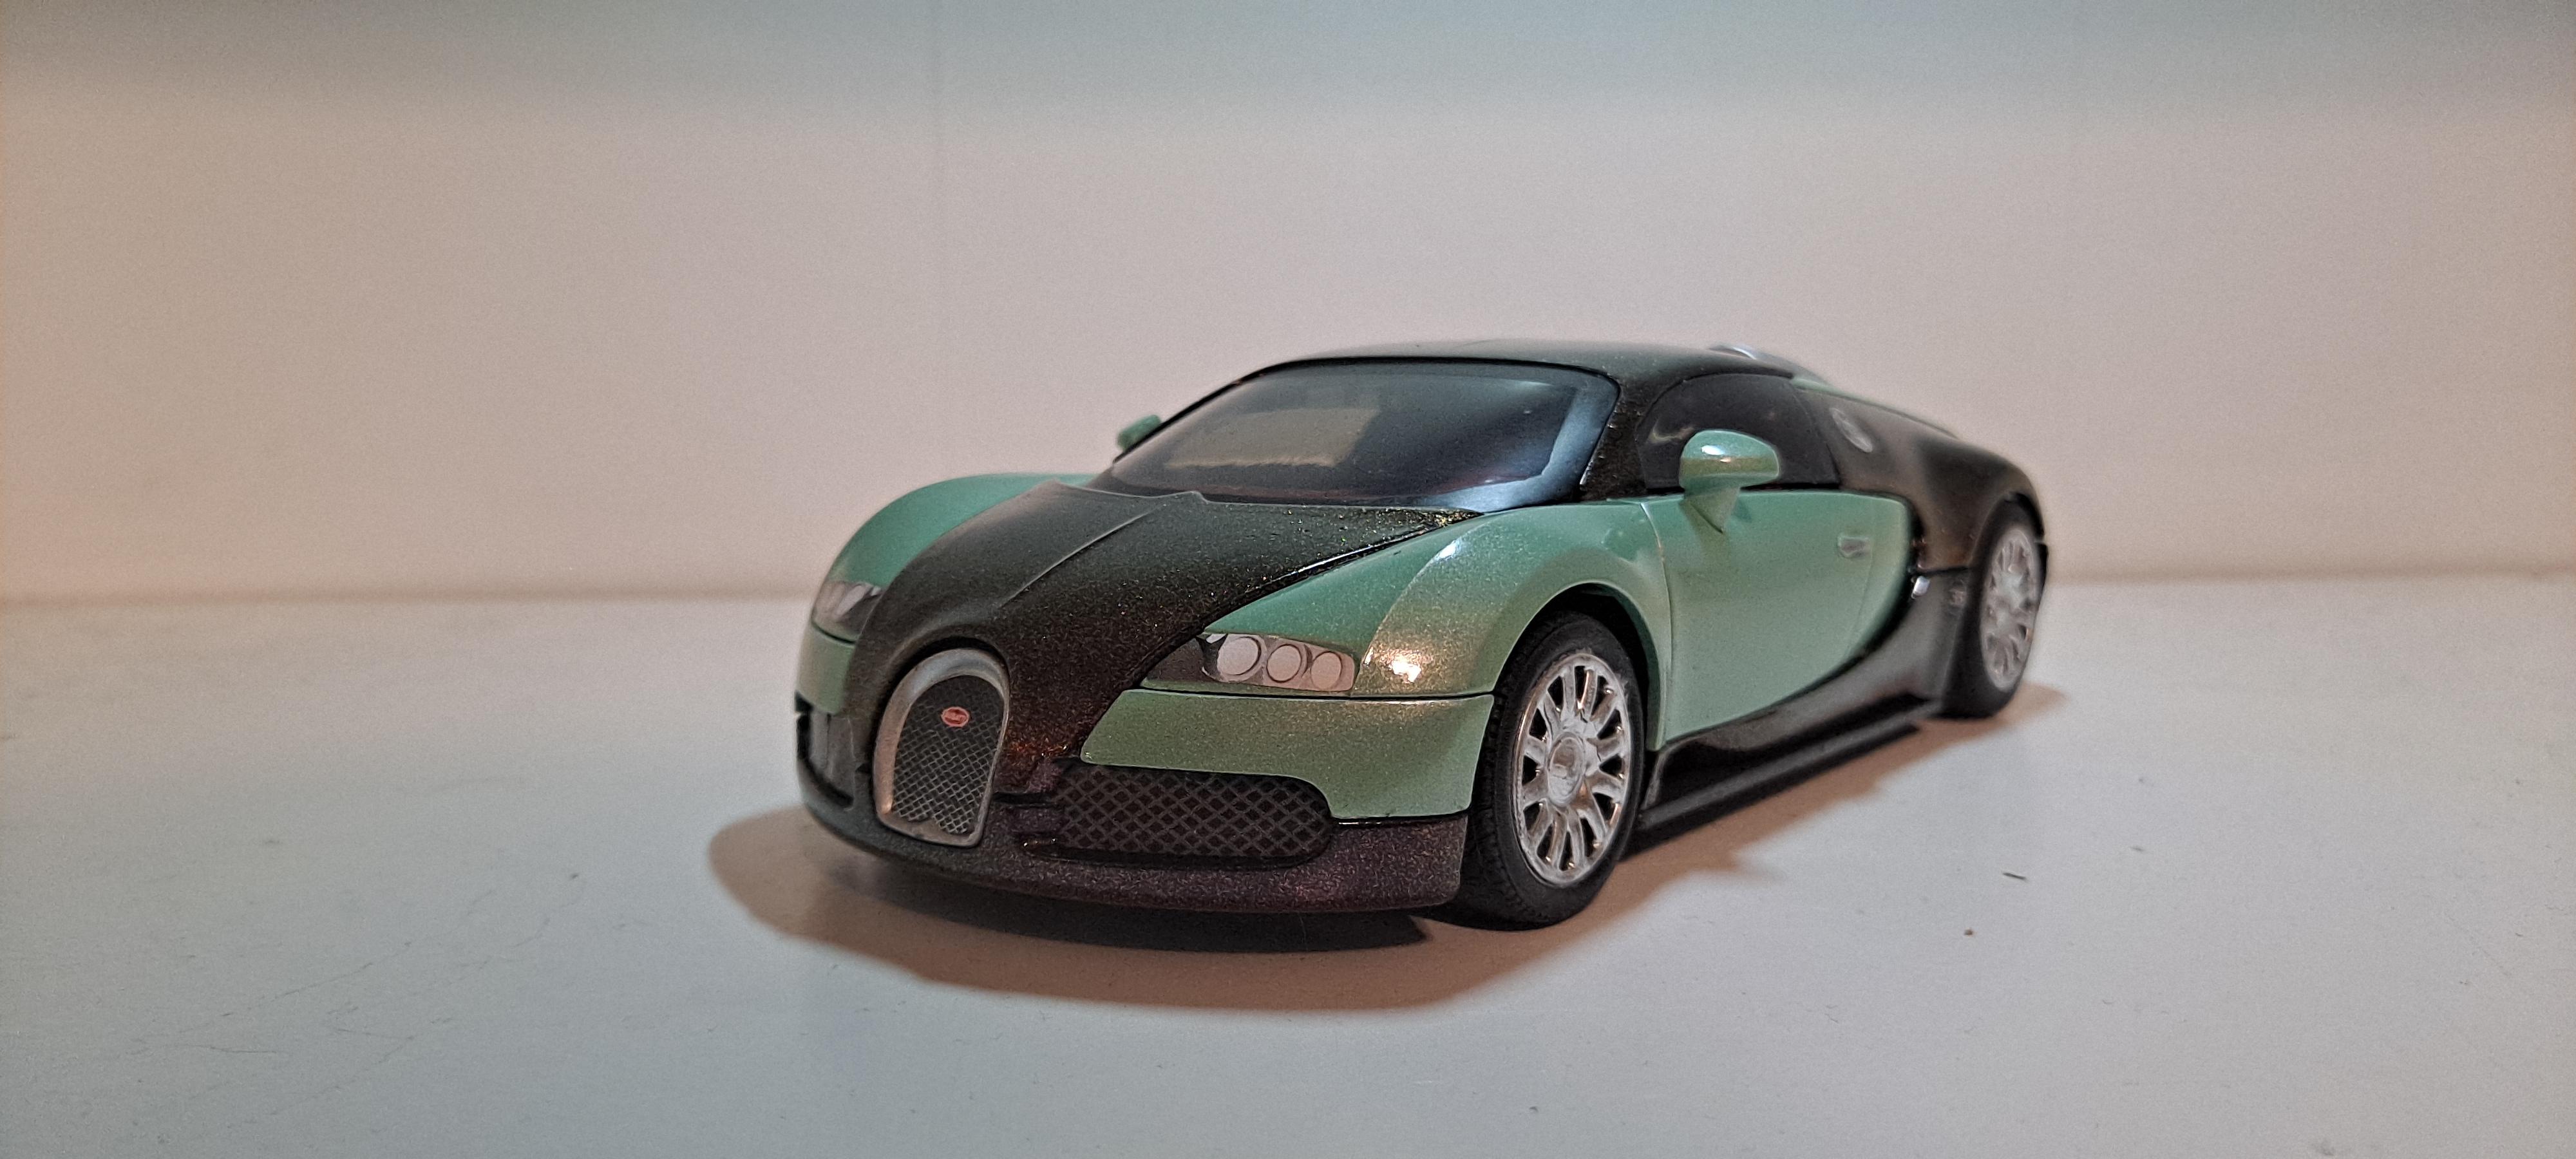
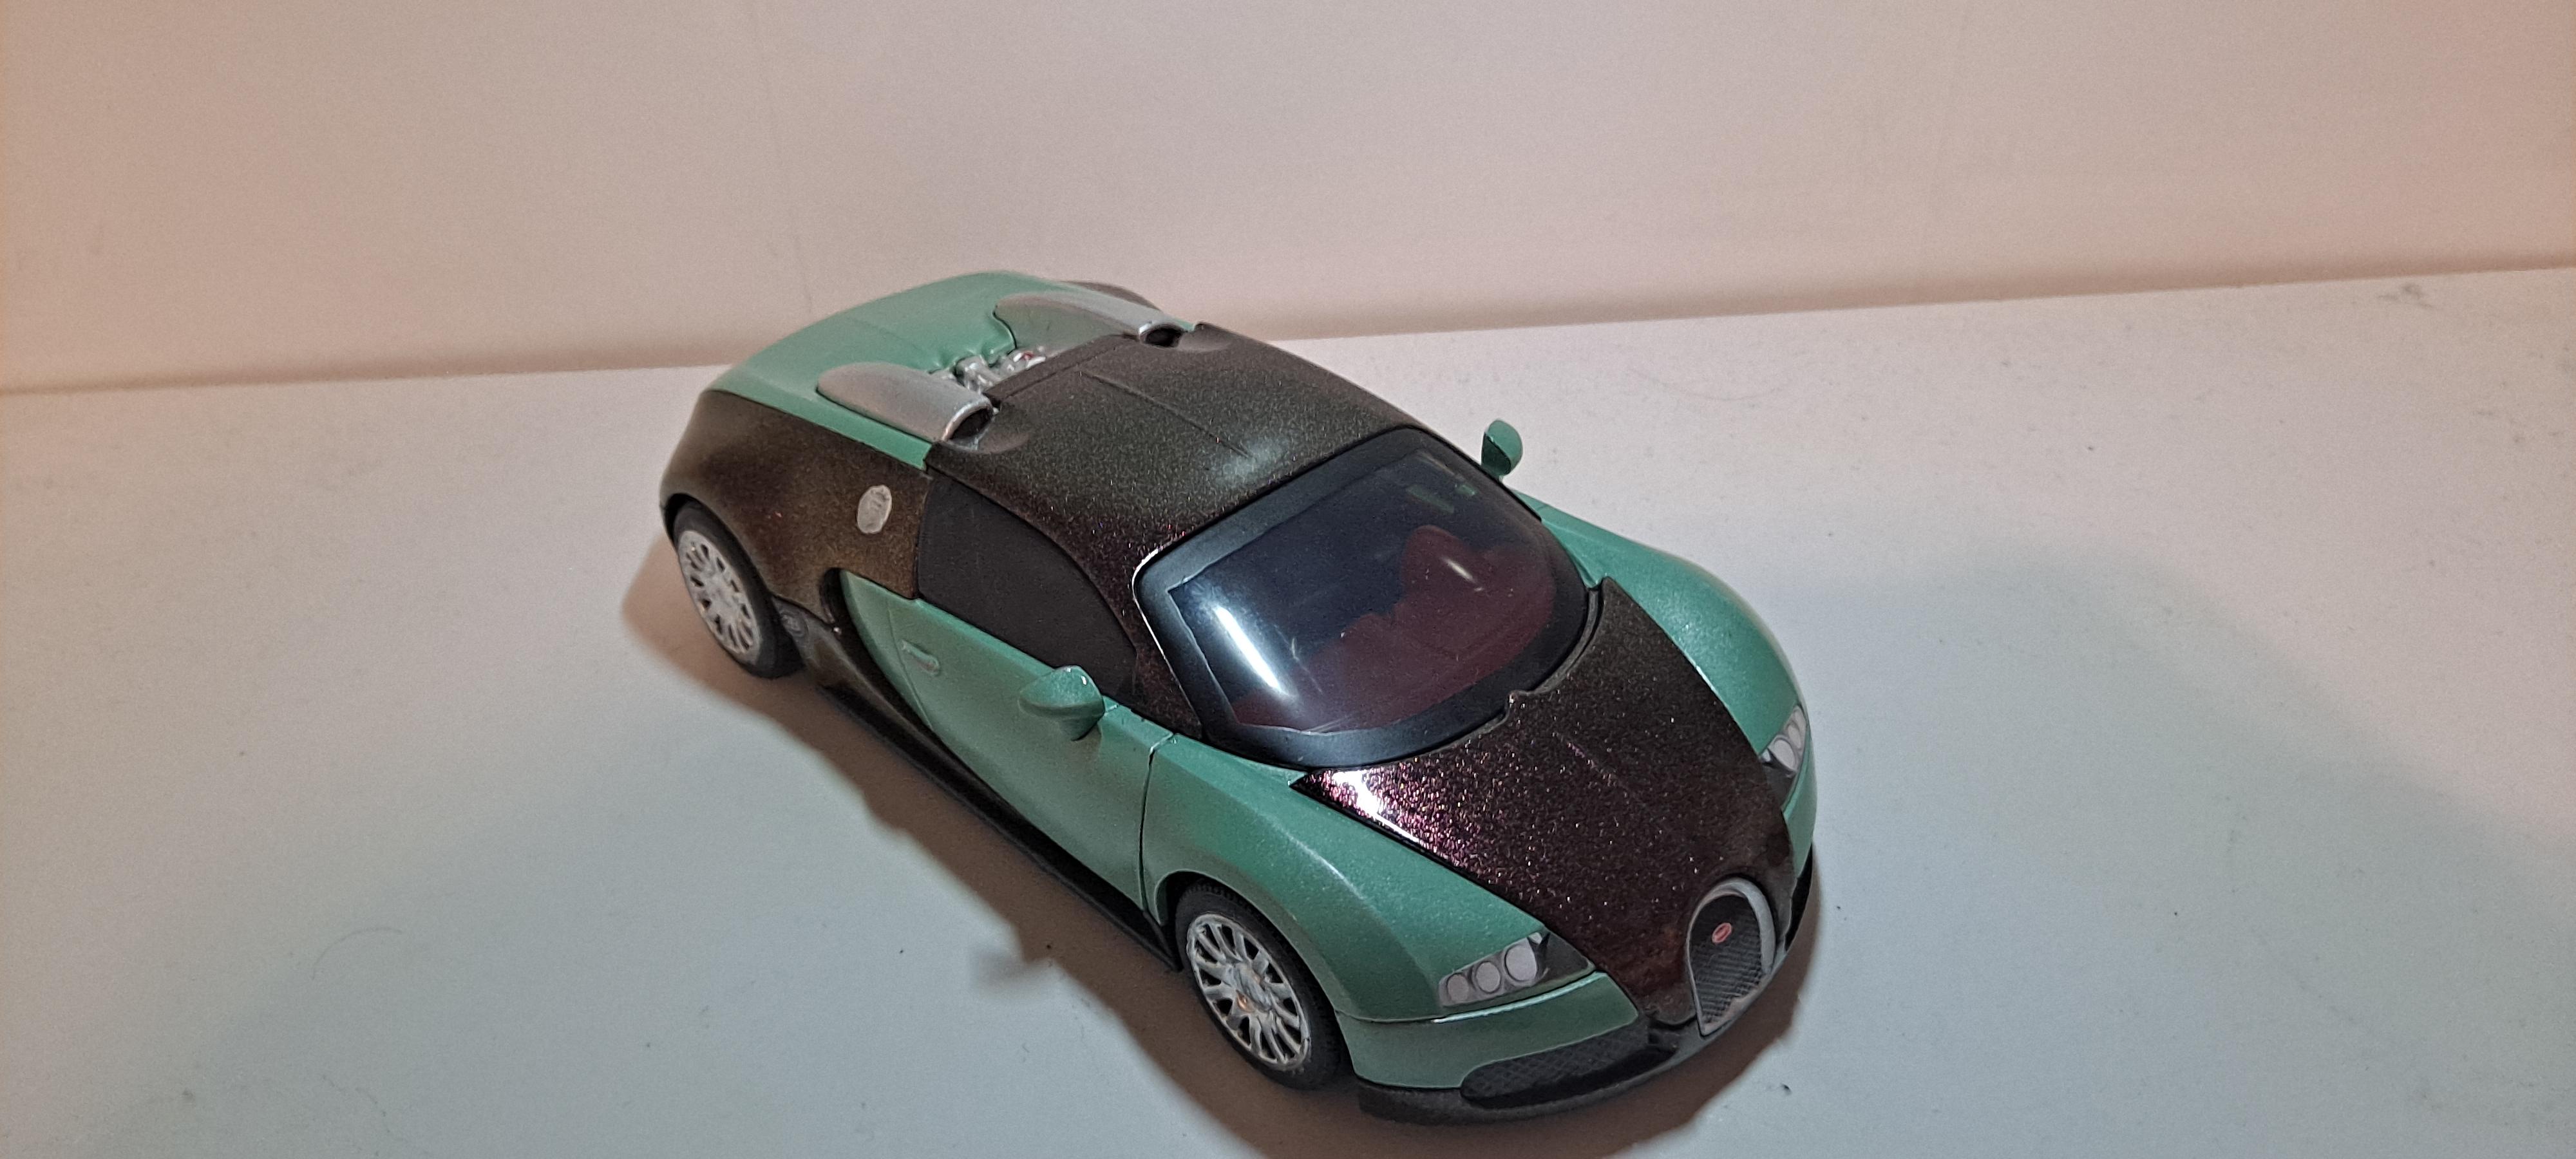
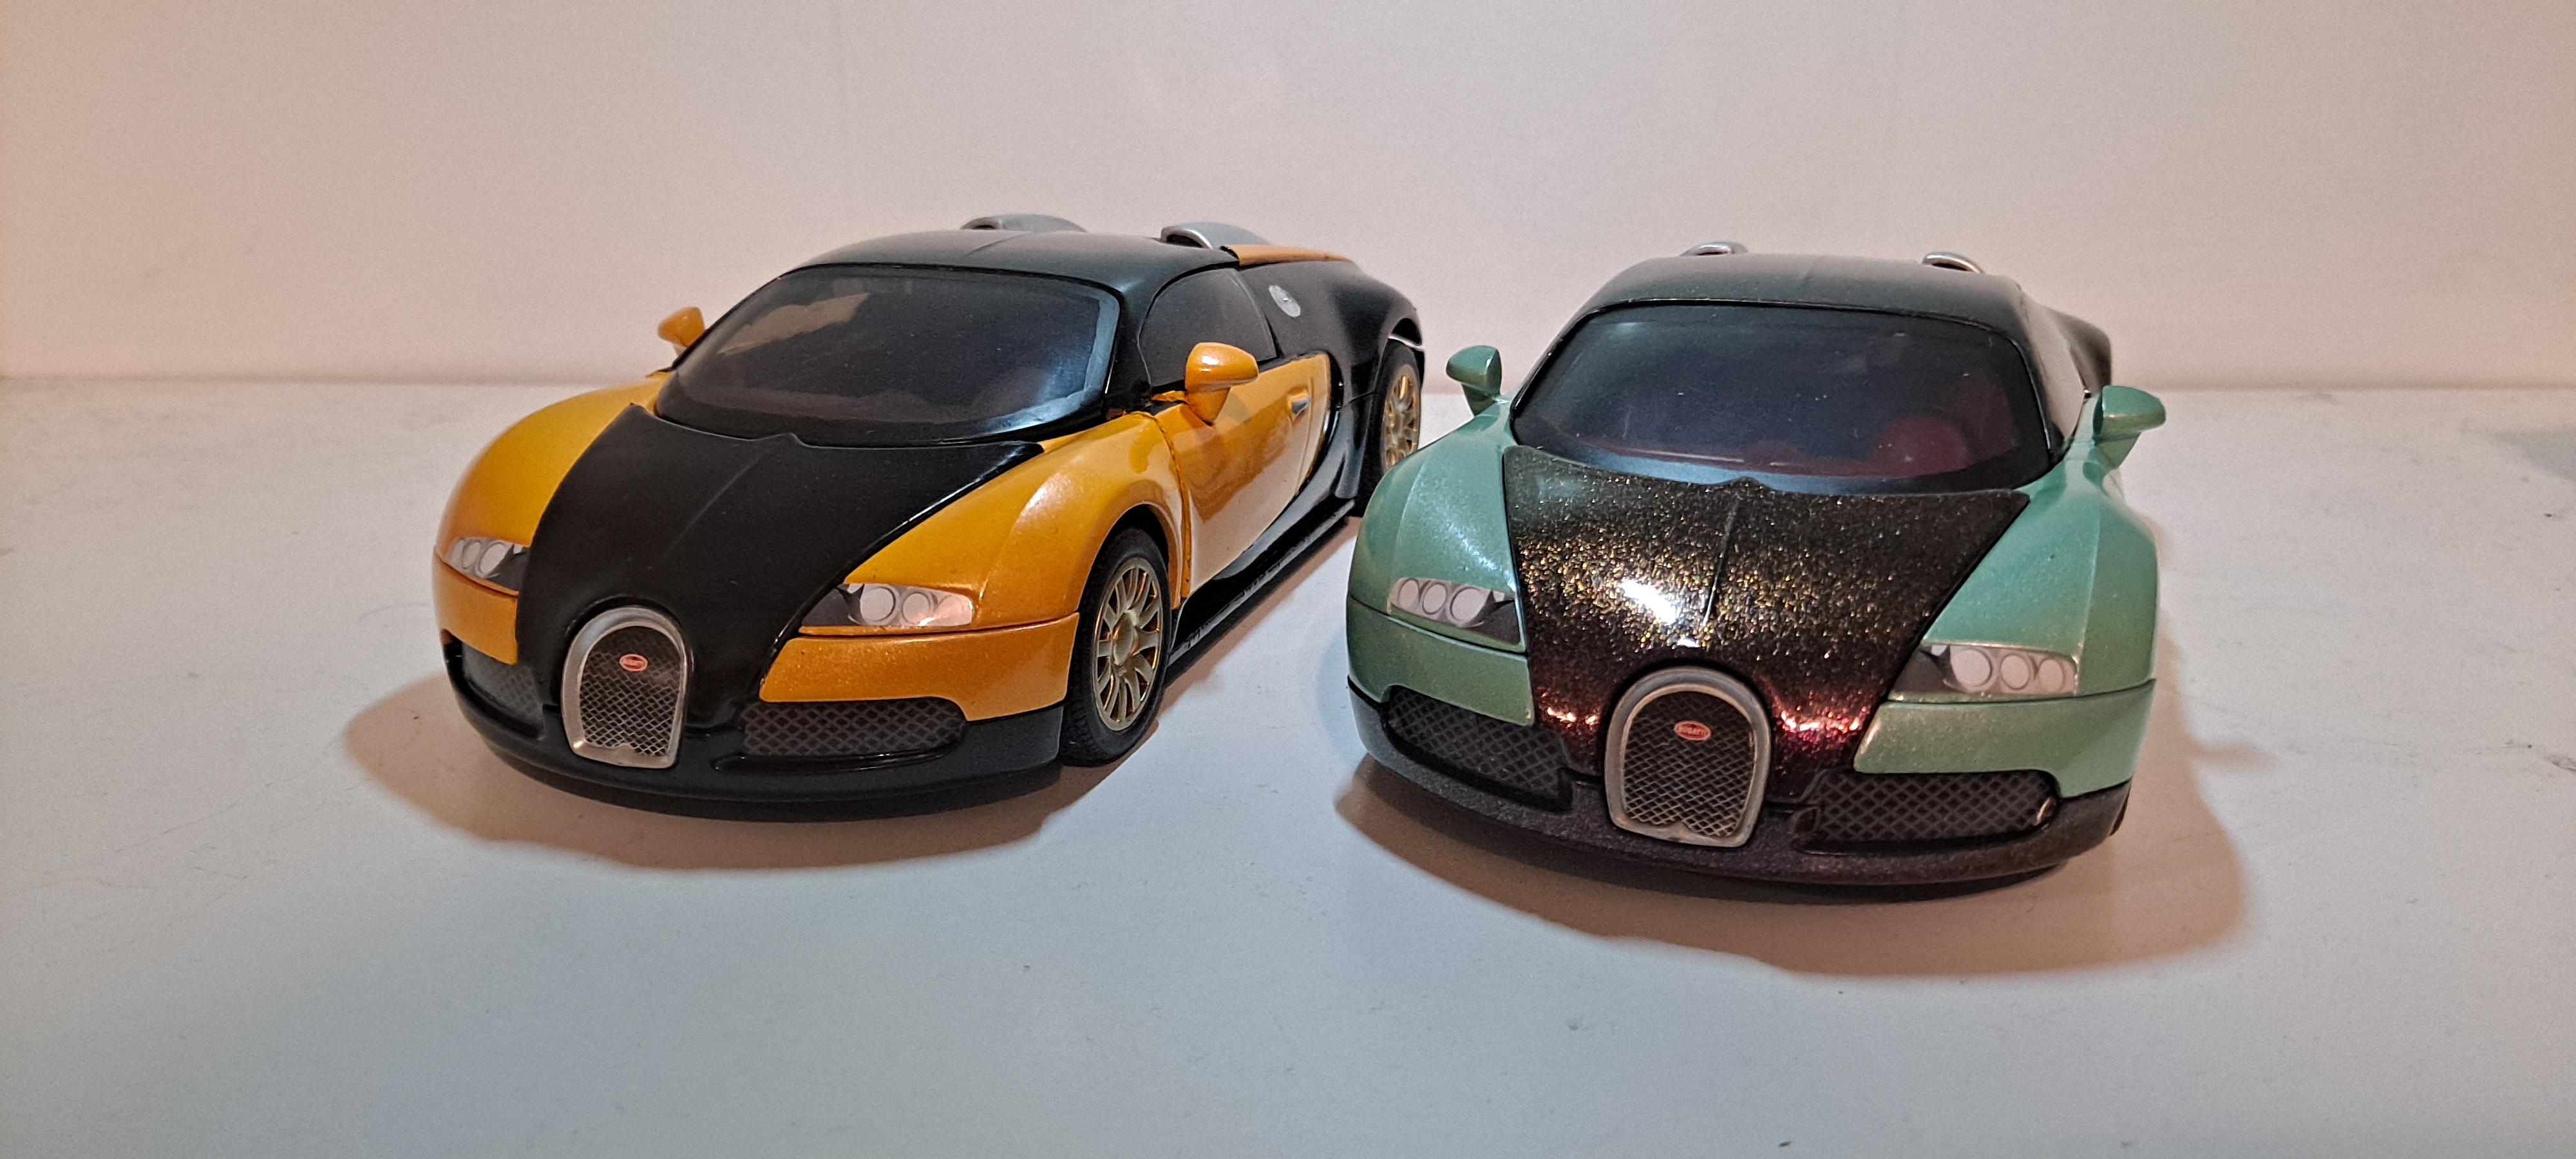
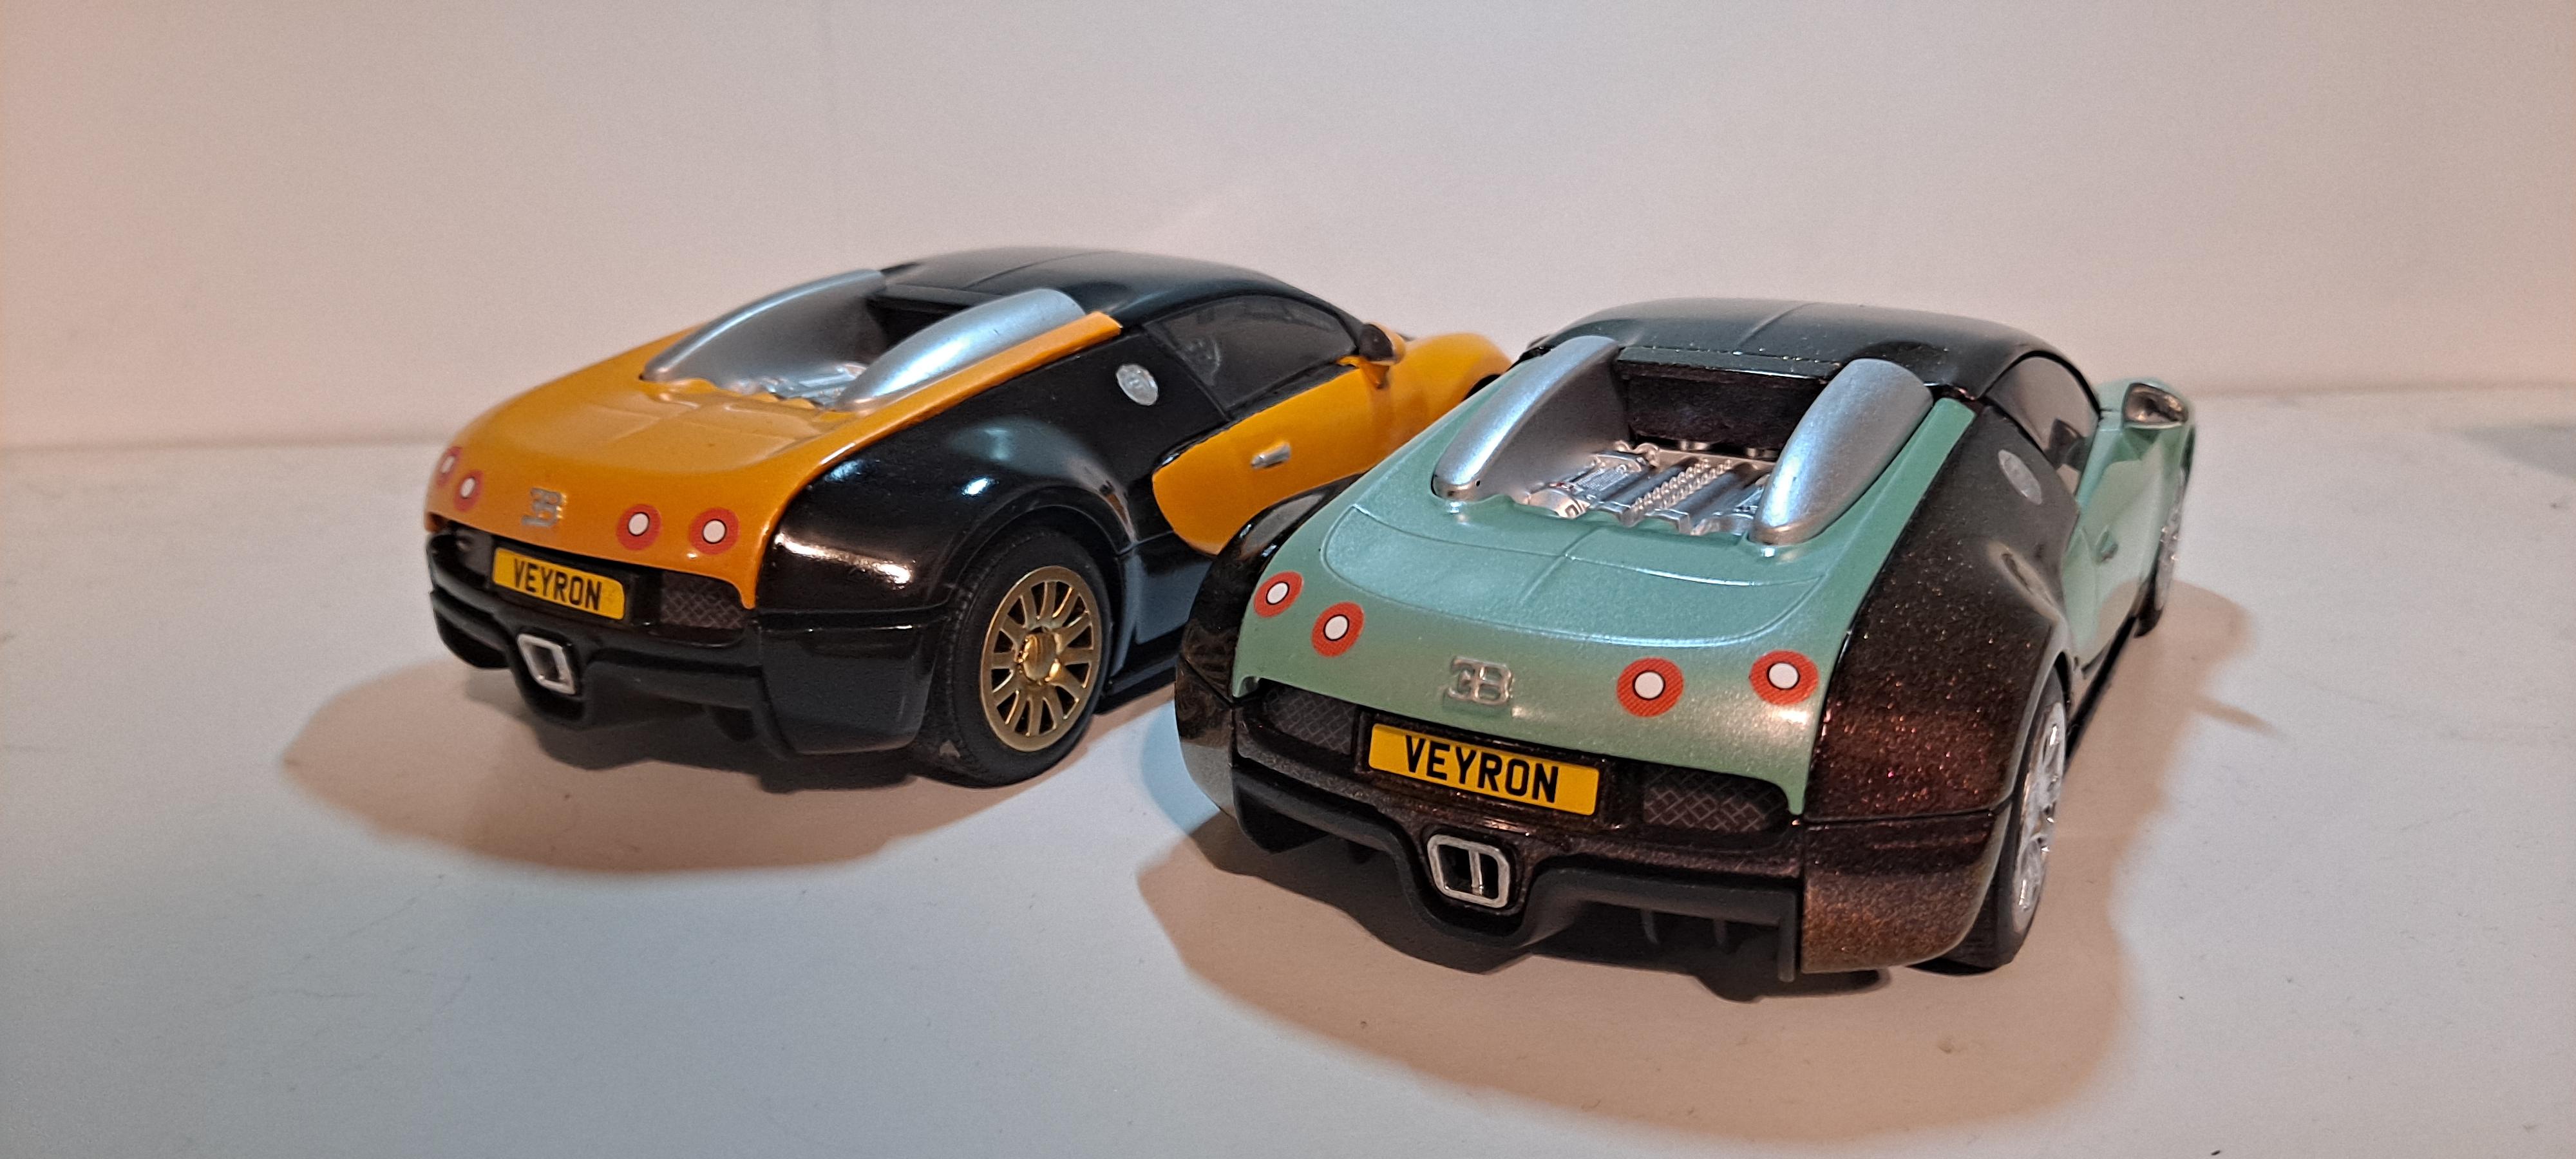
Anudda one of these fresh off da bench! From the Airfix Quickbuild series kit. This one was a HL $5 markdown that someone started and threw back in the box. Same mods as the orange one with Lego-like joints on seats and floorboard patched. New seats and steering wheel were added to replace the original Lego square blocks. Gaps in wheels were filled in with clear headlight lenses and painted to match. No indentations for the rear taillights, making those stickers very difficult to align. Otherwise mostly OOB. Exterior is Rustoleum Color Shift Pink Champagne and Tamiya TS-60 Pearl Green, all cleared with Pledge. Group photos with Orange Veyron: It's own thread here
-
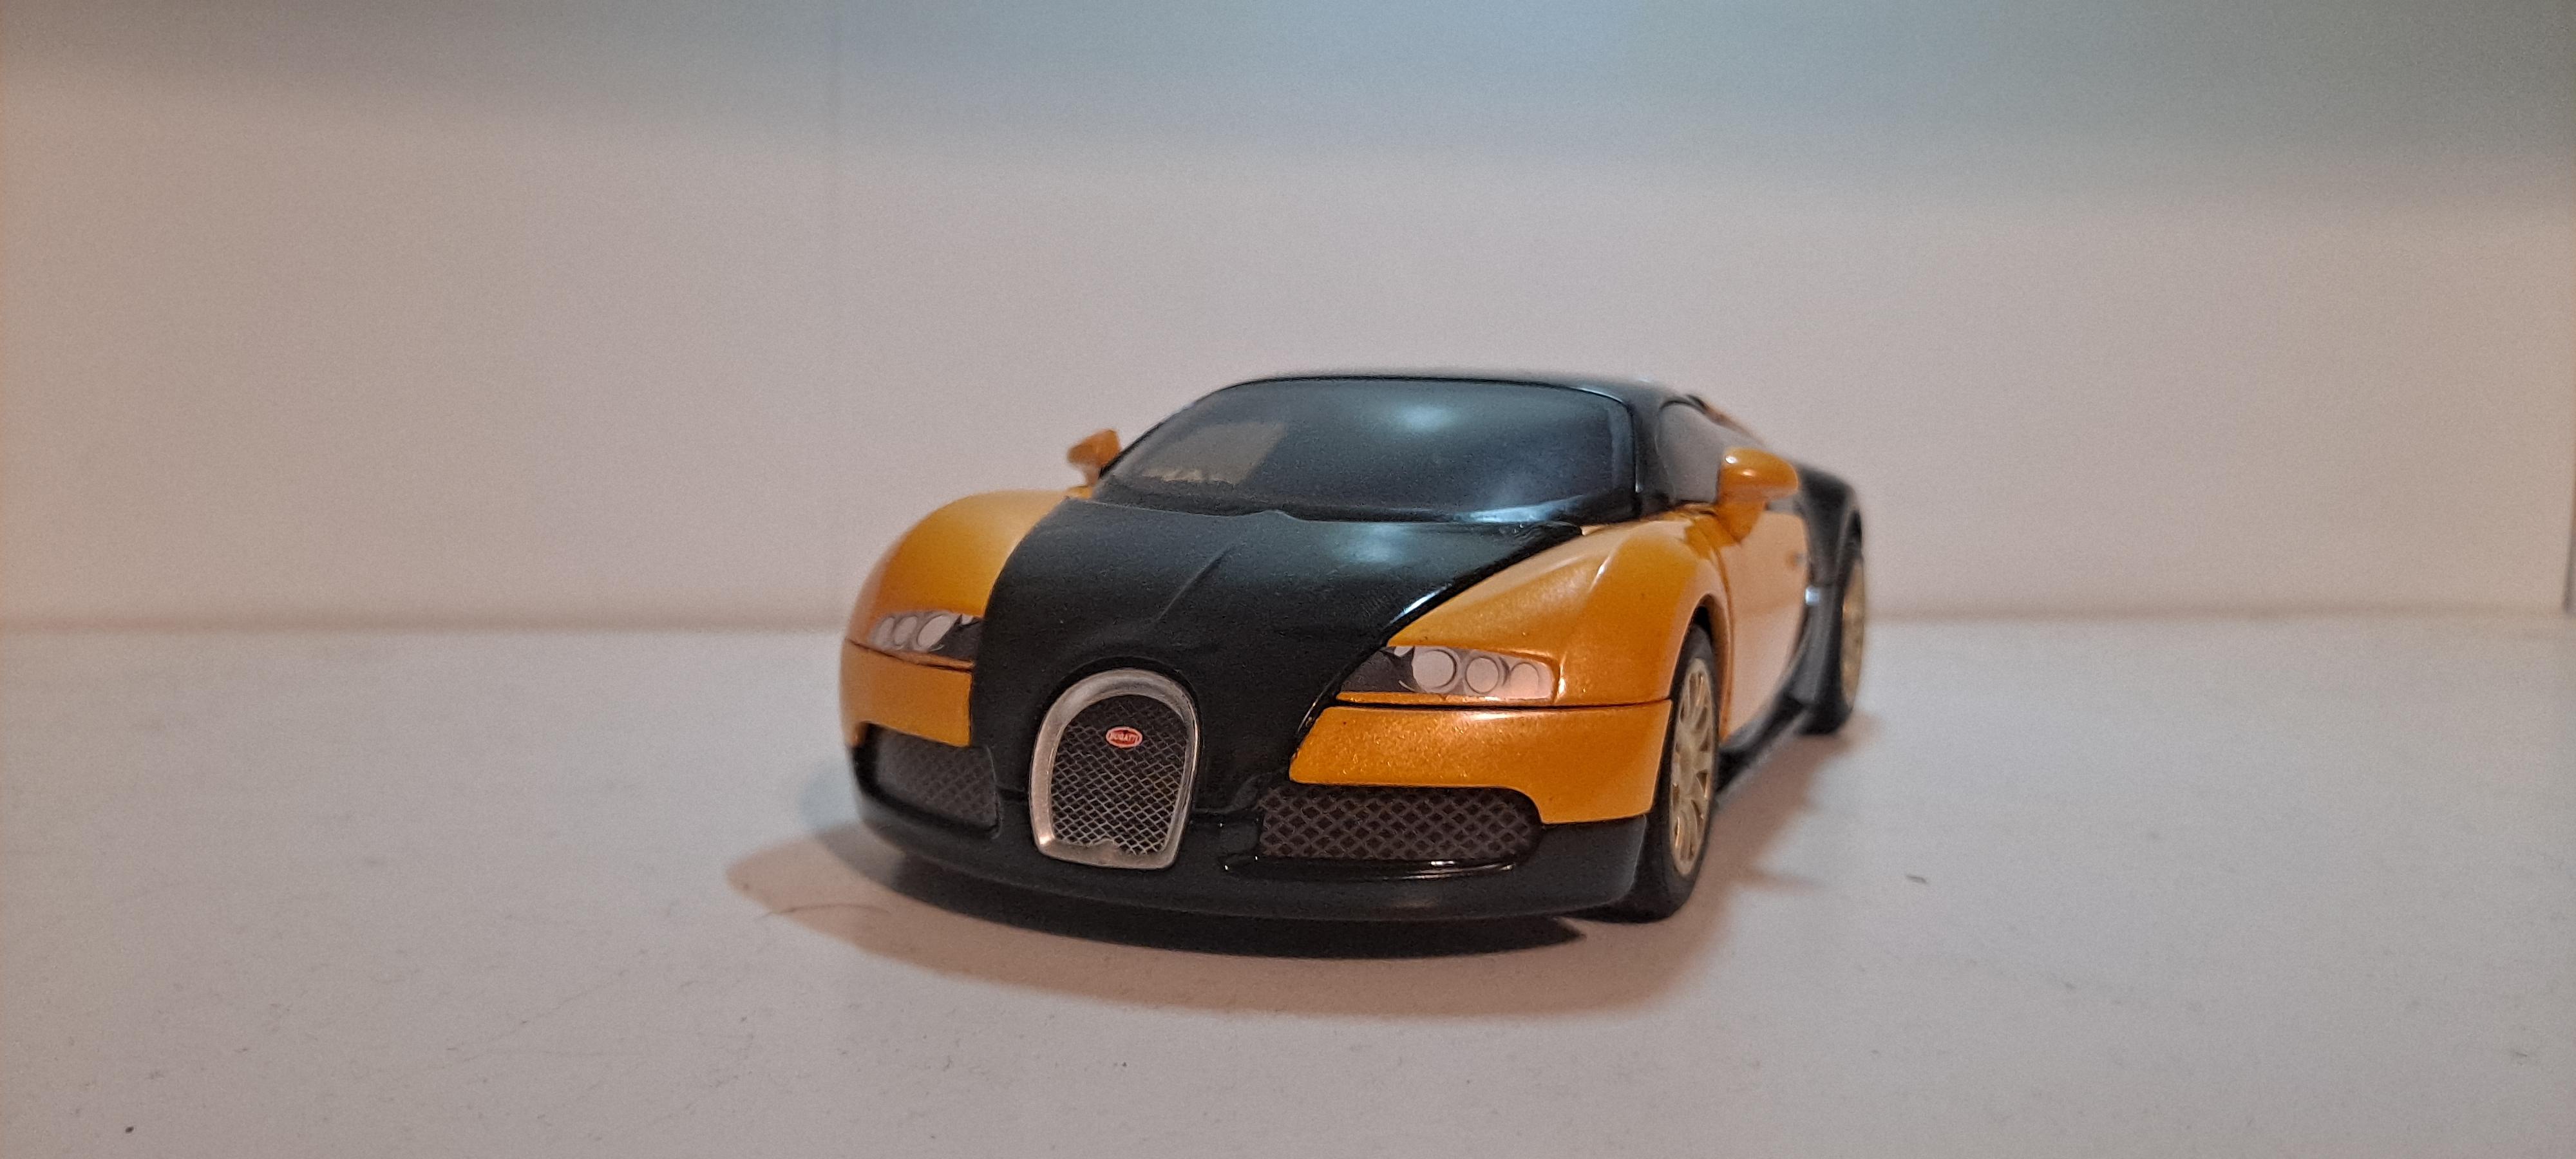
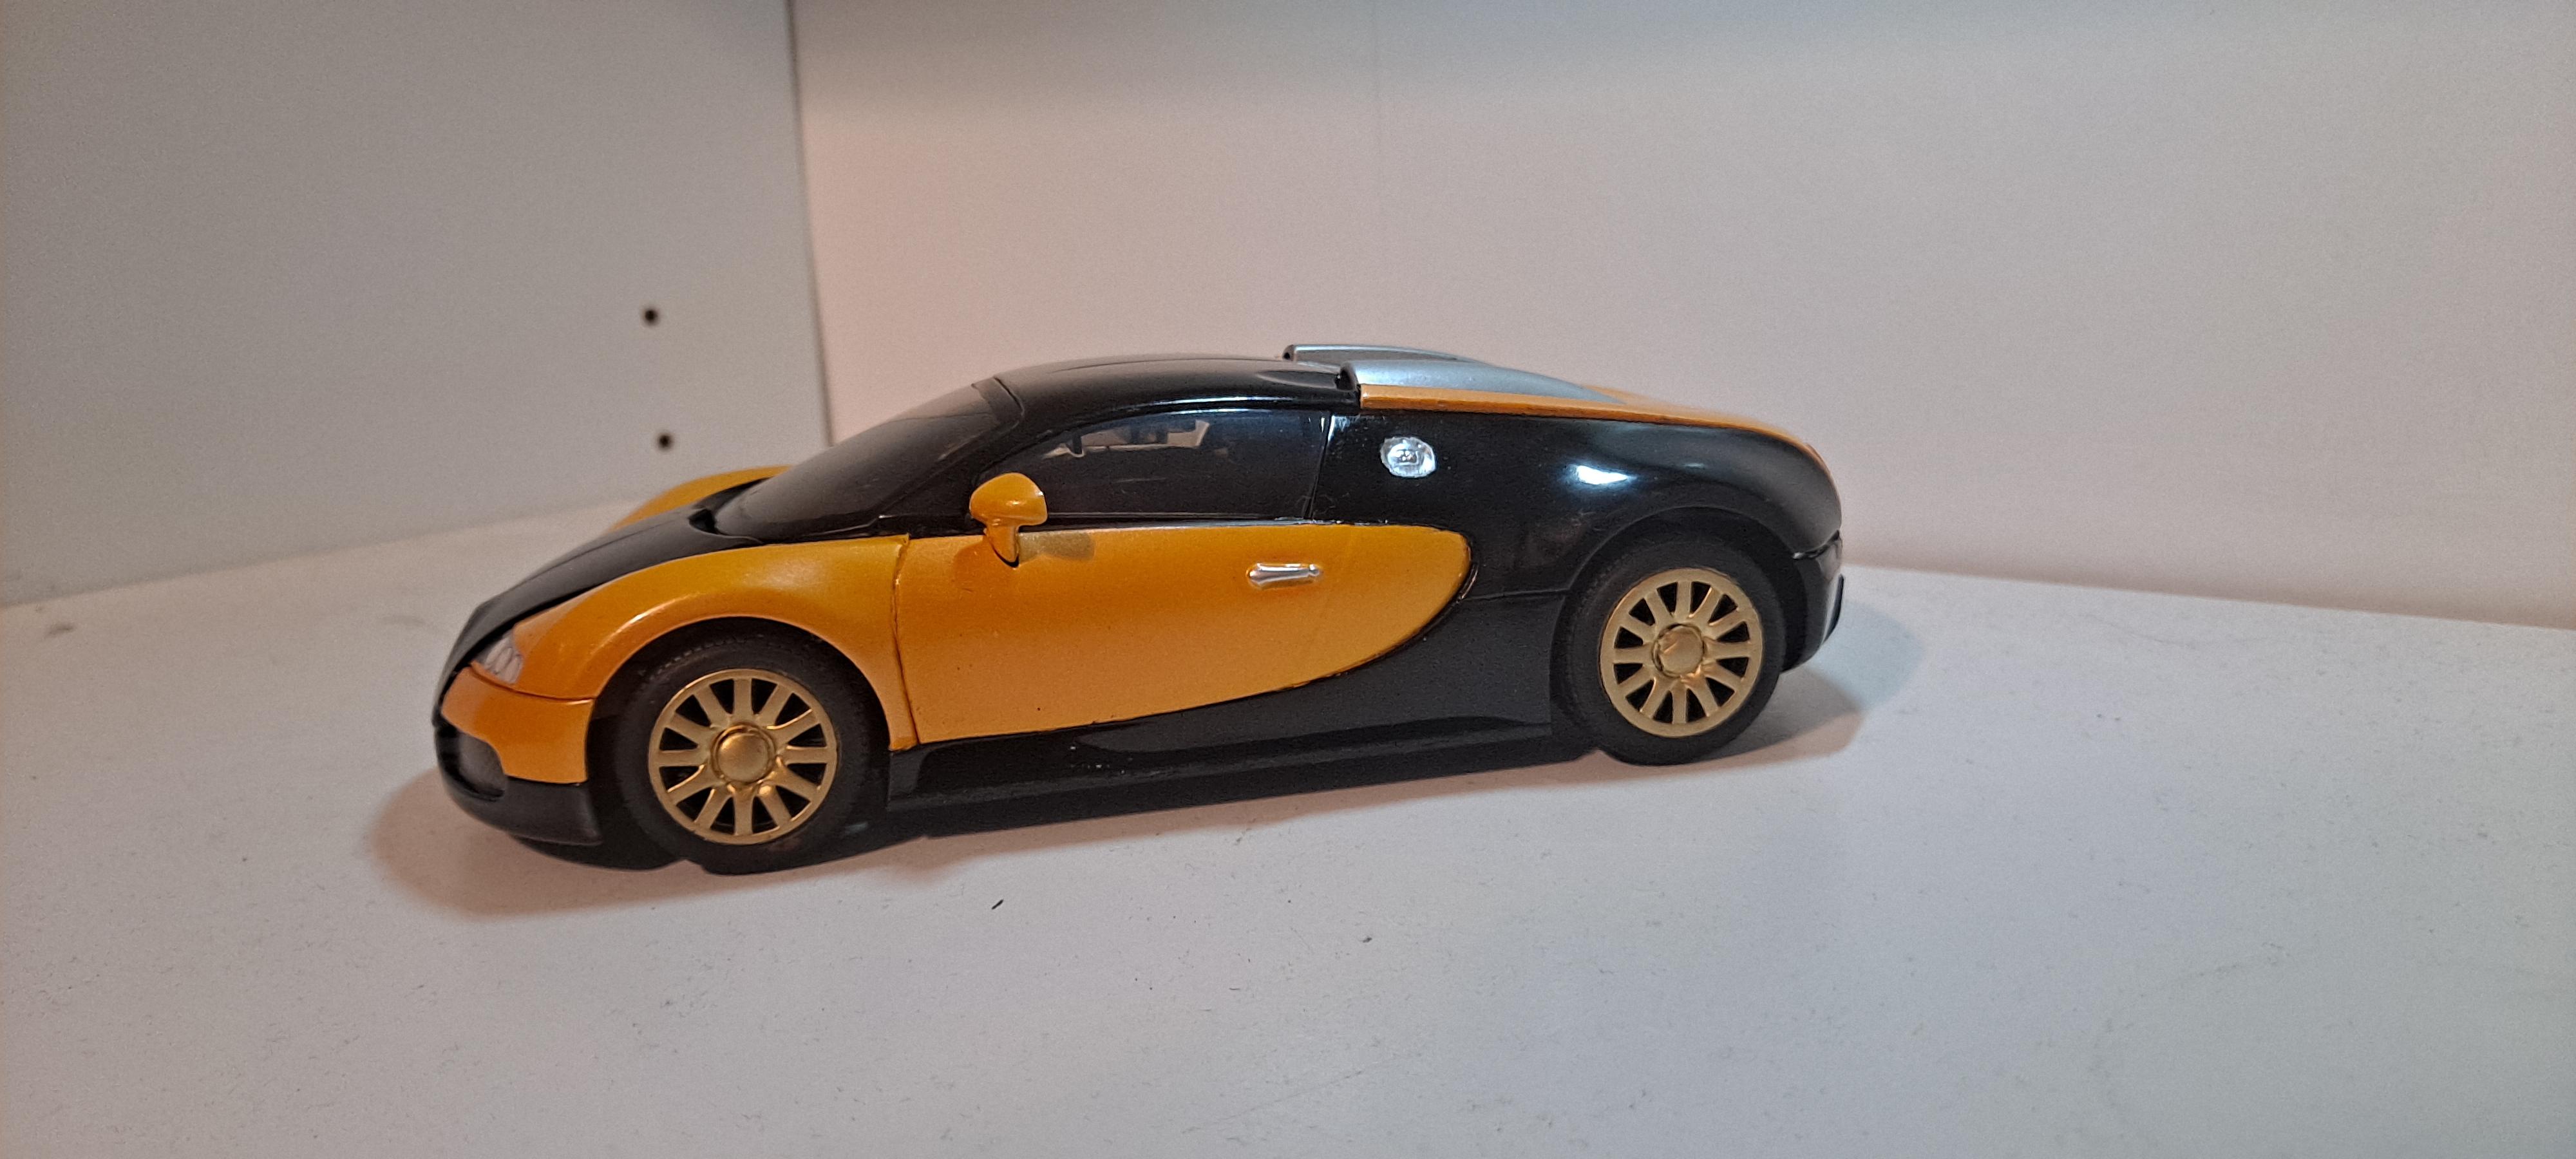
Fresh off da bench! From the Airfix Quickbuild series kit. Lego-like assembly joints mostly hidden upon final assembly, though some were still visible on the floorboard and seats. New seats and steering wheel were added to replace the original Lego square blocks. Gaps in wheels were filled in with clear headlight lenses and painted to match. No indentations for the rear taillights, making those stickers very difficult to allign. Otherwise mostly OOP. Since the body was in separate pieces molded in black and red respectively, the exterior was resprayed Colorplace Gloss Black and a custom mixed Orange Crush Pearl, made using Rustoluem orange with a mist of Tamiya TS-97 Pearl Yellow. All cleared with Pledge.
-
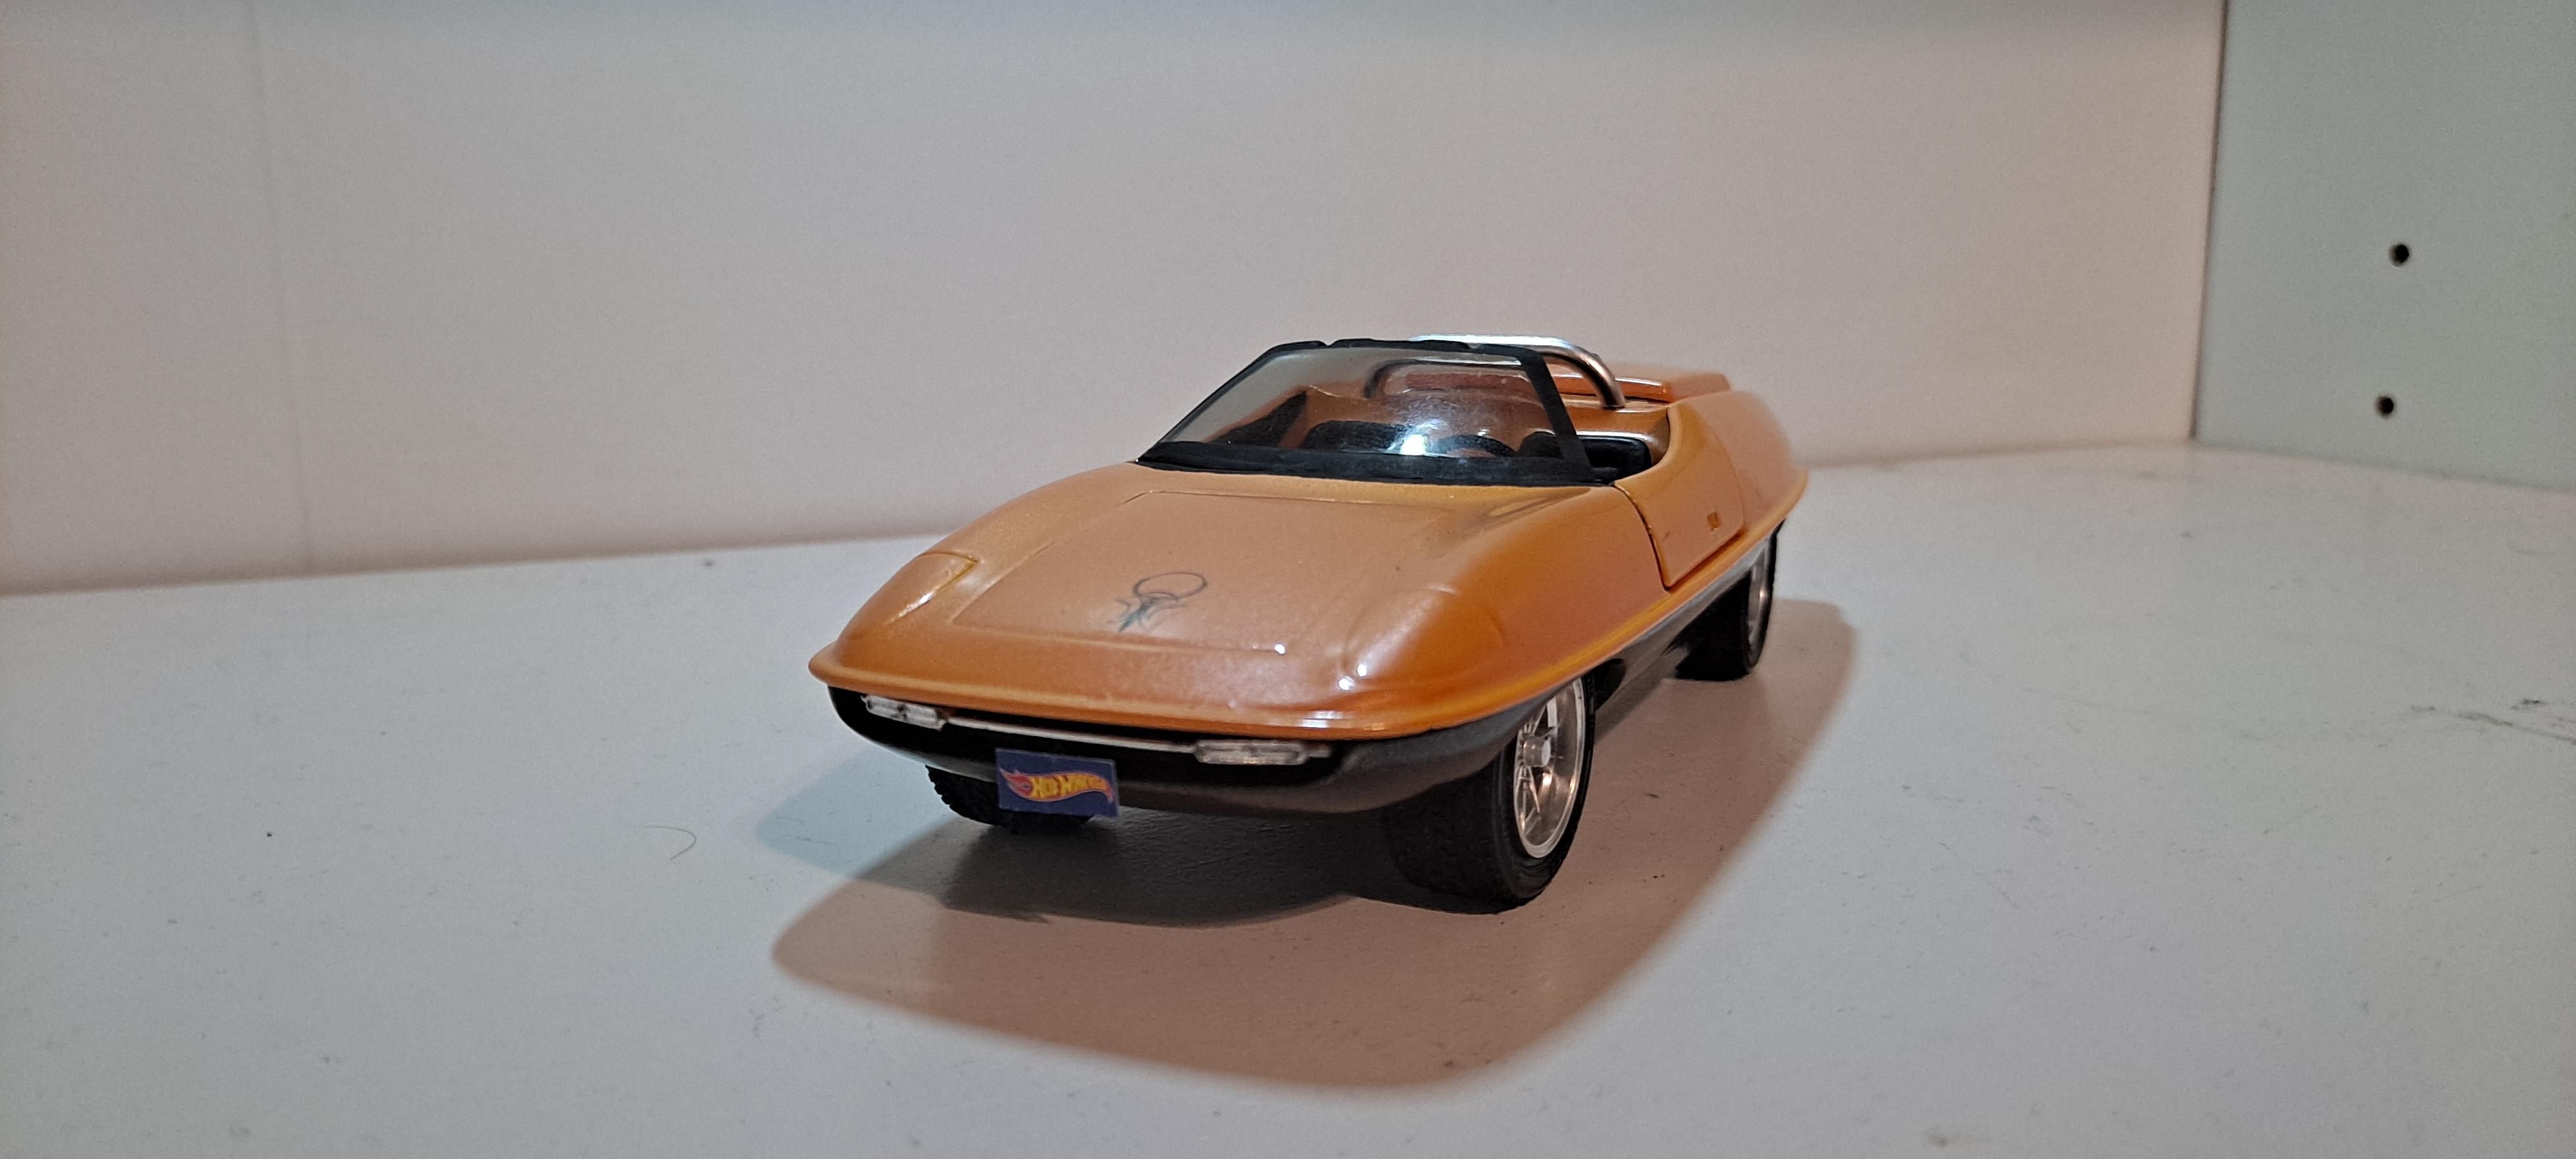
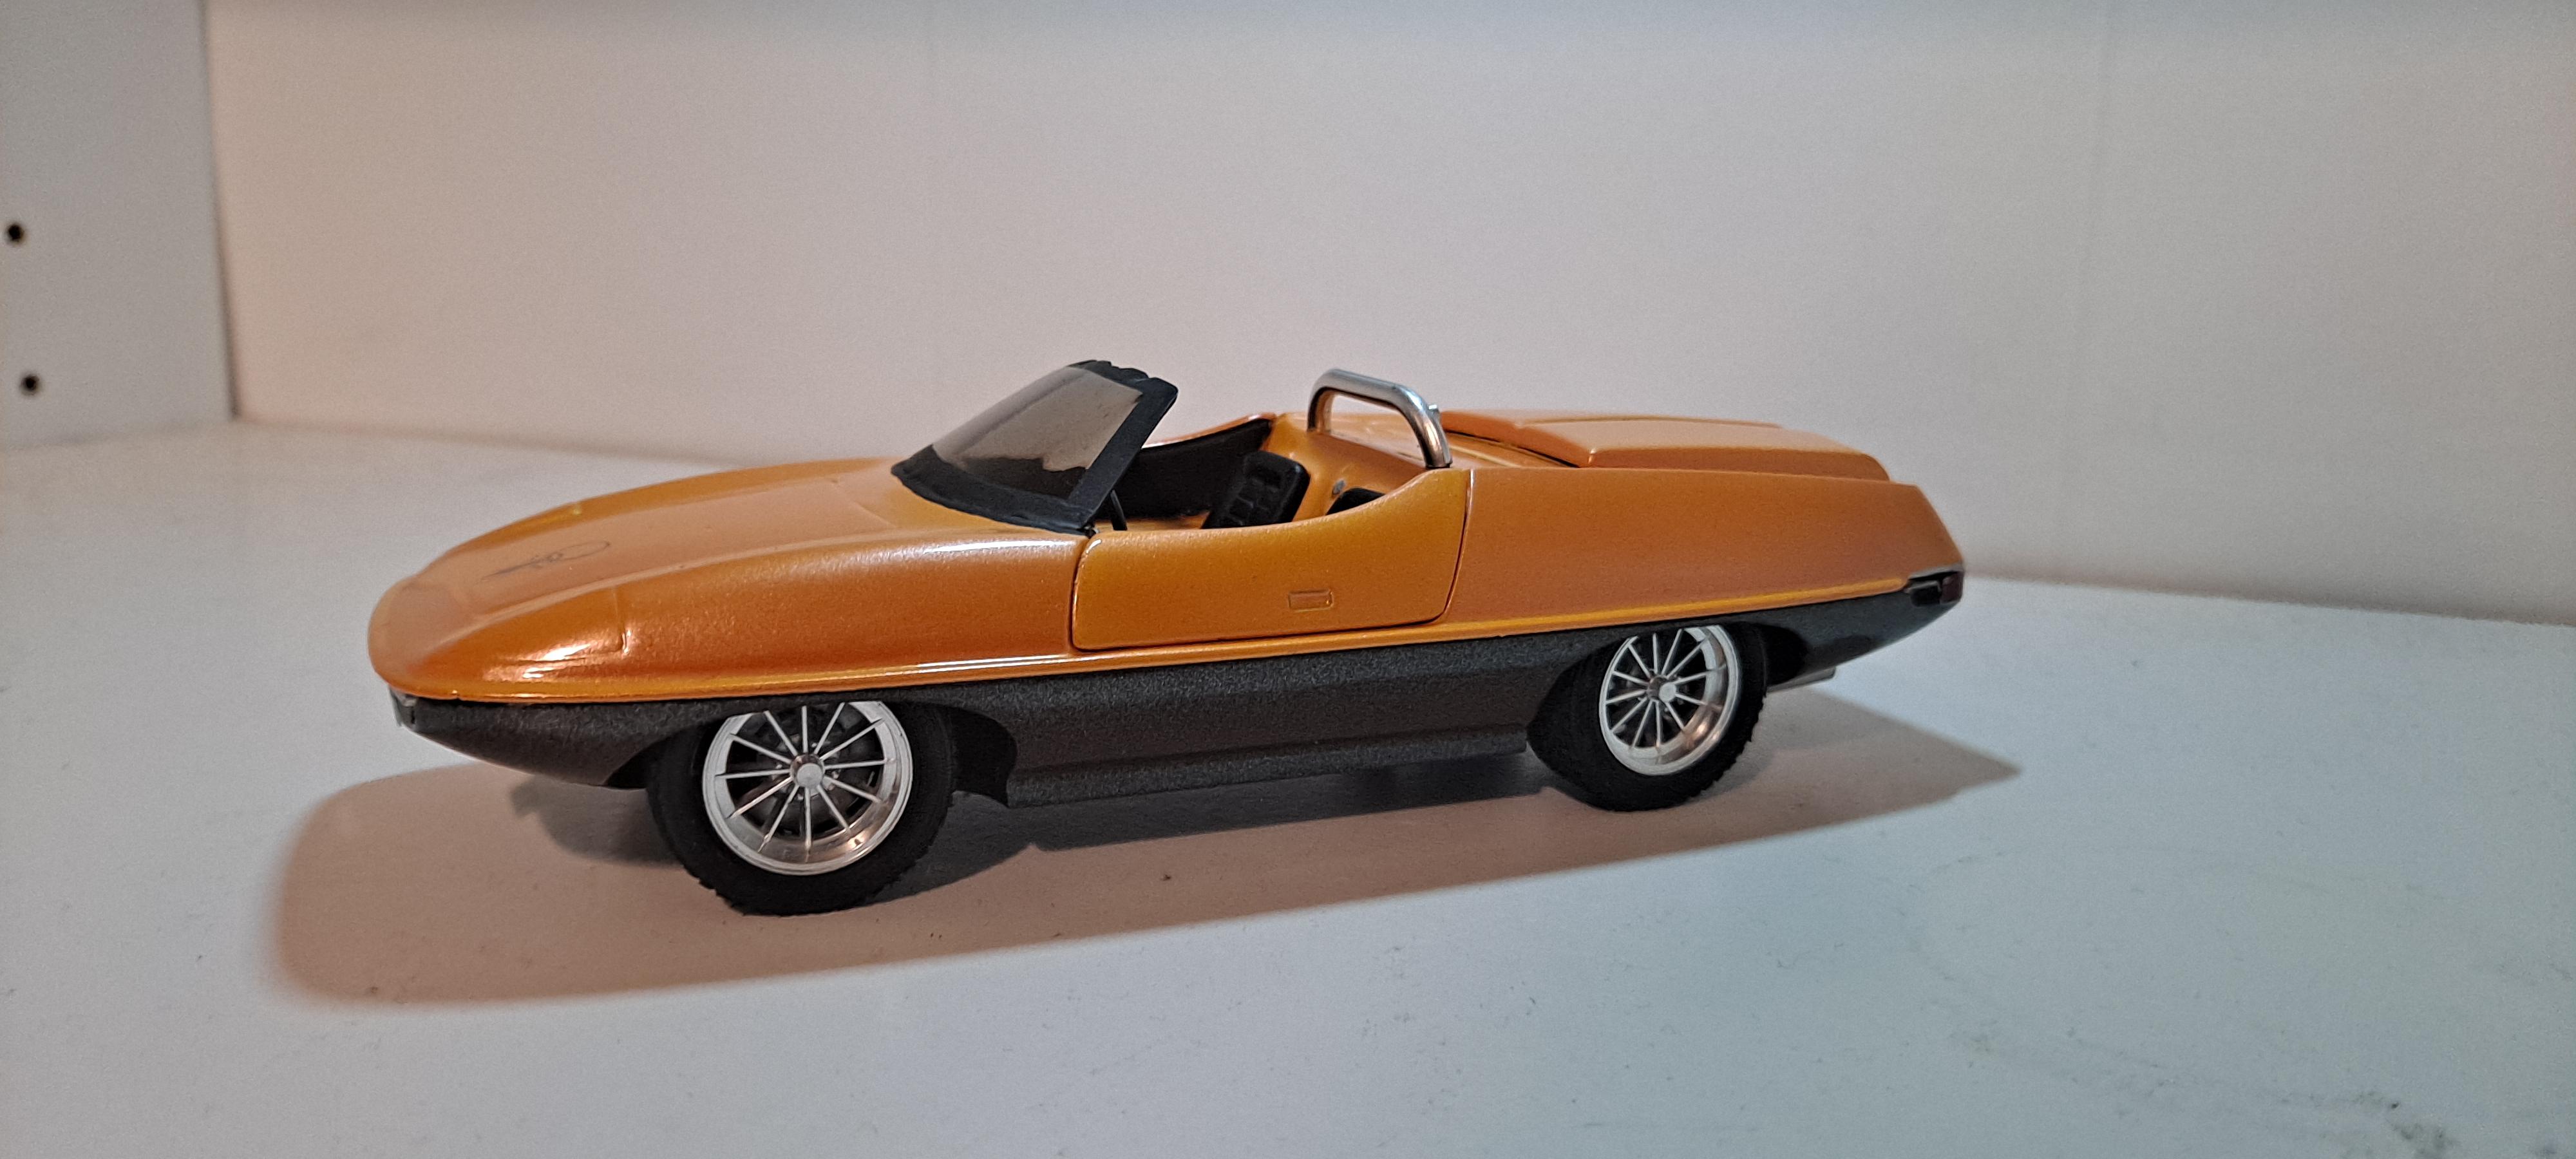
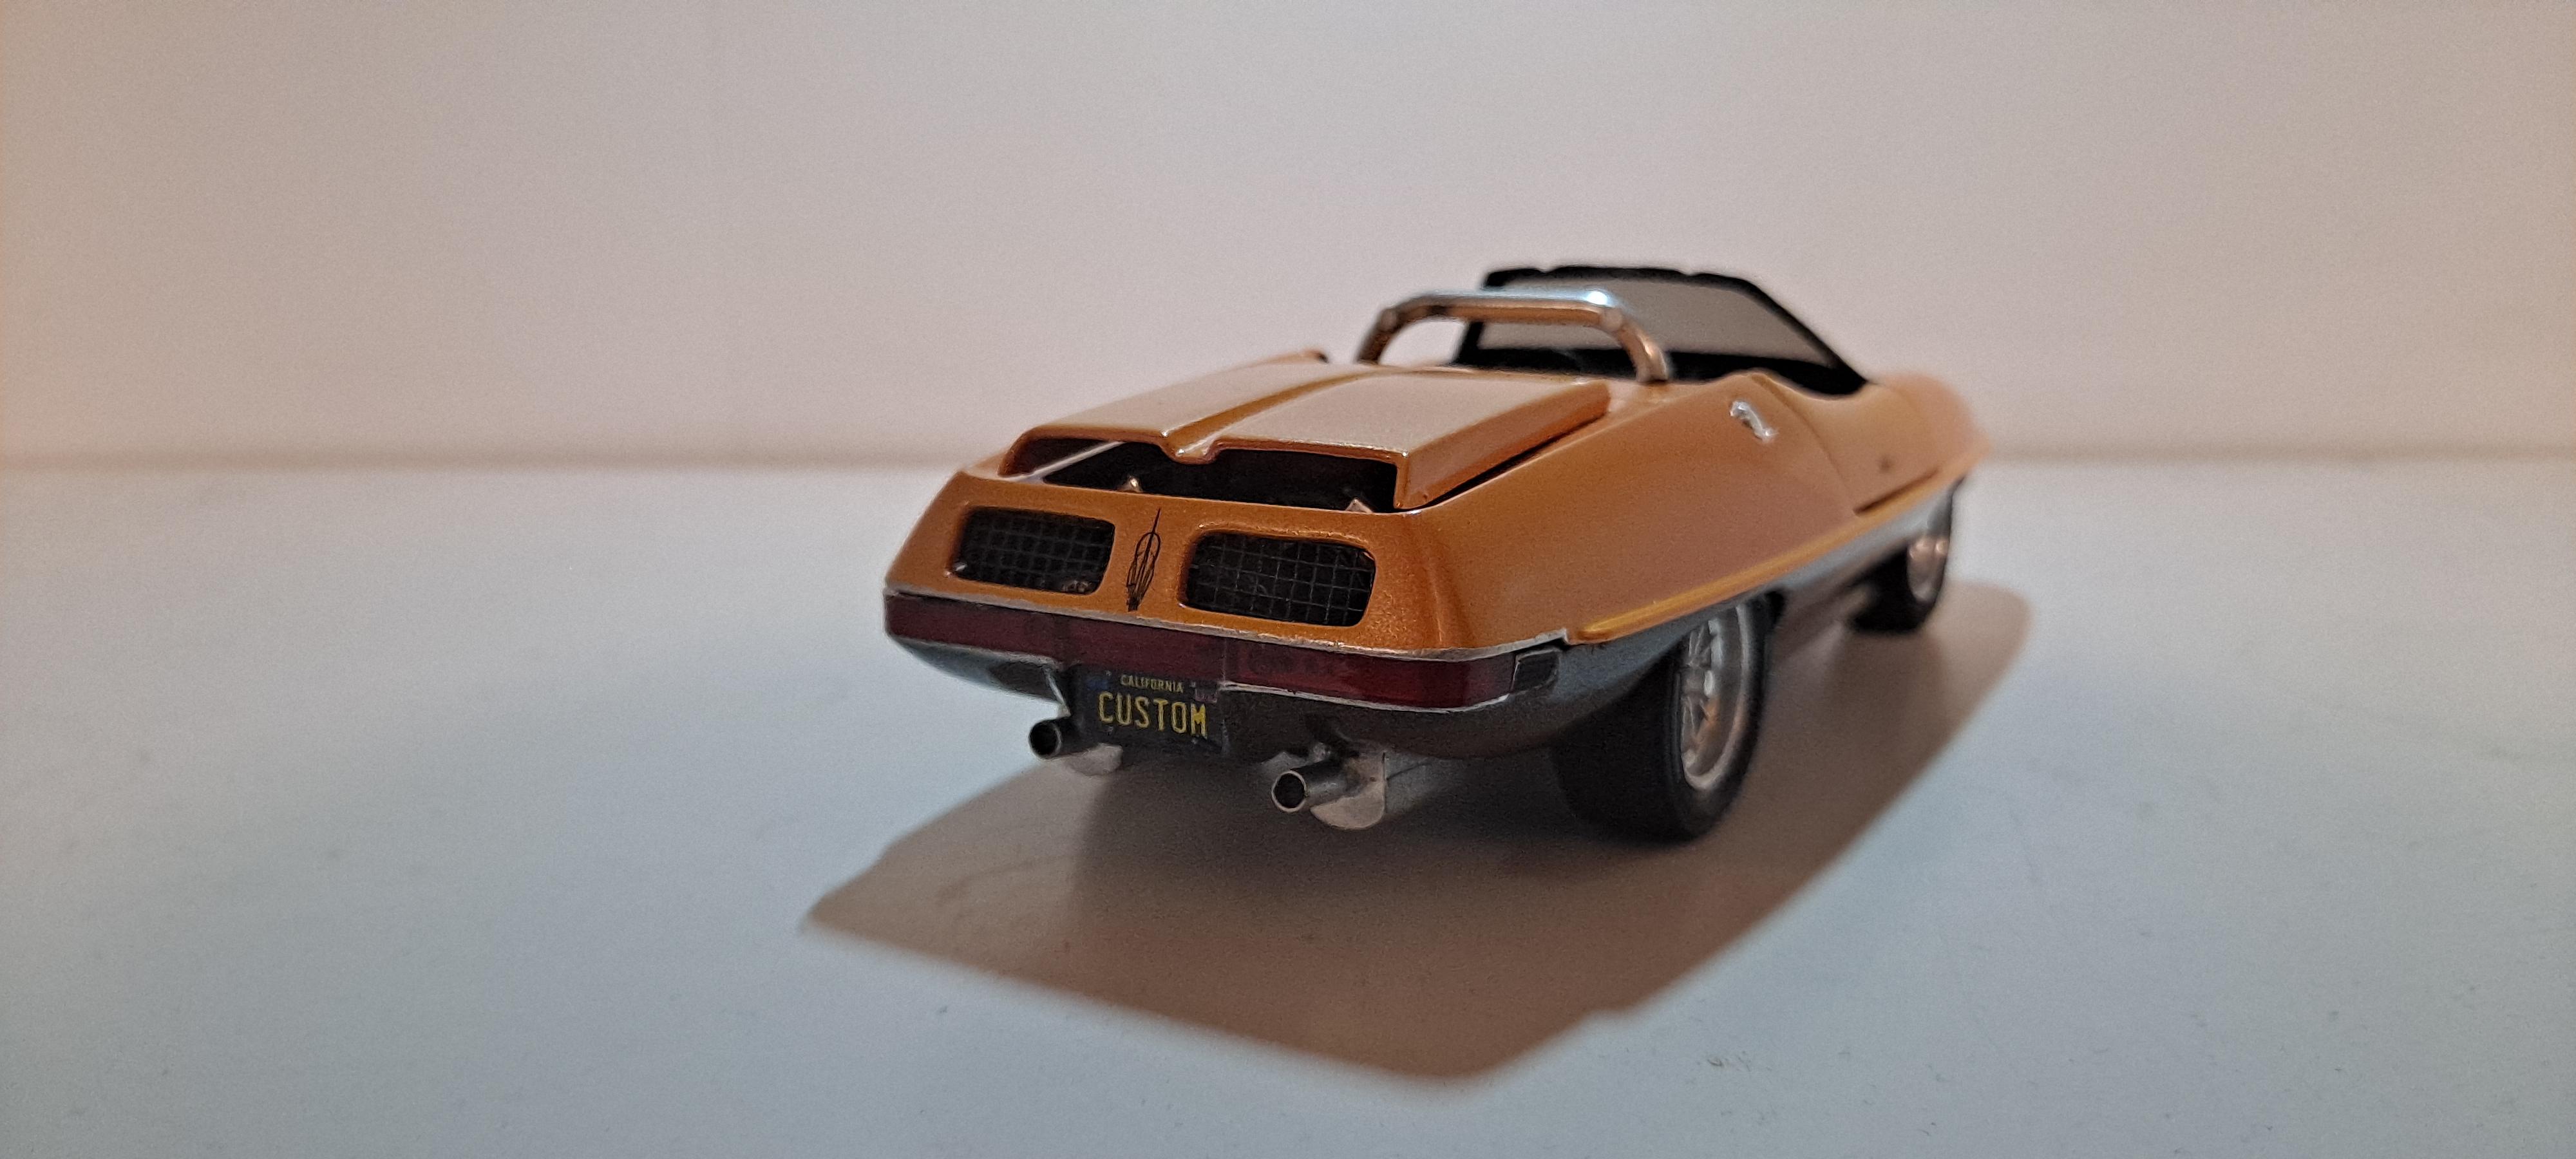
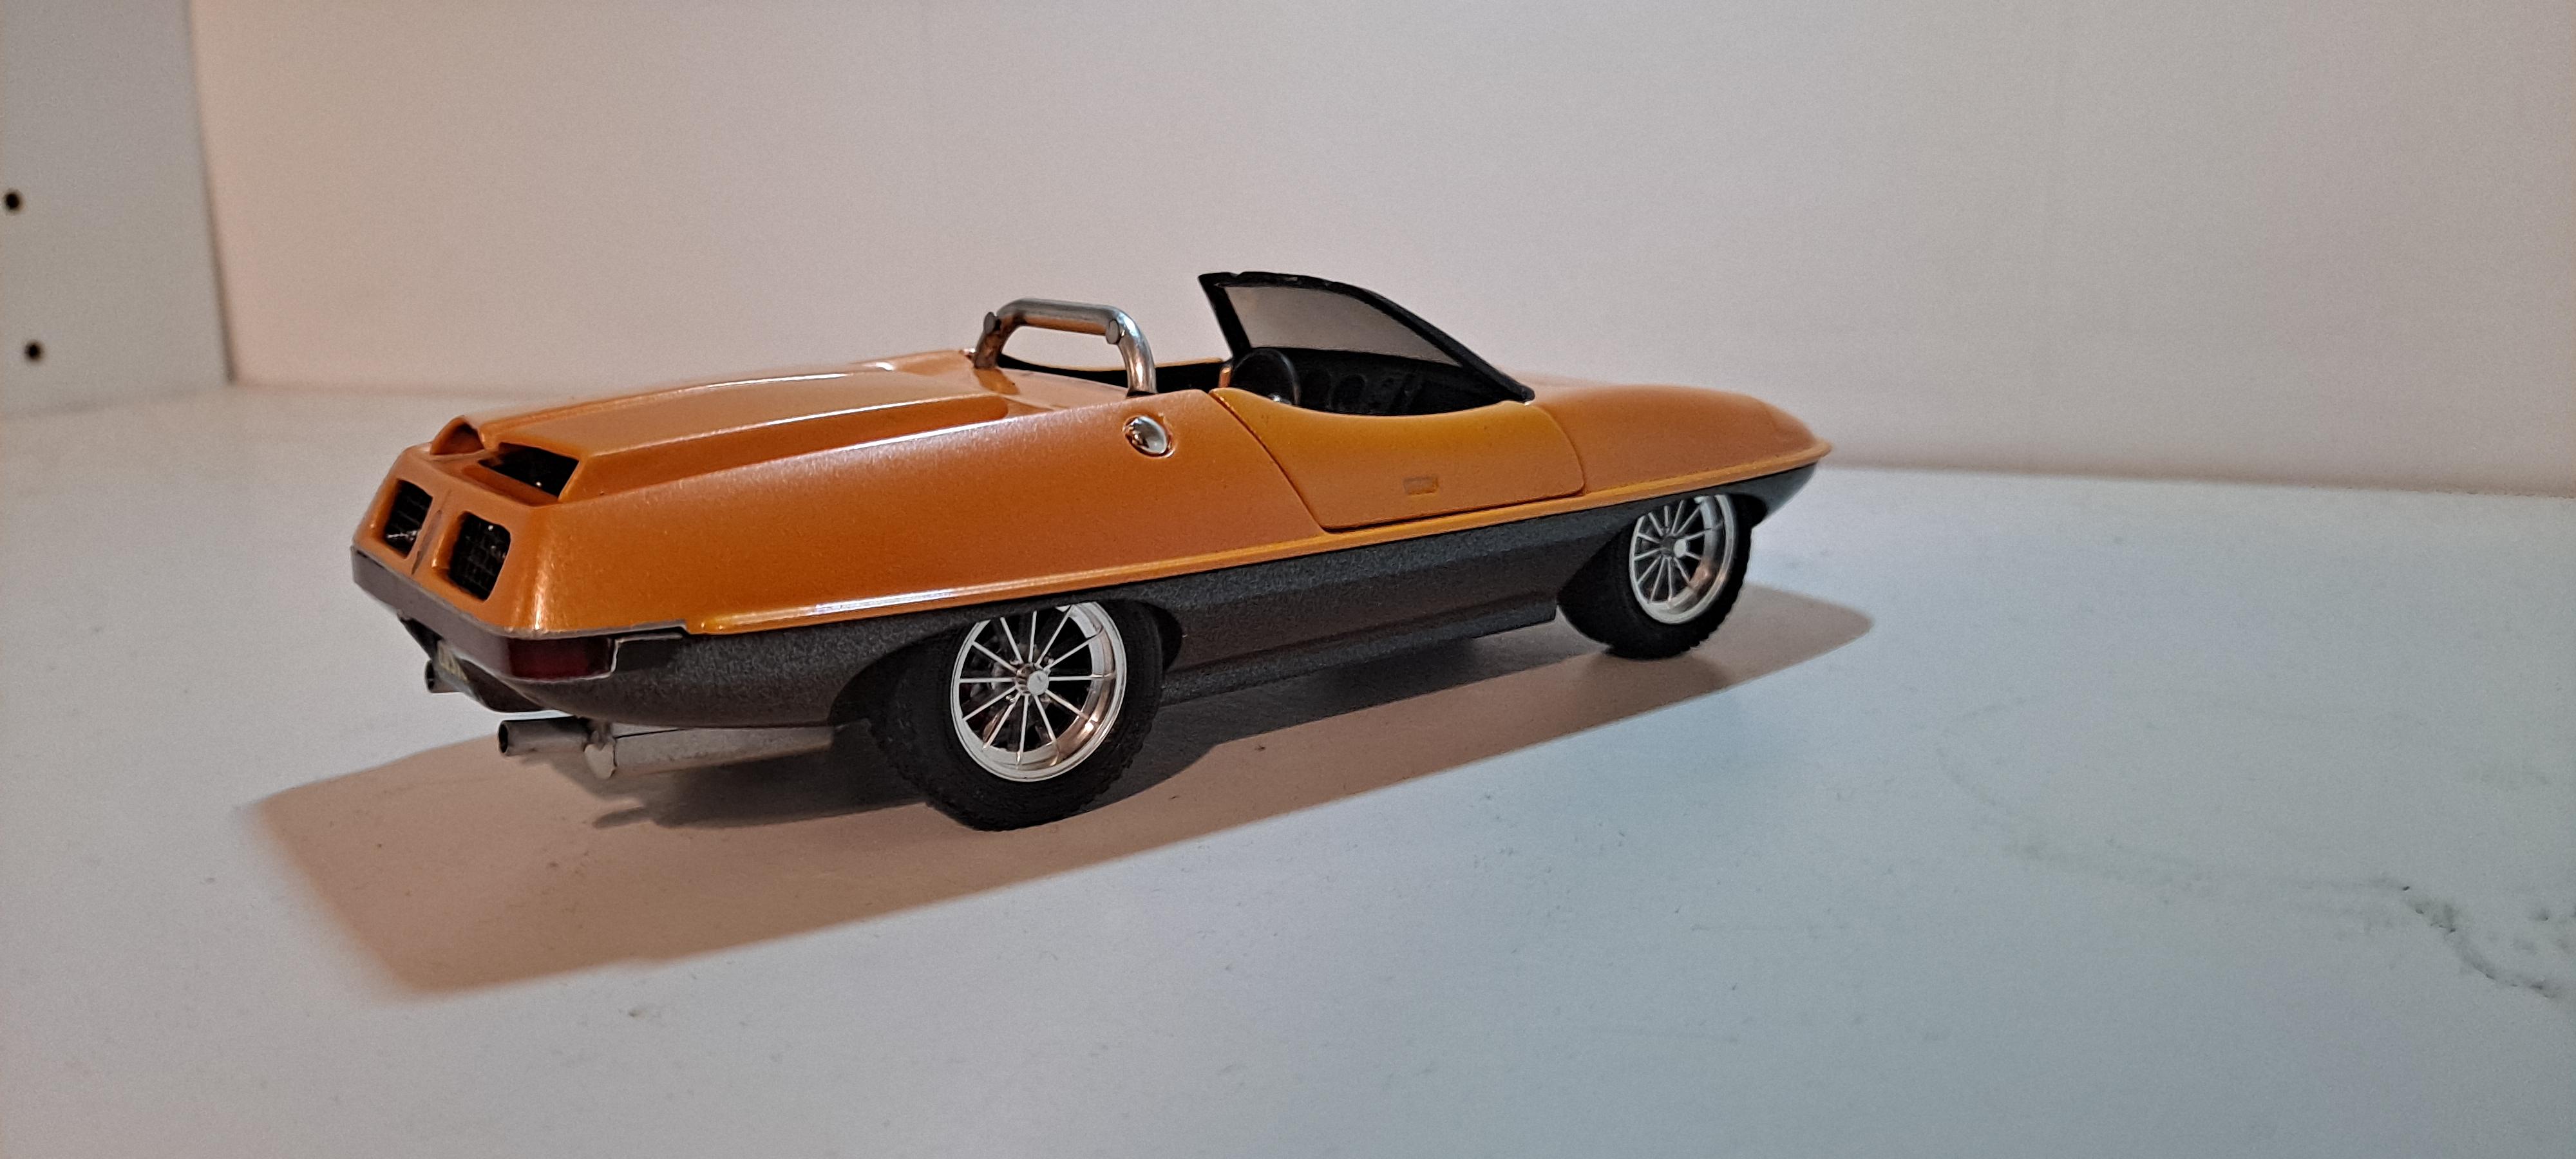
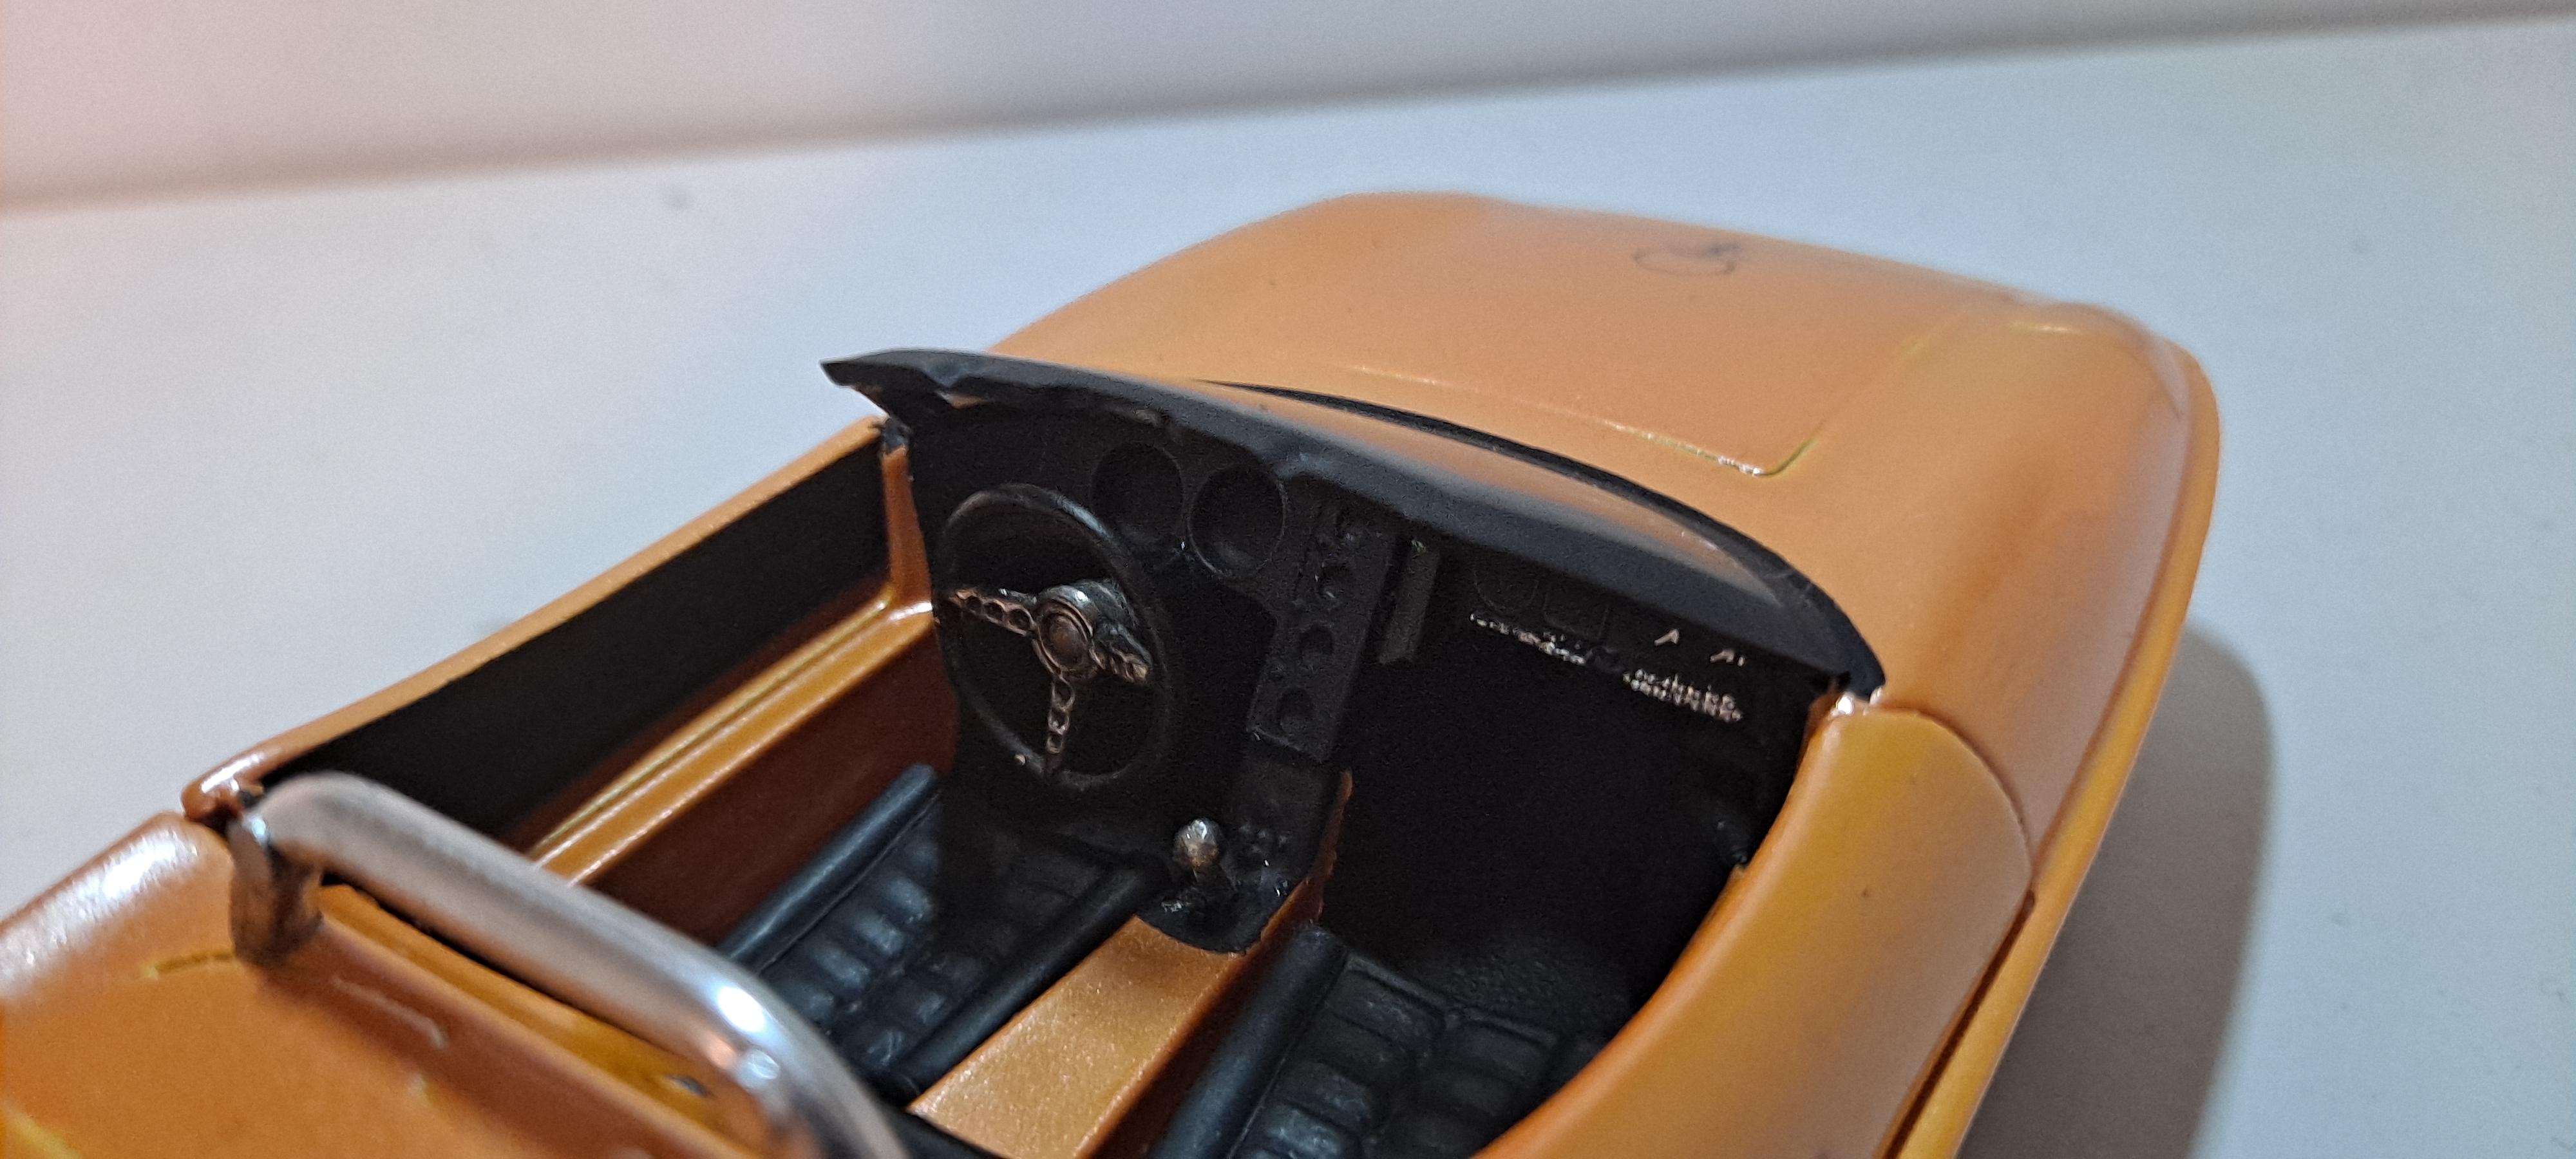
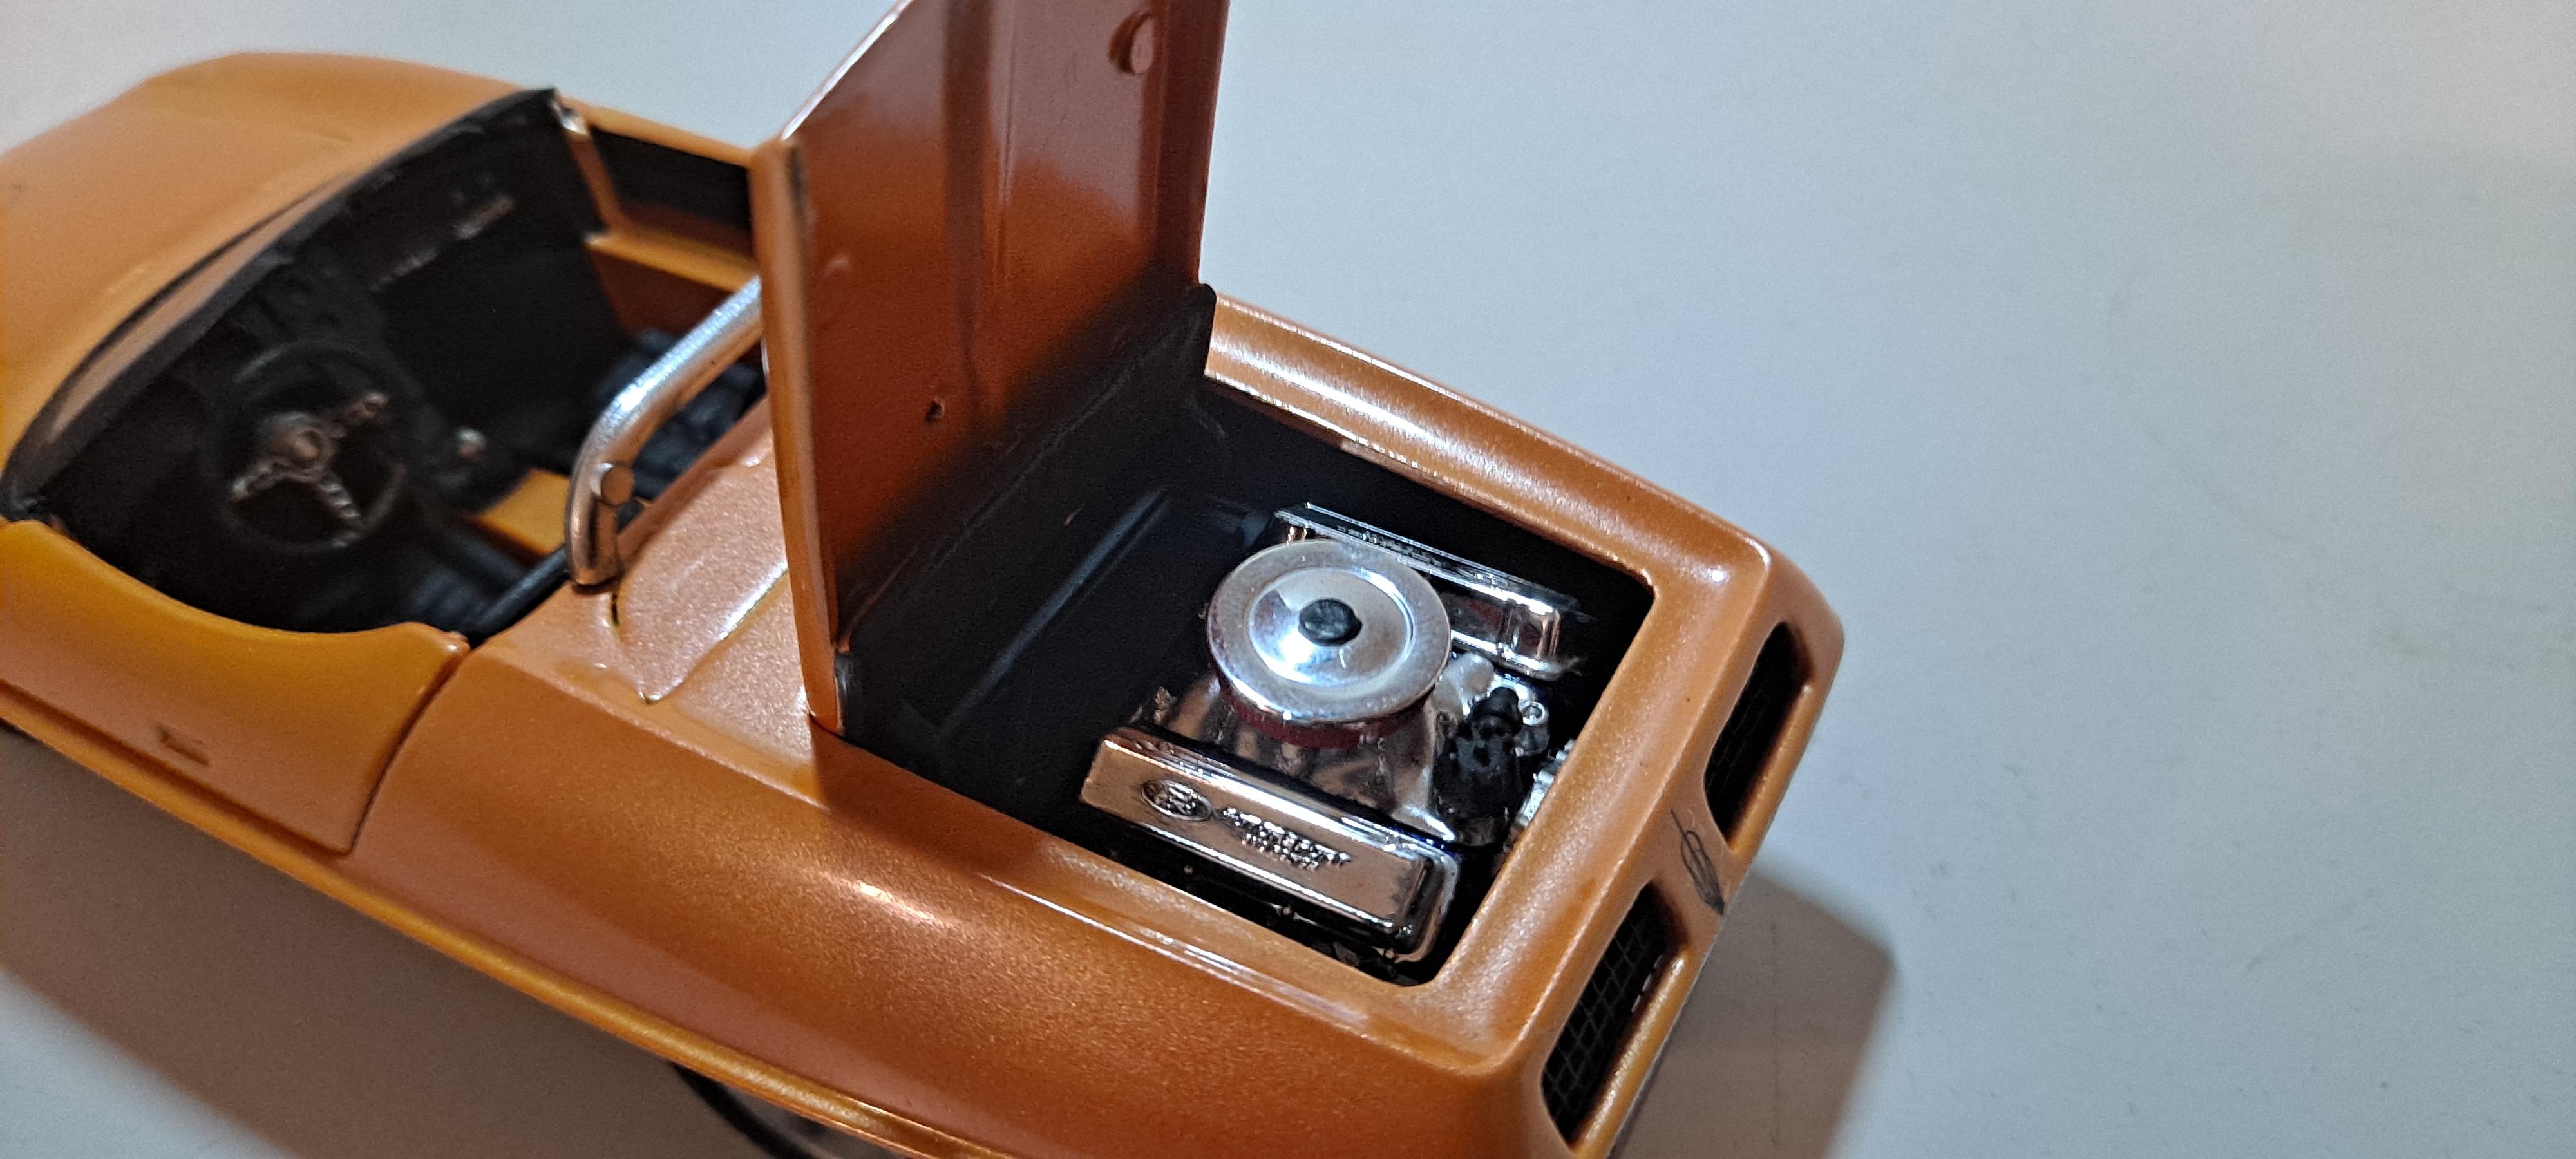
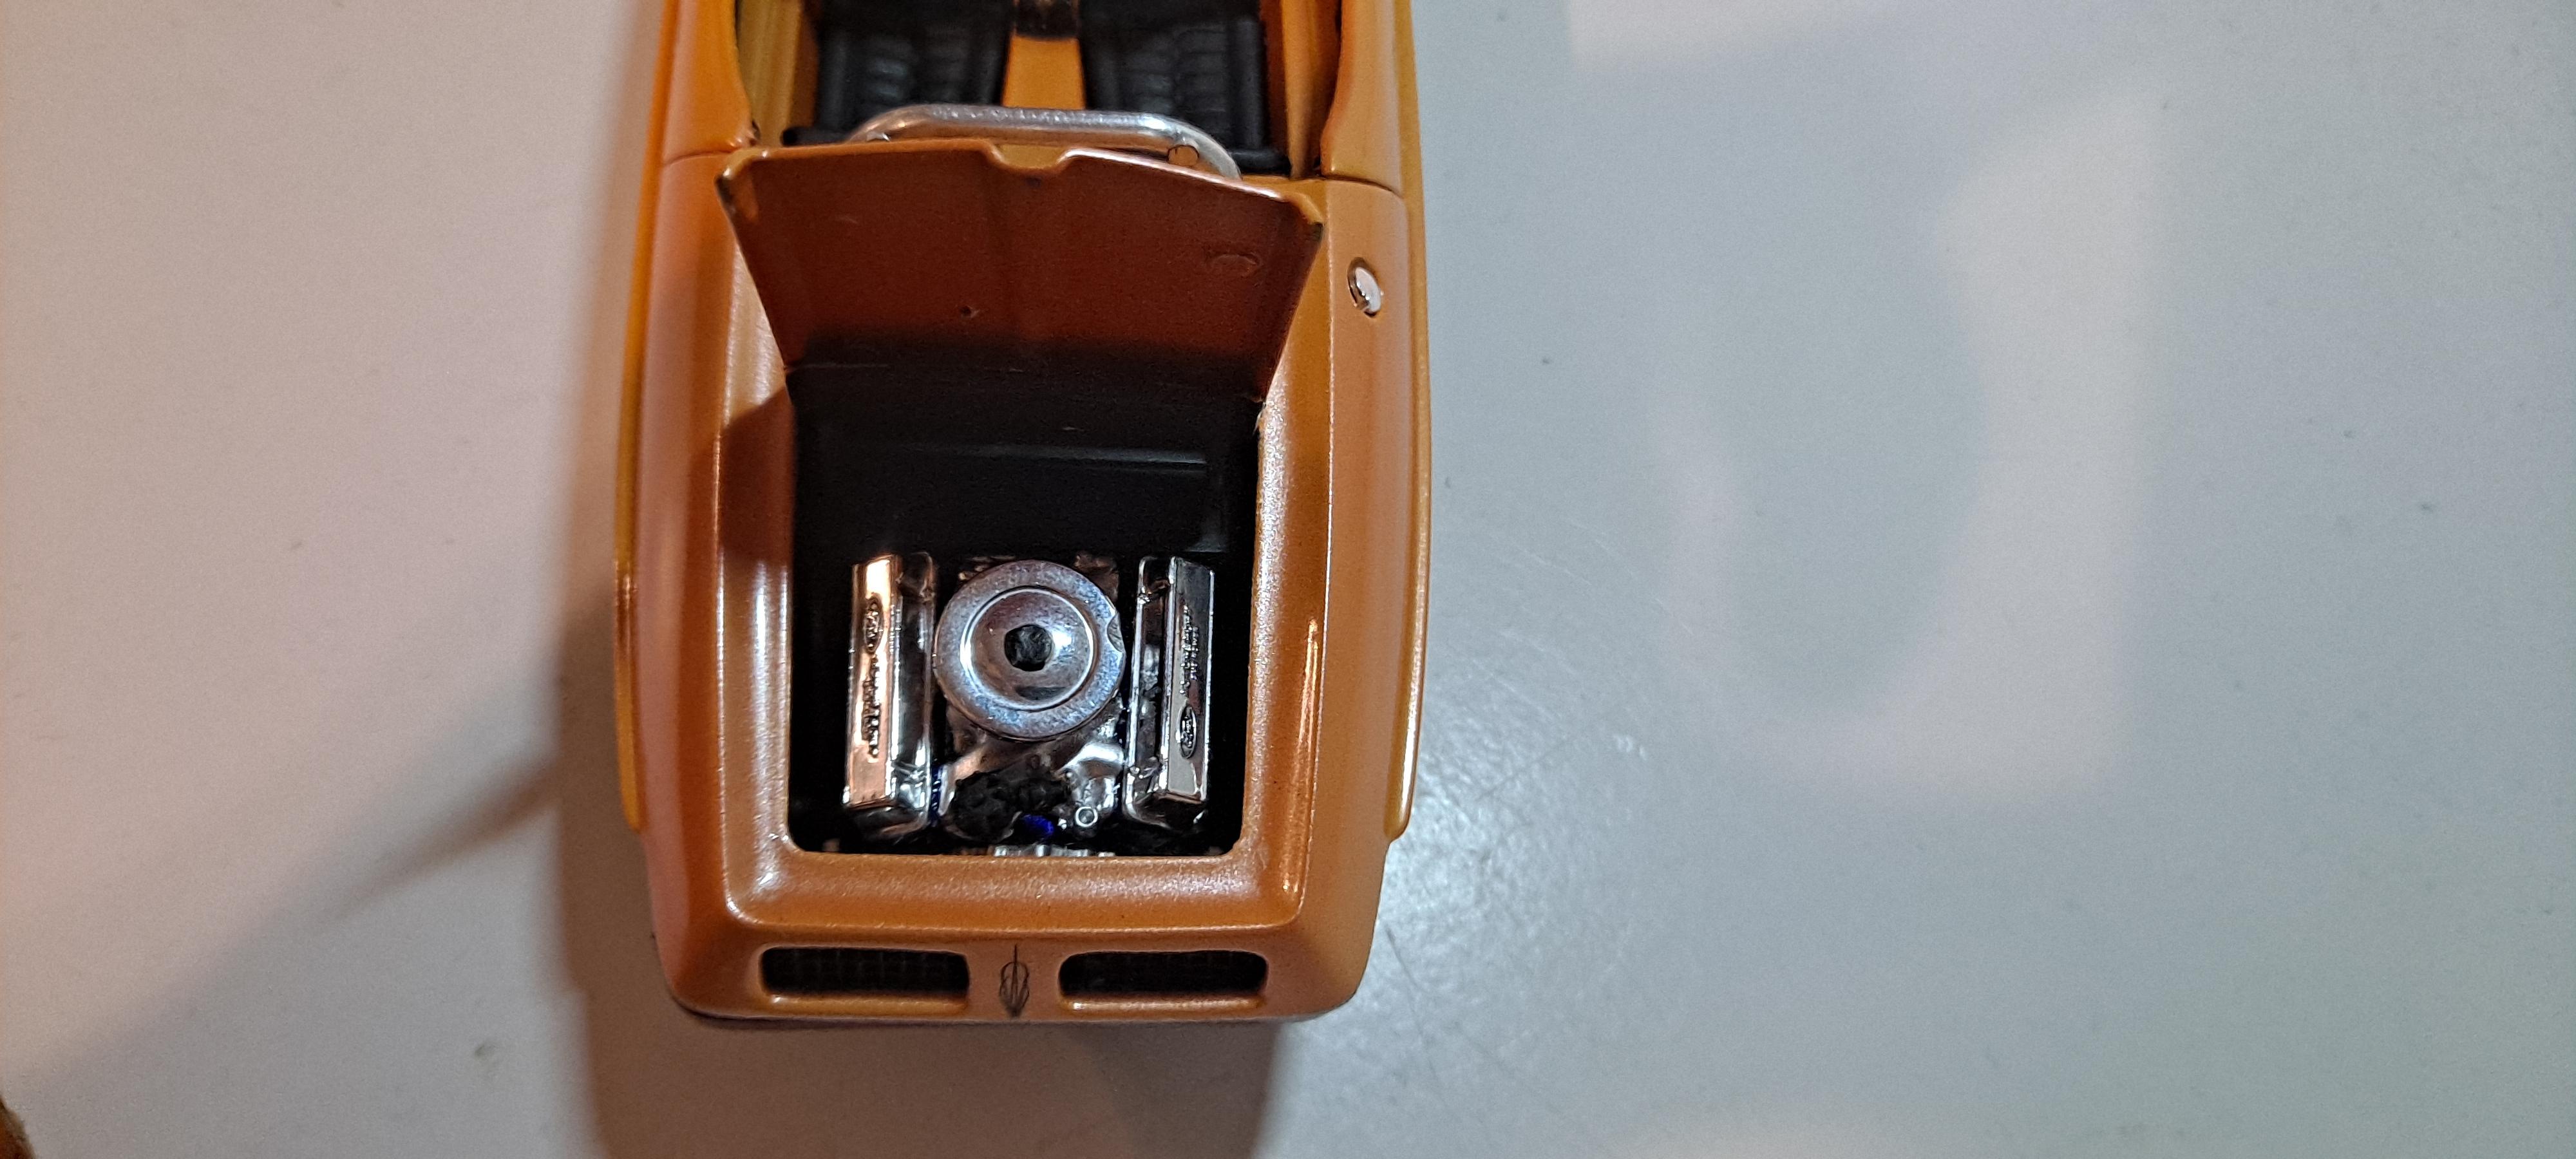
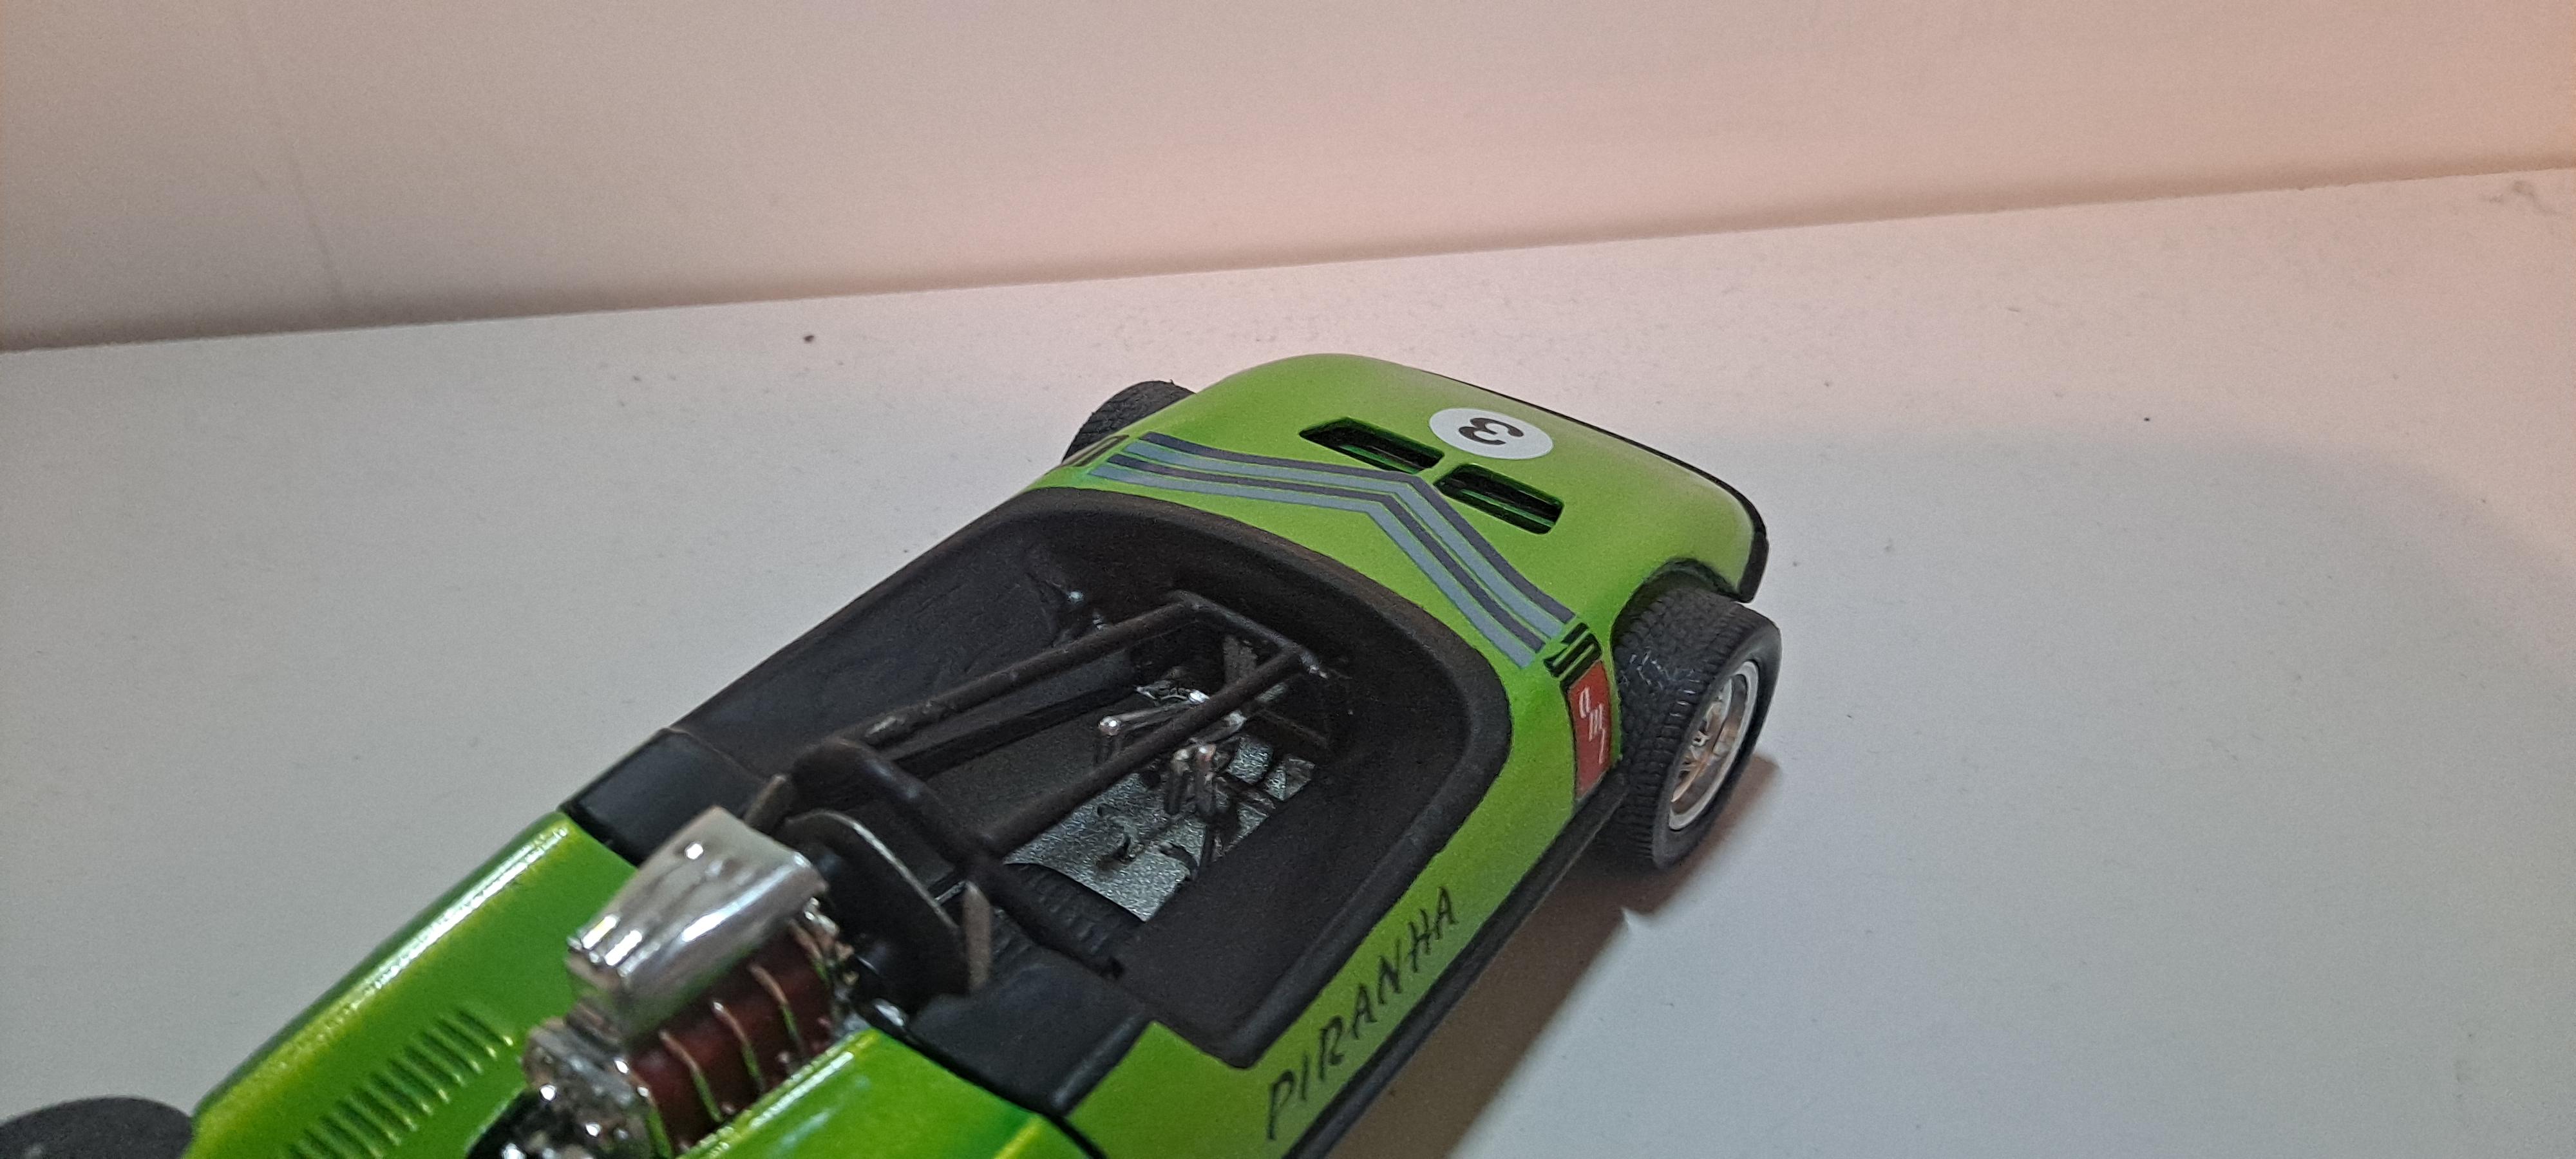
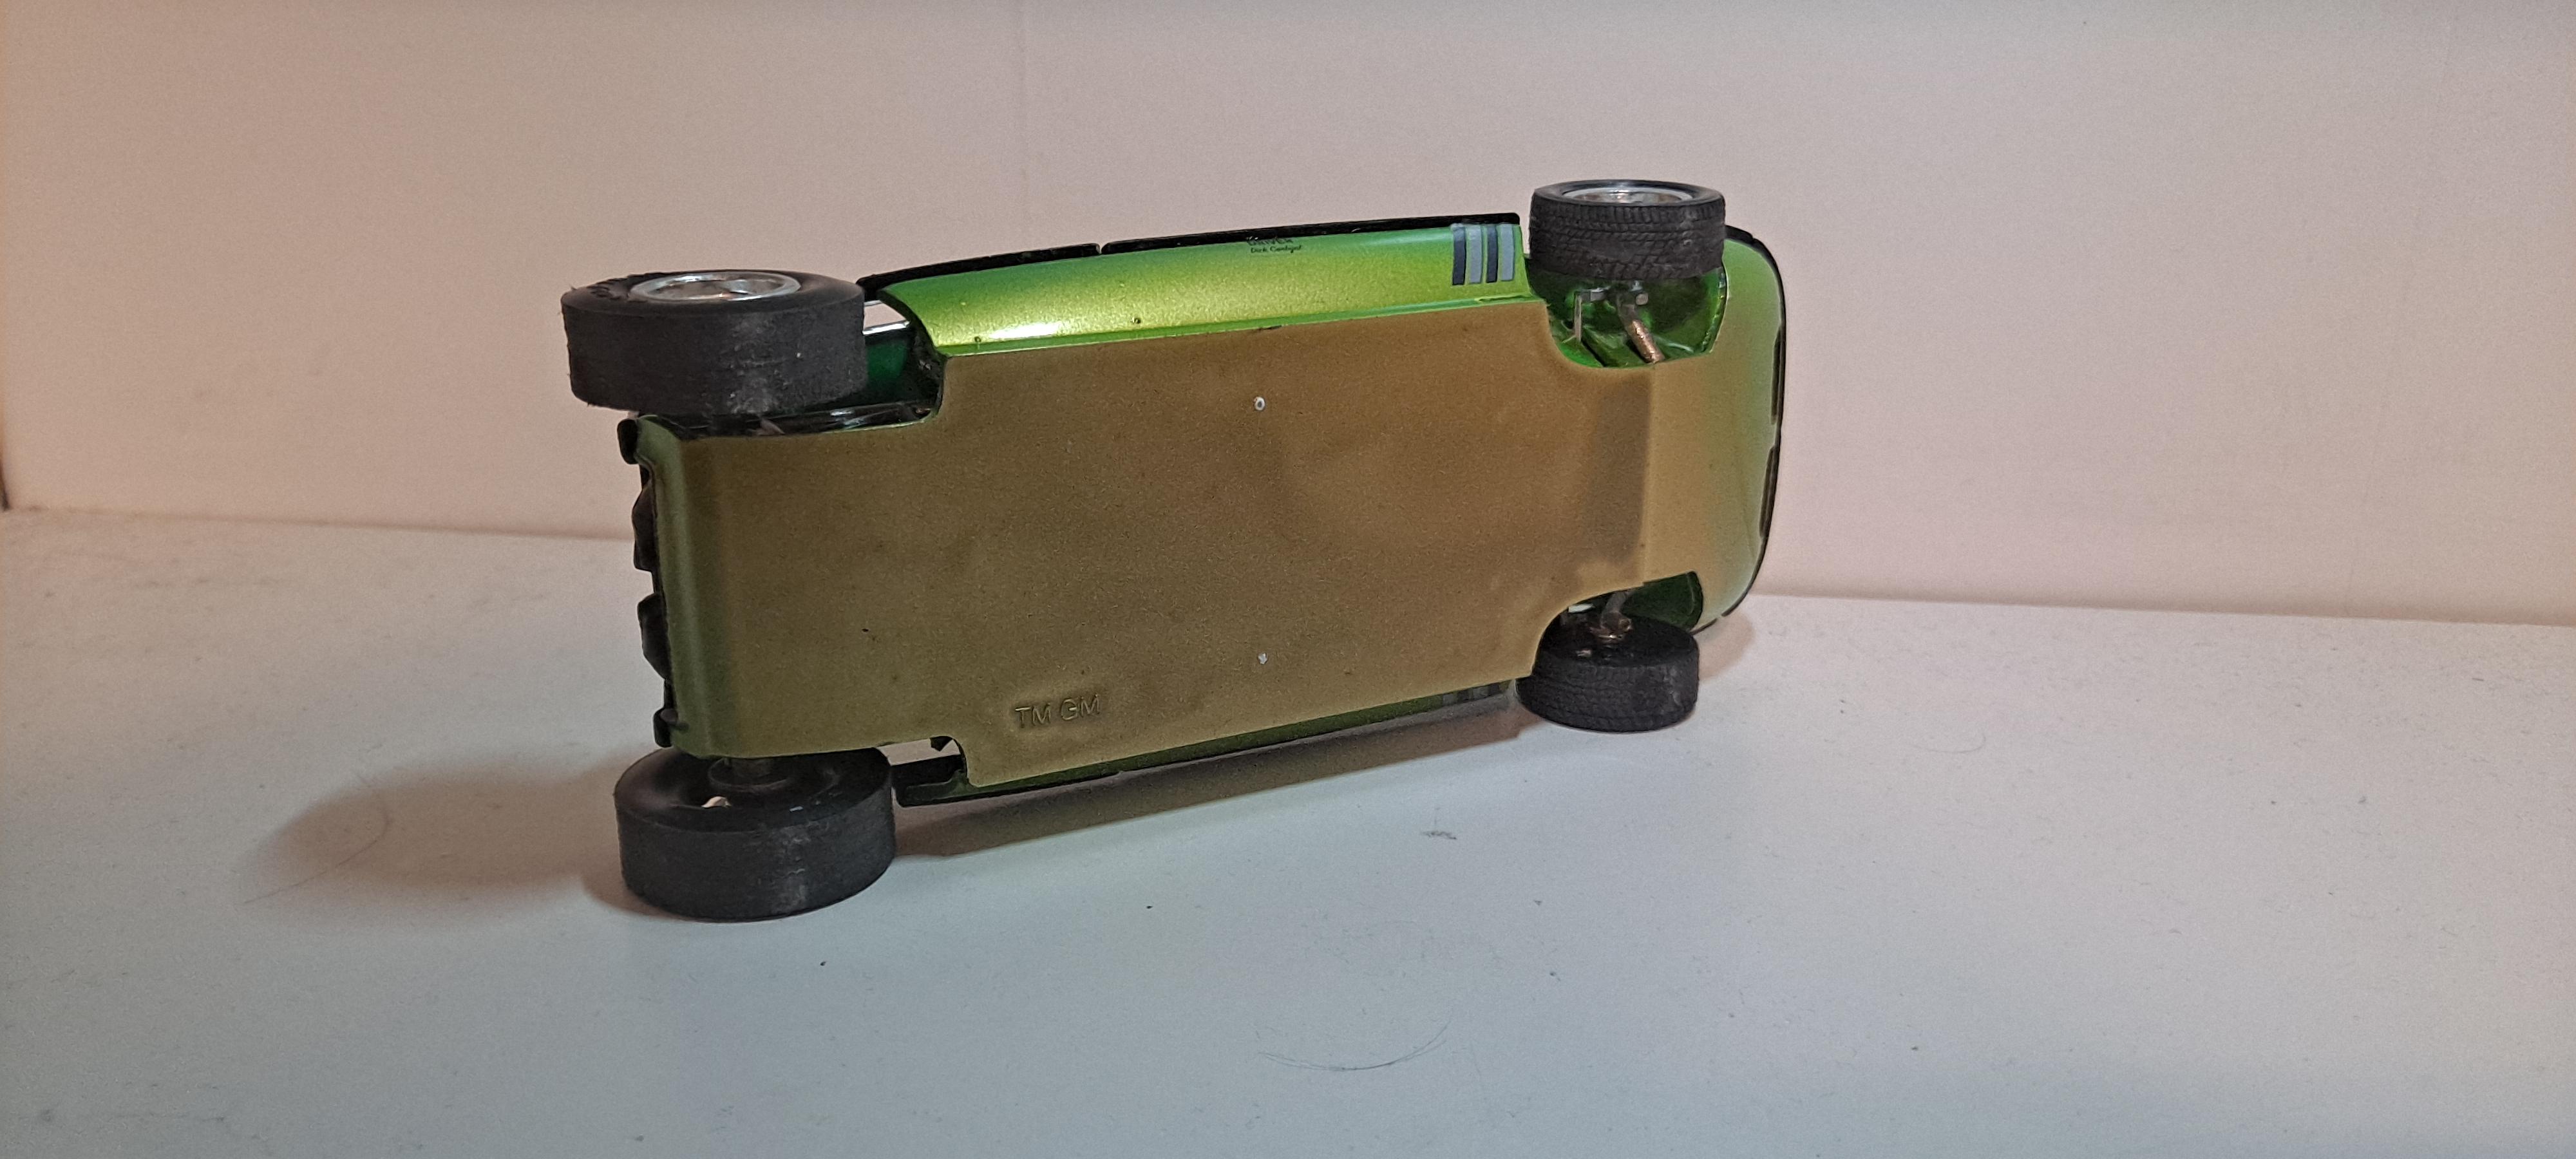
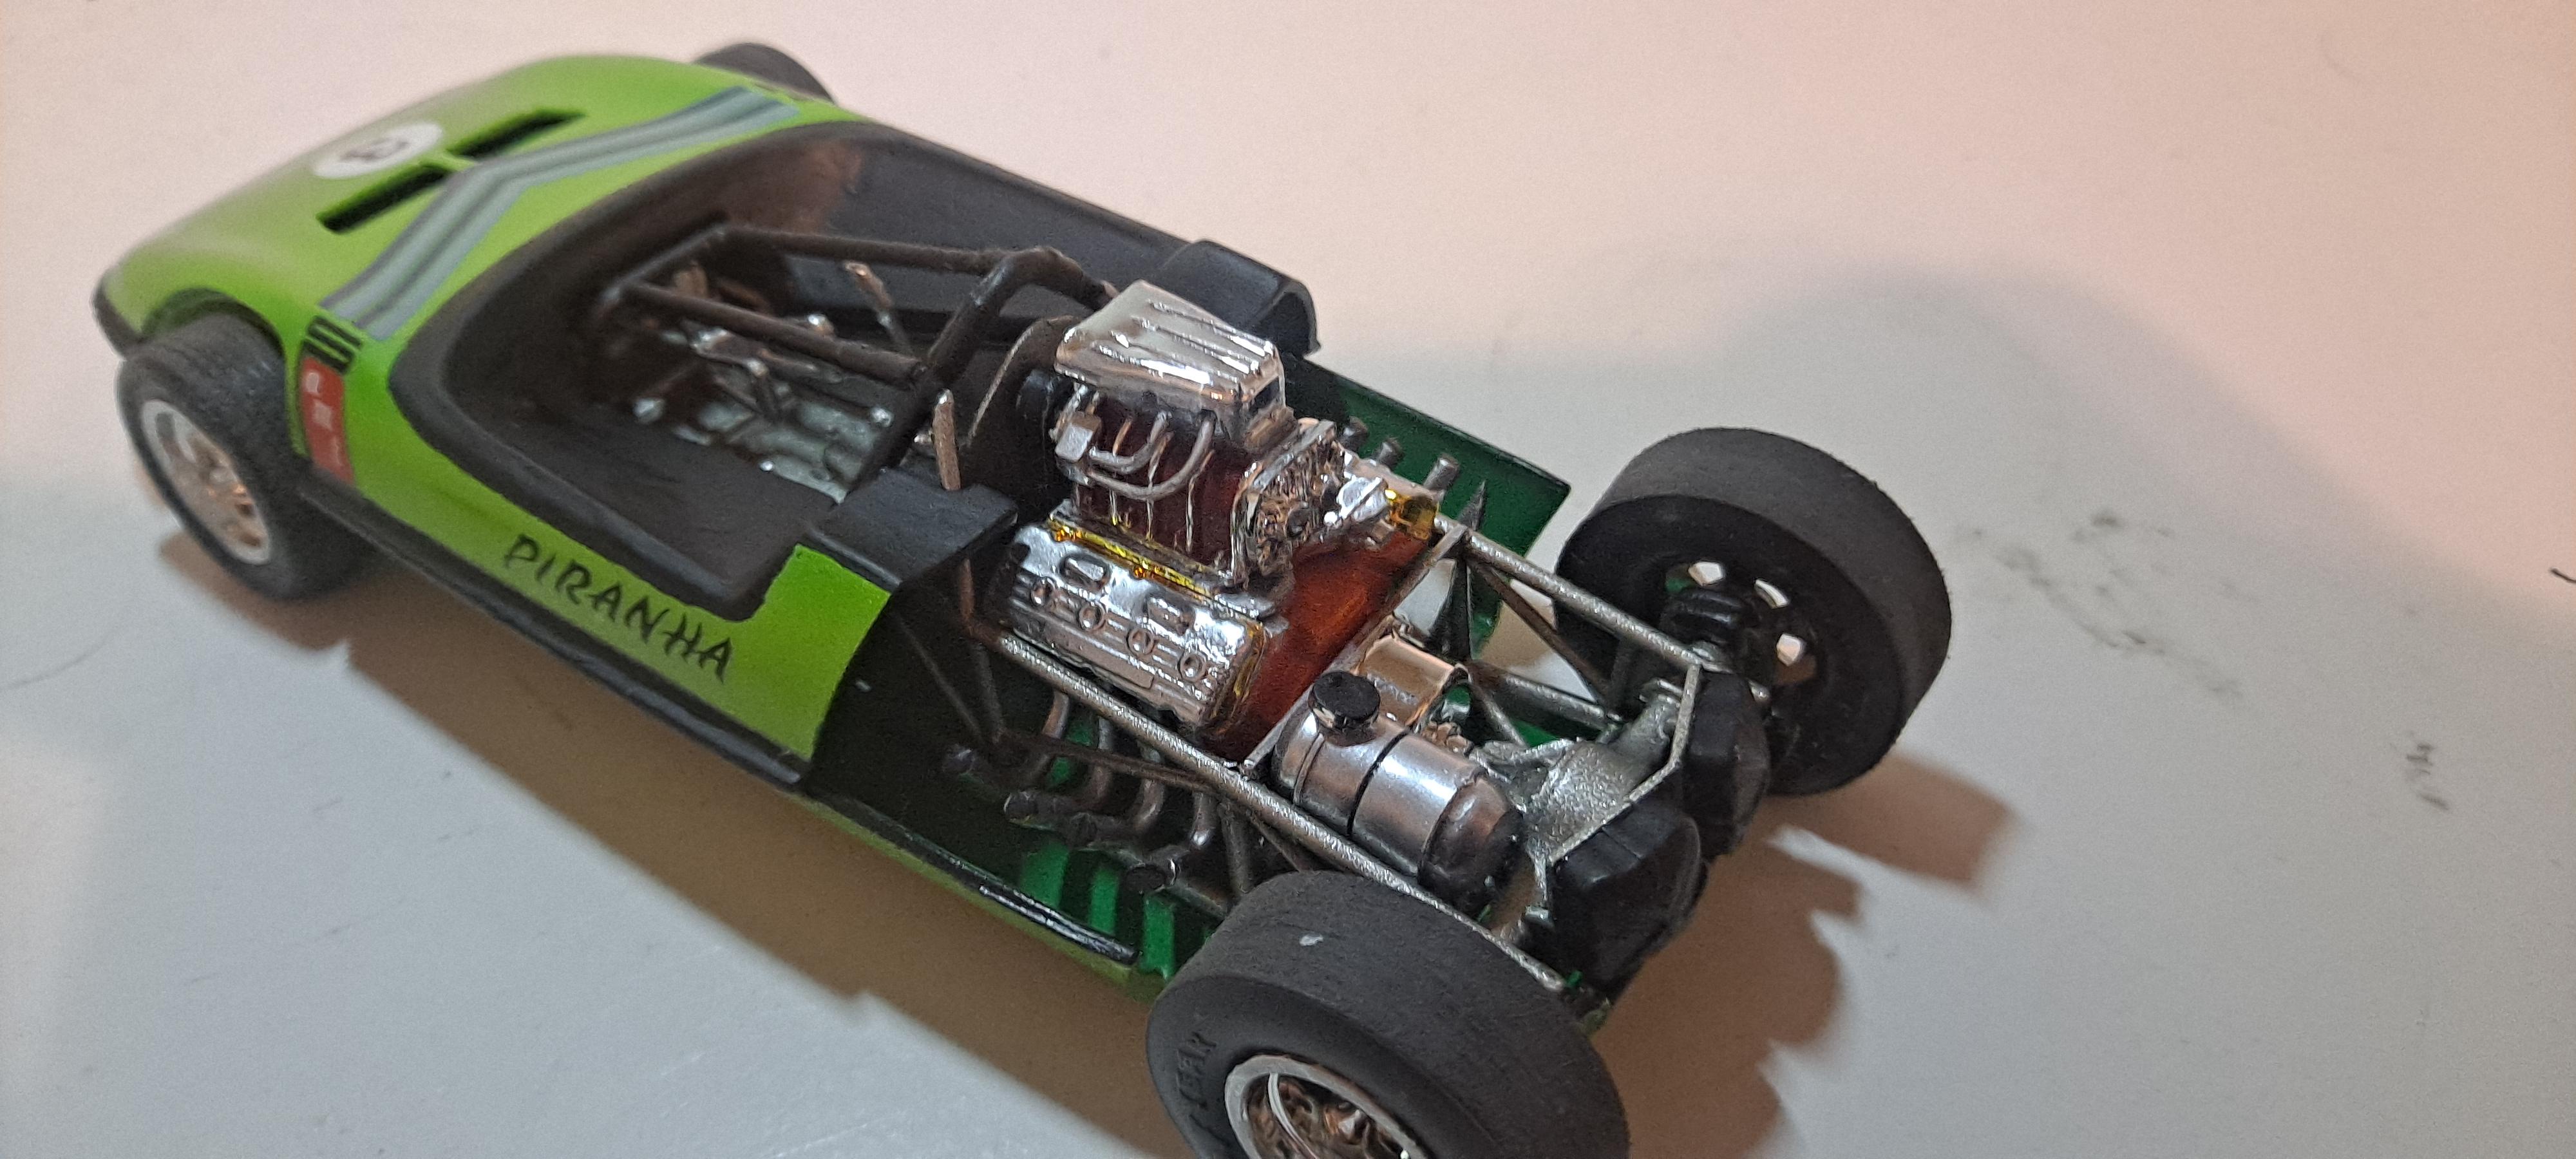
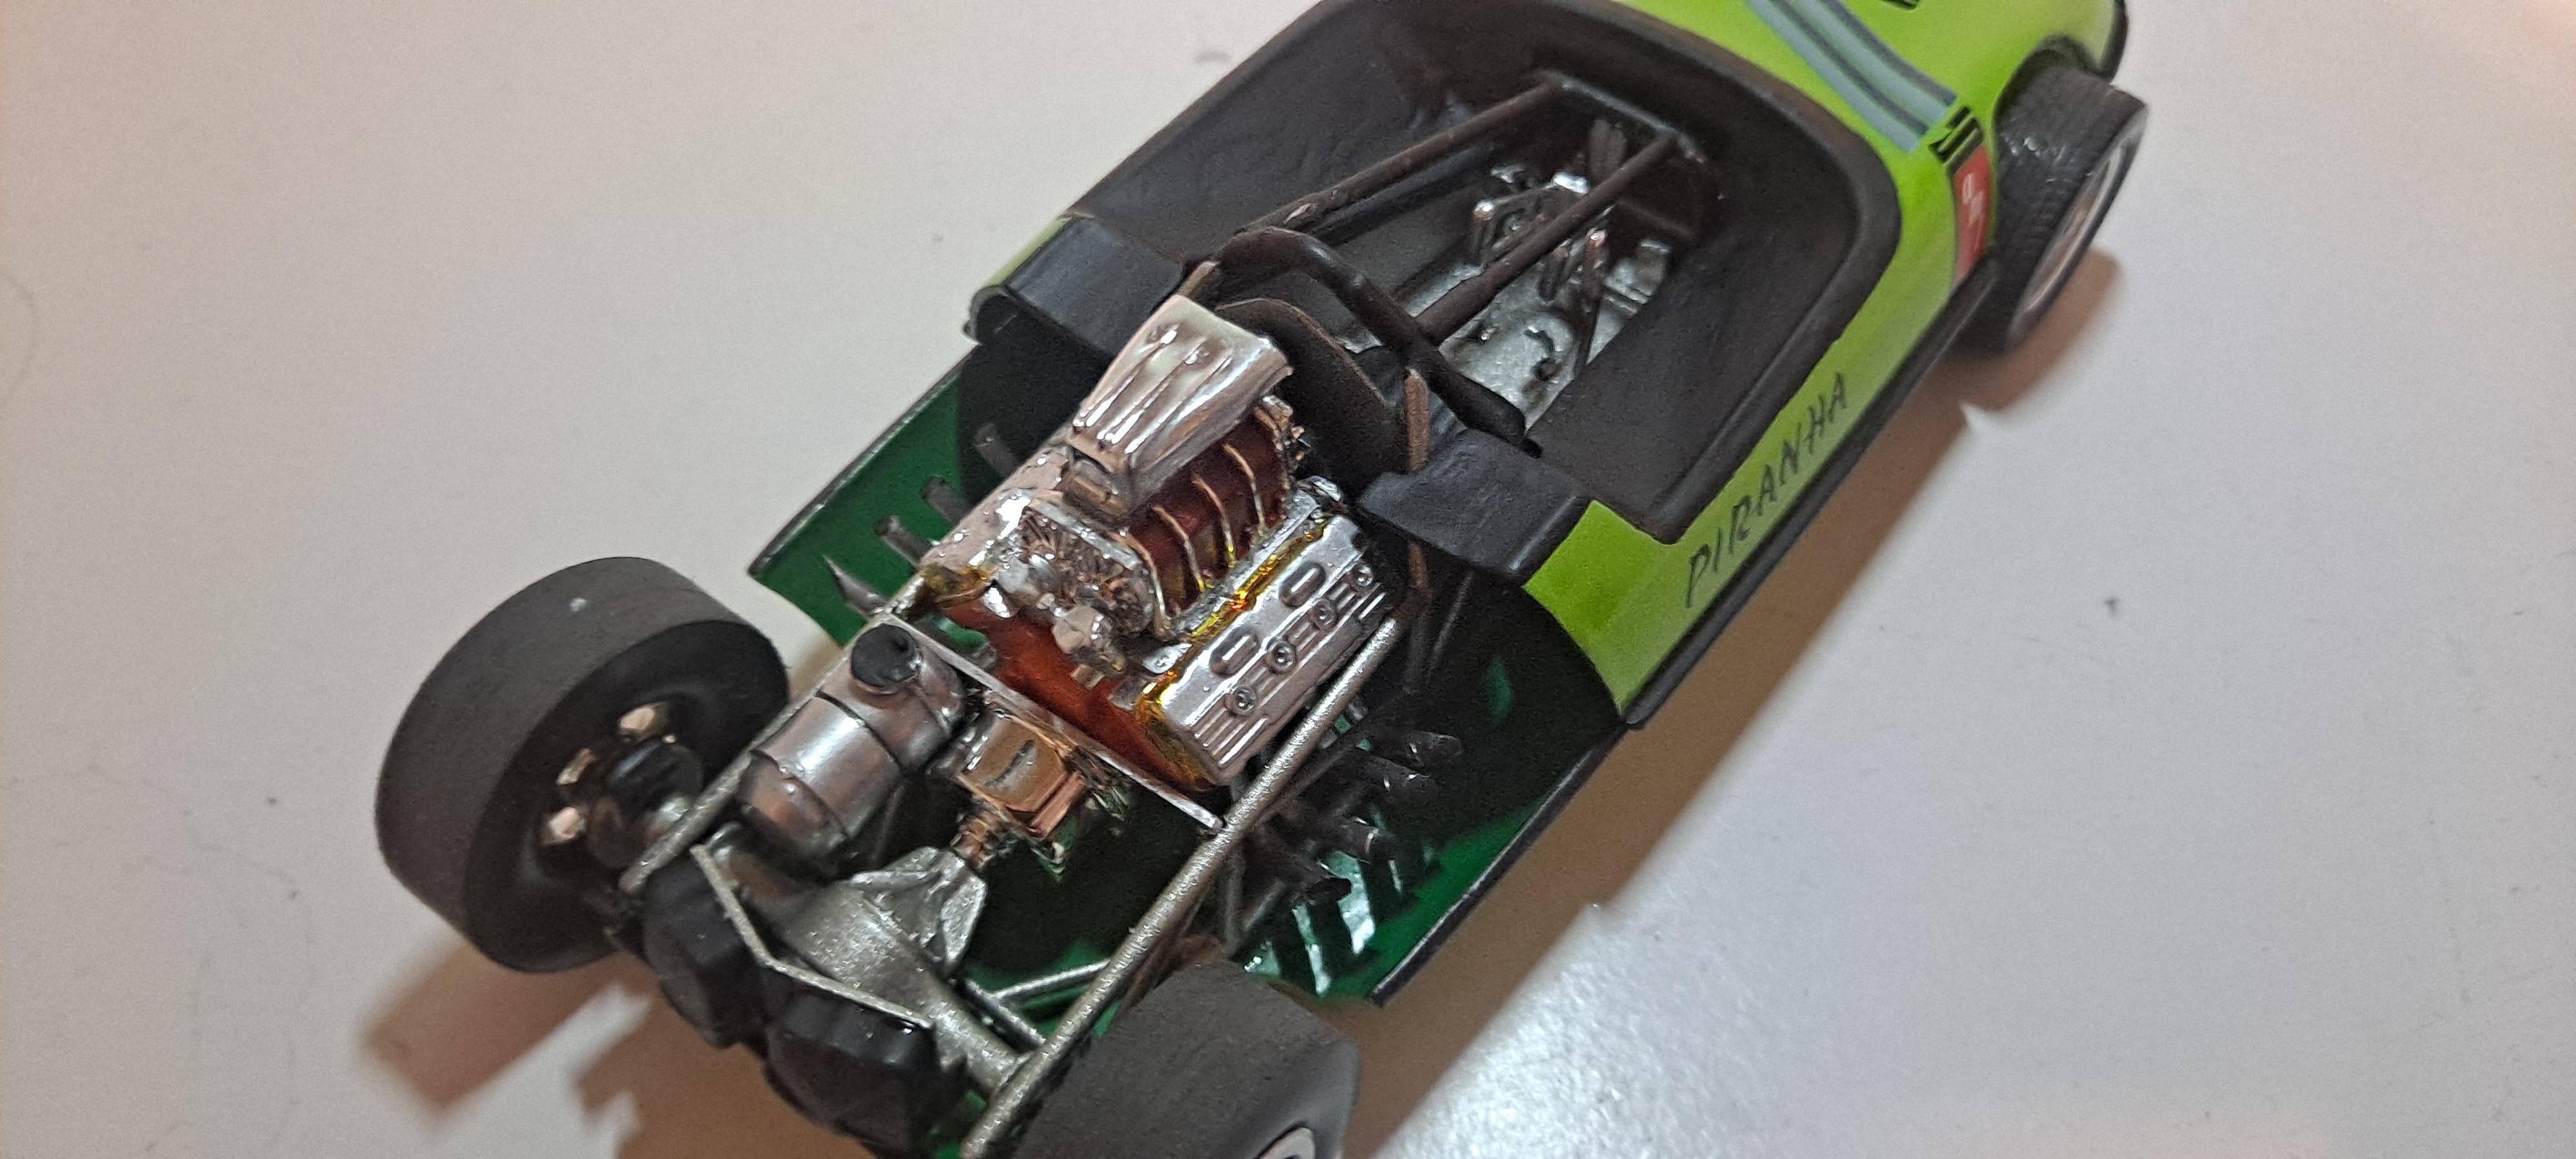
Fresh off da' bench! Built from the 2014 R2 issue of the Piranha Super Spy Car. This and the 2005 issue of the Piranha Drag Car I had in my stash for several years. Dreaded getting around to the both of them because I knew opening the boxes they'd be atrocious, ill fitting dumpster fires. I can imagine a lot of kiddos back in the day got very frustrated with these and blew them all up with firecrackers. Along with poorly molded and ill-fitting parts throughout, the separate top and its opening gullwing doors were the worst of all being warped and having no locator pins to hold in. The speedster setup came from a happy accident when I broke the roof and decided painting around the glass would look neater and make the interior easier (plus getting rid of the notorious cramping problem). Like the Drag Car, joining the top half with the completed lower half was the stuff nightmares come from. Eventually I got it, but still it's not an easy feat for anyone of any skill level. This one sports my usual custom touches and the Covair motor was ditched for a Ford 429 big block out back. The rear deck lid was too small and a new taller one was made using a AMT Chevelle custom hood scoop that was the perfect dimensions. A custom exhaust setup was made and better engine mounts were added to keep the bigg 429 in place. A 4WD setup was added with a differential in the front and a driveshaft going under the interior to the rear transmission. Wheels and Tires are from a old Fujimi custom parts set that work well with the Piranha. Exterior is a two tone. The top is a custom mixed Orange Crush Pearl, made using Rustoluem orange with a mist of Tamiya TS-97 Pearl Yellow. The bottom is Rustoluem Black Night Metallic. All cleared with Pldege.
-
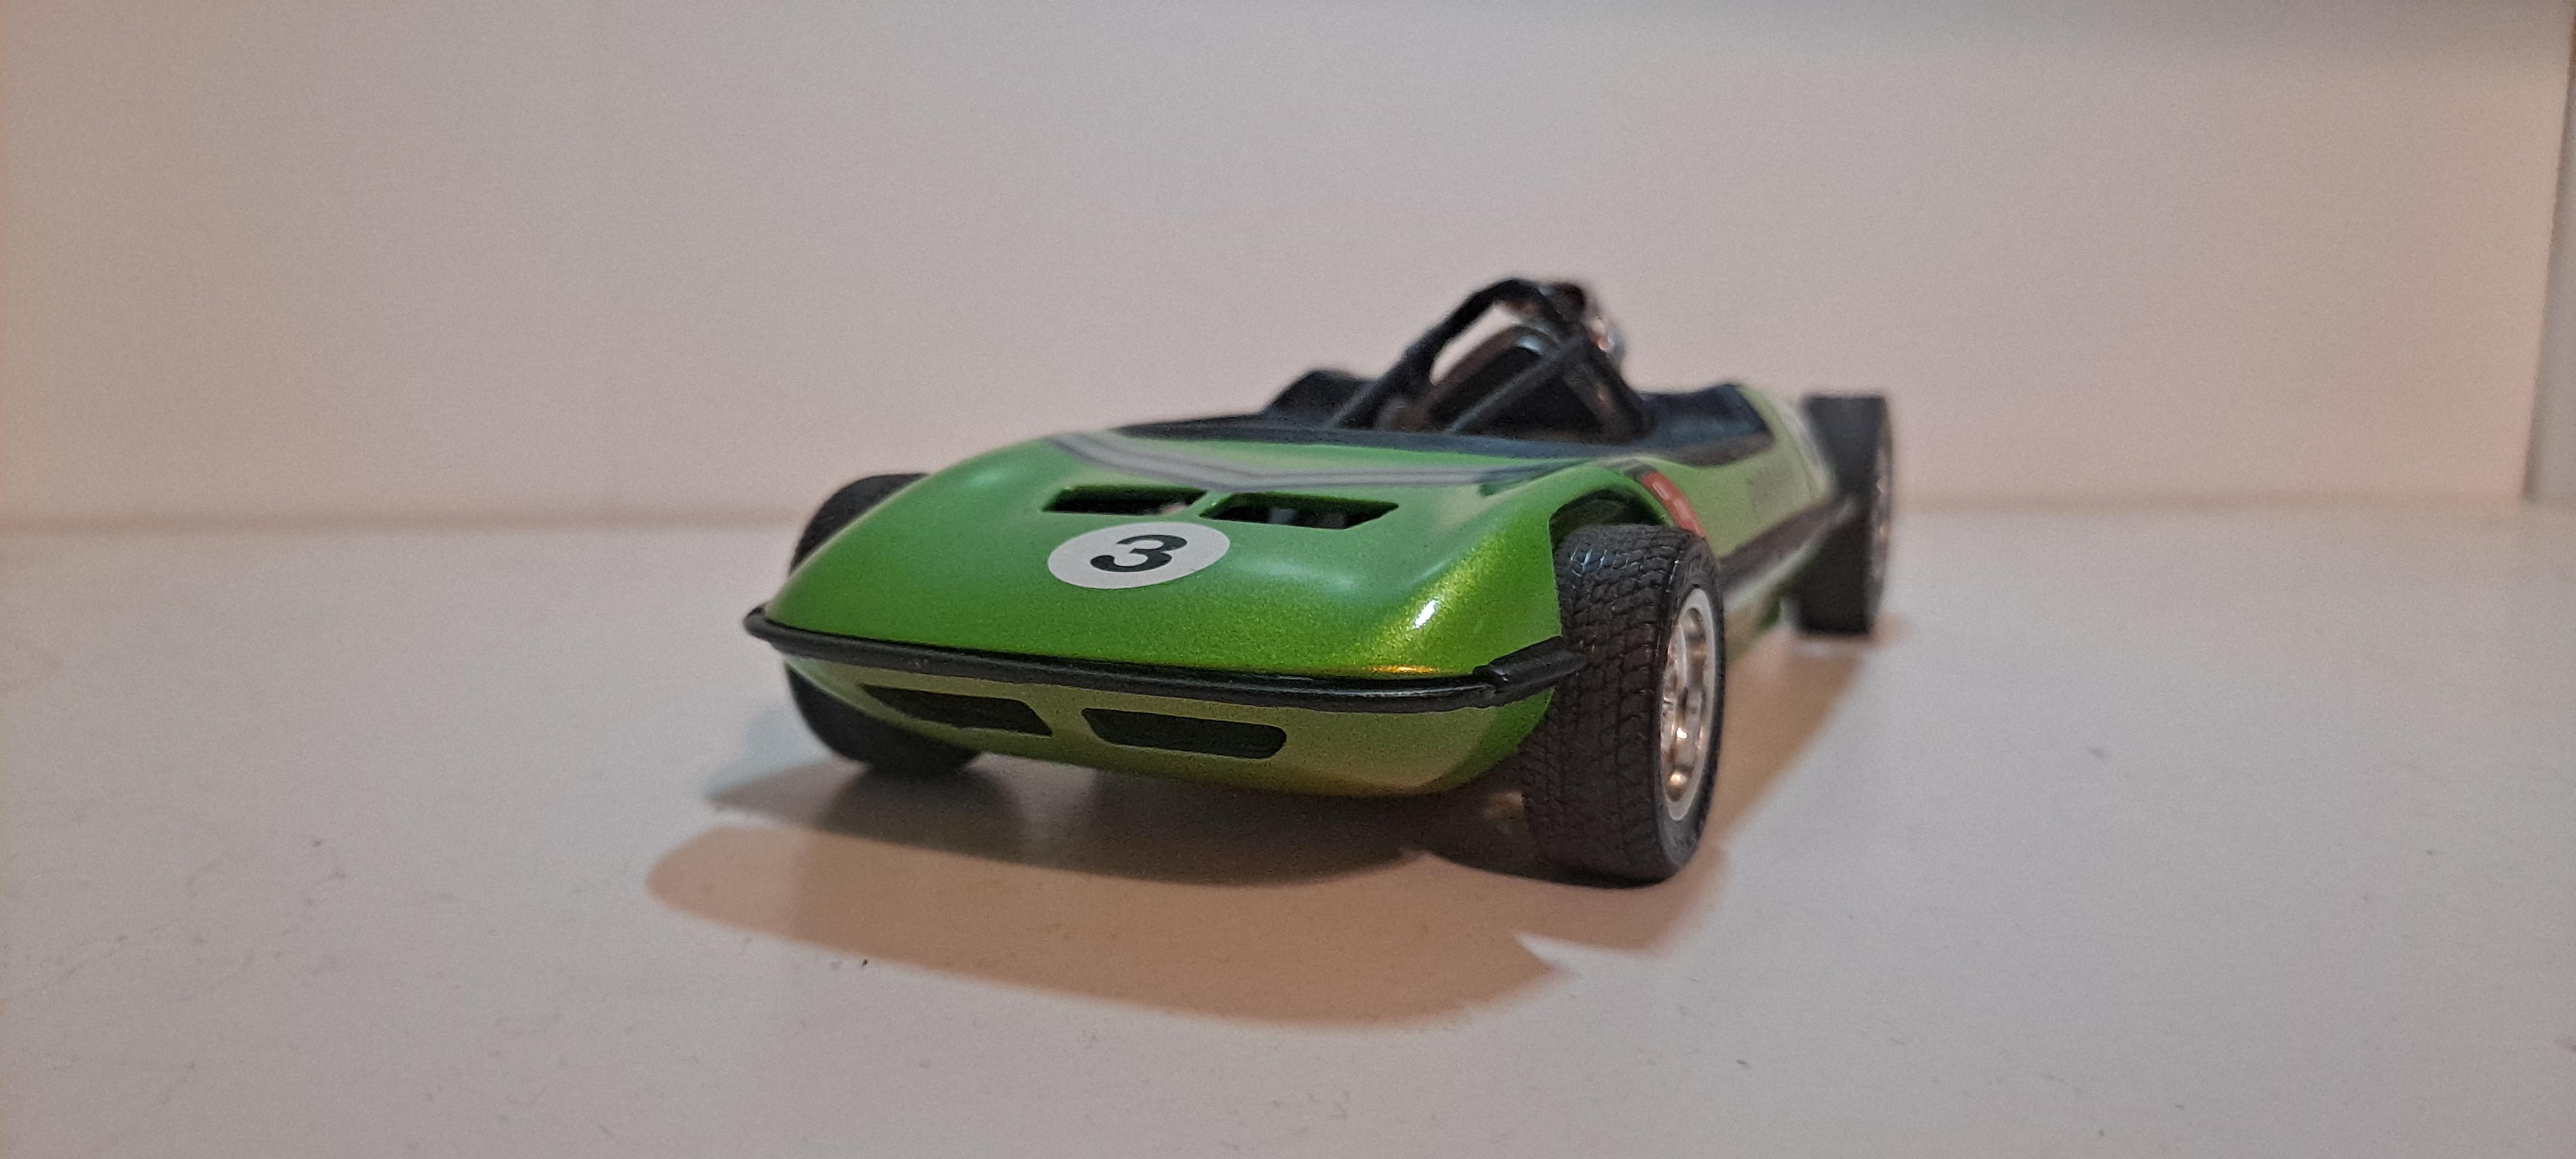
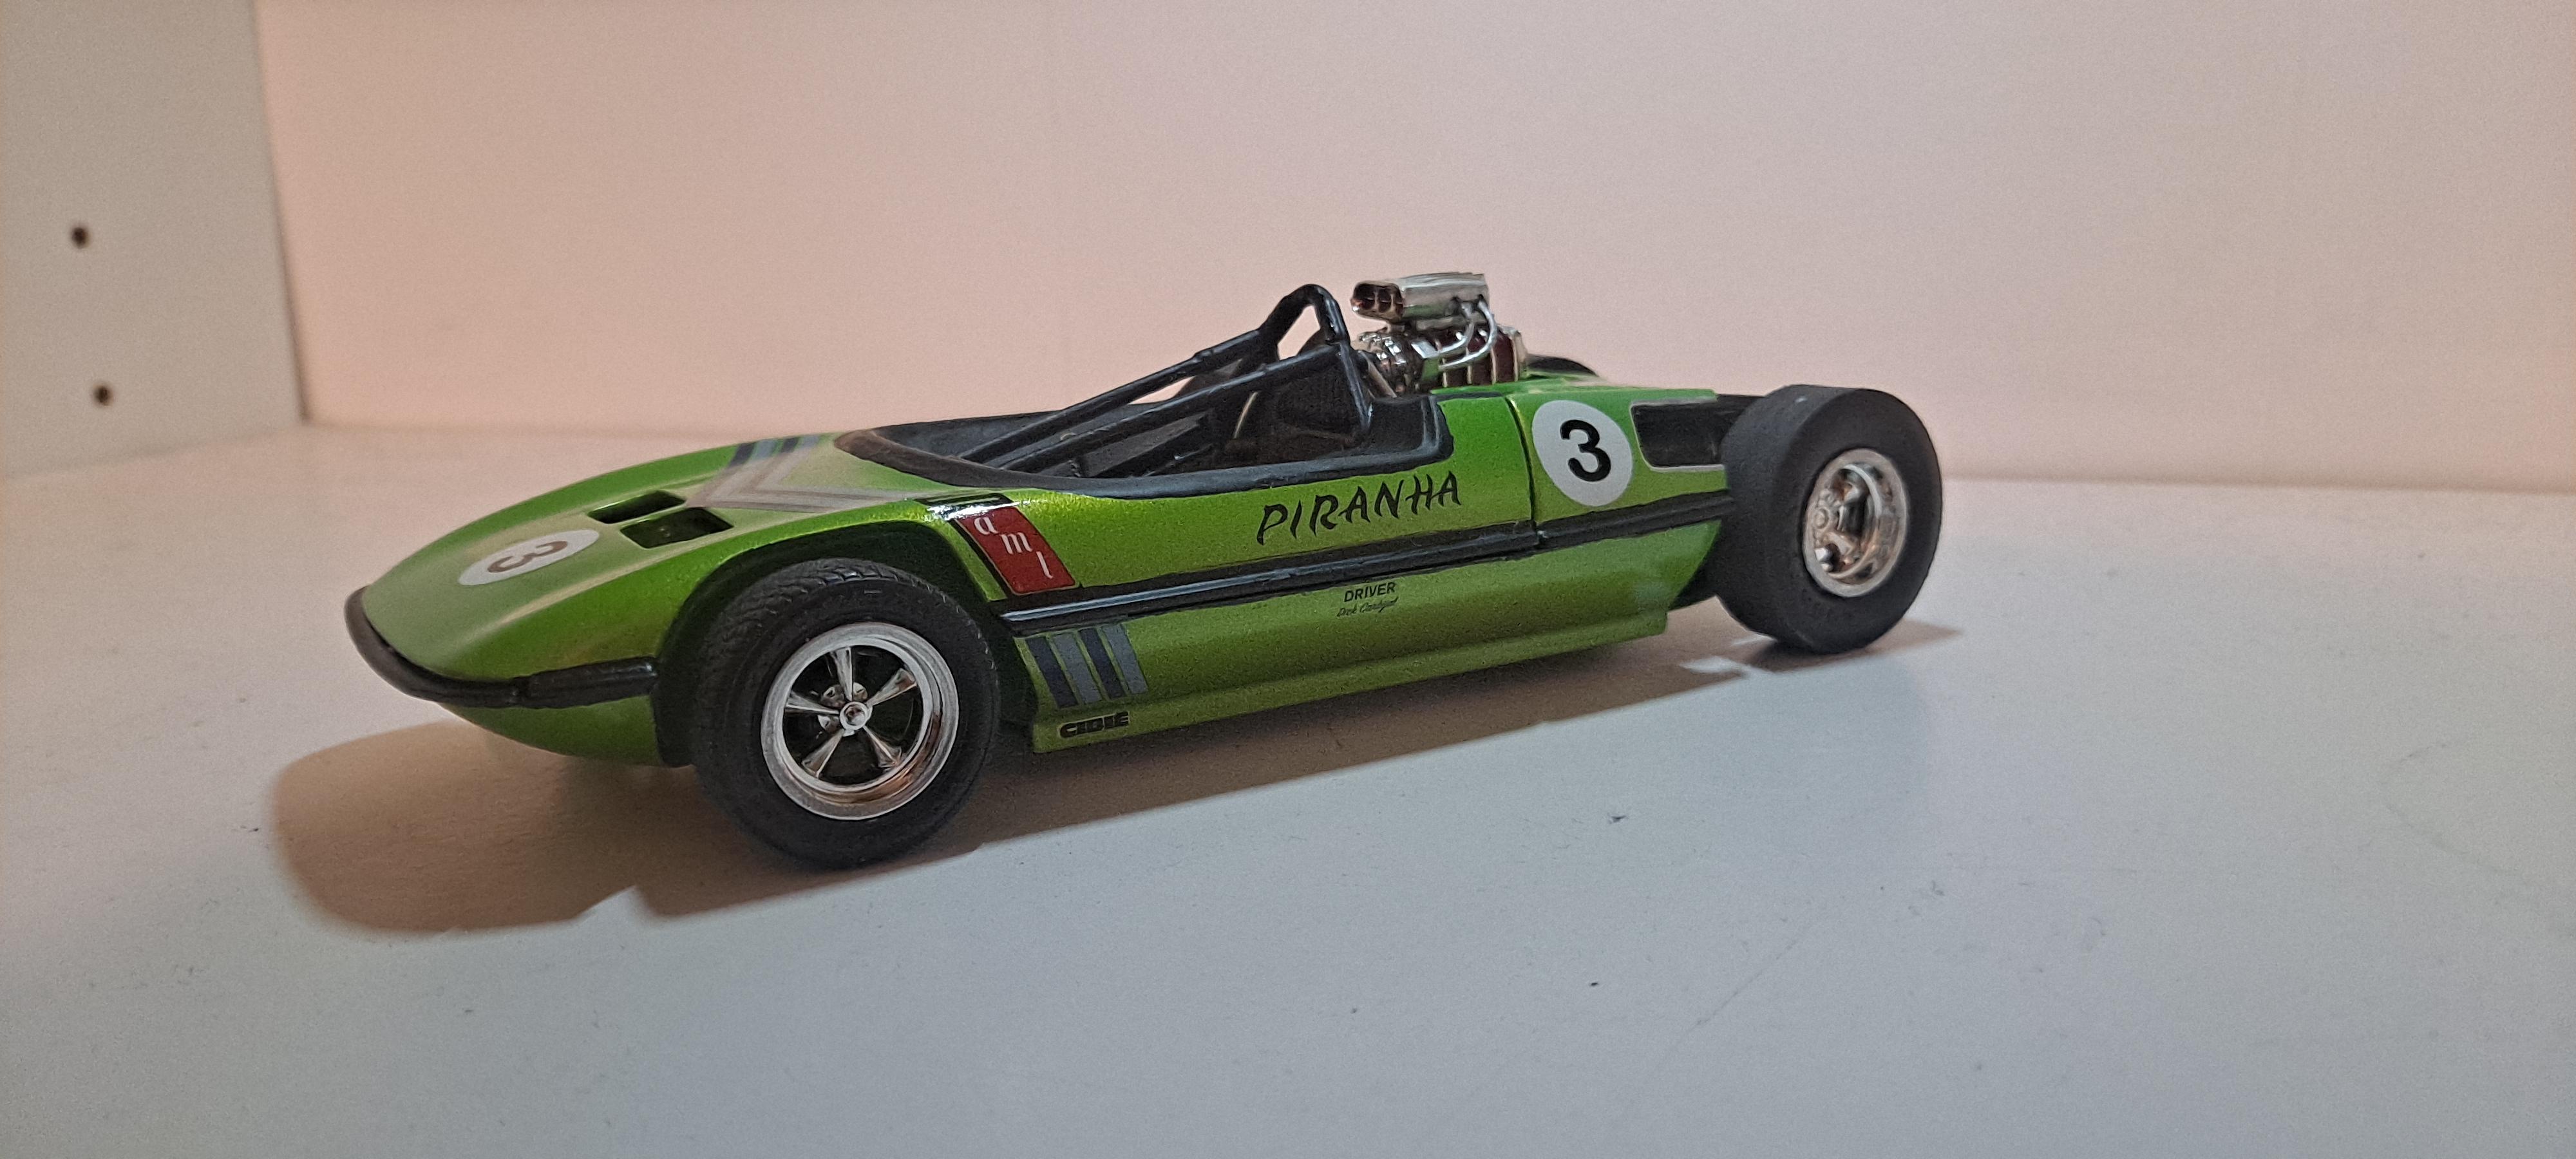
AMT kit built from the 2005 buyer's choice reissue. Had this and the 2014 deluxe issue of the Super Spy Piranha in my stash for several years, dreaded ever getting around to them. This kit is a radioactive horse manure dumpster fire, and that's keeping things family friendly here! The frame assembly to the lower body half was a nightmare that fought me for days on end, and the top body half (molded in clear) when the fenders are in was just as bad. Had to use lots of glue, sanding down joints, rubber bands, and a weeks worth of patience. Only additions are better tires (to replace the lousy plastic ones) and extra decals from the SSC issue (since the 2005 Buyer's Choice had a pretty sad decal sheet). Exterior is Tamiya Candy Lime Green, with a mist coat of Rustoluem Gold on the lower body half to give it a fade job (or like how certain Piranha breeds are). All cleared with Pledge.
-
Rustoleum paints are terrible.
RickRollerLT1 replied to James Maynard's topic in General Automotive Talk (Trucks and Cars)
The only paints that don't require a primer coat are the Testors Enamels. Those are formulated with "soft" solvents, but come at the cost of frequent errors and long dry times. Testors QC these days makes them even worse then I was using them back in 2007-8. The standard Rustoluem lines (Protects Against Rust, Metallics, Specialty/Color Shift) are also pure Enamel, but have hotter solvents that will attack most bare unprimed styrene. I know this because I once bought a cheap Revell '02 Camaro SS and some bobo painted the body Rustoluem Yellow without a primer base and a very rough finish. After the Purple bath took it off with ease, it was discovered the body crazed like mad and lots of sanding needed to smooth it out best as possible. The Testors One-Coat Lacquers were once the same hotter solvent Enamel formula as the standard Rustoluems, then recently changed to a Lacquer-Enamel mix that seems softer than the Rustoluem formula. As mentioned, the Rustoleum Painters Touch are paint+primer built-in and will react over primered parts, even if the primer base was a lacquer like Duplicolor. These paints have hot solvents meant for heavy duty applications over stuff like PVC, and the gloss colors will attack unprimed weak styrene which makes using them for bodies impossible. Apparently, the same thing happens if one sprays a Painters Touch 2x gloss/satin color over a Painters Touch Grey/White/Ect. Primer base. So even using the same brand and formula doesn't always work due to a bad design. However, the Painters Touch satin/flat colors are usable on styrene parts not meant to be glossy and work really well. I use these on interiors and frame/exhausts/motor pieces all the time and in most cases the crazing is non-existent or very minimal.