TFchronos Posted July 19, 2014 Author Share Posted July 19, 2014 Those tail lights are awesome Mike, thanks for the tip. I don't know any smokers, but will keep that in mind. Quote Link to comment Share on other sites More sharing options...
Custom Mike Posted July 19, 2014 Share Posted July 19, 2014 If you need or want some of that foil, PM me your address, I've got a bunch of it here for future use! Quote Link to comment Share on other sites More sharing options...
Dragfreak Posted July 19, 2014 Share Posted July 19, 2014 (edited) Jonathan, the GTX looks fantastic, nice work scratching those tailights, that does not look like an easy task Edited July 19, 2014 by Dragfreak Quote Link to comment Share on other sites More sharing options...
superbike-shaun Posted July 19, 2014 Share Posted July 19, 2014 Jonathan, absolutely love the dash, where did you procure the gauges? also , taillights, very ingenious!!!!!! how did ya do that? thanks Shaun.s Quote Link to comment Share on other sites More sharing options...
TFchronos Posted July 19, 2014 Author Share Posted July 19, 2014 If you need or want some of that foil, PM me your address, I've got a bunch of it here for future use! Thank you for the very kind offer, I greatly appreciate it. But this (for now at least lol) is the only build I was planning to do darker lights on. I don't think I would have a good use for any right now. I ended up painting these with some Tamiya Gunmetal Friday. Thank you again Mike, keep on making killer custom tail lights my friend. Jonathan, the GTX looks fantastic, nice work scratching those tailights, that does not look like an easy task Thank you Jason, it did take a few tries to get them right lol. Quote Link to comment Share on other sites More sharing options...
TFchronos Posted July 19, 2014 Author Share Posted July 19, 2014 Jonathan, absolutely love the dash, where did you procure the gauges? also , taillights, very ingenious!!!!!! how did ya do that? thanks Shaun.s Thank you Shaun I found the gauges on Amazon, saved the images, did a little resizing in MS paint and printed them on my printer using card stock paper. For the tail lights I have this sheet of clear plastic I bought years ago that is very flexible. I just cut some narrow pieces and bent them to the shape of the read end. Quote Link to comment Share on other sites More sharing options...
TFchronos Posted July 20, 2014 Author Share Posted July 20, 2014 (edited) Here's another update with another modification I'm making. This one is to the front bumper, I didn't like the gap between the grille and bumper, it doesn't match the lower body line or mount very flush to the body either. Plus with its lower stance on the front it does need to be picked up anyway. So that's what this update is about, tightening the bumper up to the body a bit better. Stock straight from the box. Sorry, I forgot to snap a picture of it on the body before doing this. Bumper mount before. Just cutting out the supports raised it enough. Glued back together. Test fit. Update will be finished off in the next post. Edited July 21, 2014 by TFchronos Quote Link to comment Share on other sites More sharing options...
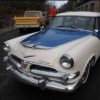
TFchronos Posted July 20, 2014 Author Share Posted July 20, 2014 Part 2 Finished and in place. Having smoothed over the bumpers I decided to move the turn signals under the grille. Also a look at the tail lights they look darker in the picture than they really are. And last but not least at the request of Gene, some purple fuzzy dice. Thank for looking! Quote Link to comment Share on other sites More sharing options...
slusher Posted July 21, 2014 Share Posted July 21, 2014 Nice touch on the dice... Quote Link to comment Share on other sites More sharing options...
TFchronos Posted July 23, 2014 Author Share Posted July 23, 2014 (edited) Thank you Carl, credit for the idea goes to Gene aka Speedfreak. Edited July 23, 2014 by TFchronos Quote Link to comment Share on other sites More sharing options...
TFchronos Posted July 23, 2014 Author Share Posted July 23, 2014 Here's what I've been up to these past few days. Got some engine work done, detailed as much as my skill level will let me. I can't tell you how much respect I have for all you guys that do these ultra detailed photo accurate engines, it's nothing short of extraordinary what you guys do. Next is a little modification to the exhaust, I chopped off the old turbo style mufflers and made some cherry bombs for it. And last but not least are some custom exhaust tips inspired by the C6 Corvette tips. Thanks for looking! Quote Link to comment Share on other sites More sharing options...
microwheel Posted July 23, 2014 Share Posted July 23, 2014 Hi Jonathan, dont seel yourself short on the quality of your detail work. Your quality of detail is looking on par with anyones to me. Everything I do and have done over the years has been refined through trial and error. And being away from the hobby myself for almost 30,and not having the quality of eye site I did in my younger days, I find it takes me alot longer to detail anything than it used to, and I still have to find new ways to do old tricks lol. And sometimes I find things that I want to do as far as detailing goes, doesnt always find its way from my head to my hands. Quote Link to comment Share on other sites More sharing options...
TFchronos Posted July 26, 2014 Author Share Posted July 26, 2014 Hi Jonathan, dont seel yourself short on the quality of your detail work. Your quality of detail is looking on par with anyones to me. Everything I do and have done over the years has been refined through trial and error. And being away from the hobby myself for almost 30,and not having the quality of eye site I did in my younger days, I find it takes me alot longer to detail anything than it used to, and I still have to find new ways to do old tricks lol. And sometimes I find things that I want to do as far as detailing goes, doesnt always find its way from my head to my hands. Thank you for your kind words Jim, they mean alot to me. Quote Link to comment Share on other sites More sharing options...
TFchronos Posted July 26, 2014 Author Share Posted July 26, 2014 Here's the final update, I'll have it finished up by the end of Sunday. Thanks for looking! Quote Link to comment Share on other sites More sharing options...
slusher Posted July 26, 2014 Share Posted July 26, 2014 Love the Cherry bombs, nice touch... Quote Link to comment Share on other sites More sharing options...
Dragline Posted July 27, 2014 Share Posted July 27, 2014 That is looking Fantastic bro. The trim, the engine detail...... Really impressed with this one. Bob Quote Link to comment Share on other sites More sharing options...
Speedfreak Posted July 27, 2014 Share Posted July 27, 2014 Jason, the car looks awesome! The exhaust system is very cool, the tips are killer. I've got a '69 Charger R/T I just painted MM Gray Metallic, very close to the color on your car, but not quite as dark. It will also have a black vinly top. Wasn't quite sure how to proceed with the build but I think I might use some que's from this build for inspiration, very nice. It's been fun following along. Quote Link to comment Share on other sites More sharing options...
DeeCee Posted July 27, 2014 Share Posted July 27, 2014 That is one very nicely detailed engine bay in a great looking GTX. Quote Link to comment Share on other sites More sharing options...
om617 Posted July 27, 2014 Share Posted July 27, 2014 Great detail on the engine and sweet exhaust. Did you make the sparkplug boots? They look great. Quote Link to comment Share on other sites More sharing options...
TFchronos Posted July 27, 2014 Author Share Posted July 27, 2014 Love the Cherry bombs, nice touch... Thanks Carl, they're my muffler of choice. That is looking Fantastic bro. The trim, the engine detail...... Really impressed with this one. Bob Thank you Bob! Quote Link to comment Share on other sites More sharing options...
TFchronos Posted July 27, 2014 Author Share Posted July 27, 2014 Jason, the car looks awesome! The exhaust system is very cool, the tips are killer. I've got a '69 Charger R/T I just painted MM Gray Metallic, very close to the color on your car, but not quite as dark. It will also have a black vinly top. Wasn't quite sure how to proceed with the build but I think I might use some que's from this build for inspiration, very nice. It's been fun following along. Thanks Gene, sounds awesome, make sure to show it off when it's done. I'm a big Mopar fan so anything related will have my full undivided attention. Thanks again for following along and for the fuzzy dice suggestion. That is one very nicely detailed engine bay in a great looking GTX. Thank you Dale, much appreciated. Quote Link to comment Share on other sites More sharing options...
TFchronos Posted July 27, 2014 Author Share Posted July 27, 2014 (edited) Great detail on the engine and sweet exhaust. Did you make the sparkplug boots? They look great. Thanks Tommy, the boots come from a USB cable, same with the battery wires. As soon as the fog burns off I'll get some photos. Edited July 27, 2014 by TFchronos Quote Link to comment Share on other sites More sharing options...
Speedfreak Posted July 27, 2014 Share Posted July 27, 2014 You're welcome Jason, Purple Power! Quote Link to comment Share on other sites More sharing options...
1 bad55 stan Posted July 27, 2014 Share Posted July 27, 2014 That engine is right up there mate,the color is spot on too!Great job on this build Quote Link to comment Share on other sites More sharing options...
TFchronos Posted July 28, 2014 Author Share Posted July 28, 2014 That engine is right up there mate,the color is spot on too!Great job on this build Thanks Stan! Here it is all finished and ready to roar. More pictures of in under glass. To everyone who watched and commented on this build thank you. Quote Link to comment Share on other sites More sharing options...
Recommended Posts
Join the conversation
You can post now and register later. If you have an account, sign in now to post with your account.
Note: Your post will require moderator approval before it will be visible.