jjsipes Posted February 7, 2013 Share Posted February 7, 2013 I purchased the 1/16th Scale Dukes of Hazzard Charger and wasn't pleased that it could not be built into a street stock car. So I went looking to see what could be done with it and found a conversation kit from Resin Motor Replicas to make it into a Daytona Charger. I received the conversation kit and it came with instruction on how to modify the rear window from the tunnel glass to the flush fit glass. I sliced the body along the base of the "C" pillars and bent the panel between the rear window and trunk up to align with the top edge of the "C" pillar. Rescribed the trunk edge and glued plastic in around the window to try and make it look closer to the rear window opening in a real car. Then I moved to the nose. I straighted the leading edges of the front fenders and glued the resin nose on. Then I cut from the top edge of the bumper notch in the fender back and cut and filled in the opening with sheet plastic to mold the nose into the fenders. Sanded things down and puttied with Tamiya White Putty and primed quickily today to see how things was looking. I am not sure how to finish the bottom out so I placed chassis in the body and seen how much room I had with the roll bars in placed and cut to be able to clear all this when I go to complete it. Have not seen how anybody else is handling this area either. Would like to replicate the Bobby Allison #22 which means I will have to come up with my own decals. Quote Link to comment Share on other sites More sharing options...
shafer Posted February 7, 2013 Share Posted February 7, 2013 (edited) man that looks gr8 Edited February 7, 2013 by shafer Quote Link to comment Share on other sites More sharing options...
MAGNUM4342 Posted February 7, 2013 Share Posted February 7, 2013 I guess this means I don't need to make a conVERSION kit for this one. I'll just grab one from RMR. I'm interested to see where this one goes. Quote Link to comment Share on other sites More sharing options...
TooOld Posted February 7, 2013 Share Posted February 7, 2013 Looks good so far Jason ! I wish they had those conversion kits when I built my Daytona , I had to make my own pieces . I don't know how accurate you want to be but the nose on the real car was a bolt on piece , you can see a gap between it and the body that is filled with a rubber strip . Not a big deal , just FYI . Quote Link to comment Share on other sites More sharing options...
MAGNUM4342 Posted February 7, 2013 Share Posted February 7, 2013 Looks good so far Jason ! I wish they had those conversion kits when I built my Daytona , I had to make my own pieces . I don't know how accurate you want to be but the nose on the real car was a bolt on piece , you can see a gap between it and the body that is filled with a rubber strip . Not a big deal , just FYI . The real street cars did, the NASCAR's like he is trying to build had none. The nose cone was blended directly into the bodywork, although some teams represented the rubber gasket with black tape. Quote Link to comment Share on other sites More sharing options...
TooOld Posted February 8, 2013 Share Posted February 8, 2013 You're right Kevin , only the street cars had a visible gap . My mistake . Quote Link to comment Share on other sites More sharing options...
VERNON Posted February 8, 2013 Share Posted February 8, 2013 Jason, your Daytona is looking great, keep us posted. Can you tell me where you go the conversion kit from? Thanks, Vernon Quote Link to comment Share on other sites More sharing options...
jjsipes Posted February 8, 2013 Author Share Posted February 8, 2013 Vernon, here is the website where I got it from. http://www.freewebs.com/rmrresin/nf125.htm Quote Link to comment Share on other sites More sharing options...
VERNON Posted February 8, 2013 Share Posted February 8, 2013 Thanks Jason! Quote Link to comment Share on other sites More sharing options...
Shunter Posted February 8, 2013 Share Posted February 8, 2013 Nice start... Quote Link to comment Share on other sites More sharing options...
bbowser Posted February 9, 2013 Share Posted February 9, 2013 I realize this is probably a replica, but the nose sure looks like it's bolted on to me? Quote Link to comment Share on other sites More sharing options...
roadhawg Posted February 9, 2013 Share Posted February 9, 2013 These are not restored, these are actual race pictures, and you can see lines. They sure look bolted on to me too. I'm guessing, though, that some teams may have bondo'd them in. Quote Link to comment Share on other sites More sharing options...
Dragline Posted February 9, 2013 Share Posted February 9, 2013 Man O Man is that looking good dude. Watching this all the way. Bob Quote Link to comment Share on other sites More sharing options...
VERNON Posted February 9, 2013 Share Posted February 9, 2013 Hello Jason...Thanks for the info on RMR. I contacted Ron yesterday and he responded right away. Long story short, I just placed an orer for my kit. As soon as I get started I'll try to post some pictures. Hey decal guys out there, WE NEED SOME 1/16 scale DECALS FOR THE DAYTONA, CHARGER & PETTY CHARGER KITS!!!!! Thanks again for your help, and thanks to Ron @ RMR for responding so fast. Vernon Jason keep us posted on your project, it looks great. Quote Link to comment Share on other sites More sharing options...
Bonekrosha Posted February 9, 2013 Share Posted February 9, 2013 Ron is fantastic to deal with. I'll be buying couple more conversion kits from him soon and one of them will be grafted onto the new Petty re-issue just for kicks. Jason, My Daytona-ish conversion is still in progress but yours looks a bunch better than mine, I need to keep practicing. I'm really looking forward to seeing this build as it goes along, I can see already I can learn a lot from your fantastic work so far. Quote Link to comment Share on other sites More sharing options...
MAGNUM4342 Posted February 9, 2013 Share Posted February 9, 2013 The blue #40 is Pete Hamilton's PLYMOUTH SUPERBIRD, not a Daytona. The Petty teams didn't start using Chargers until after the Daytonas and Superbirds were outlawed. Quote Link to comment Share on other sites More sharing options...
Casey Posted February 9, 2013 Share Posted February 9, 2013 Hey decal guys out there, WE NEED SOME 1/16 scale DECALS FOR THE DAYTONA, CHARGER & PETTY CHARGER KITS!!!!! PM member Dave Van - he might be able to point you in the right direction. Quote Link to comment Share on other sites More sharing options...
stump Posted February 11, 2013 Share Posted February 11, 2013 Hey Jason, great work so far mate. (2 thumbs up) I too have just placed an order with Ron (over the weekend) to convert an old rebuild-able DOH kit. Tracking your progress to gain some valuable tips with this one. Keep it up man. Quote Link to comment Share on other sites More sharing options...
jjsipes Posted February 11, 2013 Author Share Posted February 11, 2013 Thanks guys for all the comments. They are welcomed. Progress will be slow on this with having a 2 year old and a 6 month old. Maybe one day they can help me build all the models in my stash. I have blocked the nose and rear window area and applied a skim coat of spot glazing and blocked that down again. I hve applied the fender scoops as well and started cleaning up the rear wing from the flash and pin holes. I have re-primed the body to see whatelse needs to be done. I do know that I need to fab up some rear window trim, need to think how best to do that. I have seen where Patto Decals out of Austrilia will print out decals at any scale you need if asked and I have seen where he has decals for the Bobby Allison Daytona and have been in contact with him and placed an order. Now I just need to wait and see what I get from him. Have heard he has nice decals and great to work with. Quote Link to comment Share on other sites More sharing options...
vairnut Posted February 12, 2013 Share Posted February 12, 2013 Patto has several decals available that will work for the 1/16th kits. Problem is for the #22 car the foil #'s are not available. Patto does not use and ALPS so he cannot print chrome or gold foil. Dave Van has the K&K #71 available in 1/16th. Quote Link to comment Share on other sites More sharing options...
Custom Hearse Posted February 14, 2013 Share Posted February 14, 2013 I'm definitely gonna have to order a couple of those Daytona conversion kits! Nice work on this one so far! Quote Link to comment Share on other sites More sharing options...
VERNON Posted February 21, 2013 Share Posted February 21, 2013 Just found 1/16th scale steel wheels (ideal for this kit) on e-bay @ $11.00 a set plus shipping. I ordered a couple sets yesterday and will let everyone know how they look as soon as they arrive. If you go to ebay, type NASCAR resin in the brouse box and to toys & hobbies then to model kits. From the picture posted on ebay the look pretty darn good! Happy modeling, Vernon Quote Link to comment Share on other sites More sharing options...
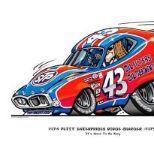
jjsipes Posted February 21, 2013 Author Share Posted February 21, 2013 Got my decals from Patto and they look great. I will have to look into the numbers on the doors though, the pics of the car show them being gold foil but the decals are not. Quote Link to comment Share on other sites More sharing options...
Wheels Posted February 22, 2013 Share Posted February 22, 2013 Looking good Jason!! Quote Link to comment Share on other sites More sharing options...
VERNON Posted February 28, 2013 Share Posted February 28, 2013 Just got my steel Hollman-Moody style NASCAR wheels last night and they look excellent. I don't have a picture to post but if you go ebay type in NASCAR resin or Petty Charger, go to toys & hobbies and then to models, that will take you right to them. They are a very clean casting and nicely detailed. At $11.00 plus S&H, they are well worth the money. These will be perfect for the 1969 Charger or Daytona and will work for many of the early 1970's NASCAR teams. Happy modeling, Vernon Quote Link to comment Share on other sites More sharing options...
Recommended Posts
Join the conversation
You can post now and register later. If you have an account, sign in now to post with your account.
Note: Your post will require moderator approval before it will be visible.