vintagedragfan Posted April 30, 2013 Share Posted April 30, 2013 that's some good stuff Scott, really nice!! Quote Link to comment Share on other sites More sharing options...
MicroNitro Posted April 30, 2013 Share Posted April 30, 2013 WOW! Quote Link to comment Share on other sites More sharing options...
Pro Tech Posted April 30, 2013 Share Posted April 30, 2013 Scott, that's gonna be a killer Fairmont! Charlie Pro Tech Quote Link to comment Share on other sites More sharing options...
Yahshu Posted April 30, 2013 Share Posted April 30, 2013 This is real nice work Scott, I was wondering how to use the stuff I bought from you, now I know. Looking forward to future updates & seeing it finished. The US Fairmont is heaps different to any Fairmont here in Oz. Quote Link to comment Share on other sites More sharing options...
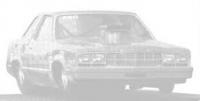
futurattraction Posted May 2, 2013 Author Share Posted May 2, 2013 (edited) Hey Chuck - Thanks for your encouragement! Thank you, Bill. I’ll try to keep it going in that direction... LOL Thanks Jim! I need to send you a sample of some 1/16th PE rotors I just got in to see how they work with your hats. Hey Thanks Charlie. I love your braided line. I’m going to use it as much as possible for this build. Thank you, Phil. Yes - our respective Fairmonts are two totally different animals. I’m very preferential toward “ours”... They made for some neat drag cars in their day, and I still like the body style, even though they are pretty boxy. Also, I'm glad to hear that you're seeing how some of my stuff goes together. If you keep watching you'll get to see even more... Edited May 2, 2013 by futurattraction Quote Link to comment Share on other sites More sharing options...
futurattraction Posted December 9, 2013 Author Share Posted December 9, 2013 OK. I'm gonna pull this one by its bootstraps again and see if I can make some more progress. I'm working on some tinwork for it that I am hoping to do in photo etch when all is said and done. Still not quite finished getting the pieces done to my satisfaction, but I'm getting closer. I can add etch lines to imitate bead rolled work on them and the nose panel. I got a start on some roll cage work but don't have pics for that available to post yet. More later. Quote Link to comment Share on other sites More sharing options...
James2 Posted December 9, 2013 Share Posted December 9, 2013 Good to see this one is still near the bench at least! Quote Link to comment Share on other sites More sharing options...
PappyD340 Posted December 10, 2013 Share Posted December 10, 2013 WOW, Scott it looks outstanding so far, keep up the good work and I will catch ya on the next update!! Quote Link to comment Share on other sites More sharing options...
futurattraction Posted December 10, 2013 Author Share Posted December 10, 2013 Thanks guys. I'll try to keep it within arm's reach of the bench. LOL Quote Link to comment Share on other sites More sharing options...
Jim_Kampmann Posted December 10, 2013 Share Posted December 10, 2013 Looks great Scott, thanks for the photos! Jim Quote Link to comment Share on other sites More sharing options...
Prostreet Posted December 10, 2013 Share Posted December 10, 2013 Very nice mockup on the Tin Scott. looks great Quote Link to comment Share on other sites More sharing options...
Randytheroadrunner Posted December 10, 2013 Share Posted December 10, 2013 Scott, this looks great! I'd like to do a Dodge Mirada like this. Quote Link to comment Share on other sites More sharing options...
futurattraction Posted December 10, 2013 Author Share Posted December 10, 2013 Thanks Joe. I appreciate it! Does anybody make a Mirada in 1/24-1/25th scale? It'd be cool, for sure. Quote Link to comment Share on other sites More sharing options...
futurattraction Posted December 10, 2013 Author Share Posted December 10, 2013 I hope to post some pics of roll cage construction over the next while. I'll start with a pic of the jig I made. I drew up the dimensions and shape in my CAD program, printed it and cut it out and taped the silhouette of it in the pan so I could see how it would fit. After a bit of tweaking, I was happy with where things fit, then laid out the points where the .080 styrene rod would wrap to place the bends. I had to buy a heat gun a couple weeks ago to de-solder an old metal doll body for my wife, so used the heat gun to help set the bends in the main hoop. More to come... Quote Link to comment Share on other sites More sharing options...
tyrone Posted December 10, 2013 Share Posted December 10, 2013 Looking good Scott.... Quote Link to comment Share on other sites More sharing options...
futurattraction Posted December 10, 2013 Author Share Posted December 10, 2013 Thanks Tyrone. Eventually I want to scratch build a full tube chassis like you've done in a lot of your most recent builds. It would definitely offer more flexibility in design. Quote Link to comment Share on other sites More sharing options...
Magic Photos Posted December 10, 2013 Share Posted December 10, 2013 Nice work Scott. Quote Link to comment Share on other sites More sharing options...
comp1839 Posted December 12, 2013 Share Posted December 12, 2013 love the tin work scott. cage is starting off on the right foot!!! Quote Link to comment Share on other sites More sharing options...
bytownshaker Posted December 12, 2013 Share Posted December 12, 2013 Looking good Scott, keep up the fantastic work!!! Edgar Quote Link to comment Share on other sites More sharing options...
futurattraction Posted December 16, 2013 Author Share Posted December 16, 2013 (edited) I was able to make a bit of progress on the roll cage, but more so the pan, over the weekend. I’m working on the door cross-bars and really need to get them finalized so the main hoop is totally locked in before I can do much more on the rear half of the car. I was able to add the bulkhead between the tubs and add a section of filler that spans the width of the rear window. This is where I kind of picked up from at the start of the weekend This pic shows a bit farther along in the process. I'm lousy at documenting step-by-step construction like lots of you guys are. Wish I was better, but oh well... It's kind of hard to tell from this angle but there is actually some curvature to the filler strip. It's a pretty tight fit to get the pan in since the package shelf piece stays with the pan and must fit up between the rear window framework and the deck lid flange. This shot is before I added any filler to in the strip. I'm now trying to get an idea how the diagonal tubes will fit into the equation. Closeup of the previous shot. I'm using aluminum tubing so it will be straight and more rigid than styrene rod. Edited December 18, 2013 by futurattraction Quote Link to comment Share on other sites More sharing options...
outlaw105 Posted December 16, 2013 Share Posted December 16, 2013 Man thats some nice work you are doing! I ordered some parts from you yesterday and i definitely cant wait to see them. Quote Link to comment Share on other sites More sharing options...
comp1839 Posted December 16, 2013 Share Posted December 16, 2013 scott, your documenting skills are as incredible as your work!!!! this.......is gorgeous!!!!! Quote Link to comment Share on other sites More sharing options...
blackbeard Posted December 16, 2013 Share Posted December 16, 2013 x3 Quote Link to comment Share on other sites More sharing options...
futurattraction Posted December 17, 2013 Author Share Posted December 17, 2013 (edited) Thanks for the kind words, Ronnie. FYI, your parts went out yesterday. Thank you, Dave. I don't feel like I do as good a job of documenting as several guys, here. My situation isn't real conducive to doing lots of photography as I go. Hey thanks Henry - I appreciate it. I got some more work done last night. Got both sets of door bars in. As much as possible, I want to create the illusion that all the tubing is tied together. It won't always play out that way, but it's my goal. This shot demonstrates that intent. After getting the remainder of the tubing in, I intend to remove the entire cage so it can be painted a different color from the pan. More to come! Edited December 18, 2013 by futurattraction Quote Link to comment Share on other sites More sharing options...
Magic Photos Posted December 19, 2013 Share Posted December 19, 2013 Looks great Scott very nice work. Quote Link to comment Share on other sites More sharing options...
Recommended Posts
Join the conversation
You can post now and register later. If you have an account, sign in now to post with your account.
Note: Your post will require moderator approval before it will be visible.