

drpndstroy
-
Posts
36 -
Joined
-
Last visited
Recent Profile Visitors
1,993 profile views
drpndstroy's Achievements
MCM Regular (3/6)
-
 yea i got it i had another incident which broke my knee again and was bed ridden for over a month, hope to get back on my models hell I'll try to break something out today and see what i can come up with
 -
Abell does it not bother you that the interior tub is entirely inaccurate for being from the convertible? the actual size of the back seat and rear tubs and what not, it's more represented by the GT/Cobra Hatch rear back seat, I'm actually gonna give it a go with scratch building so that stuff looks a little more realistic than just a flat trunk separator where the third brake light is just added to to a vert interior tub.
-
1988 Ford Mustang (Snot Rocket) my 1:1 replica project
drpndstroy replied to drpndstroy's topic in WIP: Model Cars
WOW i didn't even notice that lol. so what is the answer for that? do i lower that mm difference on the bottom of the window or just try to hide it in my fabrication stage? what did you do to compensate on frankenstang there abelle? -
1988 Ford Mustang (Snot Rocket) my 1:1 replica project
drpndstroy replied to drpndstroy's topic in WIP: Model Cars
doesn't look like much but I'm taking every precaution to make sure this thing is perfect, so only one quarter window in progress but it's darn good progress in my eyes -
1988 Ford Mustang (Snot Rocket) my 1:1 replica project
drpndstroy replied to drpndstroy's topic in WIP: Model Cars
http://www.modelcarsmag.com/forums/index.php?showtopic=52275&hl=%20mustang%20%20lx&st=0 -
While work on my AMT Model T project is going well it has been eating me alive thinking about getting started on my 1:1 Fox Mustang LX with most of my inspiration coming from Frankenstang. I won't waste any time with fluff or reason right this second. The three kits I'll be bashing together to get my coupe done since quarter windows seem to be the biggest problem areas for most resin bodies i simply went outside and blueprinted my quarter windows sketched out on some styrene sheet
-
sweet build way to think outside the box
-
gate to dig up a dinosaur post but what color paint is that? brand and what not I'd like to try to match it for my 1:1 mustang
-
AMT 1925 Ford Model T (first model in 10+ years)
drpndstroy replied to drpndstroy's topic in WIP: Model Cars
I'll leave this one as is just to get the hang of detailing until i can order the right scale stuff as my local RadioShack doesn't stock 30 AWG wire. I'm not going for perfect on this one i just want it clean and completed...that's why it's not getting any drastic body mods or anything. now when i get started on my fox body coupe EVERYTHING will have to be perfect. this one will be ok though it's just for me to practice stuff like wiring and braided hoses and what not. it's pretty much my learning curve. I hope to get as in depth as Romell's 67 Chevelle when i do my fox body mustang -
plug wires and painted carbs...wasn't happy with the height of the magneto so i shortened it a lot
-
AMT 1925 Ford Model T (first model in 10+ years)
drpndstroy replied to drpndstroy's topic in WIP: Model Cars
Painted the Body with a custom mix painted the carbs and wired up the plugs (the wire scale is way off but I'm just getting back into the hobby) -
First a little background story about me before we get to the pics. It's been at least ten years or better since I've touched models, that being said my skills are rusty, my talent (or lack there of) is poor as i was young back then and most of them were just glue bombs and I was quick to lose interest with every kit i started when i first got into detailing them years ago. So this will be the first of what i hope to be many projects to increase my knowledge and modeling skills. I've got several other "old" projects I want to pick back up but i chose this AMT Model T kit to knock the dust off and actually successfully complete one without wasting an entire "tube" of glue ( I used to use testors now i use Extreme Power thin and medium CA ). Furthermore I was in a severe auto accident back on Christmas eve 2011 and video games kinda ran their course and now I want to stir the modeling nerve again so that i can achieve my end goal which is building a Fox Body Mustang Coupe to match my 1:1. But enough blabbering about my past and on with the show... Smoothing the firewall gap Carved the tires and filed the wheels both from different kits to get the style I wanted for this particular build Painted the motor Primed the body Wrapped the headers and then Sharpie'd/painted them
-
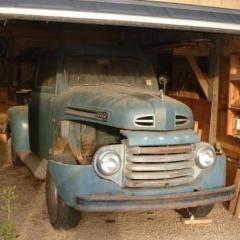
well had it not been for the new paint rack i would have never realized that i had a few duplicates of select paint colors so I'm happy i took a few hours to organize years of disarray. and the dually is one of those old projects from years ago that i plan to revive after i get done with some of the new projects that I've selected to get me back into the hobby.
-
Any Clubs in North Carolina?
drpndstroy replied to drpndstroy's topic in Model Club News and Announcements
great video and i would like to breath some younger new life into the club, I'll see if i can't get a few friends together and see if we can find out about this Charlotte club that video seems like what i remember NASCAR being as a kid...they don't even run sanctioned events at Rockingham anymore! -
what grade fishing line is that?