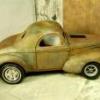
RyanSilva Posted November 17, 2009 Share Posted November 17, 2009 (edited) Today one of my most wanted truck kits arrived, the ford C-600 stake truck. The plus side to getting the stake truck kit rather than the semi tractor kit, is it come with two frames, one to build the semi anyways..so win win! I bought the kt for the 5 spoke wheels, to modify and pull resin copies, but I started to build the truck today. The frame assembles easy, which is a big plus, and surprisingly not much flash on the cab..seriously, just two mold lines on the back. Surprising since this kit is almost 40 years old. The downer as with most big truck kits is the suspension, very thick mold lines. only way to really get rid of them is to build your own leafs, but I wont do that, as the kit will never get finished! I assembled the whole frame including crossmembers and radiator, to be painted as one. suspension will be partially painted with the chassis, some things are just mocked up. I'm going for a weathered plow truck, you know the 500 dollar special, that sits on the work parking lot all year waiting for the big storm, to be fired up. I will most likely be using budd 6 hole wheels on this. Plow is from the Lnt8000 dump truck. It will use a flat bed and maybe the sanding gear, with a box of sand in the back, possibly some manual labor pitching sand into the shooter! Edited November 20, 2009 by RyanSilva Quote Link to comment Share on other sites More sharing options...
Jim B Posted November 17, 2009 Share Posted November 17, 2009 Should be interesting! Quote Link to comment Share on other sites More sharing options...
RyanSilva Posted November 17, 2009 Author Share Posted November 17, 2009 Thank's! This little guy sparked new energy into me, I love it. I'm thinking of painting it as a retired freight truck in roadway transit colors, or maybe even CF , Carolina or Yellow Freight (my four favorites) complete with painted over company names etc. I managed to get most of the build into the "tape" stage, this plow is big, I might have to adjust where its mounted on the front, since the guide wheels/sliders do not touch the ground. Quote Link to comment Share on other sites More sharing options...
mackinac359 Posted November 17, 2009 Share Posted November 17, 2009 Cool idea! Tim Quote Link to comment Share on other sites More sharing options...
Foxer Posted November 17, 2009 Share Posted November 17, 2009 Neato, Ryan! Definitely needs a sander in back ... this IS New England after all. And get that dremel to work grinding out the salt holes in the body ... Quote Link to comment Share on other sites More sharing options...
Brizio Posted November 17, 2009 Share Posted November 17, 2009 Looks very nice! Quote Link to comment Share on other sites More sharing options...
Chuck Most Posted November 17, 2009 Share Posted November 17, 2009 Great idea for the C-cab! My only question: How's the cab going to tilt with the plow in place? Quote Link to comment Share on other sites More sharing options...
RyanSilva Posted November 18, 2009 Author Share Posted November 18, 2009 I added some longer frame extensions to mount the bumper a little more forward so the cab can tilt. I may or may not use the peterbilt bumper. I just mocked up the front half of the hydraulics to get a visual, I need to trim down the extensions. Hosted on Fotki Hosted on Fotki Hosted on Fotki Quote Link to comment Share on other sites More sharing options...
Twist67 Posted November 19, 2009 Share Posted November 19, 2009 Hi Ryan, nice looking plowtruck....Keep it going. You have pm... Regards,Chris Quote Link to comment Share on other sites More sharing options...
RyanSilva Posted November 19, 2009 Author Share Posted November 19, 2009 Thank's Chris, If I decide that route, I'll take you up on it! thanks! I'll be putting a flatbed on it, and building a sander. I decided to go 4wd. A friend Dan (southgate) convinced me too My monogram Quadzilla unbuilt had a transfer case I'm gonna pull a mold from it. No doubt I'll need a few copies for my louisville's. Axle is from a AMT Peterbilt wrecker. It was a very poor gluebomb I bought off ebay, the glue used has some ridiculous strength to it, so the whole chassis is unusable. Springs are from a Louisville with the helper's cut off. I have two options, raise the cab, cab mounts and engine, or cut off the bottom half of each spring and add more to it to raise the shackles. I'm going with the latter...much easier. Now, to get this to work..because this thing looks tough! Tires are from Italeri Volvo fire ladder, I gotta cast these things, hardest thing is getting 20 inch 1/25 scale wheels to fit 20 inch 1/24 tires. Front wheel s are my resin budd wheels with the rear floater hub glued to the front. Right now it's just sitting inside the Italeri sleeves between the two piece tires. Quote Link to comment Share on other sites More sharing options...
Modelsbyroni Posted November 19, 2009 Share Posted November 19, 2009 THATS GOING 2 B A NICE BUILD. Quote Link to comment Share on other sites More sharing options...
stangman Posted November 19, 2009 Share Posted November 19, 2009 awesome build Quote Link to comment Share on other sites More sharing options...
RyanSilva Posted November 20, 2009 Author Share Posted November 20, 2009 I started on the suspension. It's kinda funny, how I expected this to be a straight forward build..but to my surprise it's going smoothly. I added some sheet stock and made some new attachments to gain some height, so my differential would clear the oil pan on the engine. Drilled out some holes for some O scale bolts to be used. I have to finish the axle and add some ends on them to make steerable wheels. I need to fill in that dimple on the leaf springs..one thing I always hated about AMT/Ertl components. It should be a tad lower when complete. Quote Link to comment Share on other sites More sharing options...
Kostas Parchas Posted November 20, 2009 Share Posted November 20, 2009 W O W ! ! ! That's a good one. Kostas. Quote Link to comment Share on other sites More sharing options...
RyanSilva Posted November 20, 2009 Author Share Posted November 20, 2009 Thankyou Kostas! I added some tubing to the axles, this fits the leaf spring holes perfect. I cut the bottoms off the leaf springs so I could glue the right side on, I will reattach them when it comes time for assembly. The skinny axle is the stock front from the c600 kit, so I cut the ends of and filed down the insides to square them up, so they will fit over the tubing ends on the new heavy axle. I will most likely need to make tirerod ends, which won't be a big deal. now to start the rear! Quote Link to comment Share on other sites More sharing options...
RyanSilva Posted November 21, 2009 Author Share Posted November 21, 2009 I'm plowing away at it..LOL I'm not sure what size tubing this is, but all I know as it saved my but on this build. I cut the ends of the axle tubes to the correct width, however, not sure on which wheel's I'm using I made little bungs to insert into the tubes so I can mock up each wheel assembly and just push it onto each axle end. On each bung there is some tubing drilled to mount the steering knuckles on, this gives me positionable wheels too. I'll finish the other side, mock up the rear and get the rear springs and transfer case into resin, before I go any further, I'll need them for some 4x4 and 4x6 Louisville! Hosted on Fotki Hosted on Fotki Hosted on Fotki Hosted on Fotki Hosted on Fotki Quote Link to comment Share on other sites More sharing options...
Ben Posted November 21, 2009 Share Posted November 21, 2009 Wow! That is some awesome work!!!!!! Your as sick as I am! LOL Do you want me to make a set of these wheels fit those larger Italeri tires? I'll try to get going on them this weekend. Quote Link to comment Share on other sites More sharing options...
Kostas Parchas Posted November 21, 2009 Share Posted November 21, 2009 Hi Ryan, The progress of your truck is very fast ( that is good for me cause I like to see others work ) and of course it s amazing!!! I have seen in the past other modelers modifications on working steering but this is my first time seeing someone doing a 4x4 modification. It is very cool. Ben, All of us, we are sick!!! and you know what's the problem about this sickness? It needs muuuuuuuuuuch €€€€€/$$$$$ money and something that I don't have, FREE TIME..... Kostas. Quote Link to comment Share on other sites More sharing options...
RyanSilva Posted November 21, 2009 Author Share Posted November 21, 2009 Thanks guys, and Ben, no it's ok, I can get them to work the way they are, I might not use budd wheels in the back, to make it easier. Using Google Sketchup, I drew out the sander box, using rough guesstimates I wrote the drawing in feet, then used the feet as inches for the print out so it will scale out close to what I wanted. I cut out the drawing, and used the patterns to transfer the dimensions over to styrene. The key is to produce one accurate pattern, from there you use that as the template. Using double sided scotch tape i held down the original and placed it on scrap styrene, then a regular hobby knife and 11# blade i scribed a few times the outline of the pattern. Now I ran out of styrene, I will have to look for my stockpile, or just pick up some "for sale" signs from the store today I want to finish this box tonight. Quote Link to comment Share on other sites More sharing options...
RyanSilva Posted November 22, 2009 Author Share Posted November 22, 2009 I cut out the sides of the hopper, and added some strip to help guide the other sides into place, to help get a even edge. I wont be using the plastic flatbed but It does give me some idea how the wood one will look. I will add vertical borders around the top of the hopper, then the conveyor bottom (just strips) and then the reinforcements. Quote Link to comment Share on other sites More sharing options...
Aaronw Posted November 22, 2009 Share Posted November 22, 2009 This is turning out to be quite a project, the 4x4 is a nice addition. Tbe power company out here used to run some big 4x4 C cab boom trucks in the mountain areas. Quote Link to comment Share on other sites More sharing options...
RyanSilva Posted November 22, 2009 Author Share Posted November 22, 2009 Thx Aaron! I'm happy I went with 4x4 Gives me some ambition got the Louisville. Quote Link to comment Share on other sites More sharing options...
Old Albion Posted November 22, 2009 Share Posted November 22, 2009 Ryan, Very impressive! Its amazing the interest this little Ford kit has generated. I will certainly be watching the progress on this one. Dave Quote Link to comment Share on other sites More sharing options...
RyanSilva Posted November 22, 2009 Author Share Posted November 22, 2009 I'm a huge fan of these little guys, Like how some are nutty for macks and Pete's..I'm the same way for the L and C series Fords I added bolt heads to the rubber edge at the bottom of the plow and one half of the suspension in the front. Hosted on Fotki Quote Link to comment Share on other sites More sharing options...
RyanSilva Posted November 23, 2009 Author Share Posted November 23, 2009 (edited) Steaming Along.. I finished one side of the hopper and the bottom half where the conveyor sits. I added some scrap plastic to the inside to reinforce the channel, I will add a plate inside so it can look more full than it really is, when it comes time to add the sand/salt. Edited November 23, 2009 by RyanSilva Quote Link to comment Share on other sites More sharing options...
Recommended Posts
Join the conversation
You can post now and register later. If you have an account, sign in now to post with your account.
Note: Your post will require moderator approval before it will be visible.