Porscheman Posted November 17, 2012 Share Posted November 17, 2012 (edited) I remember this kit from years ago, but back then I didn't like them. Now I'm the proud owner of a 1 to 1 1982 928S and love it. So this will be exact replica my car. The kit is very close in scale to my AutoArt 1:18th 928. This had a motor in it in earlier issues, so the rear axel and suspension needs a lot trimming to get everything fit right. I'll post more pictures of the build shortly Al Edited November 20, 2012 by Porscheman Quote Link to comment Share on other sites More sharing options...
Fat Brian Posted November 17, 2012 Share Posted November 17, 2012 If this is more of a build thread than a kit review you should probably restart this in the On the Workbench section. Quote Link to comment Share on other sites More sharing options...
bryan_m Posted November 17, 2012 Share Posted November 17, 2012 nice 1:1 porsche, my buddy mike has a black one.......not as nice lookin as yours though, his needs some TLC for sure, the paint is faded bad. cheers bryan Quote Link to comment Share on other sites More sharing options...
Porscheman Posted November 17, 2012 Author Share Posted November 17, 2012 (edited) Thank you Bryan. It's a labor of love. Here an engine shot during and after I rebuilt it and my perfect plate. Al Edited November 17, 2012 by Porscheman Quote Link to comment Share on other sites More sharing options...
Foxer Posted November 17, 2012 Share Posted November 17, 2012 You definitely got a clean one there. It's amazing how many of those are stuck in a garage and rarely driven! I had 5 water-cooled Porsches and drove them daily .. including Northeast winters. They never let me down and were the most rust free cars I ever owned. Will be looking forward to seeing the build up on this. Quote Link to comment Share on other sites More sharing options...
WizPorsche944 Posted November 17, 2012 Share Posted November 17, 2012 I am buying this kit soon. Cant wait to watch this build ! Quote Link to comment Share on other sites More sharing options...
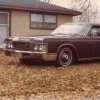
Porscheman Posted November 17, 2012 Author Share Posted November 17, 2012 (edited) Since I've already painted the body and smoked the rear windows to mach my car. Here is some things that need to be cleaned up before painting. There is a large mold lines on front fenders near the top of the fenders, front bumper on top and along the side corners and the rear bumper under the PORSCHE and down the sides. Also the front fenders where it curves towards the hood are too sharp and need to be rounded. Start at the windshield and move to the front. You want to sand more near the windshield and less as you move forward, just make sure it more rounded. I think this picture of the 1to1 will help you. Also if your doing a US version, don't forget to relocate your front side marker from in front the door to behind the bumper. Al Edited November 17, 2012 by Porscheman Quote Link to comment Share on other sites More sharing options...
Porscheman Posted November 18, 2012 Author Share Posted November 18, 2012 I'm not real good with a camera, but I've been building model cars for 52 years. That being said, here's some pictures of the 928S by Tamiya. Quote Link to comment Share on other sites More sharing options...
Bennyg Posted November 18, 2012 Share Posted November 18, 2012 Nice. I'm building a replica of my car (subaru brz) when I finally get the real one in May 2013. Will be watching this one. Ben Quote Link to comment Share on other sites More sharing options...
Porscheman Posted November 20, 2012 Author Share Posted November 20, 2012 (edited) Thanks everyone for all the nice compliments. This is a nice kit, but has a lot of things that need to be addressed to make it a true replica. 1st off, on the box picture on the side shows the dash portion in the engine compartment show it to be body color. This is not incorrect, it should be semi-gloss black. The rear axle has lot of play in it. They supply 8 poly caps, 2 for each wheel. I used 1 for the wheel and the other for an adjustable spacer. This allows for perfect positioning of the wheel placement. Next, the front wheels stick out too far. Tamiya uses a metal pin to hold them in place. to correct this, put only 1 poly cap in each wheel , trim the wheel hub back to the to of the cap using hobby cutters and then cut a 1/16" off the metal pin. This will give a perfect stance.Next the Interior, the tub is made up of 3 separate pieces. The dash/console, hatch area and the floor board. The door panel attach to the inside of the body. Make sure you paint the inside of the body to match your interior. also the sunroof edge need to be painted flat black, on the real car there is a black gasket around the sunroof that can be seen from the outside. I will post pictures of the 1to1 interior later today. Al Edited November 21, 2012 by Porscheman Quote Link to comment Share on other sites More sharing options...
Recommended Posts
Join the conversation
You can post now and register later. If you have an account, sign in now to post with your account.
Note: Your post will require moderator approval before it will be visible.