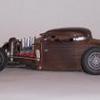
kasteer Posted January 9, 2008 Share Posted January 9, 2008 I tried a wash for the first time on the engine of my green 41 Willy's and it came out ok. I super thinned out some flat black with thinner and put it on lightly with a brush. I tried the same on a door panel to try to get some depth and a different shade but it looked bad and I repainted it. What's the trick to wash???? I'm not sure I get it. Quote Link to comment Share on other sites More sharing options...
Raul_Perez Posted January 9, 2008 Share Posted January 9, 2008 I tried a wash for the first time on the engine of my green 41 Willy's and it came out ok. I super thinned out some flat black with thinner and put it on lightly with a brush. I tried the same on a door panel to try to get some depth and a different shade but it looked bad and I repainted it. What's the trick to wash???? I'm not sure I get it. Eric, What paint did you use for the wash? (Brand/type) What did you use to thin it? That may be why you didn't like the results. Some thinners will attack the paint and leave a lot more of the wash behind than you intended. I like using the Tamiya acrylic paints for my washes. They thin with either water or Isopropyl alcohol (rubbing alcohol from the drug store). When thined with water, you can often wash it off (if you catch it quickly) if you don't like the affect. For interior parts, I often spray a light coat of Testors Dull Coat on before the wash. After the wash is applied I'll lightly rub the top surfaces of the parts with a mild 3M scuff pad. That leaves the wash in the recesses and gives various shades of "wear" to the highlights. Regards, Quote Link to comment Share on other sites More sharing options...
jbwelda Posted January 9, 2008 Share Posted January 9, 2008 yeah like raul implies, a wash is a pretty subtle thing, or can be. i use the detailer stuff...the last detail maybe its called. comes in a number of colors. reason i use this is again as raul says it wont attack paint like thinner will. i usually slop it on or even dip a part in it. then i set it aside to dry for a couple hours, then come back with a damp (as in stick in my mouth) q-tip and wipe off the highlights. sometimes wipe it down almost back to where it was except there will still be wash in the cracks and crevices. if you wipe off too much just reapply and wipe again, this time more lightly. if you use the black on light metal simulating paints like metalizer or even chrome silver, it will dull it down and will look like alloy. if there are little dimples in the paint, or slight orange peel, it will accentuate that...good on bare metal because it gives it texture. you can also make a nice wash with india ink diluted with water, or paint even as long as you dont use the same type of wash as it will tend to soften and/or remove the paint it is applied on. again a wash is a subtle thing but can be very convincing when worked around. the best part is it can be removed and reapplied without damage and each application will build it up a little more. Quote Link to comment Share on other sites More sharing options...
kasteer Posted January 9, 2008 Author Share Posted January 9, 2008 I used the same testor's paints I had. I guess I'll look at a different paint (like the Tamiya Acrylic or the india ink you mentioned) to do this. I defintely saw my method reacting with the paint! I like the idea of water to thin it. Quote Link to comment Share on other sites More sharing options...
Olle F Posted January 9, 2008 Share Posted January 9, 2008 I second what Raul and Bill said. IMO, washes are kind of a trial and error thing, you never know what it's gonna look like until it's done. That makes it important to use something that A: Does not attack the base paint and B: Can be easily washed off if you don't like the result. It's safe to use an acrylic wash on an enamel or laquer base, it's a reversible process that allows for screw-ups. I usually build up the wash in several applications. That way, I have better control of the way it's gonna look. Apply, let it dry, re-apply and repeat until it looks good, and if necessary I shoot a thin coat of clear on it to protect it. Another thing you may want to experiment with is to use other colors than black. For example, it can look better to use a dark red wash on a red engine block, dark grey on an aluminum intake manifold etc. Quote Link to comment Share on other sites More sharing options...
Raul_Perez Posted January 9, 2008 Share Posted January 9, 2008 There you go, Eric, another problem solved. What's next? You gotta just love this place!! Quote Link to comment Share on other sites More sharing options...
CAL Posted January 9, 2008 Share Posted January 9, 2008 these are some good ways to do washes. Personally, I use inks and alcohol and often, particularly, on flat finishes I go over that with a super thin mix of color and an airbrush to soften it up. Quote Link to comment Share on other sites More sharing options...
Guest Davkin Posted January 9, 2008 Share Posted January 9, 2008 I usually use craft acrylics. They are cheap and easy to mix up in any color you need if none of the hundred or so colors on the shelf are what you need. Another tip for washing panel lines, washes made with an extra dark version of the color the body is painted are more realistic than using straight black. Another tip for panel lines, while prepping your body for paint scribe the panel lines deeper, and rescribe after every time you put down a coat of primer. The shallow lines the bodies come molded with quickly get filled up with paint and then won't take washes well. David Quote Link to comment Share on other sites More sharing options...
kasteer Posted January 10, 2008 Author Share Posted January 10, 2008 Wow. Thanks for all the valuable input. I'm learning alot! I'm stopping by the hobby shop tomorrow and plan to pick up some acrylic. And some med tape for seat belts at the grocery store. I'm eager to try this now that I can "erase" it if I don't like it. Eric Quote Link to comment Share on other sites More sharing options...
j_nigrelli Posted January 10, 2008 Share Posted January 10, 2008 just like weathering, sometimes a "wash" doesn't appear to have done anything until you see the dried result. i think you could use a blow dryer to speed things up but i just move on to something else for awhile. also, if there are going to be subsequent washes, you might consider a barrier coat in between so the second or third wash doesn't act as a solvent to the previous coats and turn everything to mud. like everything, practice is the key Quote Link to comment Share on other sites More sharing options...
bobss396 Posted January 10, 2008 Share Posted January 10, 2008 Ditto on the craft store acrylics, dirt cheap and they do the job. Even the Tamiya acrylics are great and if you don't like what ya got, a spritz of Windex, a rinse and you're back to square one. Bob Quote Link to comment Share on other sites More sharing options...
cruz Posted January 10, 2008 Share Posted January 10, 2008 I used the Detailer on these Stromberg carbs, it has always worked fine for me. Just remember that less is more...... Quote Link to comment Share on other sites More sharing options...
kasteer Posted January 11, 2008 Author Share Posted January 11, 2008 Wow awesome carbs! They look perfect / real. I picked up 4 bottles of acrylic (Tamiya) today (to start...). I darkedened some tan in a contained and thinned it with water and tried it out. Being able to wash it with windex and start over is GREAT! I used the darnened tan on the tan interior and it came out ok. Definitely need to practice and develope my own technique. Definitely trying to keep it to a minimum... but if I don't like it after it dries I'll just windex it a little... or a lot. : Also used some dark gray on some engine parts and I'm very happy how that came out. Thank you for the guidance. I'll put up some pics of it in the "under glass" section. Eric Quote Link to comment Share on other sites More sharing options...
CAL Posted January 11, 2008 Share Posted January 11, 2008 Here is another example or washes done with Detailer, and W&N inks. Quote Link to comment Share on other sites More sharing options...
MikeMc Posted January 11, 2008 Share Posted January 11, 2008 (edited) these wheels and rotors were both washed with tamiya acrylic black and alcohol thinned 1 part paint to 6 parts alcohol. it may take 2 or 3 washes to get what your looking for..also sometimes with a bright base a lite wash will make details pop out like the manifold on this motor! All my bases are lacquers so I can remove excess wash with my erasure! Edited January 11, 2008 by MikeMc Quote Link to comment Share on other sites More sharing options...
kasteer Posted January 11, 2008 Author Share Posted January 11, 2008 Those look really good! I'm going to have to get good at using a wash because it makes a world of difference... like Pro Football vs College Football. Thanks for the great examples! I now have high goals to shoot for. Quote Link to comment Share on other sites More sharing options...
CAL Posted January 11, 2008 Share Posted January 11, 2008 Then there is advanced techniques, post shading, preshading, shading over washes, which softens the effect for interiors. Quote Link to comment Share on other sites More sharing options...
Raul_Perez Posted January 12, 2008 Share Posted January 12, 2008 Then there is advanced techniques, post shading, preshading, shading over washes, which softens the effect for interiors. Nice work!! I love building Sci-Fi stuff, especially SF3D and Star Wars stuff!! Quote Link to comment Share on other sites More sharing options...
Robert81 Posted January 13, 2008 Share Posted January 13, 2008 I'm glad you are getting a better response than I got. I can use these tips to get my project under way, again. Quote Link to comment Share on other sites More sharing options...
CAL Posted January 13, 2008 Share Posted January 13, 2008 (edited) Nice work!! I love building Sci-Fi stuff, especially SF3D and Star Wars stuff!! Thanks, but it's not sci-fi lol. Works good for that, too, though. It's actaully a WWII Japanese Imperial Navy Seiran, or Sub Plane. I was a cool little, well not so little, two place fighter attack plane the folded up into a small enough pakage that the Japanese could put three on specailly modified I-400 (the biggest sub built during WWII; biggest sub until 1960) class subs. Photo courtesy of the Smithsonian Washington D.C. The idea was they cross the Pacific emerge off the cost of California and launch a bunch of Seirans. Edited January 13, 2008 by CAL Quote Link to comment Share on other sites More sharing options...
Raul_Perez Posted January 13, 2008 Share Posted January 13, 2008 Thanks, but it's not sci-fi lol. Works good for that, too, though. It's actaully a WWII Japanese Imperial Navy Seiran, or Sub Plane. Thanks for the clarification, Cal!! The only WWII stuff I build are figures and land vehicles put into small dioramas, so I easily mistook the cockpit for a Sci-Fi piece, which I also build a lot of. You're correct, the techniques carry over to any type modeling type. I actually learned a lot about weathering from the train modeling guys. From what I've seen, they know how to weather anything and make it look completely realistic!! Too many hobbies and not enough time... Quote Link to comment Share on other sites More sharing options...
Recommended Posts
Join the conversation
You can post now and register later. If you have an account, sign in now to post with your account.
Note: Your post will require moderator approval before it will be visible.