Wagoneer81 Posted May 18, 2010 Share Posted May 18, 2010 (edited) You're on the right track with the modified Roo-bar. I'd keep going the way you are, it's looking pretty good. You're keeping the basic shape of the Ford bumper which is a plus. I'd keep what you've got, cut some Evergreen tube to replace the bars on the sides you widened, make the bars body colored with the chrome uprights and run with it! It would look similar to this with a little color added. Well, color match your bars and it would look like a photo negative of this... I did this to cover up where I had to remove some very heavy flash from mine. yes, that's the T-900 Aussie I'm working on... Now, on to the mural. You've made a sleeper side that almost has the dimensions of a Hi-Def TV screen so I'd go "widescreen" on the mural... I'd take your original mural (Which is beautiful, BTW) and crop and widen it to take up most of the sleeper side. A bit off the bottom and about a 1/2" off the sky Keep maybe a 1/4" of body color around it as a frame... It'll be an interesting truck, whatever you decide to do. Edited May 18, 2010 by Wagoneer81 Quote Link to comment Share on other sites More sharing options...
Kostas Parchas Posted May 18, 2010 Share Posted May 18, 2010 Hey Highway, I am not moose bars fan too, but what you have done so far is very nice. I would suggest you to leave it as it is. I like the way it looks with the fog lights hidden below the moose bar's bumper. Keep on, I like this rig!!! PS. You should use only round fuel tanks and not square. Square fuel tanks dont match (in my eyes ) Kostas. Quote Link to comment Share on other sites More sharing options...
highway Posted May 18, 2010 Author Share Posted May 18, 2010 Thanks for the help so far guys, and I like the body color idea on the uprights, Wagoneer! I noticed the quite heavy mold seam, and that was going to be the next thing I was going to tackle! I already have some K&S aluminum tubing to replace the kit's bars, too. The mural is also getting reworked slightly, it will be a little longer and a little thinner in height. By the way, Kostas, the two square tanks I was planning on using are for the sleeper water storage, and the biggest problem I have is a very limited truck parts box, so I had to use the tanks from two Italeri truck accessories sets! I would liked to have them all round, but it's all I got!! Quote Link to comment Share on other sites More sharing options...
cowboysevens Posted May 18, 2010 Share Posted May 18, 2010 i like the mural highway, have you thought of cutting it into an oval or maybe round the corners ? just a thought. how long before your gonnna need those tanks, ive got a bunch of tanks. ill be back in states around the 5th of june. if i can help you out ill ship them to ya as a lil contribution to the cause. dennis Quote Link to comment Share on other sites More sharing options...
highway Posted May 18, 2010 Author Share Posted May 18, 2010 i like the mural highway, have you thought of cutting it into an oval or maybe round the corners ? just a thought. how long before your gonnna need those tanks, ive got a bunch of tanks. ill be back in states around the 5th of june. if i can help you out ill ship them to ya as a lil contribution to the cause. dennis Thanks Dennis! It is still going to be a little while till I need them, I'm still finishing the body work and haven't even started on the engine, yet. I haven't thought about rounding the corners of the mural, but that sounds like a good idea, that was just a rough paper mock up of the mural, anyway, not the finished product. I figure some of the colors will (hopefully) blend into the final paint job as well. It will be painted Duplicolor Mirage Purple/Red flip flop. The rounded corners will probably soften it some when the red is the shade showing. Quote Link to comment Share on other sites More sharing options...
tanarries Posted May 19, 2010 Share Posted May 19, 2010 not looking bad highway cant wait tosee the finished project also i think a v16 would look nice in that thing lol Quote Link to comment Share on other sites More sharing options...
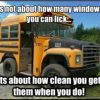
highway Posted May 21, 2010 Author Share Posted May 21, 2010 Thanks for all the ideas and kind words, guys! I have a little mini update on the bumper, and I found I had my answer sitting in front of me the whole time!! As you probably could already tell by my avatar and profile pic, I'm a huge fan of the Speed TV series, "Wrecked". I have the same pic of their truck named "Mistress" as my desktop background photo on both my main machine and the model desk laptop, and was staring into space (what's new!!) when I looked at the front bumper of the Mistress. I thought (which is rare for me ), "THAT'S IT!!! THAT'S THE LOOK I WANT!!", so I started boxing the stock Ford front bumper. I'm contouring the back of the bumper to follow the stock Ford's profile. I think boxing the bumper makes it look better with the roo bumper. Quote Link to comment Share on other sites More sharing options...
Kostas Parchas Posted May 21, 2010 Share Posted May 21, 2010 Very nice!!! Kostas. Quote Link to comment Share on other sites More sharing options...
whale392 Posted May 21, 2010 Share Posted May 21, 2010 Matt, it's looking good. I'm liking the front bumper idea, and the thoughts of fading the mural into the body color. Now, could you send me some motivation to work on my KW? Quote Link to comment Share on other sites More sharing options...
highway Posted May 21, 2010 Author Share Posted May 21, 2010 Very nice!!! Kostas. Matt, it's looking good. I'm liking the front bumper idea, and the thoughts of fading the mural into the body color. Now, could you send me some motivation to work on my KW? Thanks, guys, and for you Bradley, the best motivation I can send you on your KW is GET BACK TO WORK ON IT!!! Of course, I have to do the same for my T-Bird in the community build! Quote Link to comment Share on other sites More sharing options...
whale392 Posted May 21, 2010 Share Posted May 21, 2010 Well Matt, I will try to get something done on it tonight or in the morning before I go to work. Pics won't be up for a little while though........curse the 14 builds going at once! Quote Link to comment Share on other sites More sharing options...
tanarries Posted May 21, 2010 Share Posted May 21, 2010 whell whale if you ndd some insperation check out my build kw t600-a super kenepa WIP just a little somthing i cooked up looking very nice highway keep up the good worl Quote Link to comment Share on other sites More sharing options...
rronning84 Posted May 22, 2010 Share Posted May 22, 2010 Things are looking good. I am glad you got the bumper figured out. I cant wait to see it done. Quote Link to comment Share on other sites More sharing options...
highway Posted May 23, 2010 Author Share Posted May 23, 2010 I have the front bumper done, almost! I still have to figure out how I'm going to finish it, whether I'm going to use Alclad to rechrome it or BMF, but I added aluminum tubing for the bars themselves, since the stock bars were too short! I also have to make mounts, if I can do what I'm planning, the bumper will tilt with the hood, but also be removable. Here's a few pics of what the finished bumper will be after rechroming or painting. I don't think this would be the view you want in you're rearview mirror!! Quote Link to comment Share on other sites More sharing options...
whale392 Posted May 23, 2010 Share Posted May 23, 2010 Personally, I would remove the mold lines from the upright bars, and either Alclad or Spaz-sticks it. If I had the cash, time, and more part going that way, I would send it out for re-chroming. Quote Link to comment Share on other sites More sharing options...
huffanpuff Posted May 23, 2010 Share Posted May 23, 2010 in creditable! now can I net pick? could be the way picture was taken but, is one of the bars blocking the head lamp distorting the beam,No the answer isn't it's only a model, it's engineering! All & all you put much work into this front set up. Looking good highway> Quote Link to comment Share on other sites More sharing options...
highway Posted May 23, 2010 Author Share Posted May 23, 2010 Personally, I would remove the mold lines from the upright bars, and either Alclad or Spaz-sticks it. If I had the cash, time, and more part going that way, I would send it out for re-chroming. Already one step ahead of you, Bradley! I do plan on removing the mold line and either respraying with Alclad or using Wagoneer81's idea and paint the uprights body color. All the sanding I've done to shape the bumper, I just didn't get the uprights done, yet! Quote Link to comment Share on other sites More sharing options...
highway Posted May 23, 2010 Author Share Posted May 23, 2010 in creditable! now can I net pick? could be the way picture was taken but, is one of the bars blocking the head lamp distorting the beam,No the answer isn't it's only a model, it's engineering! All & all you put much work into this front set up. Looking good highway> Sure, Ken, I'll allow you to nit pick! I think some of the reason it looks like the bars are blocking the headlights, along with the "9000" in the grille, may be the way the picture was taken. I think some of it is also because I don't have the final mounts built yet, and if you look real close in the center of the bumper, you'll see the strip of masking tape holding the bumper to the front of the truck. I might be a redneck, but I won't have tape holding the bumper in place for the final assembly!! Seriously, though, when I get the mounts finished and the look I was going for when I was building the bumper up and almost continually matching up to the hood, that will be fixed. The look after everything is done will have the headlights framed by the outer bar sections and the "9000" in the grille will also be framed by the center section. Quote Link to comment Share on other sites More sharing options...
huffanpuff Posted May 23, 2010 Share Posted May 23, 2010 Lets see I have spent some time in truck stops in wv never thought of it as red neck unless you were a coal hauler. Although your population in 2000 was 817 & name three brothers well just may-be close to being red neck:lol:.they have it listed as a town in Ohio county,WV U.S.A. that kind of baffle's me:huh:. Well the time spent on this you may have to patten it. It will be a one of a kind & that is a good thing for I haven't seen anything close to it in pictures or this site. This is very good work . I watch your work progress & it makes me think did I miss anything on my own. It's a good thing. Quote Link to comment Share on other sites More sharing options...
tanarries Posted May 24, 2010 Share Posted May 24, 2010 think the bottom bar neds straitened out a little you must have hit one tomany bulls with it lol but seriously looking grate matt cant wait to see it done Quote Link to comment Share on other sites More sharing options...
highway Posted May 30, 2010 Author Share Posted May 30, 2010 think the bottom bar neds straitened out a little you must have hit one tomany bulls with it lol but seriously looking grate matt cant wait to see it done No, I didn't hit any bulls with it, a darn deer ran across the workbench right before I clicked the picture!!! I had to hit it since the brakes aren't installed yet! Quote Link to comment Share on other sites More sharing options...
highway Posted May 30, 2010 Author Share Posted May 30, 2010 It's update time again! I had been trying to figure out a mount for the bumper so it would move with the hood opening and closing, but no such luck. I finally decided to just make it removeable and made a simple mount out of two sizes of square brass tubing I had laying around. I did fix the height to where I wanted it so the crossbars of the bumper would frame the "9000" in the grille and also so the bars were not in front of the headlights. The first pic was taken lower down than the second, that's why it may appear like the bars are in different spots, but the bumper didn't move between the two! I also got some goodies from Eric (Porky) at P&P Vintage Kits & Resin Works for the truck. By the way, the breathers are not for this truck, I just got them to have on hand. Here is a mock up with the fenders and step boxes. And with the trailer: The trailer will hopefully be finished this week, and I plan to stop at the auto parts store to pick up the paint for the truck, and hopefully have some color on it this week as well. Quote Link to comment Share on other sites More sharing options...
Kostas Parchas Posted May 31, 2010 Share Posted May 31, 2010 I can't wait to see it painted... It is very cool! Kostas. Quote Link to comment Share on other sites More sharing options...
whale392 Posted May 31, 2010 Share Posted May 31, 2010 Is it crazy that the trailer will end up shorter than the tractor?! Quote Link to comment Share on other sites More sharing options...
huffanpuff Posted May 31, 2010 Share Posted May 31, 2010 Looks cool & like whale said, truck looks longer than trailer & that going down the highway would get many looks & comments because, of that look I am sure but, me I see it's a mock set up on how you may do AC & wind guard but, I would dump the headache rack. That's me! The fenders gives that whole truck a plus look. Quote Link to comment Share on other sites More sharing options...
Recommended Posts
Join the conversation
You can post now and register later. If you have an account, sign in now to post with your account.
Note: Your post will require moderator approval before it will be visible.