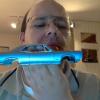
charlie8575 Posted April 12, 2013 Share Posted April 12, 2013 While I was sifting through some boxes in the cellar about two weeks ago, I cam across the box for one of my long-lost projects. This was prompted in part by seeing a couple of recent first-generation Riviera builds here. Those, being one of my favorite cars, got me to wondering what I had done with the parts of the one I had started around 8th grade or my freshman year in high school. That's the "long-lost" part, as that was between 1988 and 1990! I had started to build a then-current issue 1965 Riv, and typical for me at that point, the paint did not come out well at all. I put the body in the stripper tank (ammonia in a non-airtight plastic box), and it sat....for years. Fast forward to today, when I was finally able to re-locate the body and excavate enough so I could get over to it, and found parts from some other projects that will be back another day, too. This is the body shortly after I put it in my cleaning tank. It was covered with sticky messy residue, and I decided to memorialize the mess before the soap dissolved it all. This is what happens when a body is left and forgotten about since roughly 1990... This is the sorry excuse for an attempt to paint the interiror and some engine components. This engine will also have to be stripped and re-painted. Given the propensity of the yellow plastic to cause problems, I'm considering using this kit to experiment with an all-acrylic paint job, primer and all, just to see how it works. I'm leaning towards a light color for this, such as silver or light blue. Charlie Larkin Quote Link to comment Share on other sites More sharing options...
charlie8575 Posted April 12, 2013 Author Share Posted April 12, 2013 look forward to watching this one.. yea I remeber that yellow plastic being worse to work with than red... I am still trying to find good but cheap acrylic primer that I can run through my air brush. I'm probably going to simply use Model Master Acryl primer. While not "cheap" it covers well with decent opacity, so it's at least economical. I may also say bugger it and hit it with Dupli-Color or Plasti-Kote sealer primer, which will absolutely stop the problems. I'll be experimenting a little and seeing what works best. Charlie Larkin Quote Link to comment Share on other sites More sharing options...
charlie8575 Posted April 12, 2013 Author Share Posted April 12, 2013 I have just discovered I don't seem to have the hood and firewall for this one. Back down to the cellar to see if I can locate them. Worst case- if anyone has spares, if you could let me know. Absolute worst-case, I may just take the hood and do a curbside. Charlie Larkin Quote Link to comment Share on other sites More sharing options...
Foxer Posted April 12, 2013 Share Posted April 12, 2013 Woot, Charlie! Good to see ya at the bench! So, a first gen Riveria. I did one that was most likely an annual kit . like maybe in the early sixties. It sure wasn't yellow, though! Hope you can get all th ebody gunk cleaned off. Quote Link to comment Share on other sites More sharing options...
Foxer Posted April 12, 2013 Share Posted April 12, 2013 Woot, Charlie ... good to see you on the bench! A Riveria .. I did one of those in the early sixties ehhe. Was probably an AMT Annual, but it sure wasn't yellow! Hope you can get the body all cleaned up. Quote Link to comment Share on other sites More sharing options...
charlie8575 Posted April 12, 2013 Author Share Posted April 12, 2013 Thanks, Mike. I've actually been poking at a lot of stuff over the last year, but space constraints make it hard for me to work well, regularly or efficiently, and the space itself is so horribly messy, that I don't want to take pictures. I'll probably be posting my other project for "Workbench Saturday." In fact, I might post it tonight because I don't know if I'll be able to tomorrow. Other update: the hood and firewall are officially MIA. Given the "detail" of the engine, building this as a curbside won't be that big a loss to me. So, if anyone has a hood floating around they can spare, my request is open officially. Charlie Larkin Quote Link to comment Share on other sites More sharing options...
Foxer Posted April 13, 2013 Share Posted April 13, 2013 (edited) Sorry to hear about the hood and firewall ... hopefully someone can step up with one. Now, just for fun and Riv it up .. at 12 I was just coming off a lot of OD armor when AMT appeared ... and this wasn't that long afterward ... I'm not sure what year this is but it's original issue and looks similar to your yellow one at the rear and roof. Edited April 13, 2013 by Foxer Quote Link to comment Share on other sites More sharing options...
charlie8575 Posted April 13, 2013 Author Share Posted April 13, 2013 From the headlights, that's either a 1963 or '64. Pretty cool build, Mike. I looked again, and the firewall isn't missing- it was molded in with the body and inner fenders! Oh, this is going to all kinds of fun to paint.... Y'know, curbside's starting to look better and better. Charlie Larkin Quote Link to comment Share on other sites More sharing options...
Foxer Posted April 13, 2013 Share Posted April 13, 2013 From the headlights, that's either a 1963 or '64 Charlie Larkin Must be a '63 ... I thought I stopped building by that time .. I would have been 17 in '63. Good to hear the firewall "appeared". If I had the Riv still, I would cut the hood out for ya. Quote Link to comment Share on other sites More sharing options...
charlie8575 Posted April 13, 2013 Author Share Posted April 13, 2013 Well, twenty-four hours, give or take, later, the body is out of the cleaner tank. There's a lot of shmutz left on the body- dead paint, stains, whatever. It is, however, far, far cleaner than what I started with. Replete in awful chartreuse-yellow "splendor", the body of the Riviera is approaching usable now. How on Earth AMT ever decided to mold their products in that horrid, bordering-on-unpaintable color, I'll never understand. After much consideration, I've started to favor either tan or light blue plastic for raw parts, as that seems to provide the best contrast of primer, paint, and still serve as a good base for future coatings. I have no idea what those holes were poked out for. I might add in a spotlight because they're cool, and for some reason, it looks good on the Riv. I will definitely be putting an exterior mirror and radio antenna on. I'm planning on putting that mess in the Super-Clean after it dries to see if some more of that gunk can be liberated, along with the horribly-painted engine and interior. I will probably end up priming these parts with sealer-primer, given the amount of goop on them. I also think I've decided on a color scheme for this one; more will be following on that soon. Charlie Larkin Quote Link to comment Share on other sites More sharing options...
southpier Posted April 13, 2013 Share Posted April 13, 2013 has anyone ever used silver paint as a barrier coat on odd colored plastic? years ago i sealed some bleeding cedar siding with silver radiator paint and then used conventional latex (years ago - no acrylics!) as a topcoat and it worked out fine. i didn't think of this; credit goes to Henry. Quote Link to comment Share on other sites More sharing options...
charlie8575 Posted April 14, 2013 Author Share Posted April 14, 2013 Actually, Joe, I think I tried to paint this thing silver originally without the benefit of primer (chock it up to my youthful stupidity) as the finish color. I might experiment with a piece of sprue and see what it does. However, where I plan to use the Testors lacquer for this, I'll have to prime anyway. But, it does bring a good question up that'll give me some answers as to its blocking power. Now...what I have heard of people doing is a coat of primer, followed by a light coat of silver, then painting. I'll give it a try and see what it does. I'll probably have to do something like that anyway to provide an even color. I think my hood solution will be coming from The Modelhaus and Don's resin (thankfully!) does not look like that semi-translucent yellow! Charlie Larkin Quote Link to comment Share on other sites More sharing options...
Foxer Posted April 14, 2013 Share Posted April 14, 2013 Modelhaus makes another save! Quote Link to comment Share on other sites More sharing options...
Tom Geiger Posted April 14, 2013 Share Posted April 14, 2013 I use Duplicolor grey primer on nearly everything, and that would work to eliminate any yellow bleed through. I recently had a pair of headers that were dark red, and I painted them Testors flat black, then flat white on top of that with no problems. That yellow version was a reissue from the 1988-92 era you mentioned. Back then someone in my club did a dozen of them stock / curbside for a promo collector. He sold us the remains for a dollar or two a kit. So I had several kits worth of the custom parts and other extras. Here's a sorry custom I was working on years ago. That's two of the Rivera's custom rear treatments on the back of it. Quote Link to comment Share on other sites More sharing options...
gwolf Posted April 15, 2013 Share Posted April 15, 2013 A good portion of all the cars I built between 12 and 14 years old featured a variety of horrible attributes: gold exhaust pipes, blue gas tanks, yellow engines, blue fan belts, red batteries, homemade distributors and spark plug wires made with old Radio Shack parts, a rainbow of colors under the hood. I'd try to stuff bigger, parts box engines in Jo-Han '62 Plymouth Furies and '62 Dodge Darts and cut big squares out of their hoods so they'd stick out and fit. And if a kit came with slide-on decals I'd put them everywhere. It was like I was colorblind and had no concept of what a car should look like. But I had such a blast doing them back then. Point is, I like your "sorry excuse for an attempt to paint the interior and some engine components" comment and I'm sure you thought you were doing a great job at the time. Quote Link to comment Share on other sites More sharing options...
charlie8575 Posted April 16, 2013 Author Share Posted April 16, 2013 Actually, I didn't like it then, either! I knew it was terrible work, and those horrible paint jobs only made me more disappointed. That horrid yellow plastic drove me crazy. I also have portions of a 1965 Chevelle wagon in the same putrid color that had similar horrific results from trying to paint it. I'll be probably blowing a coat of primer on that before the end of the week, and we'll see if the newer, less-aggressive paints save me from headaches. Charlie Larkin Quote Link to comment Share on other sites More sharing options...
charlie8575 Posted April 17, 2013 Author Share Posted April 17, 2013 Not an update that would be able to show in the pictures, but a little update. After allowing the body to air-dry and being busy the last couple of days, I noticed that the body had become a bit rough on the surface, and with all the leftover stuff on it, I got to thinking.....I wonder if I could polish some of that stuff out? So, out came the Novus #2. The end result wasn't quite what I had what I'll admit might have been somewhat unrealistic hopes. It did, however, level out a couple of rough spots on the leftover paint and restored some of the finish to the plastic, which means I think I'll now be able to get a little better paint-job out of it. I'm still debating an additional soak in the Super Clean just to see what else can be taken off, but as it is, I think I'll still be able to get a decent paint job out of it. Charlie Larkin Quote Link to comment Share on other sites More sharing options...
charlie8575 Posted April 20, 2013 Author Share Posted April 20, 2013 Well, due to some problems at home, I won't be online much for the next few days, but I wanted to take a moment to add this while I could. The painted parts went into the Purple Pond today. Closer inspection to what I thought was simply some flash around the alternator fan on the pulley assembly turned out to be not only flash, but very poor molding, with the fan for all intents and purposes being part of the flash! Enough so that I don't think I can remove the belt assembly without removing the fan. Does anyone know if there's either 1- a complete GM-style alternator, fan and all available aftermarket, or 2- some kind of photo-etch alternator fan? That's a little small for ham-fisted, ham-handed me to scratchbuild. I did my best to capture this on "film", but all trying to take a picture of this thing did was prove my seething hatred for digital cameras. Charlie Larkin Quote Link to comment Share on other sites More sharing options...
IMPALA SS 427 Posted April 21, 2013 Share Posted April 21, 2013 It looks like you have a great project there Charlie, i am interested as to what you will do with it ... Quote Link to comment Share on other sites More sharing options...
charlie8575 Posted April 22, 2013 Author Share Posted April 22, 2013 It looks like you have a great project there Charlie, i am interested as to what you will do with it ... Replica-stock! Or, more accurately, considering how I build, box-stock. This car may be my Candlelight Cream/green car, if for no other reason, if that blasted yellow plastic bleeds, at least it'll be into yellow. I have an early-2000s issue, too, which I bought when I couldn't find the body to this one, and that'll probably end up being another color. I love these first-generation Rivieras, so I don't mind having two. As to why I'm still looking for a hood....well, I do plan on building them both, so I'll need one anyway in all likelihood. Actually, a lot of my builds tend to be what I think of a box-stock+. I might switch out tires, decals, perhaps do an engine swap, but tend to stay to what comes in the box modeling. Someday, I WILL try to to do something like wiring and plumbing, but I haven't the time to try it and with the budget I'm on, one slip-up can be very costly for me. Charlie Larkin Quote Link to comment Share on other sites More sharing options...
ZTony8 Posted April 22, 2013 Share Posted April 22, 2013 Charlie- Modelhaus has '63 and '64 resin hoods available. Quote Link to comment Share on other sites More sharing options...
Recommended Posts
Join the conversation
You can post now and register later. If you have an account, sign in now to post with your account.
Note: Your post will require moderator approval before it will be visible.