vincen47
-
Posts
1,398 -
Joined
-
Last visited
1 Follower
Recent Profile Visitors


vincen47's Achievements
MCM Ohana (6/6)
-
 Ha, well, that’s unique. One of those, “Hold my beer” moments when the idea of using a Nova popped into the guy’s head.
 -
1977 GMC Wrecker DONE
vincen47 replied to bobss396's topic in Model Trucks: Pickups, Vans, SUVs, Light Commercial
What an enjoyable looking build. Thanks for posting it. Great use of aftermarket parts to create something unique. One of the best things to me, is how you opened up the grille. That makes a huge difference. -
Peterbilt 379 RV
vincen47 replied to vincen47's topic in WIP: Model Trucks: Big Rigs and Heavy Equipment
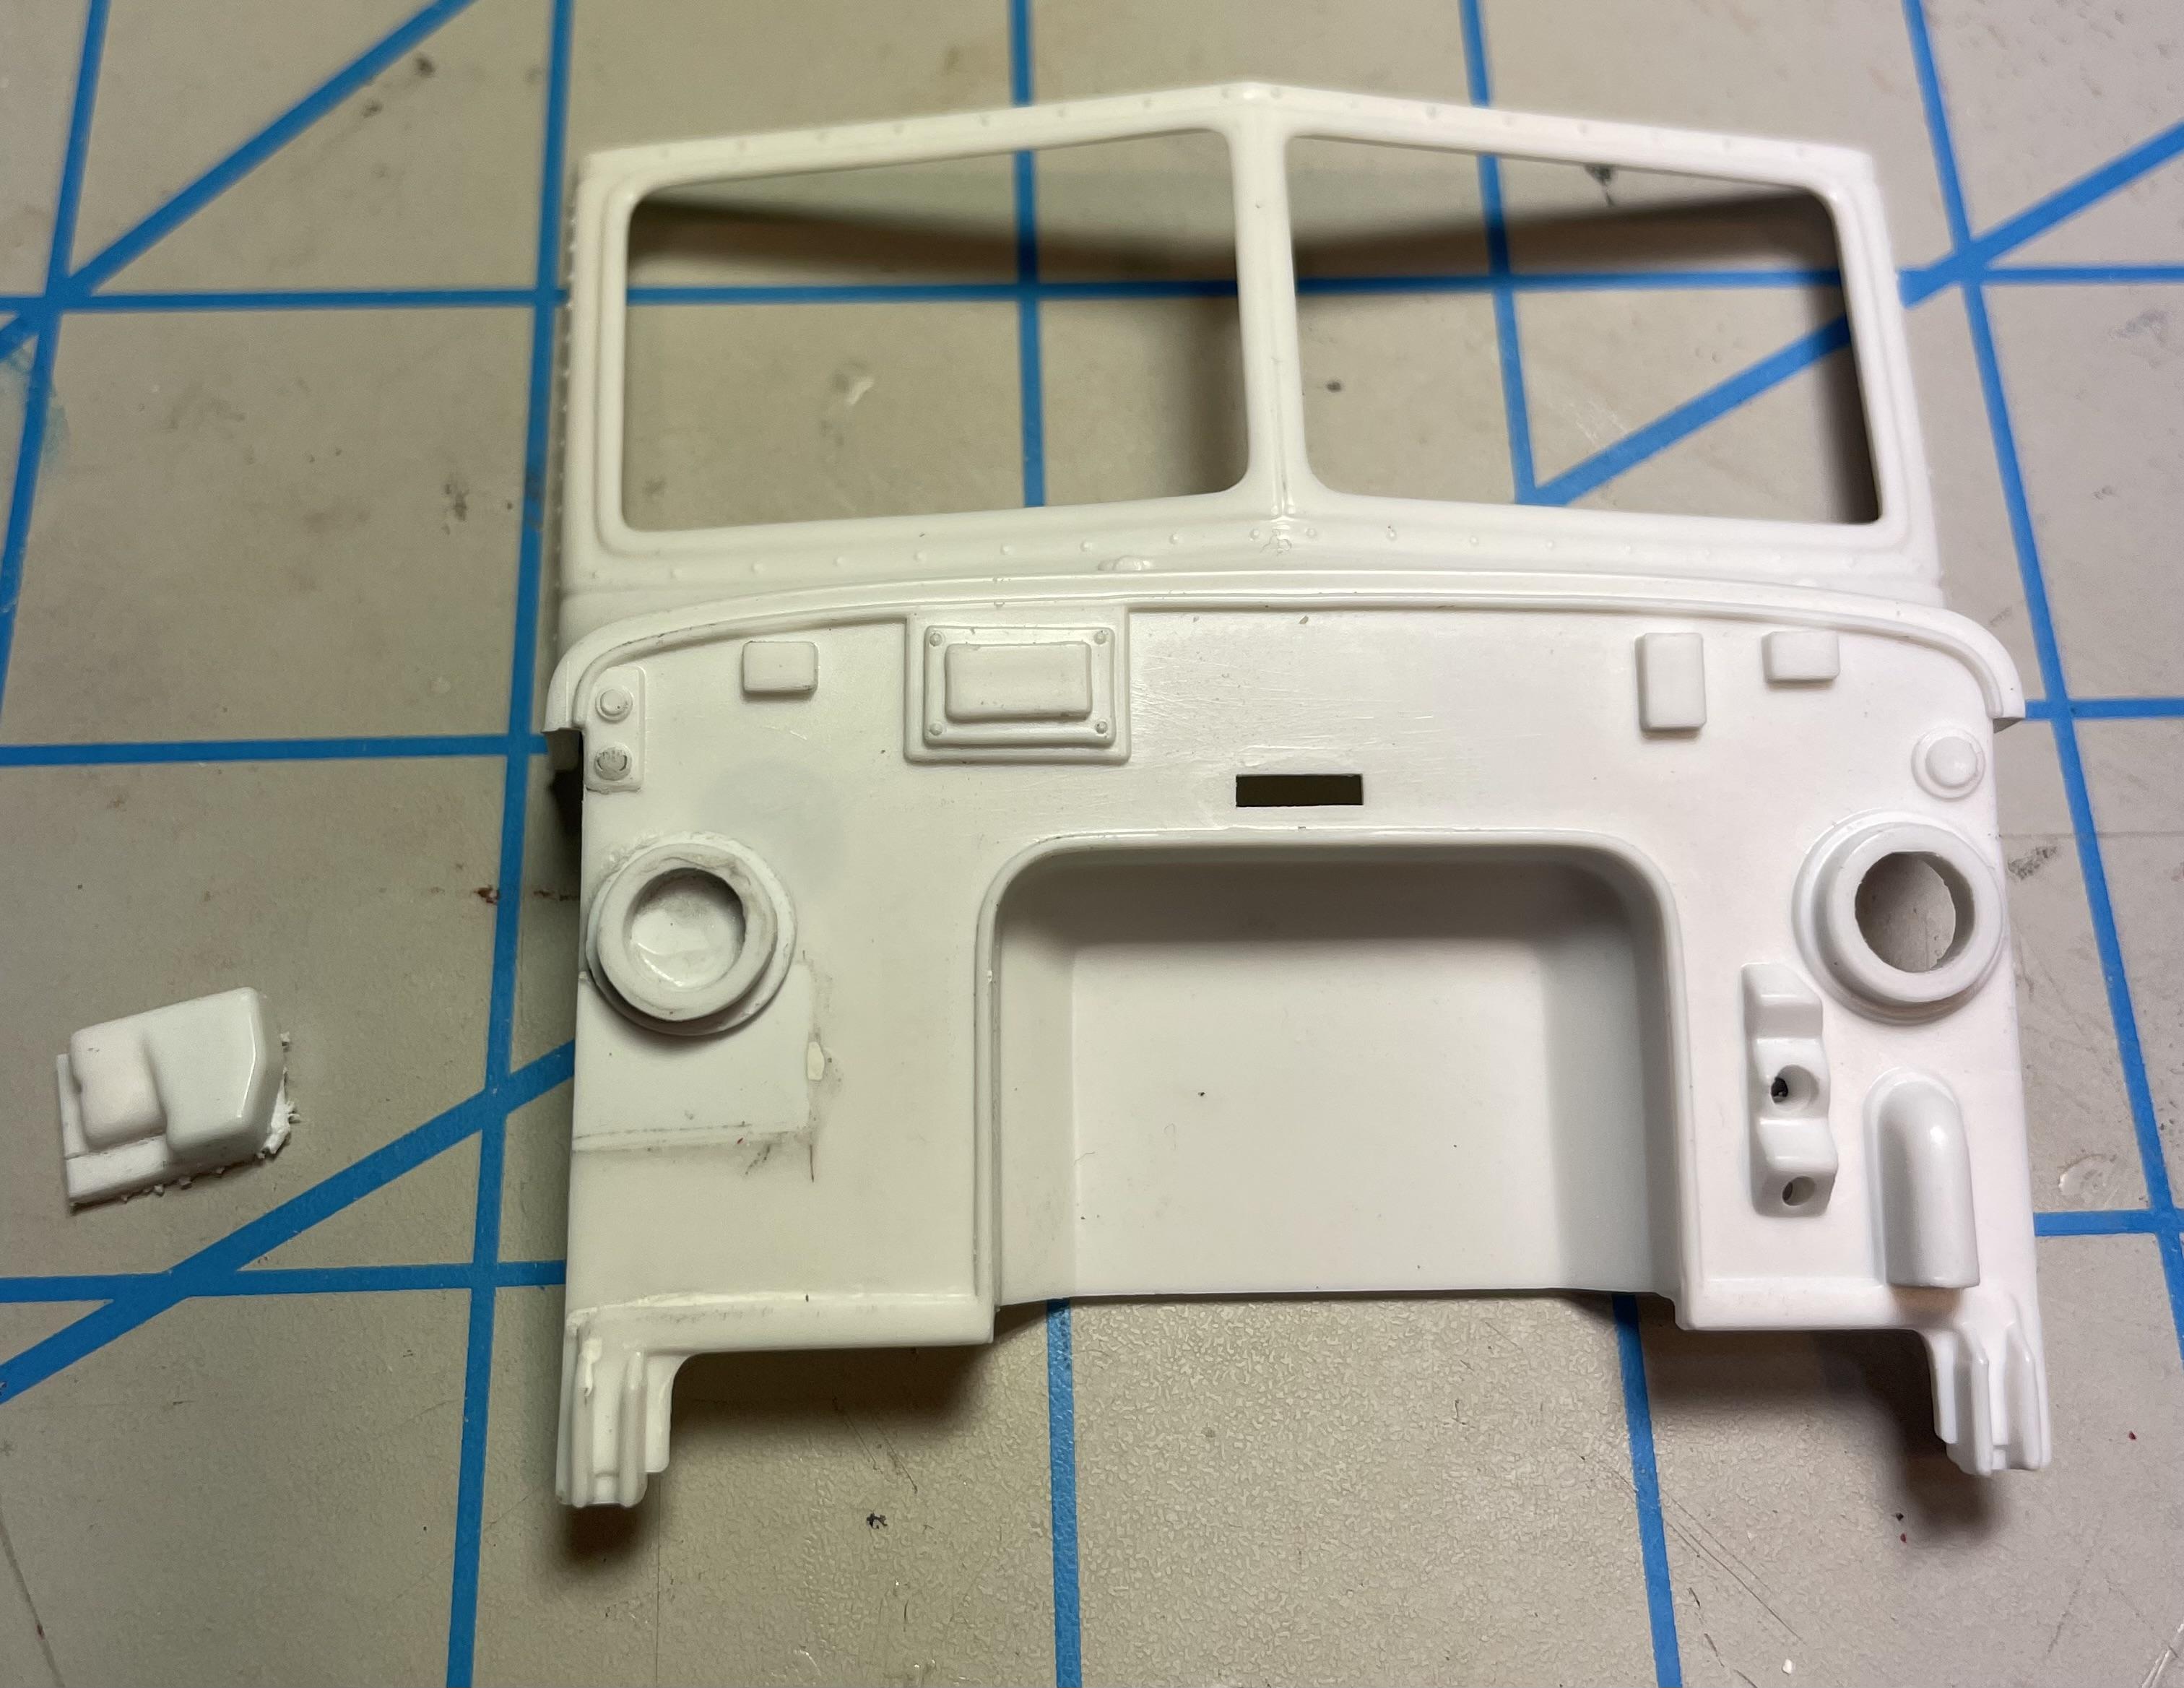
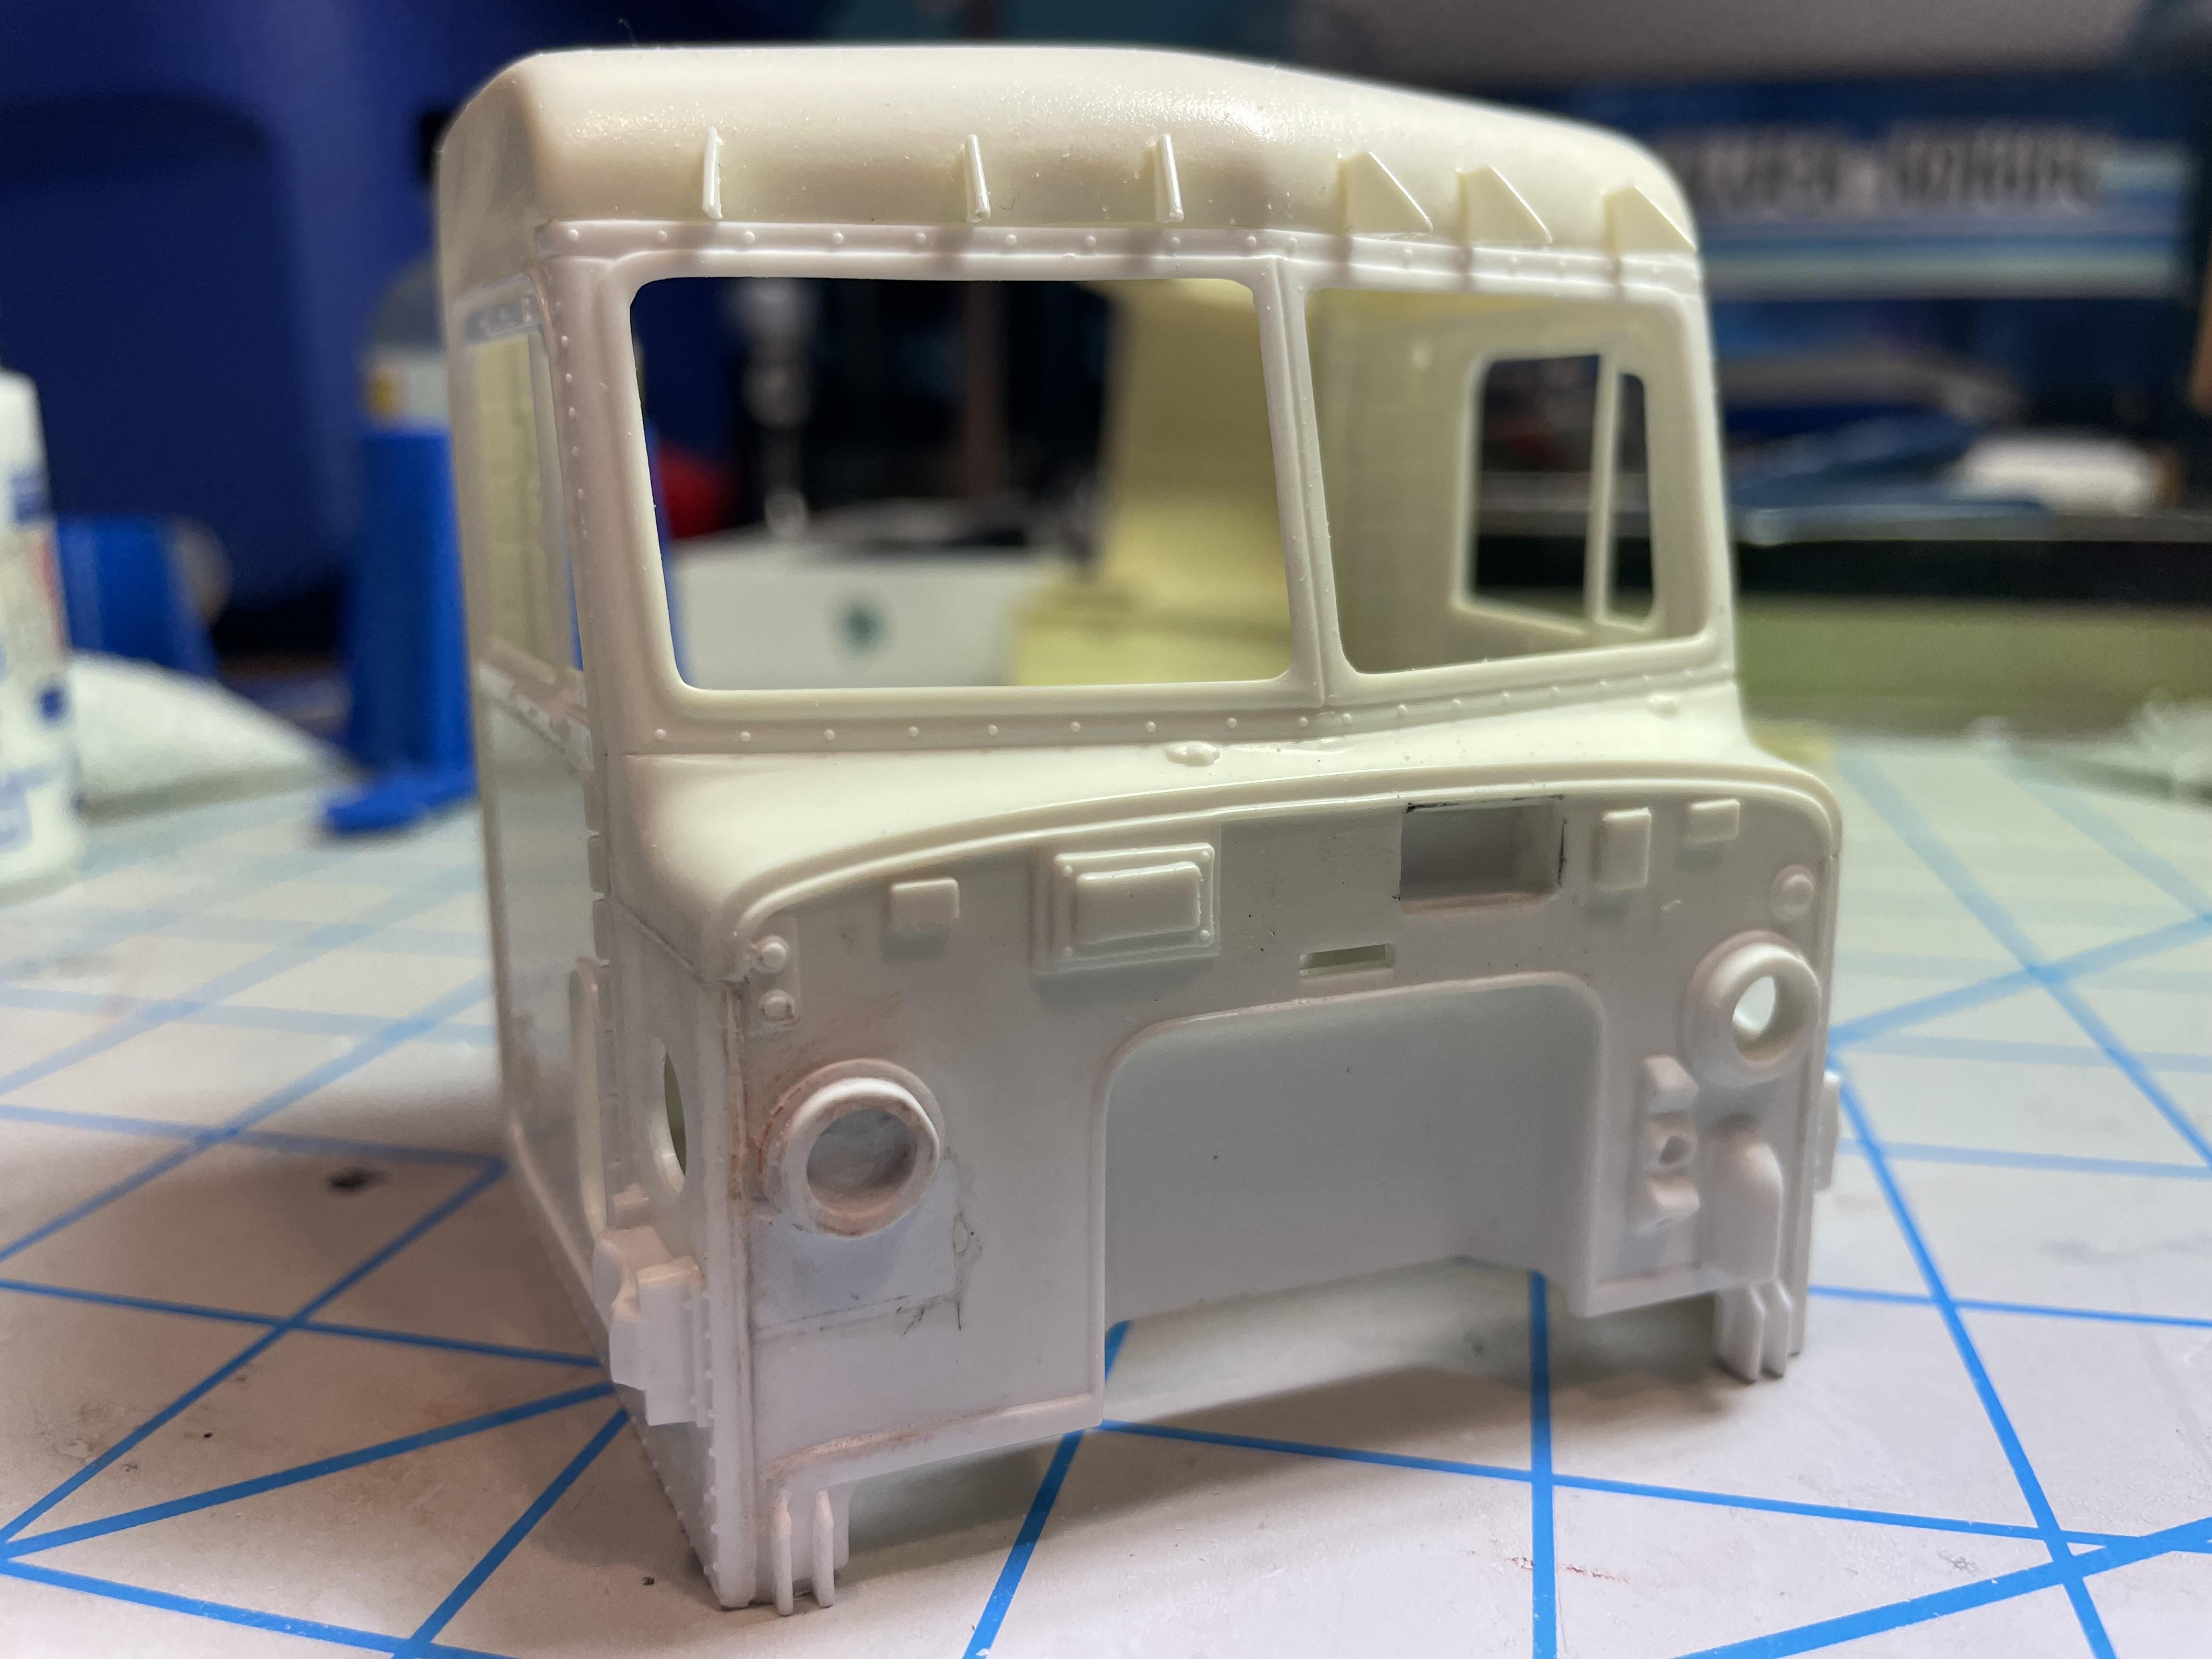
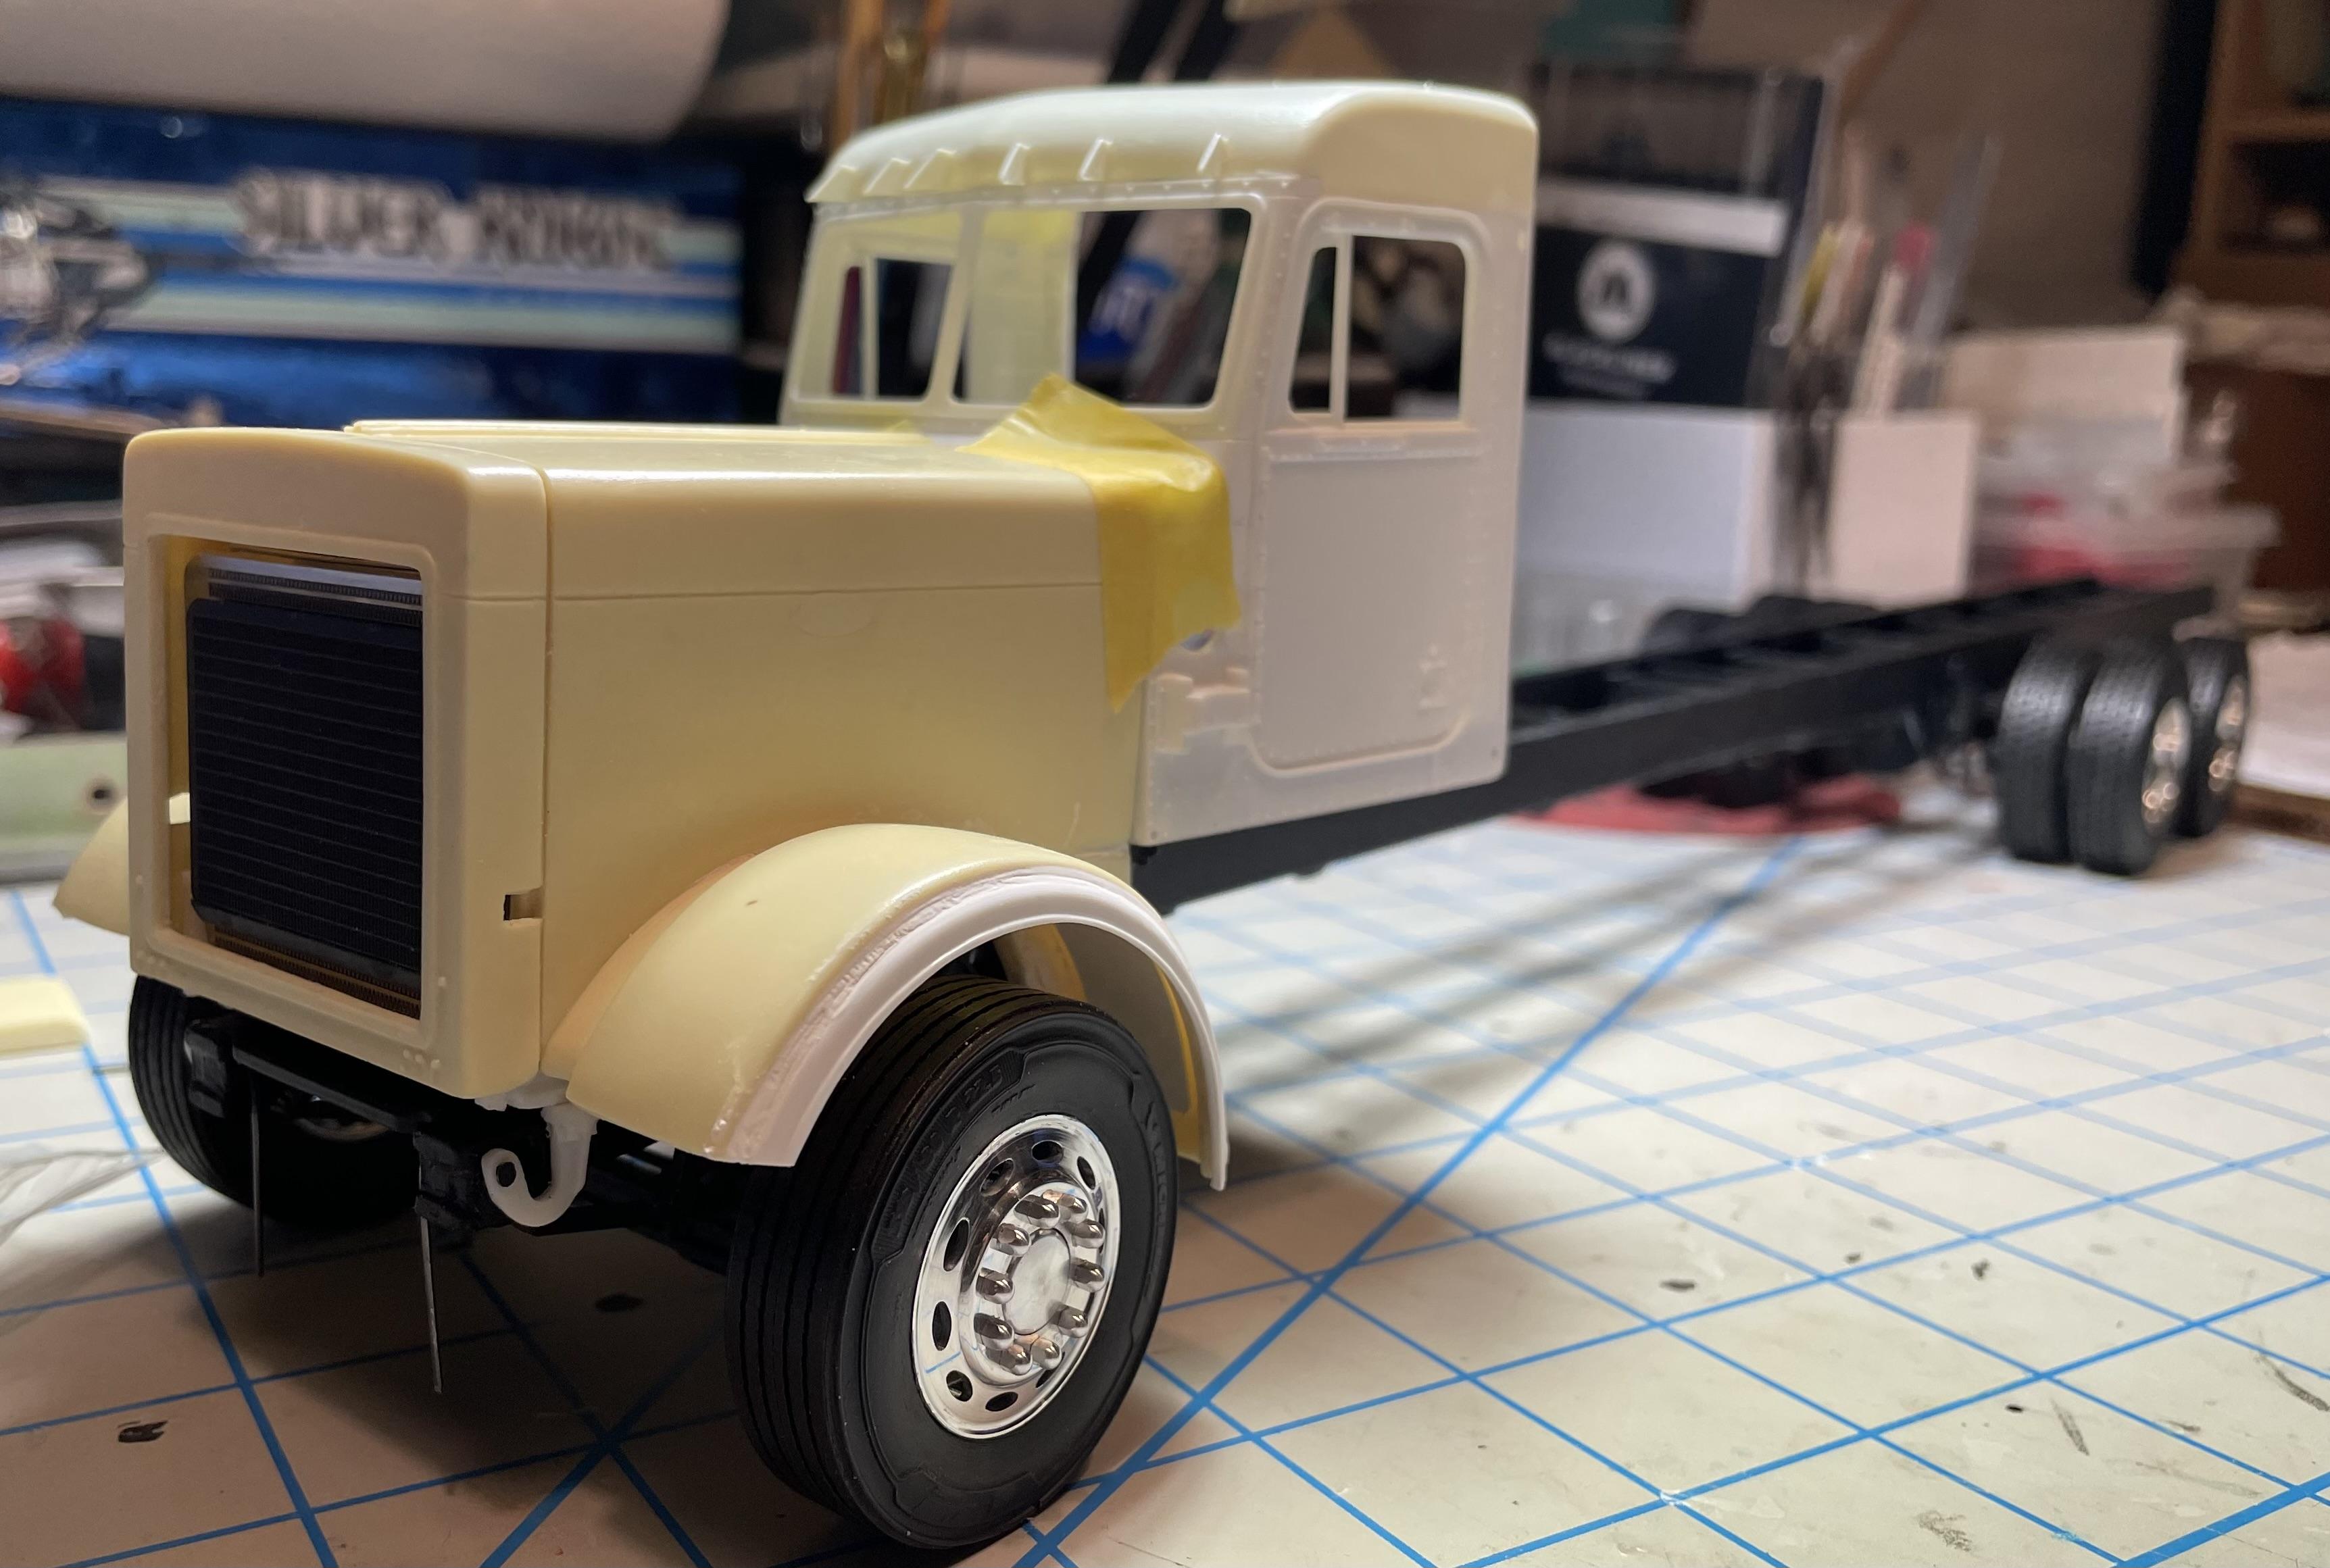
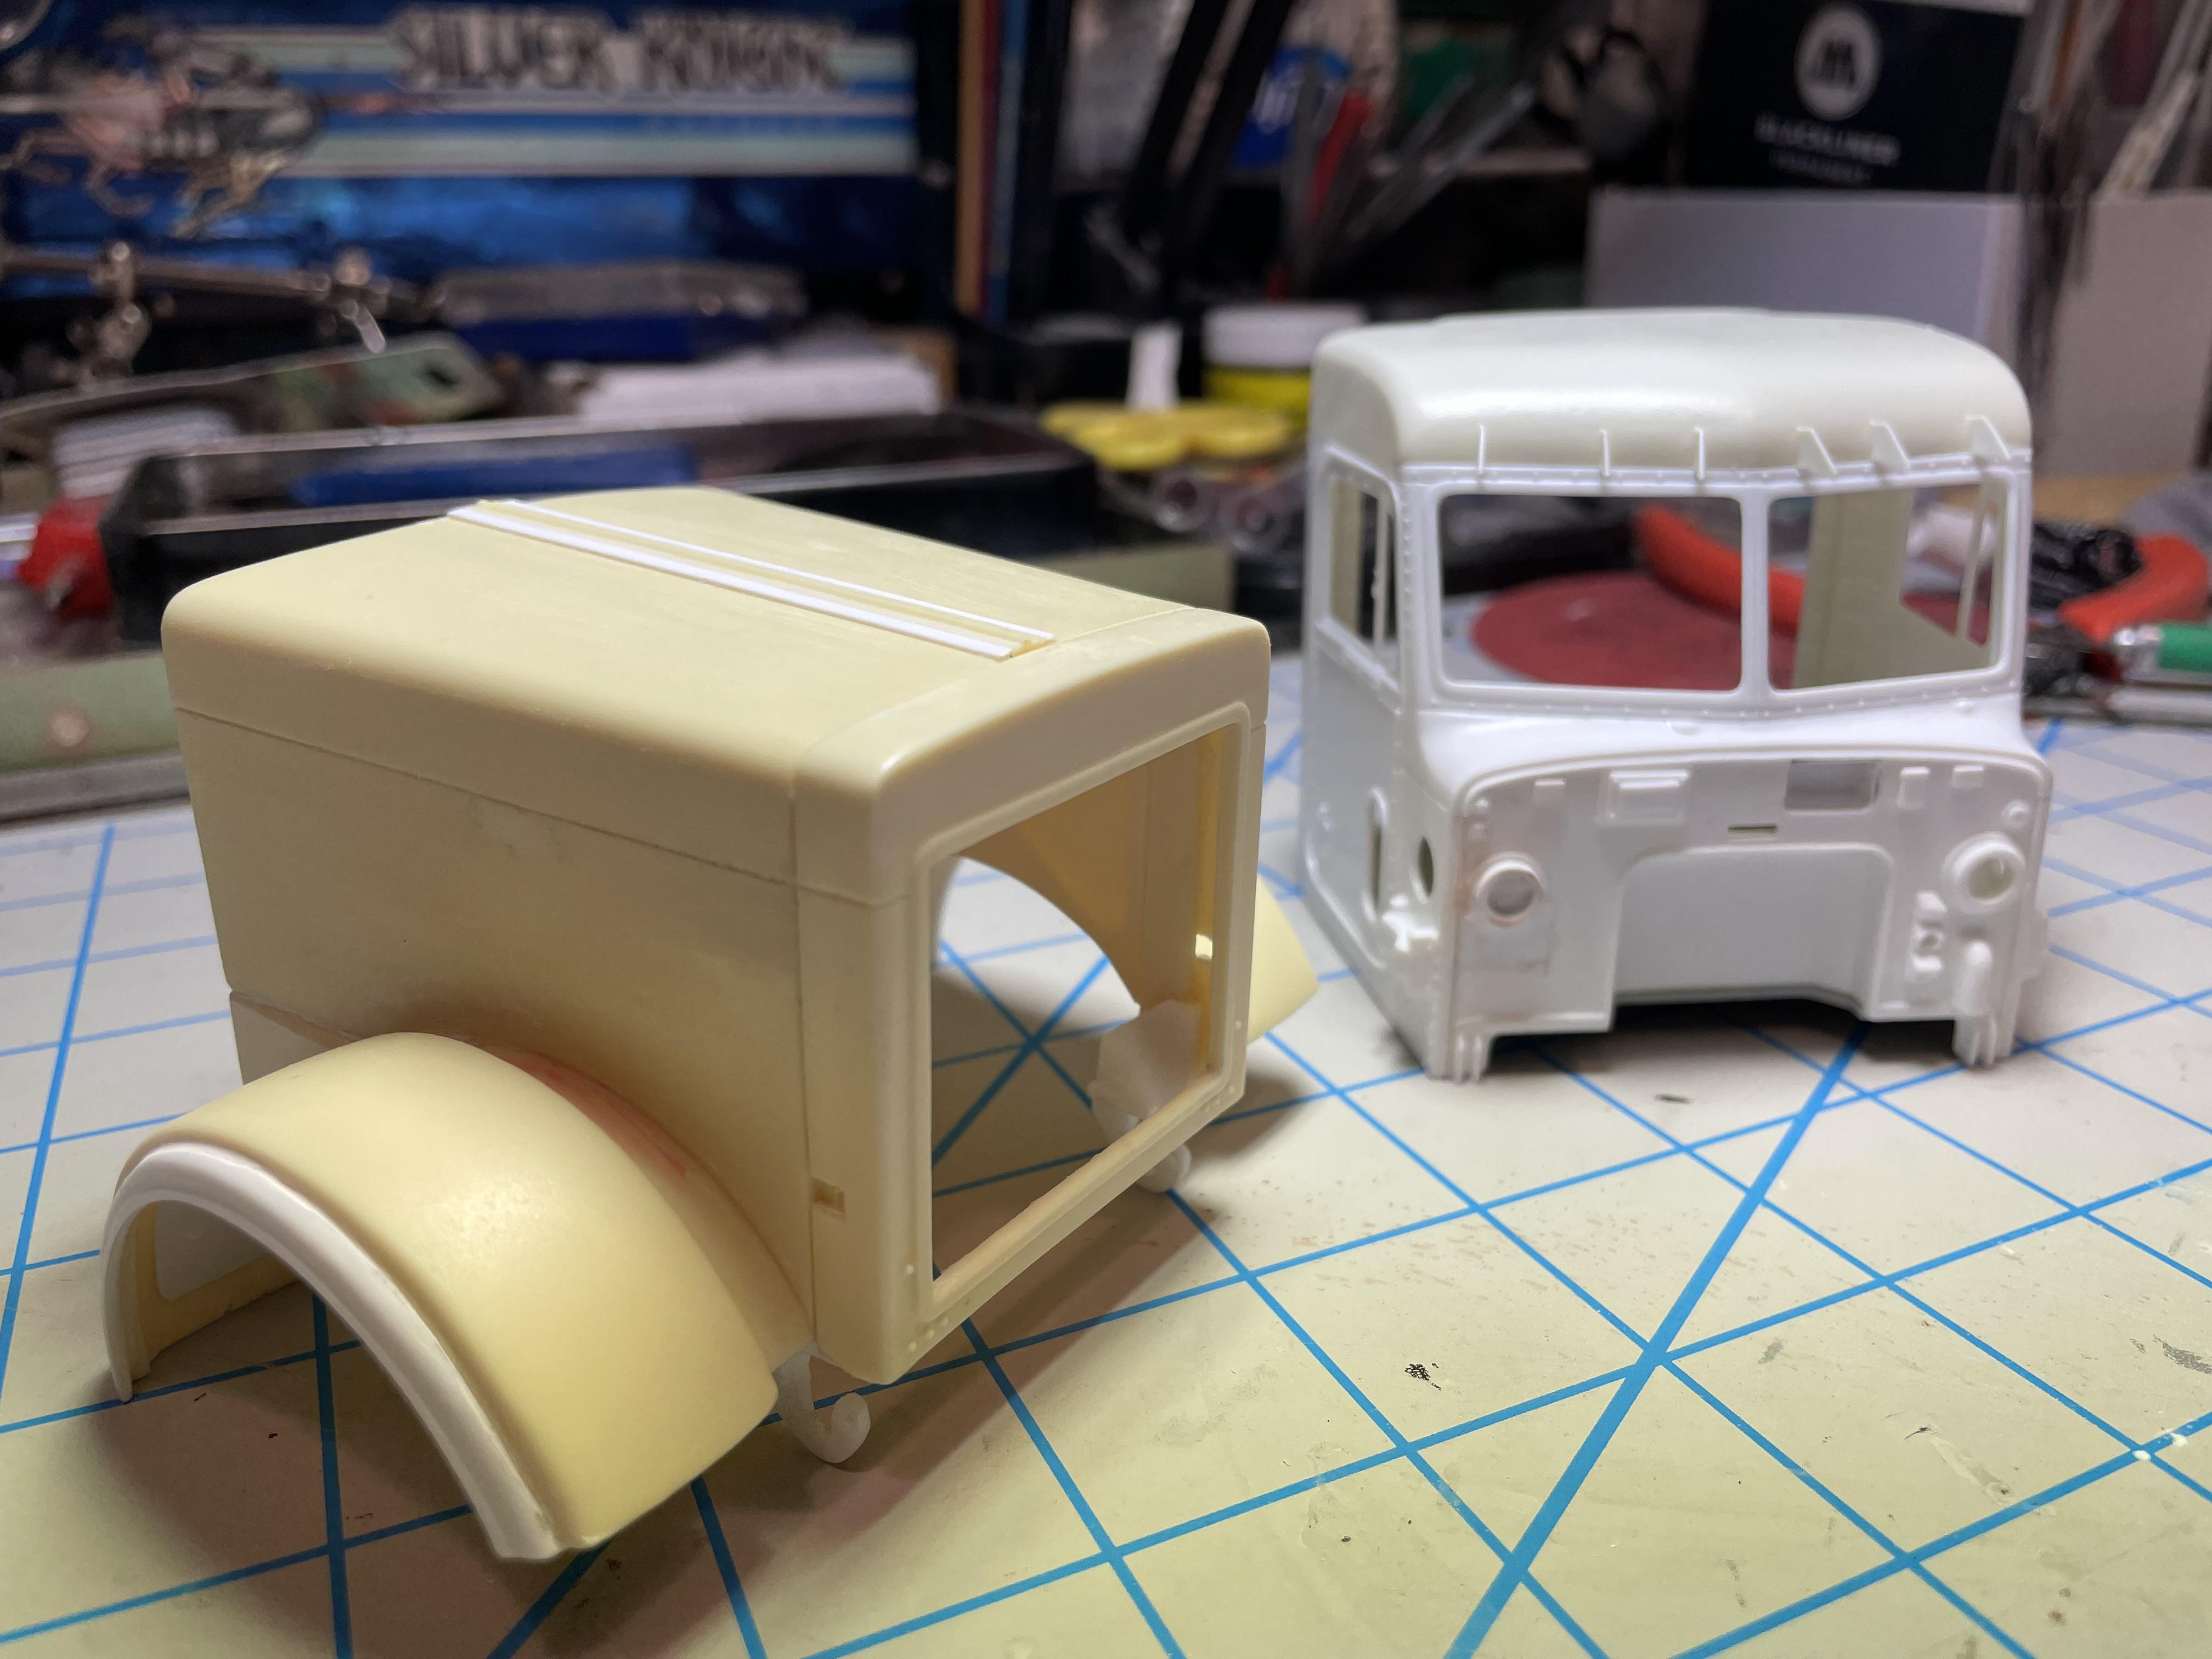
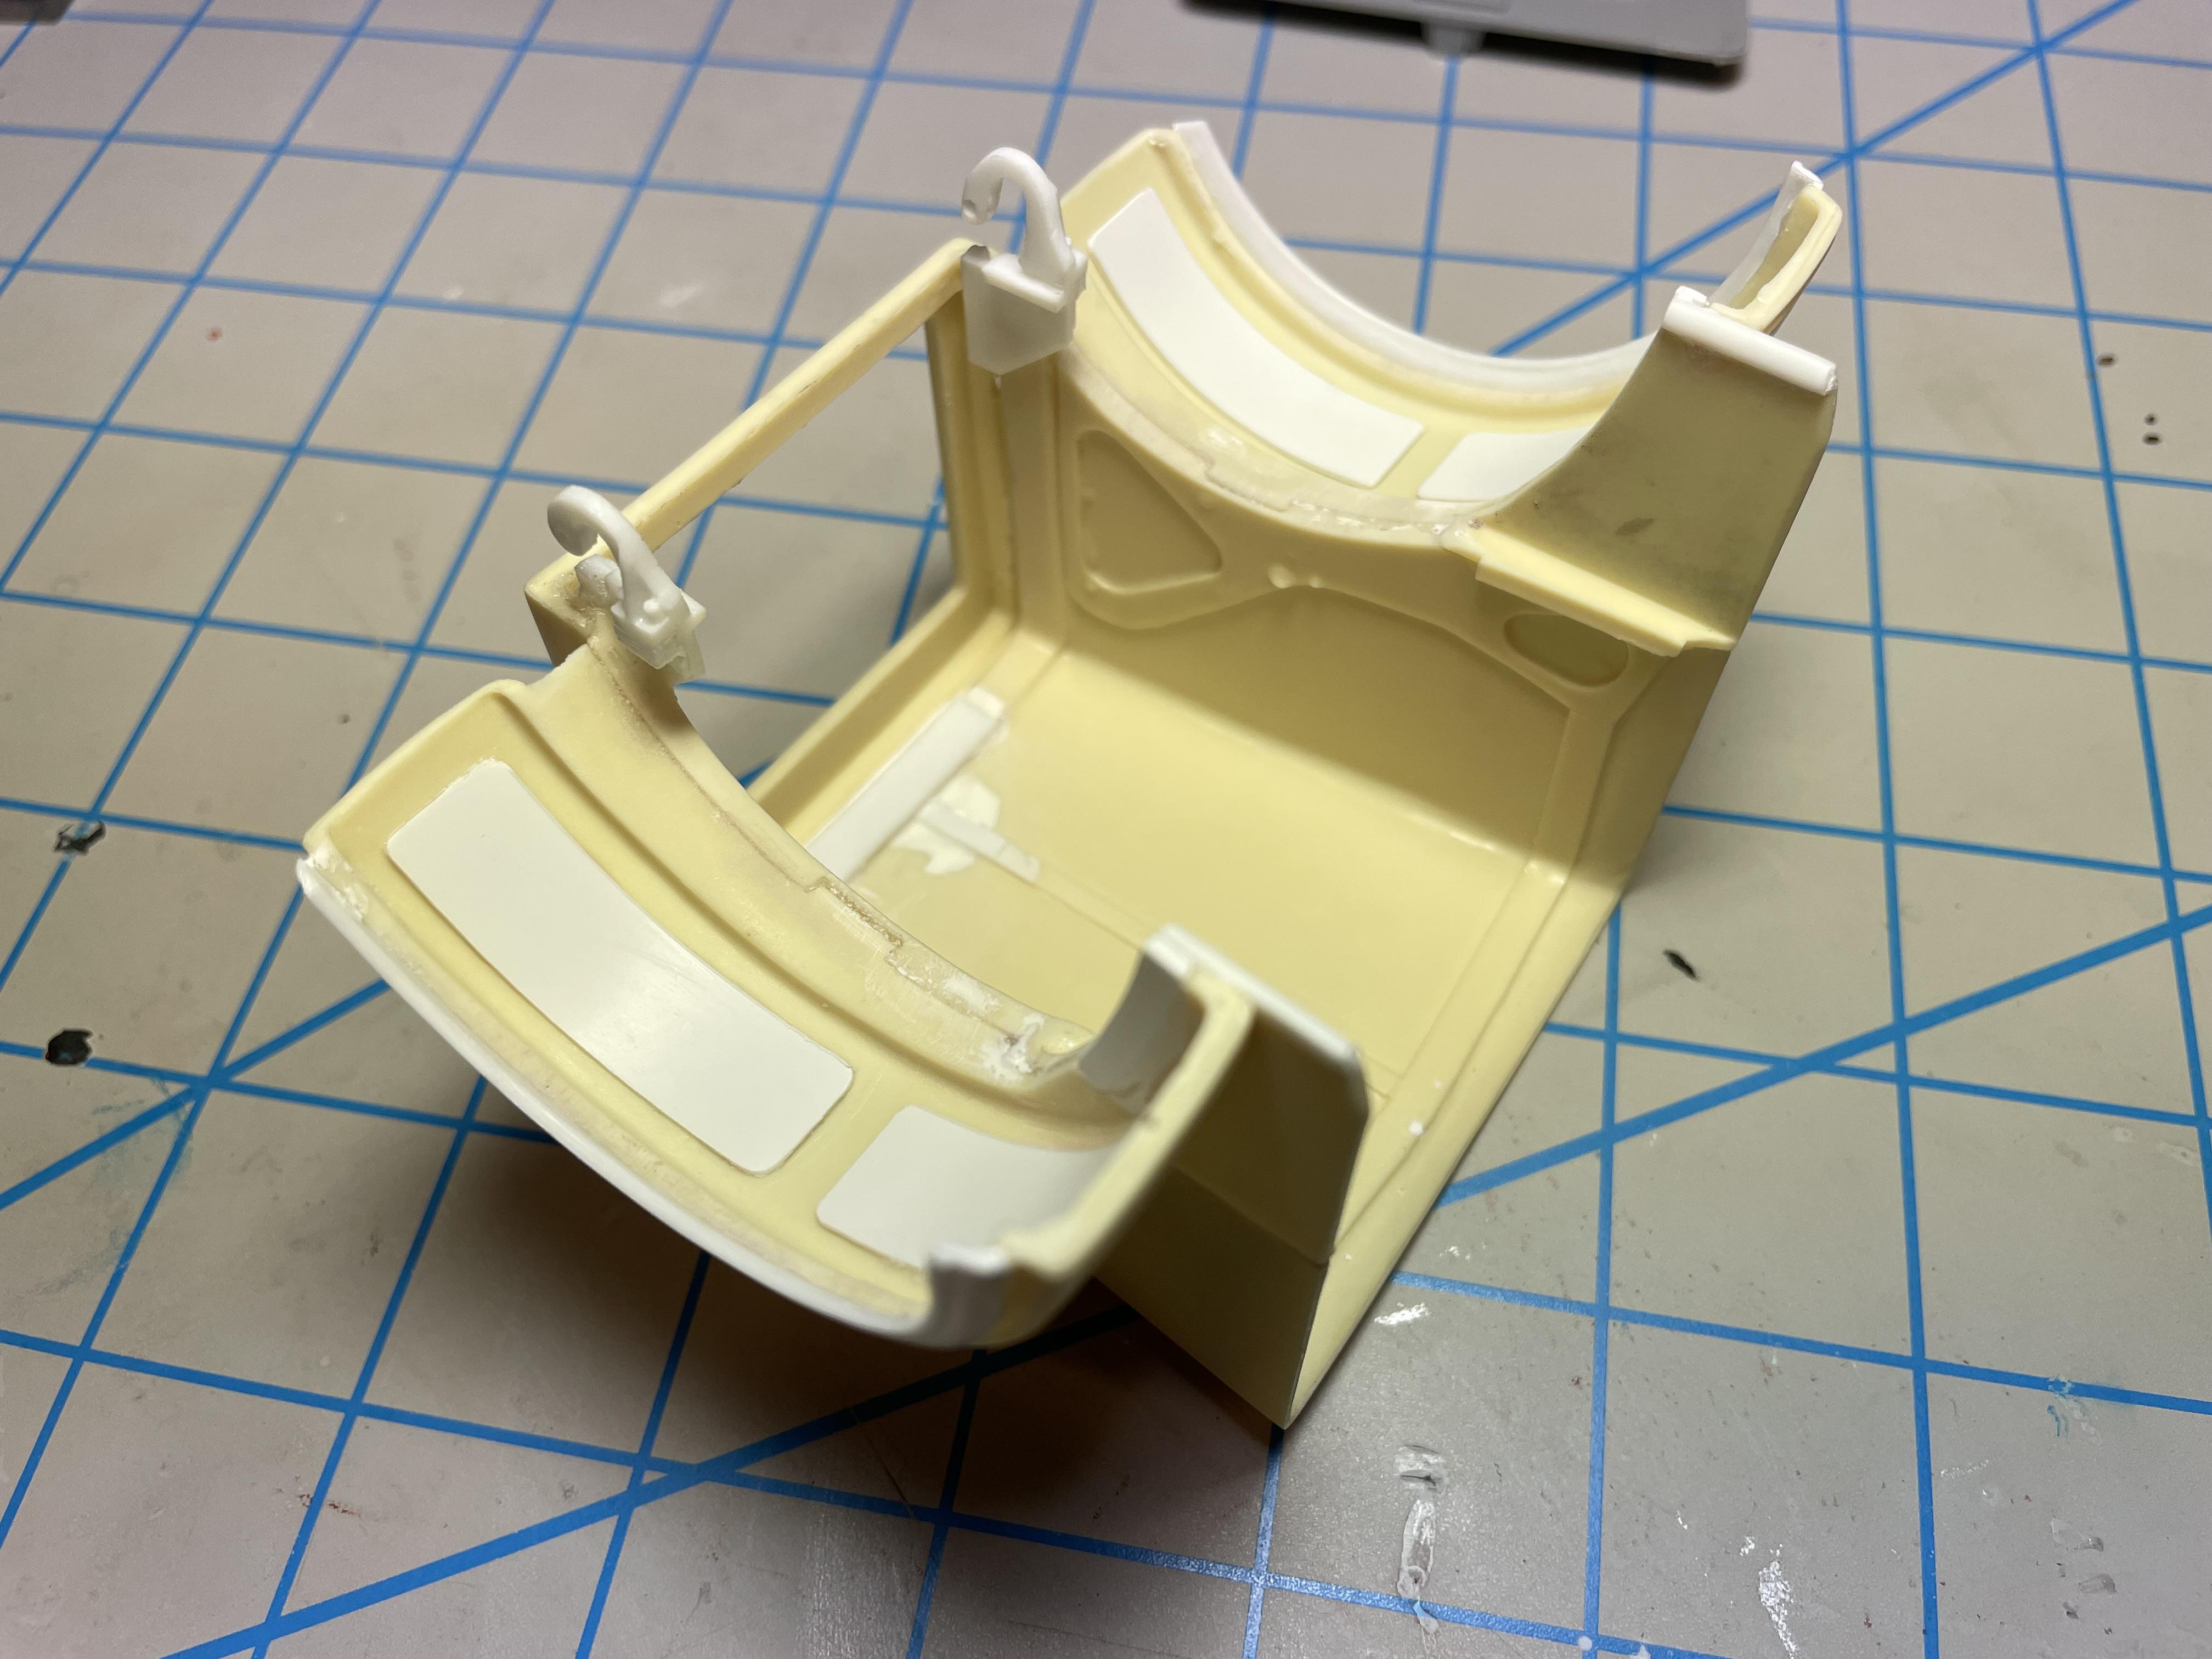
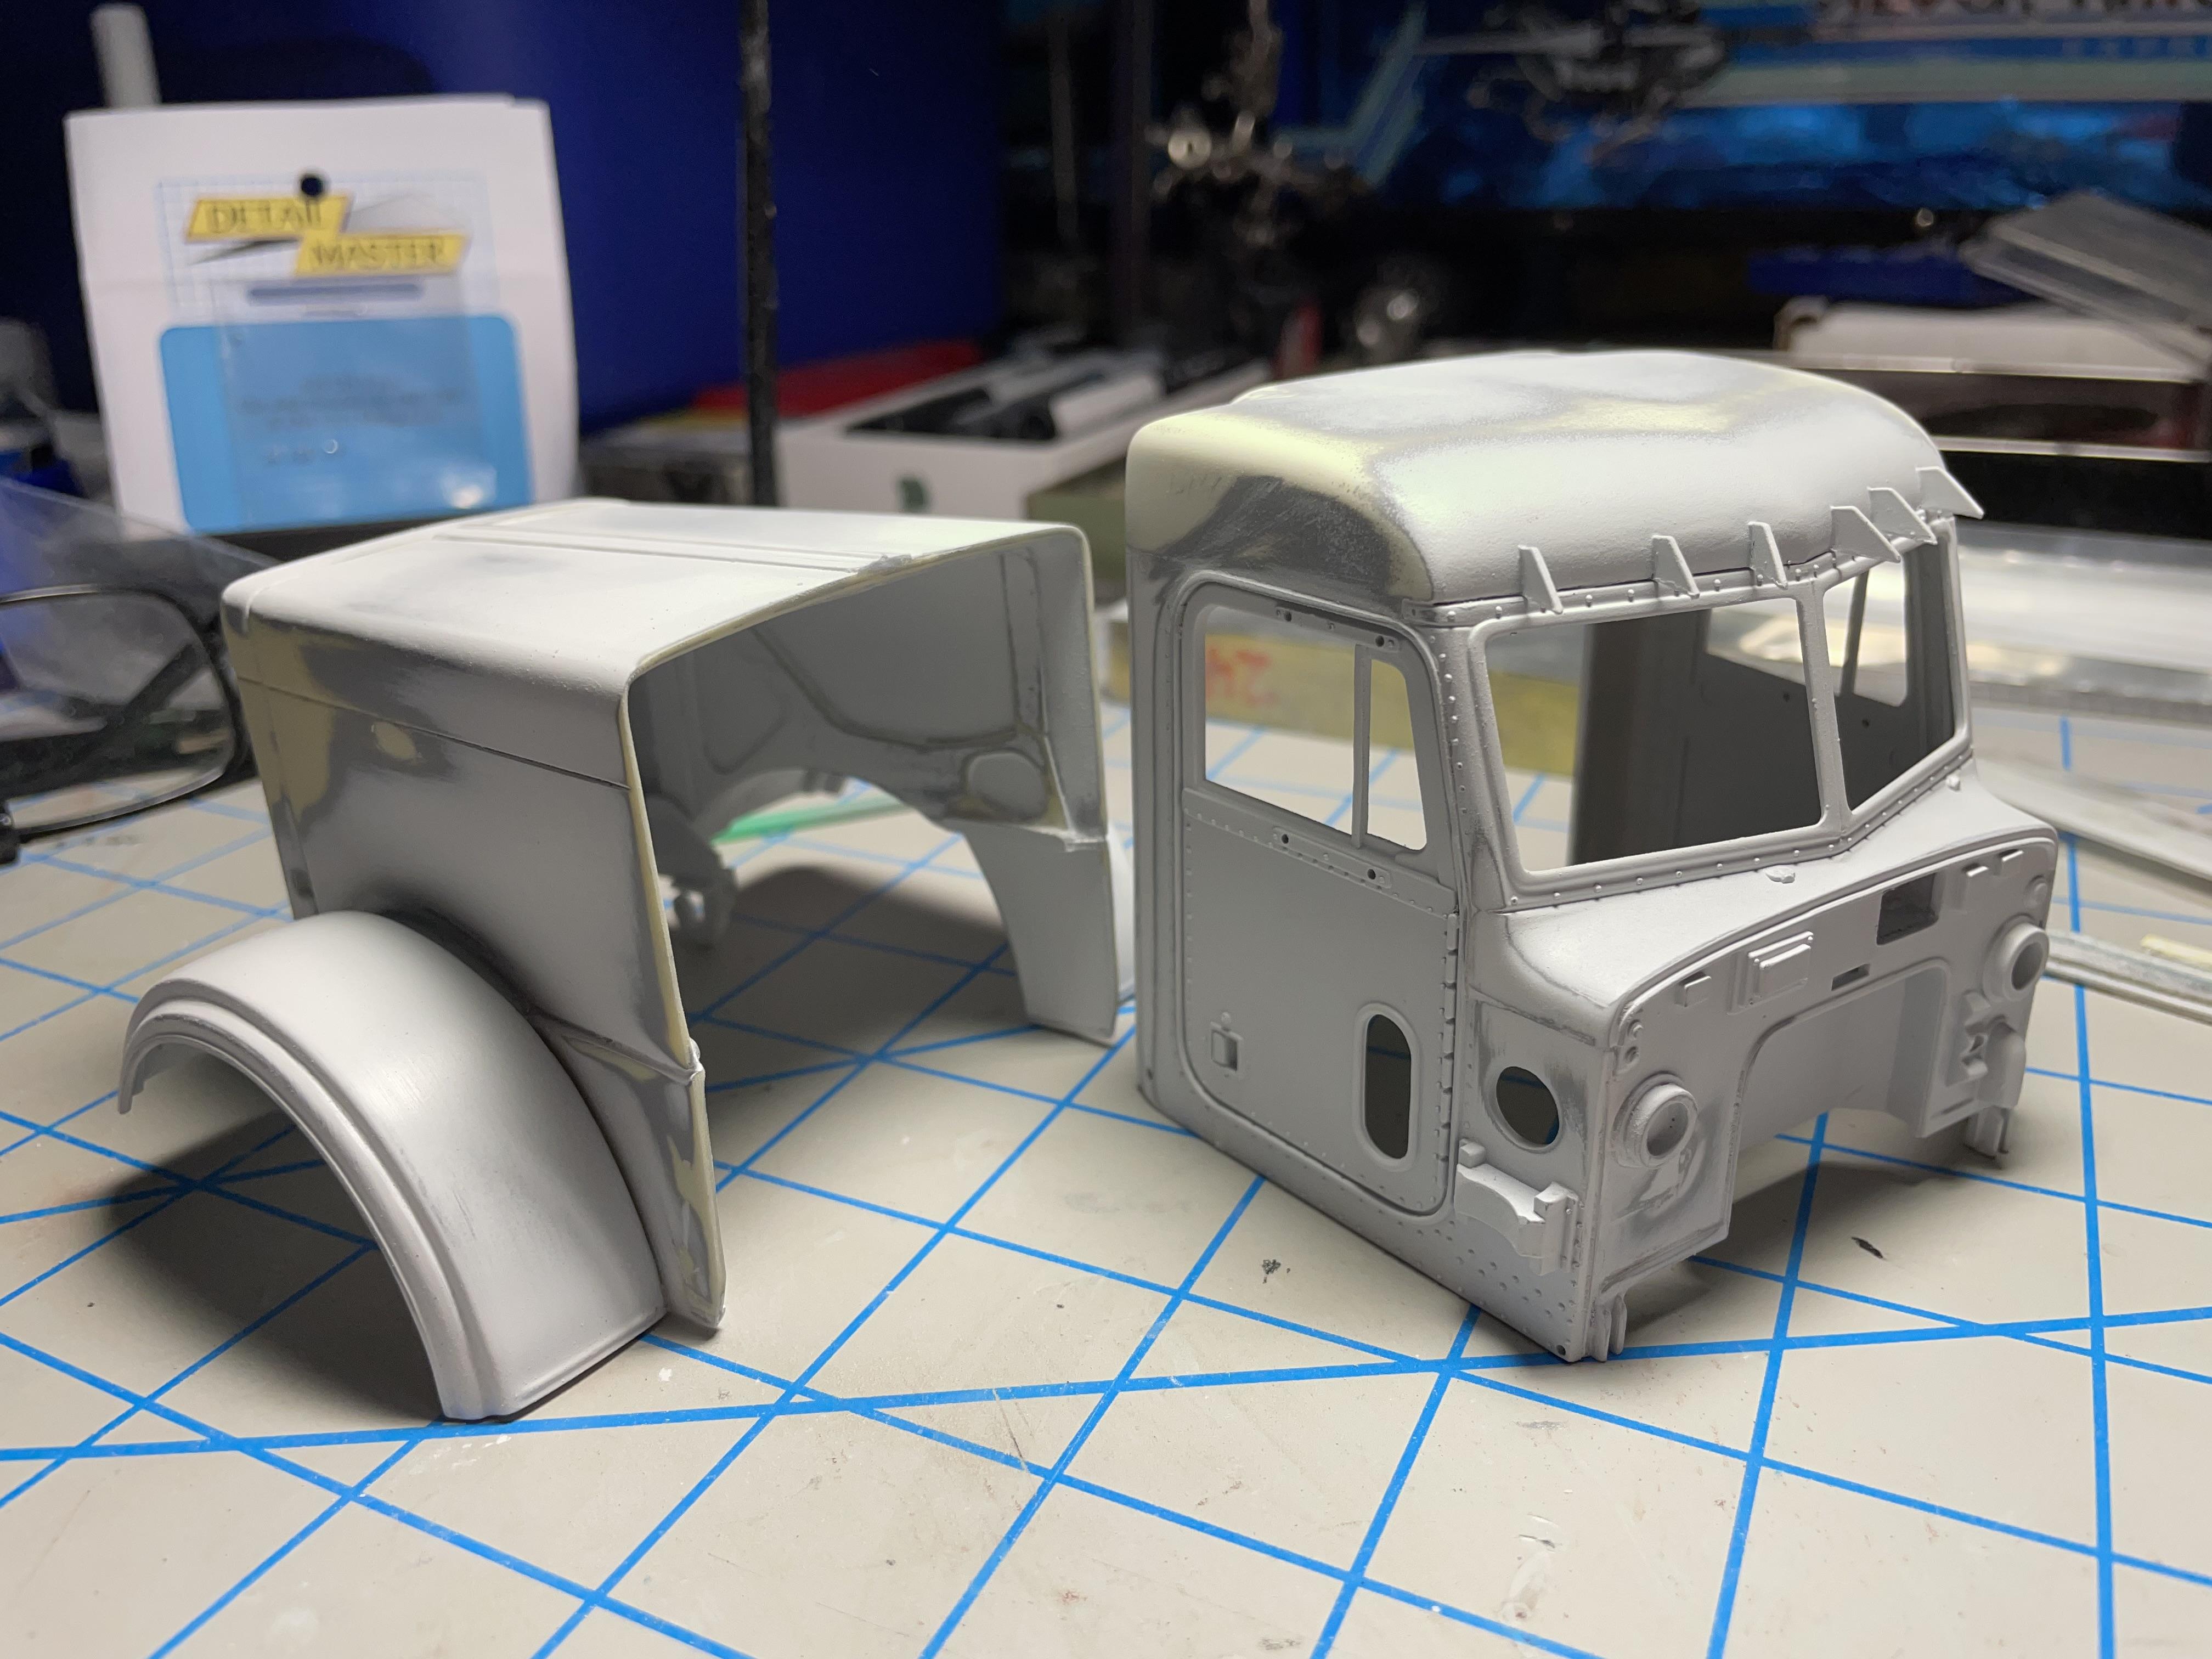
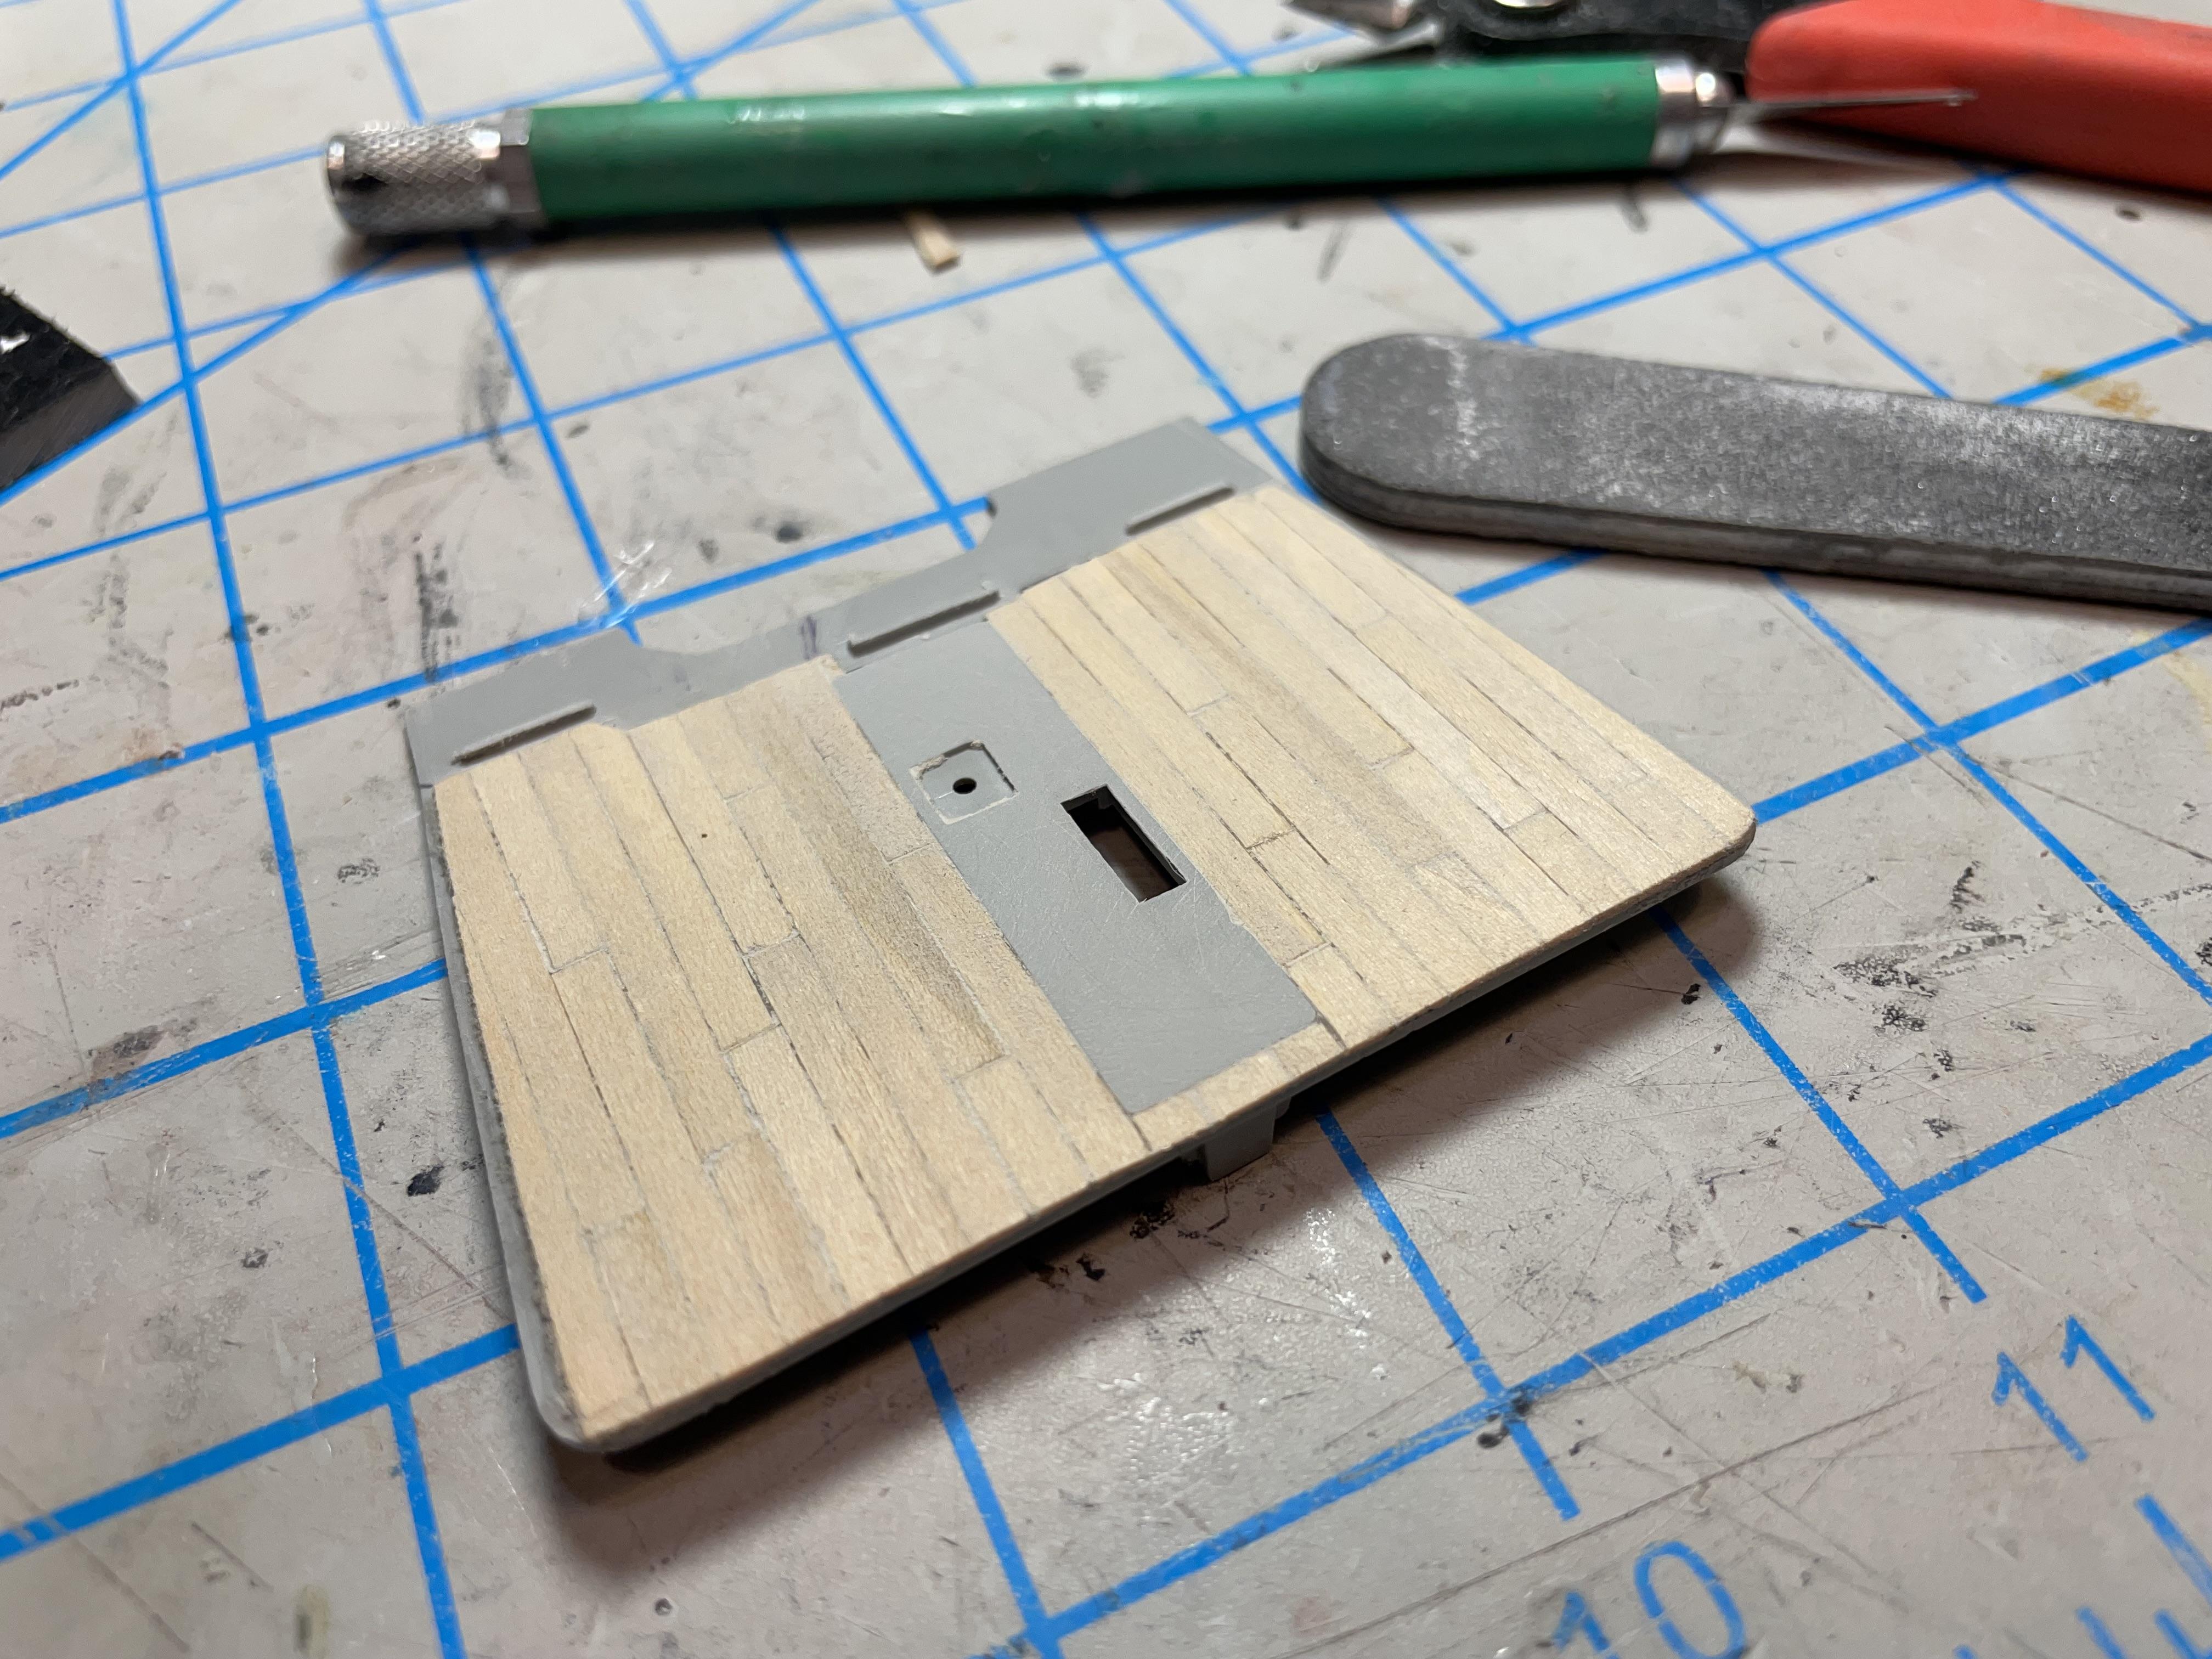
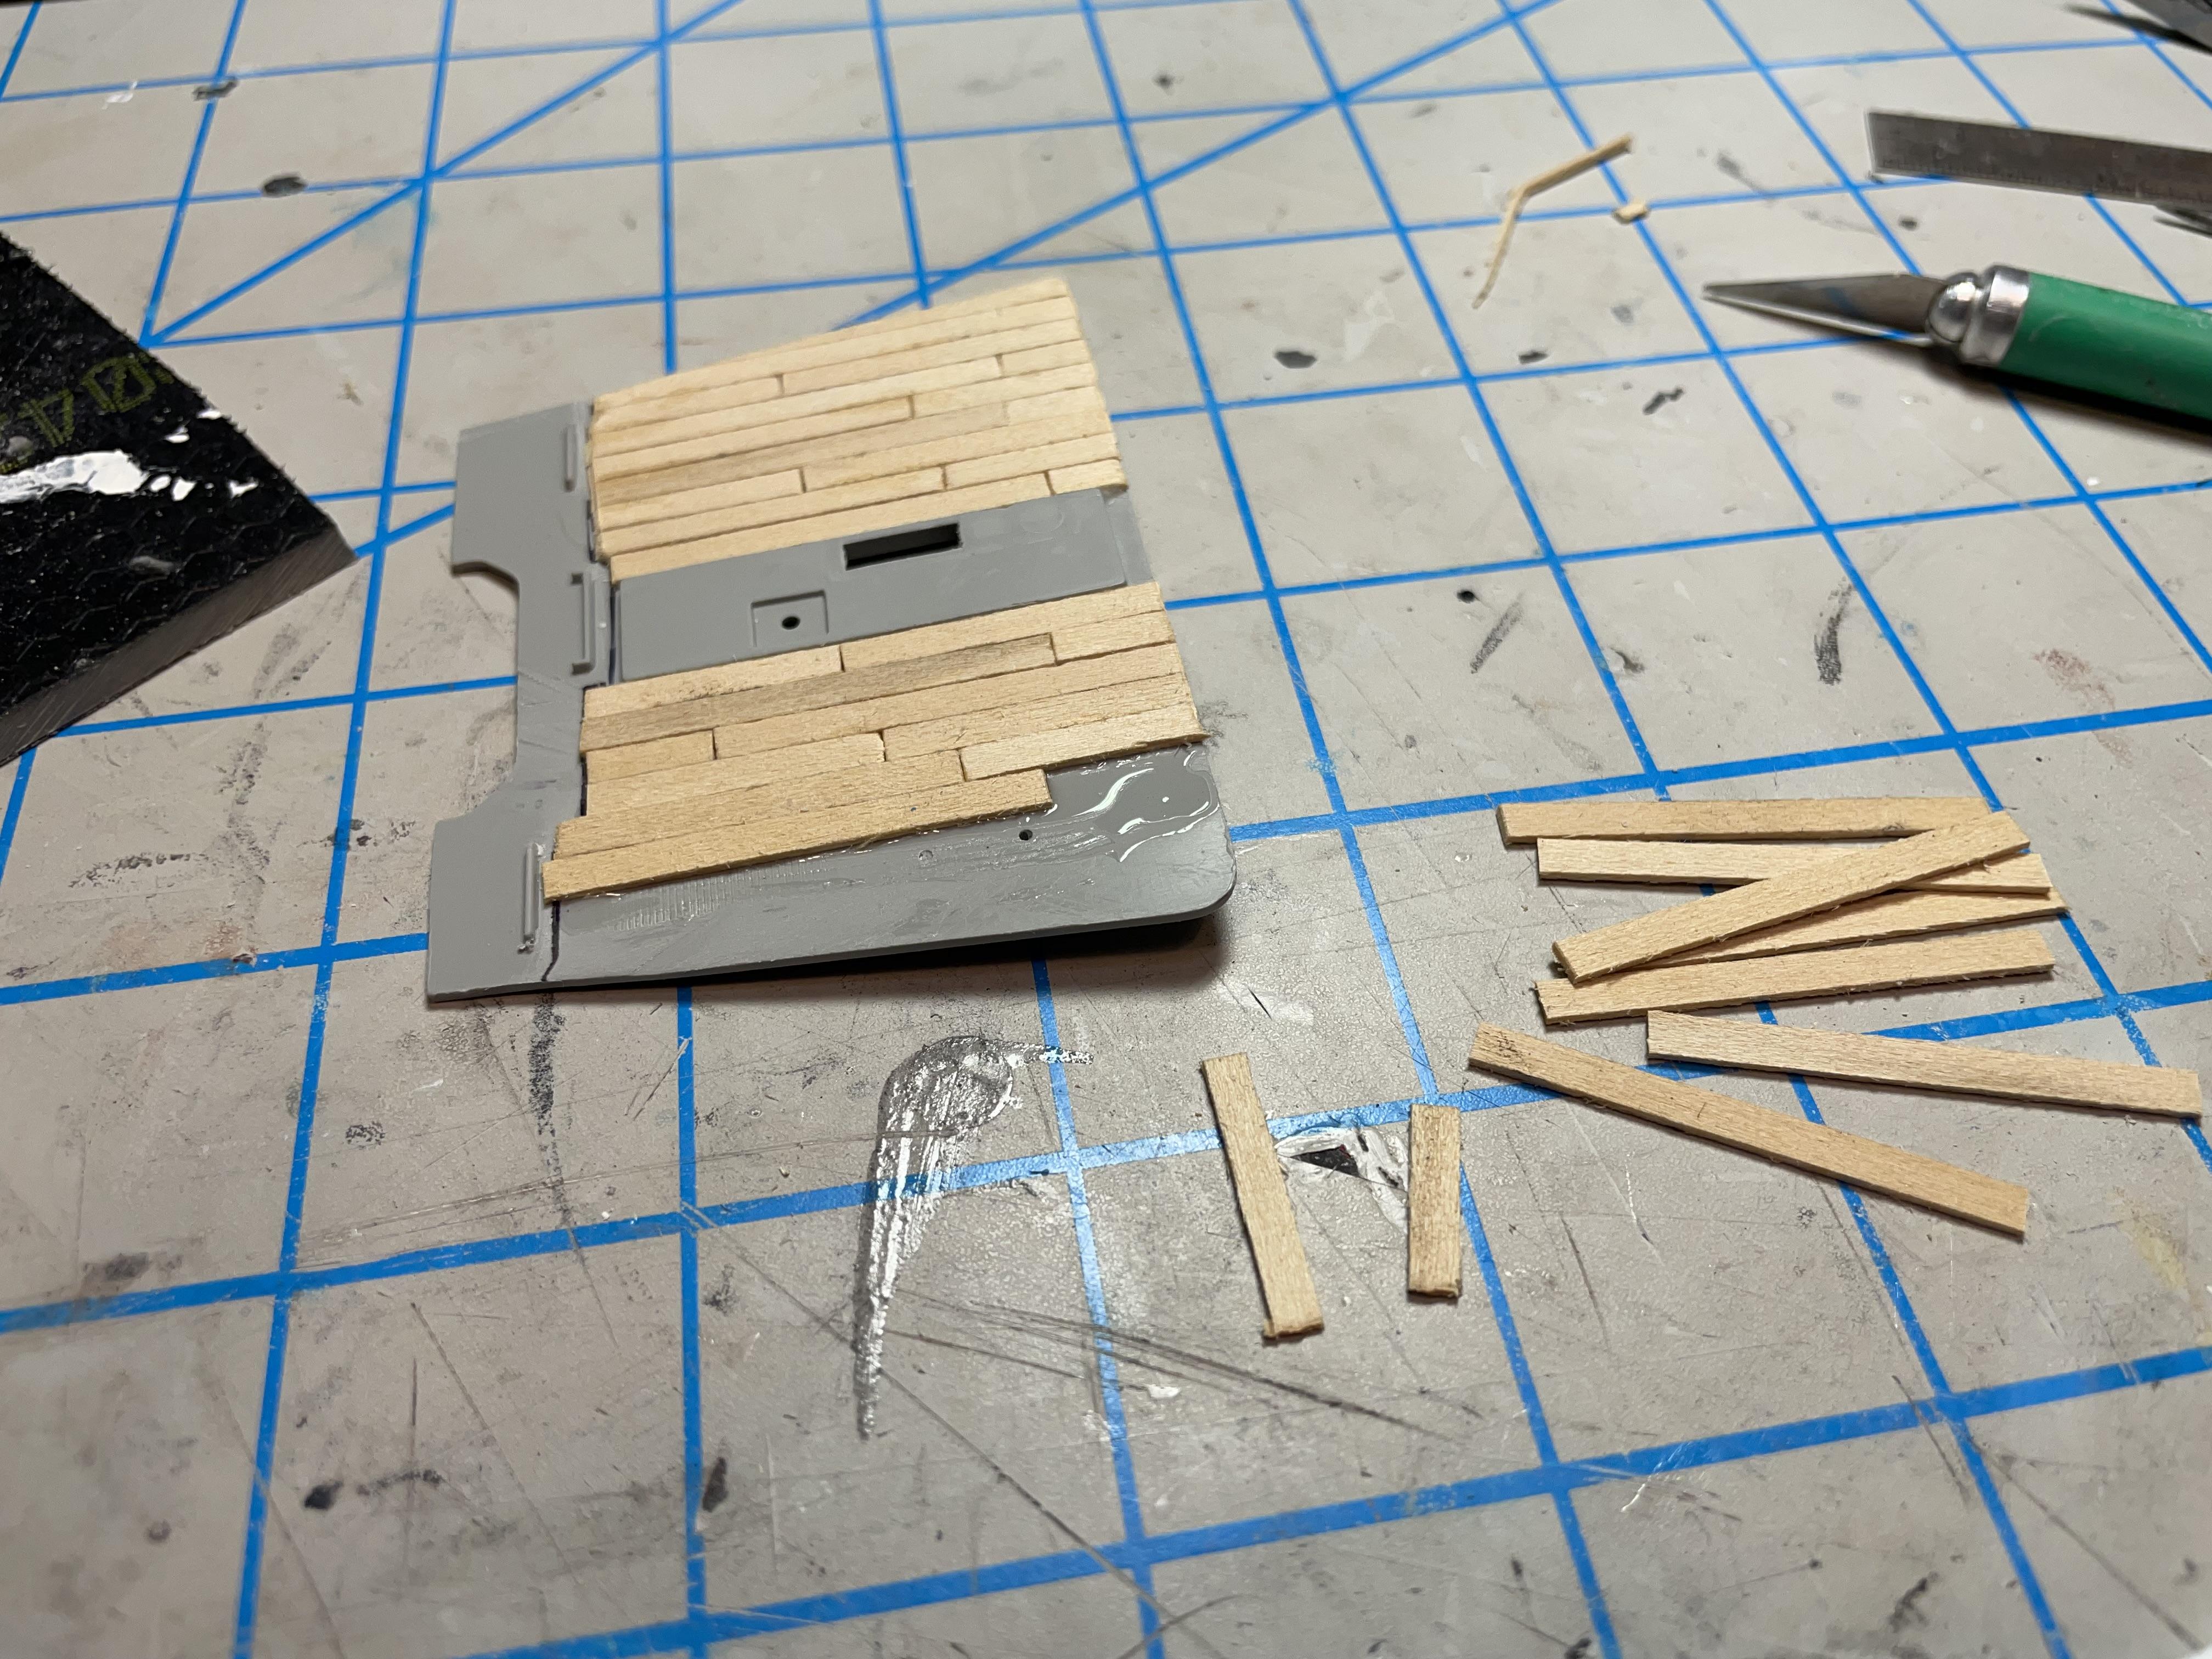
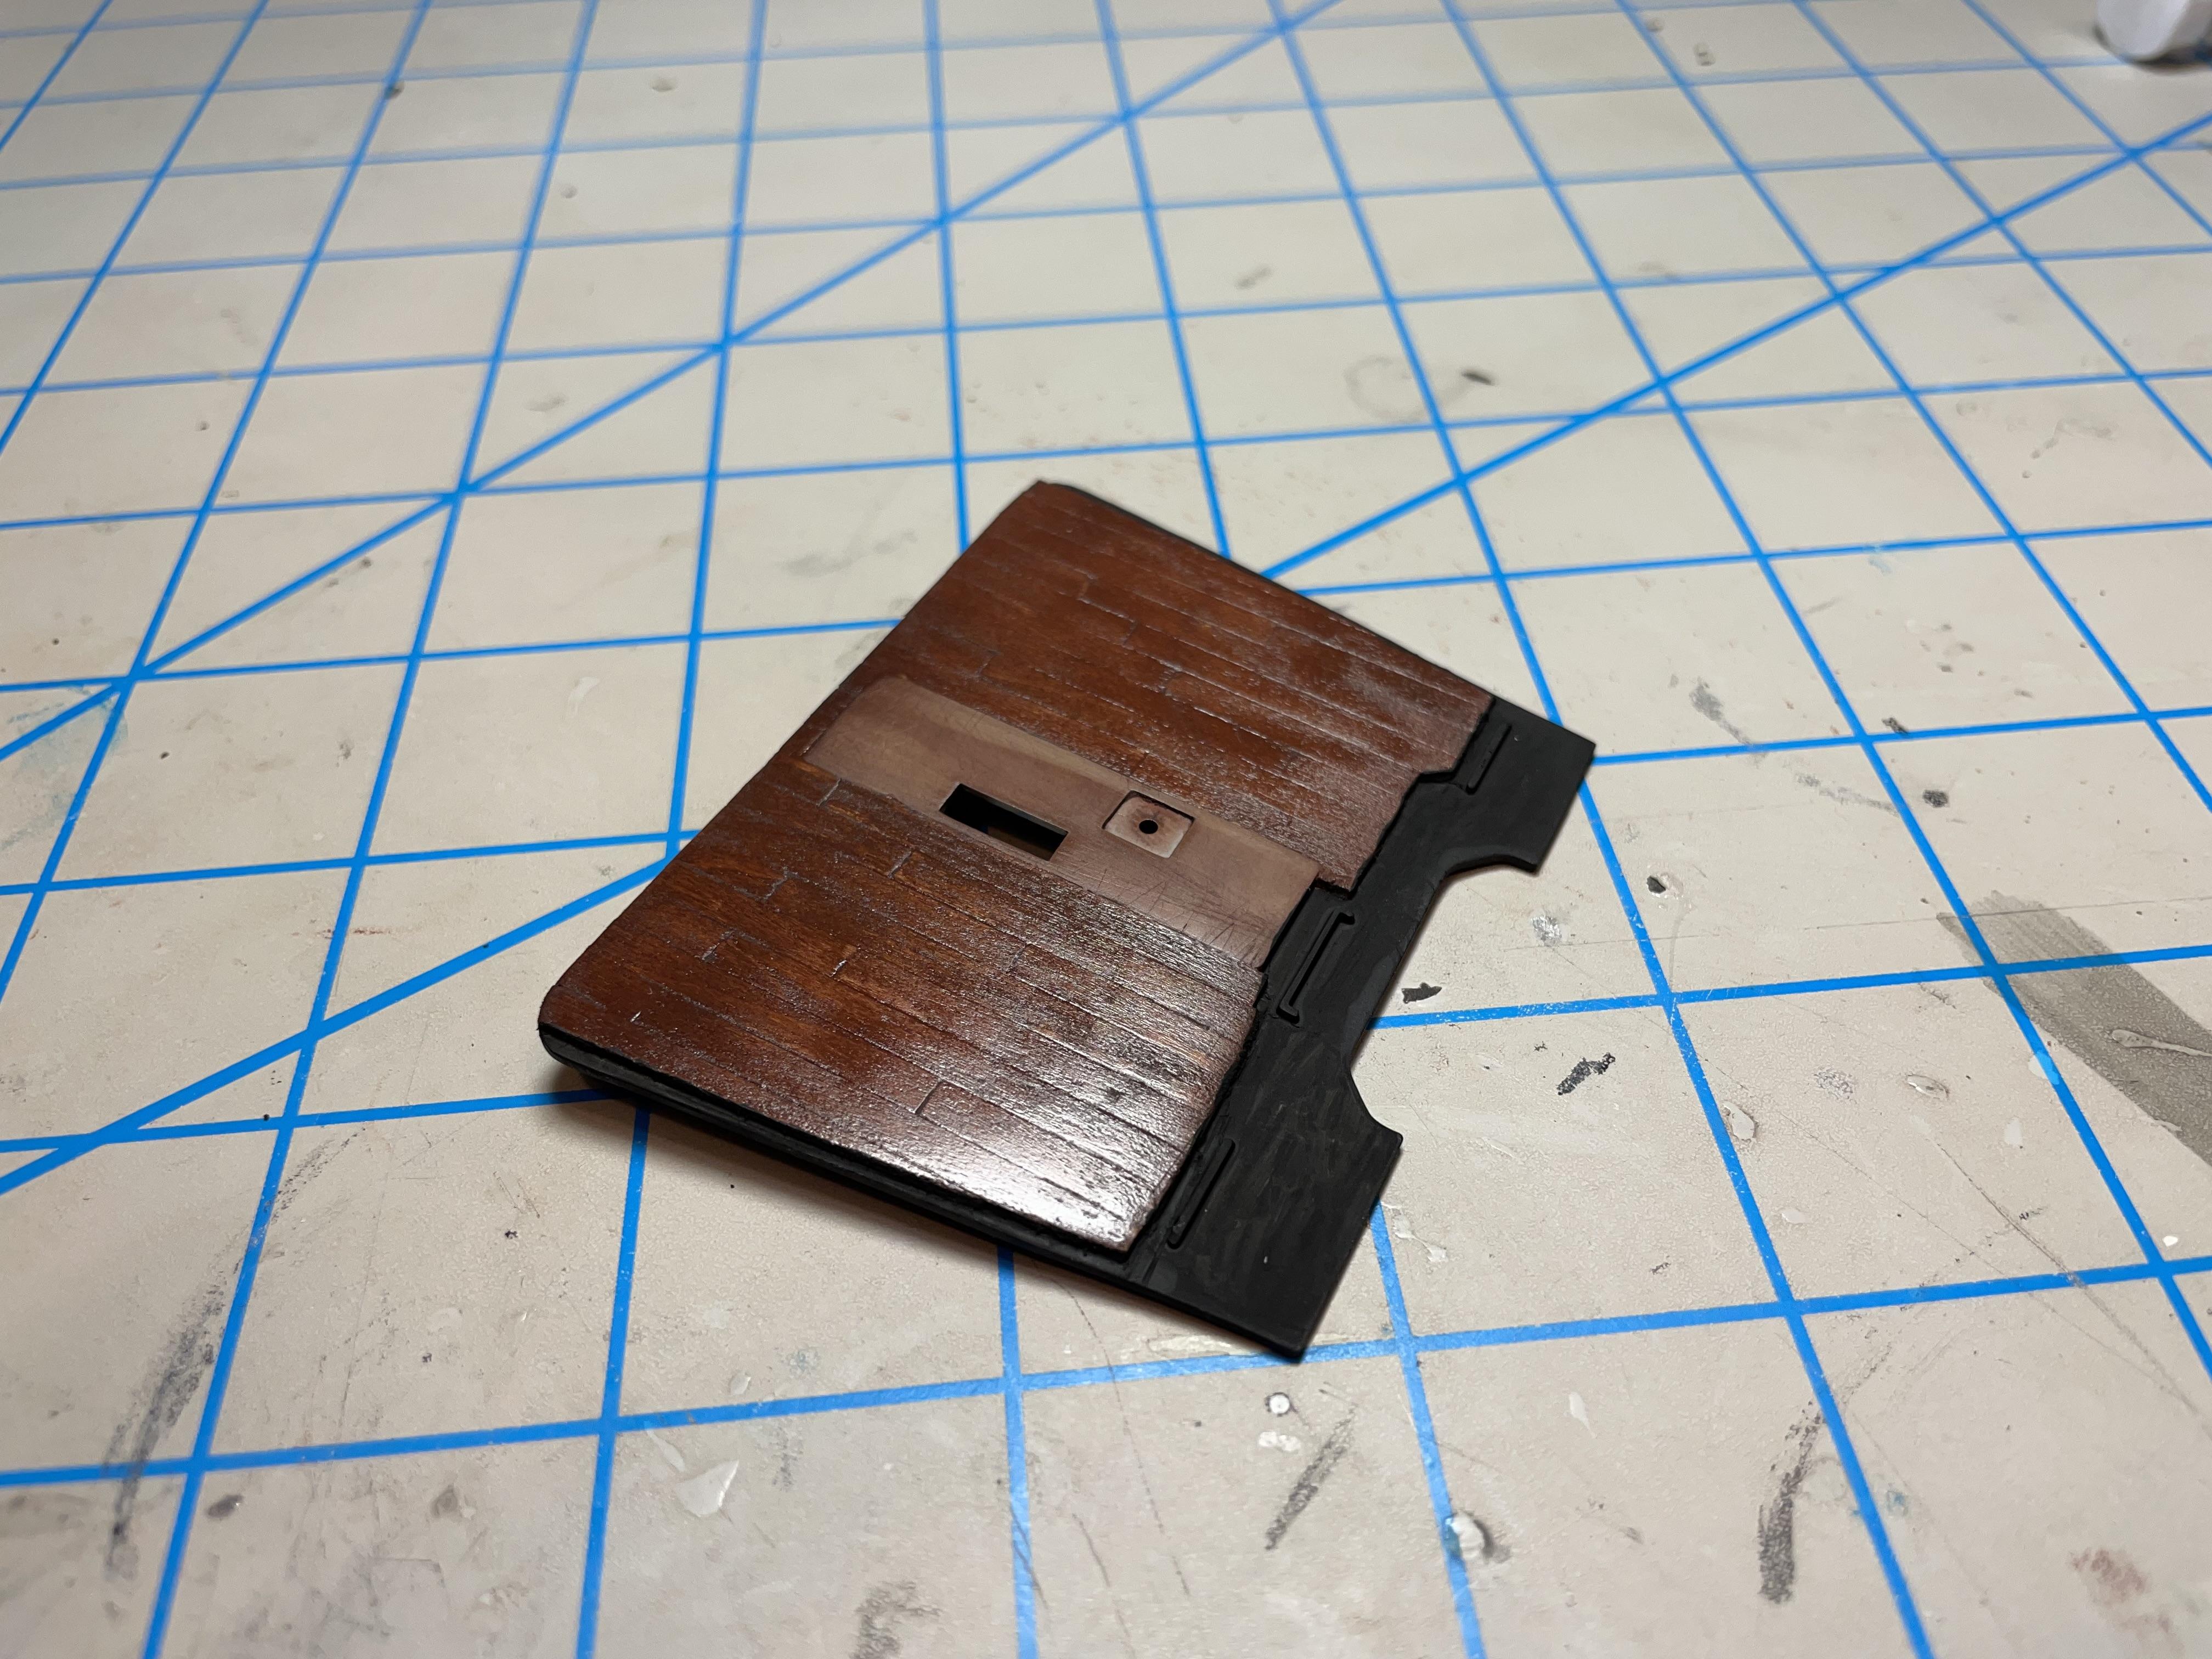
Here we have the cab and hood started. First, the firewall needed some corrections, most importantly the intake port needs to be the same on both sides. I’m not sure why Italeri goofed that up, but the opening on the vehicle’s right side, left facing the firewall, needs to be lowered and modified to match the other side. While I was at it, I removed the shallow example of a windshield washer reservoir with the intent of rebuilding a more realistic version to attach to the firewall. I eventually decided to make one that mounted to the radiator housing instead, as seen in an earlier post. Then, I cut out and created the pocket for the windshield wiper motor. I added an Ultraroof from Models by Dave, and it has the visor mounting brackets built-in. I broke a couple of them, but made the repairs. They are delicate. A lot of filler to smooth things out. I’ll also need to add rivet detail to replace some of it that was removed during the bodywork process along with some that wasn’t there to begin with. The 379-127 hood is a Bill Drennen casting, purchased from P&P resin years ago. It’s a bit hard to find nowadays, but contact Jamie at Moluminum, he has the molds. I added inner fender detail, along with a good deal of clean-up and filler to get everything as perfect as I can. I’ll also be adding proper rivet detail to the hood shortly, just like the cab. It’ll still need more filler, sanding and a final coat or two (or three) of primer and filler/sanding in between, before rivets are added and a final coat of primer before paint. Preparation can be frustrating, and it is 90% or more of the finishing process, but it’s a necessary evil. I added an improved center hood trim piece from styrene strip/shapes, and that’ll get some rivet detail as well. To better fit those bigger front tires, I added fender flares from re-worked Italeri 378 fender trim with styrene strip/quarter round. The “J” hood hinges are from GW trucks. For the cab floor, I decided to experiment with balsa wood strips and laying the “hardwood flooring” similar to the real thing. Sanded and stained, I like the results, and it’ll just need another coat of floor wax. Probably won’t be able to see the cab floor very well on the completed build, but it’s cool. Certainly easier to lay this type of flooring than in real life! I hope you’re still enjoying the build. More to come…
-
1996 Chevrolet C-3500 Dually
vincen47 replied to av405's topic in Model Trucks: Pickups, Vans, SUVs, Light Commercial
Beautiful truck! -
Excellent. The details do make all the difference.
-
Another Autocar DC9964B .. with a twist
vincen47 replied to Biggu's topic in Model Trucks: Big Rigs and Heavy Equipment
Utilitarian, functional, and just down to business, this truck isn’t fooling around. Neat concept and backstory. It certainly looks the part. I like the aftermarket parts and your added details. Love the weathering, especially the dirt on the windshield and tires. -
AMT C1500 rcsb
vincen47 replied to Dhgfx4's topic in Model Trucks: Pickups, Vans, SUVs, Light Commercial
Beautiful trucks, both the model and your 1:1! -
W900L Kenworth and Frameless Dump
vincen47 replied to DRIPTROIT 71's topic in WIP: Model Trucks: Big Rigs and Heavy Equipment
Nice shifter and flooring! -
'02 Silverado 1500 LT
vincen47 replied to ReduitRetro's topic in Model Trucks: Pickups, Vans, SUVs, Light Commercial
She’s a beauty! -
Caterpillar 3406E 15.8L Custom Reman
vincen47 replied to vincen47's topic in Model Trucks: Big Rigs and Heavy Equipment
Glad you like it. It’s going into a unique project - a Peterbilt 379 RV conversion, or toterhome. I started a build thread not too long ago over in the Big Rig WIP section of the forum. I have the chassis completed at this point, with a bunch more to be added soon. -
Looking forward to the show!
-
International 4300 tractor
vincen47 replied to Gary Chastain's topic in WIP: Model Trucks: Big Rigs and Heavy Equipment
With those wide front tires it’s looking like a nice Michigan heavy hauler. -
W900L Kenworth and Frameless Dump
vincen47 replied to DRIPTROIT 71's topic in WIP: Model Trucks: Big Rigs and Heavy Equipment
I like the look of the long frame with the daycab. -
Peterbilt 379 RV
vincen47 replied to vincen47's topic in WIP: Model Trucks: Big Rigs and Heavy Equipment
Oh man, now you tell me?!? 😆 -
Peterbilt 379 RV
vincen47 replied to vincen47's topic in WIP: Model Trucks: Big Rigs and Heavy Equipment
I’ve only made a few, including these, so I’m far from an expert. But, I started with a Alumilite resin casting kit from Hobby Lobby, and bought the clear resin and dye separately online. I’ve only done simple parts that require a single mold where one side of the part is “unfinished”, smooth, and without detail. No complicated undercuts. The kit instructions are relatively easy to follow. I’ve certainly appreciated this new way of creating some otherwise unavailable parts.