goodwin3224 Posted February 5, 2014 Author Share Posted February 5, 2014 It's even more funny in person lol. You can officially see how much I lowered the show truck lol Quote Link to comment Share on other sites More sharing options...
blackbeard Posted February 5, 2014 Share Posted February 5, 2014 what you do cut the springs and forgot to the shocks in Quote Link to comment Share on other sites More sharing options...
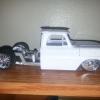
goodwin3224 Posted February 5, 2014 Author Share Posted February 5, 2014 Lol oh lord. Nope it's got a channeled cab lowered hood mounts low pros and the adjustable air ride kit. Not a work truck by any means haha Quote Link to comment Share on other sites More sharing options...
goodwin3224 Posted February 6, 2014 Author Share Posted February 6, 2014 got the #1 led kit. note this is for the light bars only. kit 2 and 3 will be for the rest of the truck Quote Link to comment Share on other sites More sharing options...
blackbeard Posted February 7, 2014 Share Posted February 7, 2014 where can you get the light Quote Link to comment Share on other sites More sharing options...
olsbooks Posted February 7, 2014 Share Posted February 7, 2014 Very nice. Are you fabricating an LED controller or was part of the light bar kit? This thing is going to be a beast! On the LED's Henry, check Radio Shack if you are up for some simple soldering. They are getting out of this kind of stuff more and more nationwide (sadly). I picked up a large "kit" of LED's (about 20 or so) of various sizes/colors for $5. Ditto for microswitches. The other thing is check Dollar General and cheapo type stores for leftover LED Christmas light strings and little prelit "desktop trees". Usually a buck or less if they still have them. Granted they will likely be all one color (clear) but are usually pefect for headlights or interior lights. Sometimes these strings can difficult to tell the voltage required and polarity. Just try series connecting AAA batteries. Try one battery, then reverse the wires. Then two batts in series and reverse wires, then three....and so on. You might pop one LED in the process of figuring it out, but at this price, so what?. Quote Link to comment Share on other sites More sharing options...
goodwin3224 Posted February 7, 2014 Author Share Posted February 7, 2014 really rough mauch up Quote Link to comment Share on other sites More sharing options...
blackbeard Posted February 7, 2014 Share Posted February 7, 2014 looks great Quote Link to comment Share on other sites More sharing options...
goodwin3224 Posted February 7, 2014 Author Share Posted February 7, 2014 thanks man Quote Link to comment Share on other sites More sharing options...
goodwin3224 Posted February 7, 2014 Author Share Posted February 7, 2014 (edited) ok this is the last one for the night. im just a kid in the candy store with this lol Edited February 7, 2014 by goodwin3224 Quote Link to comment Share on other sites More sharing options...
blackbeard Posted February 7, 2014 Share Posted February 7, 2014 yes you are like a kid in a candy store Quote Link to comment Share on other sites More sharing options...
goodwin3224 Posted February 7, 2014 Author Share Posted February 7, 2014 its that toy i always wanted Quote Link to comment Share on other sites More sharing options...
kilrathy10 Posted February 7, 2014 Share Posted February 7, 2014 Very nice work....Excellent idea and execution.... Quote Link to comment Share on other sites More sharing options...
goodwin3224 Posted February 7, 2014 Author Share Posted February 7, 2014 (edited) Thank you. Now I just have to hide the wires lol Edited February 7, 2014 by goodwin3224 Quote Link to comment Share on other sites More sharing options...
blackbeard Posted February 7, 2014 Share Posted February 7, 2014 very true Quote Link to comment Share on other sites More sharing options...
tbill Posted February 8, 2014 Share Posted February 8, 2014 that is COOL!!!!!! will be needing part numbers and directions for this Quote Link to comment Share on other sites More sharing options...
goodwin3224 Posted February 8, 2014 Author Share Posted February 8, 2014 (edited) Haha its very simple. I made my light bars up in about 15 minutes. I've been able to hide the wires in the rotator and bed which took a little longer. But now its time to feed them and the controller into the sleeper Edited February 8, 2014 by goodwin3224 Quote Link to comment Share on other sites More sharing options...
goodwin3224 Posted February 8, 2014 Author Share Posted February 8, 2014 (edited) i was able to hide 90 % of the wires by routing them down through the rotator (still rotates almost a full rotation) all i have left to do at that point to hide them is to build a few pannels. Edited February 8, 2014 by goodwin3224 Quote Link to comment Share on other sites More sharing options...
goodwin3224 Posted February 8, 2014 Author Share Posted February 8, 2014 also note my line of work has helped a considerable amount lol Quote Link to comment Share on other sites More sharing options...
goodwin3224 Posted February 8, 2014 Author Share Posted February 8, 2014 i now have all of the light br wiring hidden other than the control switch i also had 2 extra white leds si i figured i would add two extra lights to the rear Quote Link to comment Share on other sites More sharing options...
blackbeard Posted February 8, 2014 Share Posted February 8, 2014 looking great with all those lights you can use it as a night light Quote Link to comment Share on other sites More sharing options...
goodwin3224 Posted February 9, 2014 Author Share Posted February 9, 2014 Oh yeah lol. It is bright with the lights off. I keep adding more as well haha Flashing bumper lights Quote Link to comment Share on other sites More sharing options...
blackbeard Posted February 9, 2014 Share Posted February 9, 2014 you will need sunglass's standing next to it looking great keep at it Quote Link to comment Share on other sites More sharing options...
williamchevelleman1972 Posted February 9, 2014 Share Posted February 9, 2014 Looks outstanding. I love the lights. Cant wait to see the finished product!! definitely following this build. Quote Link to comment Share on other sites More sharing options...
goodwin3224 Posted February 9, 2014 Author Share Posted February 9, 2014 Filling up fast. I have two controllers in there now and waiting on the third. Then I have to clean up and shorten the power wire from my 9 volts and mount my switches Yeah your right Henry 14 lights down 45 more lights to go haha Thanks will. It's kinda crazy. I can't wait to see either. I'm almost ready to do paint Quote Link to comment Share on other sites More sharing options...
Recommended Posts
Join the conversation
You can post now and register later. If you have an account, sign in now to post with your account.
Note: Your post will require moderator approval before it will be visible.