vaughn Posted July 26, 2010 Share Posted July 26, 2010 Thanks guys for the input on the Packard. Won the bid, so I got another toy to play with for awhile. Lookin real hard at that 1/16 Rolls Phatom 2 on ebay....but concerned about parts missin. Never have done a 1/16th. Is 25$ a good price for that ? Awesome work you guys do ! thanks again Quote Link to comment Share on other sites More sharing options...
Junkman Posted July 26, 2010 Share Posted July 26, 2010 (edited) Re. the hinges. It is too bad that I was forced to sell my batch of 1/16th scale models when I was going through a nasty divorce about 15 years ago. In those days, I neither had a digital camera nor internet, hence there is no photographic evidence of my models. I had built them all, the SS100, Morgan Three Wheeler, both Rollses, several 540Ks, the 1928 SS, the 1928 Lincoln and all the Gakken A-bones. I can well remember the door hinge issue, i.e. the doors being seperate, but no hinges being provided with the kits. I used hinges which were intended for doll's house furniture. They make them in all kinds of sizes and shapes and they can easily be adapted and look fantastic. I also remember using hinges from cigar boxes in some cases - ask your local tobacconist for empty ones - or full ones if you fancy the odd puff. I'm not sure how popular dolls house furniture making is over beyond, but if you have difficulties obtaining these hinges, check out old Blighty - it's full of this stuff. Entirely btw, this ex-Gakken, Gunze, Entex, Revell, Anmark Phantom III is a right karfuffle to build. Totally contrary to the ex-Renwal (yes! you read right) now Revell AG Phantom II, which practically falls together and looks terrific - if you severly lower it. Edited July 26, 2010 by Junkman Quote Link to comment Share on other sites More sharing options...
Harry P. Posted July 26, 2010 Share Posted July 26, 2010 Around here you can find some nice brass hinges in the dollhouse section of Hobby lobby. Quote Link to comment Share on other sites More sharing options...
Junkman Posted July 26, 2010 Share Posted July 26, 2010 (edited) Around here you can find some nice brass hinges in the dollhouse section of Hobby lobby. See, I would have been surprised if not. I just noticed, I entirely forgot to mention that the SS100 model here is a stunningly beautiful build from a very challenging kit. Excellent work, m8! Edited July 26, 2010 by Junkman Quote Link to comment Share on other sites More sharing options...
sjordan2 Posted July 26, 2010 Share Posted July 26, 2010 (edited) Martin Swire and I discussed the issue of the PII body riding too high on the chassis, and he said he had similar problems with the SS 100. Here's a thread from a few years ago about how he dealt with it, along with something of a build journal: http://cs.scaleautomag.com/scacs/forums/p/45399/501732.aspx#501732 Edited July 26, 2010 by sjordan2 Quote Link to comment Share on other sites More sharing options...
Junkman Posted July 26, 2010 Share Posted July 26, 2010 (edited) Not saying they don't exist, but I seem to be unable to recall issues with the ride height of the SS100 kit. Did you have to make any adjustments in ths area, Doug? If yes, how did you do it? I'm asking, because this kit is on my to-do list as well. On a different note, I learned about Martin Swire's models not knowing he had passed away just days before I came across his modelling website by pure coincidence. Man, what a gap he left in the modelling world. I therefore dedicate every 1/16th scale model I build from now on to him and it will be built in as close as what I believe is to his spirit. Edited July 26, 2010 by Junkman Quote Link to comment Share on other sites More sharing options...
sjordan2 Posted July 26, 2010 Share Posted July 26, 2010 (edited) Not saying they don't exist, but I seem to be unable to recall issues with the ride height of the SS100 kit. Did you have to make any adjustments in ths area, Doug? If yes, how did you do it? I'm asking, because this kit is on my to-do list as well. I'm also looking forward to Doug's response. On the SS 100. Meanwhile, this is from an e-mail that Martin sent me about 4 years ago: "It occurred to me tonight that the SS100 suffers from much the same problem. They did have clearence between the top of the wheel and the wing (fender?) but not as much as the kit seems to have. If I remember rightly there was nothing too drastic about it - I think I just bent the springs gently till I got the stance I wanted. If you don't mind - a few tips on the SS100 (I hope I'm not trying to teach my Grandmother to suck eggs!!) Build the chassis inside the upturned body floorpan - I always do that because it means that when you have to fit it all out it will fit together and the chassis will be true. On that kit you will also find that the main body tub doesn't marry up too well around the rear wings (fenders again?). It will sit there nicely on dry fitting but that is dependent on doing the body from the plans. You won't want to have the firewall as a seperate piece (plans again!)- because you will find it better to blend it into the body and spray it that way - this means that it won't sit exactly where it is shown on the plans. You will find that by taking about 2mm off the two side supports on the chassis the firewall will the fit against those nicely and will pull the whole body back and it will fit at the rear. Eventually there is piping anyway all around so a little gap is not too worrying. The dashboard it wrong - but I'm sure you have seen that (I scratchbuilt another) The moulding of the scuttle is very inaccurate - when you have got rid of the mould lines etc and sanded it down you will find that the screen base will not fit! It is totally different. On my kit the 'hump' on the driver's side was totally different to the other side - you can't see this with the naked eye but it would look awful if the windscreen was fitted! That's why I scratchbuilt my screen (apart from the fact that I wanted it to fold) - I used multicore solder to get the base shape and built the screen up on that." PS: As you'll see from Martin's website, he made a number of modifications since he was building a replica of a client's 1:1 SS100; this included hand-laced wire wheels (tutorial at his site). Edited July 26, 2010 by sjordan2 Quote Link to comment Share on other sites More sharing options...
doug2013 Posted July 26, 2010 Author Share Posted July 26, 2010 (edited) Not saying they don't exist, but I seem to be unable to recall issues with the ride height of the SS100 kit. Did you have to make any adjustments in ths area, Doug? If yes, how did you do it? I'm asking, because this kit is on my to-do list as well. On a different note, I learned about Martin Swire's models not knowing he had passed away just days before I came across his modelling website by pure coincidence. Man, what a gap he left in the modelling world. I therefore dedicate every 1/16th scale model I build from now on to him and it will be built in as close as what I believe is to his spirit. well when i mocked it up for thew first time the rear axel can be ajusted up or down and a little to the left or the right i had measured it up and i made so where the tires were just so where there was a cm inbetween the tire and the body the front axle was built and only turnedthe wheels one way buyt i got the steering colom to turn the wheels so that was my mod to this car but the height was way to high for me it would of just looked silly so i managed to adjust them upwards to the main body you also have to build the chassis form the ground up so i stuck with the original plans in the kit but you can always modify it i you wished to that also would changed the ride height Edited July 26, 2010 by doug2013 Quote Link to comment Share on other sites More sharing options...
vaughn Posted July 26, 2010 Share Posted July 26, 2010 Well, I should be receiving both the '30 four door Packard Speedster Phaeton 1/25 and the '34 Rolls Royce Phantom 2 Contenial, 1/16. I hope the issues are minimal. If not, I hope I can turn to you guys for some tips. This ought to keep me busy and out of trouble for awhile. Quote Link to comment Share on other sites More sharing options...
Junkman Posted July 26, 2010 Share Posted July 26, 2010 Well, I should be receiving both the '30 four door Packard Speedster Phaeton 1/25 and the '34 Rolls Royce Phantom 2 Contenial, 1/16. I hope the issues are minimal. If not, I hope I can turn to you guys for some tips. This ought to keep me busy and out of trouble for awhile. I may take you up on the RR PII. I have an unboxed but complete one floating around here somewhere. We could build them parallel and exchange our experiences. Apart from the stance issue discussed in this thread, there aren't any major issues I can recall. It was one of the first models I ever built and even with my skill level (or rather, the lack of it) back then, I was amazed how well it goes together. Of course, the sky is the limit, when it comes to superdetailing, but AFAIR it builds into a very pleasing model with relatively little effort. Quote Link to comment Share on other sites More sharing options...
sjordan2 Posted July 27, 2010 Share Posted July 27, 2010 I may take you up on the RR PII. I have an unboxed but complete one floating around here somewhere. We could build them parallel and exchange our experiences. Apart from the stance issue discussed in this thread, there aren't any major issues I can recall. It was one of the first models I ever built and even with my skill level (or rather, the lack of it) back then, I was amazed how well it goes together. Of course, the sky is the limit, when it comes to superdetailing, but AFAIR it builds into a very pleasing model with relatively little effort. For both of you, PM me with your mailing addresses. I have a huge digital reference file on the PII, particularly Gurney-Nutting, which contains my complete original PII owners manual with color-coded wiring diagram (thanks to scanning by Harry P) and dozens of galleries and massive detail information. The file is nearly 1 GB, so if you could send me a USB flash drive of 1-2 GB that I could put the file on, that would be helpful. But I'm glad to make CD-ROMs. Just let me know. Quote Link to comment Share on other sites More sharing options...
vaughn Posted July 27, 2010 Share Posted July 27, 2010 For both of you, PM me with your mailing addresses. I have a huge digital reference file on the PII, particularly Gurney-Nutting, which contains my complete original PII owners manual with color-coded wiring diagram (thanks to scanning by Harry P) and dozens of galleries and massive detail information. The file is nearly 1 GB, so if you could send me a USB flash drive of 1-2 GB that I could put the file on, that would be helpful. But I'm glad to make CD-ROMs. Just let me know. Done deal. Looking foward to this. thanks again Quote Link to comment Share on other sites More sharing options...
vaughn Posted July 27, 2010 Share Posted July 27, 2010 I may take you up on the RR PII. I have an unboxed but complete one floating around here somewhere. We could build them parallel and exchange our experiences. Apart from the stance issue discussed in this thread, there aren't any major issues I can recall. It was one of the first models I ever built and even with my skill level (or rather, the lack of it) back then, I was amazed how well it goes together. Of course, the sky is the limit, when it comes to superdetailing, but AFAIR it builds into a very pleasing model with relatively little effort. That will be cool. Quote Link to comment Share on other sites More sharing options...
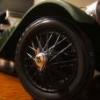
sjordan2 Posted July 27, 2010 Share Posted July 27, 2010 Vaughn & Christian: One thing Martin mentioned was that the Phantom II tires were very soft and could come off the rims, so he was thinking of devising some sort of inner tube to keep them right. Based on some shots of a built PII that sold a couple of days ago for $25, he's right. So you should keep that in your thinking. http://cgi.ebay.com/1978-REVELL-1-16-ROLLS-ROYCE-PHANTOM-II-GURNEY-1294-/120598925227?cmd=ViewItem&pt=LH_DefaultDomain_0&hash=item1c14418fab PS: Today, I have sent both of you copies of my reference files on the PII Quote Link to comment Share on other sites More sharing options...
Junkman Posted July 27, 2010 Share Posted July 27, 2010 With the first ones I built, I encounterd the same issue. My solution for the issue was tissue (pun intended). I folded tissue paper and stuffed the tyres with it. On a different note, I think we have highjacked Doug's thread long enough and should open a seperate one. What do you guys think? Quote Link to comment Share on other sites More sharing options...
Tony T Posted July 27, 2010 Share Posted July 27, 2010 Doug - Nice build. That's when cars had style! Perfect colour choice, too. Quote Link to comment Share on other sites More sharing options...
vaughn Posted July 27, 2010 Share Posted July 27, 2010 With the first ones I built, I encounterd the same issue. My solution for the issue was tissue (pun intended). I folded tissue paper and stuffed the tyres with it. On a different note, I think we have highjacked Doug's thread long enough and should open a seperate one. What do you guys think? You are so correct ! Sorry about that Doug, but your build, just,just, just made me go ahead and build one and get it out of my system !! "INSPIRATION MAN" Quote Link to comment Share on other sites More sharing options...
Junkman Posted July 27, 2010 Share Posted July 27, 2010 OK, I opened a new thread here: http://www.modelcarsmag.com/forums/index.php?showtopic=33700 Many, many thanks again Doug! Yes, to say your buildup of the Jaguar is most inspiring, is certainly not an understatement, q.e.d. Quote Link to comment Share on other sites More sharing options...
doug2013 Posted July 27, 2010 Author Share Posted July 27, 2010 thaks guy Quote Link to comment Share on other sites More sharing options...
Recommended Posts
Join the conversation
You can post now and register later. If you have an account, sign in now to post with your account.
Note: Your post will require moderator approval before it will be visible.