Chariots of Fire
-
Posts
2,461 -
Joined
-
Last visited
10 Followers
.thumb.png.e64ca4fead948adbdf6a111229b6cf2f.png)


Recent Profile Visitors


Chariots of Fire's Achievements
MCM Ohana (6/6)
-

Mack monogram fire truck
Chariots of Fire replied to Aerodyne03's topic in WIP: Model Trucks: Big Rigs and Heavy Equipment
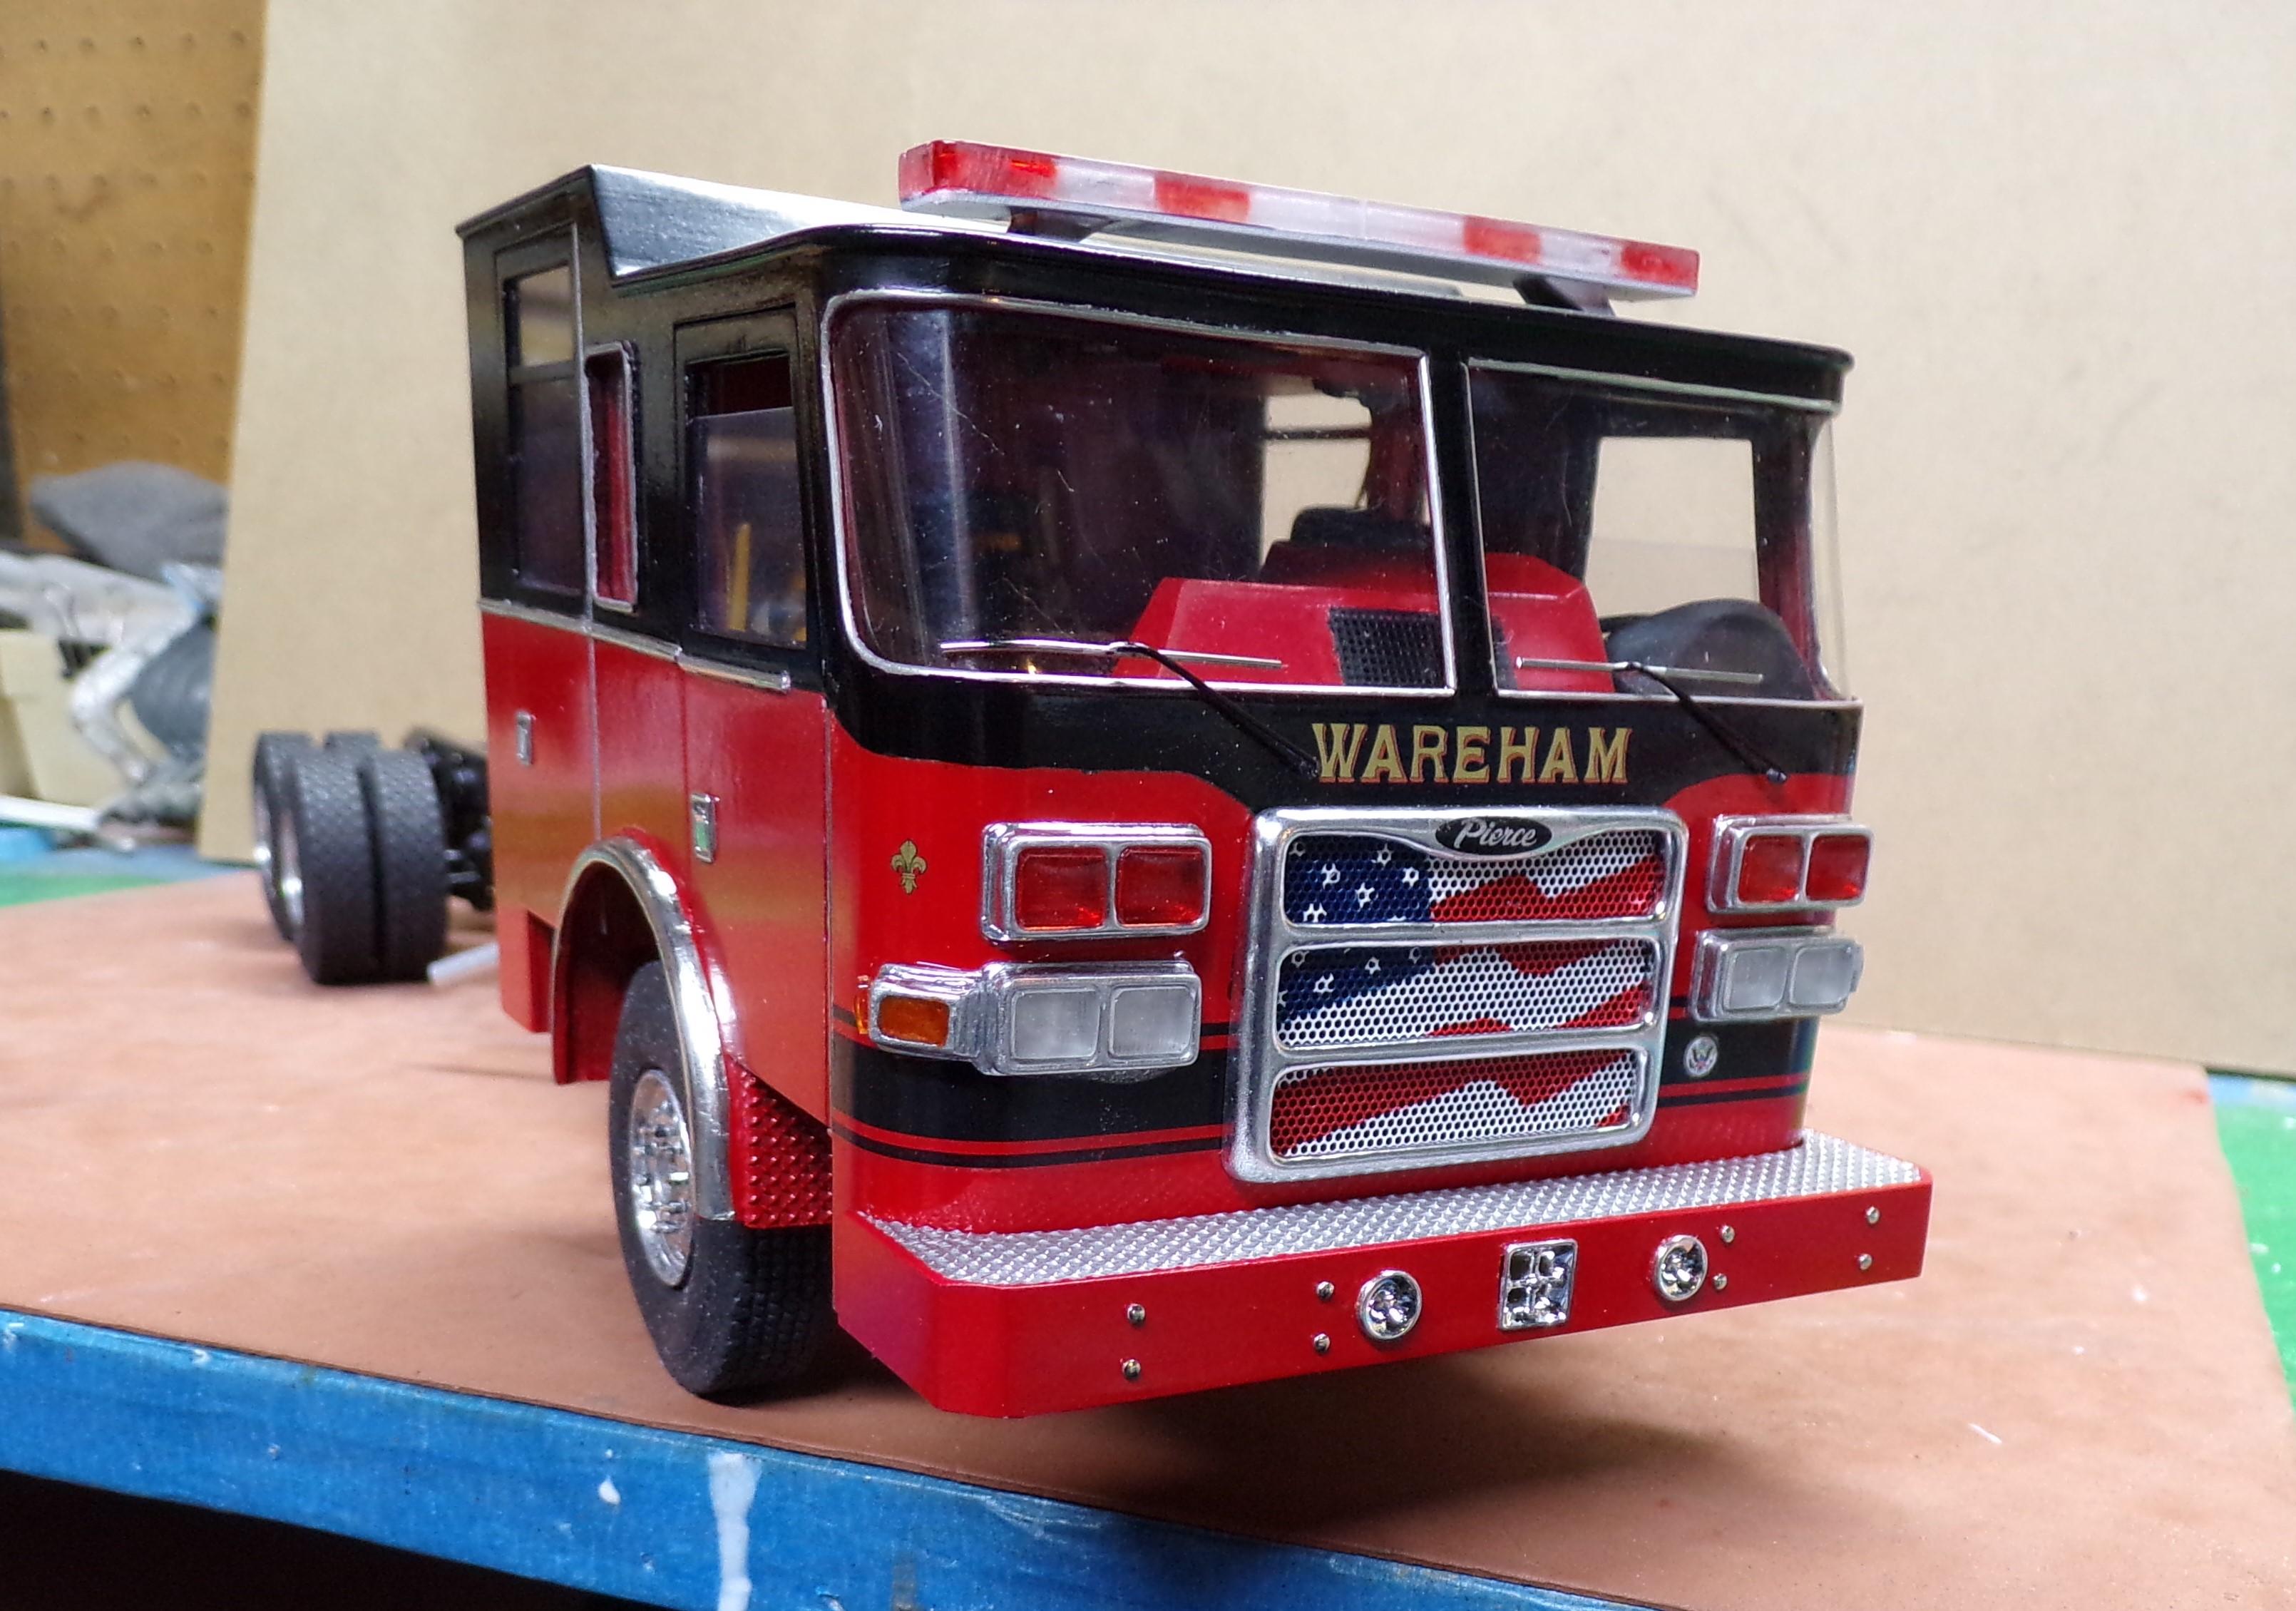
Sorry that I don't have any in-progress pix of the Mack. The headlights are clear lenses that just pop in place. I used Tamiya clear red and clear amber to paint the red warning lights and the amber turn signals. It really pops over the chrome base. The body and chassis are very durable and easy to work with. They did some nice work on the kit. Why they molded in the cross lays above the pump panel is beyond me. The other thing that they could have improved on was the tires. But then it would not have been a snap kit. To fix that I cut the sidewalls off some spare tires of the same type of kit, sanded them flush, and glued them to the open face of the tires that I was using. This fills in the back of the tires and adds to the overall appearance. Don't forget to add a vertical windshield divider to the windshield area. Windshields on those Macks were not one-piece. Plastic strip stock works well. Hope this helps. -
Outstanding job of putting this all together. Weathering is great and the details are the way they should be. Thanks for posting!👍
-
Best clear material for large flat windows?
Chariots of Fire replied to crowe-t's topic in Tips, Tricks, and Tutorials
PETG material is the best in my opinion. 0.020" thickness. It has protective backing on both faces that need to be removed first. For flat surfaces it is stiff enough not to bend and can be cut with shears. Agree with sanding round corners rather than trying to cut them. The material is very clear and transparent. I use it for vacu-forming but for what you are going to use it for I would say it is perfect. -
A little big project
Chariots of Fire replied to Chariots of Fire's topic in WIP: Model Trucks: Big Rigs and Heavy Equipment
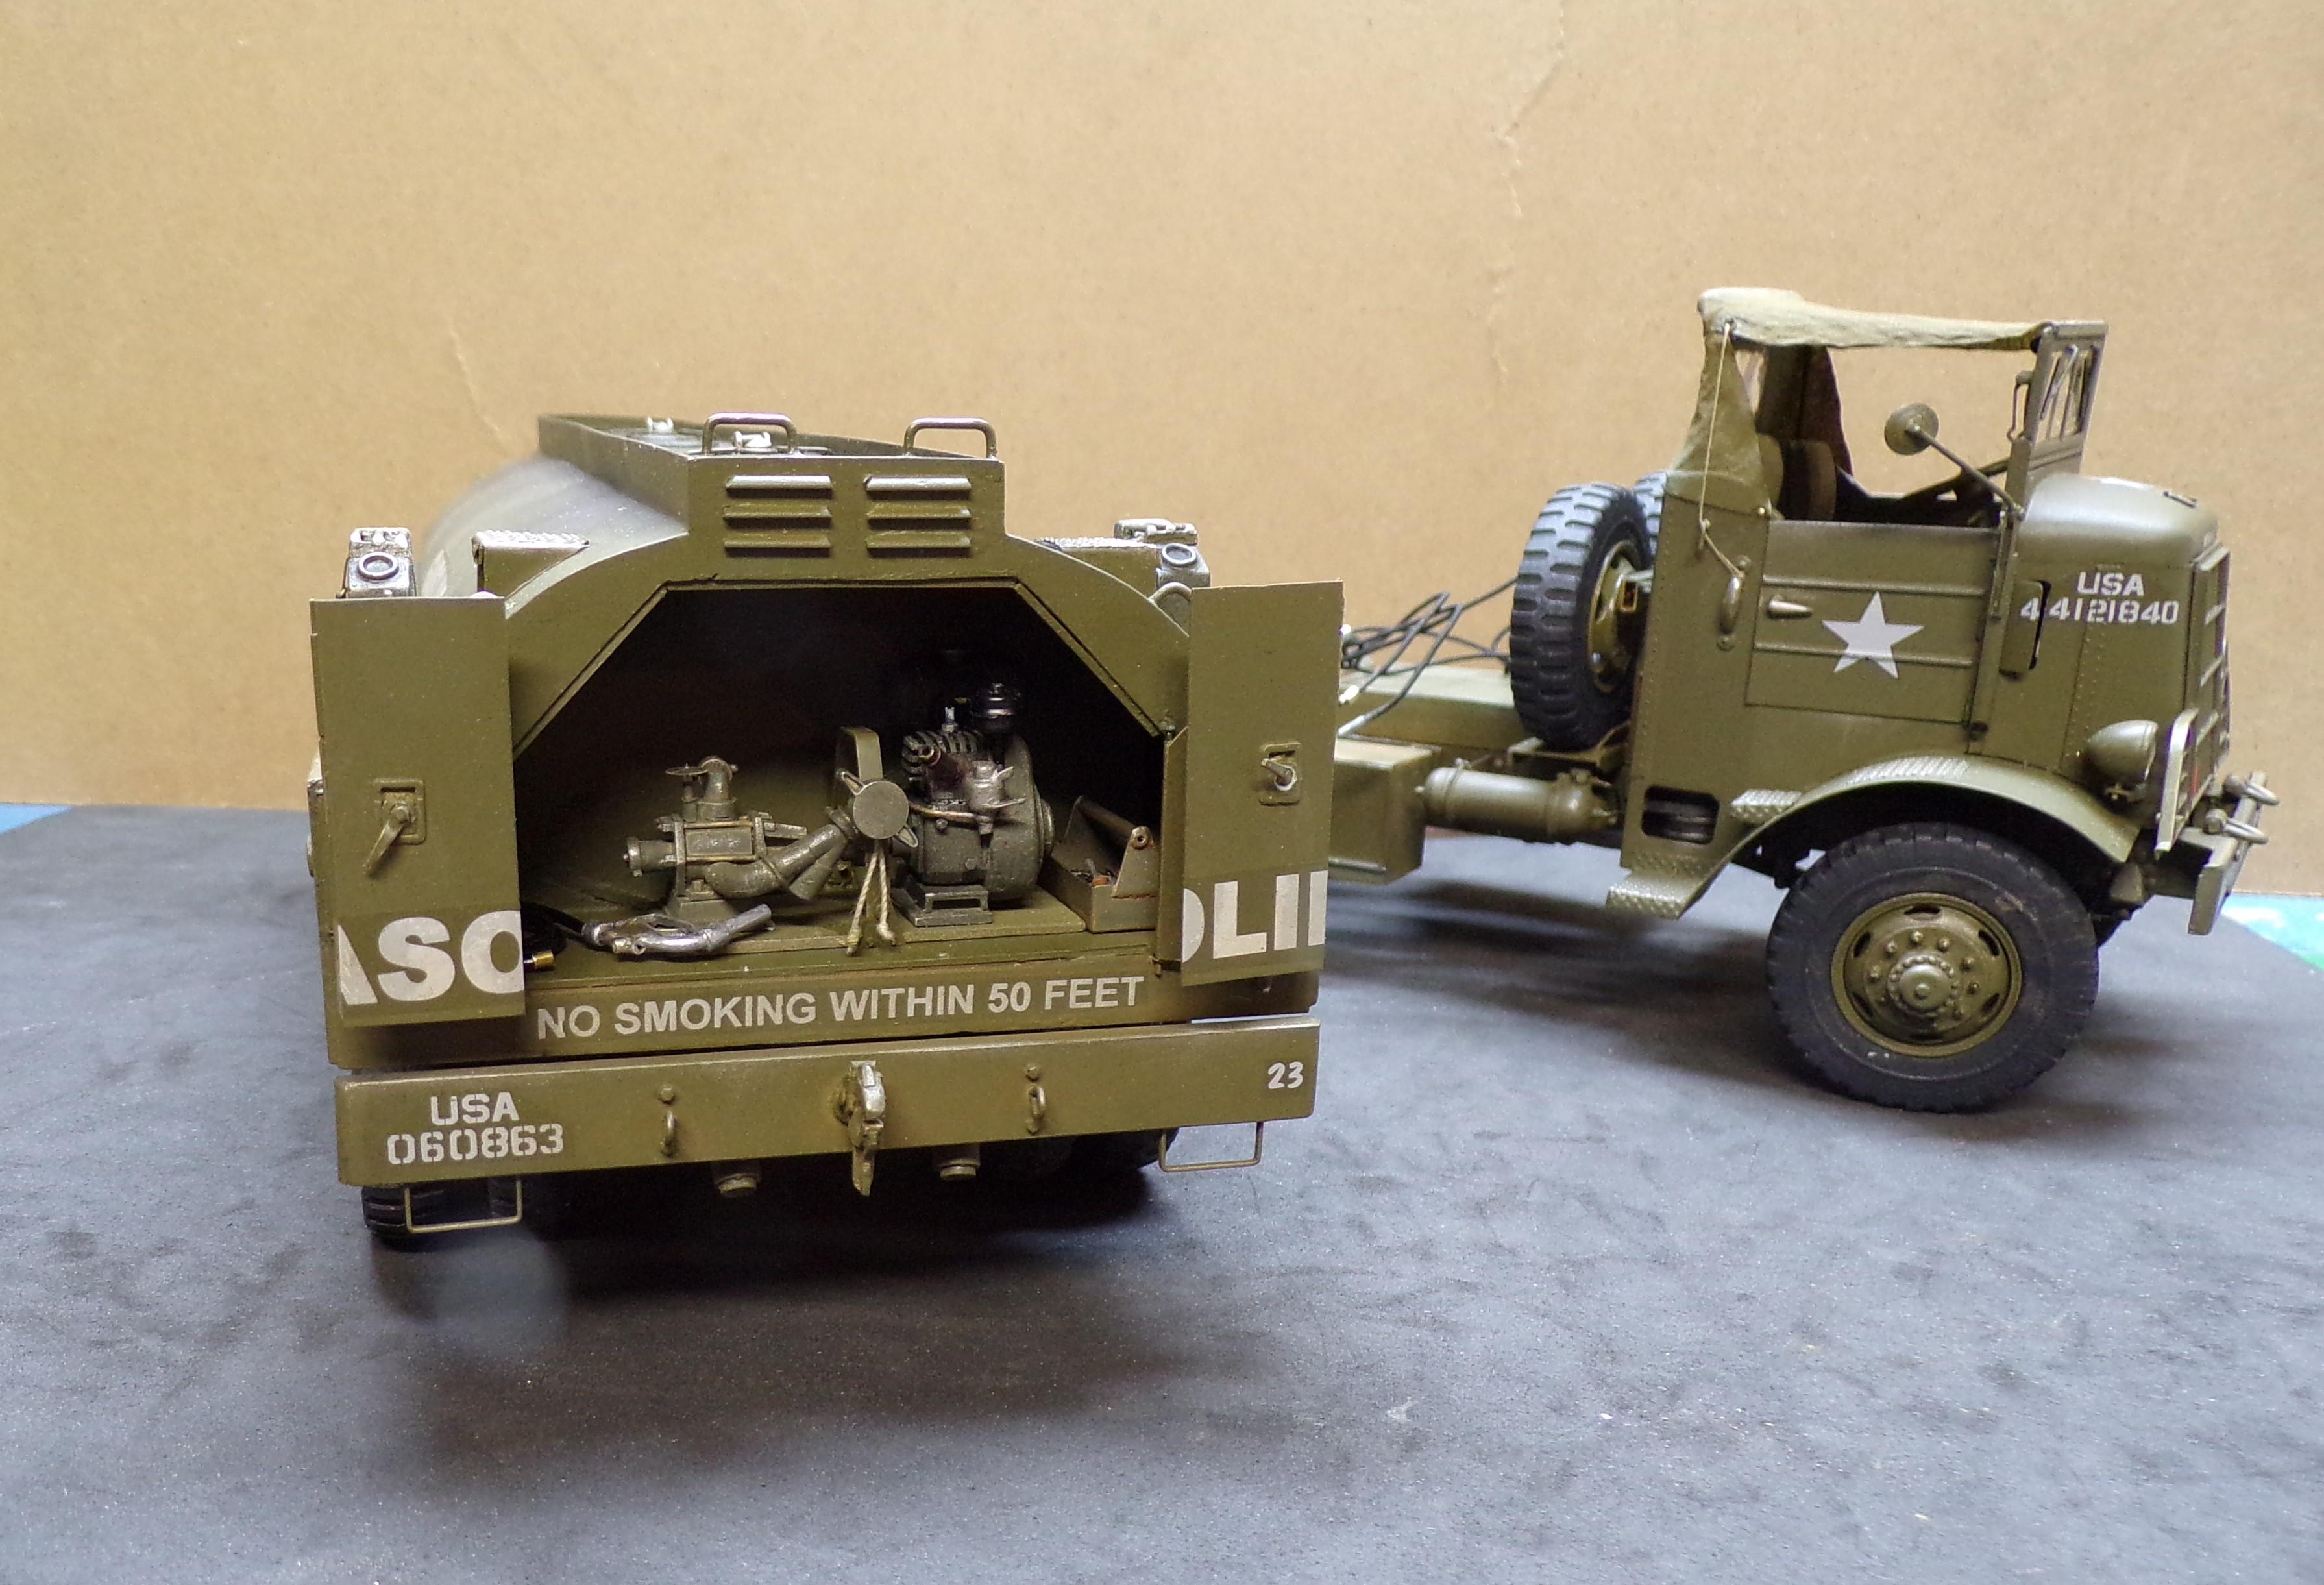
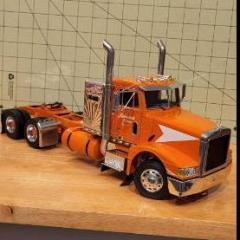
It's hard to read but that very sign is on the right rear of the truck body!😁 -
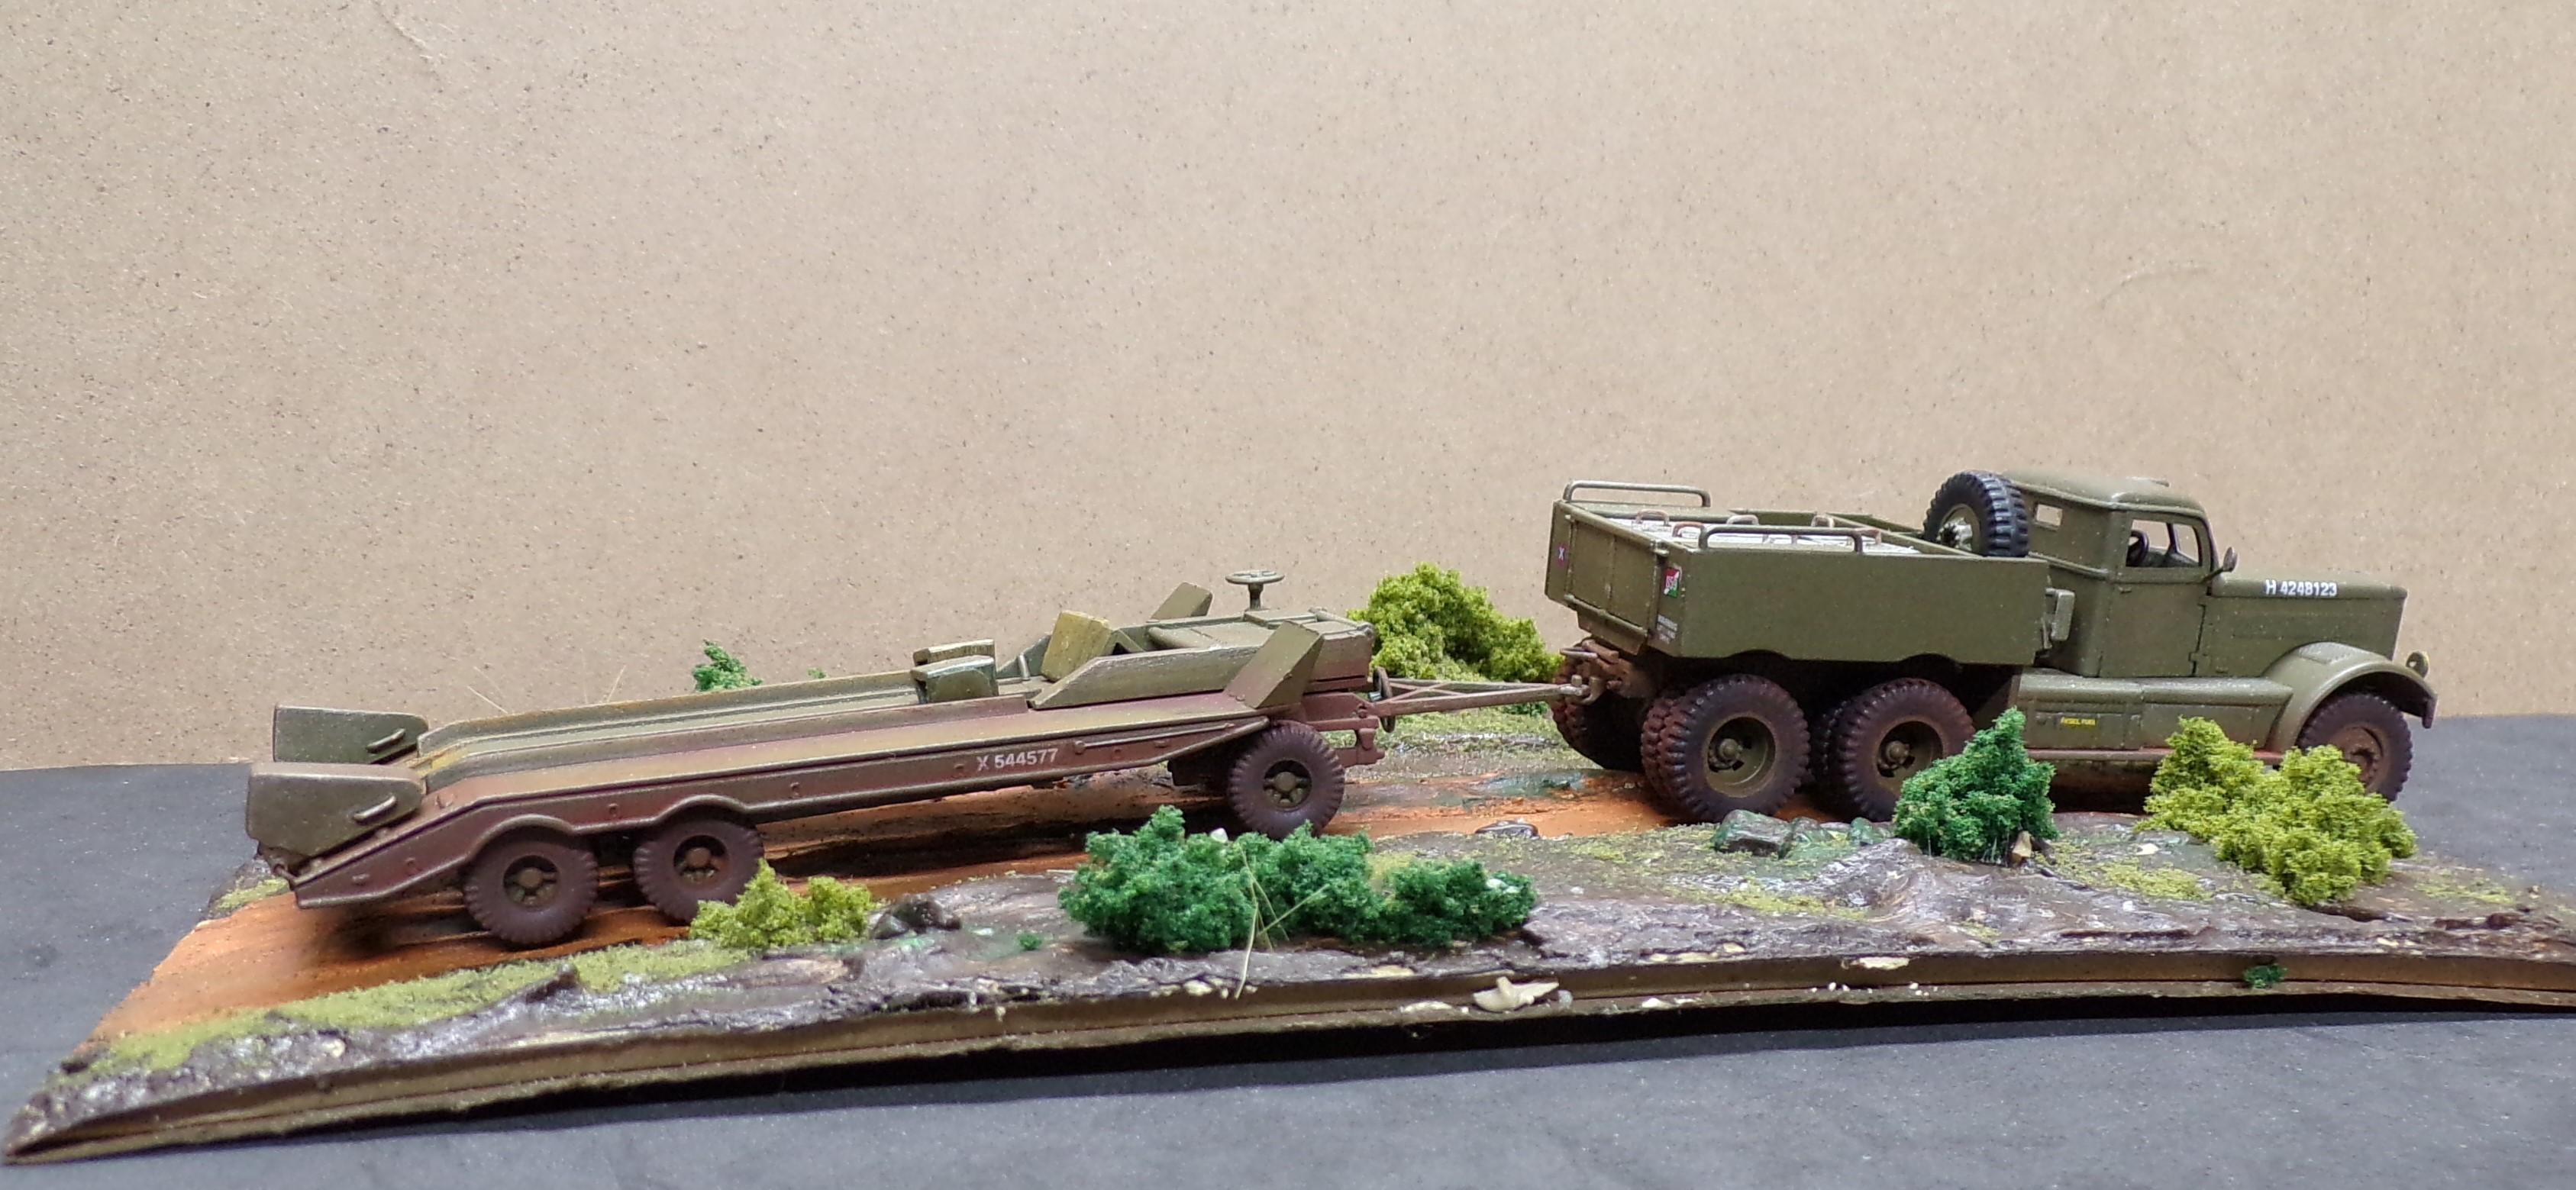
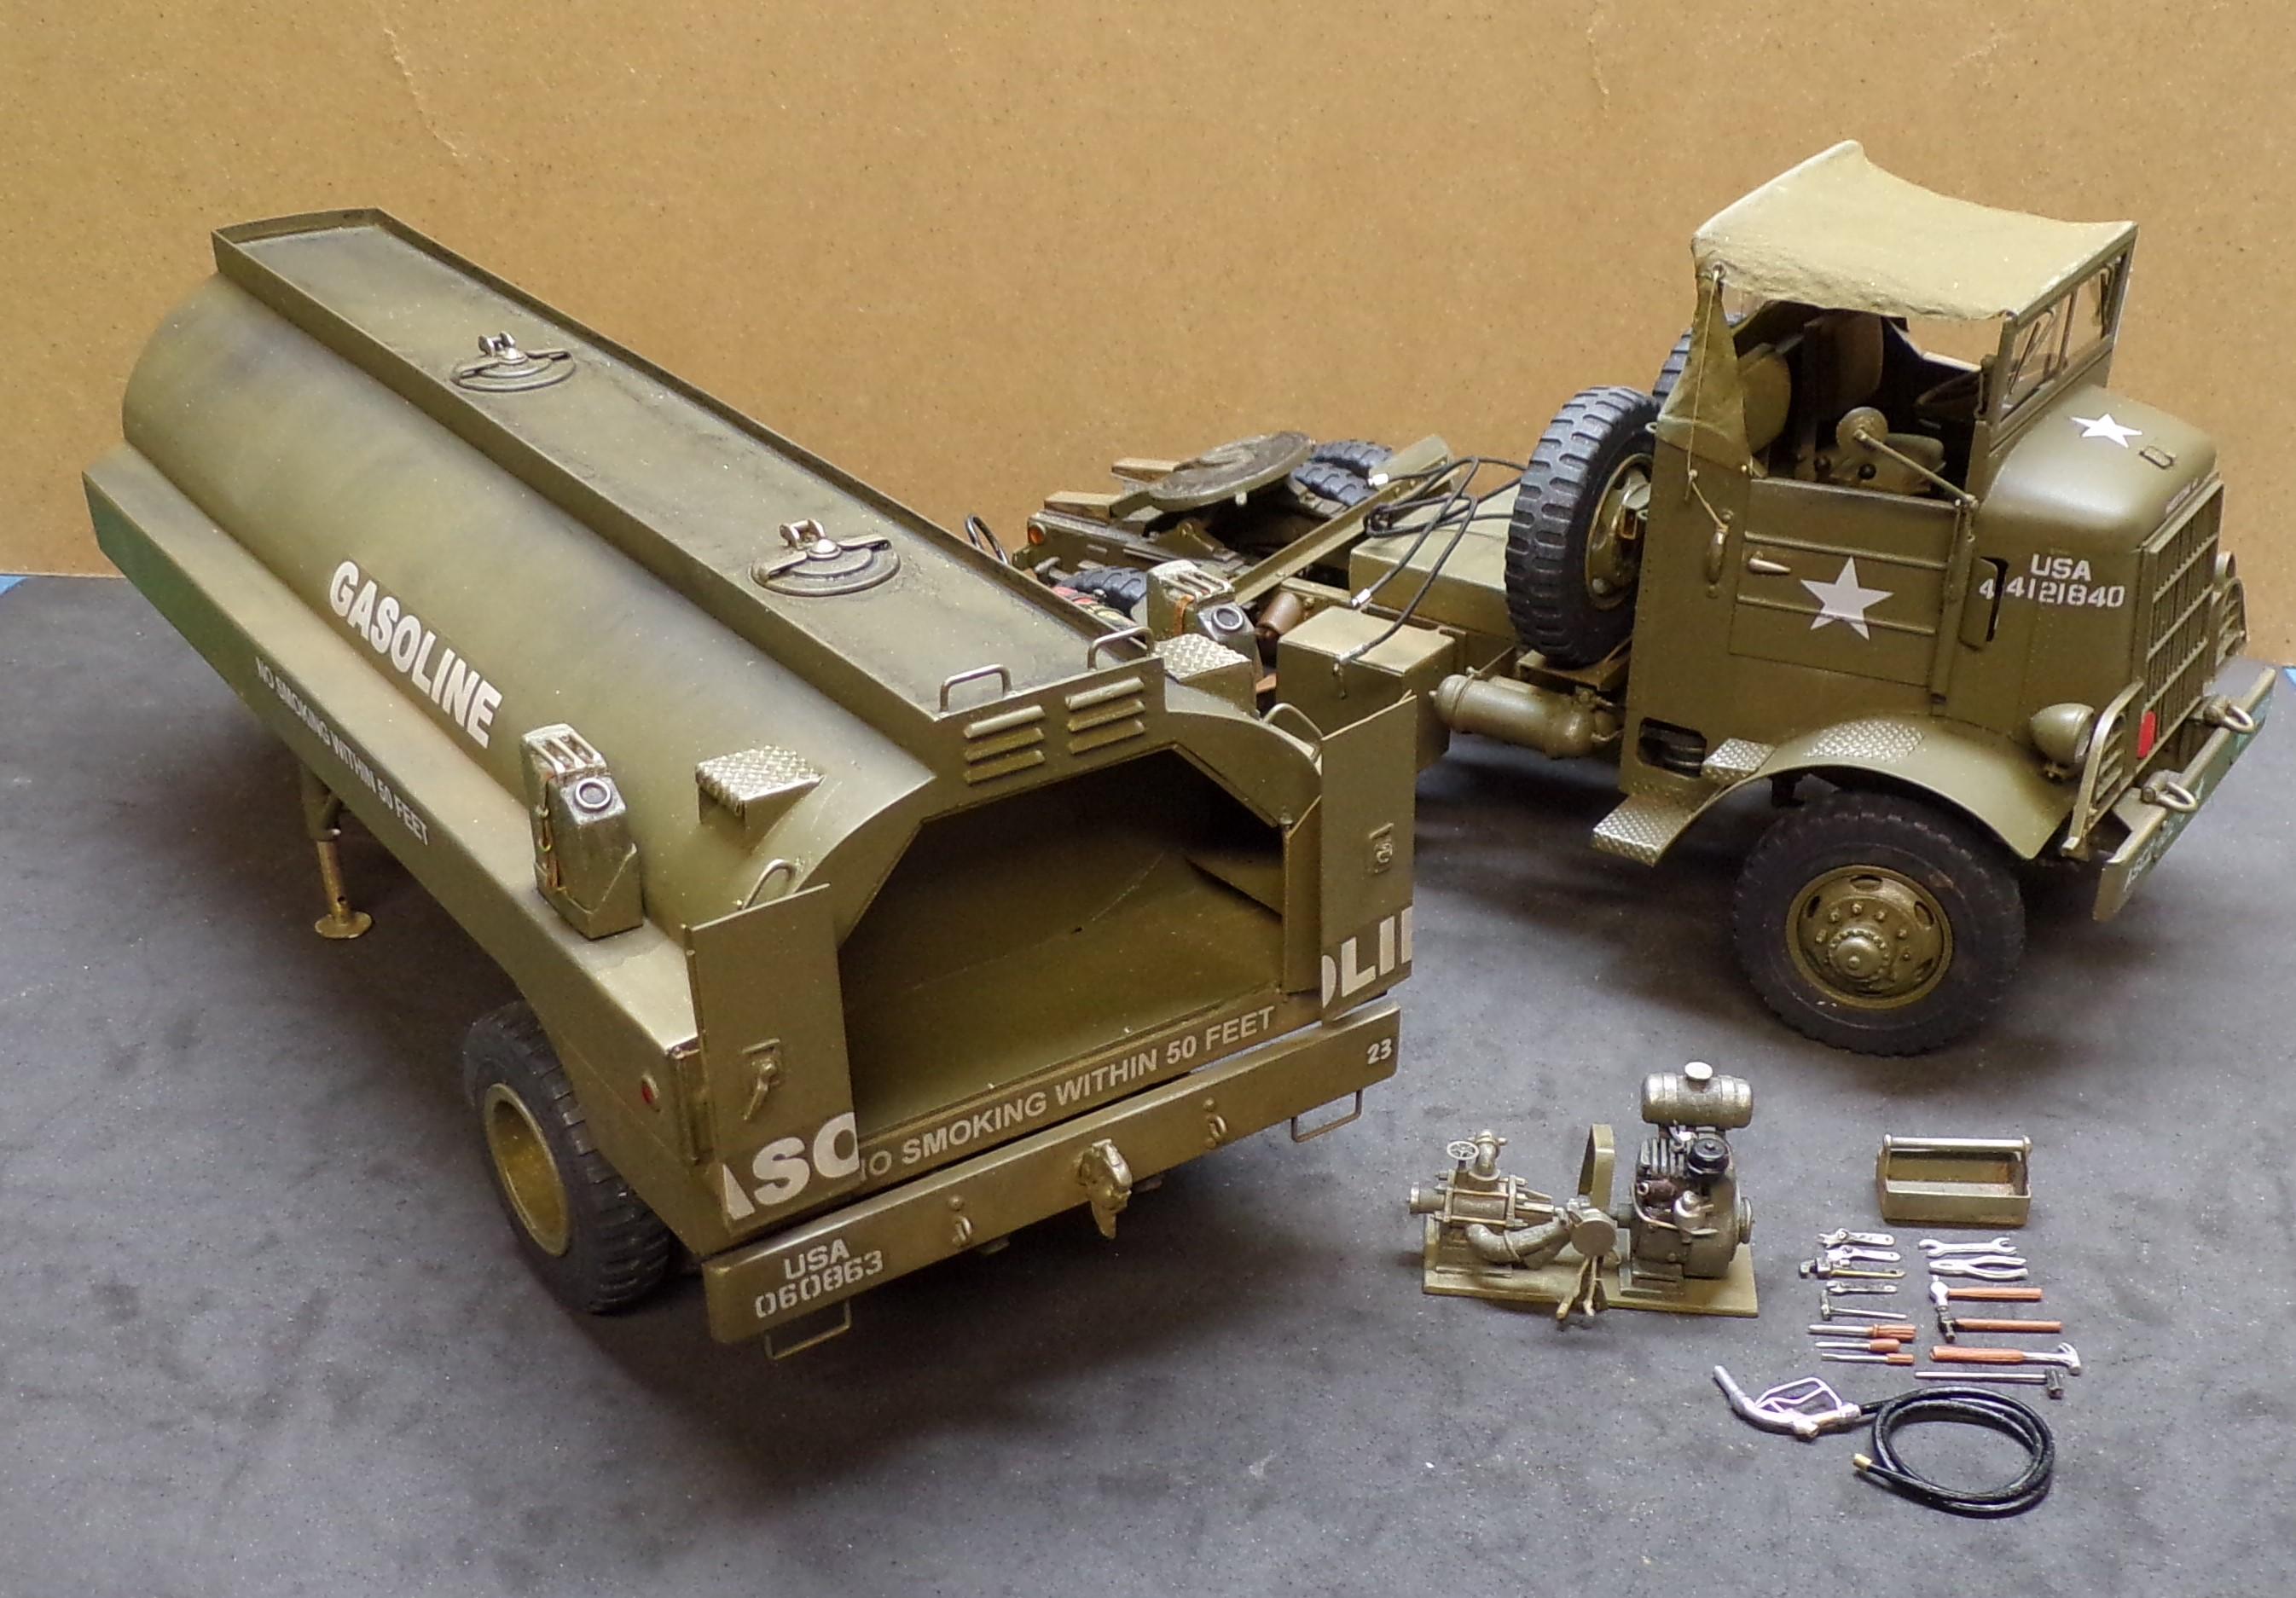
Diamond T made some 12 ton 4x6 trucks during WWII that were initially built for the British to use in hauling around tanks to strategic points in case of a German invasion. They towed a variety of trailers designed for real heavy loads. This 1/76 scale build from Revell was a lot of fun to do. I added a few details like windshield glass, winch cables, concrete ballast to the truck body and movable ramps for the trailer. The markings are British and the truck is a model 981 instead of a 980 because there is a front winch cable as well as a rear one on the truck. It's also known as an M-20 Prime Mover. Paint is Testors OD and the weathering was done with Doc O'Brien powders and Tamiya weathering pads. The base is a bit curved because I put wet Durham putty on a practice piece of cardboard. Tried flattening it with some weights but to no effect. Permanent base will be better built on something that won't warp!

-
Did that cut and paste splice of the frame straighten it out any? Nice work that you're doing. Lots of little detail things beginning to show.
-
If you are talking about the cab corners, it is PVC water pipe. I sliced it lengthwise to get a section for each corner. The radius is based on the radius measured on the drawings of the truck and reduced down to 1/25 scale for size.
-
I'll check that out Bob. At first glance they seem just a little big but maybe not. We'll se. Thanks!
-
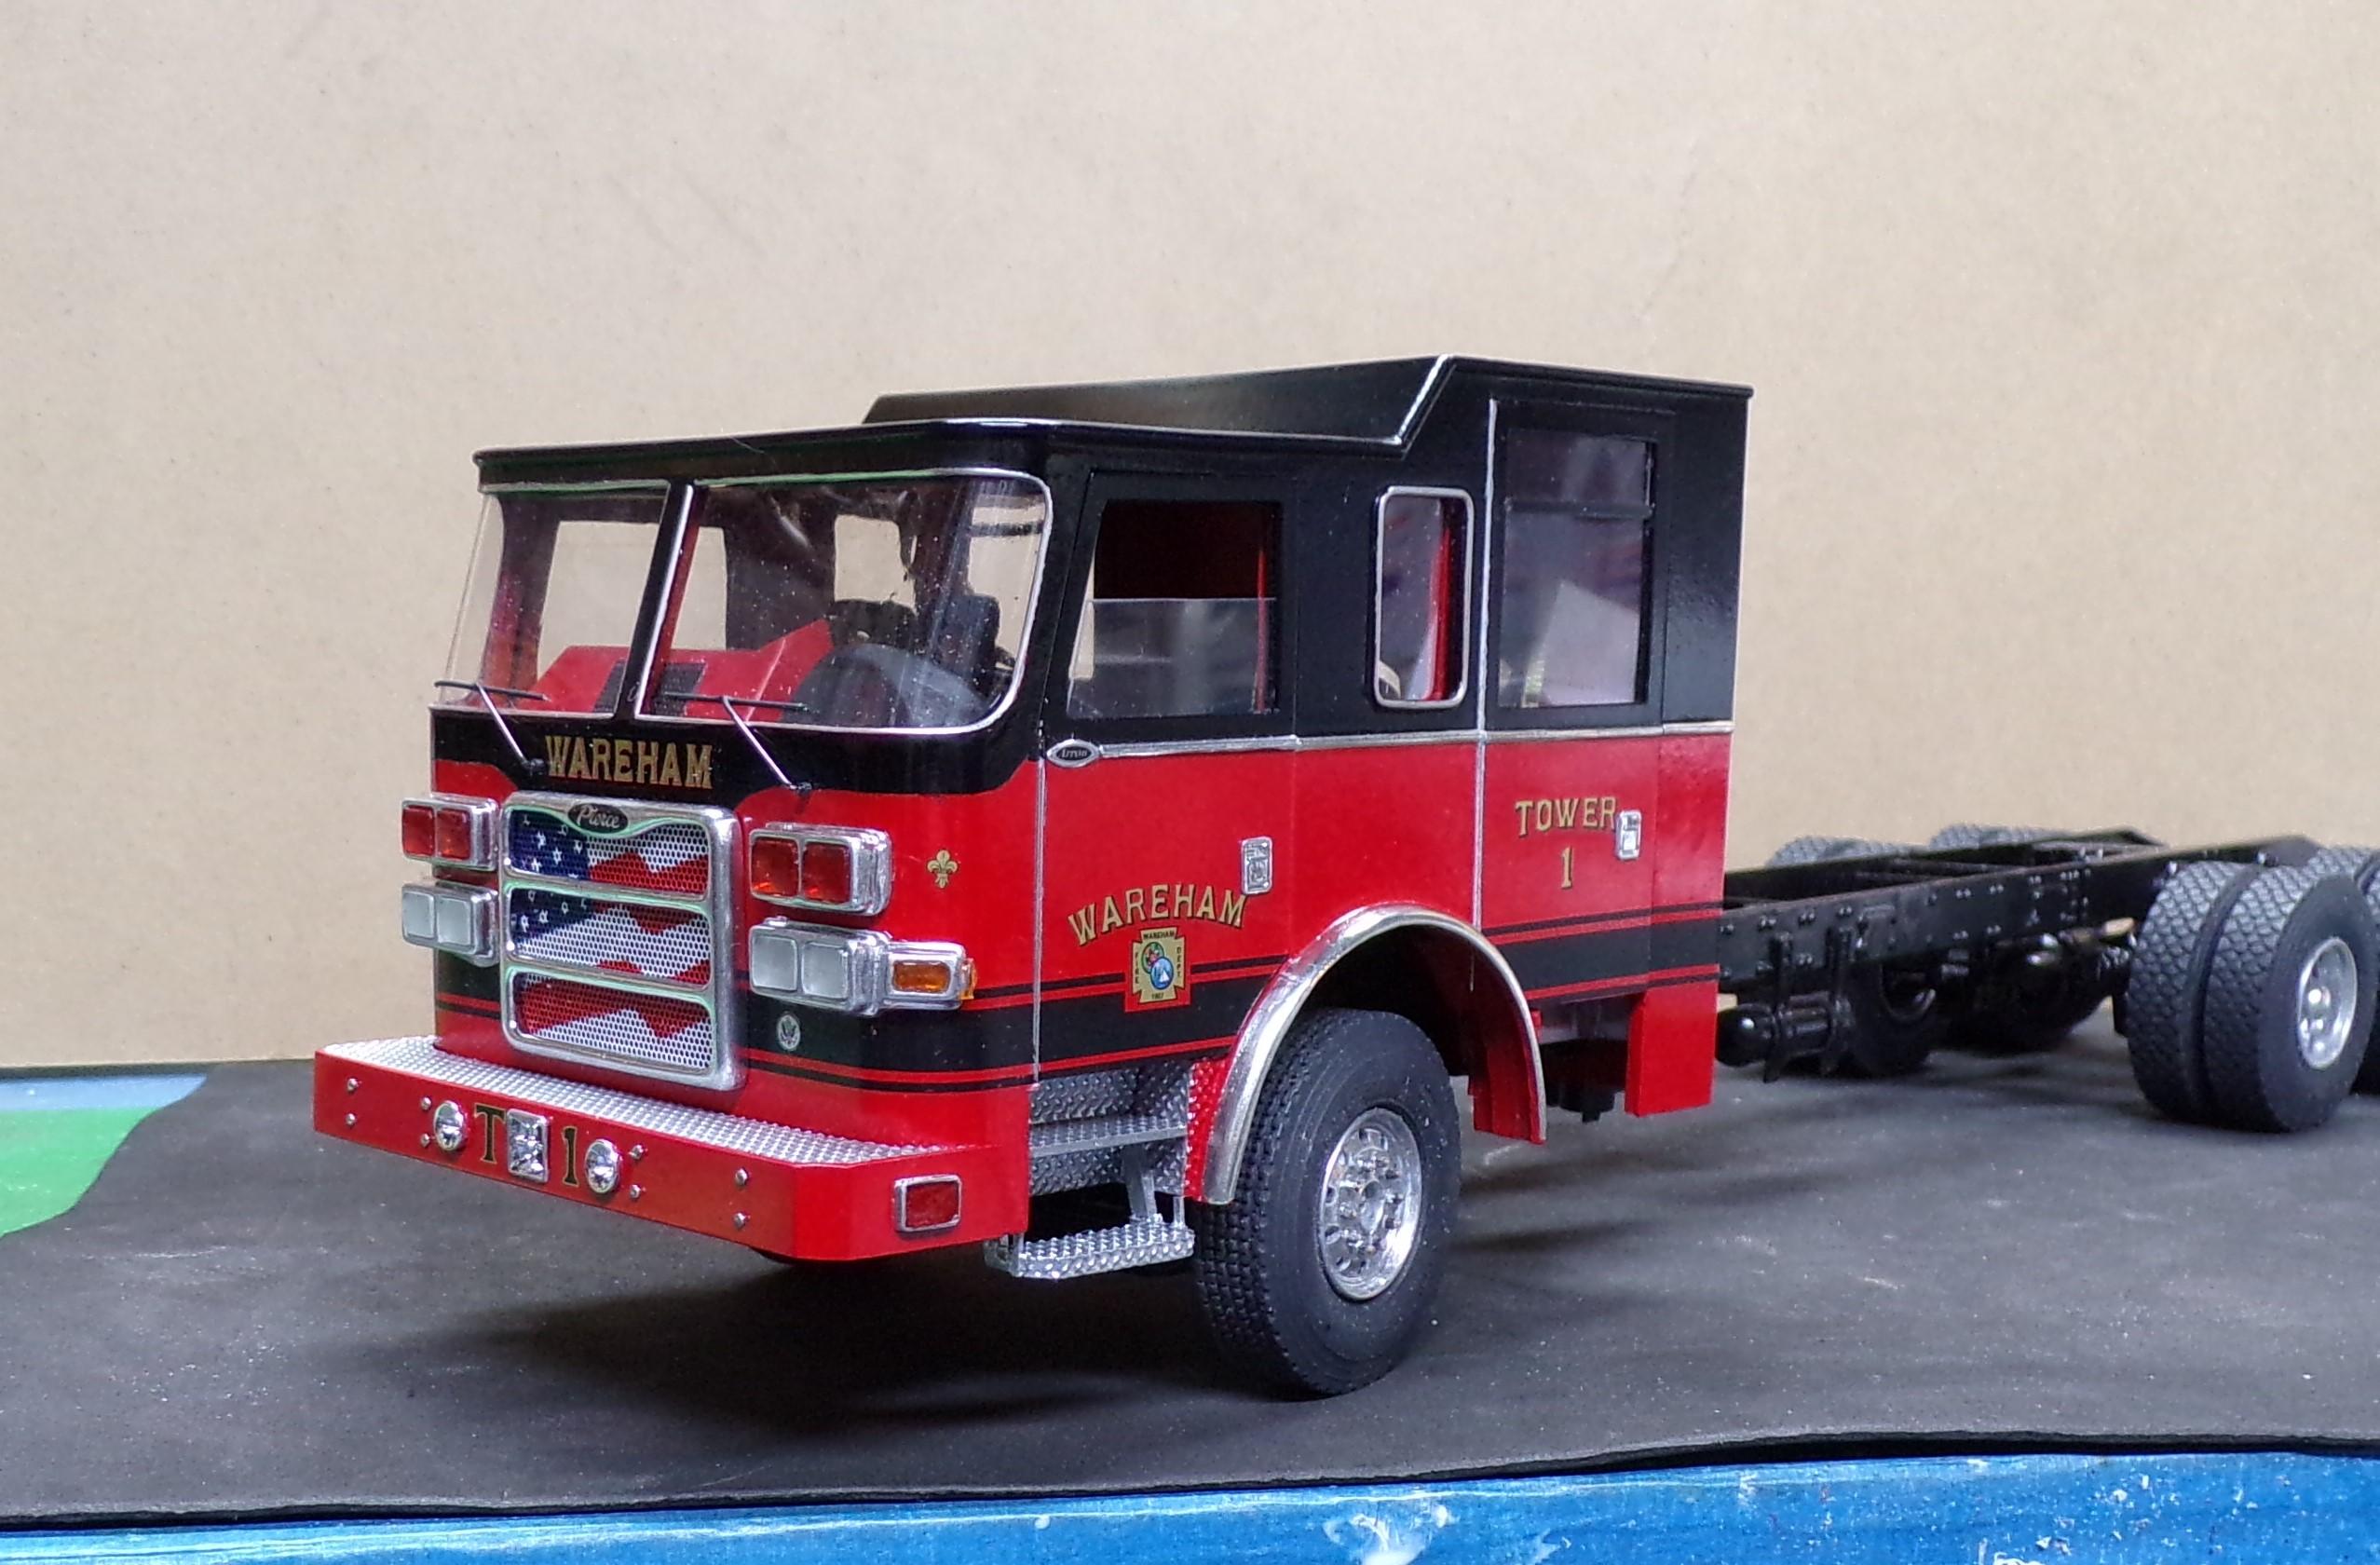
Not a bit of it, Bob. The tower has a 5 section ladder with the basket on the end. Mid mount to boot. Body is basically one of a kind so all will be scratch built as well.
-
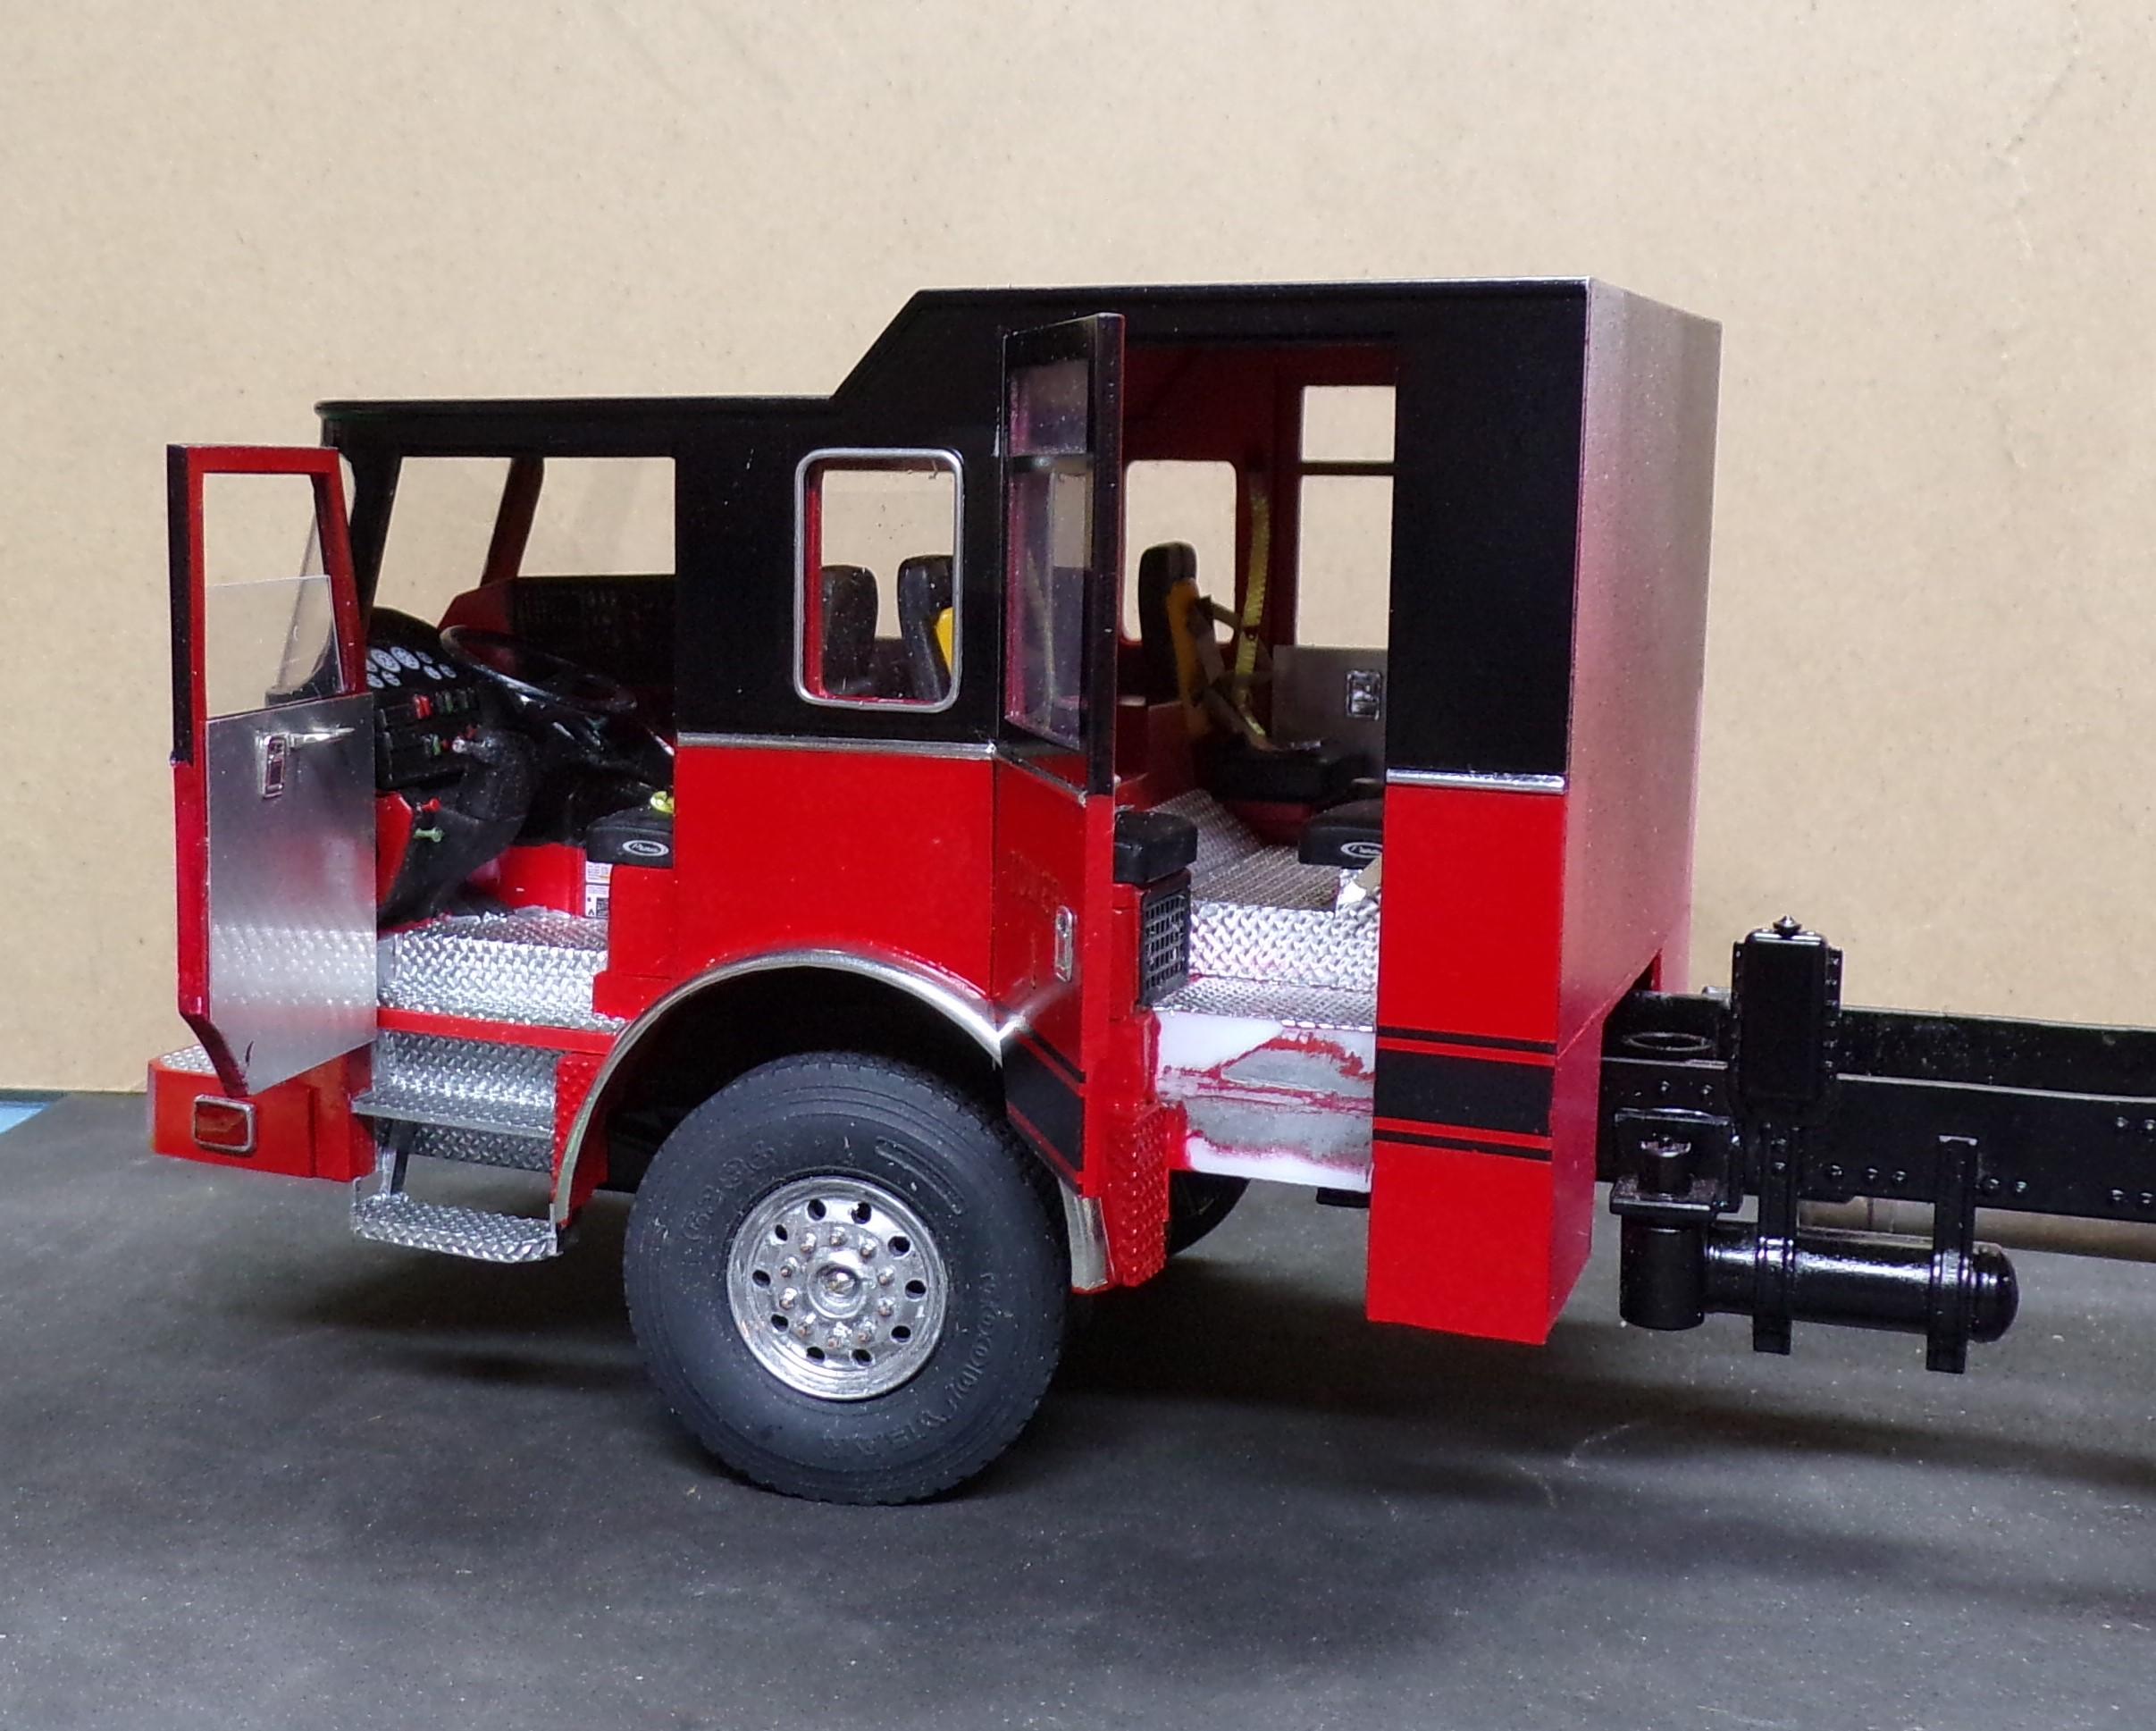
Made a little bit of progress. I've been sidetracked by another project but should get back to this one soon. Got the rear steps to build and some added detail to the outside of the cab.
-
Fire investigation unit
Chariots of Fire replied to Firebuilder's topic in WIP: Model Trucks: Big Rigs and Heavy Equipment
Photos are a blessing and a curse sometimes! The flaws show up so much! It's all about the learning curve, though. Little things like you mention won't be a problem next time around!😁 -
1/32 Mack F700
Chariots of Fire replied to The Brush's topic in WIP: Model Trucks: Big Rigs and Heavy Equipment
That's some good work! Glad to see some different kinds of scratch building. -
Fire investigation unit
Chariots of Fire replied to Firebuilder's topic in WIP: Model Trucks: Big Rigs and Heavy Equipment
That is a hard thing to do, especially if there are continuous pieces that are separated by the wheel wells and cab. Had the same thing with the decals I did for the Pierce cab. Ended up taking the stripes off the rear doors to re-apply the decals. Just a little difference is noticeable for sure. -
Fire investigation unit
Chariots of Fire replied to Firebuilder's topic in WIP: Model Trucks: Big Rigs and Heavy Equipment
I'm fortunate enough to have an ALPS printer for decal work. Not only does it print gold and silver but it prints white also. The front of the Pierce has some gold lettering with a drop shadow that was done simply by copying the gold part and changing the color in the graphics program. The printer knows which colors to select based on what is on the screen. The fluer de lis and "Pierce" on the grill were also done on the printer.
-
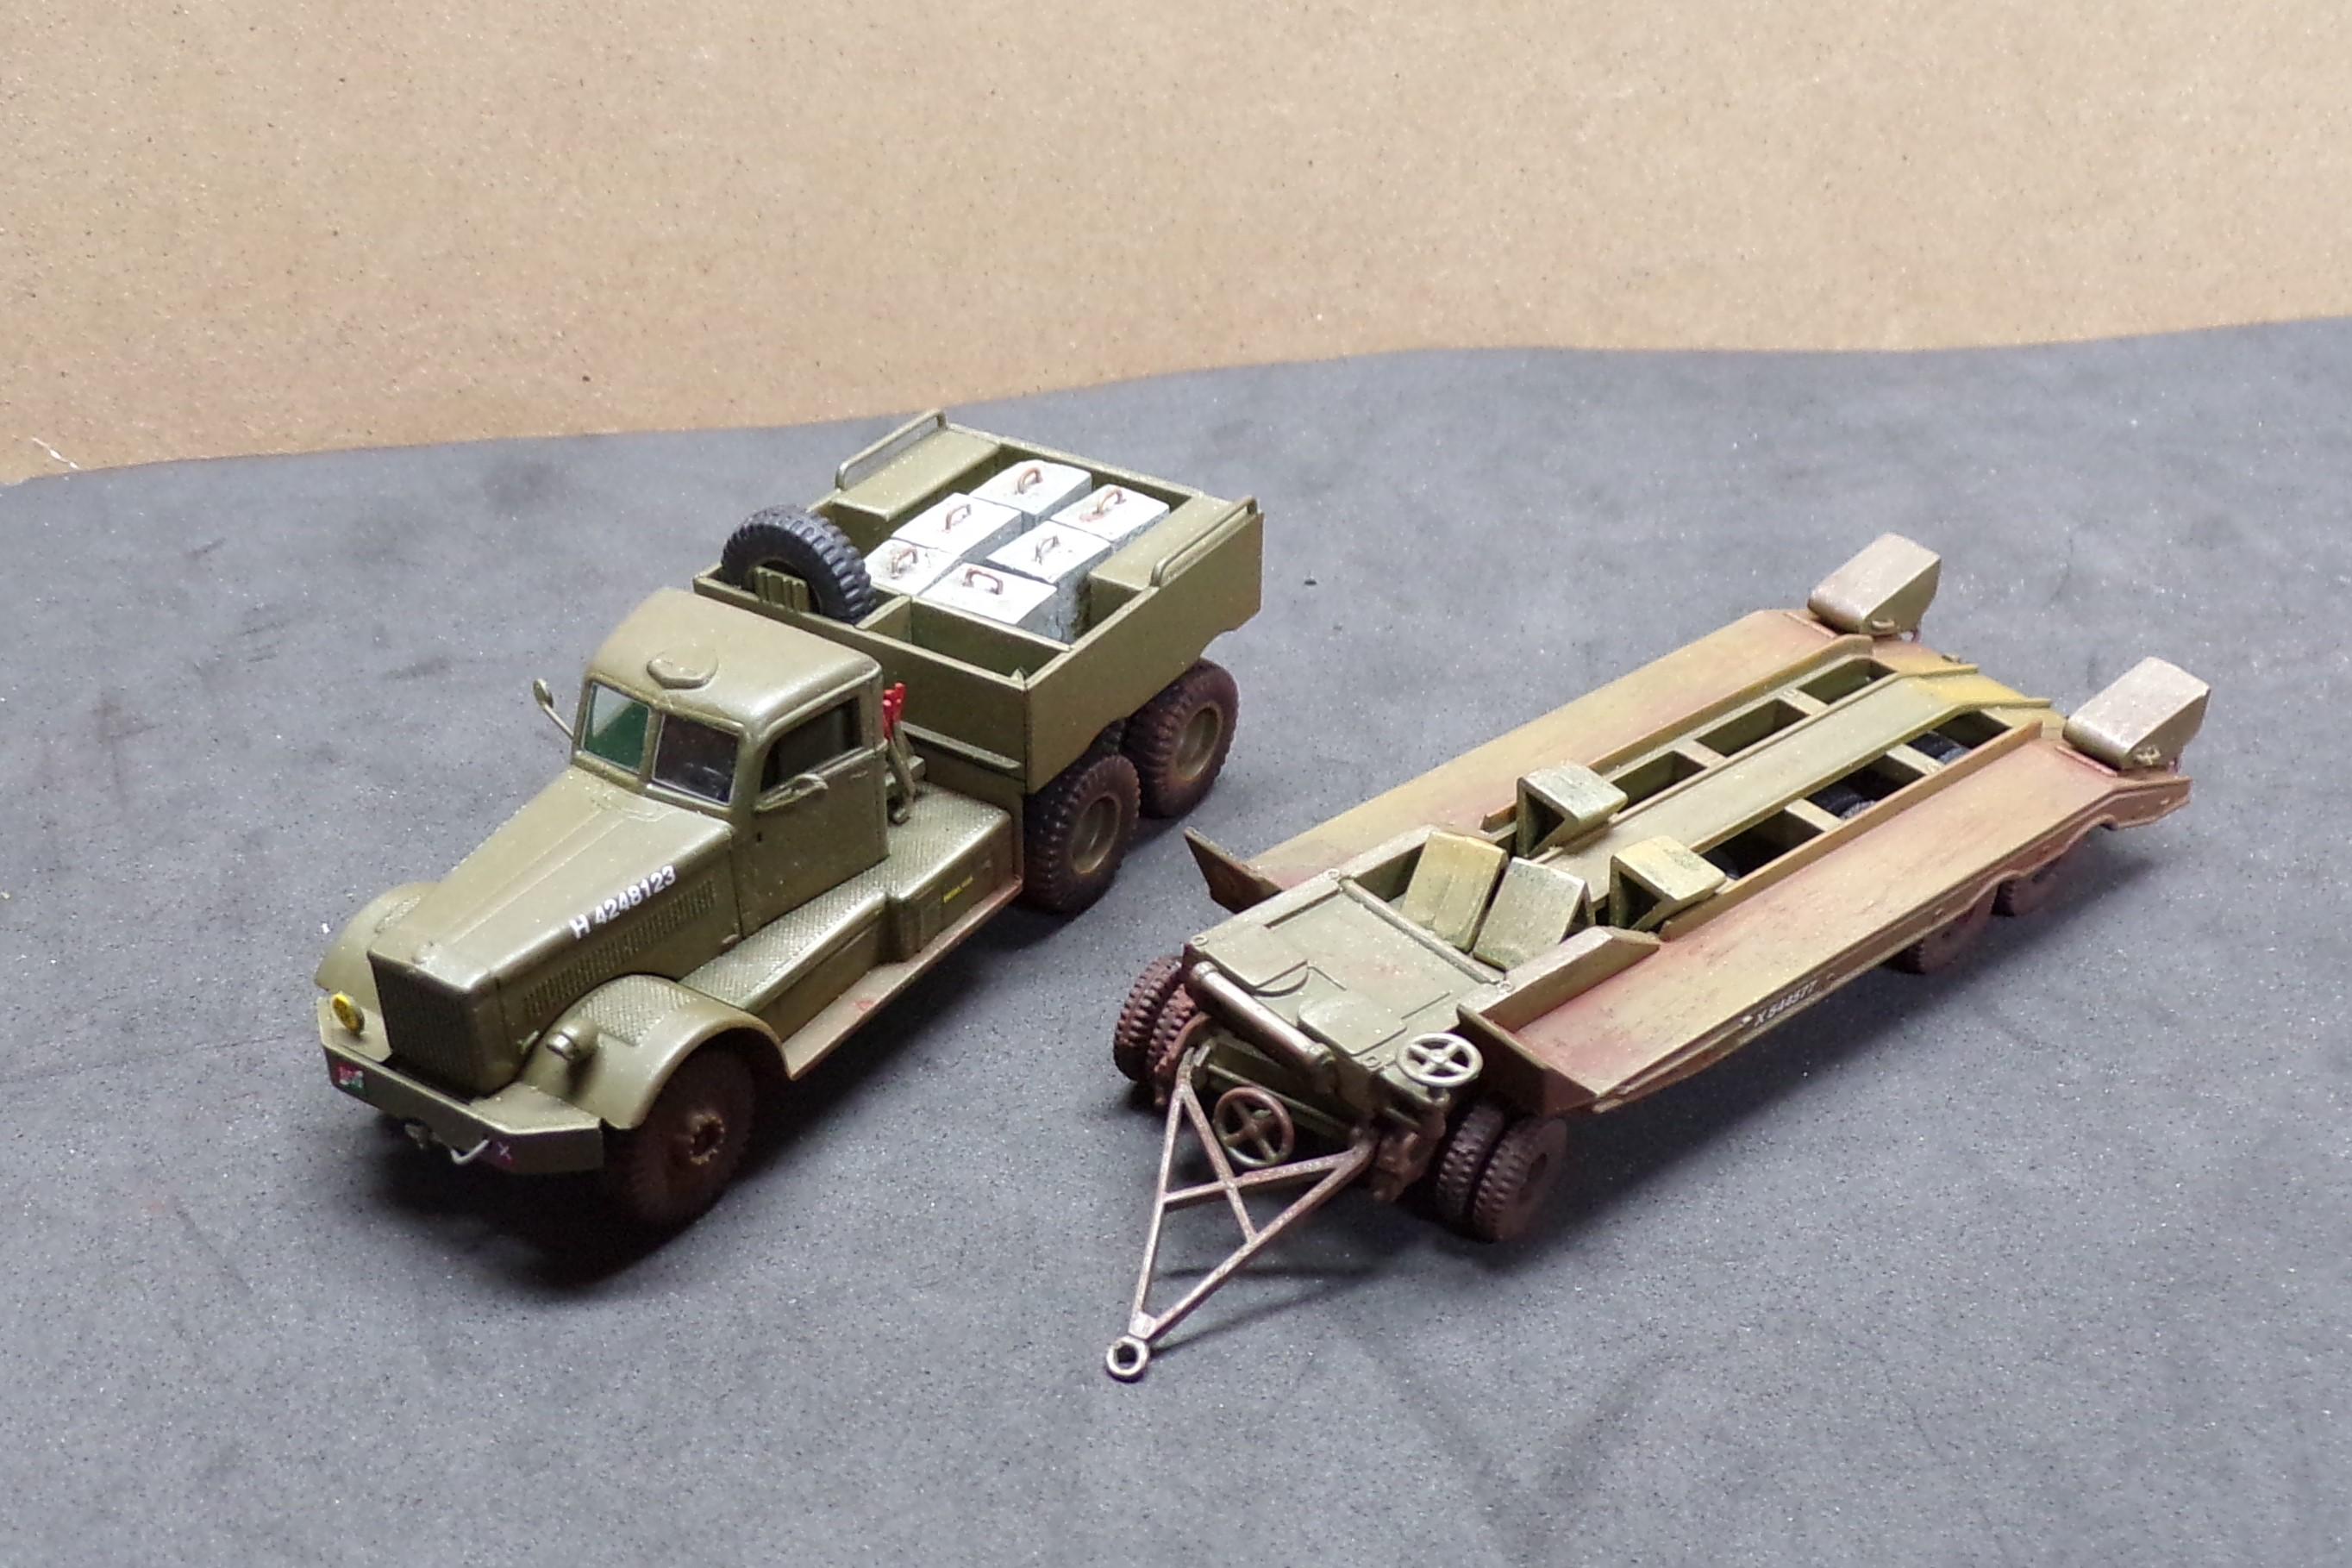
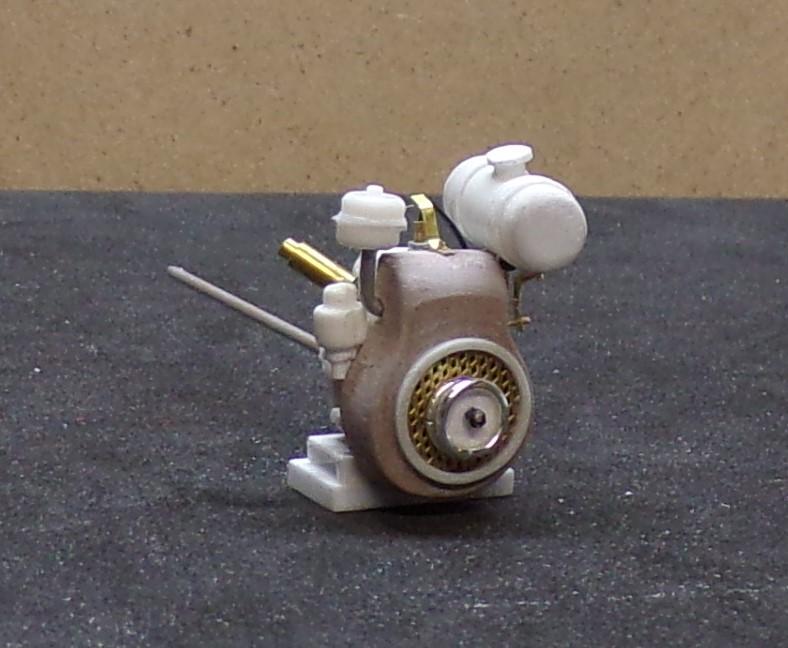
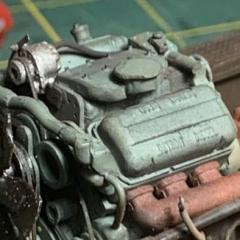
I never did show the results of adding detail to the inside. Here's what is in the back of the trailer in the compartment area. Briggs and Stratton engine for the small fuel pump. The fuel pump on a platform that can be put on the ground, tools and tool box, gasoline filler hose.