vintagedragfan Posted November 12, 2012 Share Posted November 12, 2012 I use DuPont chromasystem B/C with 7900 clear , and its 2 part, with a 3 to 1 ratio, I think you can get it in quarts, I have never had (the clear) give me any trouble with being too aggressive, and I been spraying paint about 30 years, man that makes me sound old Quote Link to comment Share on other sites More sharing options...
eviltwincustoms Posted November 13, 2012 Share Posted November 13, 2012 I use DuPont chromasystem B/C with 7900 clear , and its 2 part, with a 3 to 1 ratio, I think you can get it in quarts, I have never had (the clear) give me any trouble with being too aggressive, and I been spraying paint about 30 years, man that makes me sound old Man Bill.... That makes you almost as old as dirt! J/K! Quote Link to comment Share on other sites More sharing options...
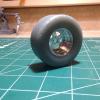
Prostreet Posted November 21, 2012 Author Share Posted November 21, 2012 Have the rear and shocks finished. Did the housing in a silver, For the brakes i used a set of rotors i got off Jim(microNitro) they are aluminum and i glued some 1000 grit wet/dry sandpaper to them to simulate carbon rotors. i added a set of Lamb brakes i had Jim machine up for me, also added the line from the lube pump to the pinion and ring gear, used various RB motion fittings and bolts. I also added some protech steel braided lines and turned down the oil cap on the lathe and hit it with some clear red, after tommarrow i have the next 4 days off for thanksgiving so i hope to have the whole backend of the car together. The shocks are from micronitro, i added bump stops and painted the springs red. Sorry my pictures suck i'm hit or miss getting decent pictures with the Iphone. Quote Link to comment Share on other sites More sharing options...
comp1839 Posted November 21, 2012 Share Posted November 21, 2012 incredible workmanship, joe. can't wait to see the rearend hung. Quote Link to comment Share on other sites More sharing options...
tyrone Posted November 21, 2012 Share Posted November 21, 2012 Joe.... my man that rear end looks great.... Keep it going.... Quote Link to comment Share on other sites More sharing options...
futurattraction Posted November 21, 2012 Share Posted November 21, 2012 (edited) I'm noting that everyone is cautious about how they describe your rear end, LOL. And I will, too... You've done a fantastic job in assembling it - it looks super. Your coil-overs are a work of art. Keep up the awesome work, Joe! Edited November 21, 2012 by futurattraction Quote Link to comment Share on other sites More sharing options...
Prostreet Posted November 21, 2012 Author Share Posted November 21, 2012 Thx. Guys, Scott, Jim made the shocks. I added the springs and bump stops. Quote Link to comment Share on other sites More sharing options...
vintagedragfan Posted November 22, 2012 Share Posted November 22, 2012 The rear end set up turned out beautiful Joe! man you are getting closer! Quote Link to comment Share on other sites More sharing options...
Prostreet Posted November 23, 2012 Author Share Posted November 23, 2012 Thx. Bill, I was able to get the drive shaft built today. I used TDR u-joints and some styrene tube, I added some archer weld decals and primered it. i wanted to clear the primer so it was gloss but wasn't sure how the primer would react so i decided not to, I was very impressed with the archer weld decals, They work great and i can't wait to do my headers with them. Still have to hook up the rear brake lines and install the tubs, plan on doing that tommarrow after work, i was suppose to be off but can't pass up O.T. Still trying to decide if i want to display it with one of the rear wheels off or not. Quote Link to comment Share on other sites More sharing options...
1320wayne Posted November 23, 2012 Share Posted November 23, 2012 Superb detail work. Very impressive. Quote Link to comment Share on other sites More sharing options...
Dyno Davo Posted November 23, 2012 Share Posted November 23, 2012 Driveshaft came out amazing Joe, agree the weld decals just add another touch of realism to an accurate component on this cool build. Quote Link to comment Share on other sites More sharing options...
W-409 Posted November 23, 2012 Share Posted November 23, 2012 You do excellent work with this build! The detail and craftmanship is near perfection! I'm enjoying this one alot, can't wait to see more progress. Quote Link to comment Share on other sites More sharing options...
vintagedragfan Posted November 23, 2012 Share Posted November 23, 2012 SWEET!! Quote Link to comment Share on other sites More sharing options...
tyrone Posted November 23, 2012 Share Posted November 23, 2012 TOP NOTCH .... Quote Link to comment Share on other sites More sharing options...
TedsModeling Posted November 24, 2012 Share Posted November 24, 2012 Joe - I stock the TDR u-joints and have played with them a little. I know you have to make the end caps, but Is there a trick to getting the pieces put together without breaking them? I was afraid I was going to break something and stopped fussing with it. Thanks for a great build! Quote Link to comment Share on other sites More sharing options...
Prostreet Posted November 24, 2012 Author Share Posted November 24, 2012 Joe - I stock the TDR u-joints and have played with them a little. I know you have to make the end caps, but Is there a trick to getting the pieces put together without breaking them? I was afraid I was going to break something and stopped fussing with it. Thanks for a great build! Thx, guys, Ted, They are very hard to work with and i broke 4 of the Yokes trying to drill them out, so i ended up using a tiny round file to open them up and then had to sand down the tube to fit. Next time i will use solid rod and drill them out to work so the caps look better, not sure what material they are made of. Wonder if they could be printed in the white material and they would be stronger? Quote Link to comment Share on other sites More sharing options...
TedsModeling Posted November 24, 2012 Share Posted November 24, 2012 TDR tells me this is the strongest material. The white material is really thin. Thanks for the tips - I'll have to try it out. You have to admit they look like the real thing - great job! Quote Link to comment Share on other sites More sharing options...
stump Posted November 24, 2012 Share Posted November 24, 2012 Joe, SUPER work buddy. Your attention to the finer details leaves me breathless, much like Chris' (Mooneyes) work. Yeah, I managed to break one of my yokes during assembly. I know it would probably ADD to the cost of these parts, but maybe TDR could look at producing these more fragile components from one of the metals Shapeways have available??? Just a thought. Quote Link to comment Share on other sites More sharing options...
comp1839 Posted November 25, 2012 Share Posted November 25, 2012 (edited) not to beat a dead horse but, trying to drill printed material is a no-no. you should always use a rat tail file or a carbide burr to open up this stuff. especially with minimal wall thickness. a drill bit by nature will try to expand the material you are drilling. it will find the weakest print line and crack it. i don't think the metal material that is printed will be any better as it is still only held together by a binding agent. sorry, joe. i wanted to tell you how good the '57 looks and i got side tracked. great work!!!!!!! Edited November 25, 2012 by comp1839 Quote Link to comment Share on other sites More sharing options...
Prostreet Posted November 26, 2012 Author Share Posted November 26, 2012 Thx. and no problem Dave, always looking for insight. Didn't do much today, I installed some Dzus fastners on the center carbon panel and installed it along with the tubs and the ARB. If i decide to display with the one wheel off i will do some more detail work inside the wheel wells. I cleaned the bench so i can start on the motor tommarrow after work. Quote Link to comment Share on other sites More sharing options...
tyrone Posted November 26, 2012 Share Posted November 26, 2012 Everything is looking Fantastic Joe... Love watching these promod builds go together.. I can't wait to see the engine assembly... Quote Link to comment Share on other sites More sharing options...
vintagedragfan Posted November 26, 2012 Share Posted November 26, 2012 wow! looks like your wheel tubs came out just fine, nice save! everything looks awesome! super nice work Joe!! Quote Link to comment Share on other sites More sharing options...
Prostreet Posted November 26, 2012 Author Share Posted November 26, 2012 Thx. Guys, really excited to get started on the engine. Forgot a picture of the underside. Quote Link to comment Share on other sites More sharing options...
TedsModeling Posted November 26, 2012 Share Posted November 26, 2012 Joe - going back to the enclosed container issue and the wheel tubs/decals, would it be safe to store a model (or parts) during a build in a dehumidifier? Especially one with a fan and adjustable heat. You could always leave the fan running and I suppose low heat wouldn't hurt anything either. Just a thought because I've been thinking about one for several months for curing paint, but I never thought of it for general storage. I'd appreciate everybody's opinions. Quote Link to comment Share on other sites More sharing options...
Prostreet Posted November 26, 2012 Author Share Posted November 26, 2012 Yeah I'm not sure on that Ted, I wouldn't want to leave that running all the time. I just did the container to keep dust off of stuff. Maybe a couple small vent holes would help. Quote Link to comment Share on other sites More sharing options...
Recommended Posts
Join the conversation
You can post now and register later. If you have an account, sign in now to post with your account.
Note: Your post will require moderator approval before it will be visible.