nate47 Posted October 27, 2012 Share Posted October 27, 2012 This will be my first build in a long time. I'm building this as a replica of my dads 2002 Z. I'm using the Monagram 1:25 Dream Rides car. I'll need to have the 2 year only electron blue paint mixed for me at the local Car Paint store. Its been obsoleted at the dealerships. The car will be a chrismas gift, so I'd like to go a little over the top on the quality of the build. I've been learning a ton here on the board and look foreward to learning more from you guys. I doubt there will be too much custom work on this build other than some work on the hood, but I've got a few other builds in the planning stages that might be a little more entertaining. I was also wondering if you guys have used Plasti Dip on your kits before? It leaves a really nice finish that I think might be cool for chassis and maybe interior parts? I used the search function looking for another C5 Z06 build and didn't see any...if you have any tips I'm all ears! I'll try to attach a couple pictures of the inspiration for this build! Quote Link to comment Share on other sites More sharing options...
Scuderia Posted October 28, 2012 Share Posted October 28, 2012 That's a wild color should be a real beauty. on the modern cars under hood area may be cramped for wiring but if you think and plan ahead you should be okay. If thats what you meant by over the top lol. Anyhow, Good luck mate. Quote Link to comment Share on other sites More sharing options...
Duntov Posted November 1, 2012 Share Posted November 1, 2012 Try going to Rogers Corvettes (Maitland FL)... you can Google the name and you will find a number of good photos of the real thing in his C5 section..... Quote Link to comment Share on other sites More sharing options...
bryan_m Posted November 2, 2012 Share Posted November 2, 2012 plasti dip? what is it? ive never heard of it before....... cheers bryan Quote Link to comment Share on other sites More sharing options...
nate47 Posted November 2, 2012 Author Share Posted November 2, 2012 (edited) Bryan plasti dip is a product designed to be used to coat tool handles, its a liquid product that you can dip something in and let it hang dry and it turns into a rubber/plastic coating. Over the last few years I have noticed its available in spray can form. I ran accros some youtube videos and realized its huge among the import and tuner crowd, because its available in multiple colors, and you can spray it directly on paint, chrome, steel, plastic, etc. and if you don't like it or want to change a year later you can just peel it back off with no damage to the surface below. These guys are using it to black out their wheels, and spray stripes and graphics cars. I used it on my 1:1 hot rod on a few items and I've been pleased with the results. Its available at most hardware and auto parts stores. I'd think it would make a good masking as well. I'm going to try to use it to black out the edges of my windows in the Z06. Check out the link below. http://www.usplastic...CFexFMgodggcAIg Duntov Love the avatar, I've got my dads C5 at my disposal he only lives about 5 min. away so I've got all the upclose detail looks I need! Edited November 2, 2012 by nate47 Quote Link to comment Share on other sites More sharing options...
nate47 Posted November 2, 2012 Author Share Posted November 2, 2012 I've been working nights this week but I did manage to get a little work done when the kids would cooperate! First I seperated all the parts, trimmed and sanded all the flashing. There were some pretty ugly mold lines on the body so I got rid of those. I've got most of the drive train installed. I'm wanting to get to a hobby shop to get some flocking for the carpet, and I need to get some flat red paint for the engine covers. I would really like to prep, paint, and polish this body out very well as my dad prides himself on the condition of his paint so I'll be reading any tech articles I can find. If you have any suggestions please let me know! I've got to strip the chrome off the wheels, I was thinking oven cleaner? Anyway thanks for looking! Quote Link to comment Share on other sites More sharing options...
nate47 Posted November 2, 2012 Author Share Posted November 2, 2012 I also opened up the body lines a little bit, and I'm wondering what the correct way to detail those out would be? I was thinking about painting them black before spraying the body and seeing if the lines looked darker? Quote Link to comment Share on other sites More sharing options...
Scuderia Posted November 2, 2012 Share Posted November 2, 2012 I've got to strip the chrome off the wheels, I was thinking oven cleaner? I never had luck with oven cleaner, but purple power and a plastic container with a lid. Just drop it in there, lid on and come back tomorrow. Quote Link to comment Share on other sites More sharing options...
mrm Posted November 2, 2012 Share Posted November 2, 2012 looking good so far Quote Link to comment Share on other sites More sharing options...
nate47 Posted November 2, 2012 Author Share Posted November 2, 2012 I've got some purple power in the garage I'll have to try that tonight! Thanks! Quote Link to comment Share on other sites More sharing options...
Scuderia Posted November 2, 2012 Share Posted November 2, 2012 No problem, it works really well. Quote Link to comment Share on other sites More sharing options...
nate47 Posted November 2, 2012 Author Share Posted November 2, 2012 WOW...I dropped the wheels in some Castrol Super Clean (I left my purple power at my dads when we resto'd the engine compartment in a 68 Vette last year) right after I read Scuderia's tip. I just went back out there about 10 min ago, and found the wheels perfectly cleaned! Now I've just got to de-burr them and get some wheel argen paint I've got out there on em! Quote Link to comment Share on other sites More sharing options...
Scuderia Posted November 2, 2012 Share Posted November 2, 2012 Glad to hear it was efficient for ya. Some kits take a few mins some take a few weeks it seems lol.. Sounds like a good colour plan can't wait to see. Quote Link to comment Share on other sites More sharing options...
Duntov Posted November 3, 2012 Share Posted November 3, 2012 Nate: Thanks for the reply.... the Avatar is my 66 Big Block coupe.... 48K miles... I have owned since 1998.... 3 rd owner and unrestored in all aspects.... goes like a bat out of hXXX.... Nassau Blue, black leather... all options except A/C..... does not really need it..... Regards Bill Quote Link to comment Share on other sites More sharing options...
nate47 Posted November 3, 2012 Author Share Posted November 3, 2012 Duntov...thats a dream car man! Ive always said a 66 or 67 is the best looking vette of all time! My dad had a hunter green 427 4spd w side pipes and the BB hood! Awesome cars! Quote Link to comment Share on other sites More sharing options...
Tonioseven Posted November 3, 2012 Share Posted November 3, 2012 Nice project!! I haven't been to Dayton in a few years (born & raised) but last I heard, The Hobby Shop is still out by the Dayton Mall. They usually have a good selection of supplies and can order pretty much whatever you need for your project. Take care. Quote Link to comment Share on other sites More sharing options...
nate47 Posted November 3, 2012 Author Share Posted November 3, 2012 Yeah I used to go out there every other weekend when I was growing up they are still there just moved down the road a bit! I'll probably get started on the interior today. Quote Link to comment Share on other sites More sharing options...
nate47 Posted November 3, 2012 Author Share Posted November 3, 2012 Does anyone have any tips on how to make the body pannel gaps look better (deeper and or darker)? Quote Link to comment Share on other sites More sharing options...
nate47 Posted November 6, 2012 Author Share Posted November 6, 2012 I got a little more done over the last few days. The wheel argent looks about the right shade, so I'm gonna clear em this afternoon and try to knock out some more detail on the engine compartment. I was a little dissapointed to see the heater controlls don't match the real car. I can only assume they may have been different on the 02 than the 04, I'm not sure if I'll try to fix it or not. I need to start on my hood soon, thats gonna be a real challenge for me. I'm hoping to get the paint for the body Saturday so I'd like to get the body primed soon too. Hopefully I'll have some updates this evening! Quote Link to comment Share on other sites More sharing options...
nate47 Posted November 7, 2012 Author Share Posted November 7, 2012 Made a little more progress last night. I still don't have the flocking for the carpet so the interior is just mocked up for the time being. The shifter looks too large but my dad has a Hurst short throw shifter and shift knob in his car so its not that far off. I'm plannin on engraving an H into the top of the shifter. I need to get to the hobby shop and get some flocking, and flat or semi gloss red paint for the engine covers. I'm probably going to start the primer on the body today. Oh and these tires suck! No lettering at all, I'm going to have to look around to see what I can find. Thanks for looking. Quote Link to comment Share on other sites More sharing options...
Johnny1973 Posted November 7, 2012 Share Posted November 7, 2012 looking so far Nate Quote Link to comment Share on other sites More sharing options...
sjordan2 Posted November 7, 2012 Share Posted November 7, 2012 For darkening panel lines, one of our members swears by MIG wash before painting. Quote Link to comment Share on other sites More sharing options...
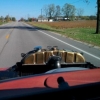
nate47 Posted November 8, 2012 Author Share Posted November 8, 2012 Thanks for the comments and tips guys...Got some more interior done. Still no flocking but I'm proceeding, I've been realizing after I tint the heck out of the back window you won't be able to see squat in the interior. Still however I'd like to get it done. I painted a 6 speed shift patern on the top of the shifter, and an H on the side as its a Hurst shifter. It came out pretty cool. I got the suspension pretty much wrapped up, about to start the body work, including the hood I went out and snapped some shots of my dads cars for refrence on the hood. It will be a big challenge for a guy who hasn't done something like this in years! I'm going to have to work on the rear exhaust exit the pipes are very crooked. If I cant fix it then I'll be making new tips! I'll attach some pics of my dads hood and the window tint as refrence! Any tips and tricks are welcome. Thanks again! Quote Link to comment Share on other sites More sharing options...
Scuderia Posted November 8, 2012 Share Posted November 8, 2012 Lookin' good there! Careful with the rubber bands, they're known sometimes to leave marks where they were laying. Thats some good stuff goin on here! Quote Link to comment Share on other sites More sharing options...
nate47 Posted November 9, 2012 Author Share Posted November 9, 2012 Thanks Scuderia...they are already off! I'm already looking foreward to doing something more my style...Something I can sink my teeth into with some wires and plumbing! But I need to stay focused. I'm really nervous about the body. I've never really put the kind of work into a paint job that you guys do, but I want it to be really nice! Quote Link to comment Share on other sites More sharing options...
Recommended Posts
Join the conversation
You can post now and register later. If you have an account, sign in now to post with your account.
Note: Your post will require moderator approval before it will be visible.