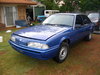
DANB Posted May 30, 2012 Share Posted May 30, 2012 Hey guys, started this Polar LIghts kit a lil while ago, had problems with the decals splitting before they were even pulled off the sheet, so some are missing. But ive gotten some clear on the body today and prety happy with how things are going so i thought i would throw some pictures up. Tried wiring my first engine, on this model. Things haven't quite worked out as you can see the hemi is just massive, no space for beginners hands lol, might have been easier to use the 360 also supplied with the kit. Cheers. Quote Link to comment Share on other sites More sharing options...
DANB Posted May 30, 2012 Author Share Posted May 30, 2012 Ohh really, well the decals are all i have negative to say about the kit so far, in my eyes its a prety decent kit, just have to be abit more careful with the decals next time maybe. Cheers for the feedback Futurabat. Quote Link to comment Share on other sites More sharing options...
TooOld Posted May 30, 2012 Share Posted May 30, 2012 Nice job Daniel . Even with the few issues you had it turned out great ! One of my favorite cars of all time . Quote Link to comment Share on other sites More sharing options...
TooOld Posted May 30, 2012 Share Posted May 30, 2012 Looks okay to me . Even with the few issues you had it turned out great ! One of my favorite cars of all time ! BOB . Quote Link to comment Share on other sites More sharing options...
dimebolt Posted May 30, 2012 Share Posted May 30, 2012 Nice job Dan. Looks like it's coming along great. Have to say though, thats a 73 or 74 Charger by looking at by looking at the roofline. 71 and 72 Chargers have this roof line. The model you are building is his 73 I believe. Here is a shot of it also. Quote Link to comment Share on other sites More sharing options...
bbowser Posted May 30, 2012 Share Posted May 30, 2012 You have done a great job with this dog of a kit. I built one a couple years ago and wrestled with it for months. Nothing fit, it was a real exercise in patience/frustration. I finally got a decent looking replica out of it but it was a fight to the finish. The guy who mastered it deserved his fate! Quote Link to comment Share on other sites More sharing options...
MAGNUM4342 Posted May 30, 2012 Share Posted May 30, 2012 You have done a great job with this dog of a kit. I built one a couple years ago and wrestled with it for months. Nothing fit, it was a real exercise in patience/frustration. I finally got a decent looking replica out of it but it was a fight to the finish. The guy who mastered it deserved his fate! This is the same guy that mastered the Torino/Cyclone kits too. I prayed for patience and god sent me a Polar Lights Charger kit! Quote Link to comment Share on other sites More sharing options...
DANB Posted May 31, 2012 Author Share Posted May 31, 2012 Hahahaha, yeah dad and i were discussing how some parts seem to differ in scale, the whole car itself next to all my others i have built seems quite small. And cheers for correcting me on the year model, some of you may know the box actually pictures a 71/72.. Ill get some finished product pics up tonight im just waiting for glue to dry atm. Cheers. Quote Link to comment Share on other sites More sharing options...
DANB Posted May 31, 2012 Author Share Posted May 31, 2012 (edited) Well im not bothered by it that much as im quite pleased with the end result. Edit: Yes i know the tyres need the white letters but i do not have any decals to do so. Edited May 31, 2012 by DANB Quote Link to comment Share on other sites More sharing options...
W-409 Posted May 31, 2012 Share Posted May 31, 2012 It looks very good, nice and clean build over all. Looks like parts fit nicely together and paint turned out good. Interesting subject too, these Chargers are pretty rarely seen, and that's sad. You did nice job with this one. One thing what could be improved on next Build: Those spark plug wires are bit too long. They should be shorter, same as those spark plug boots are bit too long too. Here is one picture, what could be used for reference: Quote Link to comment Share on other sites More sharing options...
novadose71 Posted May 31, 2012 Share Posted May 31, 2012 Nice work. I didn't mind this kit when I built it. Chassis went together nicely, a few issues in there somewhere, and I did some mods to make the 1973 Marcis car. I think the vented 1/4 windows designate the SE option, which IIRC were more aerodynamic for the speedways. Quote Link to comment Share on other sites More sharing options...
DANB Posted June 1, 2012 Author Share Posted June 1, 2012 Nah its cool Futurabat, i know what your saying, Novadose71 amazing job! looks like you have allot more patience then i do lol W-409, i know the plug boots go inside the rocker cover but i was already having enough trouble with it as it was, i wanted to drill holes to shove the boots into but i couldn't find a small enough drill bit, can also see the distributor sits on an angle which i missed. Quote Link to comment Share on other sites More sharing options...
Recommended Posts
Join the conversation
You can post now and register later. If you have an account, sign in now to post with your account.
Note: Your post will require moderator approval before it will be visible.