peekay Posted January 19, 2015 Share Posted January 19, 2015 (edited) For various reasons I'm doing a series of cars that don't require me to use my airbrush. Here I'm using the body from AMT's pre-painted kit (which I've polished out and foiled) but nearly everything else is from the normal kit and will be either brush painted or done with a spray can. Unfortunately there's little I can do about the mold lines under the black paint but I've decided not to let that spoil my fun. The tyres are from AMT's recent parts pack. Here's where I'm at with the interior, foil and other details yet to be added. For comparison I've shown the pre-painted kit's interior wall, whose colour is too dark. I sprayed the top of the dash and the package shelf with Tamiya semi-gloss black and the beige is brushed on using a mix of Humbrol colours. You have to thin these paints carefully for them to flow well. More detail to come here too. The engine is basically finished, apart from more plumbing etc. The silver and gold are from Tamiya cans, the rest from Humbrol. More soon. Edited February 19, 2015 by peekay Quote Link to comment Share on other sites More sharing options...
Ron Hamilton Posted January 19, 2015 Share Posted January 19, 2015 Very Nice!!! Quote Link to comment Share on other sites More sharing options...
cobraman Posted January 19, 2015 Share Posted January 19, 2015 Looks great ! Quote Link to comment Share on other sites More sharing options...
mustang1989 Posted January 19, 2015 Share Posted January 19, 2015 Man I like that dash!!! Quote Link to comment Share on other sites More sharing options...
fun9c1 Posted January 19, 2015 Share Posted January 19, 2015 Looks awesome so far! I built that AMT kit about a year ago. It's the one in my avatar actually! Only two issues I had was the frame was not straight (convex lengthwise in relation to the car) so I had to work that, and I had to cut quite a bit off the bottom of the interior side panels to get the tops of them even with the tops of the doors. Other than that I thought it was a nice kit. I'll be curious to see if you have the same two issues I had. Nice detail, I can't wait to see more! Quote Link to comment Share on other sites More sharing options...
om617 Posted January 19, 2015 Share Posted January 19, 2015 Looking good. It`s a nice kit beside the way the bumpers are molded and the rear window. Quote Link to comment Share on other sites More sharing options...
peekay Posted January 19, 2015 Author Share Posted January 19, 2015 Thanks guys. Rob L, thanks for mentioning the issues you had, good to know at this stage. Tommy, I haven't got to the bumpers and windows yet but I'll keep your comments in mind. This sort of input is very helpful. It does seem to be a very nice kit otherwise. Quote Link to comment Share on other sites More sharing options...
MeatMan Posted January 20, 2015 Share Posted January 20, 2015 Very good work. Clean build. Quote Link to comment Share on other sites More sharing options...
slusher Posted January 20, 2015 Share Posted January 20, 2015 Peter, I have several proshop kits just for a fun build. This is one I don't have. I will enjoy following your build... Quote Link to comment Share on other sites More sharing options...
peekay Posted January 20, 2015 Author Share Posted January 20, 2015 Carl, if you're thinking of getting the Chrysler, the black ones have much nicer paint than the green ones. Here's an Edsel from the series which I did a couple of years ago: Quote Link to comment Share on other sites More sharing options...
slusher Posted January 20, 2015 Share Posted January 20, 2015 (edited) I may pick up a Chrysler sometime Peter. I have an Edsel almost done. The Edsel is easy to get scratches but they wax out great with scratch x. I have all but the Chrysler, Ford Woody, and 55 Chevy Nomad. I bought many at wal mart Edited January 21, 2015 by slusher Quote Link to comment Share on other sites More sharing options...
Ramfins59 Posted January 20, 2015 Share Posted January 20, 2015 Great looking Chrysler Peter, I love the work you did on the interior. Quote Link to comment Share on other sites More sharing options...
peekay Posted February 3, 2015 Author Share Posted February 3, 2015 At last a little progress to report here. I'm an excruciatingly slow builder anyway, but I was slowed even further by unforseen problems with this kit. As Rob mentioned above, the interface between the interior, dash and body requires a fair deal of fiddling to get right. The front glass is also pretty vague, as Tommy pointed out. Most American kits I've built have these problems but I wasn't expecting them here because I'd read two reviews when it was new that praised the fit. Also that it was offered as a factory assembled model led me to believe it would be relatively problem-free, as the Edsel was. Never mind, I think I've got it sorted and the finished interior is actually a good looking assembly. I've added a PE mirror face from Detail Master - the mirrors have their sprue attachments bang in the middle of the "glass"(!) I removed the molded-in horn ring and replaced it with silver wire. I modified a Johan washer bag and worked on other bits and pieces... I would prefer the sprue attachment anywhere else except in the middle of the glass... This pink car was my first attempt at this kit. The Mr.Super Clear reacted with the Zero acrylic colour coat and there is bad orange peel and fine cracks in the surface. (I usually use Tamiya clear.) Also I think I mixed the pink a tad too bright. I'm now starting to wonder if I'm going to be satisfied with the pre-painted black body (above) - I may end up doing a pink, or perhaps white convertible instead. But having started a WIP I will finish the black car first. Next up is the chassis, which I hope will less problematic - but don't hold your breath. Quote Link to comment Share on other sites More sharing options...
1972coronet Posted February 4, 2015 Share Posted February 4, 2015 Nice work so far , Peter ! One suggestion ; the transmission for this vehicle was cast iron . All V8 Torqueflite transmissions (and their lesser-known 2-speed PowerFlite predecessor) were cast iron prior to the 1962 model year. These were known as model numbers "466" ( PowerFlite) and "488" (Torqueflite) . Keep up the great work ! Quote Link to comment Share on other sites More sharing options...
slusher Posted February 4, 2015 Share Posted February 4, 2015 Been curious how this build was going Peter. Nice progress. glad that I am not the only one who builds slow.. Quote Link to comment Share on other sites More sharing options...
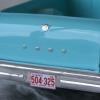
Tom Geiger Posted February 4, 2015 Share Posted February 4, 2015 Peter, one constructive comment. Delco batteries were sold in GM vehicles. The correct battery for your car would be: Here's a great reference for all old car batteries: http://www.antiqueautobattery.com/batteries.html Quote Link to comment Share on other sites More sharing options...
peekay Posted February 4, 2015 Author Share Posted February 4, 2015 Thanks so much for your comments and suggestions. John, thanks for the tip, I will now paint the transmission accordingly. Tom, I'm not savvy enough to make my own decals, but I'll keep your tip in mind and maybe I can cobble something better together. The Delco comes from Tommy Logan's (roadhawg) great mini sheet, which is more motor-sport orientated, but he can make custom orders too, which would be what I should do. To be honest, I'm not that mechanically minded and often get things a bit wrong under the hood! Quote Link to comment Share on other sites More sharing options...
Tom Geiger Posted February 4, 2015 Share Posted February 4, 2015 Tom, I'm not savvy enough to make my own decals, but I'll keep your tip in mind and maybe I can cobble something better together. Peter, you don't need to make a decal, this one is a Pep Boys (store brand) battery that I copied from an old print ad in black and white. It's just printed on copier paper and I even cut it in half to go around the molded in battery hold down. Quote Link to comment Share on other sites More sharing options...
StevenGuthmiller Posted February 4, 2015 Share Posted February 4, 2015 I don't worry too much about that stuff either Peter. Maybe the owner had to replace his Mopar battery. Although, I do try to keep things as accurate as possible, I don't obsess. Maybe use one of the aftermarket batteries like an Interstate or a Diehard. They're all represented on the mini sheet. I'm planning on some more custom decals from Tommy in the near future, that Mopar battery would be a good one to add. Steve Quote Link to comment Share on other sites More sharing options...
peekay Posted February 4, 2015 Author Share Posted February 4, 2015 I dont like the battery decal to one side of the of the retainer anyway and and will remove both and start again. I will then use one of the other mini sheet decals, as you suggest Steve. But the more I get into this build, the more it seems a pity to use the pre-painted body, with its mold lines etc. My plan at the moment is to finish the model in such a way that I can take it apart again and use a fresh, properly painted body at a later date. I really like the black, but the engine bay details would pop a lot better surrounded by a lighter colour. I'm now working on the chassis. As a guy who isn't that interested in the underneath of a model, I sometimes miss the simpler 60s kit chassis. This one is typical of the 90s, when seperate frames and multi-piece suspensions came into vogue. Part of me wants to like this, but it does slow up the whole process and makes achieving a good stance more difficult. But I suspect I'm alone with this opinion. Quote Link to comment Share on other sites More sharing options...
peekay Posted February 8, 2015 Author Share Posted February 8, 2015 Got the chassis finished and this is how it would look ..... ...if I hadn't altered it to make the steering poseable with a wire connecting rod. I've also cut off the axle stubs (top arrow) because I can see already that the stance won't be how I want it. I will epoxy the wheels on when everything else is done, as I usually do. The little white square of plastic (bottom arrow) is to reduce the gap between the A-arms for a tighter assembly. The engine is in place. The next problem was the warped chassis. When properly attached at the front there is this much gap at the back, and vice-versa. I will fix this with wire, as shown. It could also be glued but I may want to disassemble the model at a later stage. Then there was the glass. The front windshield in particular is not well shaped and didn't want to sit properly. I managed to get it looking OK by removing the side vents and glueing it solidly to the cowl and then using these stubs (arrows) and some superglue to force it to behave. Having solved the major problems with this build, I'm beginning to really enjoy it and am quite pleased with the look. More soon. Quote Link to comment Share on other sites More sharing options...
peekay Posted February 8, 2015 Author Share Posted February 8, 2015 BTW how do I edit the title to signify an update? Quote Link to comment Share on other sites More sharing options...
Mopar - D Posted February 8, 2015 Share Posted February 8, 2015 Peter wow that's more than a warped frame. Glad you didn't let it slow you down nice fixes to it and the windows. This is a very sharp looking 300. Quote Link to comment Share on other sites More sharing options...
fun9c1 Posted February 8, 2015 Share Posted February 8, 2015 That is one gorgeous engine bay! Yup, that's how my frame came too. I glued it, put the car upside down and put alot of weight on it and so far after a year or so it's still together. But I hear you on the being able to take it apart someday. I do that alot, too. In fact most of my models do not have the chassis glued to the body. NIce work! Quote Link to comment Share on other sites More sharing options...
StevenGuthmiller Posted February 8, 2015 Share Posted February 8, 2015 I dont like the battery decal to one side of the of the retainer anyway and and will remove both and start again. I will then use one of the other mini sheet decals, as you suggest Steve. But the more I get into this build, the more it seems a pity to use the pre-painted body, with its mold lines etc. My plan at the moment is to finish the model in such a way that I can take it apart again and use a fresh, properly painted body at a later date. I really like the black, but the engine bay details would pop a lot better surrounded by a lighter colour. I'm now working on the chassis. As a guy who isn't that interested in the underneath of a model, I sometimes miss the simpler 60s kit chassis. This one is typical of the 90s, when seperate frames and multi-piece suspensions came into vogue. Part of me wants to like this, but it does slow up the whole process and makes achieving a good stance more difficult. But I suspect I'm alone with this opinion. No, you're not alone Peter. I know a lot of guys really get into detailing chassis, but I have no interest either. I do enjoy the occasional detailing of the engine compartment because as long as I'm not doing 427 Chevies or 426 Hemis over & over again, the power plants of some of these old cars can be interesting & unique. There is little to get excited about on a chassis in my opinion & it can become very tedious working on something that holds no interest for you. These old chassis plates on the annuals are the perfect antidote for that tedium. A little paint, slip in the axles & you're done. Steve Quote Link to comment Share on other sites More sharing options...
Recommended Posts
Join the conversation
You can post now and register later. If you have an account, sign in now to post with your account.
Note: Your post will require moderator approval before it will be visible.