LAV25
-
Posts
76 -
Joined
-
Last visited
LAV25's Achievements
MCM Regular (3/6)
-
Go for it! Nothing like remembering those days when you had the coolest beater in the world.
-
So I had what seems to be an original idea (sorry if it's been done before, but I think I came up with it on my own) for making glass packs for 1:24/1:25 scale models. Put together a youtube video, I know I'm not going to win any awards for cinematography but I hope someone finds it useful. If you have any questions, please ask.
-
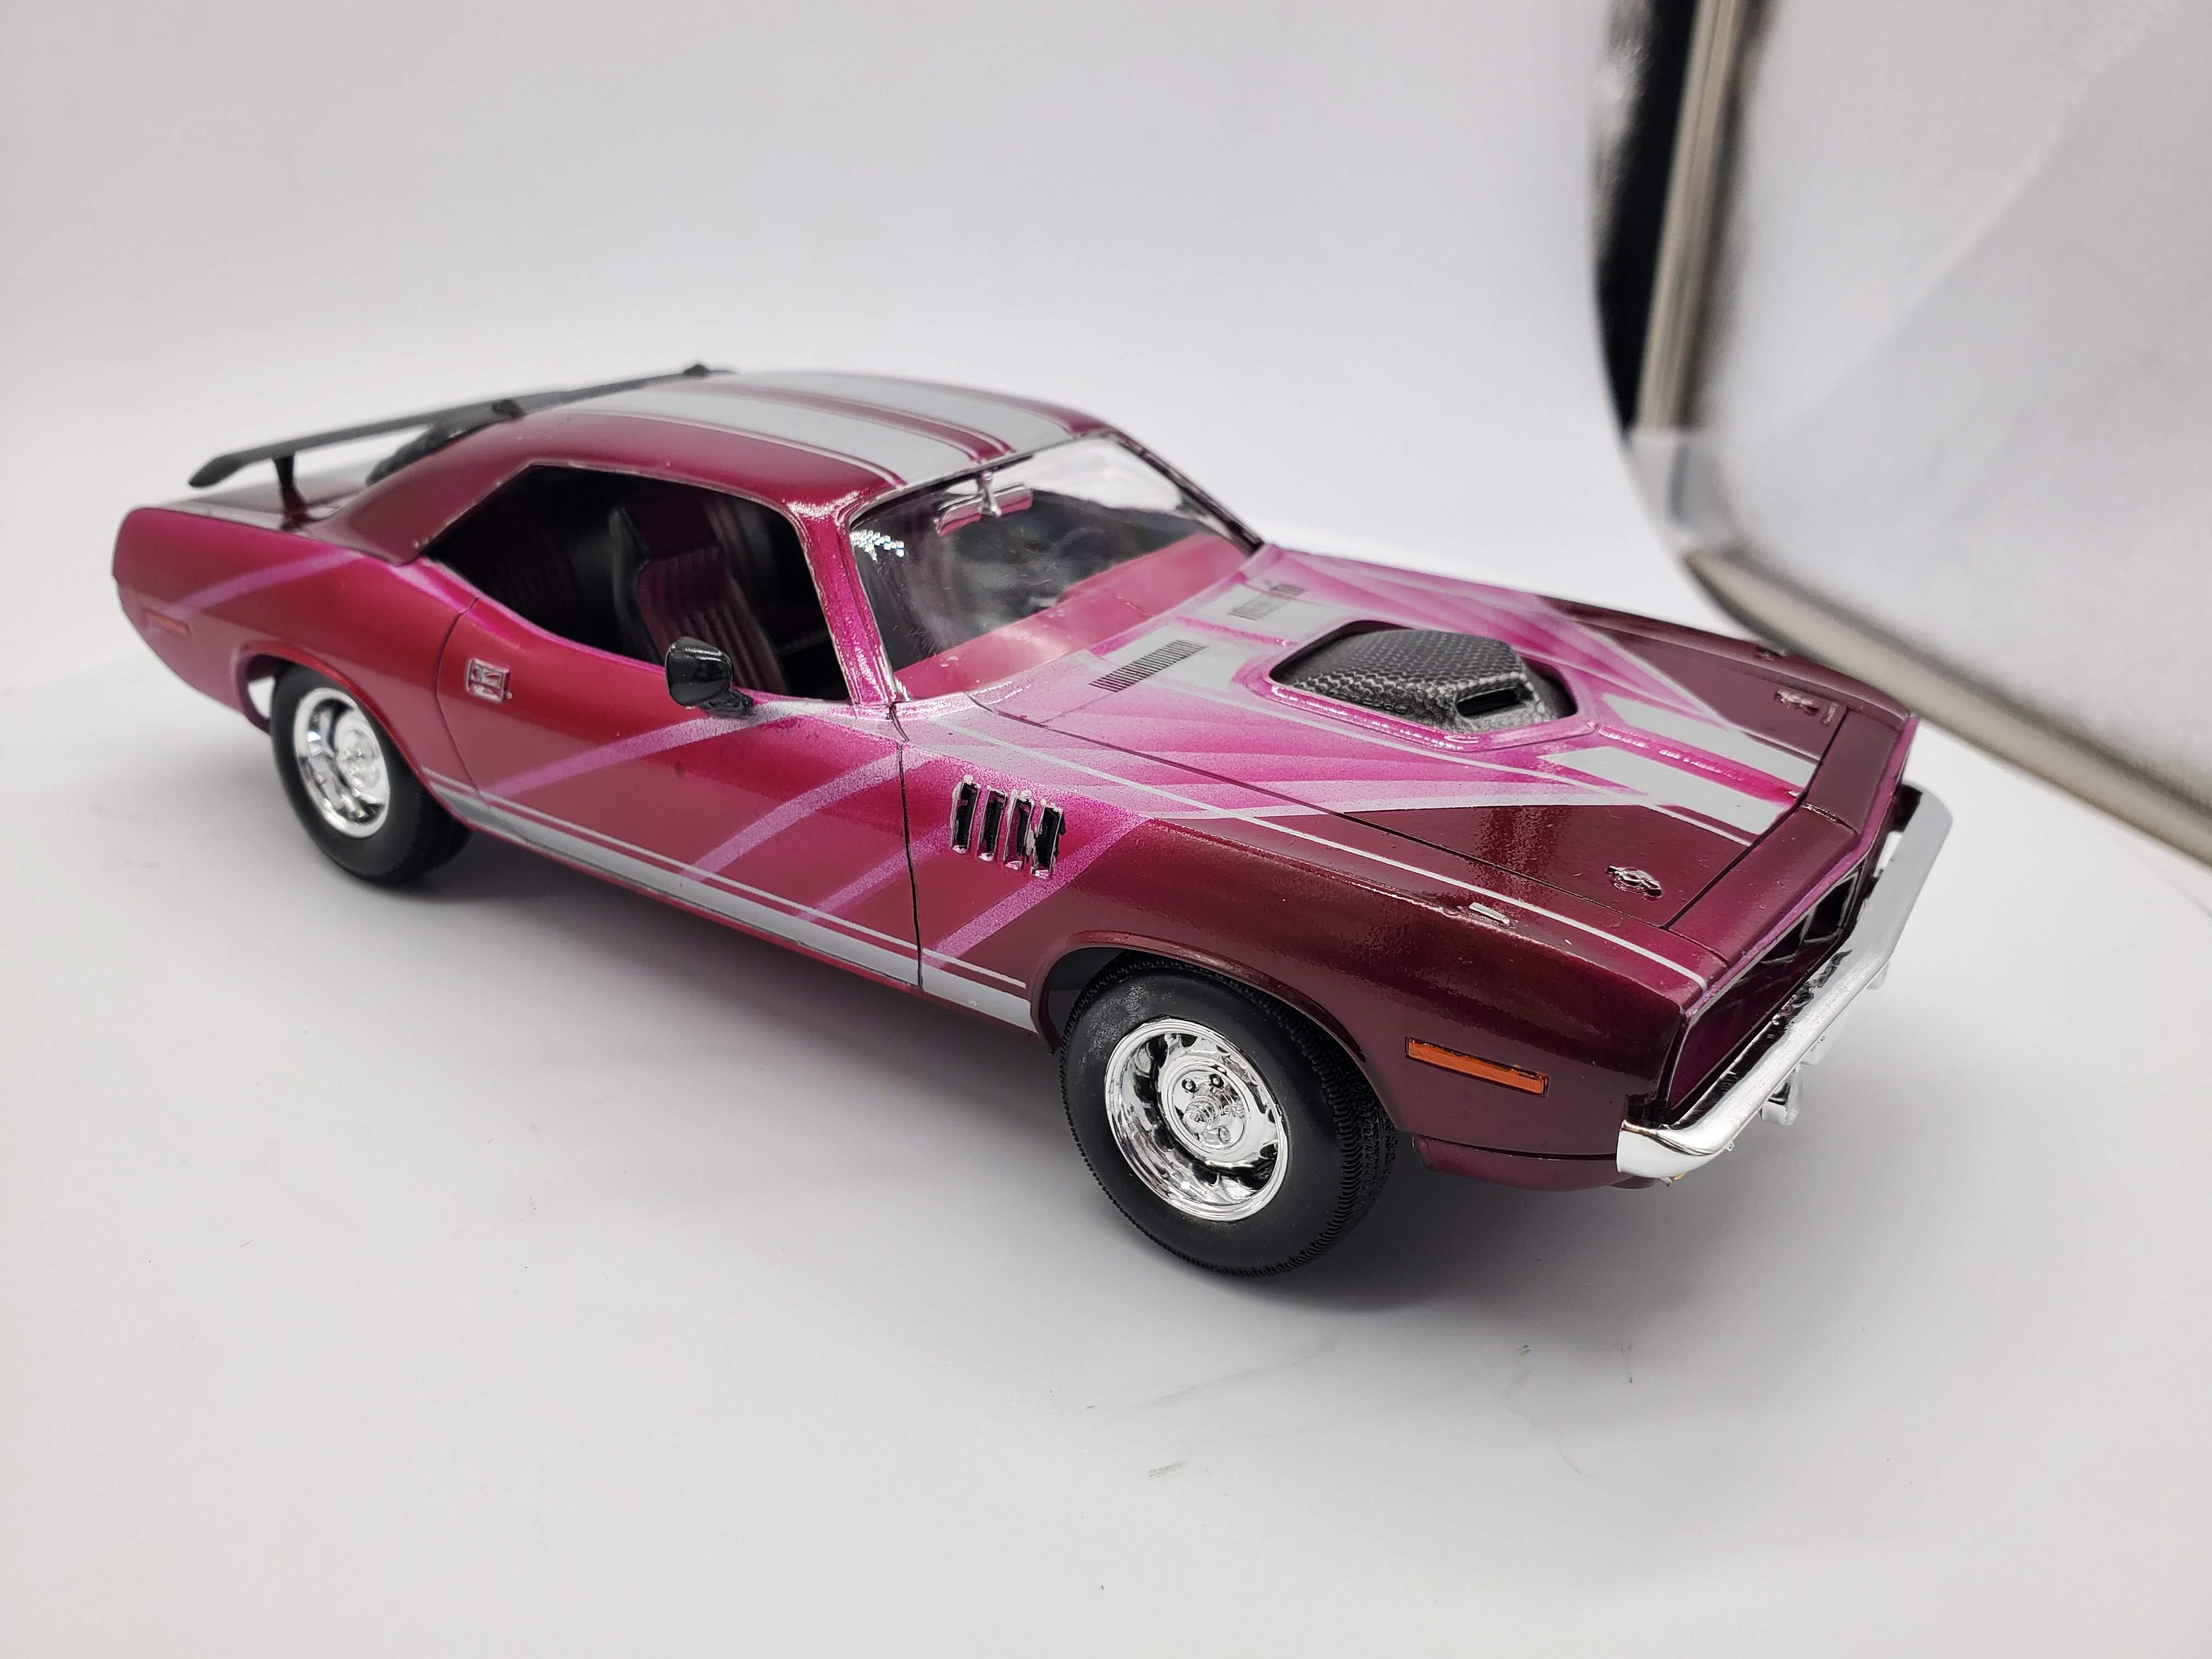
Thanks very much! Thank you, I'm glad you like it. That's actually a bit of a miracle. It's Mr. Color Wine Red that I added a few drops of black into an unmeasured dump of paint until it looked nice. I've got color vision issues so I couldn't reproduce it in a million years. The hood is unmodified wine red over silver. Thanks so much, I'm glad you like how it came out. I'm pretty happy too, but if I were to do it over again, I think I would extend the sunburst and the stripes to the nose section of the car. Also, the third diagonal silver stripe on the left side of the car is misaligned to the sunburst. I put it to the rear of its "burst" ray rather than the front. Dunno why, I wasn't paying attention. I think I would also eliminate the final diagonal silver stripes on the rear fenders of the car. They don't connect clearly to the sunburst on the hood (although they are aligned from it) and I think the car would overall look better with the last stripe connecting to the bottom of the rear wheelwell. Next time I join that makerspace I'm going to buy a 500 pack of spoons and just sit there for two weeks learning to paint and polish to a glossy finish. Then I'll start a new car.
-
Got this car as a practice piece before working on another model I wanted to do really well on. This one came out better than the one that followed, go figure. This was my first time really using an airbrush to full-ish capacity. There are some things I'd do differently if I did it again, and the reason I left the finish all orange-peely is because I was too happy with the paint job to be willing to risk messing it up with sandpaper. Thanks for looking, and comments and critiques are welcome.

-
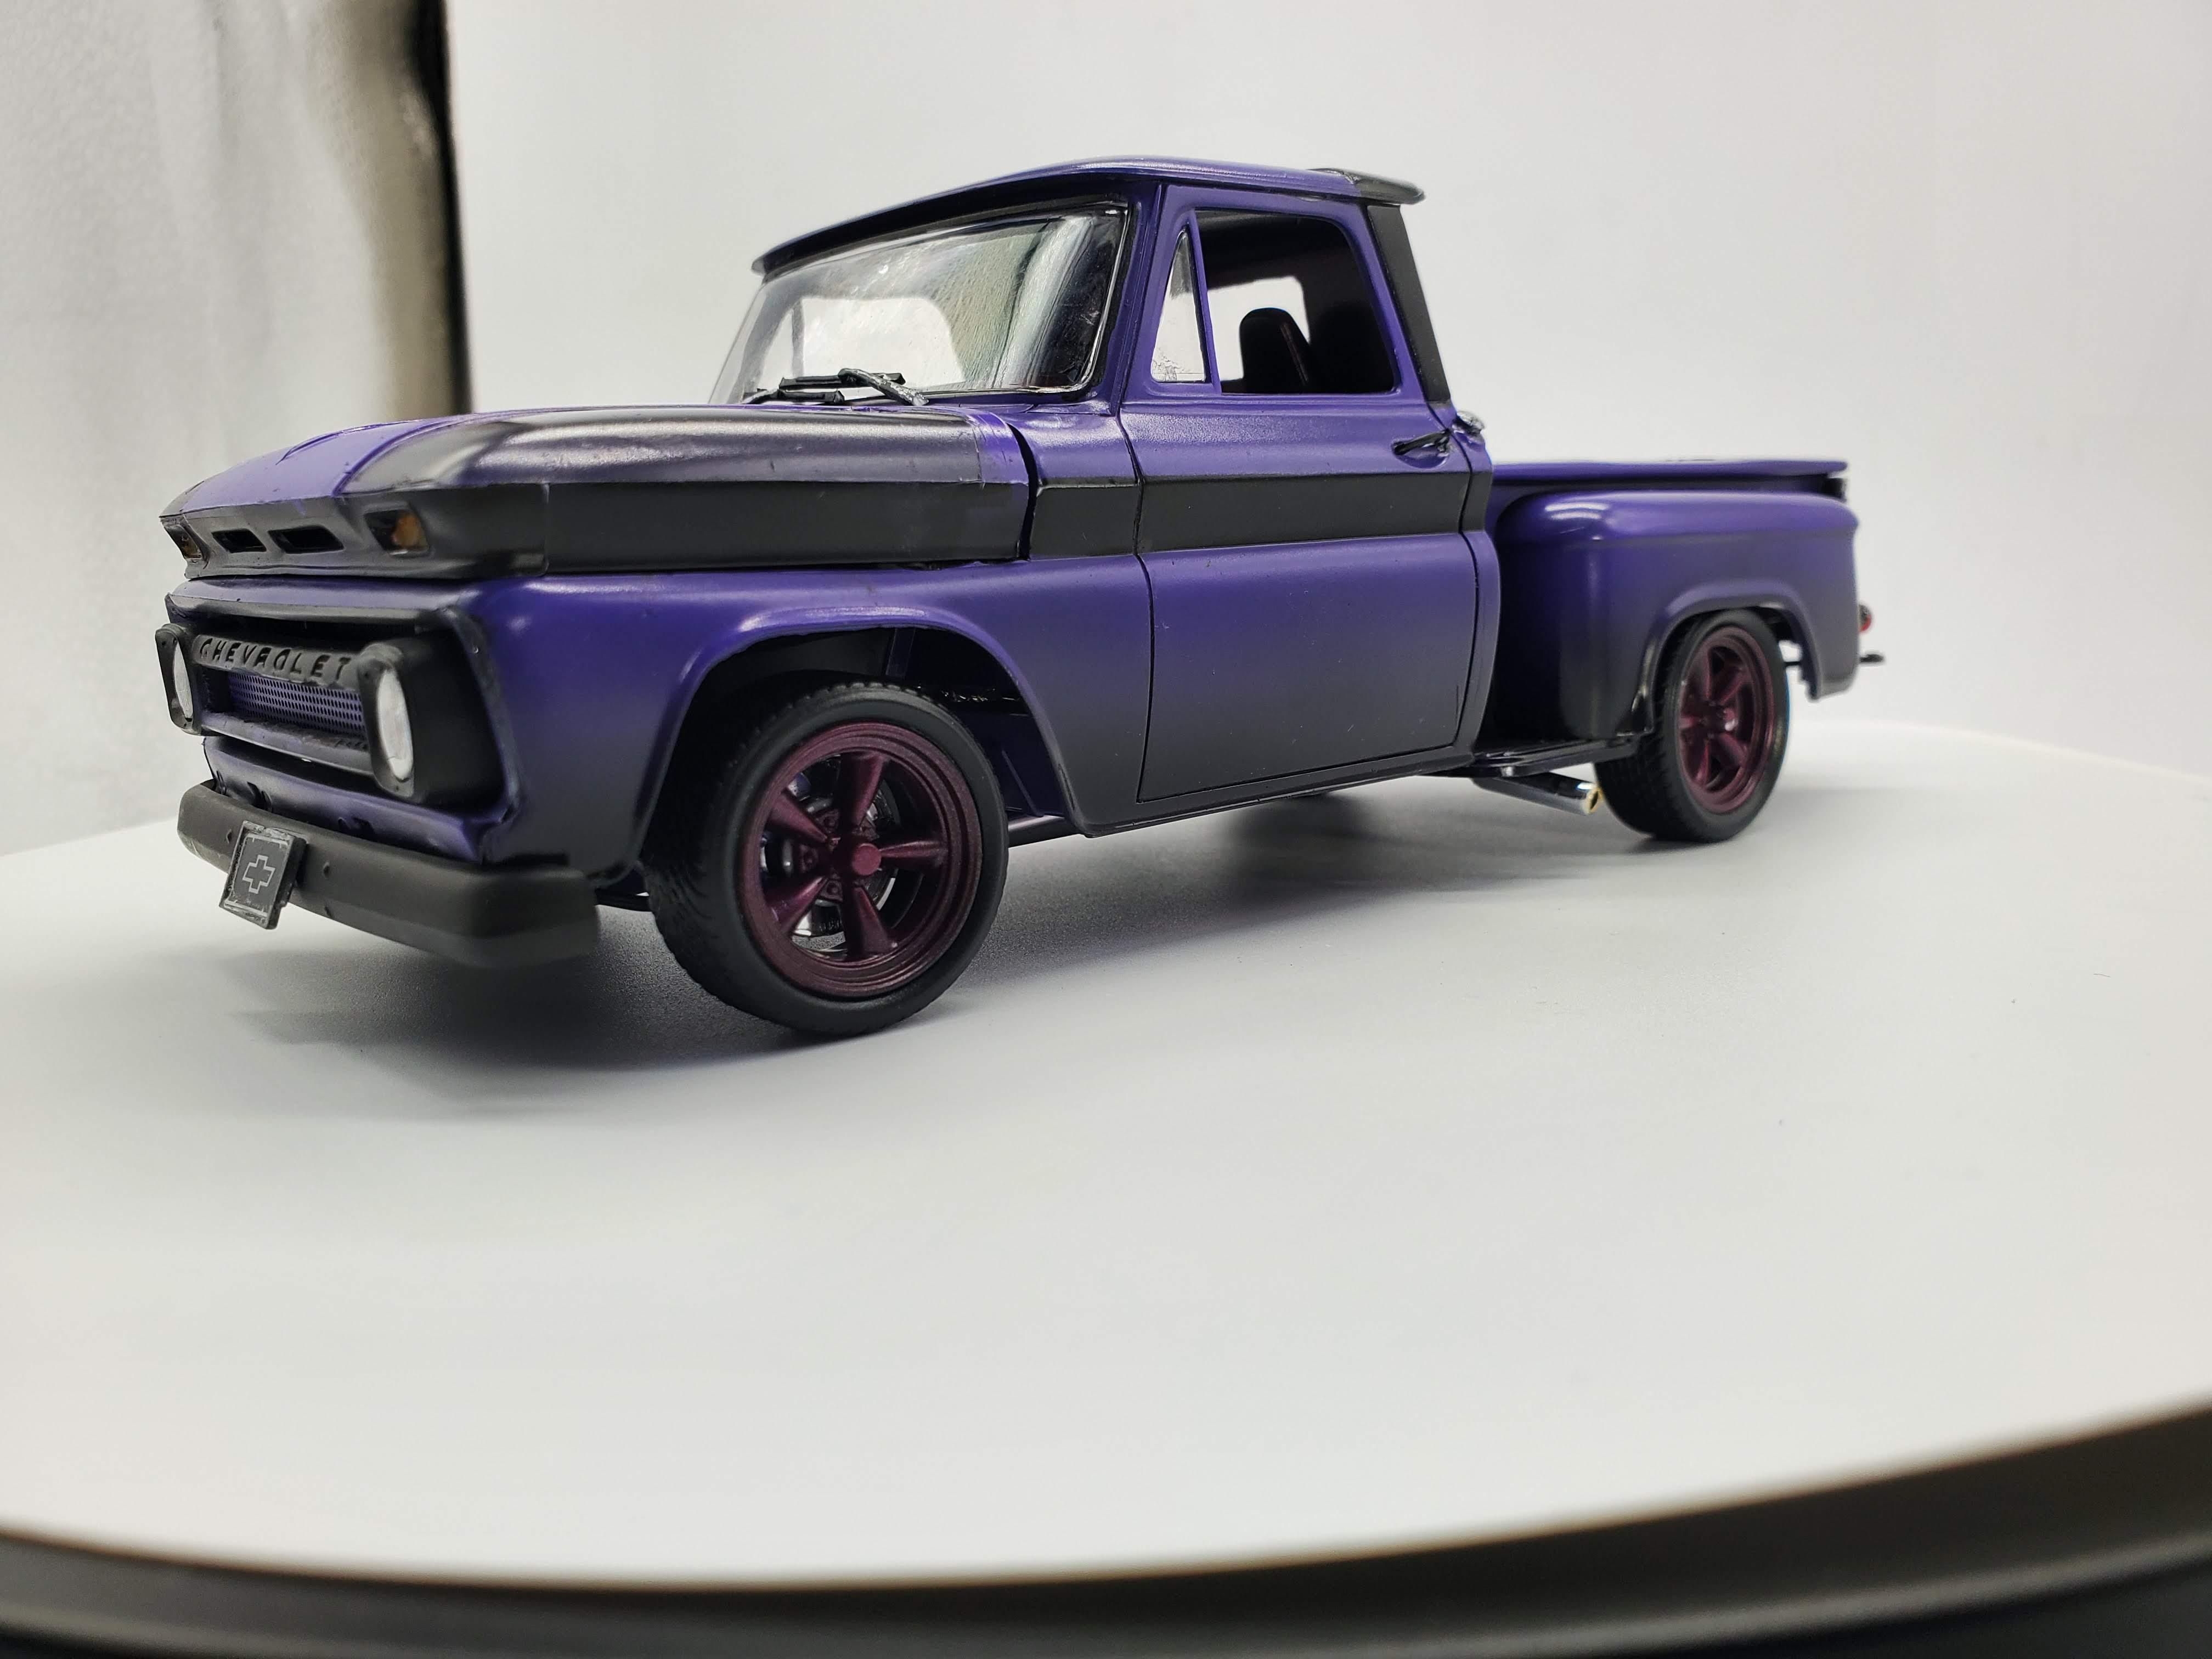
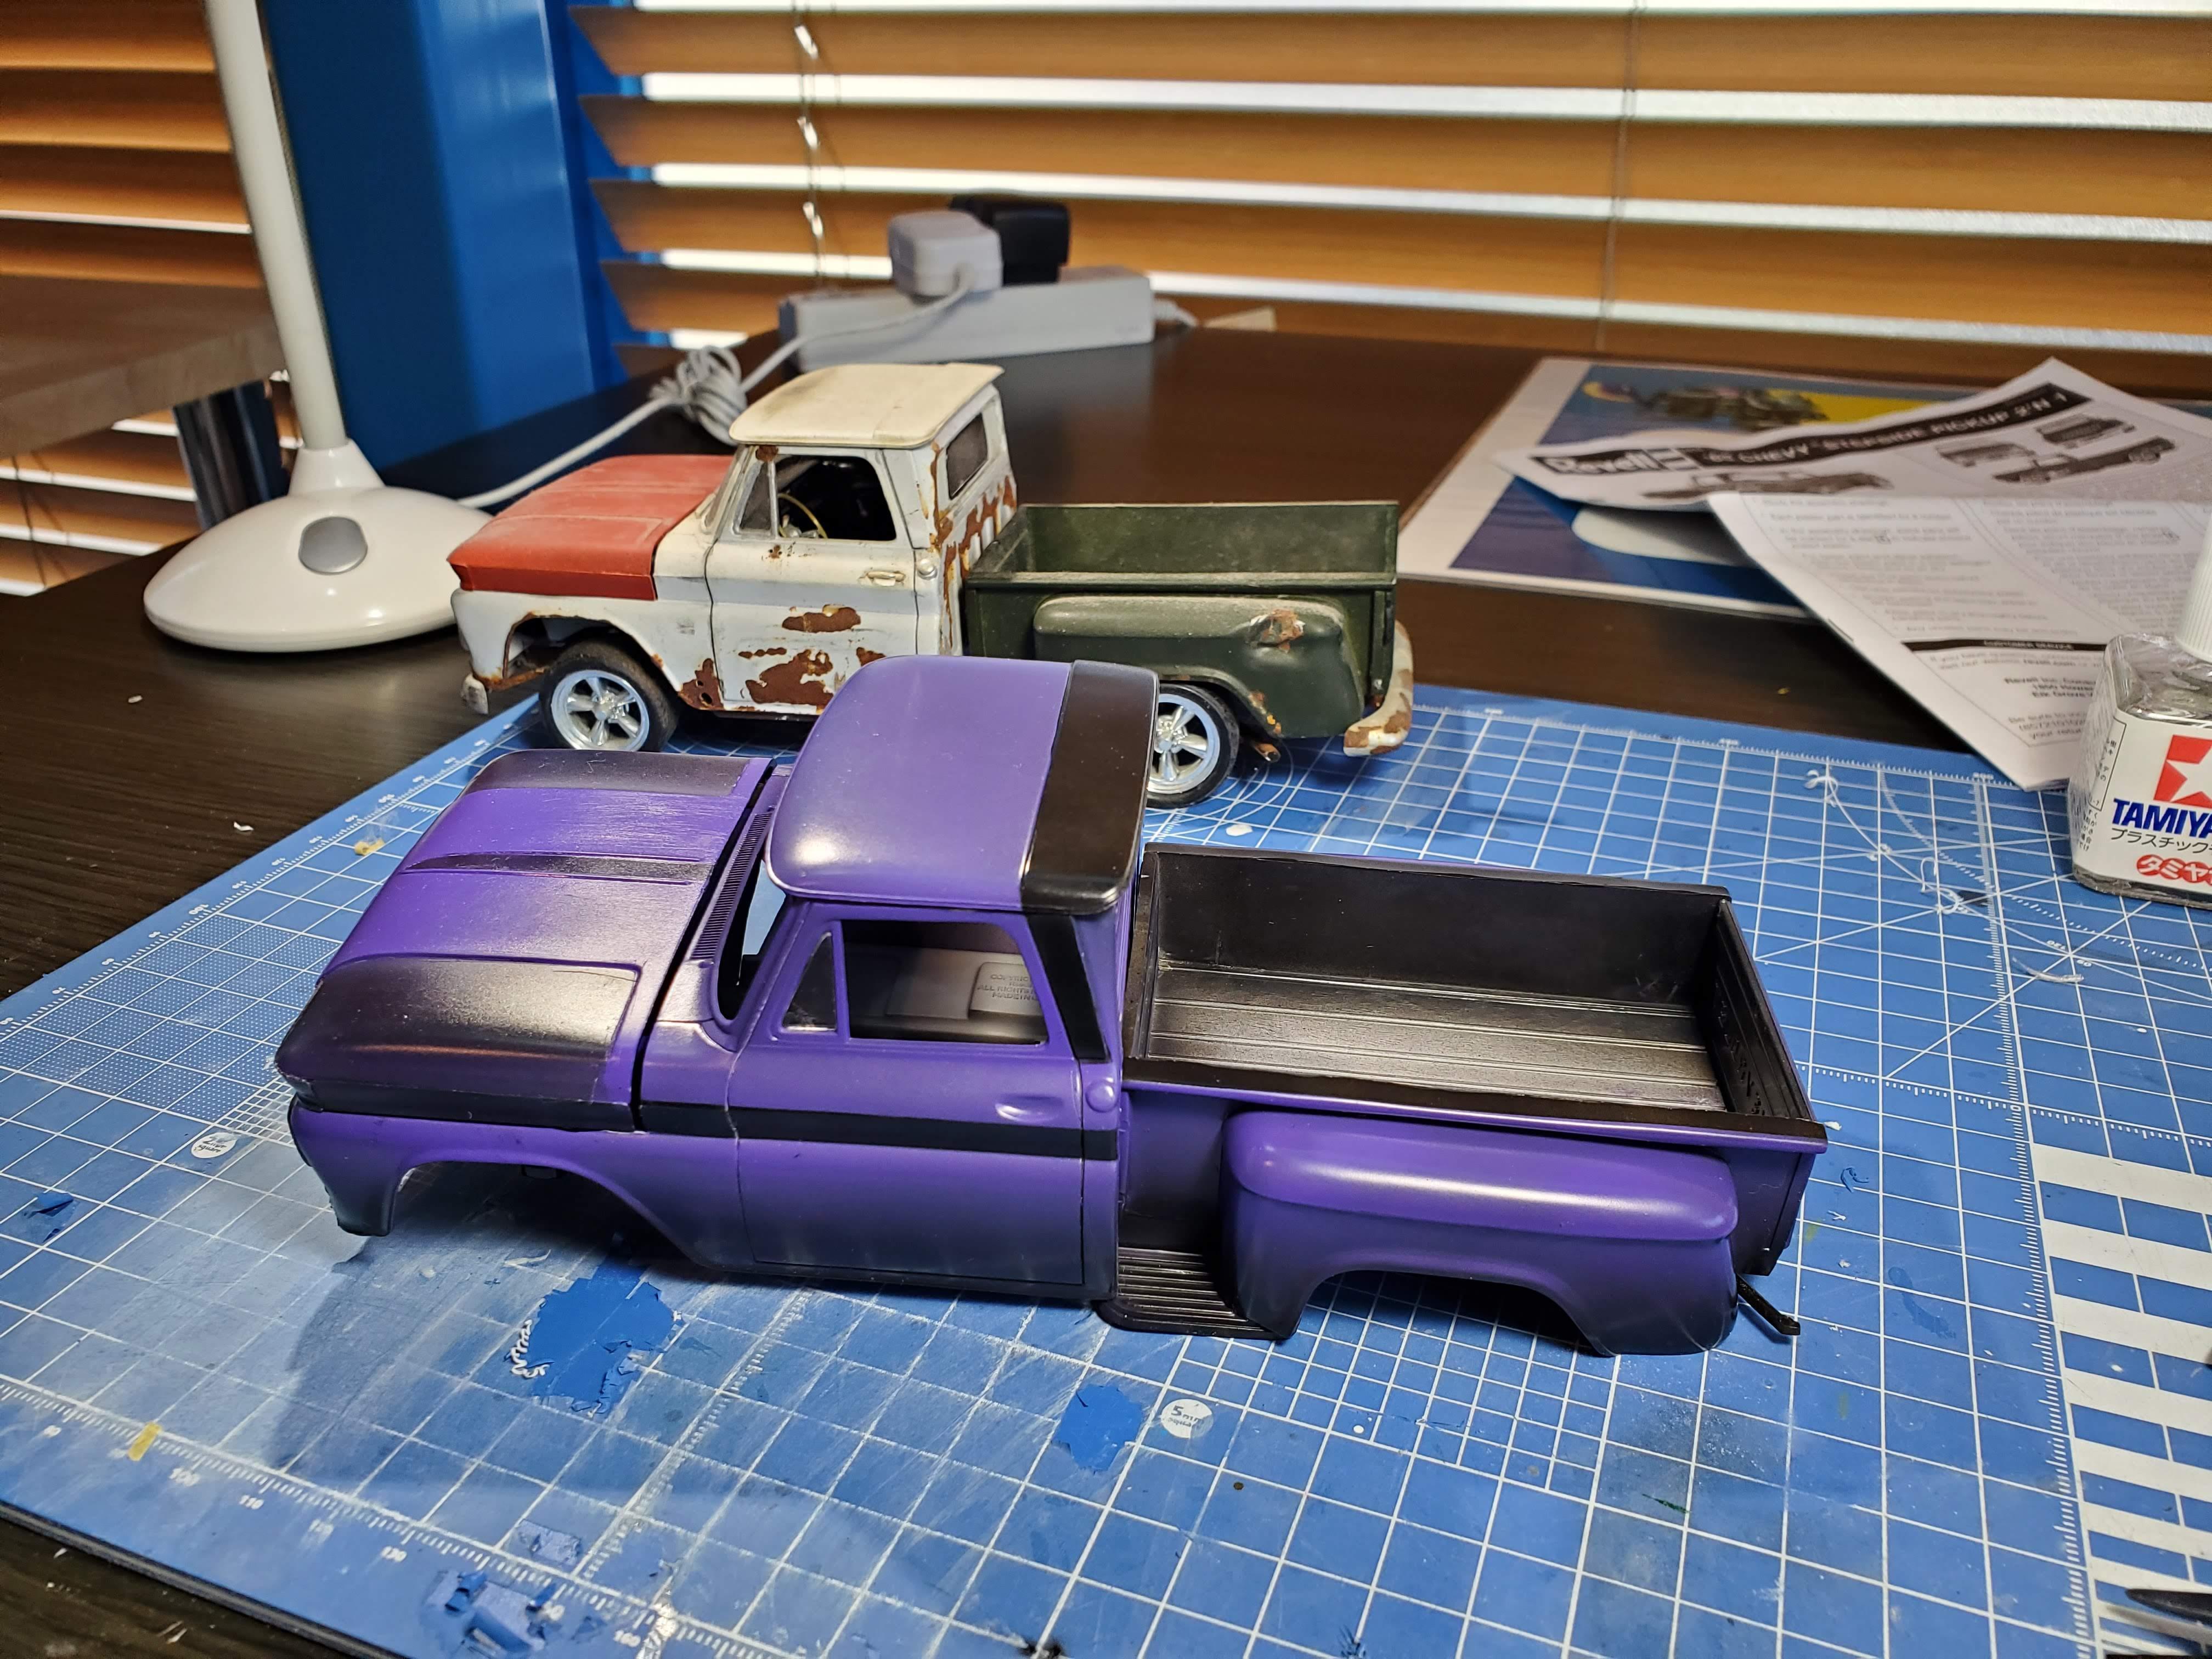
In 1989 I got a 1966 Chevy Stepside that was a real rustbucket. My teenage self assumed he'd be able to transform it into a hot rod. He was wrong. So in 2011 I got the Revell 1965 Chevy Stepside model and re-created, more or less, what the truck looked like the day I got it. And this year I bought another copy and created what might have been if my life had gone a different path. So here we are. (The only difference between a 1965 and a 1966 C-10 is the badge. By not installing them, I've converted this to a 1966). It has known issues, but feel free to offer critiques on what and how I could have done better. I'm still very new to this hobby. Build thread is here.
-
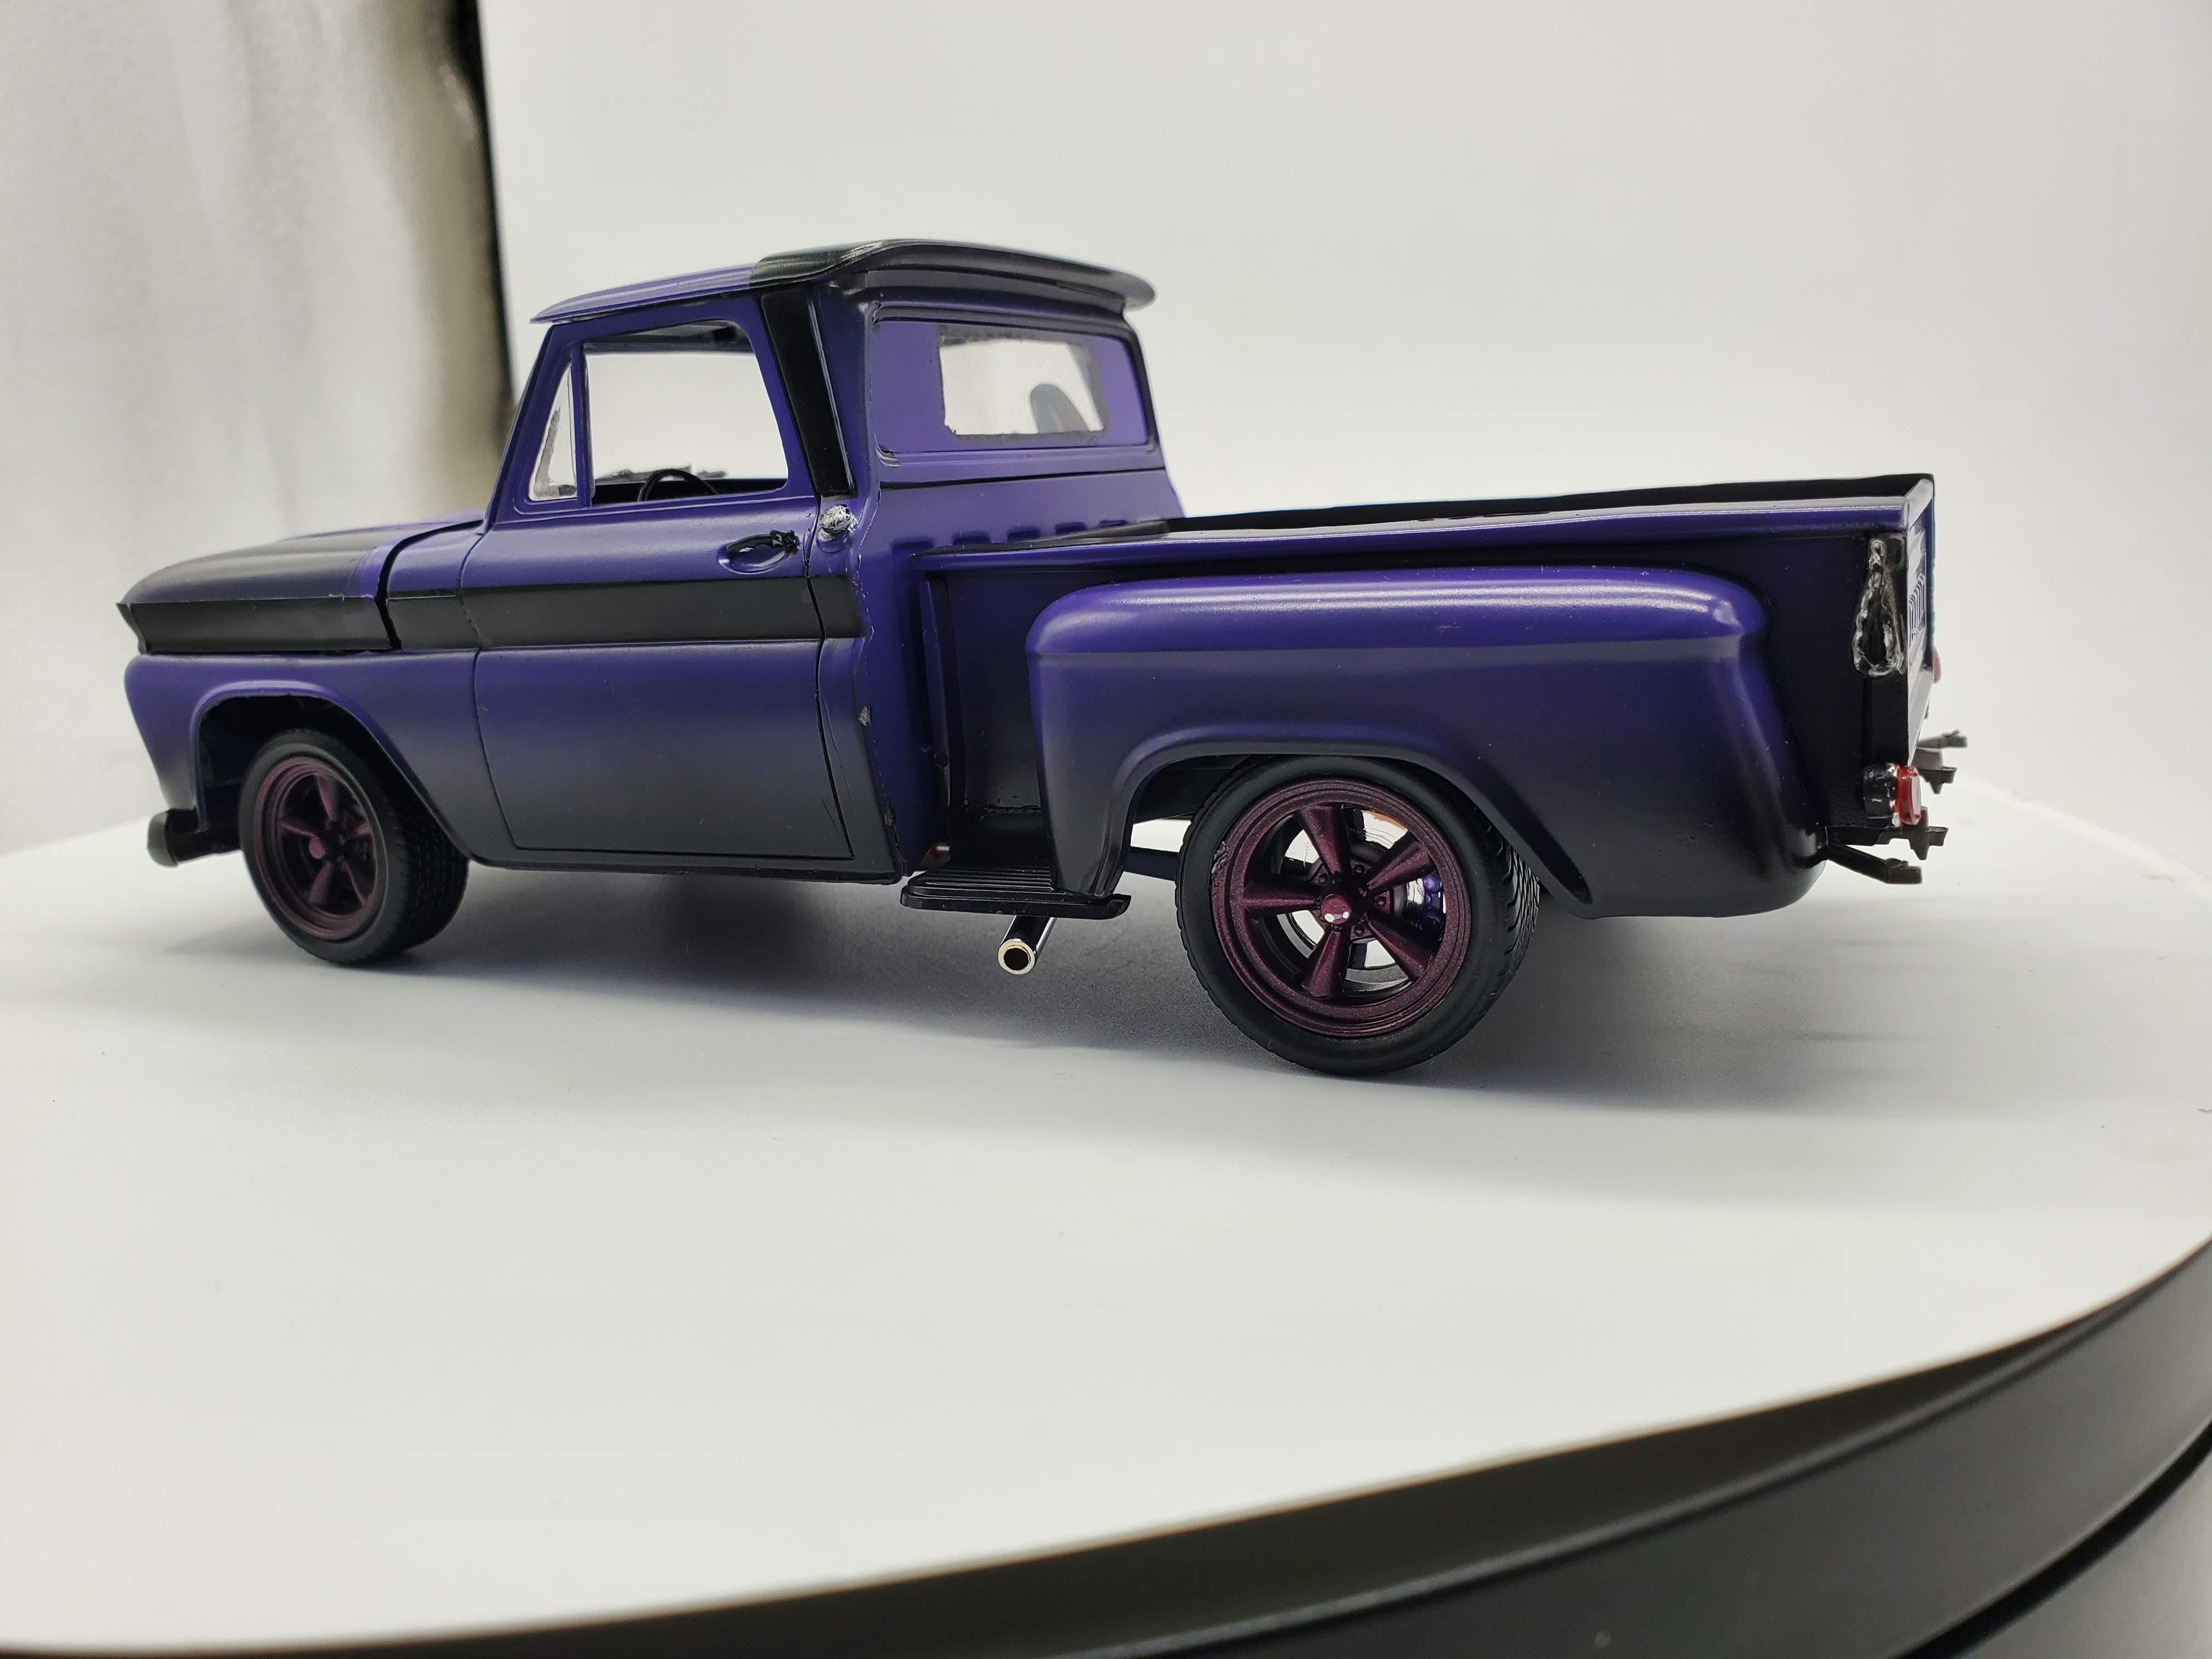
Finally, did someone say cherry bombs? My truck as I bought it had dual exhausts and glasspack mufflers, but that was beyond my modeling skill when I built it back in 2011. No such issue this time. It took me hours to get the bends right, but by using some flexible 3mm hobby wire to make the pipe and some shrink tubing (used for soldering) I managed to pull it off. The mufflers were made using two pieces of shrink tube each. I don't remember the dimensions off the top of my head, but let's say I took 15mm of shrink tube and threaded it over the "exhaust," then heated it with a lighter until it shrunk down. I found it was still a little too mobile so I hit each with a dot of superglue to keep them in place. Then I cut another piece of tube, maybe 20mm long, and slid it over the first, now-shrunken bit. Make sure it's lined up and hit it with the lighter. The middle will conform to the slightly larger diameter of the first bit and the ends will shrink down to the diameter of the wire. Voila, glass packs! I do not recall seeing anyone having done this before. Not saying it didn't happen, but I'm pretty sure I came up with it on my own. I still need to make exhaust tips using an old telescoping antenna. That I know I learned from Jun's Mini Garage on YouTube. EDIT: Exhaust mounting brackets are outside of my current abilities. I just used superglue.
-
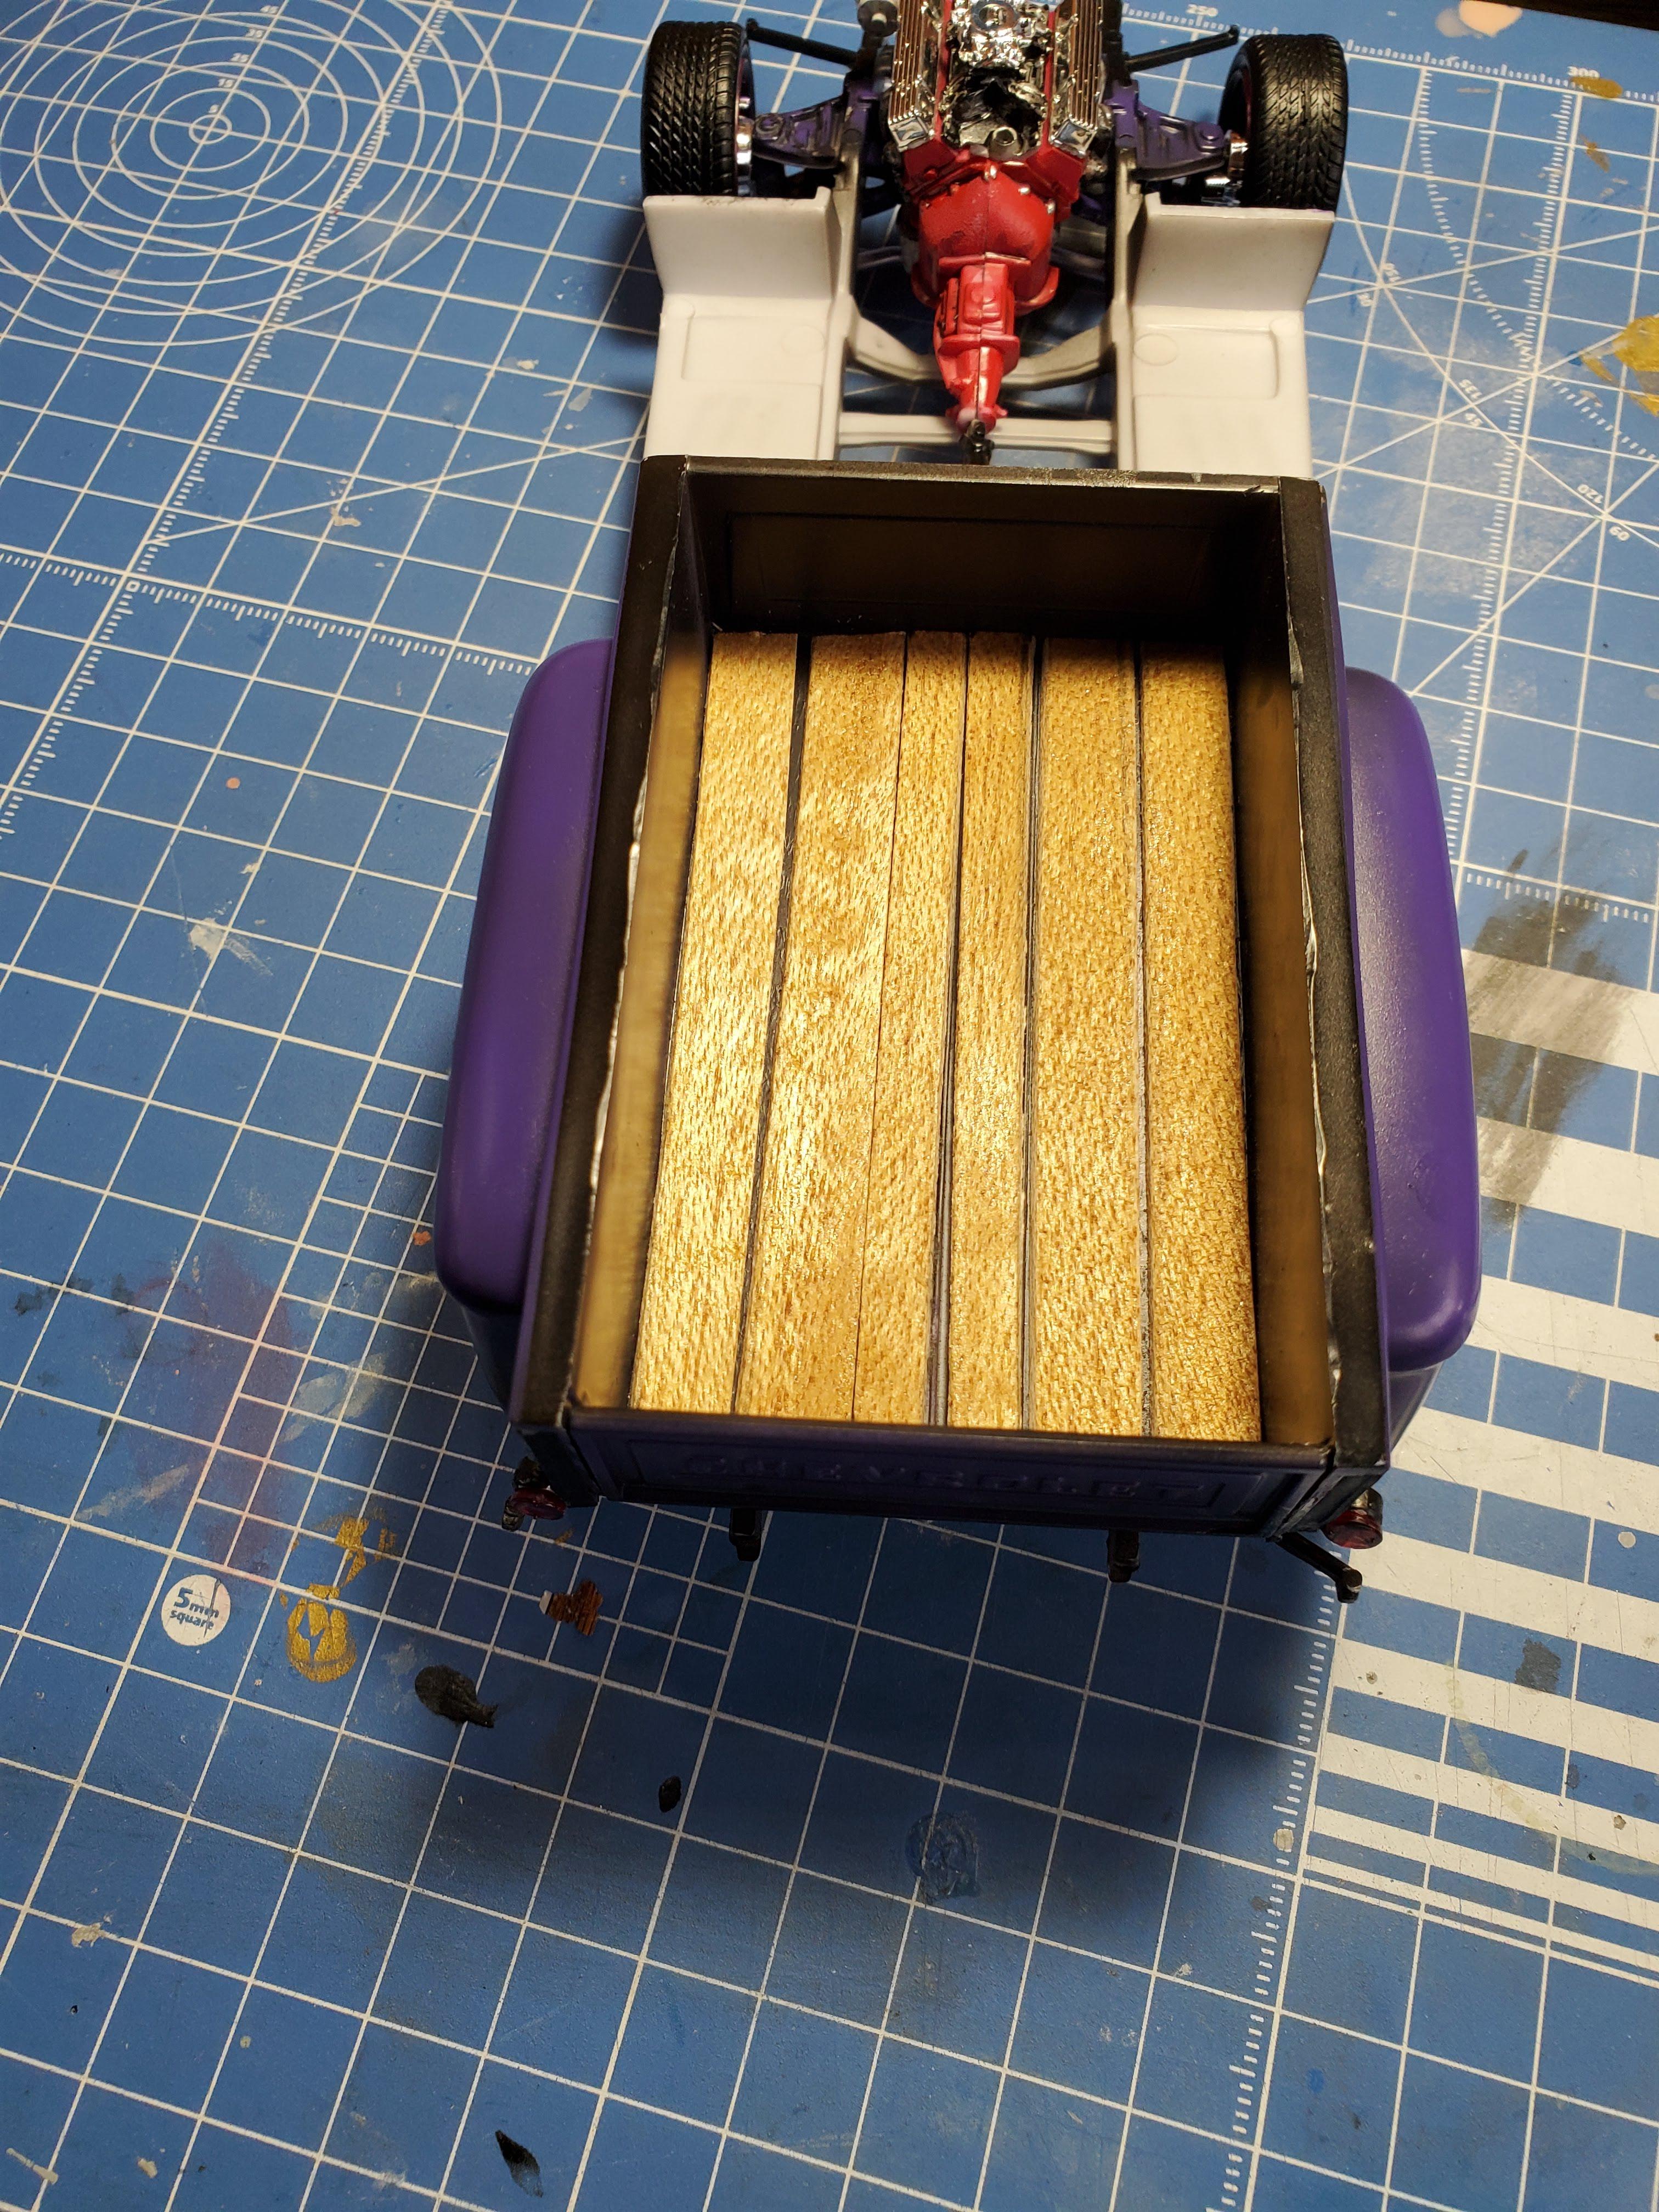
Next I made a real wood bedliner for it out of some 1mm thick balsa dyed with coffee. It's... okay I guess. I need to make some chrome strips to go between the boards, might have gone about things the hard way. On the bottom of the bed I used wood bed waterslide decal that came with the kit. Not totally accurate or smooth, but if I put it on a mirror it'll look like I didn't forget.
-
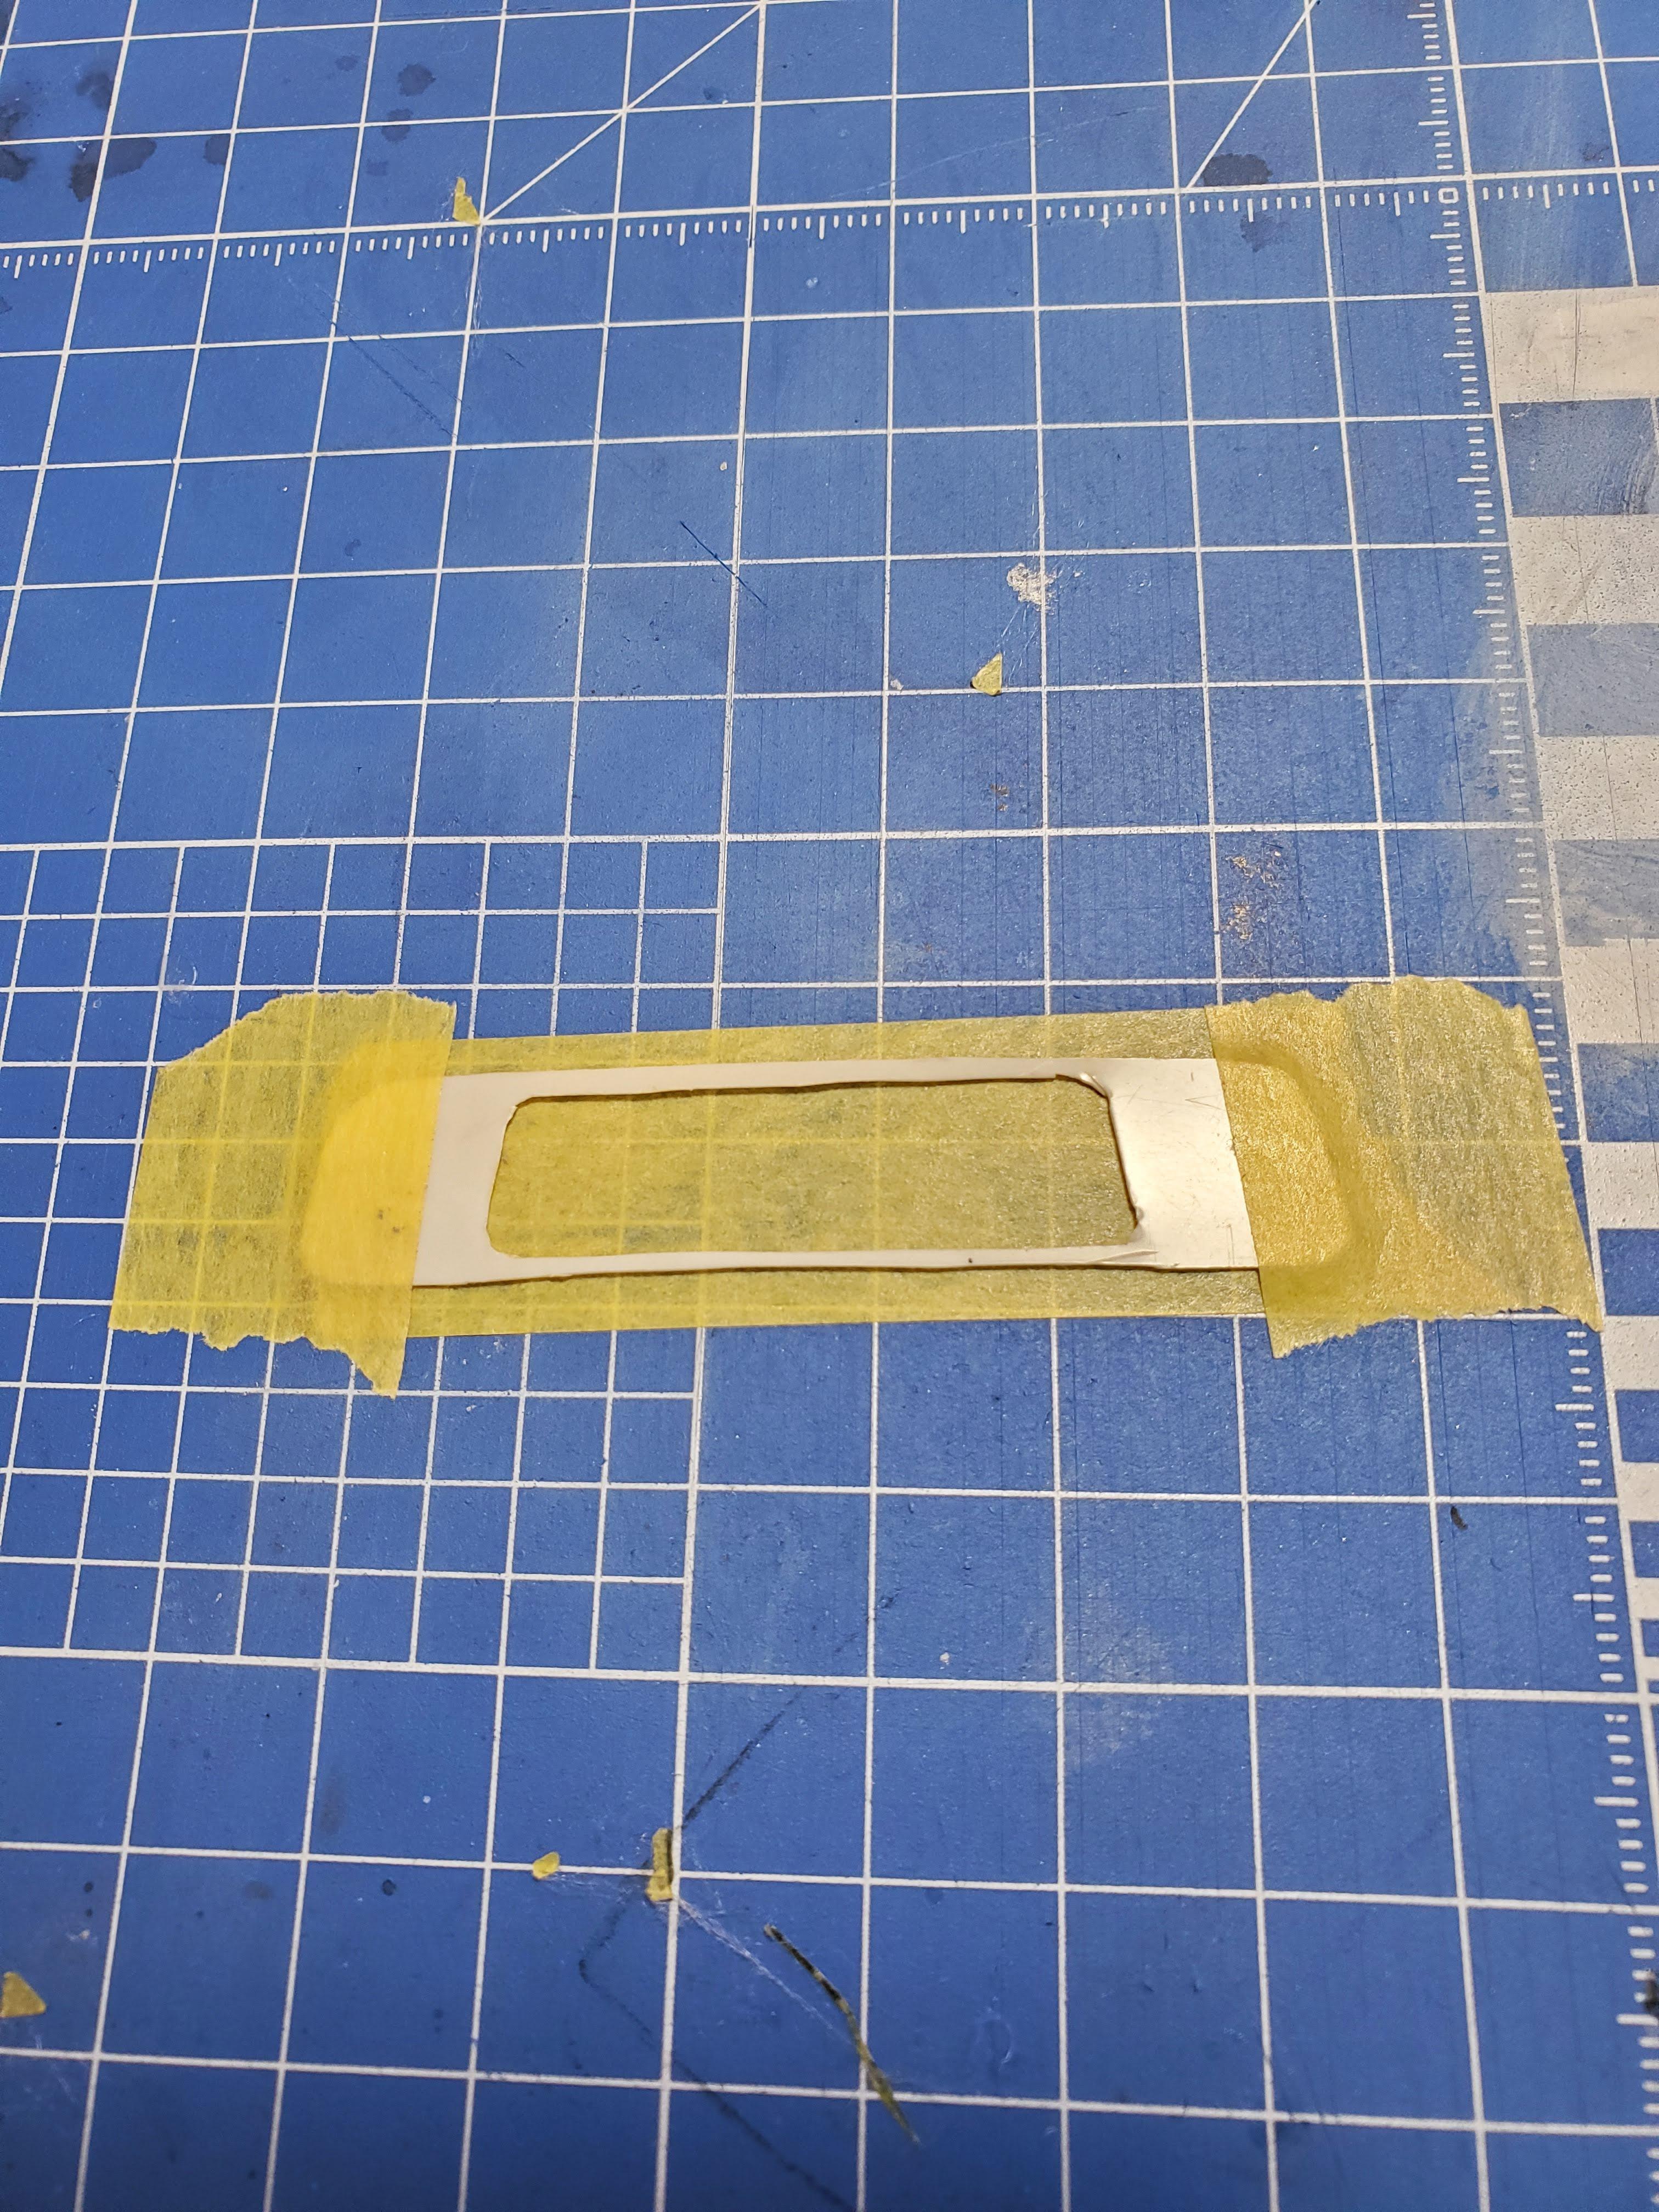
One feature of the '66 is its small rear window. For some reason, maybe safety, lots of owners of the 1:1s go for the "big window conversion" which gives a full-width window in the back. I'm having none of that, my truck came with a small rear window and if I wanted to know what was behind me, I'd install mirrors (side note, I forgot to install the rearview mirror before gluing the cab together. Oops.) So when I built the rustbucket version I spent ages trying to create a rear body panel with a small window out of polystyrene. I was unsuccessful, but then I realized I could just mask out and paint the big rear window piece to look like the original small model version. And I still had the template this time, so problem solved. The template isn't pretty, but I use it to get the basic shape down and then cut the mask with a straightedge and a hobby knife. I put down two layer of masking tape, but for the second one I de-tacked it on my flannel shirt first to make the two layers (one for the inside of the window panel, one for the outside) separate easily.
-
Thanks Greg and David. The rust was done with a Japanese product called "Sabiten" (sabi is the Japanese word for rust). It's a two-part formulation with part one being iron filings in a gluey gooey medium. Brush that on, wait a day or so, and then add the second liquid which is an oxidizer that causes the first coat to actually rust. I understand that the US has a similar product available at... Michael's Hobby/Craft shop? Not sure, but I know I've heard of it. The damage work was done with a lighter, a soldering iron, and some patience and good luck. The rust holes in the front quarters were done with a dremel and a ball grinding bit from the inside. Thanks! I just wish that my life had panned out so that I was posting this on a 1:1 car site, but so it goes. And... A quick thanks to everyone who has posted their build of a Revell 65 Stepside in the last few years. Before embarking on this project I did a lot of reading on the model and looking at different modelers' takes on it. I can't remember who or what or where, but if you see something that looks like what you did, you're probably right. More later.
-
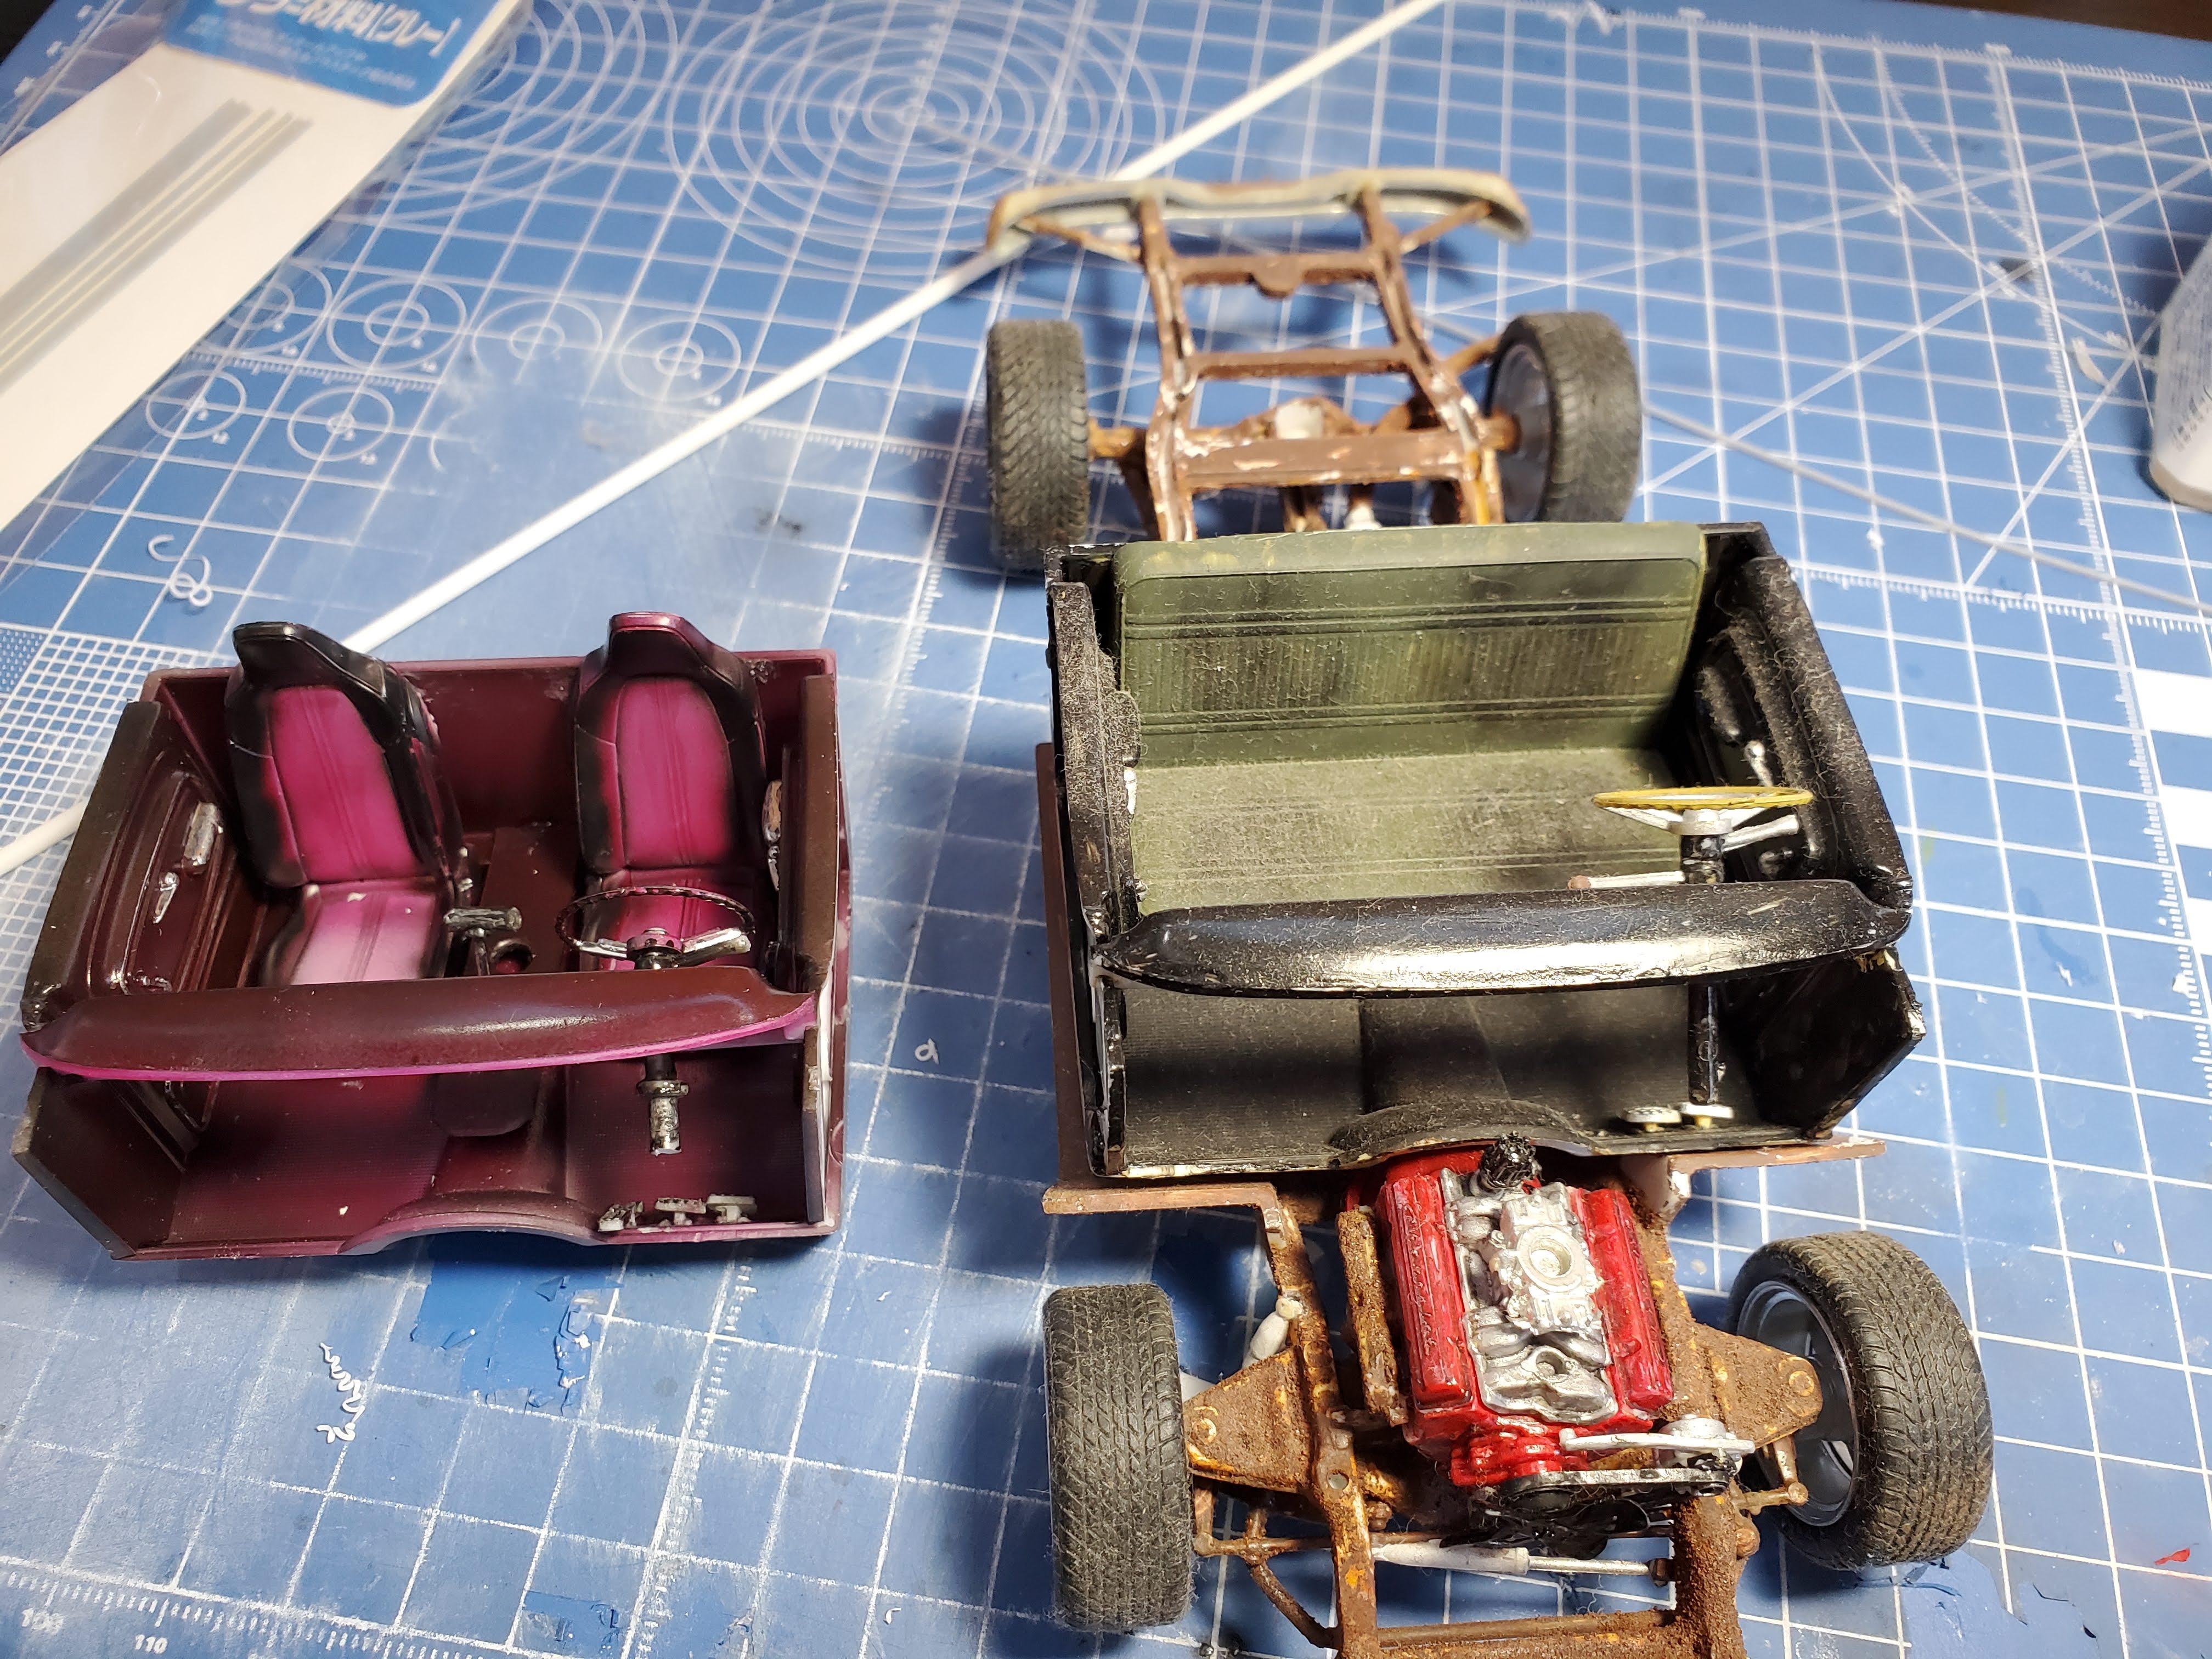
I brought out the older brother for some repairs and comparison. The rustbucket version was built in 2011 when all I had was rattle cans and a windy balcony, so it's cruder in a lot of ways. It's also more distressed than it should be because in 2018 we had an earthquake that sent my whole hobby shelf crashing to the floor. Some of the pieces may have gotten swept up and discarded. Anyway, a comparison of what was and what could have been.
-
Some more progress. No more three on the tree, I put in a center console with a drink holder and a shifter. Once it was installed I realized the shift lever was a little long, but I'm not going to stress over that.
-
Next I did the cab. I wanted to keep a complementary color scheme without just going full Purple Rain on it, so I went with Mr. Color Wine Red. The seats are from... I don't know what. The makerspace has a little bin that members can drop unneeded greeblies into. First day I walked in I found two 1:25 bucket seats, which was great because the 1:1 truck had Camaro buckets when I bought it but I had to model it originally with the bench.
-
Black base coat, Mr. Color Purple. Then I tried to do a fade to black on the bottom but it didn't work out so well. I may attempt to respray it since I think I know what I did wrong (I'm very new to the airbrush, so advice and tips are always welcome):
-
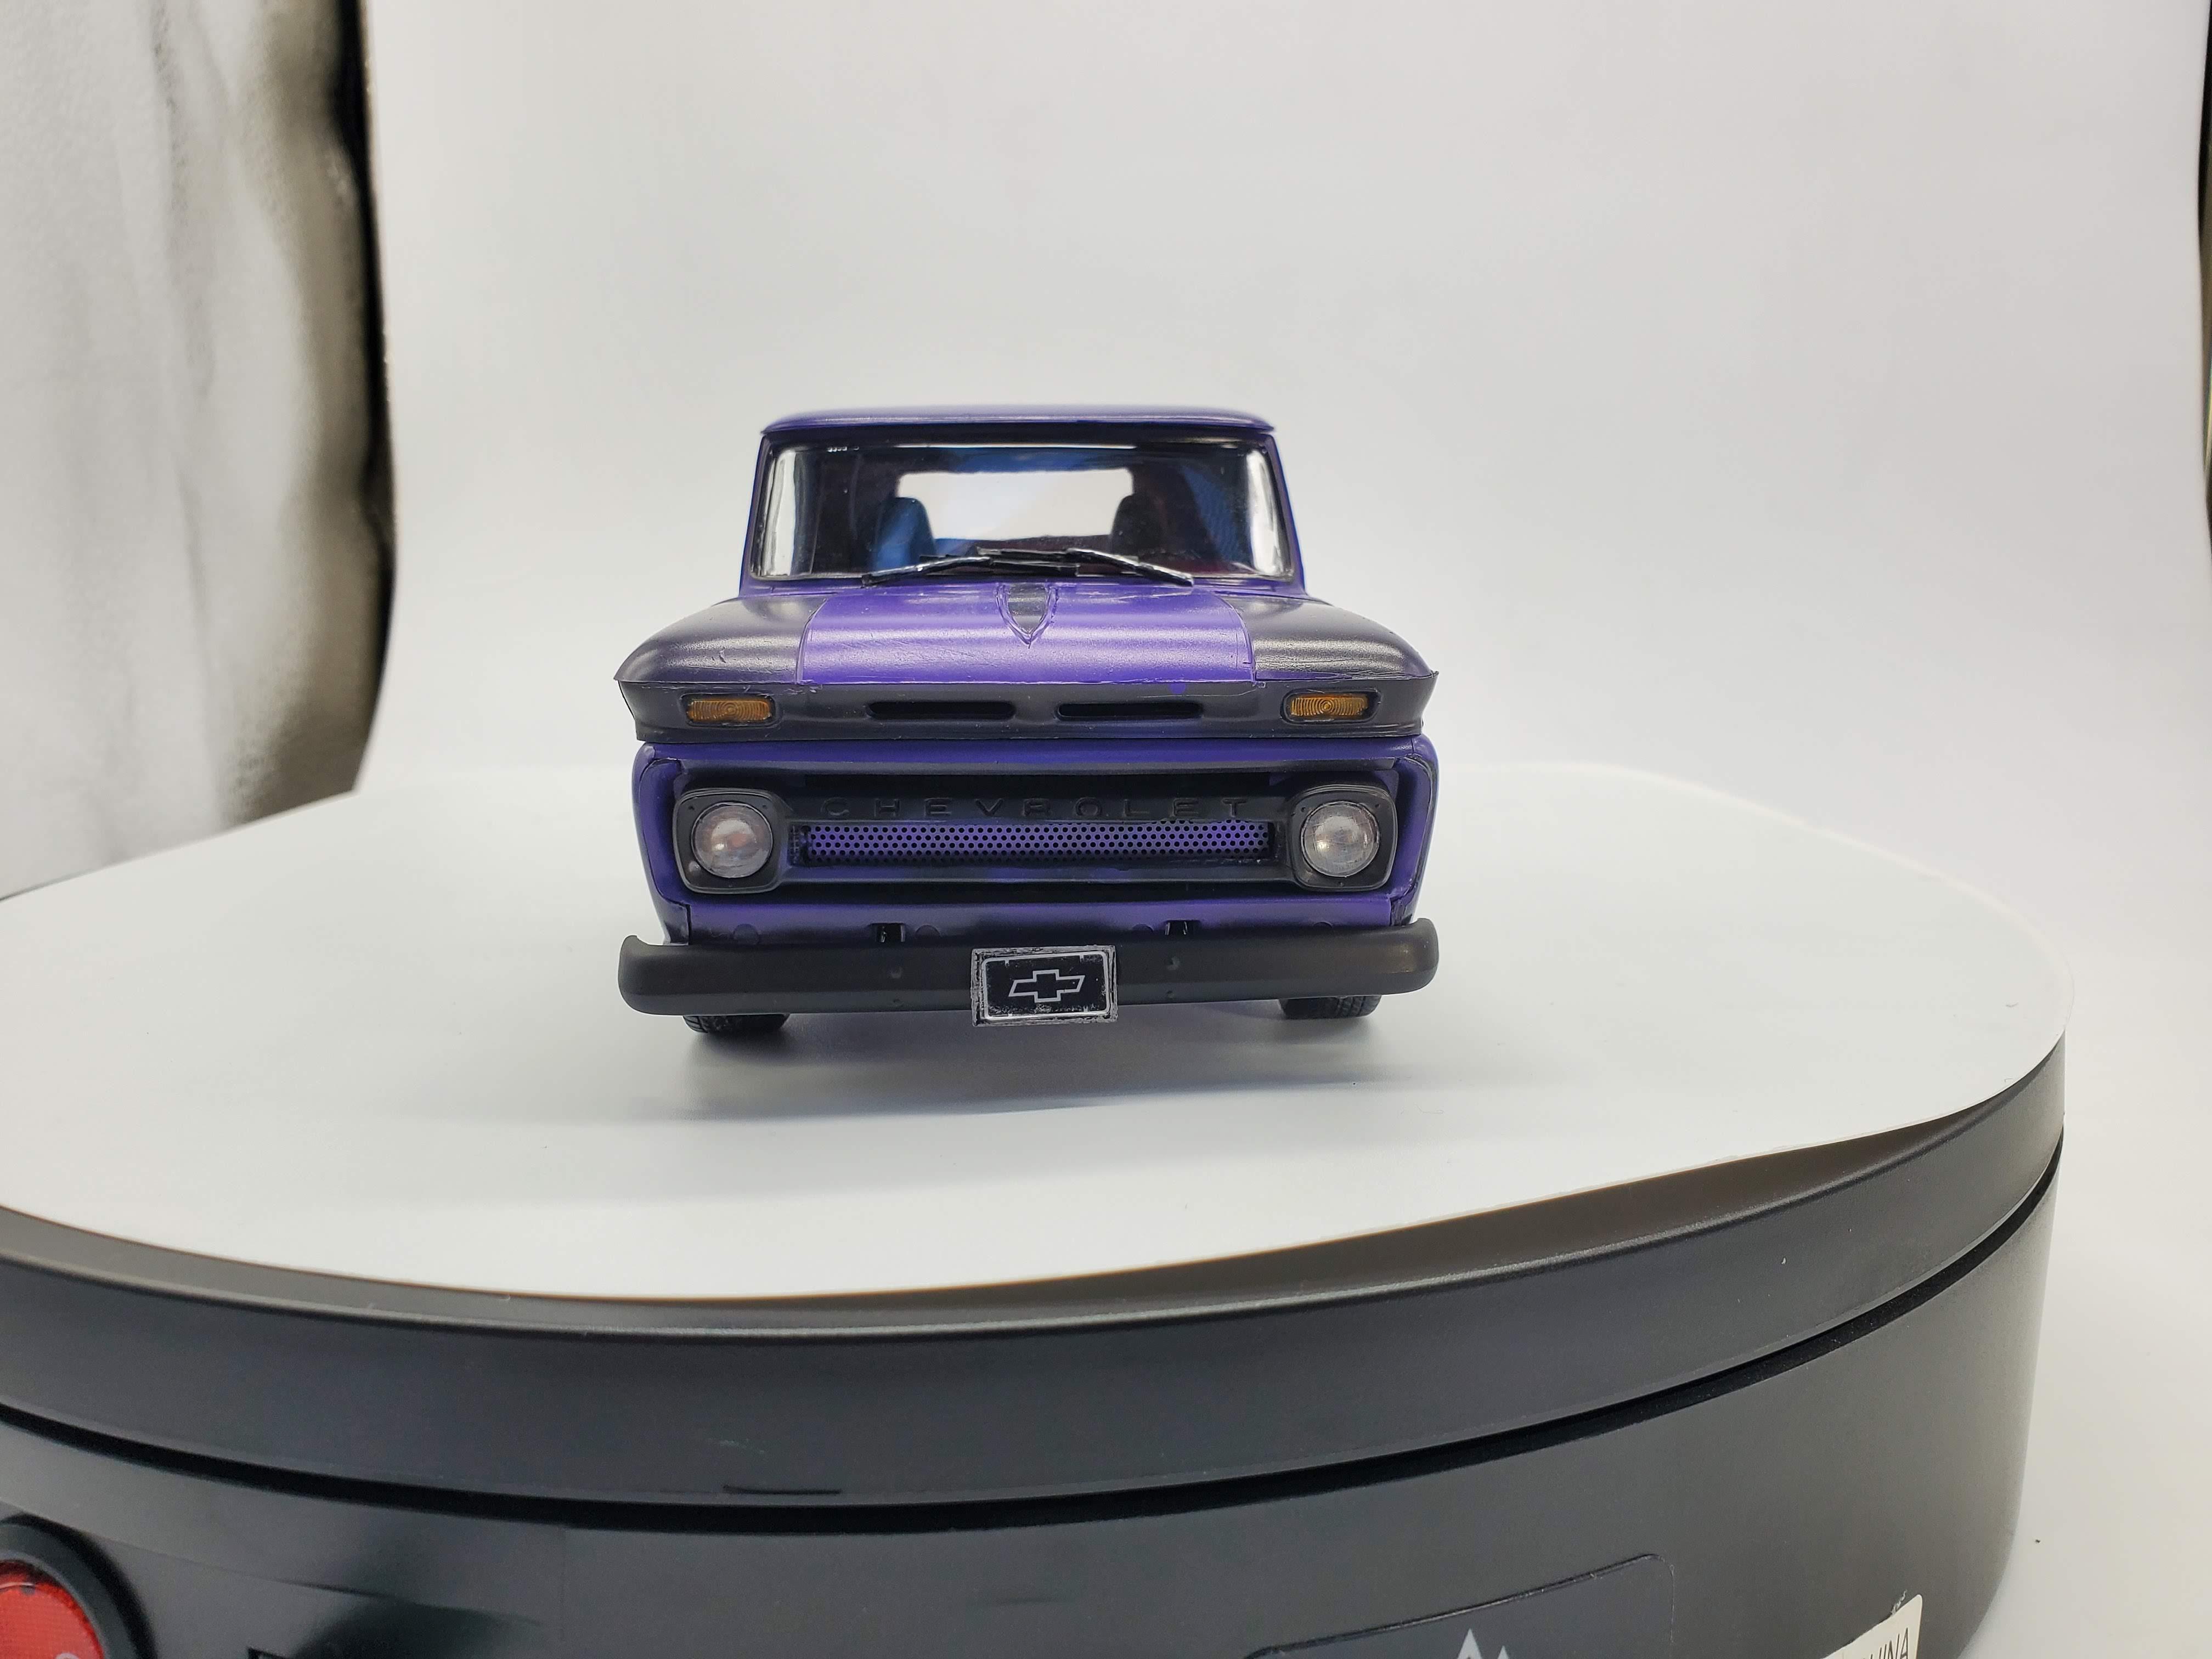
Back then I assumed that every American boy had a genetic ability to turn a junker into a wonderful hot rod. Like Arnie in Christine. Well, my truck didn't Christine for me and I ended up selling it ten or so years later. But now I'm going to try to fix that mistake. First I dechromed the bumpers and grille with some カビキラー, kabi killa Japanese mildew remover. One of the headlights kept its chrome, but oh well. Then I chopped out and filed the grille. Not perfect but not bad. Backed it with a piece of very fine perforated aluminum for a custom look.
-
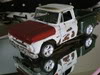
So back in 2011 I posted a thread detailing my build of a Revell 65 Chevy Stepside that I attempted to make as close to the one I got in 1988 as possible. Here's a photo of the original truck and my recreation: