
mario lucchini
-
Posts
28 -
Joined
-
Last visited


mario lucchini's Achievements
MCM Regular (3/6)
-
 From Dan Megard, very good friend and owner of the Scale Motorcars Forum.... Cheers Mario
 -
More reinforcements for parts attaching.... http:// Monocoque painted stippled aluminium and the dashboard scale bolted.... http:// http:// http:// http:// http:// http:// Thanks for looking............ Mario
-
New additons to the Lola, specially made hardware located in the rear bulkhead to receive some oil pipes...they screw & unscrew, so we can paint afterwards... http:// http:// Note the special attaching flange on the upper/right of the picture... http:// Attaching miniature Allen bolts holding the fuel tanks to the monocoque structure... http:// http:// http:// Continued inmediately.................. Special reinforcements all over the monocoque structure to receive varied parts scale bolted.... http:// http:// http:// http://
-
Hey Harry!............beautiful Alfa, though I've seen it before.... You should have listened to Paul Koo and moved the engine backwards 10 mm....no more problems with the hood fitting! I have the Pocher Sedanca Rolls started and the Star of India virgin in the box, once you finish your Mercedes we could go Rolls Roycing together.... Cheers............ Mario
-
The front bulkheads and the special reinforcements made, so scale hardware may be used safely in order to dissassemble things any time you want.... All holes are allready drilled & tapped accordingly.... http:// http:// http:// http:// http:// The front bulkhead and some of the many scale bolts and nuts used to keep things together............. http:// http:// Also at this stage, all parts are sanded, puttied, etc, preparing them for the primer coats and final paint..... Cheers Mario
-
The front bulkhead, with every lighting hole opened and chamfered...scale bolt & nut assembly... Part of the engine being assembled... To be continued after my homework for the client!... Mario
-
Busy as I am with my client, assembling the Fiat 806 and some Protar motorcycles in 1/9 scale, I couldn't resist buying from a friend the most sought kit of the Lola T 70 Mk lll coupe... The kit was already begun but with little work done ...Thanks for that!!!....The kit is most complete, every part flawless and even the box is in pristine condition, I was very lucky with this one..... I managed to dissasemble everything without much destruction and bagged every bit & piece...Now comes the sanding and deflashing part, which I enjoy a lot, besides being a boring stage, it makes me feel like an archeologist discovering something important! I've googled this kit and there are very few offerings in Ebay, with some prices that knocked me out! Anyway, here are some images of the kit itself................ The original box with a beautiful artwork... The box with all the bagged goodies inside... I couldn't resist assembling something too, so..............part of the engine bulkhead, after carefully studying the scale hardware locations... The spare tire carrier and its tube structure being held by scale bolts and scratchbuilt flanges... Continued inmediately.... Mario
-
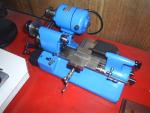
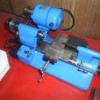
Since I began the assembly of my client's Protar Fiat 806, I became more and more involved with Protar kits... They are extremely well done, solved and complete...the motorcycle kits are of very famous machines, lots of them of the Golden Era, they have many metal parts and are becoming very difficult to find... My client brought from Italy a lot of them, which I'm buying from him little by little... Tarquinio Provini, a great Italian motorcycle champion, when retired began the production of these kits...if you join the first 3 letters of his name and surname;inverted; you have the "PROTAR" brand... Sadly, as happened with Pocher, these kit's production ceased many years ago due to a lot of factors...so, they are becoming collectors items and hence their prices will begin skyrocketing very soon... Enough for the story, let's go back to the kits....all in scale 1/9, they are big enough for my tastes and of course they are potentially very prone for superdetailing....they are detailed from the box already, but I will work them to excruciating detailing from now on..... My first motorbike kit will be the Suzuki RG 500, a very famous Grand Prix machine that was produced by the factory in the mid 70's, and it had among other curiosities a 2 stroke, 4 cylinder, water cooled engine... It won a lot of competitions till the 80's and was raced by very famous pilots of the time... Let's begin with the frame, which you can see already cleaned, deflashed (metal parts comes with a LOT of it!), and with the first coats of primer...the frame is being assembled only with scale hardware... The rear oscilating frame has received the same treatment and is also assembled with scale hardware... The front lower part of the front fork's dampers, semi-polished and with the brake calipers bolted in place... Part of the front fork's parts...notice the specially built bolts, washers, spacers, etc... http:// I was warned of no more picture capacity, so I'll leave now till the next post... Thanks for watching... Mario
-
New parts added to the Fiat....handmade brass leaf suspensions for the rear train... The kit's suspensions are plastic and besides the asthetics, no way they will support the model's weight... The ones I made are from 0.4 mm thick brass plate, cut to 4 mm width from a K&S 1/4" wide strip, the remnant of the cut was used to make the leaf pack ties... Once cut, I heated the leafs to obtain a brownish color and inmediately submerged in W 90 oil, this gives them a certain appropiate elasticity...they were then polished and degreased to be blued before final assembly with cold gun blue... Here you can see them mounted on the frame....notice the real wood floor made with wood veneer table by table... The floor was treated with a slight wood stain and then hand rubbed with Tung oil... Thanks for looking... Mario
-
Hey Harry! It's 90% metal and the rest is plastic, mainly the engine parts....it is a delight to build, though you need a lot of elbow grease!! Cheers Mario
-
The brake drum painted as foundry aluminum... A finished wheel seen from both sides... The 2 rear wheels ready to mount on the rear axle... The frame sides being polished & cleaned... The frame assembled with only scale hardware...the naked engine block in place...
-
A client and friend of mine gave me this kit to assemble & superdetailing it... At first I looked at it as one more small scale kit (I'm used to 1/8 scale), but as I moved on in the assembly and knowing the kit better I was more & more surprised with the quality of Protar's product and its great potential... I searched the Web as alwayas do, trying to find as much data as possible on the prototype, but alas, little I found... However, lets see some images... The wheels are assembled in four layers and a central hub...this is how they came out of the box...lots of flash to clean here!!.. One layer cleaned and polished, ready to receive primer & paint... The hub as it comes... The hub being trued & polished on the lathe... The hub ready... One wheel set complete & painted.. Continued ....
-
The 16 ventilation holes made on the block's rear upper section as in the prototype, including micro wire mesh ... The clutch & kickstarter cover out, showing the hardware and the special reinforcements applied to the block to allow drilling & tapping to receive the hardware... The left cylinder being unscrewed from its position on the block... Both cylinders out...1.5 mm round head brass screws were used here, attached to special reinforcements on the block which were tapped accordingly...these screws are way out of scale, but not to worry, they will never be seen once the model is assembled... The reinforcements before mentioned to receive the cylinders... The front cover out with its hardware... The reinforcements made on the central block to receive the intermediate cover... The intermediate cover with its attaching non-scale hardware, used for the same reasons as above.... By the way, all the parts shown have at this stage, received at least 3 coats of primer with sanding in between.... Still having a ball....thanks for looking. Mario
-
We continue our restoration working on some elements of the engine block... A lot of effort was made to insure the engine's block assembly by means of scale hardware, avoiding the use of glue as much as possible...this of course allows the dissasembly of elements any time, great help for fixing details and painting of separate parts... Some images of the bare engine block and cylinders mounted on the frame.... The engine has been attached to the frame by means of specially made 2 mm studs, with nickled hex nuts, for which the holes in the engine block were lined with brass tube, drilled and tapped 2 mm... Back view of the engine showing the clutch and kickstarter cover which has been already treated with polished aluminum paint (I'm using Marson's chrome spray for this effect) Here you can see the 2 mm studs holding the engine to the frame...the 2 front studs are short, the 2 rear studs are longer since they hold not only the engine but also the side pedals and the silencer brackets... http:// A walk arround of the engine out of the frame... The front cover held in place with scale hardware, including scale Allen bolts just as it is in the prototype... The clutch and kickstarter cover in place with rectified and polished scale hardware... No more place for pics....to be continued :blink: Mario
-
Hey Don!............I'm far away from the painting stage yet....too busy drilling & tapping hundreds of holes for the scale hardware.... however I've been thinking on colors myself...difficult choice.... I personally think the orange version is a little far away from serious for this wonderful piece of machinery....I agree with you in the dark brown... nevertheless I'm thinking in other liveries.... What's up buddy?.... Cheers Mario