

Jim Keeler
-
Posts
19 -
Joined
-
Last visited
Recent Profile Visitors
4,945 profile views


Jim Keeler's Achievements
MCM Member (2/6)
-
-
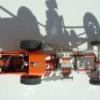
Since I designed all of the Revell Custom Car Parts kits I can answer a lot of questions that are in this thread. There were twenty kits in the fist go round and they sold like HOTCAKES! We did a lot of kits after the first twenty, and there were more in the works until slot racing tooling money took away the last planned release. The kits were metallized (chrome plated) because modelers could paint parts easier than they could "chrome" plate them. The kits were designed to be completely interchangeable and adaptable with the other kits and other 1/25 scale kits. AMT and Aurora copied the concept a year after Revell's first twenty Custom Car Parts kits were released. They were originally .29 cents and .49 cents and the later body kits were .69 cents. I could write an interesting story about the planned later release which would have provided model car builders with an amazing concept, which I believe would be successful now. Jim Keeler
-
-
April 7th, 2014 Busy day today, Went in the hospital for a heart, lung, and kidney transplant. They also did a shoulder replacement, new knees, and one hip transplant. One was still good. I got two corneas implanted, reversed the vasectomy, and cleaned up some arthritis in my hands and wrists. When I woke up, the doctor told me it was a great way to celebrate my 73rd birthday. I could hear him better than yesterday because of the new hearing aids.... Then he told me that I would be good for another 73 years if I followed the prescription he wrote me: RX, sex, drugs, fast women and fast cars! I feel like a million dollars!
-
Fryske Falk - 1/32 - Landspeedrecord-car
Jim Keeler replied to The Creative Explorer's topic in WIP: Model Cars
Check out: http://www.landspeed.com en.wikipedia.org/wiki/North_American_Eagle_Project There are many photos of the North American Eagle on the landspeed site. Also, for Land Speed Racing information there is nothing better than the http://www.landracing.com web site. They have Build Diaries of many lsr cars. Good luck on your project. Jim Keeler -
Craig Breedlove Streamliner Dragster
Jim Keeler replied to biscayne63's topic in WIP: Drag Racing Models
Nice job!!!! I was at Riverside Raceway when it was driven for the first time. Beautiful car but was never seriously campaigned. Jim Keeler -
Hey guy's, I'll see you at NNL WEST later this month. Really looking forward to the show Jim Keeler
-
I wanted to wish everyone a merry Christmas today as I have surgery to my jaw tomorrow at 7:30 am. My jaw was dislocated when I broke my neck, and it finally caught up with me. Soooo... I won't be doing much this next couple of weeks but drinking liquids and trying to eat soft food, and no talking much either. Doc say's six weeks recovery time at home after I get home from the hospital. If anyone calls me and I do not answer, you know why. Anyway, may everyone find their personal grail under the tree next week, and enjoy those great meals...me, I'll be enjoying turkey in a straw!! Jim Keeler
-
Aluminum Model Toy was the name AMT came from. They produced metal car banks like the Banthrico stuff. Dennis Doty could fill in the details better than I. Jim Keeler
-
Hardcore Scratchbuilding Question
Jim Keeler replied to straightliner1's topic in Tips, Tricks, and Tutorials
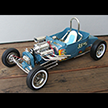
A comment on "hardcore scratchbuilding. Hardcore scratch building starts with a small project. It doesn't have to be metal to qualify as "hardcore" many parts can be made easier with sheet or strip styrene, and when painted an observer would never know the difference. I had the opportunity to meet and become friends with Gerald Wingrove. He was one of the"masters" of scratch building model cars. He used metal for his projects and hand hammered his small parts from sheet brass, copper, and aluminum. He carved wood to simulate upholstery and his models were very convincing. His books are landmarks in the scale model car building world. His whole concept of making parts, like engines, transmissions, and other parts was based on breaking everything down to square, rectangular, round, and triangular shapes. Almost every engine block is basically a rectangle with a lot of small shapes added to "or removed" from the the basic solid shape. Look at almost any automotive part, except bodies and you will see the same thing. Study exploded views of engines and other automobile parts and you begin to get the idea. His other major idea was that a model car part has to be made using the same type of machines that made the real parts in order for them to be accurate. Right angle corners must be 90 degrees, or they are not correct. In other words His thought was to use lathes, milling machines, and drill presses to create the parts. His models were done in series; He made several of each one to sell to various customers here in the US, and abroad. He found out as he progressed that he needed to make "masters" of each part, and then he made molds to recreate several copies of each wheel, seat, or fenders. He worked in 1/15 scale, ans was indeed a master. I maintain that even the average plastic kit model car builder can create exquisite models by taking the time to learn and study. Exhaustive research of your subject is the key. Without it you cannot build a replica of a real car, but you can build something right out of your imagination. After his research, Wingrove would do extensive drawings of each part, with some basic dimensions. many of his parts, however were made by eyeballing the parts so that they "looked right". If you can, find and STUDY his books. You will learn much,but do not get discouraged! After seeing his work, and meeting with him on several occasions I decided to try the scratch building route. I started by using styrene to create a 1/16 scale rocket powered land speed record car. Over a two or three week period I had completed the basic structure of the car. It looked great, but I wanted to do more.I did not know how to solder, but had all the tools necessary, silver solder, a soldering iron, flux,and a supply of brass strips and sheets, a sharp razor saw,a jewelers saw with an assortment of blades an assortment of files, headlined by a ten inch bastard file, and sandpaper and steel wool. I cleared my workbench of everything (so I would not set a fire, more about that later) and started to learn to solder. Everything I tried did not work. It was then that i realized that I needed a torch, so I bought a small one that was advertised to do a good job on jewelry parts. I tried the flux, and the solder, and eventually set my workbench on fire when it suddenly leaked all the gas and caught everything on fire. After using my fire extinguisher. I tossed the small torch away and went out and bought a large propane torch with a three inch diameter bottle that is about a foot high. I picked up three sizes of torches to fit on the end and went home to start over. It took me about three nights(maybe six hours) to learn how to control the size of the flame, use the right amount of flux (flux lowers the temperature at which solder melts), and to determine the amount of solder to use. Using the styrene parts I had previously made, I transferred the dimensions to brass and began to cut them to shape. It took a lot longer than making the styrene parts, but know these were brass! I proceeded to make all the parts in maybe two nights, and then started soldering. I learned that the secrets of silver soldering small parts together are: 1.Controlling the flame so that you just"kiss" the parts enough to heat them. 2.Cutting the silver solder into TINY pieces with a sharp Xacto blade. 3.Using a paste flux, not a liquid. 3.CLEANING each piece of metal with sandpaper and steel wool before you solder, and not TOUCHING the areas you solder. 4.Cooling the parts with water after you solder. 5. Making sure the parts are "square with each other. Using these steps I soldered together all off my rocket car parts in about six hours. I have had those parts for over thirty years, and they are all still together. I had to make conical compound curve nose cone for the model so I used a piece of copper and a small ball peen hammer to pound out the metal on a piece of (full scale) RR track. With a couple nights of pounding and shaping, I had a cool looking compound curve nose cone that looks like it was shaped using an English Wheel. (Google: English Wheel to see what it is.) I have since constructed a miniature English wheel and learned how to shape metal just like they build a full size car body from flat sheets of metal. For body parts I recommend copper because it is easier to shape, and it solders easy. Any way, just a comment on "hardcore" scratch building. Jim Keeler -
Gregg Went Off The Deep End
Jim Keeler replied to Gregg's topic in General Automotive Talk (Trucks and Cars)
Hi Gregg, Nice wheels, but wouldn't you rather be driving a 62 Nova Convertible? See you at NNL in San Jose... thanks, I am looking forward to a short vacation. Jim Keeler -
First model car kit I started was an Ace 49 Ford kit. The kit was a block of balsa wood, and the directions basically said to carve away everything that did no look like a 49 Ford. The first plastic kit was a Lockheed Constellation model made in acetate. It fell apart a few day's later! The first plastic model car I built was a Revell Highway Pioneers 1910 Cadillac . I painted some of the pieces black, and the roof I applied paint on and then put a Kleenex tissue over it to simulate the fabric roofs they had. I found one half of the kit 40 years later in my Mom's unfinished dirt basement buried in the dirt. I rescued it and still have it. Later on my Dad always told me that I was wasting my money and time building models, and that "It won't amount to anything"! he was still alive when I told him that Revell had hired me to design kits for them when I was 19! Uh, that was 49 years ago! Jim Keeler
-
Hi, everyone, Just got a call from Gregg and he invited me to the NNL West in San Jose. Hope to see everyone at the show. Thanks Gregg! Jim Keeler
-
This is really cool! It reminds me of the 1/8th scale patterns we made in the seventies at Aurora for the 1/16 scale Racing Scenes engines. Our next two kits would have been the 426 Hemi, and a Keith Black racing engine. If I could get a set of these patterns, we could have some made in China or here in the USA. They would be expensive, but what a cool addition they would be to the 1/8th scale modelers group of available engines. Could someone refer me to the individual who has done such a magnificent job on the patterns. I have a real interest in doing some kits of this magnificent 1/8th scale Chevy engine. Jim Keeler artmodelman@gmail.com 801-651-9107
