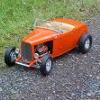
Sixties Sam Posted April 1, 2011 Share Posted April 1, 2011 Hi, guys. I just built this garage diorama. It's essentially finished, but more detail will be added as the mood strikes me. The walls are foamboard with brick paper glued over it. I bought the windows and doors from Colorado Structures. The floor is painted plywood. I found a batch of resin accessories on ebay, including the gas pump, a 55 gallon barrel (which I turned into a stove), a gas can, and a trash can. All the signs came from pictures online. There's a rock cliff behind the garage. Rock formations are cast from plaster and painted. The junk car bodies have been in my parts boxes for 40+ years! The diorama is built on a styrofoam base. The garage was patterned after several old garages near my home. Here's the barrel stove and heat deflector (alum. flashing). Pipe is a bendy straw. Top view. The roof lifts off. I'll add more details inside later. Sticks in the lower left hold the garage door in the open position. Edsel and 56 Ford drag racer junkers rusting away. This was fun to build - took about two months between model builds. I hope you like it. Comments welcome! Sam Quote Link to comment Share on other sites More sharing options...
dannyi Posted April 1, 2011 Share Posted April 1, 2011 ..great job Sam, nicely done! I especially like the brick work and green colored trim....... Quote Link to comment Share on other sites More sharing options...
ra7c7er Posted April 1, 2011 Share Posted April 1, 2011 (edited) Looks very realistic. Great Dio. That barrel stove is a awesome detail. Any chance you could post up a tutorial on building it? Edited April 1, 2011 by ra7c7er Quote Link to comment Share on other sites More sharing options...
1955chevy Posted April 1, 2011 Share Posted April 1, 2011 Good Job I like the little details Quote Link to comment Share on other sites More sharing options...
DRG Posted April 1, 2011 Share Posted April 1, 2011 Those guys need to start restoring that 56 ford. Nice job. Quote Link to comment Share on other sites More sharing options...
crazyjim Posted April 1, 2011 Share Posted April 1, 2011 Super looking, Sam. Quote Link to comment Share on other sites More sharing options...
GTMust Posted April 1, 2011 Share Posted April 1, 2011 Excellent....... keep us posted as you add more details. Great start! Tony Quote Link to comment Share on other sites More sharing options...
Sixties Sam Posted April 2, 2011 Author Share Posted April 2, 2011 Looks very realistic. Great Dio. That barrel stove is a awesome detail. Any chance you could post up a tutorial on building it? ra7c7er, The stove is pretty simple. The front plate, door, and hinges are just pieces of styrene with the corners rounded, glued to the barrel. I drilled some combustion air holes under the door. The door handle is thin craft wire with one end wound around a piece of music wire. I drilled a 1/4" hole for the pipe, and made a flange from one of my blood sugar test lancets, and glued it on. The barrel supports came with the resin barrel, so I just glued them on.I sprayed it all with flat black, then stuck the stovepipe (a cut down bendy straw) in it. Here's a pic. Sam Quote Link to comment Share on other sites More sharing options...
Tony T Posted April 2, 2011 Share Posted April 2, 2011 Very nice, Sam! I like it a lot! That stove is flat out cool! Quote Link to comment Share on other sites More sharing options...
Poncho-Power Posted April 4, 2011 Share Posted April 4, 2011 i love this dio! great idea with the bent straw on the stove! never even thought of using that!~ Quote Link to comment Share on other sites More sharing options...
charlie8575 Posted April 7, 2011 Share Posted April 7, 2011 Very nice, Sam. That building especially looks great. Charlie Larkin Quote Link to comment Share on other sites More sharing options...
Boreham Posted April 7, 2011 Share Posted April 7, 2011 excellent.. the 2 old cars at the back of the garage give it great Character.. maybe a few loos items are them would nail the "just left there look.." inspirational dio... I want build one.. Quote Link to comment Share on other sites More sharing options...
BOSWELL891 Posted April 7, 2011 Share Posted April 7, 2011 I love the brick work! Could you post a tutorial on how to do bricks because i can quite figure out how. Quote Link to comment Share on other sites More sharing options...
Sixties Sam Posted April 8, 2011 Author Share Posted April 8, 2011 I love the brick work! Could you post a tutorial on how to do bricks because i can quite figure out how. Cole, the bricks are just paper, they're not 3-dimensional. I found a sample of a brick design on Google, and printed several sheets of it out. I had to experiment with the scaling to get the size right for 1/25 scale. Each brick is about 3/8" long: about 8" in scale. The paper is glued to the foamboard walls with Elmer's spray craft glue, which is really sticky. Don't get it on your hands! I cut the window and door openings in the walls first, then glued a sheet of brick over the whole wall. Then I cut out the brick paper from the openings with an X-acto knife. The wall corners are mitered, so no foamboard edges show. It was not too hard to do. I randomly scuffed the brick surface with sandpaper to make it look a little bit worn and dirty. Sam Quote Link to comment Share on other sites More sharing options...
BOSWELL891 Posted April 10, 2011 Share Posted April 10, 2011 (edited) Thanks for the tip! Edited April 10, 2011 by BOSWELL891 Quote Link to comment Share on other sites More sharing options...
Recommended Posts
Join the conversation
You can post now and register later. If you have an account, sign in now to post with your account.
Note: Your post will require moderator approval before it will be visible.