Scuderia Posted November 9, 2012 Share Posted November 9, 2012 Cool coo... And yeah don't worry too much, just take your time in your prep-work on the body AND your materials and you should be ok. Quote Link to comment Share on other sites More sharing options...
nate47 Posted November 9, 2012 Author Share Posted November 9, 2012 Dude...Scuderia...I just realized you are at exactly 1000 post! Quote Link to comment Share on other sites More sharing options...
Scuderia Posted November 9, 2012 Share Posted November 9, 2012 Lol didn't notice earlier, good catch! Quote Link to comment Share on other sites More sharing options...
BluePopsicle Posted November 9, 2012 Share Posted November 9, 2012 (edited) This car is looking sweet! You're dad is gonna love it. Edited November 9, 2012 by BluePopsicle Quote Link to comment Share on other sites More sharing options...
nate47 Posted November 9, 2012 Author Share Posted November 9, 2012 Hope so! Thanks! Quote Link to comment Share on other sites More sharing options...
nate47 Posted November 13, 2012 Author Share Posted November 13, 2012 Well got my semi gloss red paint on the engine covers, I'll black out the letters soon. I mounted the wheels today...I must say they were a serious pain, and I'm sure I'll be pulling them back off soon as I think they are too wide for the body, but I can address that later. I'll post up some pics soon! -Nate Quote Link to comment Share on other sites More sharing options...
nate47 Posted November 20, 2012 Author Share Posted November 20, 2012 The wheels mounted are grossly too wide for the body, even after trimming down the wheel spacers. I'll have to take them off again. I'm probably going to hard mount them so they can't roll to get them where I want them. I got the interior stripped back down after going to Hobby Lobby last week to get some embossing powder so I can add some carpet. The car also sits too high, I will have to address this issue soon. I found a metal body Matisto Z06 kit that I purchased for my son and dad to build together for Christmas. I scuffed it, and shot it in high build expox primer, then sprayed the inside and bottom of the body in a blue Testors color I found at the local hobby shop. It looks like the color might be a little too dark, but better than I expected. I'm pretty sure if I used a light grey primer instead of the dark red primer it would be pretty close! I'll get you some pics soon. Quote Link to comment Share on other sites More sharing options...
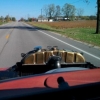
nate47 Posted November 20, 2012 Author Share Posted November 20, 2012 needless to say my son is thouroughly excited about having his "own" kit! A shot of the interior before dissassembly...dusty already Quote Link to comment Share on other sites More sharing options...
BluePopsicle Posted November 20, 2012 Share Posted November 20, 2012 Those are some awesome colors. Quote Link to comment Share on other sites More sharing options...
nate47 Posted November 20, 2012 Author Share Posted November 20, 2012 I just shot the metal body with the rest of the first coat of blue. Its a cool looking color but too dark for the real build. I'm glad I got to test it on the other body first. There was another blue color that I'm thinking will be perfect so I'll be heading back to Hobby Lobby soon! Quote Link to comment Share on other sites More sharing options...
nate47 Posted November 22, 2012 Author Share Posted November 22, 2012 Ok I got another coat of blue on the metal body, its ready for some clear coat...I'll let it sit for the weekend before I spray any clear. I put the embossing powder on the interior the same way I used to apply flocking. I never really liked the way the spray adhesive was un-even, so I always just sprayed or brushed a base coat. In this case gloss black. I should have used semi-gloss or flat black. I think it came out pretty good. Who eve realized the embossing powder would work is a genius! I did some other small jobs including re-gluing some of the engine/chassis components that were coming apart from the repeated removal of the wheels. I have narrowed the wheels again, and slightly lowered the ride height...I hope its enough! The front wheels are drying as we speak! I also did a little work to attempt to salvage the exhaust tips. If this doesn't work I'll probably be making them from scratch! On an unrelated note I also picked up some more paints, tools, and accessories from the hobby shop, and craft store last week so I needed to make a new "kit box". I have two kids under five and my garage is unheated so I don't have the luxury of leaving my stuff set up. I have to pack and un-pack it every time I want to work, so I try to keep everything portable! Check out my new kit box, its an old tool box my grandpa had from his days on the railroad. Its way too heavy but it will have to work for now! Quote Link to comment Share on other sites More sharing options...
BluePopsicle Posted November 22, 2012 Share Posted November 22, 2012 LOL I can promise you that your tool kit is better then the cardboard box i'm using... =p Quote Link to comment Share on other sites More sharing options...
nate47 Posted November 29, 2012 Author Share Posted November 29, 2012 OK I got a problem! I couldn't figure out why I couldn't eliminate the gap between the front inner fender and the front fender. I did some dissassembly and found that the whole body is warped! I will attach some pictures showing that the whole drivers front fender is jacked up about 1/2 to 3/4" while the passenger side is mostly flush all the way from front to back. I'm pretty bummed out about the whole thing! The only thing I can think of is to heat up the whole body and see if I can get it straight! I was thinking of attempting to contact Monagram and seeing if they would replace the body? Have any of you guys attempted this? If not does anyone have a body available? I really need to get this body in paint ASAP I've got to have it done by x-mas! Help I need ideas! However on the plus side my wife scored a kit at the Good Will for 2 bucks! However she made the mistake of telling my son it was for him! I think were gonna build it and when he gets tired of it I'm going to tear it appart and build a pro streeter out of it! Quote Link to comment Share on other sites More sharing options...
nate47 Posted November 29, 2012 Author Share Posted November 29, 2012 Ok I went to their website and entered a parts request. Hopefully they can get me a body fast enough! Quote Link to comment Share on other sites More sharing options...
jaydar Posted November 30, 2012 Share Posted November 30, 2012 Bryan plasti dip is a product designed to be used to coat tool handles, its a liquid product that you can dip something in and let it hang dry and it turns into a rubber/plastic coating. Over the last few years I have noticed its available in spray can form. I ran accros some youtube videos and realized its huge among the import and tuner crowd, because its available in multiple colors, and you can spray it directly on paint, chrome, steel, plastic, etc. and if you don't like it or want to change a year later you can just peel it back off with no damage to the surface below. These guys are using it to black out their wheels, and spray stripes and graphics cars. I used it on my 1:1 hot rod on a few items and I've been pleased with the results. Its available at most hardware and auto parts stores. I'd think it would make a good masking as well. I'm going to try to use it to black out the edges of my windows in the Z06. Check out the link below. Duntov, if i used this on radiator hose or on motorcycle grips and foot pegs would it make it look like rubber? Quote Link to comment Share on other sites More sharing options...
Recommended Posts
Join the conversation
You can post now and register later. If you have an account, sign in now to post with your account.
Note: Your post will require moderator approval before it will be visible.