LeadFred
-
Posts
98 -
Joined
-
Last visited
1 Follower

Recent Profile Visitors


LeadFred's Achievements
MCM Regular (3/6)
-
Datsun 510 Pro/Stock "SWEET PAIN" COMPLETED BUILD
LeadFred replied to LeadFred's topic in WIP: Drag Racing Models
Ha ha...Thanks Kerry, The drive shaft Will be there soon. Honda or Abarth? It is pretty fun to do drag cars on european and japanese cars,because that was quite common here in Sweden in the 70's on the drag strip, i,ll think the next build will be a US car. My collection of modelkits is 90% Ford GM Mopar (US cars) because that is what i'm usually Into. The Datsun was more a nostalgic choice. i remember old Datsun's from My childhood. Thanks again. Fred -
Datsun 510 Pro/Stock "SWEET PAIN" COMPLETED BUILD
LeadFred replied to LeadFred's topic in WIP: Drag Racing Models
Tyrone,Jesse, Thank you very much,indeed. -Tyrone, Great that you reminded me about the Duster. That is a project that pop-up in my mind very often,unfortunately i have very high demands on that build,(Maybe thats good) so it feels a little bit slow to get started. But i actually got my inspiration back for the Duster, Hmmm.... lets see...? Fred. -
Datsun 510 Pro/Stock "SWEET PAIN" COMPLETED BUILD
LeadFred replied to LeadFred's topic in WIP: Drag Racing Models
Troy,Ed,Ray,Fred,David,John,Ricky,Carl,Dave,Leonard,Scott, I,m glad you like my little "Sweet Pain",thank you very much,indeed. I´m still thinking what to do next? for the moment i´m cleaning up my hobby room and sorting back all small details in their boxes,so can find them. When the workspace gets cleaned,i get so eager to start building a new project. Some ideas i have been thought of the last time is, a drag version of a Ford Pinto wagon, but also a 70 Dodge Challenger Pro stock, 69 Cuda Pro Stock, I have not deside yet,what i wanna do??? I,m not sure what level i will do them in, It feels that i need to build a little more easy build between the Datsun or next "super detail" project. I have a build almost complete of Eddie Shartmans 68 Dodge Dart Pro Stock,it is taillights and wheeliebar left to do,unfortunately i dont have so many building pictures of the Dart,But i can show you pictures of the complete build when it is finished.It is not so much details on that build as it is on the Datsun,but it was pretty cool anyway. Thank you again¨, Fred
-
Datsun 510 Pro/Stock "SWEET PAIN" COMPLETED BUILD
LeadFred replied to LeadFred's topic in WIP: Drag Racing Models
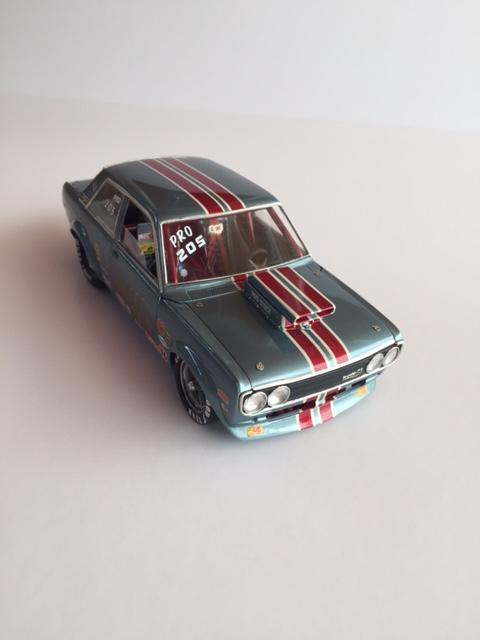
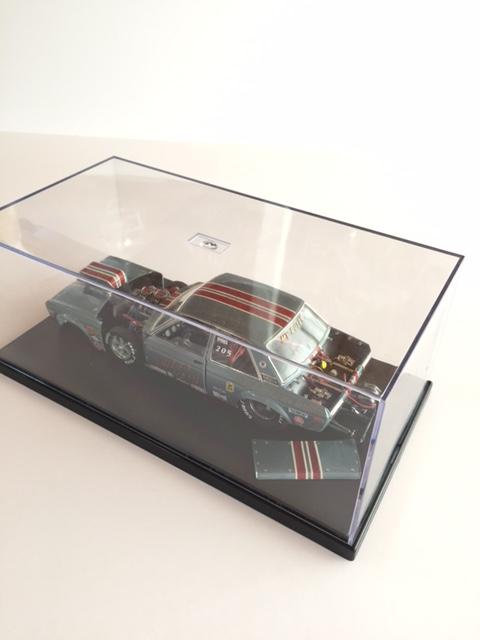
Dave,Scott,Tyrone,john and Art, Thank you guys,your words means a lot. It is time to uppload the completed build,and of course,if you want to ask something or see a picture of some details that are blurry on some picture,i will try to uppload a better picture. And also again,thank you all,for watching this build,maybe you could use it as a guide,or just inspiration. We all want to build better models and this forum is a very great source. My competition is primarily against myself,but if i visit a modelshow and takes a trophy,it´s a bonus. I have also done a list of what i have used for this build, and if you like to read it or not ?,after the list comes the completed pictures. The original kit: Revell 1/25 Datsun 510 Used from kit: Body, firewall, only two halves without the transmission tunnel, floor,glass, upper dash, Door panel (inside) headlight lenses. Cardan tunnel: Scratchbuilt of a ballpoint pen. Hood scoop: Competition resin. Rivets on scoop: Model factory hiro. Headlight reflectors: scratchbuilt of metal rivets for clothes. Paint: Zero-paints Body Color: Aston Martin Celeste blue. Stripe Color: Aston Martin Toro red. Bolts,Nuts,washers: Scale hardware and RB-motion. Wheeliebar: RB-motion stainless tube, Evergreen rod. Wheeliebar Photo etch: Machine aluminum specialties. Wheeliebar WHEELS: Scratchbuilt. A/N fittings: RB-Motion Carburator linkage: Model car garage. Seatbelt hardware: Model car garage Seatbelt: Tamiya masking tape. Gauges: Model car garage. Nitous bottle with photo etch: Detail master. Nitrous pump: Scratchbuilt Fire extinguisher: Detail master. Seat: Revell Firebird Pro Stock. Pedals: Futurattraction Fuelfilter bracket: Machine aluminum specialties. Ignition wire and battery cable: Detail master. Wire looms: Pro tech. Braided line: Pro tech. Fan: Pro tech. Rollcage: Scratchbuilt of Evergreen rod. Wheeltubs: Scratchbuilt of Evergreen platic sheets. Trunk floor: Scratchbuilt of Evergreen plastic sheets. Tube chassis: Scratchbuilt of Evergreen rod. Chassis tabs: Dirt modeler Rack and pinion: Scratchbuilt 4-Link plates: Futurattraction Rod ends: RB-Motion. Brakes: Futurattraction Front struts: Futurattraction Headers: Scratchbilt of Evergreen rod, Painted with Alclad Chrome. Engine:351 Cleveland/lenco transmission : Futurattraction Pulleys: Scratchbuilt. Radiator: scratchbuilt. Hinges: scratchbuilt. (Made of rod ends and pins.) Rear end springs: scratchbuilt in aluminum. Checker floor plate: Aber Electronic boxes: SMBC Knobs on dash: Model factory hiro. Decals: Slixx Rear tires: Competition resin Front tires: Revell Jungle Jim Vega F/C Front rims: competition resin,painted with Alclad and Humbrol grey. Center cap: Scratchbuilt. Rear rims: Competition resin,painted with Alclad. Rear panel: cast in clear and replaced. Chute: Revell Vega F/C Chute bracket: Scratchbuilt of Evergreen plastic. Fuel cell: Scratchbuilt of plastic. Batteries: Revell Olds Pro stock, (separated) Fuel filter/fuelpump: scratchbuilt. Battery harware: Detail master. The painted wheeliebar. Scratchbuilt wheels and some Hardware. Sorry guys,i have forgot to assamble the cardan axle,.....i will... Ok guys, this is it ! I ´m just wondering what build i will do next?? any suggests ? And comments are welcome. Fred.
-
Datsun 510 Pro/Stock "SWEET PAIN" COMPLETED BUILD
LeadFred replied to LeadFred's topic in WIP: Drag Racing Models
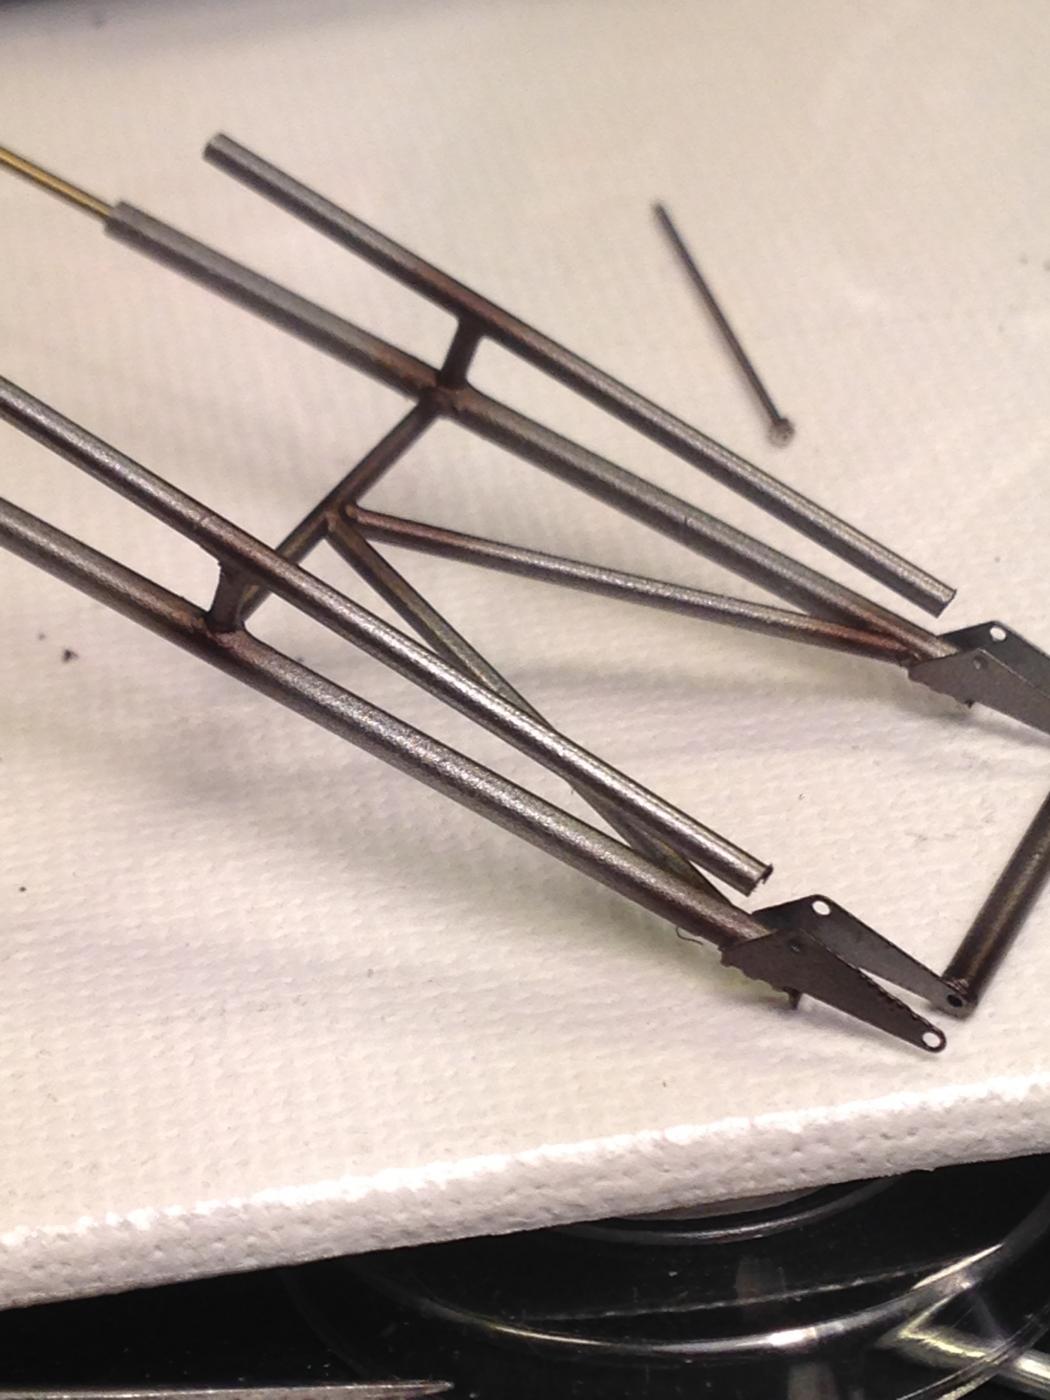
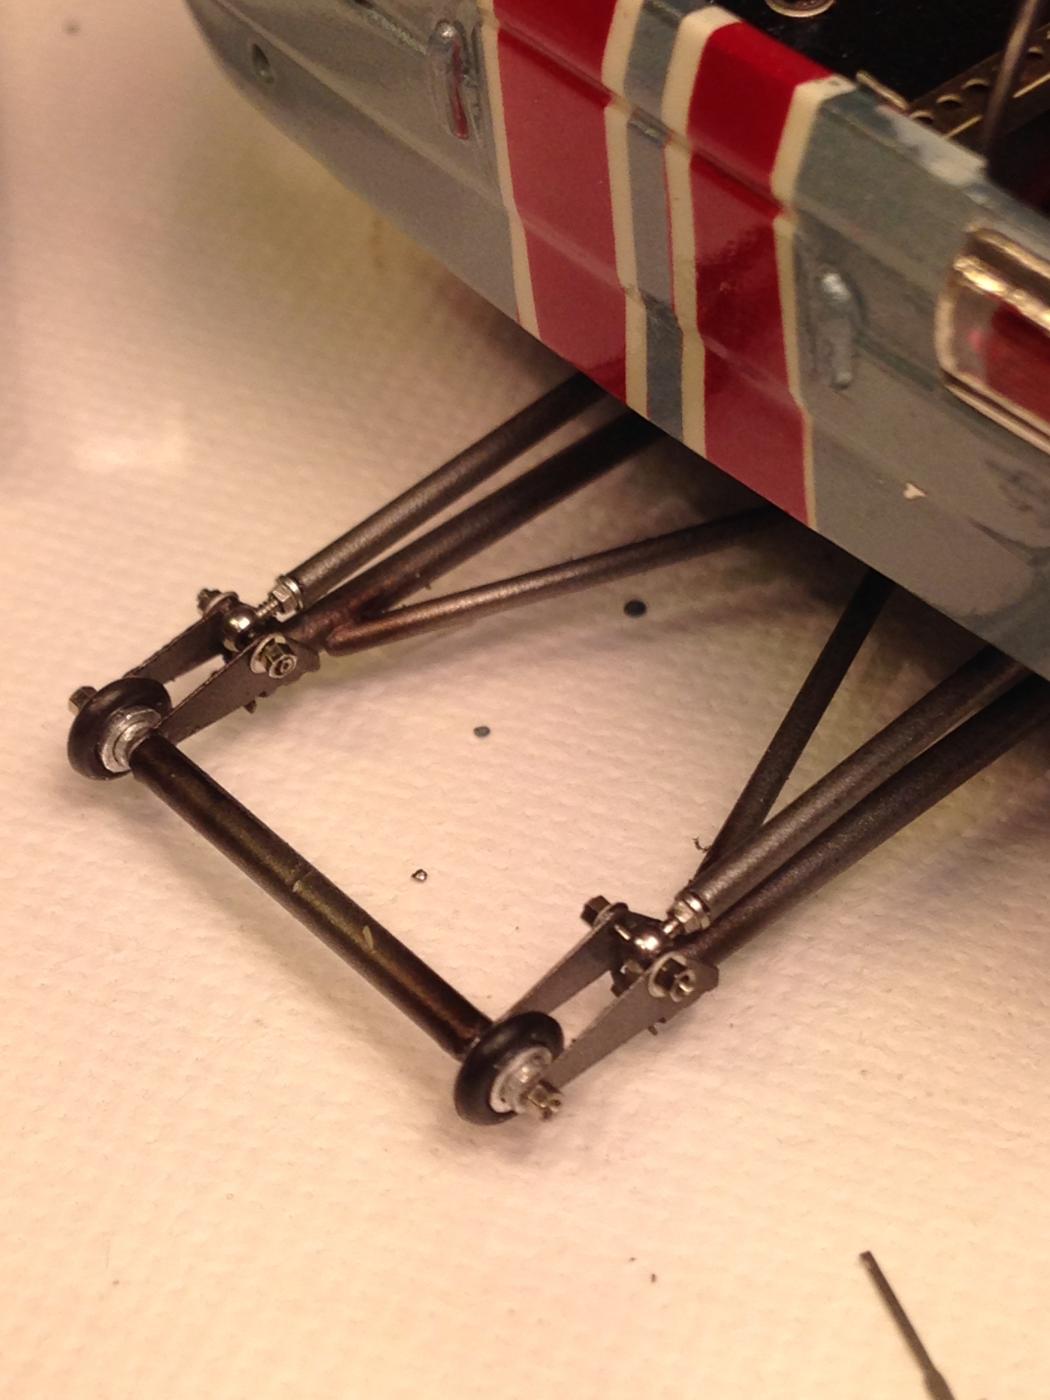
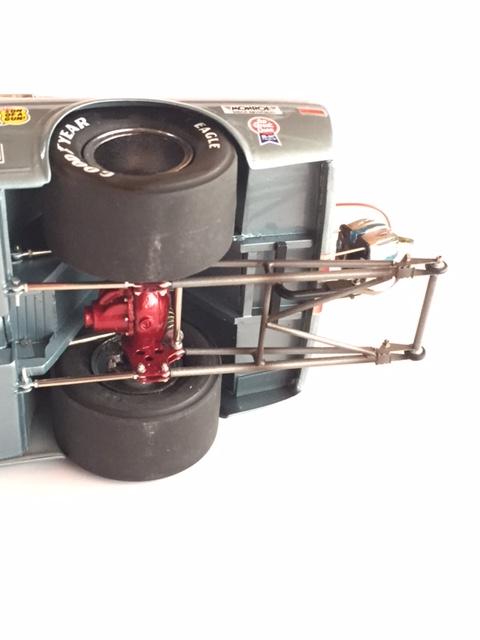
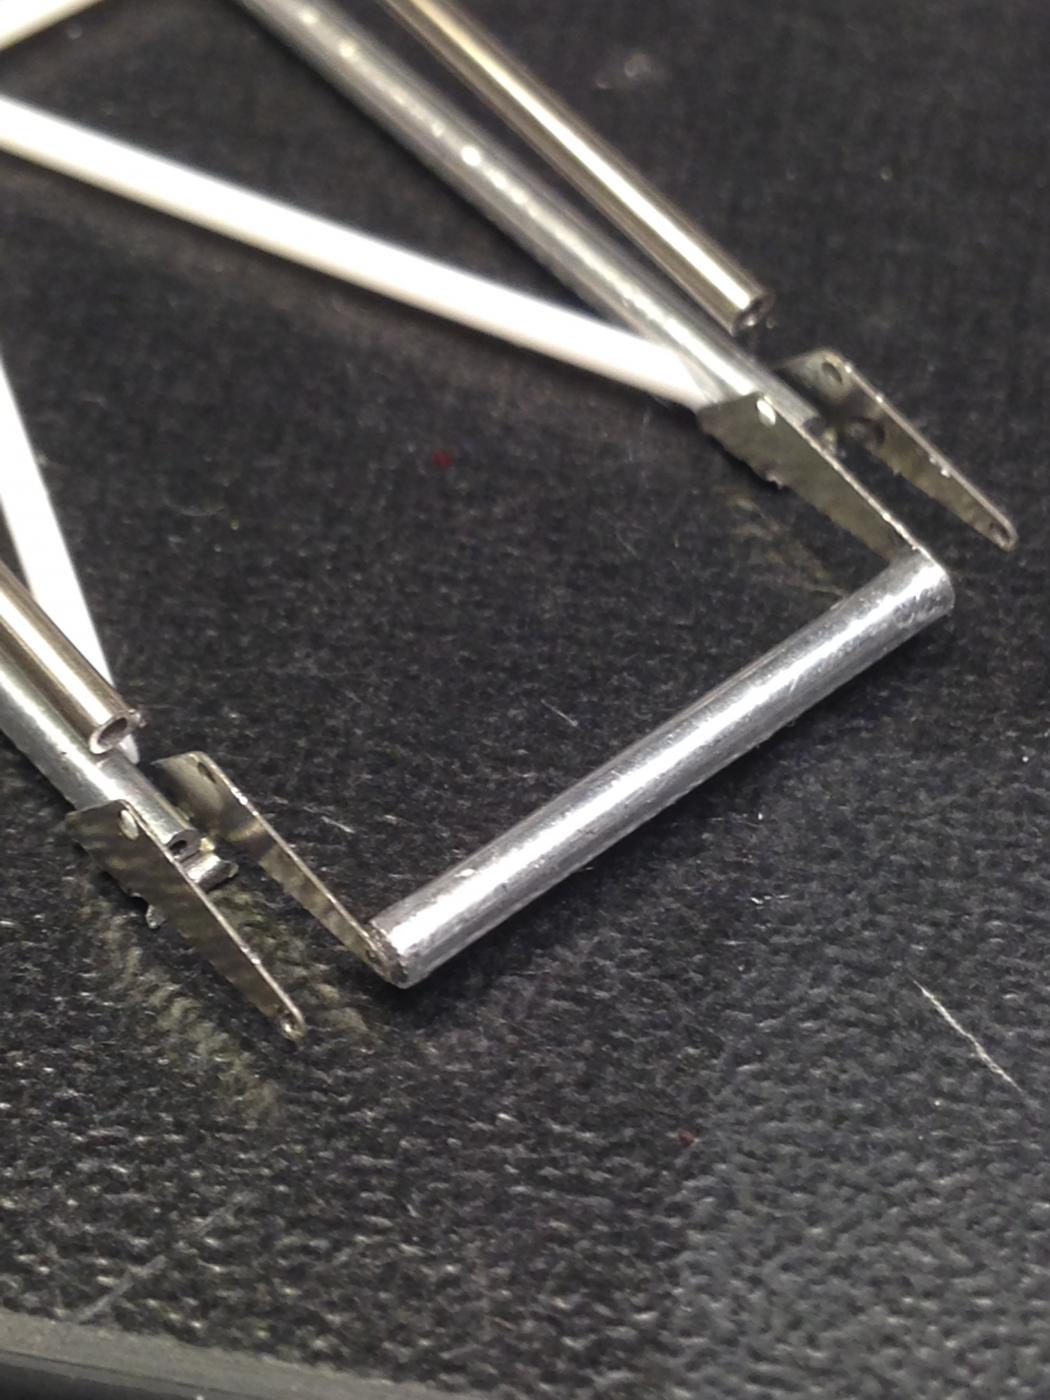
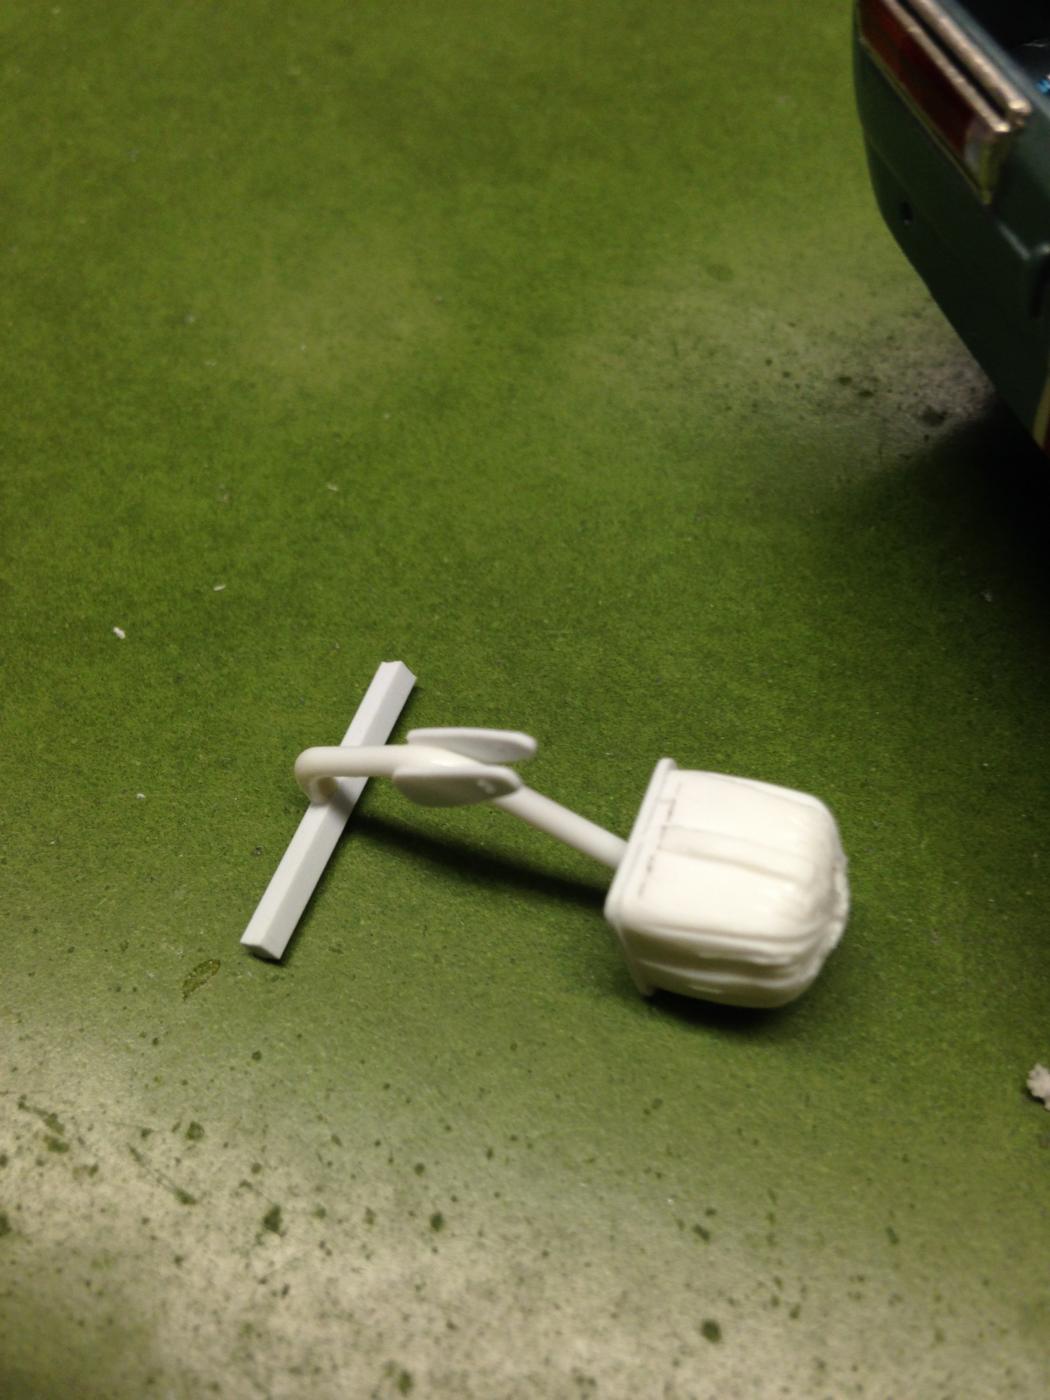
Here is the wheeliebar and its made of both stainless tubing and plastic rods with photo-etched details. the tubing will be connected/attached to the rod ends in the 4-link plates. Finaly i will paint the wheeliebar as it was row unpainted steel. Comments are welcome. Fred
-
Datsun 510 Pro/Stock "SWEET PAIN" COMPLETED BUILD
LeadFred replied to LeadFred's topic in WIP: Drag Racing Models
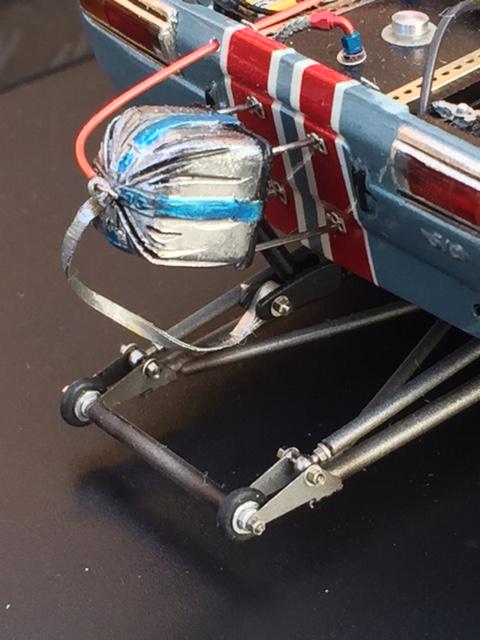
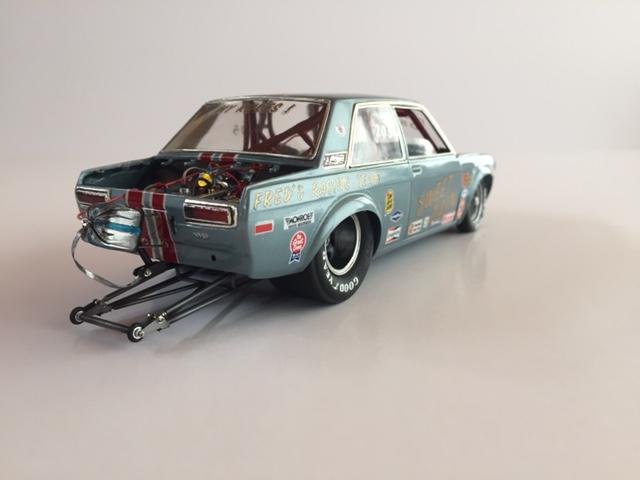
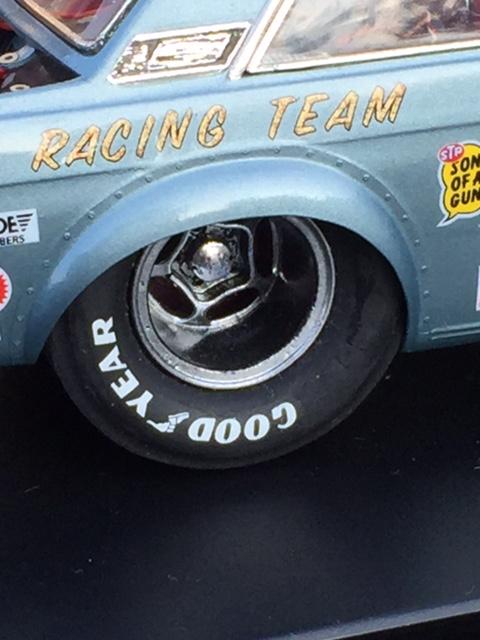
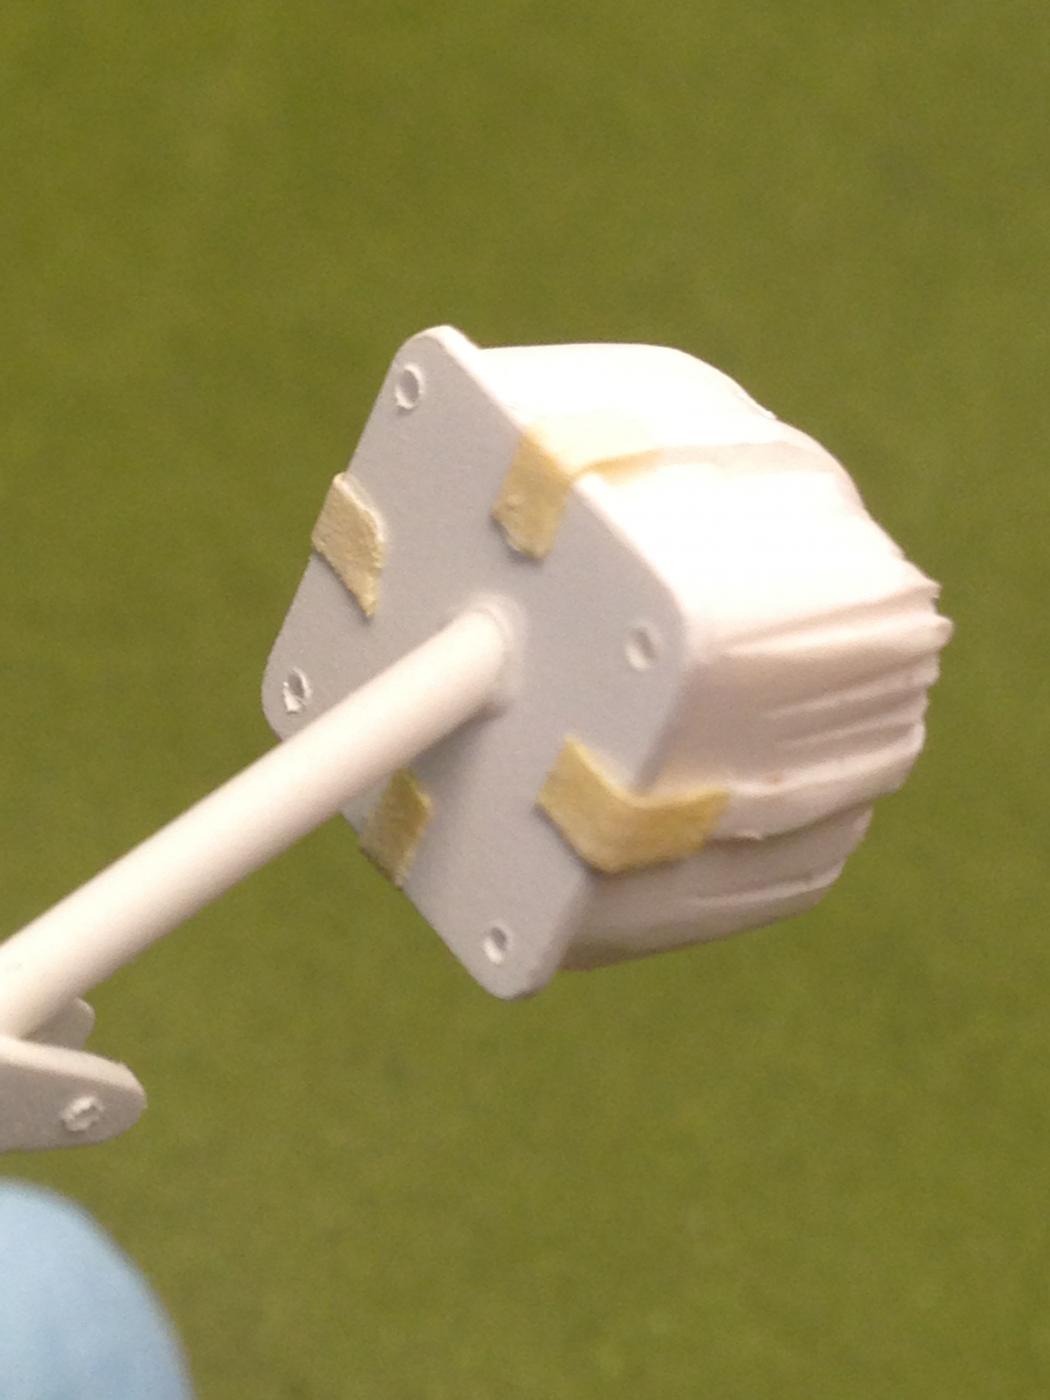
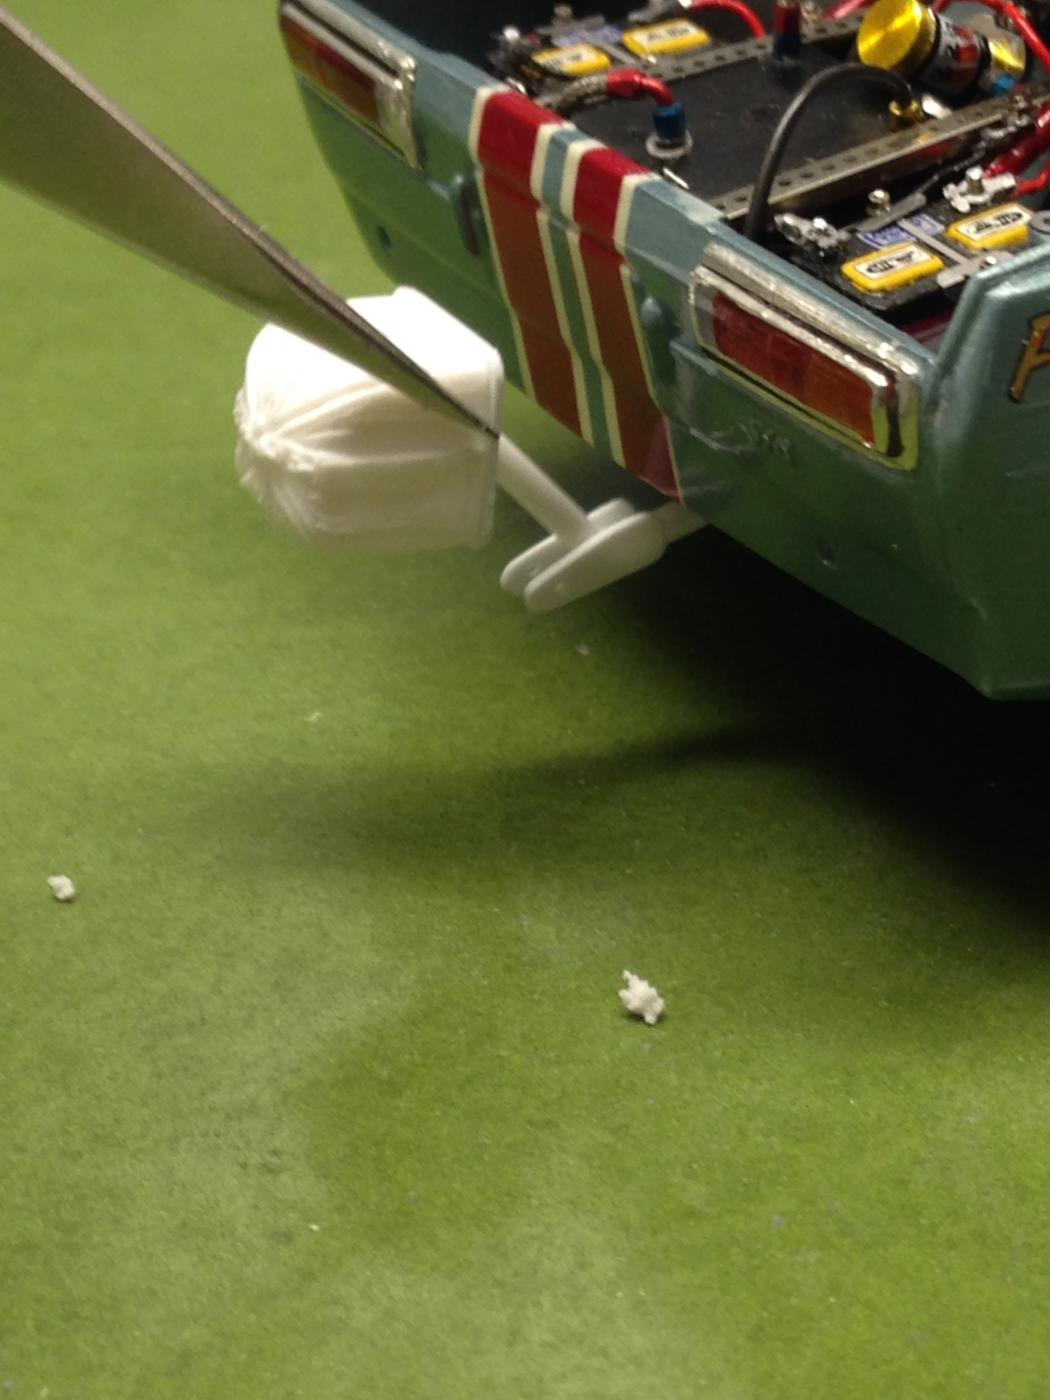
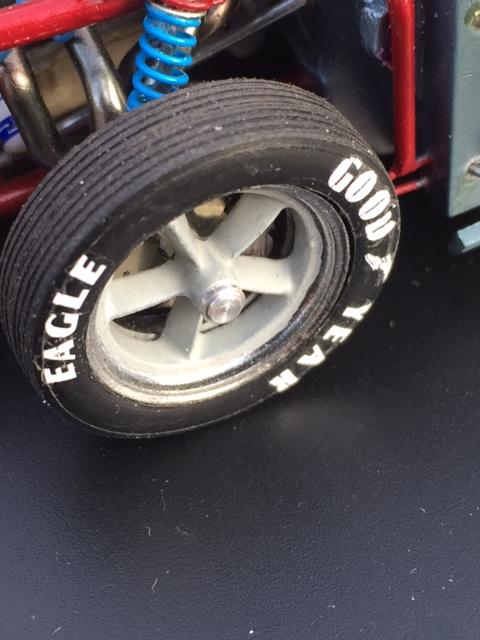
Steve,Jesse,Ricky,Dave, Thank you so much for your kind words. The chute have a scratchbuilt mounting bracket that is mounted on the frame,but first i have to mount the rear wheels to see the correct height of the rear. Otherwise it will be difficult to get the correct height of the wheeliebar and also to get a nice angle on the chute bracket. I will be upploading some more pictures of the completed build soon and also a list of material and all brands that i have used. Anyway... here are some pictures of the rearwheel and the chute and the starting point of the wheeliebar. On this picture,you can see a little of the batteries in place with the photo etched detail,but i will uppload better pictures soon.
-
Datsun 510 Pro/Stock "SWEET PAIN" COMPLETED BUILD
LeadFred replied to LeadFred's topic in WIP: Drag Racing Models
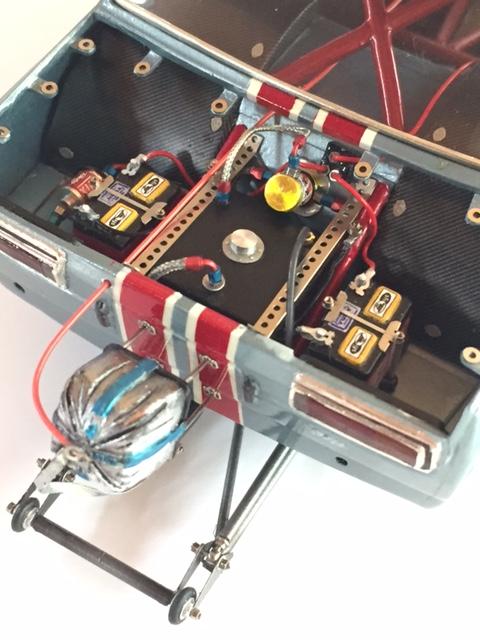
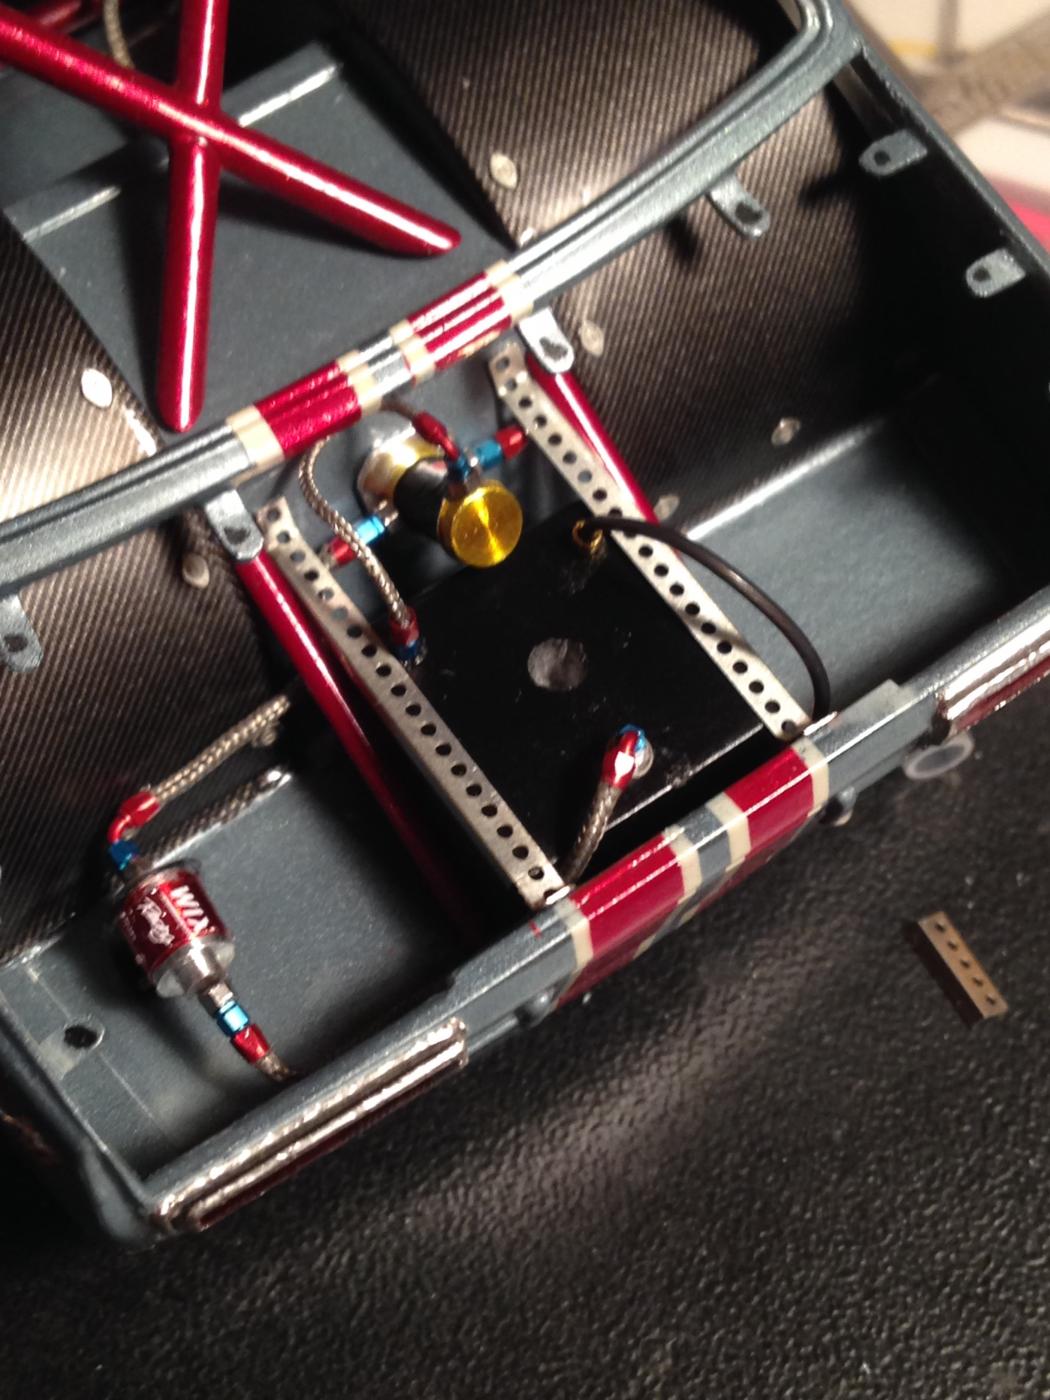
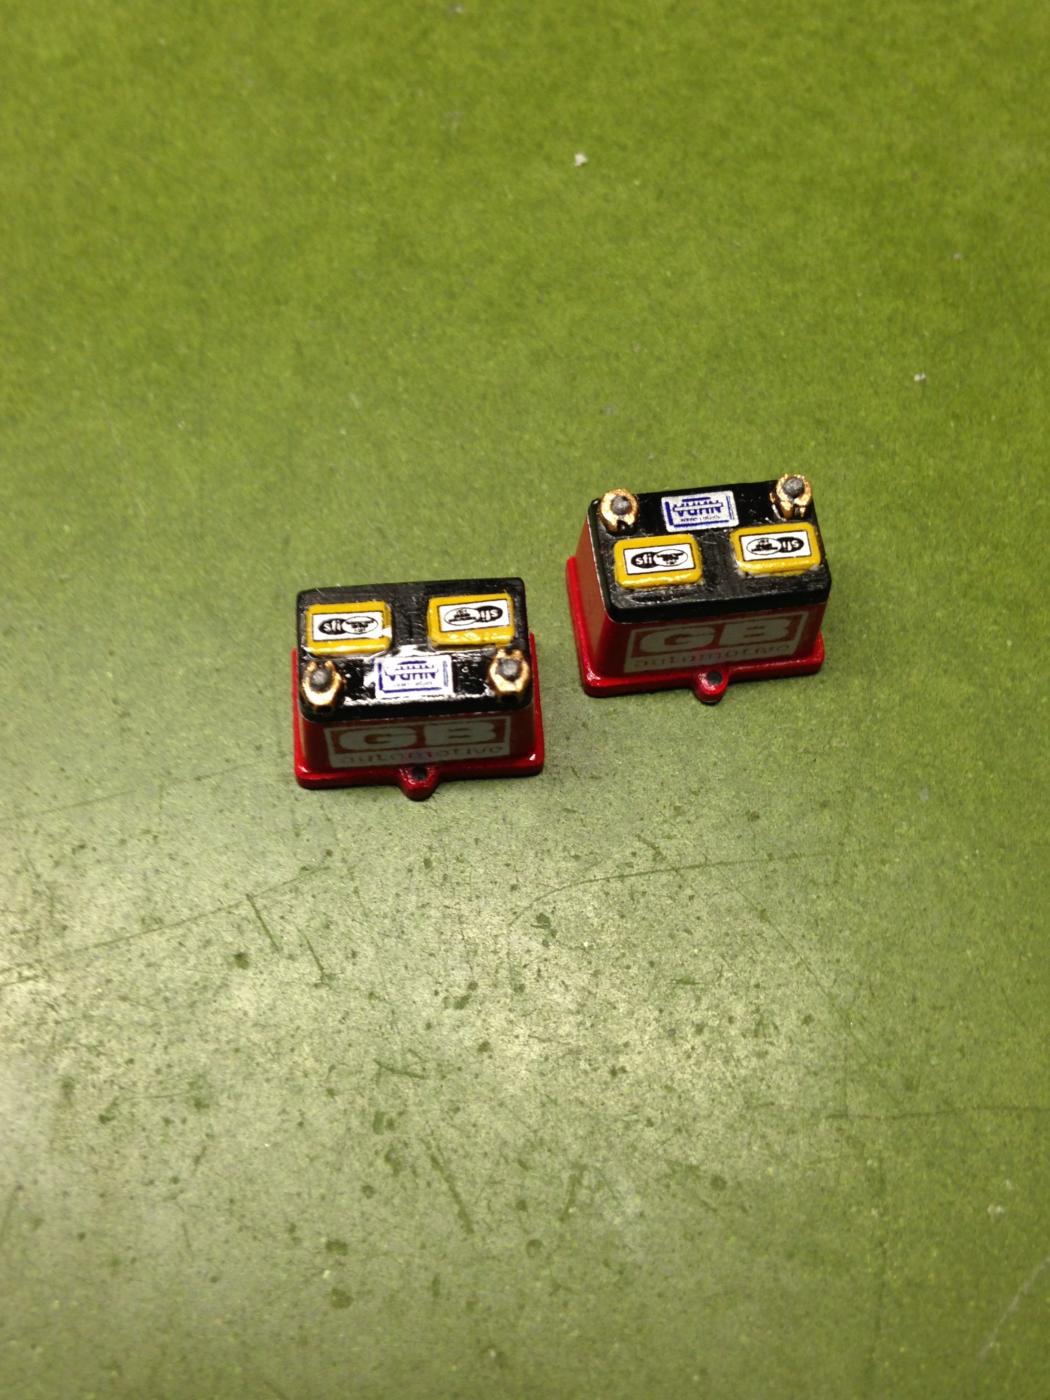
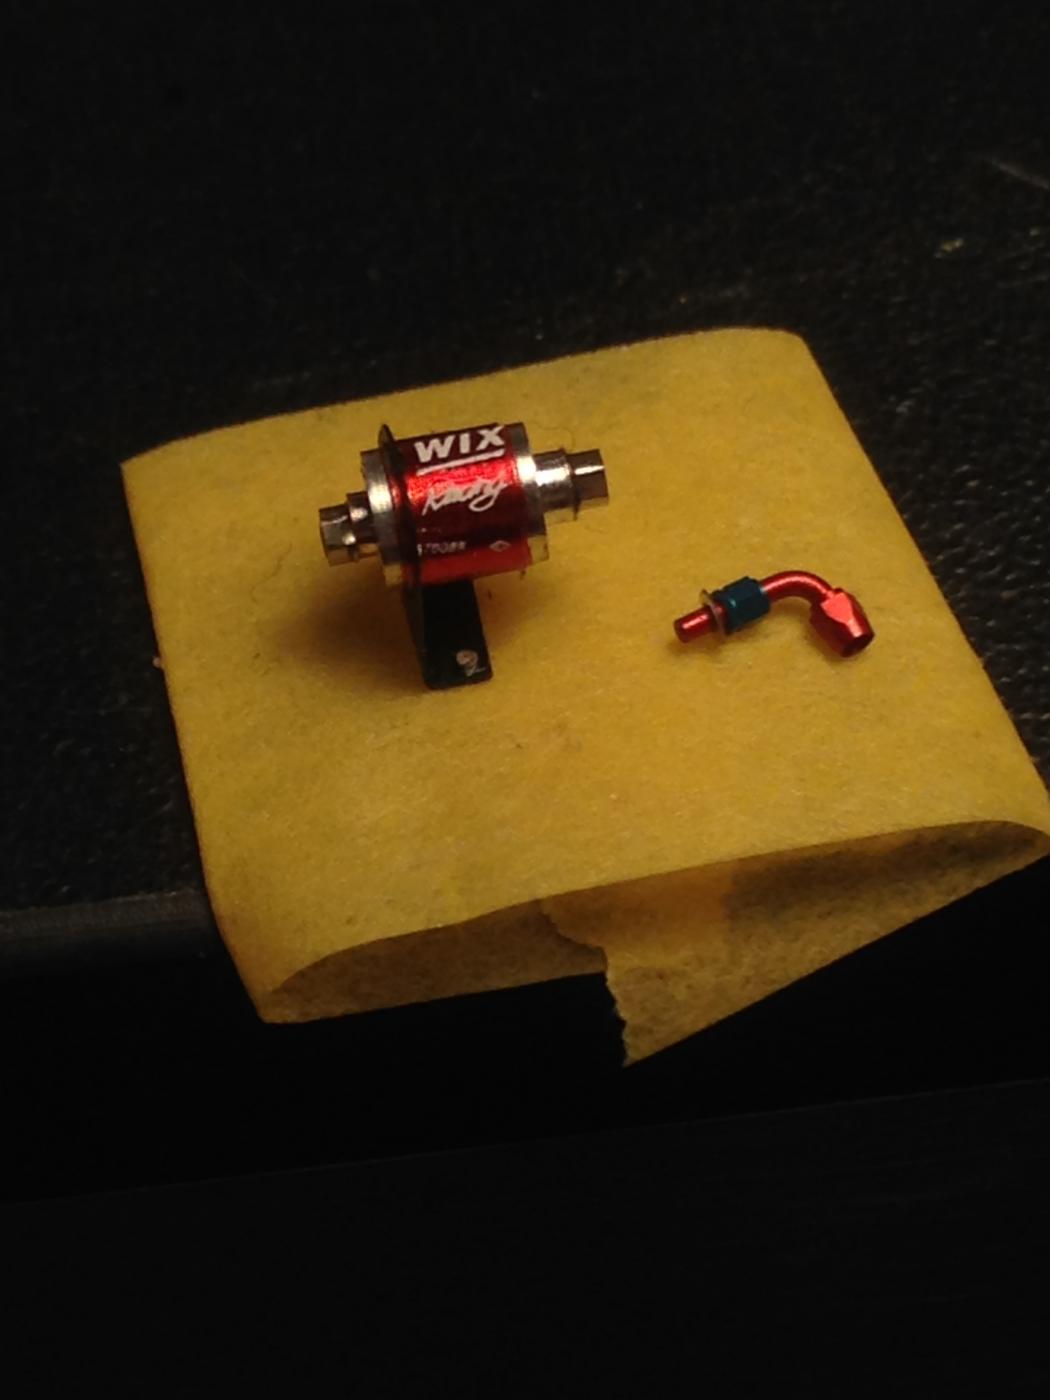
This is the fuel cell mounted in the trunk,its scratched of a plastic piece and the fuelpump are painted and mounted. First i tried to mount the fuelpump on the bottom of the trunk,but the trunk area are so small with two batteries and a fuelcell,so this mounting was the only way,so not the trunk would see to much cluttered. i found some photo etch parts that i modified so they worked as mounting brackets for the fuel cell. I will also do a fuel cap on my lathe. The batteries are painted and decaled and will also be in the trunk, but i change the battery terminals after this photo was taken to metal pins and some photo etched details. You can also see the gloss clear on the battery,this is only for the attach of the decals.later i will do a satin finish on the battery. Comments are welcome. Fred
-
Datsun 510 Pro/Stock "SWEET PAIN" COMPLETED BUILD
LeadFred replied to LeadFred's topic in WIP: Drag Racing Models
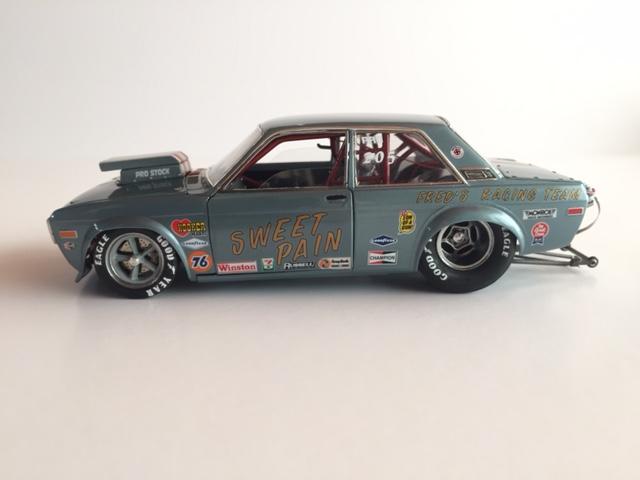
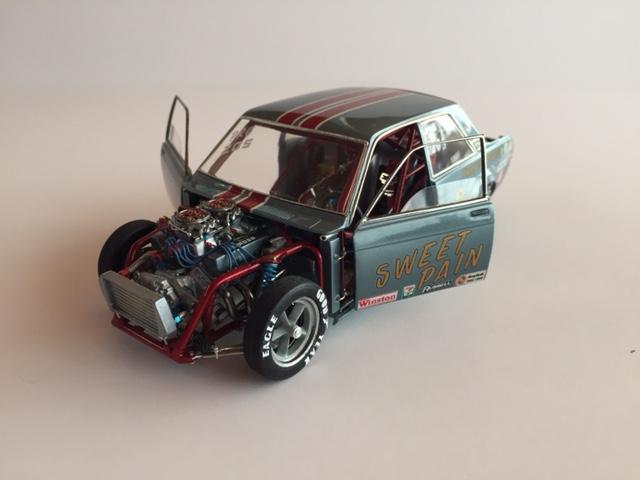
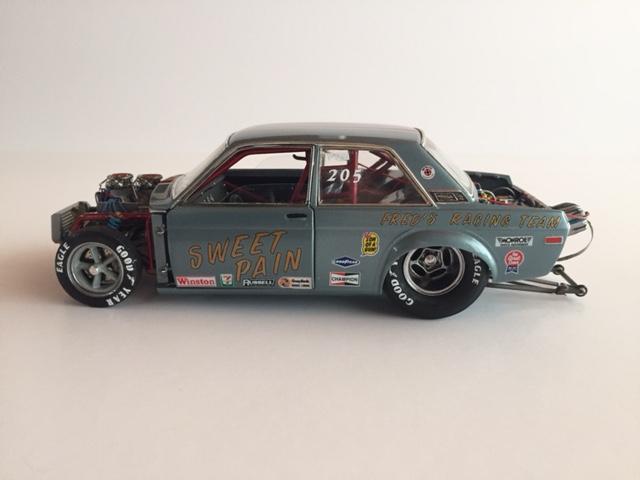
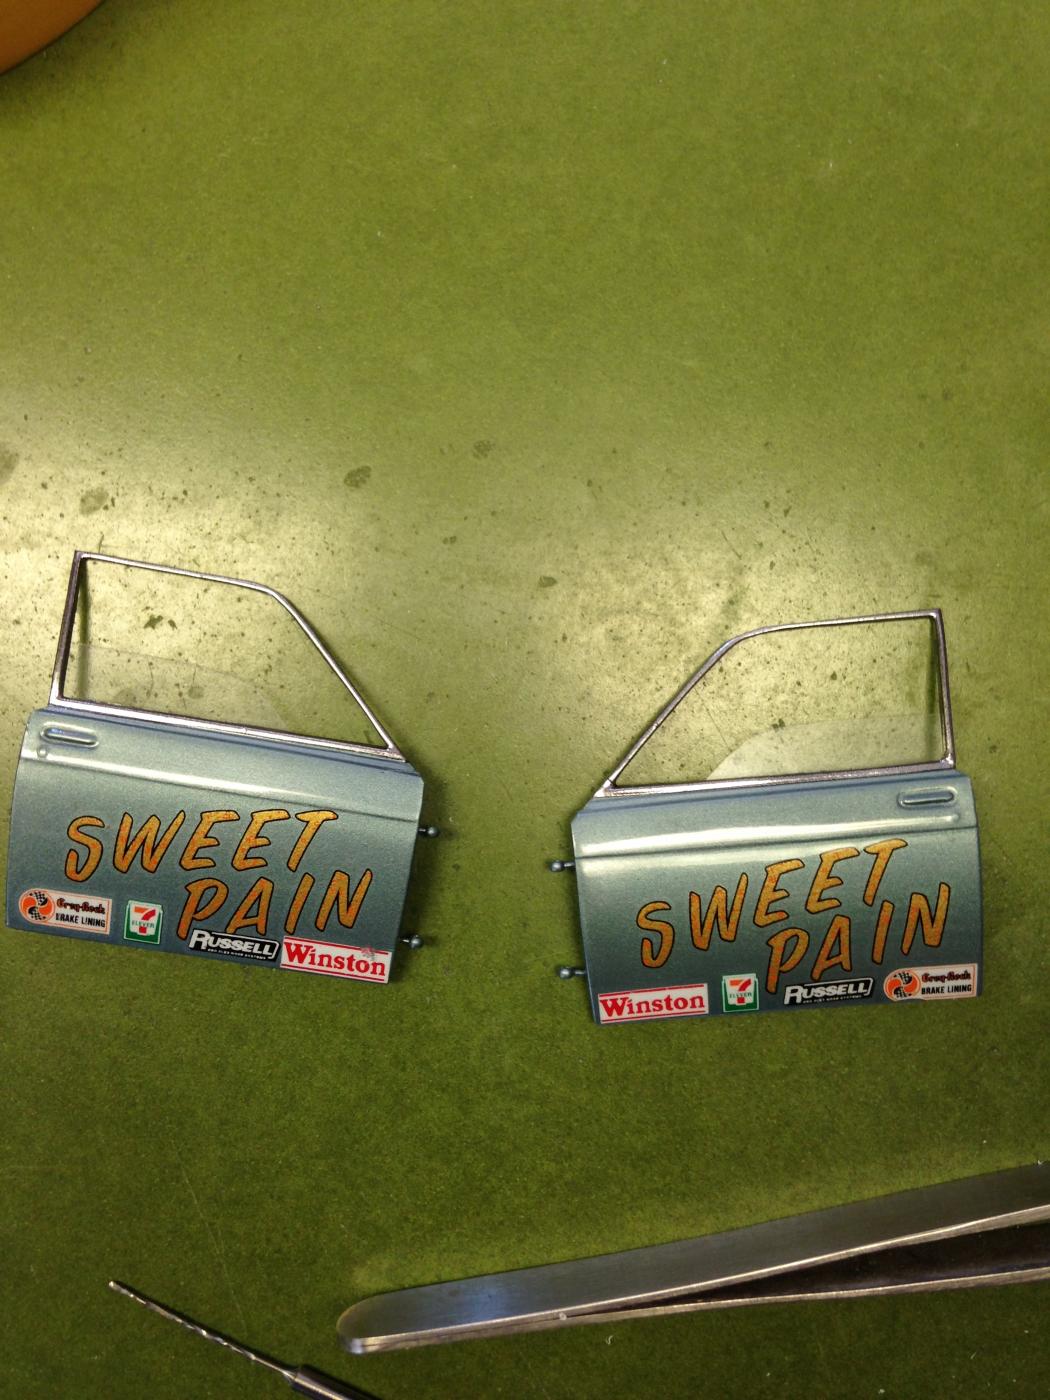
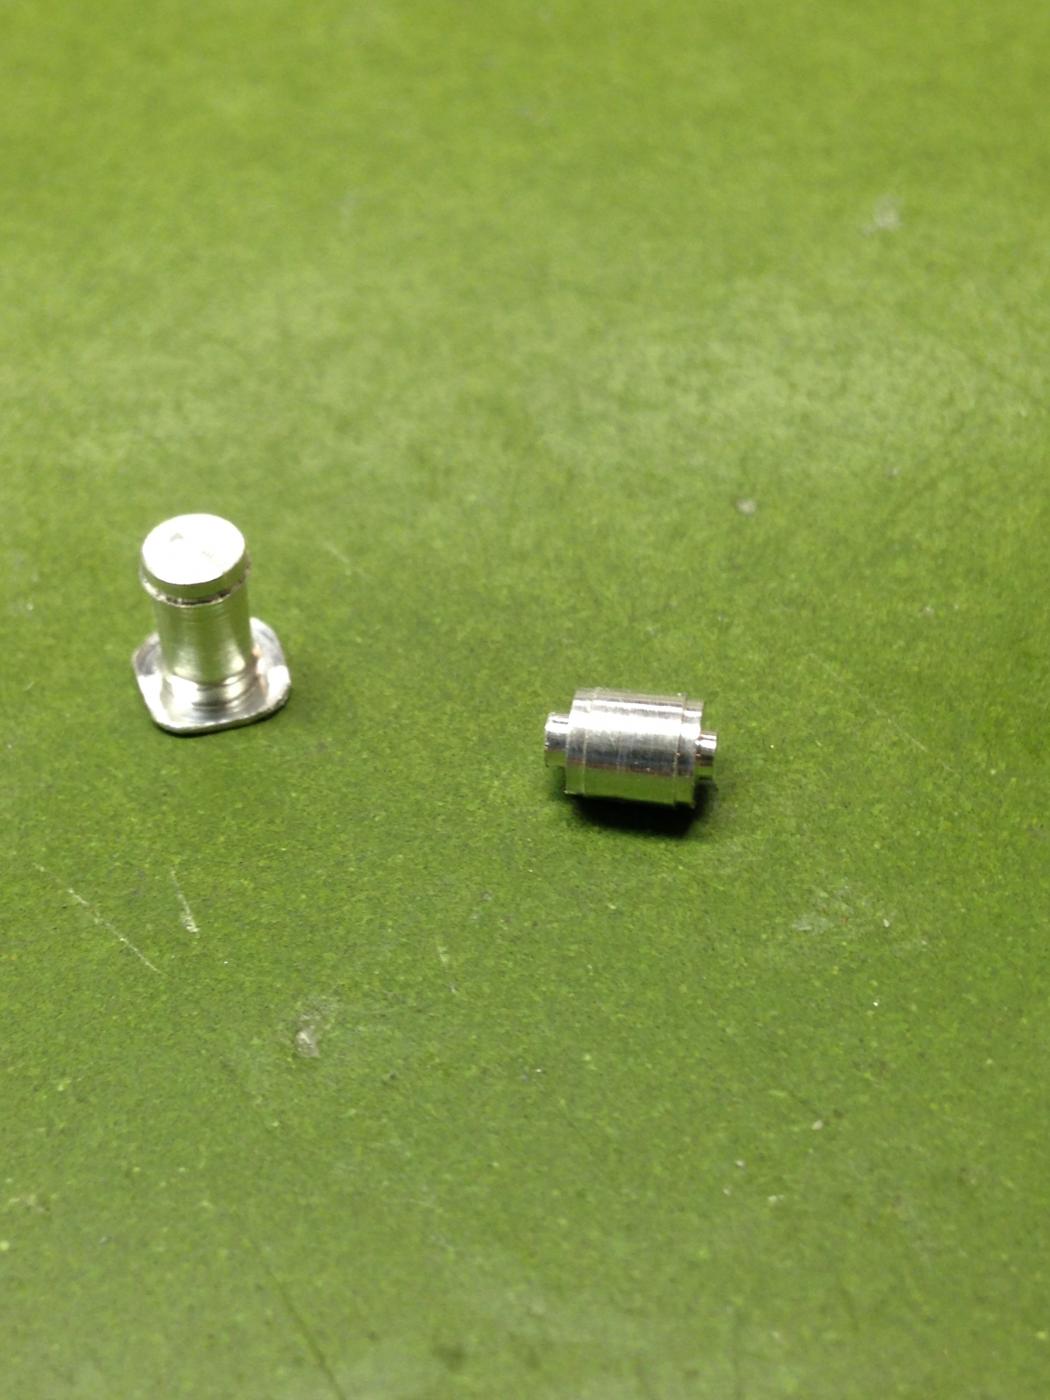
Thanks Steve,for your comments,and yes,i could had done it more easy if i had choose a little bit bigger car. But the challenge was to do this contrast of "small and big" in the same composition. Time to update some pictures. This is the doors,as you could see,i have named the car "Sweet Pain",and that is a name that i will associate to this build. Because sometimes it was so tricky to get parts together,so i was almost giving up the build. BUT.... when the tricky parts was mounted,the fun and joy came back. I have paint the window frame on the doors with Alclad chrome, it was to fragile to do the bare metal foil. I have done also a fuel filter and a fuel pump on my lathe that will mount in the trunk area where the fuel cell will be mounted. With some paint and decals and some brackets and nuts the details will come alive.
-
1/16 Scale Army Vega Funny Car - Finished 10/14/2018
LeadFred replied to Mooneyzs's topic in WIP: Drag Racing Models
it is unbelievable, i can study this for hours. A huge THANKS from Sweden for sharing this. -
Datsun 510 Pro/Stock "SWEET PAIN" COMPLETED BUILD
LeadFred replied to LeadFred's topic in WIP: Drag Racing Models
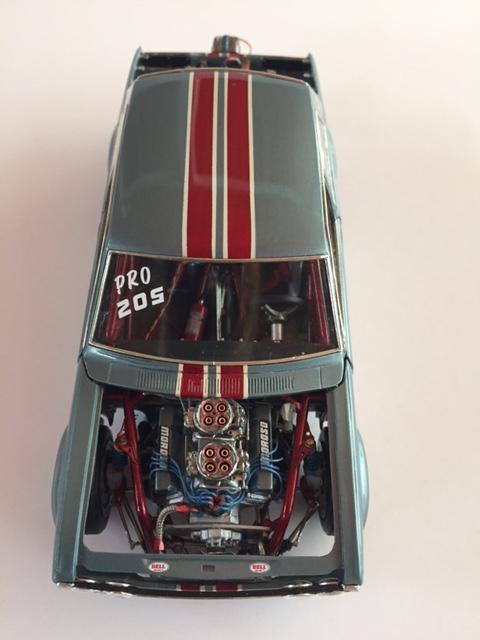
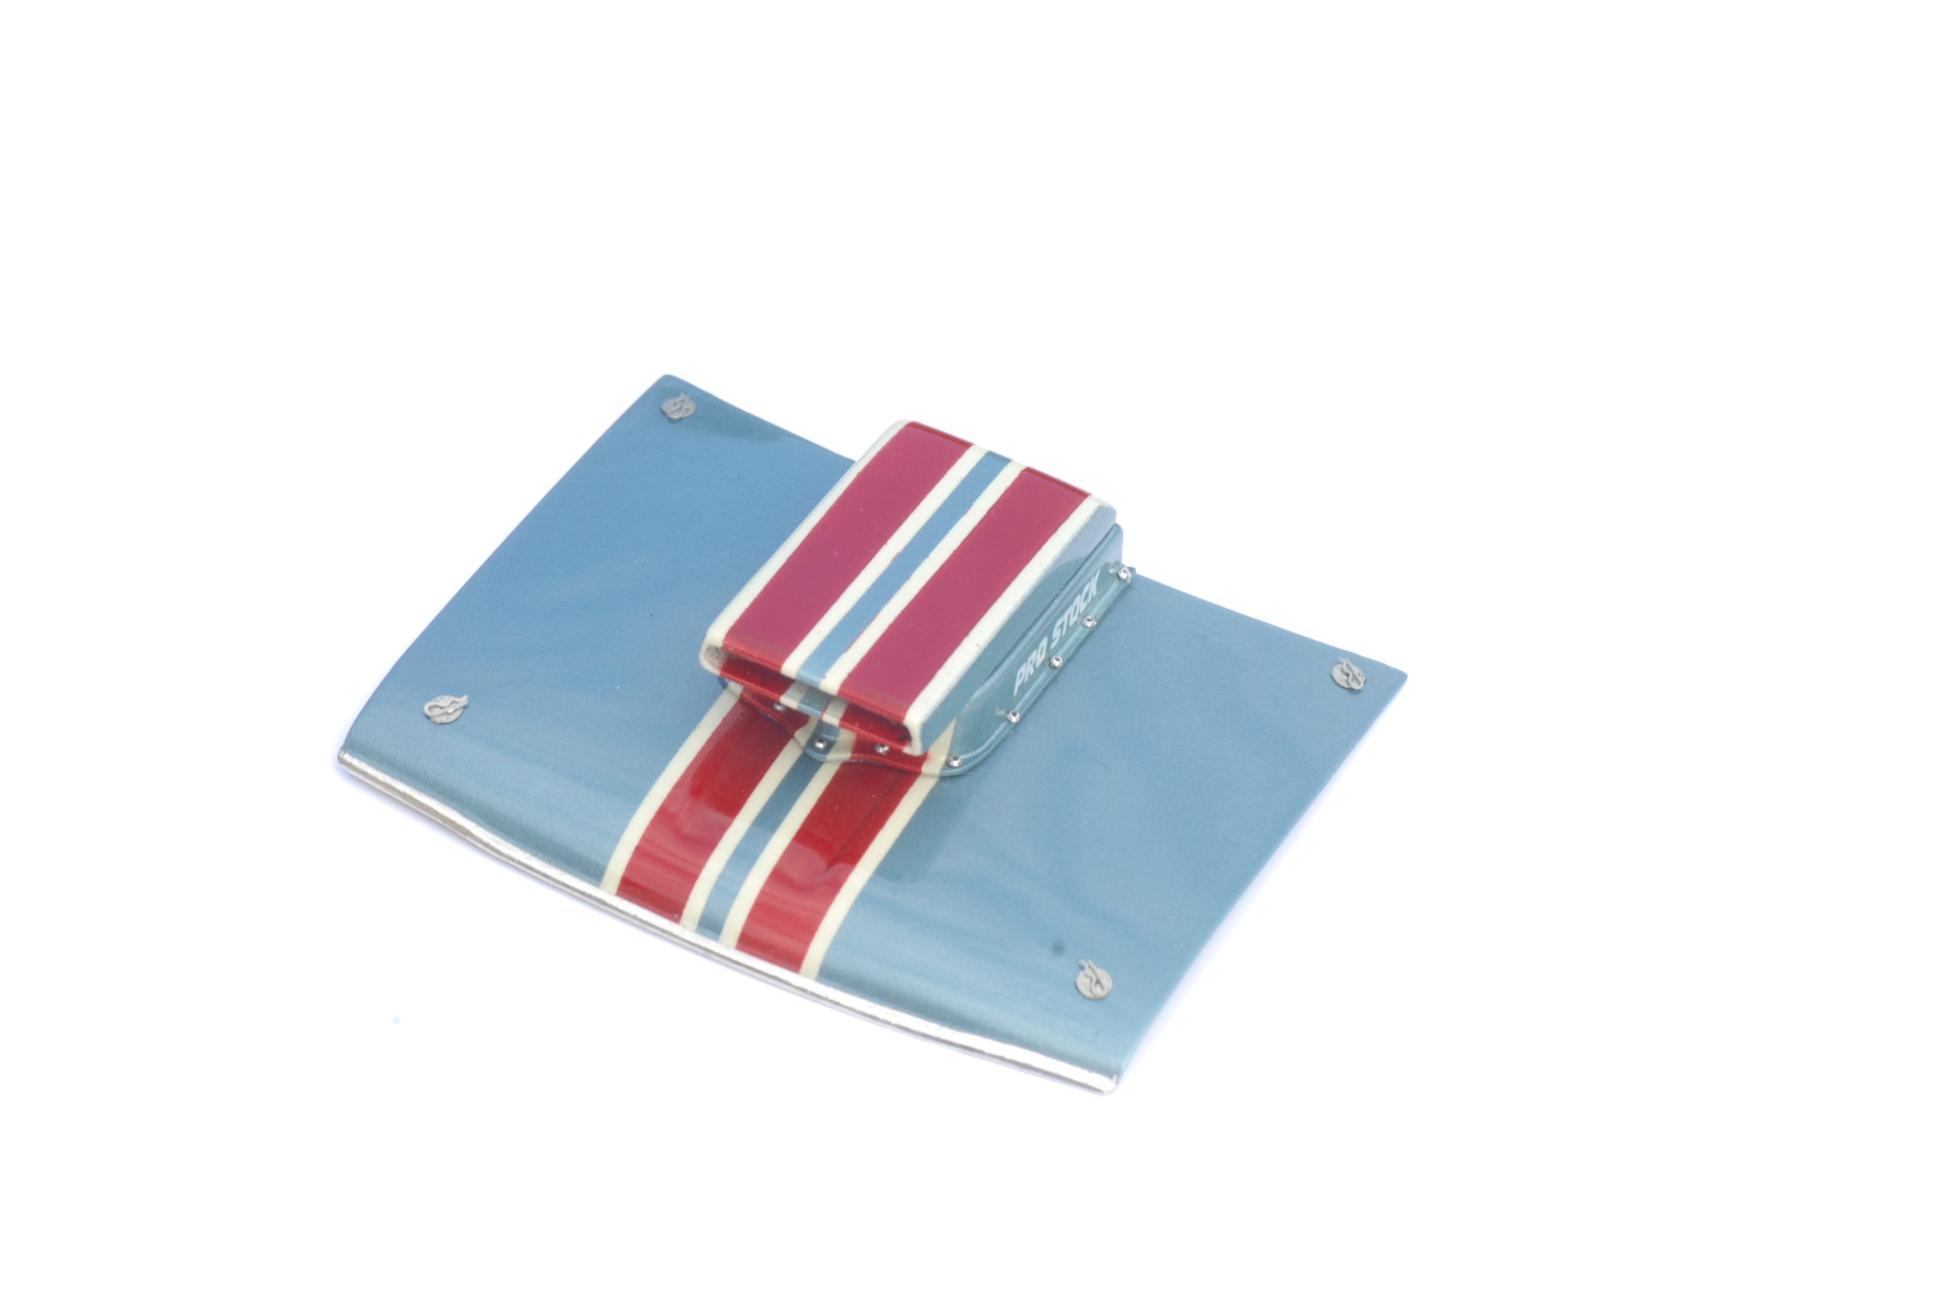
Sorry i forgot to uppload the picture of the complete hood. But here it is. Fred
-
Datsun 510 Pro/Stock "SWEET PAIN" COMPLETED BUILD
LeadFred replied to LeadFred's topic in WIP: Drag Racing Models
Its getting closer to the final steps, i have the trunk and wheelie bar and the rear wheels left. Fred
-
Datsun 510 Pro/Stock "SWEET PAIN" COMPLETED BUILD
LeadFred replied to LeadFred's topic in WIP: Drag Racing Models
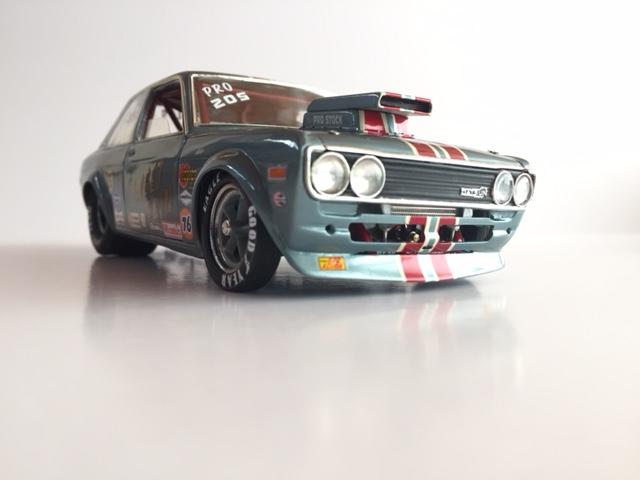
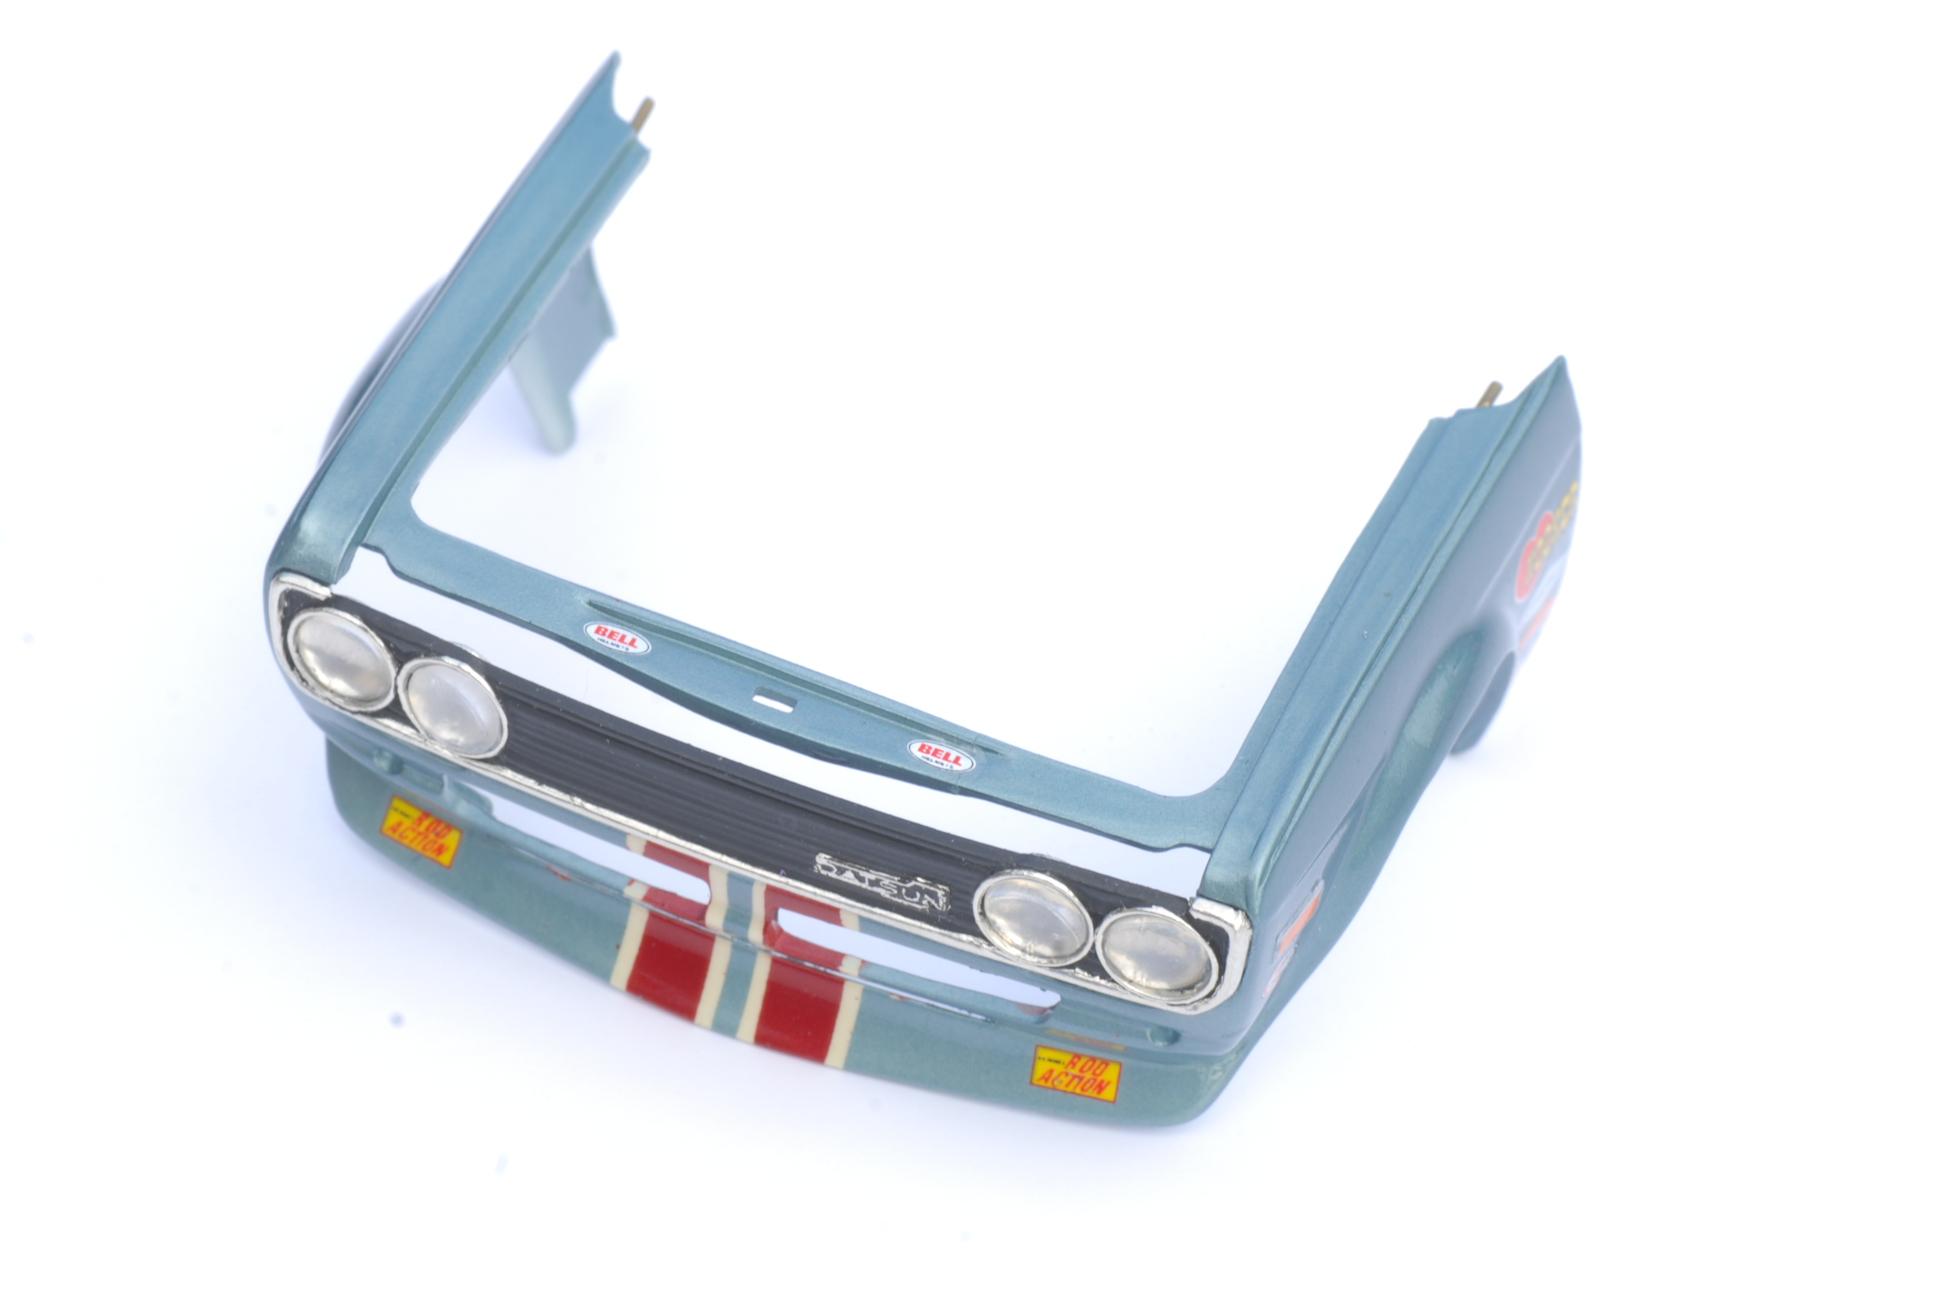
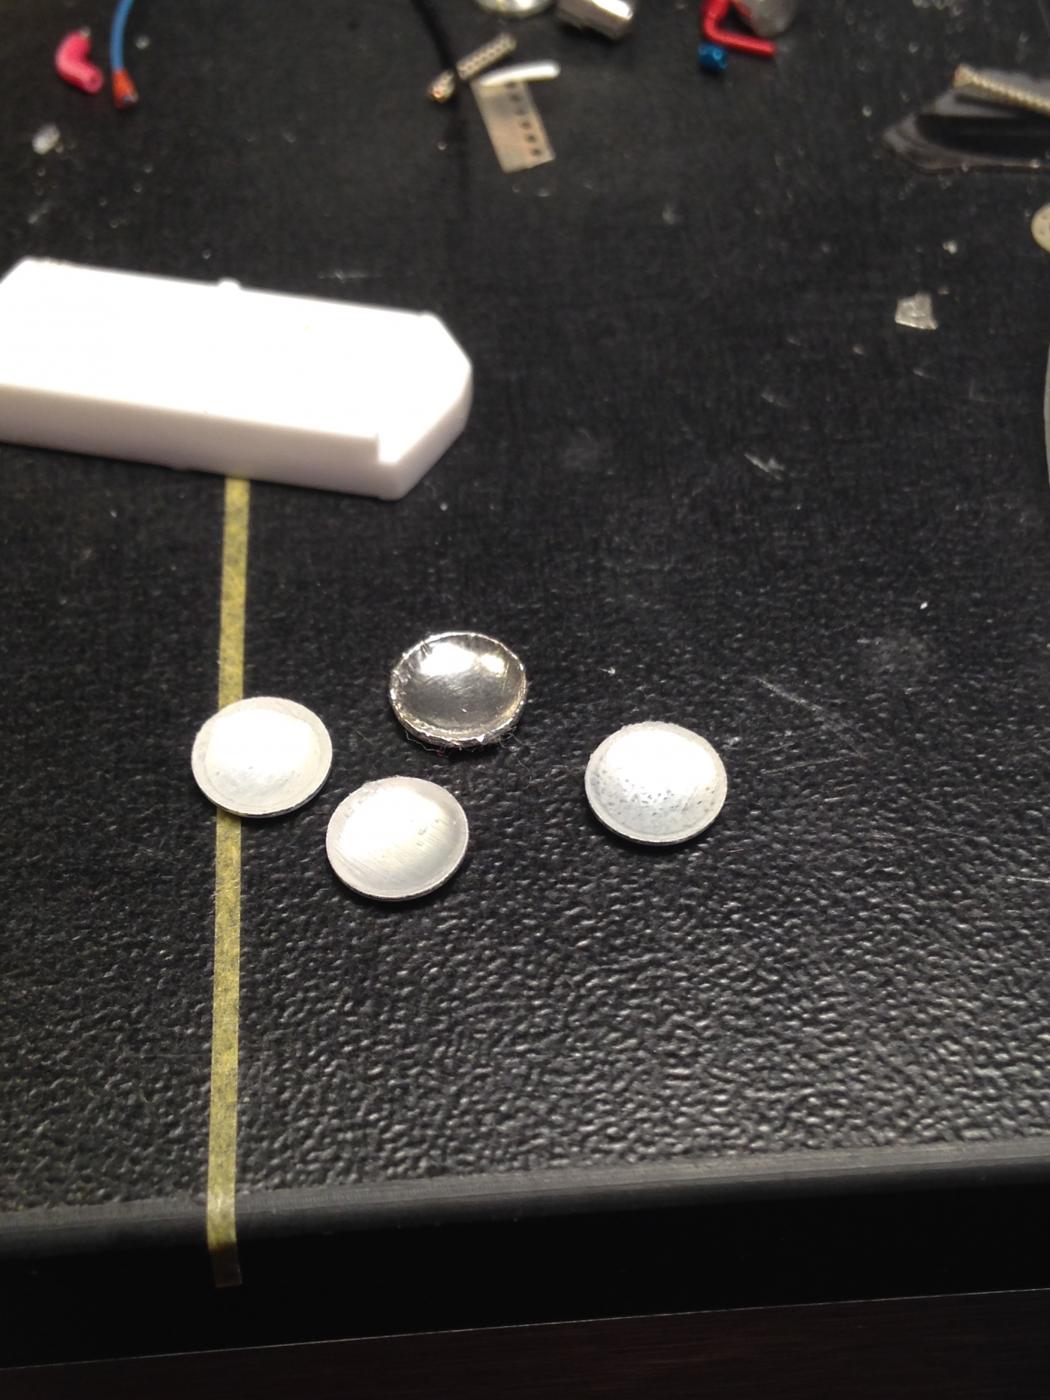
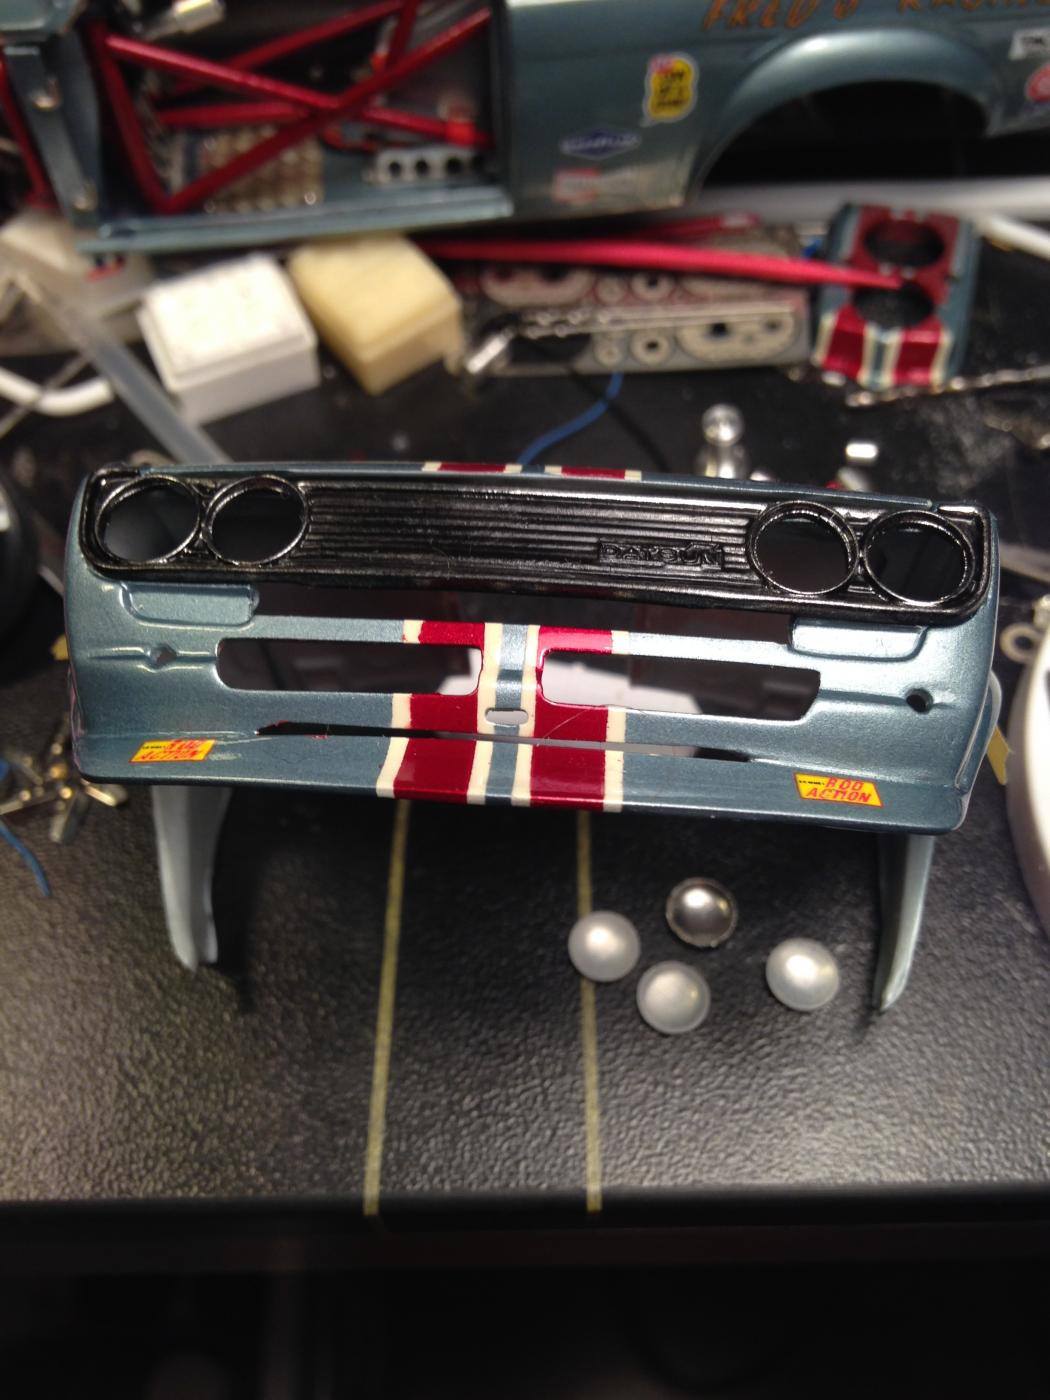
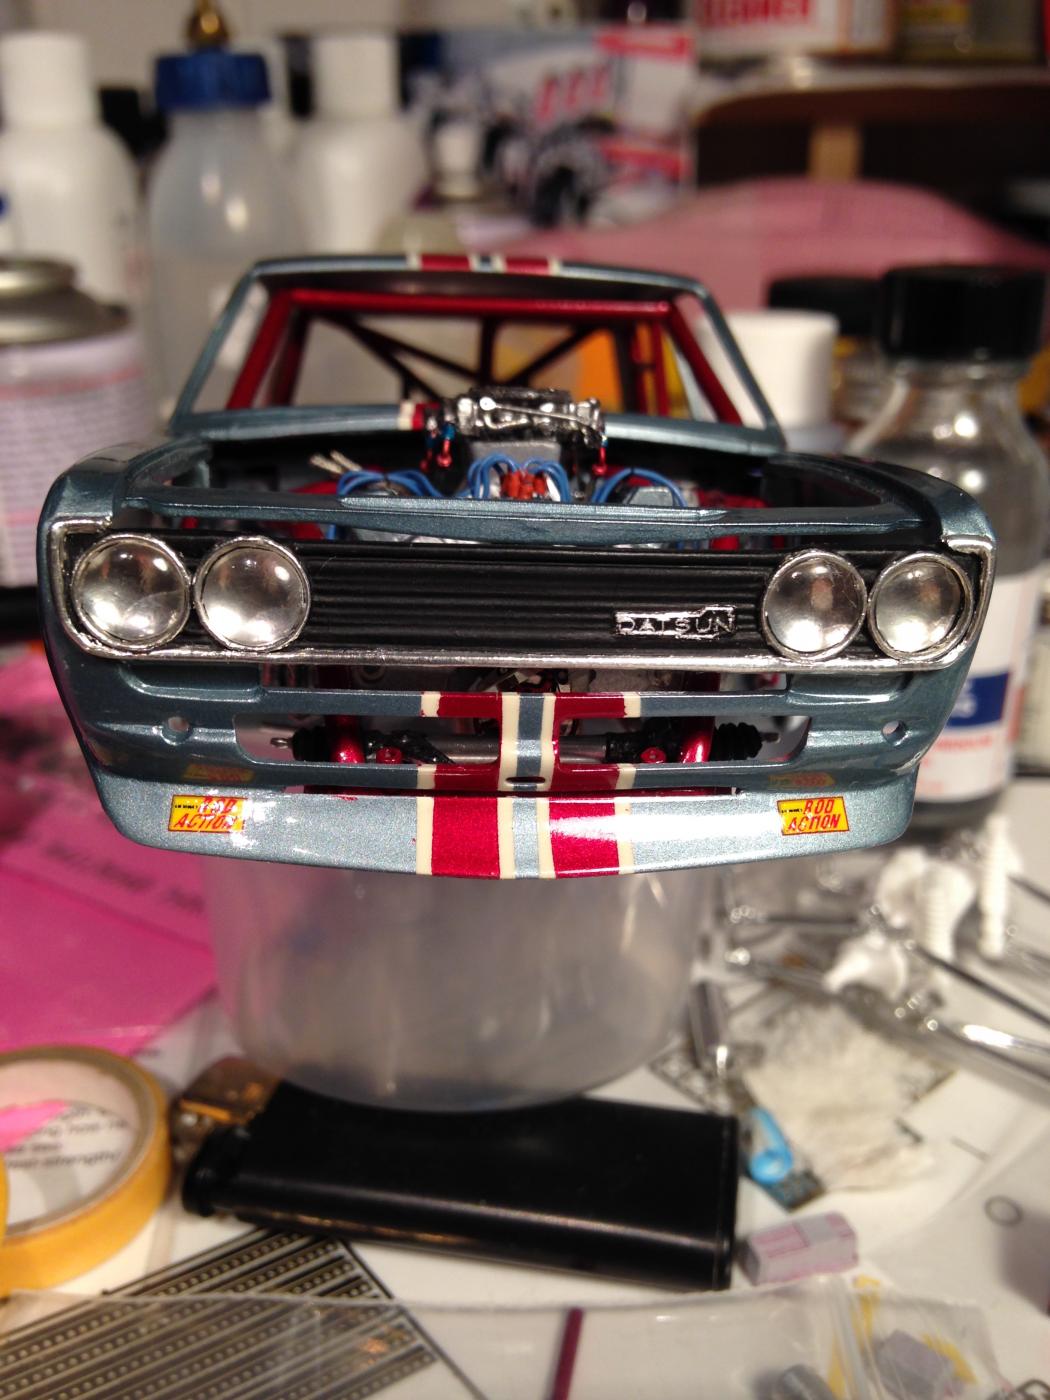
Thank you Dave,and John. The front and grille has been been modified to get a better lights on it. I have drilled out the lamp reflectors ,but i will use the kits lenses. I Have used some rivets that i found in a hobby shop for artists,and the rivets are actually for clothes. But if you put some bare-metal in the concave side,you have a good reflector for the headlights. Here you see the result.
-
1/16 Scale Army Vega Funny Car - Finished 10/14/2018
LeadFred replied to Mooneyzs's topic in WIP: Drag Racing Models
What a wonderful work you do. it is for sure, that builds like this inspire me very much. keep up the good,clean and crisp work. I Will be watching this.thanks. -
Datsun 510 Pro/Stock "SWEET PAIN" COMPLETED BUILD
LeadFred replied to LeadFred's topic in WIP: Drag Racing Models
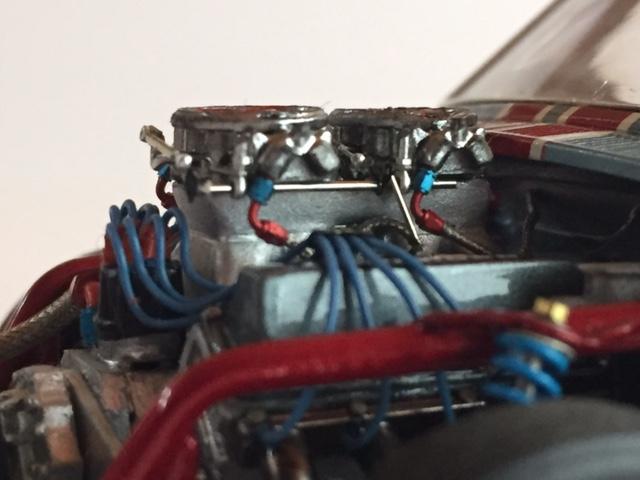
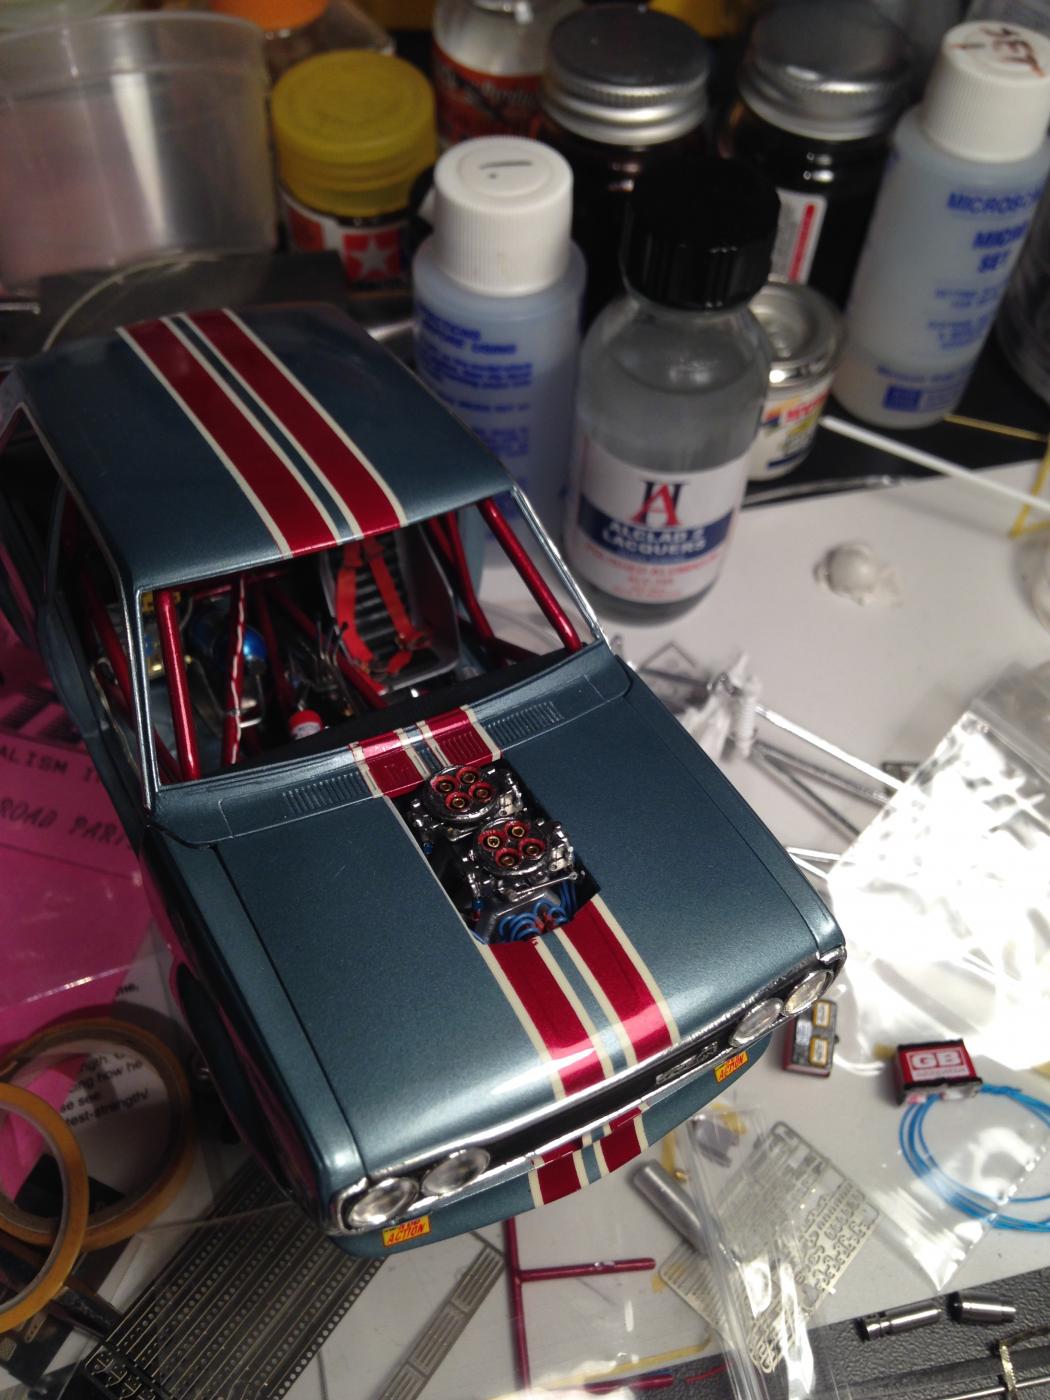
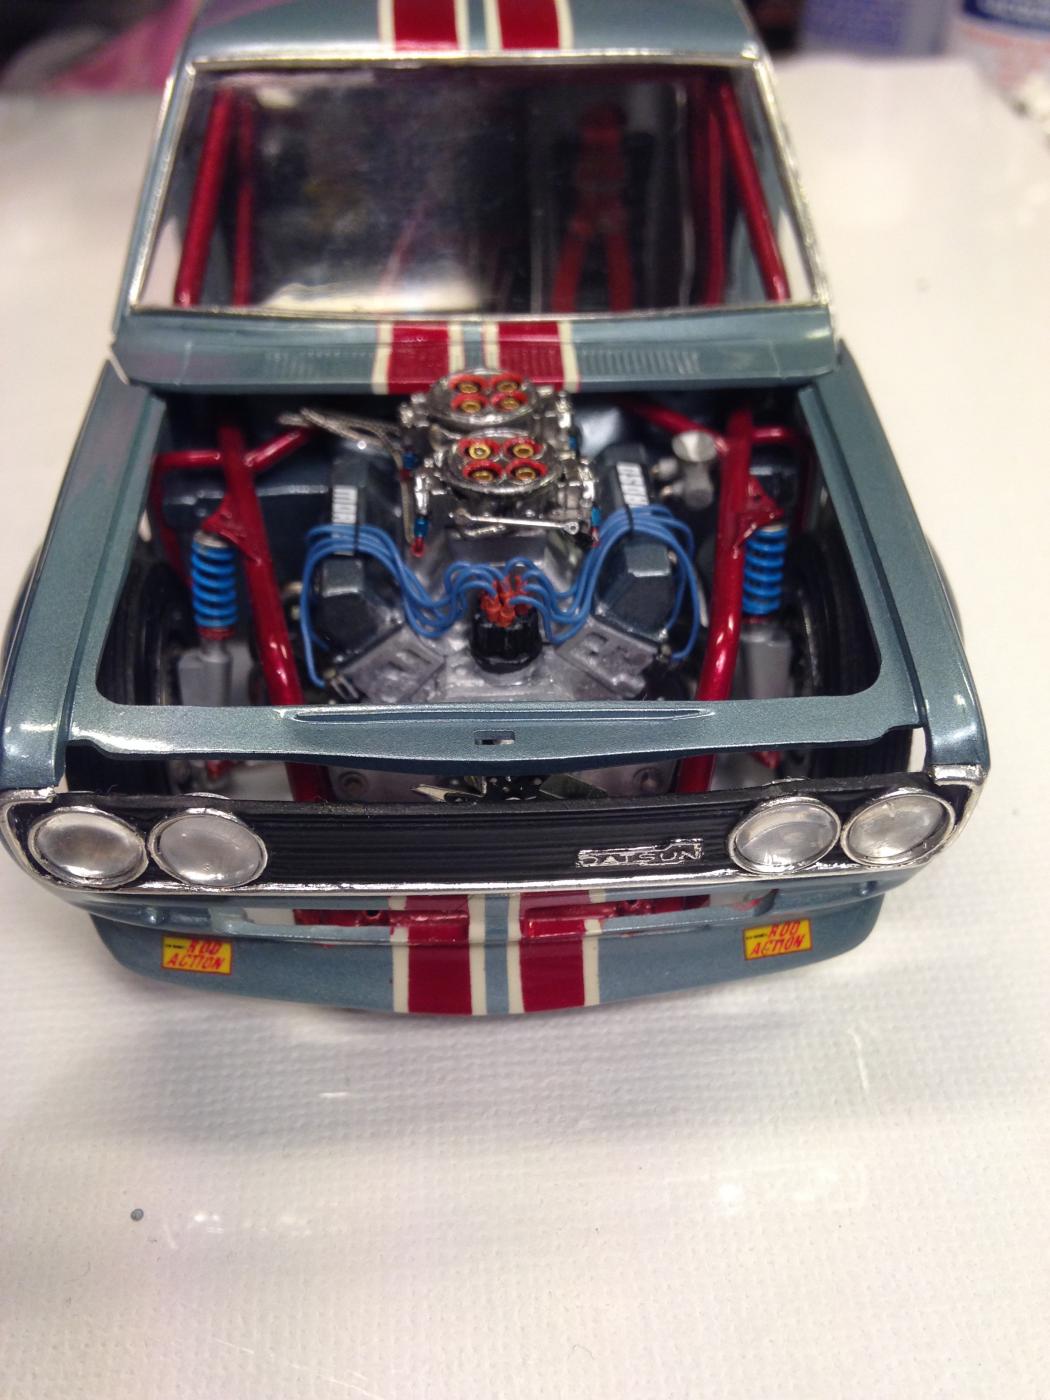
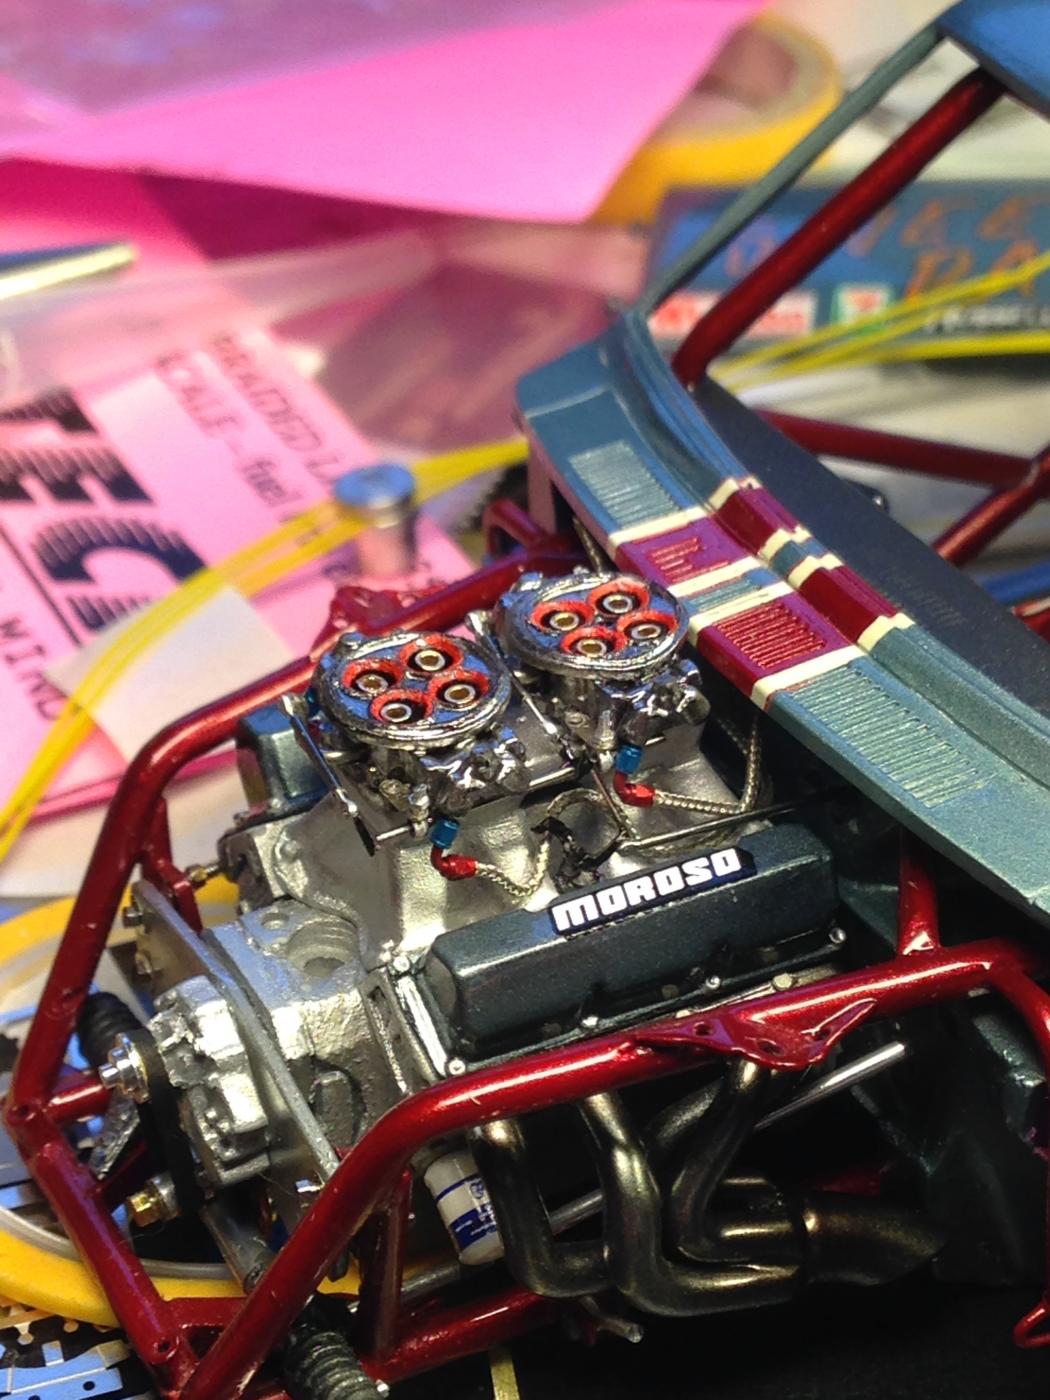
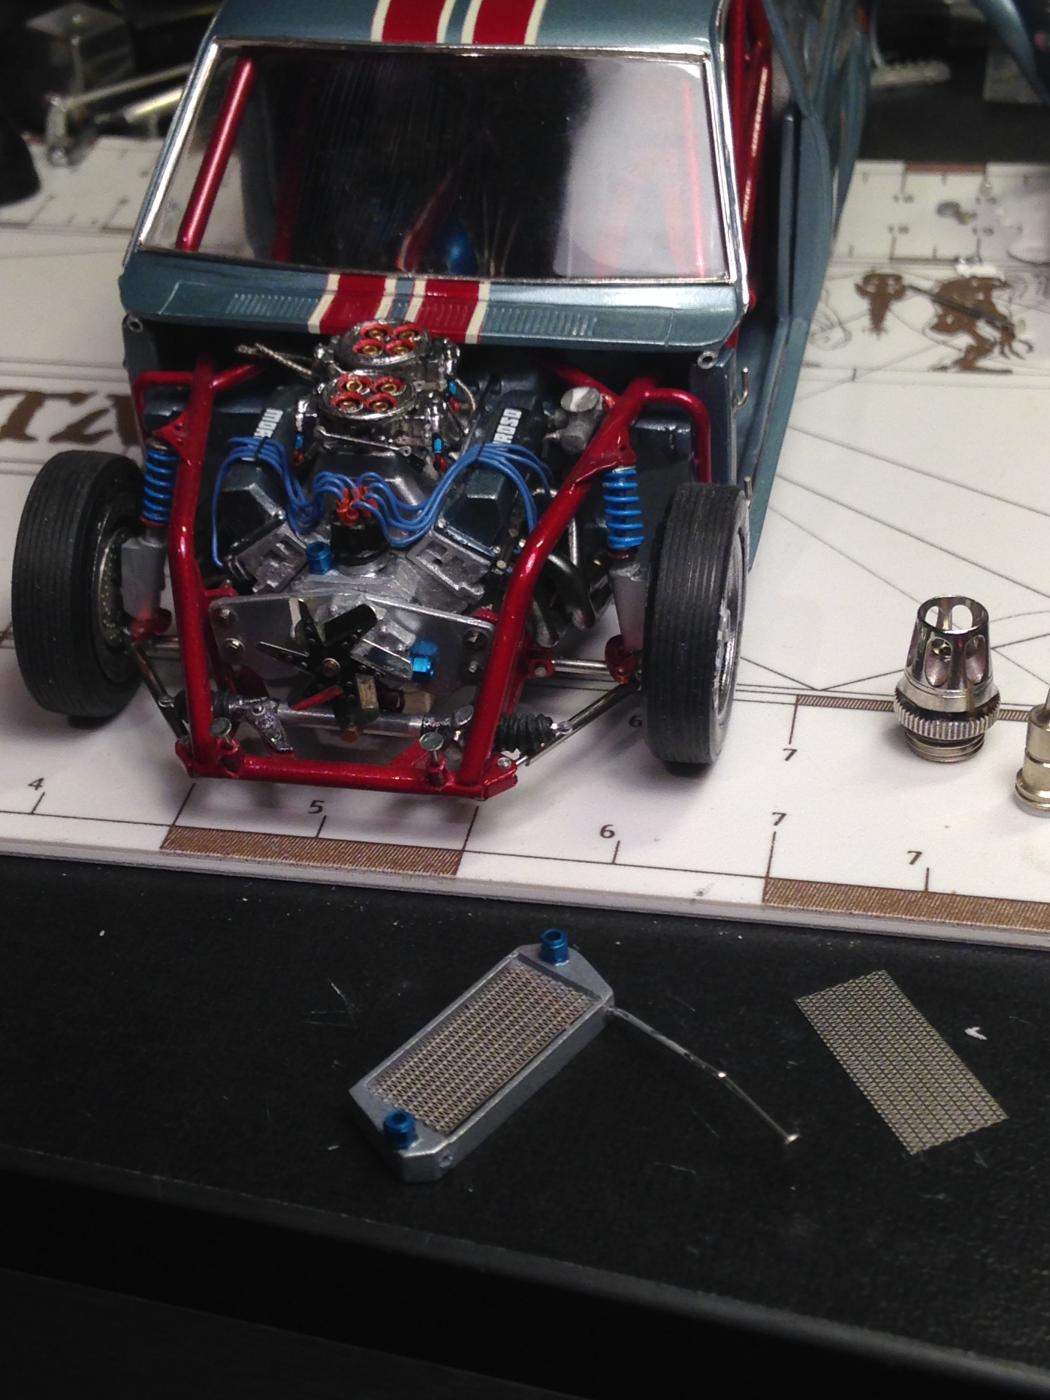
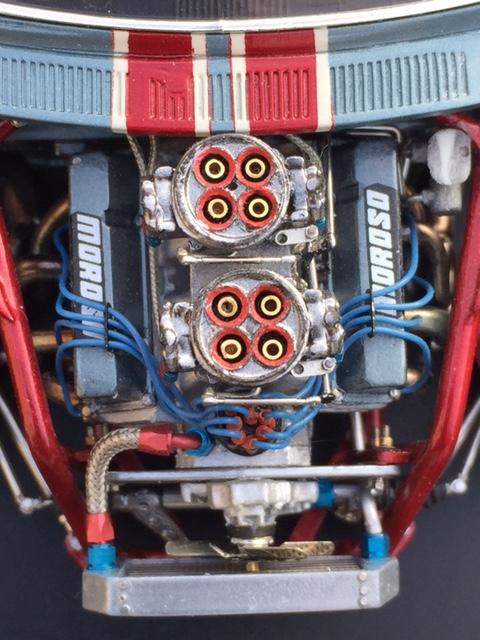
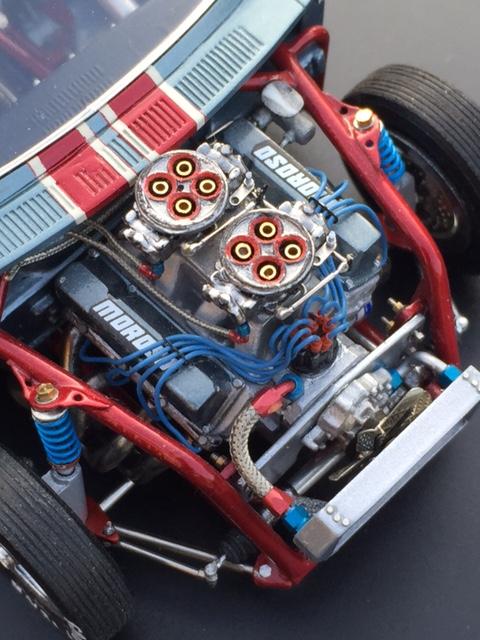
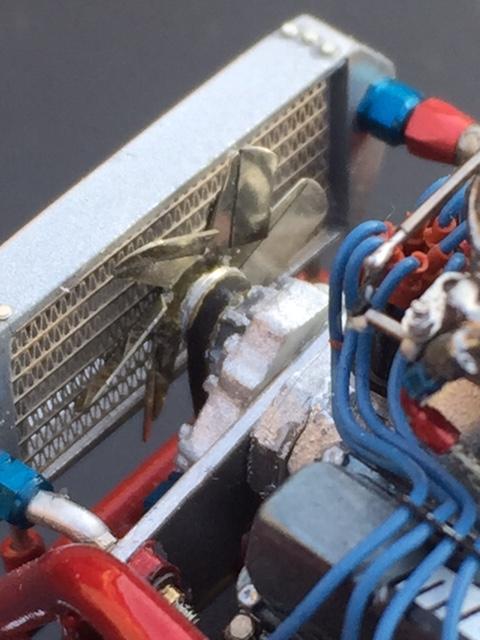
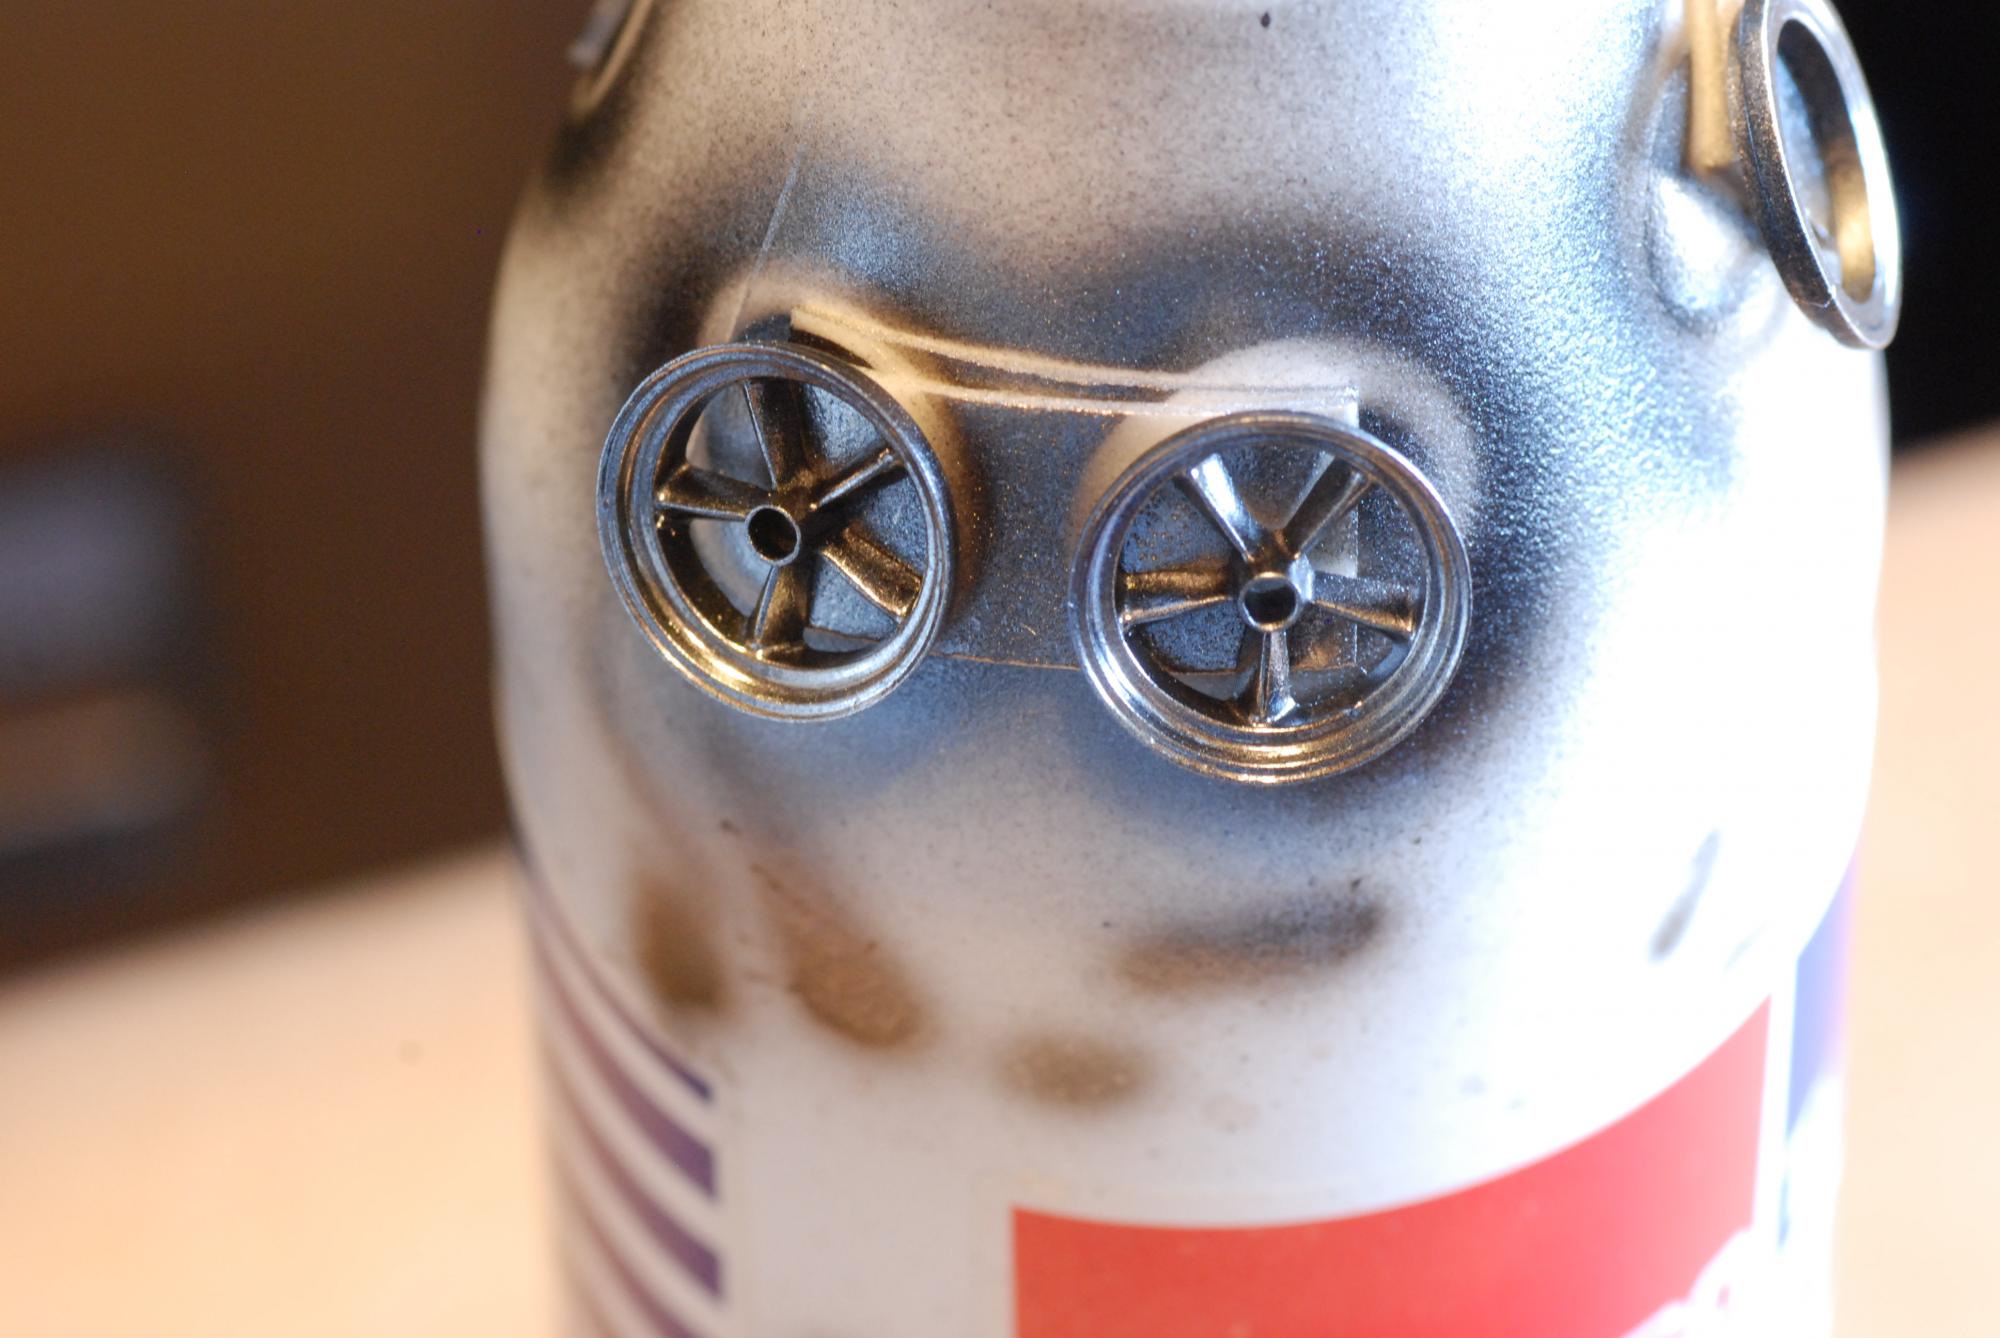
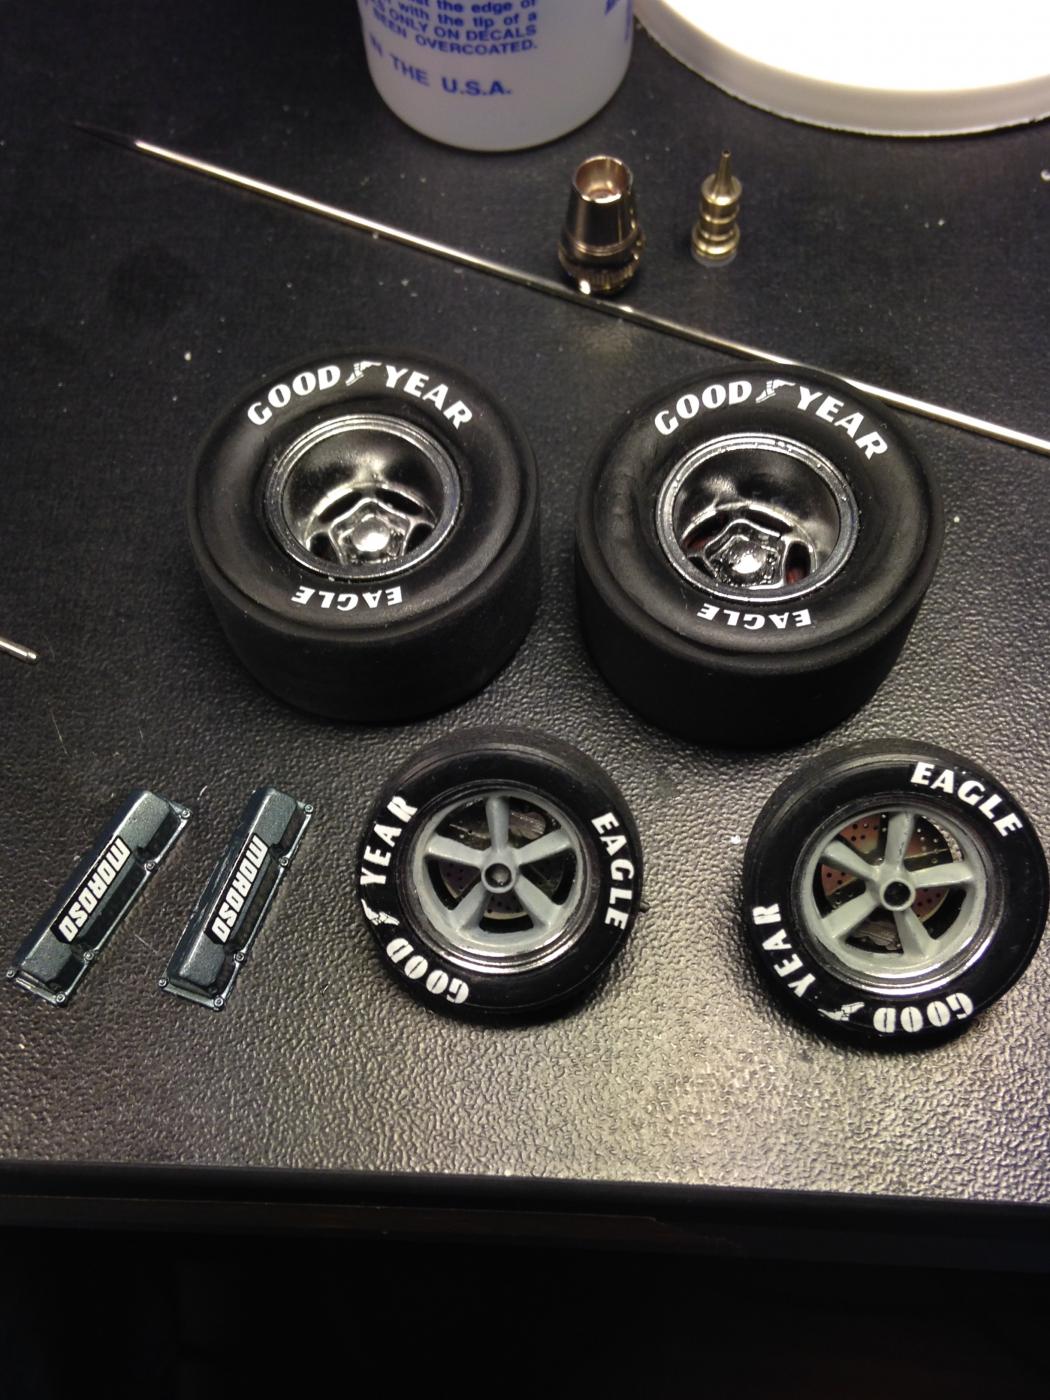
Hello, Thank you Carl and Ray. I have some new pictures from the assembly of the engine. I have paint the valve covers in the same color as the body,and the put a decal on it. Mostly parts comes alive when you have paint,decals and some detail on it. When you test fit a unpainted plastic part on a started build it is difficult to see how it is gonna be, i´ll think the composition are getting better. The radiator are scratch built from evergreen,and a photoetched mesh,but i had to place it,i´ll think,ten times in different positions before i could get the front on as i wanted it. It was very tuff to get it right,because i have no space left in the engine room. Here you see the Carbs mounted with some fuel lines and linkage. also you can see the oilfilter that had get a decal on it. Here you see the sparkplug wiring and also a photo-etched fan with some boltheads on . And the front wheels are just mocked-up in this picture,just for the photo. You can also see the scratch built radiator with a needle in some mounting holes, The Front wheel is importend to have on the chassie when you working with the radiator fit,just to see that the body front sits in it right place when youre done. And Yes!!! here it is mounted. it dont looks so difficult when you look at it in these pictures,because it is only two pins that the radiator are mounted on from the chassis. But it was,very tricky to get it right,so i also could get the front on. This is from above. Here is the front struts and wheels mounted/fixed. Guys, I hope you enjoy the pictures,and to next time. Happy modelling. Questions and comments are always welcome. Fred
-
Datsun 510 Pro/Stock "SWEET PAIN" COMPLETED BUILD
LeadFred replied to LeadFred's topic in WIP: Drag Racing Models
So ...guys, I will be posting some more pictures later when the parts are mounted. Comments are welcome. Fred