Nick Winter Posted May 10, 2010 Share Posted May 10, 2010 Well I will get more and better pictures but, I did this one myself no resin, Link to comment Share on other sites More sharing options...
Outspoken Posted May 10, 2010 Share Posted May 10, 2010 Even with the bad photo, it's easy to see that it looks like you coulda got the stance down some. looks far to high (scale speaking) for stock. almost like the front's been lifted 3" gasser style. Rear may be ok height but tough to tell with the ose in the air. let ya know more when ya get some reasonable pics up. Link to comment Share on other sites More sharing options...
crispy Posted May 10, 2010 Share Posted May 10, 2010 Outspoken, I have to disagree. As a previous 2nd gen owner of many of these cars I have to say it looks exactly right. These cars sagged in the rear after some time, maybe not right away when new, but a few years down the road when the leaf's "relaxed". My 79 Trans Am looked just like that before the new leafs were put in. Dukefan, better pictures stat! From what I can see it looks just like the period piece. Chris Link to comment Share on other sites More sharing options...
Eric Stone Posted May 10, 2010 Share Posted May 10, 2010 In Nick's pic, it's hard to see where the tire ends and the shadow in the fenderwell begins, but compared to pics on a Google Images search of "78 Firebird Formula", the stance isn't bad. Looks decent thru the blurry pic. +1 on posting more pics! Link to comment Share on other sites More sharing options...
Nick Winter Posted May 10, 2010 Author Share Posted May 10, 2010 Sorry guys, new camera old user, I've got it almost figured out and will get a few better pictures, in the mean time you'll just have to wait Link to comment Share on other sites More sharing options...
Jared Roach Posted May 10, 2010 Share Posted May 10, 2010 Yea Nick, ya got a new camera. But anyways, it looks like that the projects in the background are way clearer, maybe the micro switch wasn't on? But from what I can see it looks good. Link to comment Share on other sites More sharing options...
Nick Winter Posted May 10, 2010 Author Share Posted May 10, 2010 Here you go guys, stupid enough there clearer and nicer without the Marco switch in the on posistion, Yes I know the paint is crooked, It'll be fixed, Link to comment Share on other sites More sharing options...
Nick Winter Posted May 10, 2010 Author Share Posted May 10, 2010 (edited) Much better Nick, and nice work. One question, what happened to the windshield? One suggestion, use Tamiya masking tape for your two tone lines. Me likey! Did use Tamiya, Like I said the lines need touched up, not sure about the windsheild, I think the glue came loose. Edit: Forgot to mention the details, AMT Bandit kit, Canadian tire brand paint and primer, Duplicolor clear, scratch built straight pipes and Formula hood, Side Formula lettering by Keith Marks, the Rear spoiler bird, I made and printed to decal, that's about it. Edited May 10, 2010 by Dukefan69' Link to comment Share on other sites More sharing options...
gray07 Posted May 11, 2010 Share Posted May 11, 2010 Sweet Link to comment Share on other sites More sharing options...
MyBradKeselowski Posted May 11, 2010 Share Posted May 11, 2010 Spot on representation of a Formula... That's fine looking Firebird in my book. Looks to be ready for a 78 Firebird brochure Link to comment Share on other sites More sharing options...
Scale-Master Posted May 11, 2010 Share Posted May 11, 2010 It doesn’t matter how good the quality of the materials you purchase is, you have to use them properly too. Burnish the edge of the tape down before you paint, and don’t put the paint on so wet that it wants to bleed under the tape. Putting it on straight is another issue. But you are showing some signs of improvement. And the rear spoiler is way too far forward. Link to comment Share on other sites More sharing options...
spkgibson Posted May 11, 2010 Share Posted May 11, 2010 It doesn’t matter how good the quality of the materials you purchase is, you have to use them properly too. Burnish the edge of the tape down before you paint, and don’t put the paint on so wet that it wants to bleed under the tape. Putting it on straight is another issue. But you are showing some signs of improvement. And the rear spoiler is way too far forward. You also need to work on smoothing out your bodywork better,sand and prime untill it is completely smooth,The hood looks OK,But not correct at all! Link to comment Share on other sites More sharing options...
sjordan2 Posted May 11, 2010 Share Posted May 11, 2010 (edited) It doesn’t matter how good the quality of the materials you purchase is, you have to use them properly too. Burnish the edge of the tape down before you paint, and don’t put the paint on so wet that it wants to bleed under the tape. Putting it on straight is another issue. But you are showing some signs of improvement. And the rear spoiler is way too far forward. Your paintwork on the body looks very, very nice. I would agree with Scale-Master about the use of masking tape, however, and add that this is especially important when it comes to painting the chrome trim to make the edges sharp and precise. Get that perfected, and the next step is using Alclad or Bare-Metal foil. (Those who can't do, teach. In this case, that's me.) Edited May 11, 2010 by sjordan2 Link to comment Share on other sites More sharing options...
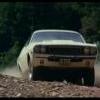
Nick Winter Posted May 11, 2010 Author Share Posted May 11, 2010 It doesn’t matter how good the quality of the materials you purchase is, you have to use them properly too. Burnish the edge of the tape down before you paint, and don’t put the paint on so wet that it wants to bleed under the tape. Putting it on straight is another issue. But you are showing some signs of improvement. And the rear spoiler is way too far forward. Burnish, whats that. It is a bit forward but it's not "way too far forward" You also need to work on smoothing out your bodywork better,sand and prime untill it is completely smooth,The hood looks OK,But not correct at all! What body work problems? the roof, all of that popped up after it was painted. It is semi correct, give me a break, no ones perfect. This is the car I was loosly replicating, Link to comment Share on other sites More sharing options...
Nick Winter Posted May 11, 2010 Author Share Posted May 11, 2010 definitely a better effort and end result than some of your past builds i agree with Mark here on some things too. still some areas to work on but as long as you keep an open mind and listen to the constructive criticism you will continue to do better. the biggest reason i avoid any of the AMT/MPC Firebird kits are for thier poor fit and overall appearance. areas like the engine bay really stand out as poorly done. points like the inner fender wells that leave huge gaps between them and the fenders, the top of the cowl that fits poorly against the firewall and is usually warped. in general the details just seem to be very "soft" in my opinion too. compare these kits to those from Monogram and there is a big difference! Monogram's Firebirds are simplified but still much more crisp in the details that are there. Dave Which builds the ones I have kept trying to tell people that are about 4-6 months old. As for the AMT/MPC VS Monogram/Revell, I've had both and my personal preference leads me back to the AMT/MPC's, not sure why but I prefer them. Link to comment Share on other sites More sharing options...
cazxr2 Posted May 11, 2010 Share Posted May 11, 2010 I think it's ace and you should be well happy with it. And if ur happy JOB DONE in my book Link to comment Share on other sites More sharing options...
Nick Winter Posted May 11, 2010 Author Share Posted May 11, 2010 I think it's ace and you should be well happy with it. And if ur happy JOB DONE in my book Thank you. I think this is my best so far, infact it is my most recently finished model. Link to comment Share on other sites More sharing options...
Steve Keck Posted May 11, 2010 Share Posted May 11, 2010 Nick, No one has answered you question about burnishing so I will. Once the masking tape is laid down there is a good chance wet paint may seep under it. To prevent this the edge of the tape must be rubbed down. Maybe finger pressure will be enough but if you must use a tool to press down the edge then be careful it does not scratch the primer or paint. We all use different tools to do this but consider the barrel of a cheap retractable ball point pen(tip retracted) or a round toothpick. Keep the tool almost parallel to the surface. Rub in the same direction as the edge, never across it as you could catch the tape edge and lift it up. You said: "What body work problems? the roof, all of that popped up after it was painted." Well, I can't see it in your photos so I will assume from your statement there are problems you can see. If they appeared after painting you may not be using the proper primer. If you are using automotive type paints they may be too "hot" and penetrating through the primer and partially dissolving the underlying plastic or putty. Don't ask me how I know this. Automotive type paints require automotive type primers. ScaleMaster would be your best bet to expand on this. Steve Link to comment Share on other sites More sharing options...
Nick Winter Posted May 11, 2010 Author Share Posted May 11, 2010 Nick, No one has answered you question about burnishing so I will. Once the masking tape is laid down there is a good chance wet paint may seep under it. To prevent this the edge of the tape must be rubbed down. Maybe finger pressure will be enough but if you must use a tool to press down the edge then be careful it does not scratch the primer or paint. We all use different tools to do this but consider the barrel of a cheap retractable ball point pen(tip retracted) or a round toothpick. Keep the tool almost parallel to the surface. Rub in the same direction as the edge, never across it as you could catch the tape edge and lift it up. You said: "What body work problems? the roof, all of that popped up after it was painted." Well, I can't see it in your photos so I will assume from your statement there are problems you can see. If they appeared after painting you may not be using the proper primer. If you are using automotive type paints they may be too "hot" and penetrating through the primer and partially dissolving the underlying plastic or putty. Don't ask me how I know this. Automotive type paints require automotive type primers. ScaleMaster would be your best bet to expand on this. Steve Ok I had never heard of burnishing before. But I did that, I'm not really sure what happened, but i'm going to straighten up the rear bumper stripe and then touch the rest up. I actually used the same brand paint and primer, both meant for each other, to tell you the truth I have no clue why that happened, it's never happened to me before. It also not to serious, just like a little lump near the drivers rear B pillar. Link to comment Share on other sites More sharing options...
Nick Winter Posted May 11, 2010 Author Share Posted May 11, 2010 If you're having issues with seams re-appearing after paint, there is a problem somewhere along the way. It could be a lot of things, but a checklist I would use next time would consist of the following: 1) Make sure the area being worked is stable. That the plastic under any filler or seams is solid enough to resist flexing. If not, add some support...otherwise as you sand and "work" the body, the flexing will expose the seams. 2) Make sure there's not lots of unsupported filler. Use scrap platic/sheet styrene, superglue and microbaloons, etc. to fill the voids. They're more stable than just bondo, and will be more durable. 3) If you're not already, use a 2-part epoxy putty of some kind. Lacquer putty will always shrink. The 2-part stuff is much more consistent. 4) No one of these things is any more or less important than any other. As you do major body work, you have to be careful each step of the way...what you see when you paint it is just a result of what's holding up the paint from underneath. It's really just a lump on the roof above the drivers B pillar. Link to comment Share on other sites More sharing options...
Nick Winter Posted May 11, 2010 Author Share Posted May 11, 2010 I hear you...but it shouldn't be jumping out after the paint...unless I am missing something that was your description. If surface issues show up after the paint that weren't there before...something's gone wrong prior to, or during painting. Ok, It's not to big and dosen't really worry me. Link to comment Share on other sites More sharing options...
spkgibson Posted May 11, 2010 Share Posted May 11, 2010 I'm not trying to be mean,I was just trying to give you some advice,I am working on a 71 Dodge Charger R/T,That i'm converting into a 500,and I had to flatten the hood,And trust me I have 4 days alone spent on working on the Hood and the gills in the doors,So anyways,You need to sand and prime as much as it takes to get it smooth,I always mist on just a light coat of Duplicolor Primer sealer to check my work,Any flaws ,More putty and sanding and primer,I use the 1800 grit sanding cloth from a polising kit with the soft sanding block after I knock the putty down with a medium grit sanding stick. Link to comment Share on other sites More sharing options...
Nick Winter Posted May 11, 2010 Author Share Posted May 11, 2010 I'm not trying to be mean,I was just trying to give you some advice,I am working on a 71 Dodge Charger R/T,That i'm converting into a 500,and I had to flatten the hood,And trust me I have 4 days alone spent on working on the Hood and the gills in the doors,So anyways,You need to sand and prime as much as it takes to get it smooth,I always mist on just a light coat of Duplicolor Primer sealer to check my work,Any flaws ,More putty and sanding and primer,I use the 1800 grit sanding cloth from a polising kit with the soft sanding block after I knock the putty down with a medium grit sanding stick. I knew you weren't, I was just daying that the hood isn't totally inaccurate, it's close enough to the real one, I have 5 days in flattening the hood then about a day and a half in adding the formula scoops and molding them into the hood. Link to comment Share on other sites More sharing options...
Scale-Master Posted May 11, 2010 Share Posted May 11, 2010 “What body work problems? the roof, all of that popped up after it was painted. It is semi correct, give me a break, no ones perfect.†Since you asked…, as stated earlier, your body prep was not done well enough, the paint’s job is not to hide poor workmanship. You are following Mark Taylor’s tutorial right? You say it all popped up after it was painted, who did the prep work? Who did the painting? Who would you say is responsible then? Did it look like this before you did the final assembly? You’d take responsibility if it came out well would you not? If you are happy building to this level, fine, but please don’t ask for help and then try to justify the shortcomings with excuses like no ones perfect. No one is, but some of their builds are darn near because they work for it. Or it popped up after it was painted. You’ll never learn if it is always “something out of your control’s faultâ€. Semi correct is usually not right, i.e. it is wrong. Look at how you can see the deck lid behind the rear spoiler? It is too far forward. Splitting hairs whether it is “WAY†too far or just too far will not make it less worse, better, or correct. Since you posted photos of the car you were inspired by, it is more apparent how far off the model is from the real one. If you had these photos you are using to justify the spoiler is not “WAY†to far back, why didn’t you refer to them or the instructions when assembling the model? You were quick enough to copy and paste the Wiki on Tim Horton, why not use the same amount of energy to look up “BURNISHâ€? I’ll repeat myself, it does not matter how long you work on something, what matters is how it looks. Link to comment Share on other sites More sharing options...
Nick Winter Posted May 11, 2010 Author Share Posted May 11, 2010 “What body work problems? the roof, all of that popped up after it was painted. It is semi correct, give me a break, no ones perfect.†Since you asked…, as stated earlier, your body prep was not done well enough, the paint’s job is not to hide poor workmanship. You are following Mark Taylor’s tutorial right? You say it all popped up after it was painted, who did the prep work? Who did the painting? Who would you say is responsible then? Did it look like this before you did the final assembly? You’d take responsibility if it came out well would you not? If you are happy building to this level, fine, but please don’t ask for help and then try to justify the shortcomings with excuses like no ones perfect. No one is, but some of their builds are darn near because they work for it. Or it popped up after it was painted. You’ll never learn if it is always “something out of your control’s faultâ€. Semi correct is usually not right, i.e. it is wrong. Look at how you can see the deck lid behind the rear spoiler? It is too far forward. Splitting hairs whether it is “WAY†too far or just too far will not make it less worse, better, or correct. Since you posted photos of the car you were inspired by, it is more apparent how far off the model is from the real one. If you had these photos you are using to justify the spoiler is not “WAY†to far back, why didn’t you refer to them or the instructions when assembling the model? You were quick enough to copy and paste the Wiki on Tim Horton, why not use the same amount of energy to look up “BURNISHâ€? I’ll repeat myself, it does not matter how long you work on something, what matters is how it looks. Do you follow me around to kick me in the nuts or something it really seems that way, thanks for insulting me I really Enjoy that, Poor workminship,.........................I'm not starting this again. Link to comment Share on other sites More sharing options...
Recommended Posts