GlueTube
-
Posts
268 -
Joined
-
Last visited
Recent Profile Visitors
3,767 profile views


.thumb.jpg.d0926de2d8346363976c7c0a63bd15d7.jpg)
GlueTube's Achievements
MCM Avid Poster (5/6)
-
Great work! Regards Brian Kroon
-
A Ferrari that raced that is not Red or Yellow! Classic. Well done. Regards Brian Kroon
-
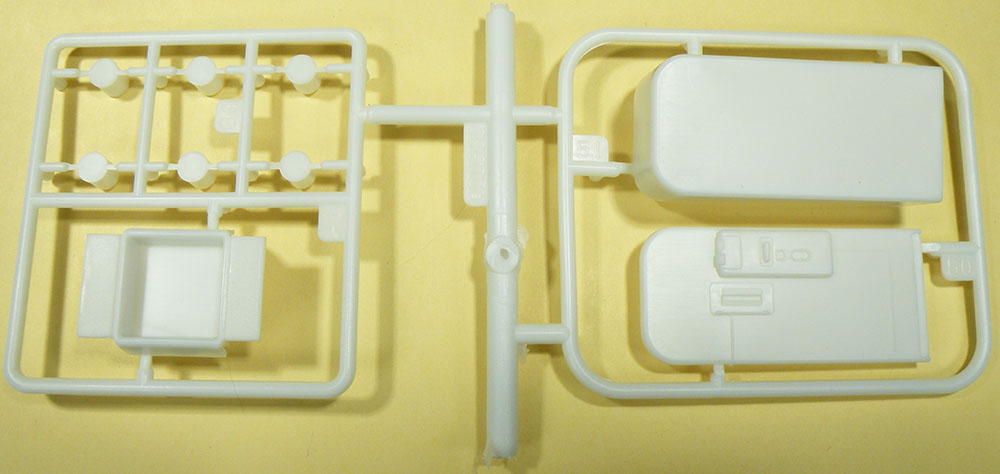
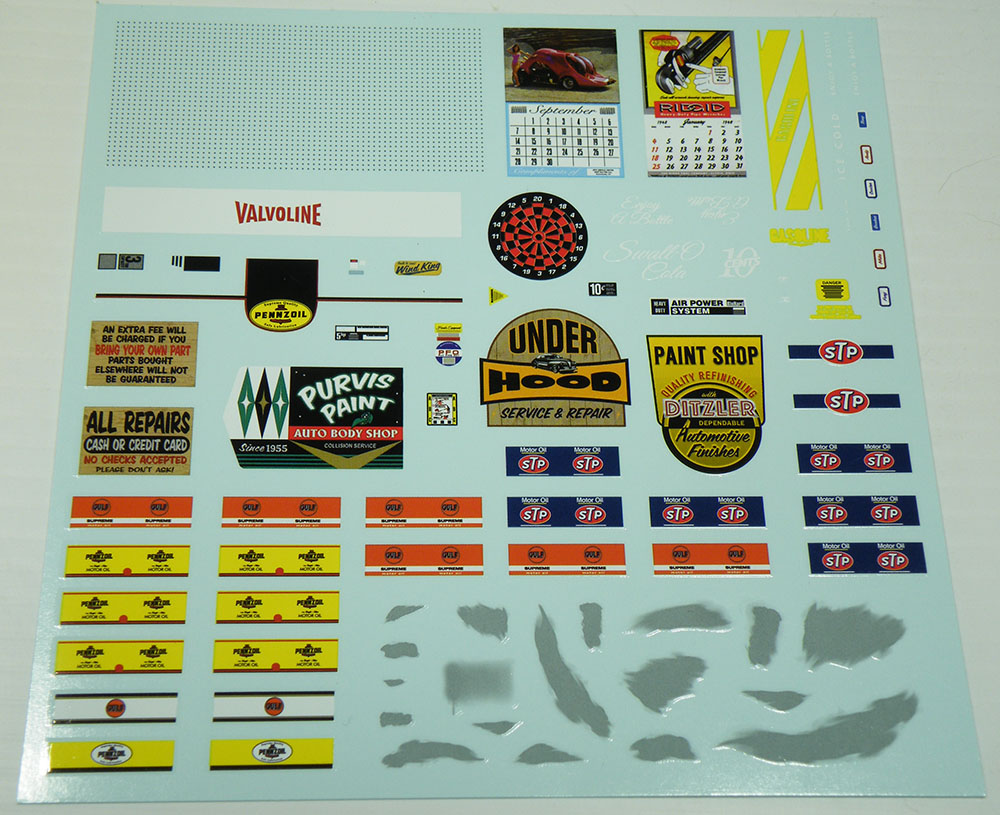
Un-Boxing AMT Garage Diorama Kit #2 Tip Top Shop Part #AMTPP9016M/12 Once the box was opened it was apparent that this kit was going to be of typical modern offering with all components poly bagged including the decals. The first tree I pulled out I will describe as the “Soft Drink Machine”. Molding is nice and simple. Included on the tree are six oil cans and what I believe is to be a card board box for the cans. The molding is best described as heavy and in-elegant on the oil cans. The same can be said for the box which in my opinion could have been better served by providing a paper cut out that would have been much more to scale. Next was the “Jack Stand Tree” that included 4 nice stands that could be assembled at any height. Also provided on the tree were a convincing floor jack and engine stand. Simple but convincing. Rolling along I dug out the “Air Compressor Tree”. Nicely molded and includes a killer representation of a siphon fee spray gun. The “Oil Drum Tree” incorporated a drain pan, fire extinguisher, gas can and pay phone, all period correct for the 1960 early 1970’s time frame. The “Work Bench Tree” included a bench vice that could have the jaws adjusted, giving potential for extra drama on the work bench! The “Figure Tree” was the molding that I was looking most forward to examining closely, as there is a lack of dual scale figures (1/24. 1/25) for the diorama builder to choose from. Sadly, the figures details are molded rather soft, at least by the standards of the modern 1/35 scale figures. Fortunately MAIM, makes a selection of, 1/24 scale heads that can be substituted. Decals round out the offering, with two bizarre image prints. A pegboard hole image that would have been better served by eliminating the image entirely and molding holes into the peg board, similar to the depressions molded into disk brake rotors. The second looks like sanded primer spots. I would have preferred different oil can brands rather than some thing I could easily and convincingly brush paint onto the model.

-
Or display it with the bonnet up or off entirely. Regards Brian Kroon
-
Well done. Regards Brian Kroon
-
Luv the car, like your work, well done! Regards Brian Kroon
-
Great subject matter! A build I've considered as well. You've save me a lot or research, Thanks! Regards Brian Kroon
-
Thanks Ken, I'm looking forward to it. Regards Brian Kroon
-
Lotus 7 Series II Un-boxing Tamiya #24046-1200 The version offered by Tamiya reviewed here was produced by Lotus from 1961 to 1967. Lifting the lid of the box revealed four plastic trees, a photo etch fret, a poly bag of 5 soft polymer tires, a decal sheet and instructions. The largest of the parts trees is molded in white and as per usual Tamiya quality, the moldings are crisp and flash free. This piece contains the body parts, road wheels and engine block. My only criticism comes from the decision to mold the battery into the cowl. It will be a pain in the butt to paint such a prominent piece cleanly. The next largest tree is molded in black and fittingly it contains primarily chassis bits, the radiator and a tonneau cover. Again minimal flash and crisp detail. The next piece was the clear tree that included windscreens, and lamp lenses. Astonishingly this part was not packaged separately but in fact squeezed in with the chrome tree and the photo etch. Fortunately there are no scratches to be found! The last plastic piece is the chrome parts tree. Flawless, it includes wheel covers and headlamp reflectors. Five soft polymer tires (tyres?!) are included and molded quite nicely, but with some flash. No sidewall markings. The decal sheet has markings for street and race versions and looks to be printed nicely. I’ve been commissioned to build this kit and place it in a diorama typical of a British clubman racer circa 1964. I will post the build. Warm Regards Brian Kroon
-
Great build Sir! Perhaps I missed it, what paint was used? It is stunning. Regards Brian Kroon
-
Very Zippie! Luv the figures! Regards Brian Kroon
-
Ahh subject matter that's dear to my heart! Ill be following along. Regards Brian Kroon
-
Great info guys! Just my observation that buying the printer and turning it on is the easy part. One MUST NOT underestimate the time it takes to learn how produce 3D files with CAD software. Just learning to drawing wheel in scale is difficult enough, but learning the ins and outs of making a good print, well that's an art in itself. (don't ask me how I know) Perhaps the future lies in fellows that will produce down loadable files to which the modeler will select and print himself. Given that most have jobs and build models for relaxation....well I just cant see the average modeller investing hundreds of hours into perfecting 3d Modelling with cad software so he can generate a few parts. Pros who are running a business …..YES! The average modeler that frequents this board, I just cant see it. Warm Regards Brian Kroon
-
Well done Sir! What did you use to replicate the stucco wall finish? Regards Brian Kroon
-
Great job, resin, especially the older stuff can be such a bear to build. Regards Brian Kroon