David G.
-
Posts
9,634 -
Joined
-
Last visited
3 Followers


Recent Profile Visitors
20,347 profile views


David G.'s Achievements
MCM Ohana (6/6)
-
That's a cool build! I really like the color combination and stance. David G.
-
Fabulous work Ken! Excellent detail, right down to the Ford badge on the radiator shell! David G.
-
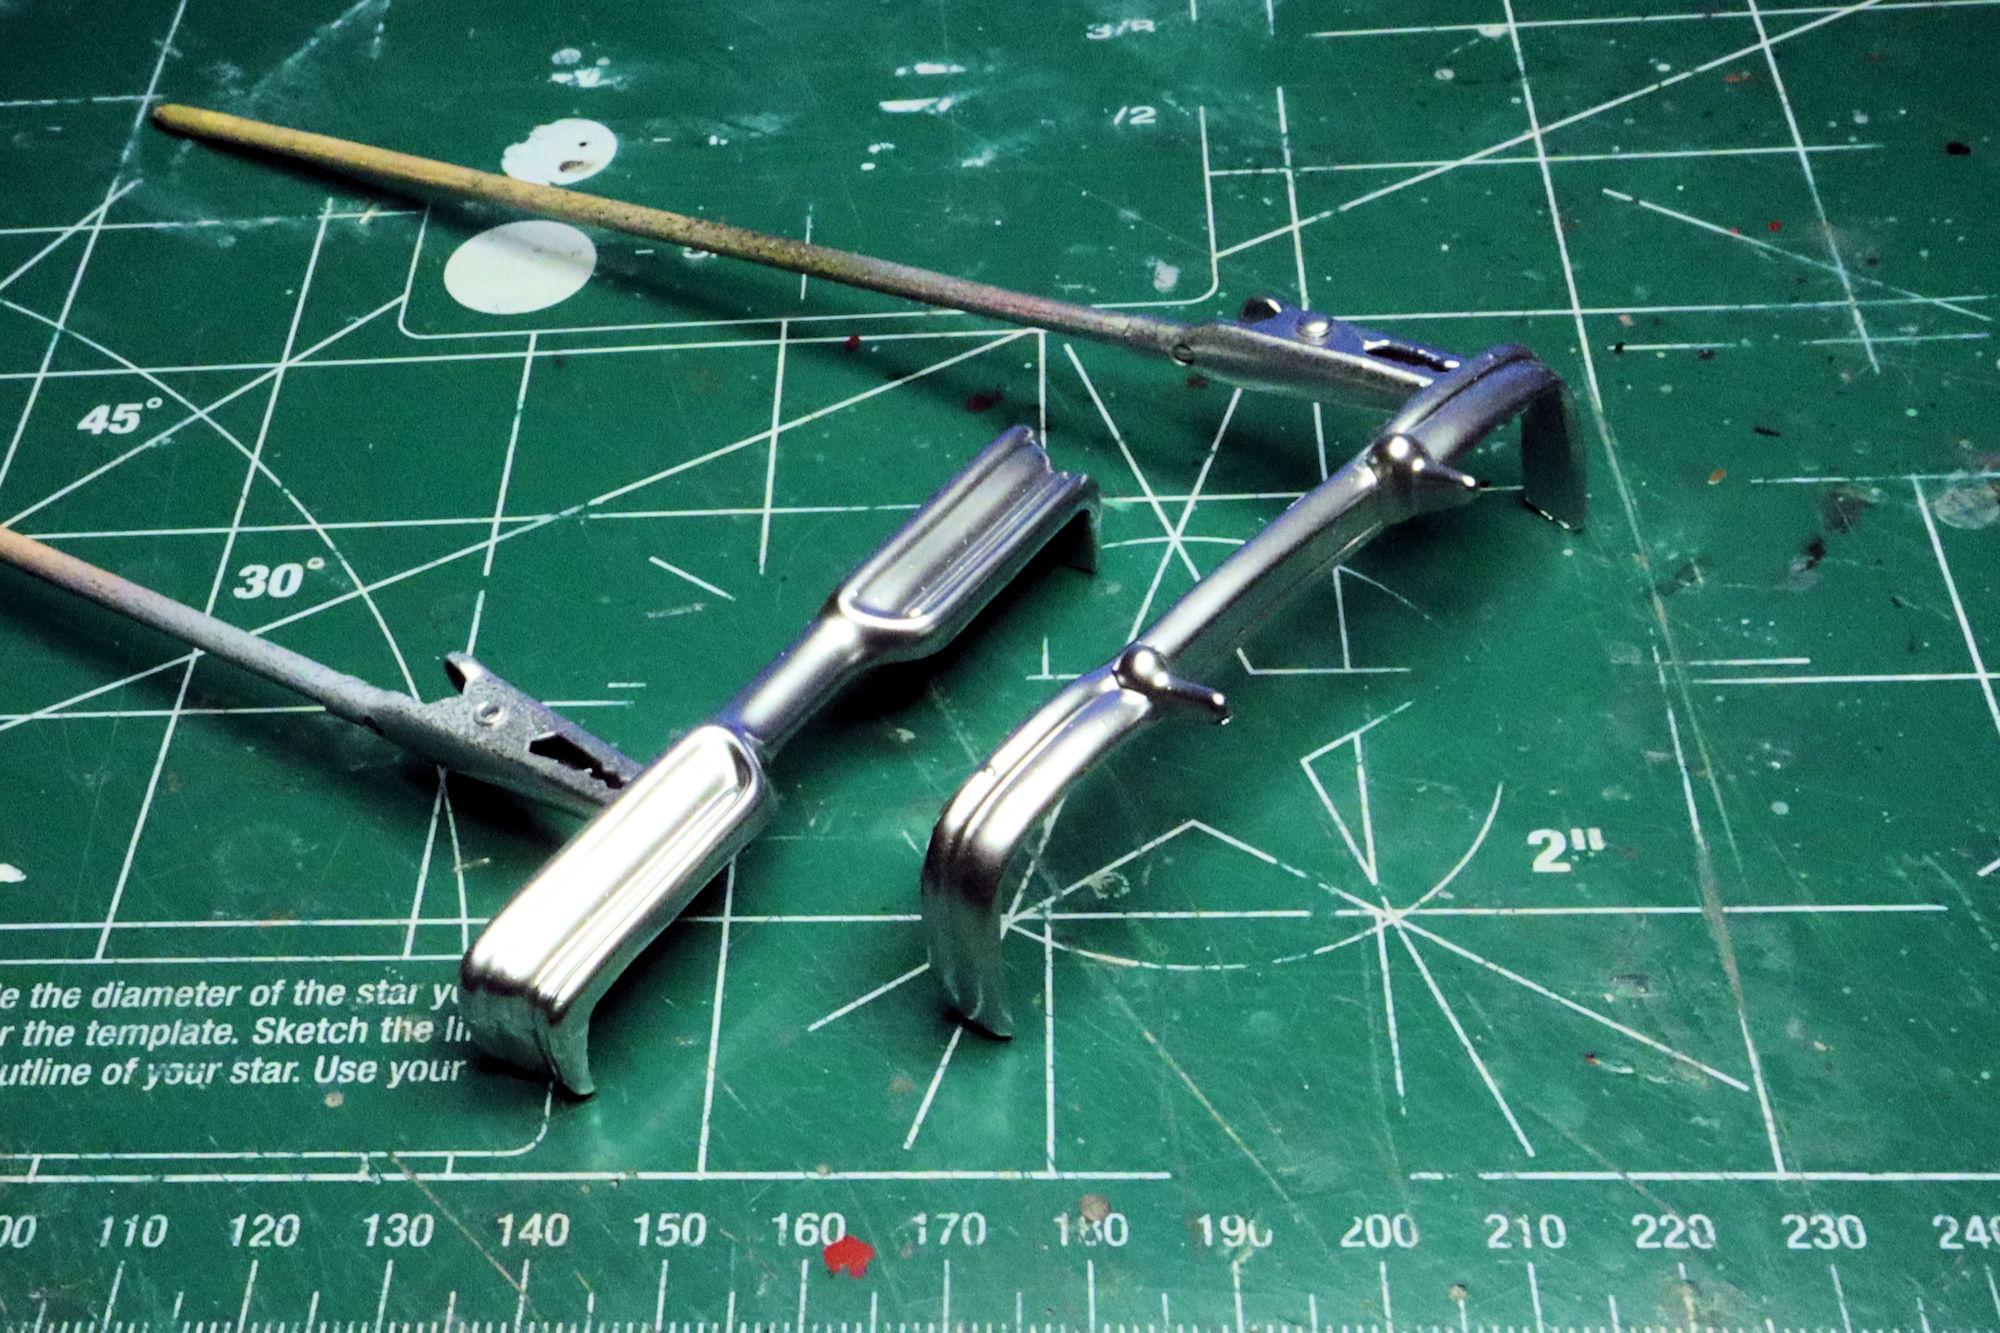
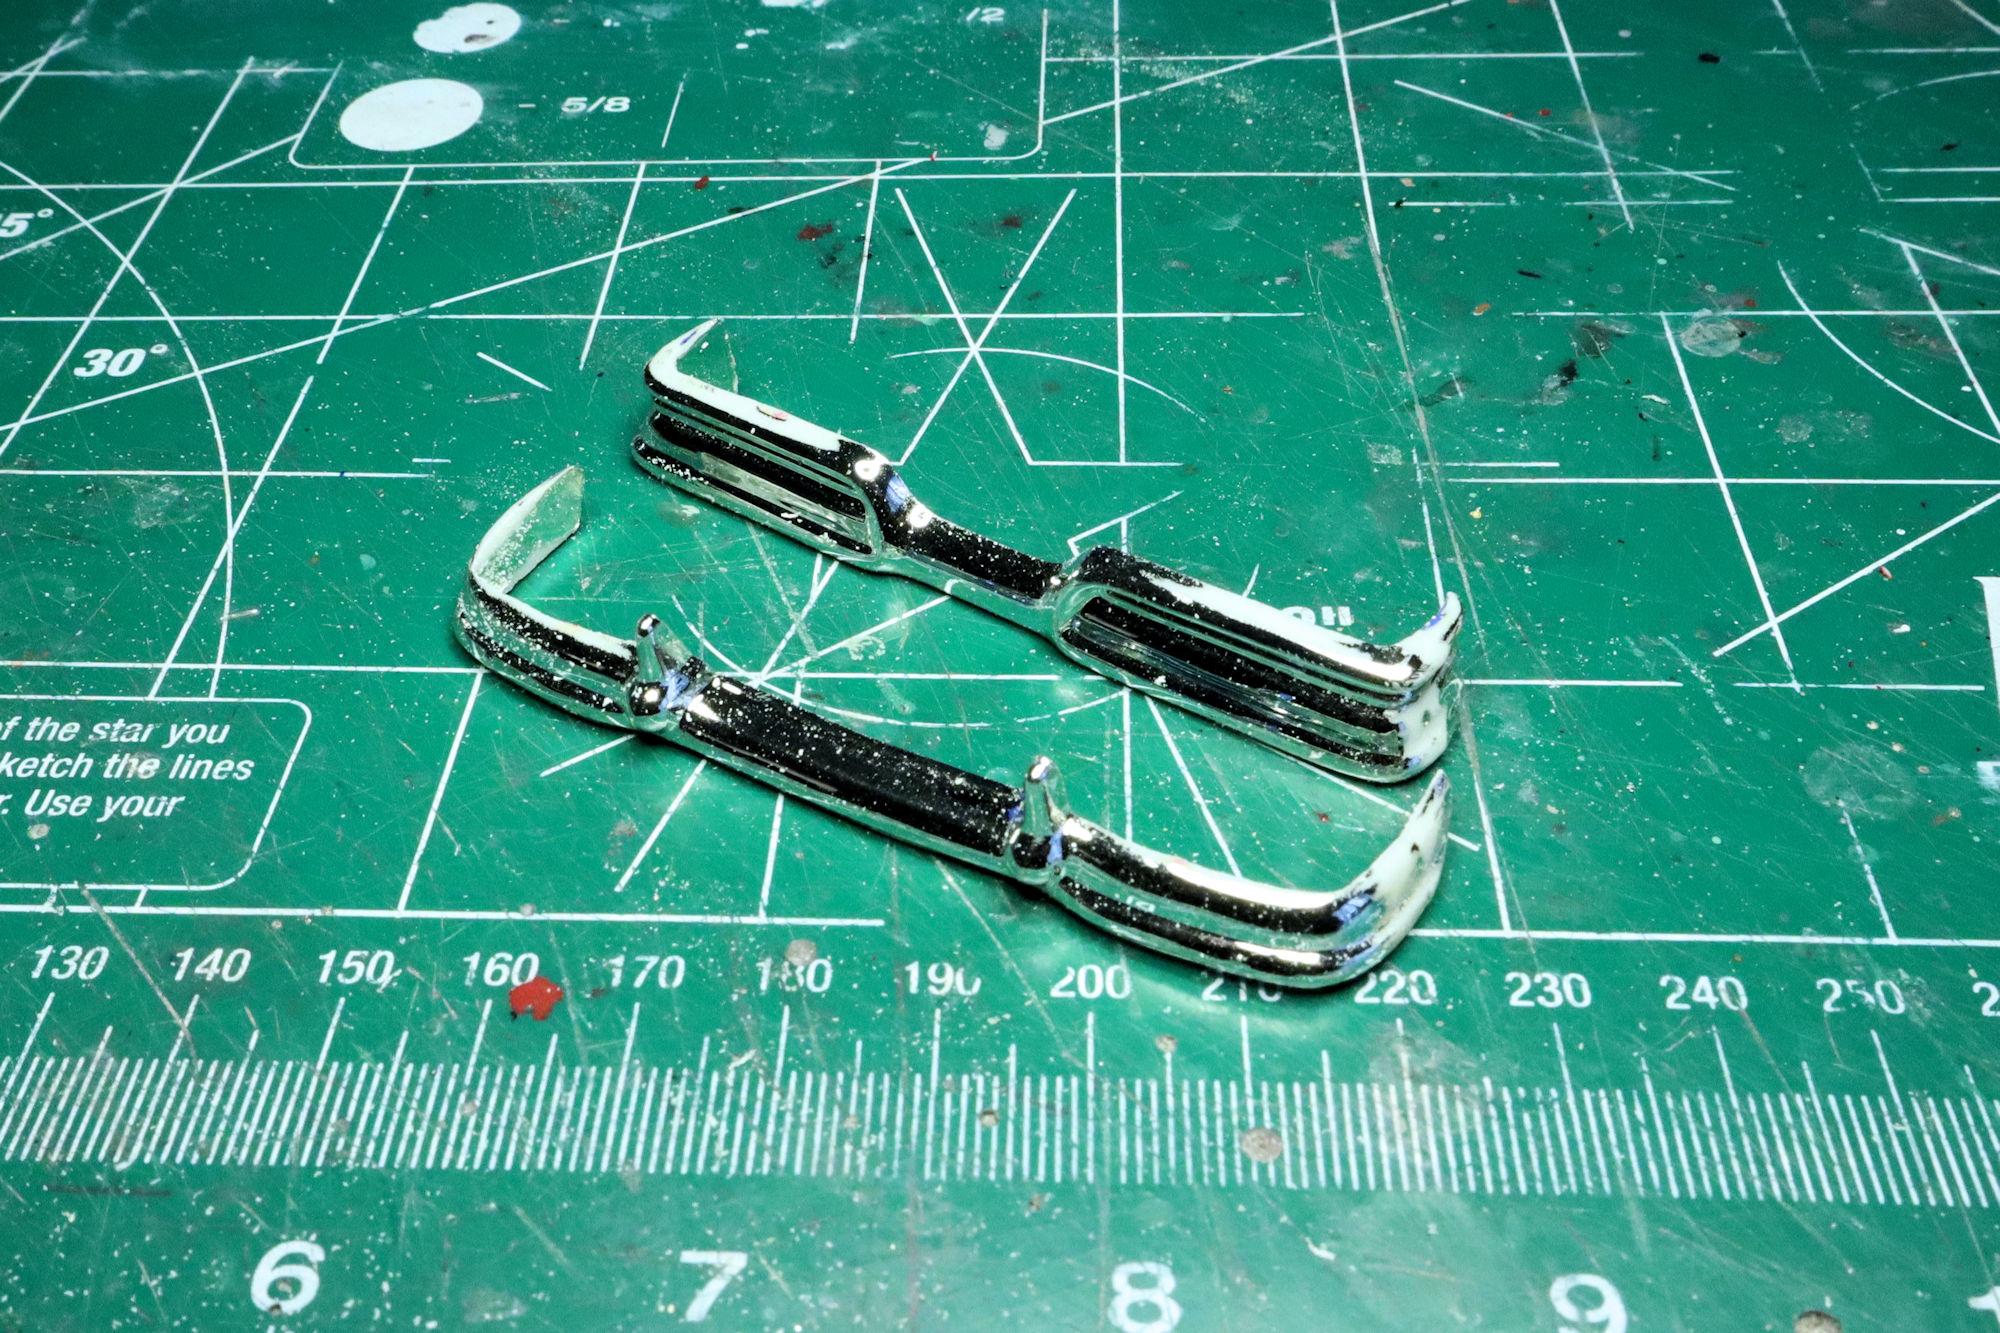
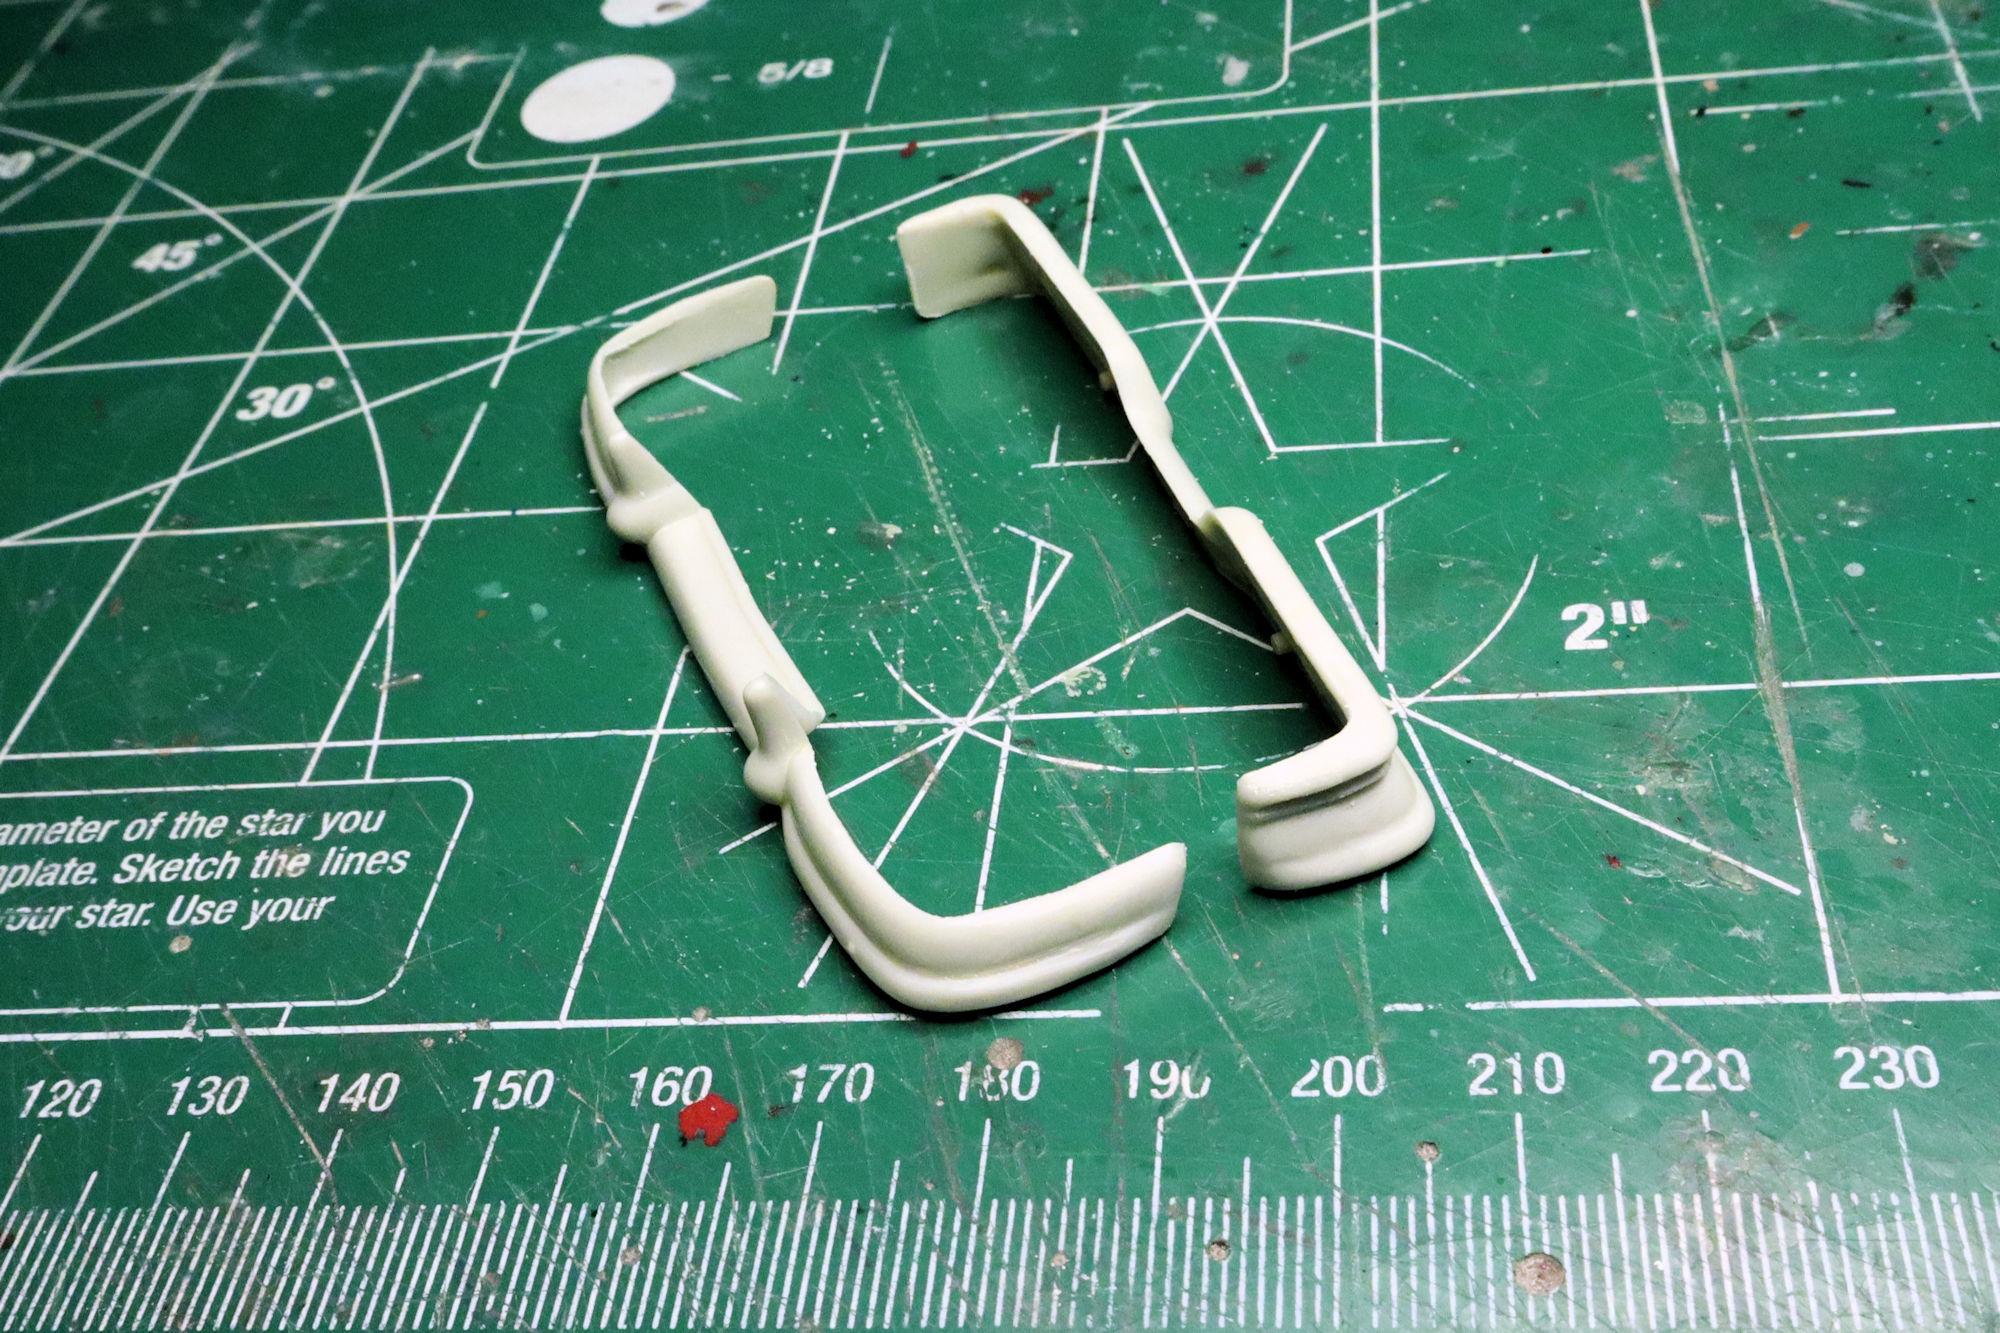
Hello Everybody! While the paint cures, it's time to focus on some other details. AMT placed the attachment points on the tops of both bumpers, That, with chunky parting lines and flash means filing, stripping and rechroming. The old chrome stripped and most of the file work done. It's primer time! The bumpers are done. Lately I've been using Rustoleum Chrome spray paint. It's easier to use than Alclad and I'm fairly happy with the way it looks. Strangely, I've almost caught up with myself on this build. I'm at the point where I need to take more photos before I can post another update. That means I'm either slacking off or getting close to being finished... probably a little of both. As always, thanks for taking the time to look and please feel free to post any comments you may have. David G.

-
Great color combination, excellent foil work, nicely detailed interior, that's one sweet build! David G.
-
This looks like it will be a fun build. Awesome color choice! David G.
-
Thanks for your post David. I've tried to make a habit of taking my progress photos at the beginning of my build sessions. I find that this helps me in a number of ways. It helps me plan what I want to get done in that build session. It helps me get my head into the work. If I neglect to take photos of key points of progress during the build session, I'll at least have a summary of the work completed when I take the snaps at the start of the next session. To further help me keep track of my builds I also have my Work-Shelf Wednesday album on my Model Cars, Mostly Facebook page. It's an album where I post a weekly photo of the little shelf where I keep my in-progress builds. With the weekly photo I post some notes describing what's on the shelf, where I am in the progression of the build and what my plans are for the upcoming week. There's a link to my Facebook page in the signature. Here's the photo from my most recent posting. Which I think also answers your question about the racing stripes. I also have a spreadsheet but that's a story for another time. Thank you for your kind comment regarding the wheels. The appearance and look of the wheels is more important than some people realize. It's one of those details that everybody sees but not everybody notices. When building a daily driver, a junker or most any car for that matter, few things break the illusion of the build more effectively than glossy black tires and hyper shiny chrome wheel covers. For the tires, I most often just roughen up the tread with a coarse emery board and brush the tread and sidewalls with a fairly stiff nylon bristled brush. I tried spraying them with dull coat but I find that it tends to get mucked up while handling (sometimes manhandling) the the tires onto the wheels. Thanks again for your post. David G.
-
That looks great! David G.
-
Hello Everybody! I'm sure that many of you have worked out that my work-in-progress postings are a couple of build cycles behind my actual build-in-progress... progress. So while I post here about the re-chroming of the hubcaps, I'm currently working on finding suitable decals so I can get this build wrapped up, which is why the current conversation doesn't seem to match up to the current updates. That being said... Here's the next update on the Disney Love Bug. The "chrome" on the hub caps was a bit stained and not too good looking so I stripped and "re-chromed" it. The newly chromed hup caps have been mounted to the wheels along with the de-shined tires. I've also completed the foil work. There wasn't much of that to do. And just for grins and giggles I installed the rag top and both of the deck lids. As always, thanks for taking the tine to look and please feel free to comment. David G.
-
They're not as thin as water-slide decals Len, but they're thinner than the stickers included in the kit. Considering my recent experiences, these vinyls are looking better all the time. I'm nearing the end of the "I just want everything to be right" phase of the build and entering the "I just want everything to be done" phase. David G.
-
Hi Jim, What I'm using is actual BMF that I ordered directly from the Bare Metal Foil company. It's about the best quality that I've had in quite a while. It's the "New Improved!! Chrome" as the label on the package says. -D-
-
Thanks David, it's actually a pretty straight foreword AMT type of build. Like I say, "Ain't nuthin' to it but the work to do it." Thank you John, the march continues. Thank you Randy, I appreciate that. I'll be using them more often in the future, great little things they are! That's funny how that happens sometimes Len. Like it was meant to be. Thanks for all your comments, I do enjoy reading them and responding. David G.
-
Thank you both. That's actually my next option, these are the very same ones I ordered as a backup! 😮 I was just a little put-off by the fact that they're vinyl decals, not waterslide decals. But it looks like they are going to be my best option. As you can see, I've been fiddling with them a bit already. Thanks for the tip and the endorsement! David G.
-
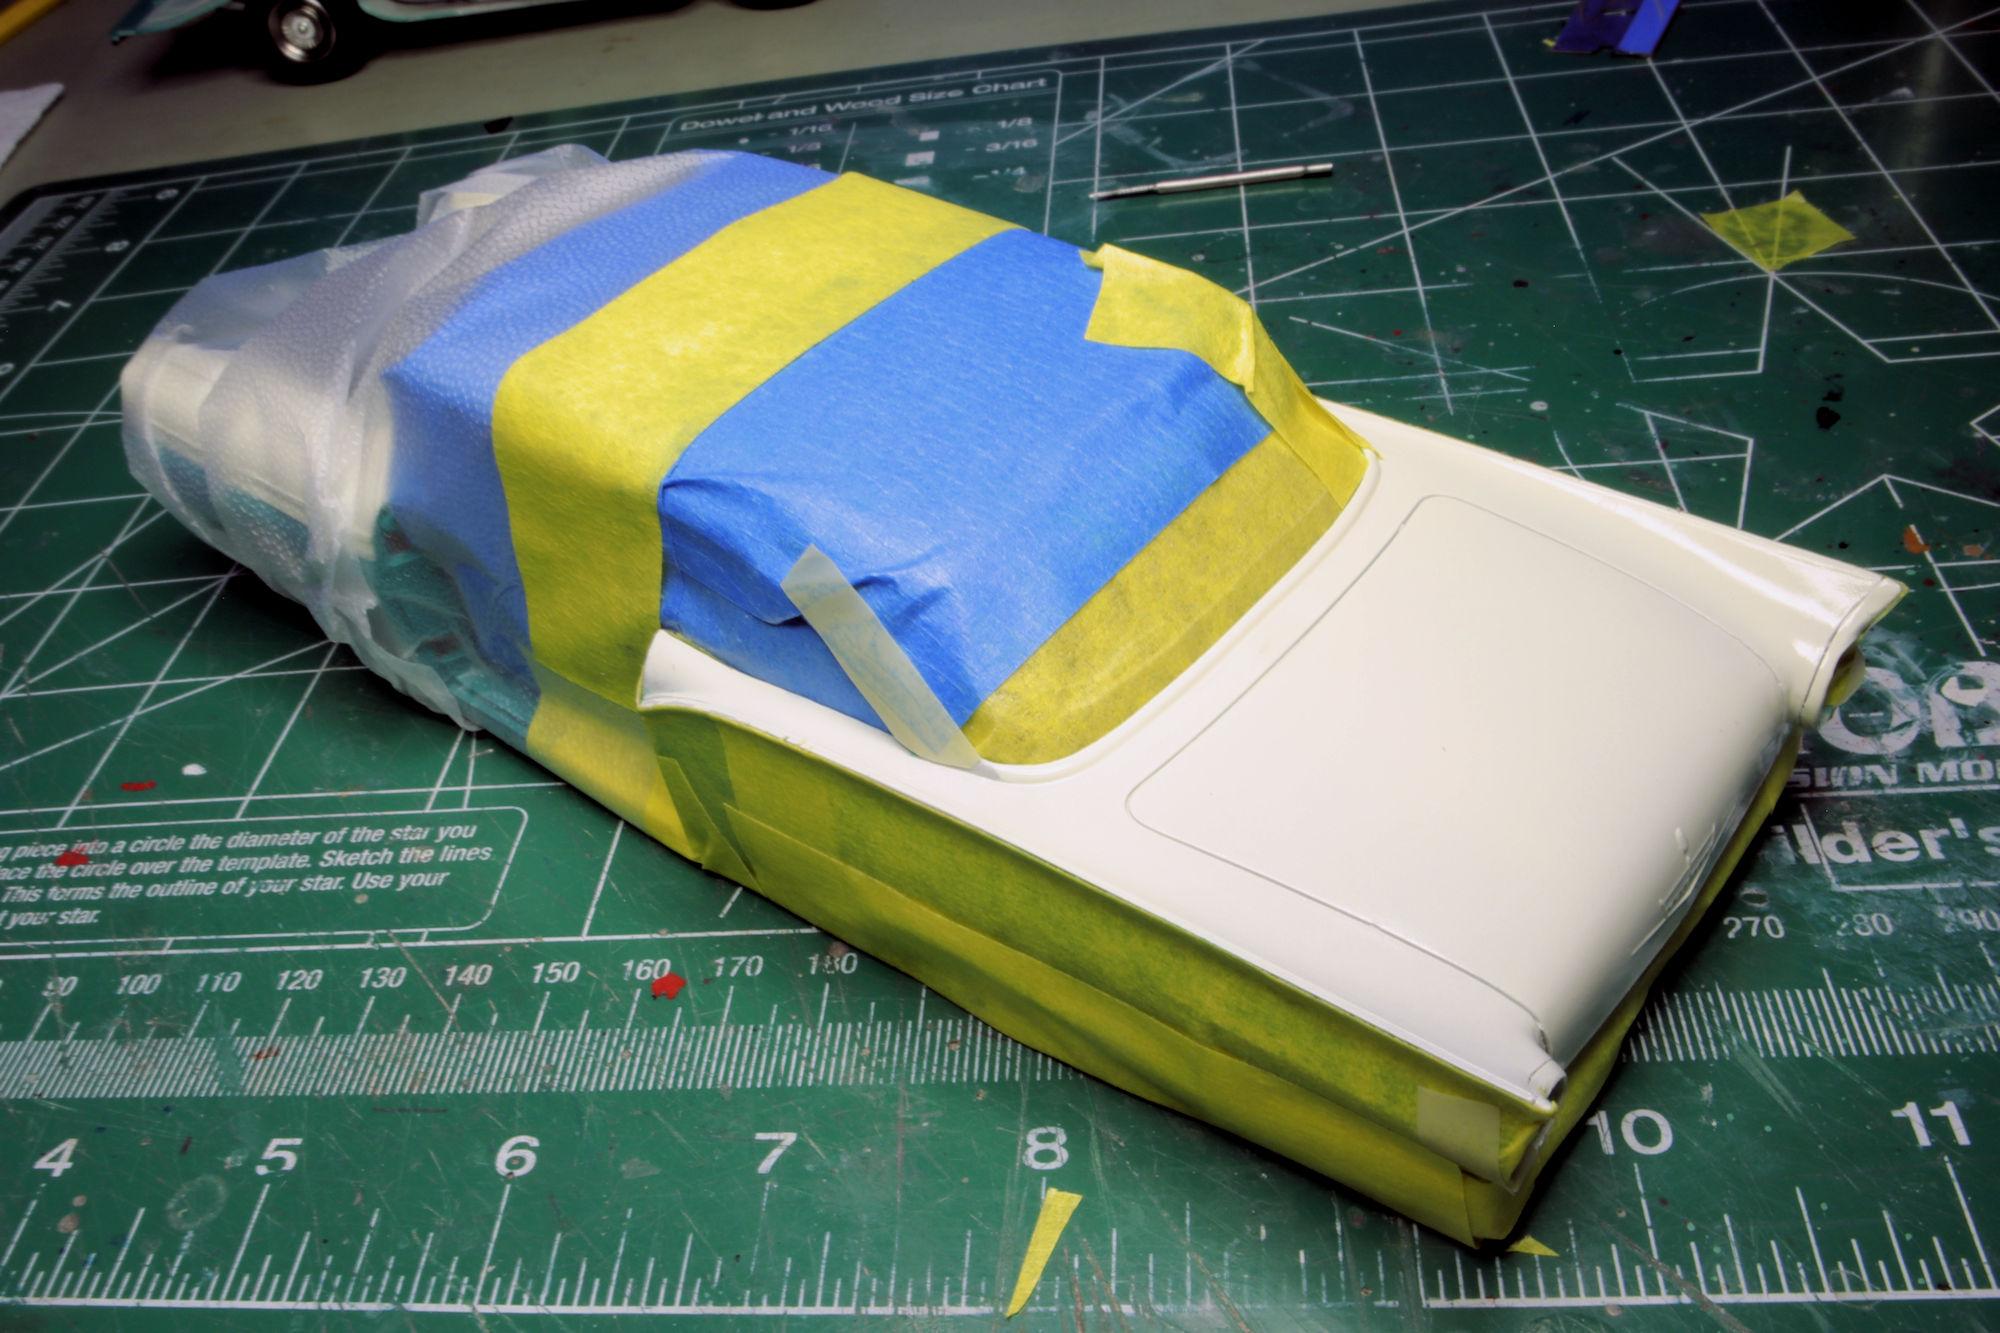
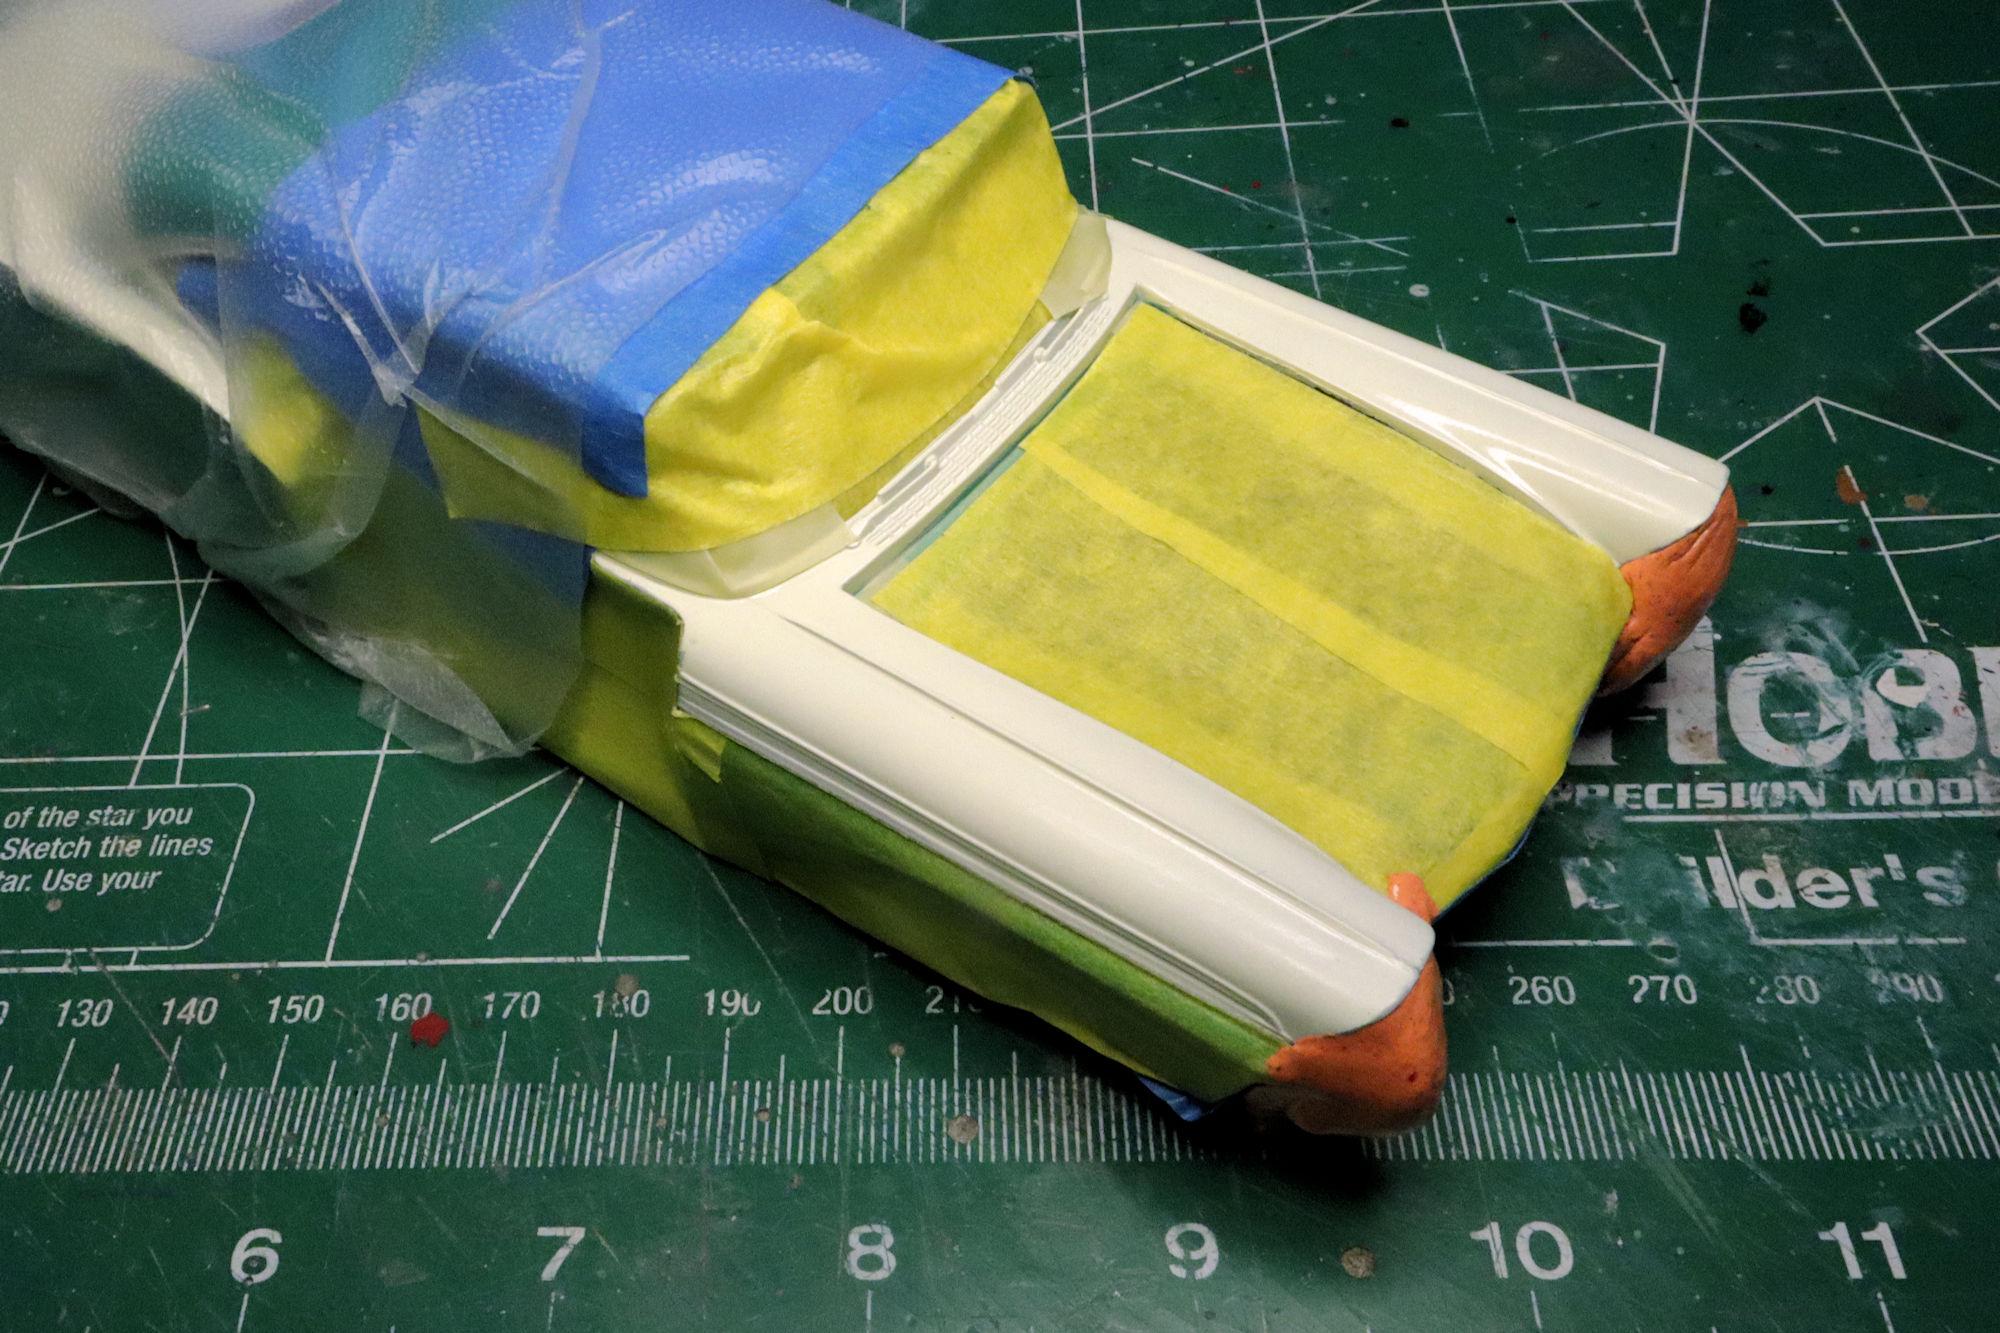
Hello Everybody! There are a few good things about having multiple builds going on at once. One is that if a particular build starts to become an annoyance, there's always another build that you work on. This can give you some valuable off from the one that's troubling you, allowing you to let that one simmer on the back burner of your mind for a while. So, while I fuss and fume with the frustrations of my Herbie the Love Bug build, I turn my attention once again to the Ford Hardtop. A quick test fit to check the door alignment. This is also a test of the new BMF I ordered. It works well! After cleaning up the green overspray and other masking mishaps I decided to spray another coat of Racing White on the front fenders. This will patch up a couple of areas that got thinned out during the cleanup and even out any shade differences between the fenders and hood. The front fenders came out well enough that after allowing them to cure for several days, I went on with masking for the paint on the rear half. There's actually eight days between these last two photos. The march continues! As always, thanks for stopping by for a look and please feel free to post a comment. David G.
-
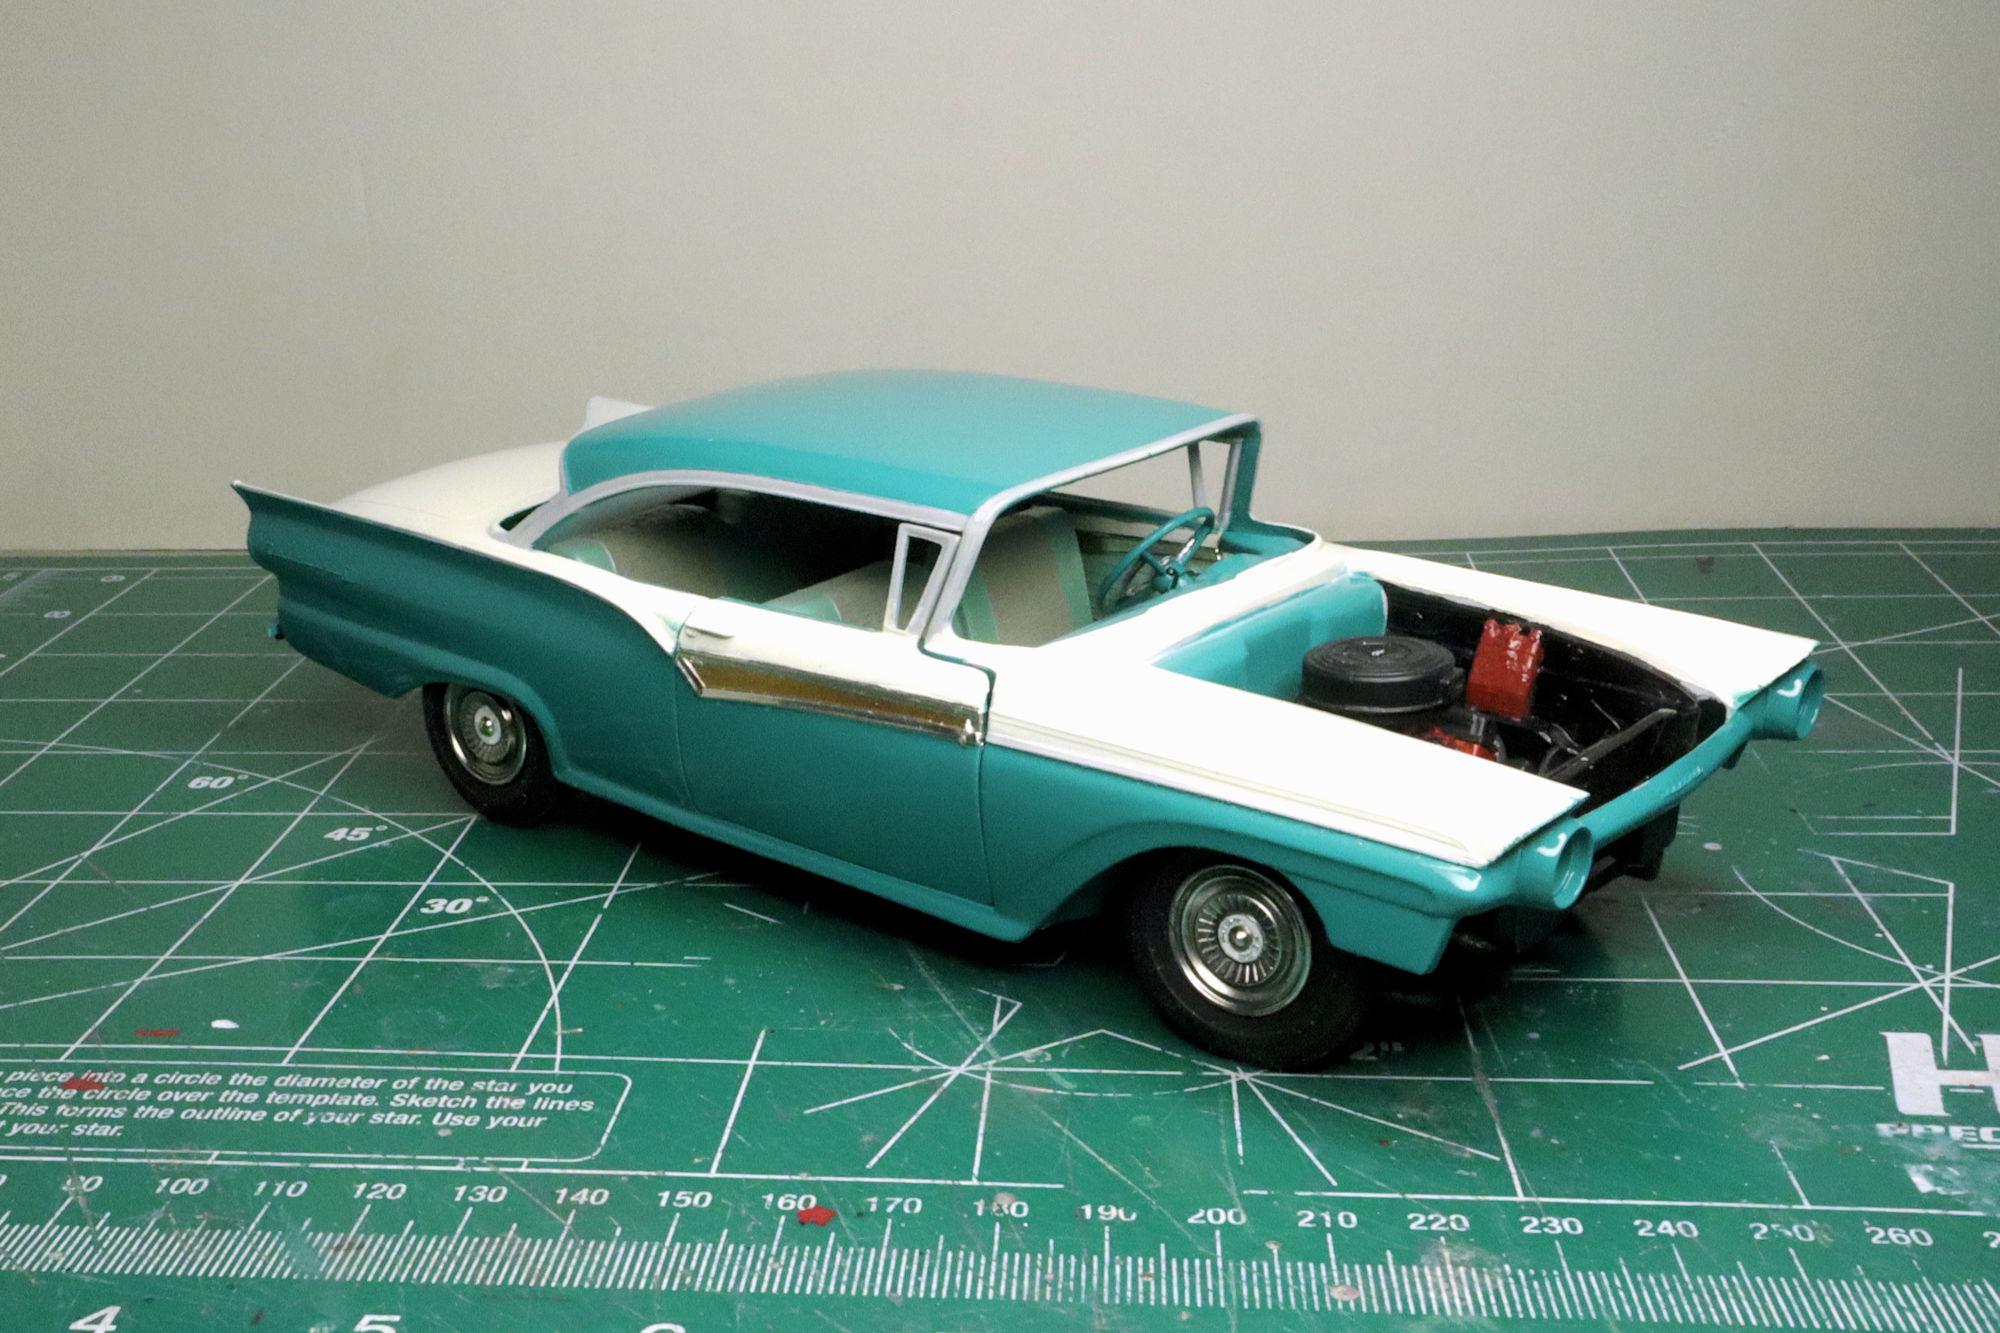
Beautiful color combination and paint, clean and tight build, and a great stance. It's everything a custom Mercury should be! If you still plan on attaching the side pipes you may wish to consider using some PVA canopy glue. I find myself using it in such instances as the one you described. It works well for attaching light-weight nonstructural parts. And it does so without much chance of marring the paint finish. It takes longer to cure but holds fast once it does. David G.