.png.e8a693cd7d5b778fc679de108eeb7eb9.png)
KurseD
-
Posts
62 -
Joined
-
Last visited
Recent Profile Visitors
2,034 profile views


KurseD's Achievements
MCM Regular (3/6)
-
.thumb.png.da75fca4d365911b38df51c5407cdaf2.png)
"Danger Ranger" AMT 77 Econoline Van
KurseD replied to KurseD's topic in Model Trucks: Pickups, Vans, SUVs, Light Commercial
Thanks for all the compliments guys, really appreciate that. -
"Danger Ranger" AMT 77 Econoline Van
KurseD replied to KurseD's topic in Model Trucks: Pickups, Vans, SUVs, Light Commercial
One of my favorite songs as my 1:1 is a Chevy 😁
-
"Danger Ranger" AMT 77 Econoline Van
KurseD replied to KurseD's topic in Model Trucks: Pickups, Vans, SUVs, Light Commercial
Thank you guys for all the compliments! It was a pretty fun build, aside from the typical AMT stuff I seem to find on every one of their models I build like an over abundance of flashing and mold marks, weird things like numbered parts in the instructions but no numbers on the actual sprues/trees, and things that don't quite make much sense like why is the steering wheel sitting ON the driver seat. All that stuff aside, I still enjoyed building it and screwing around with a bunch of new stuff. -
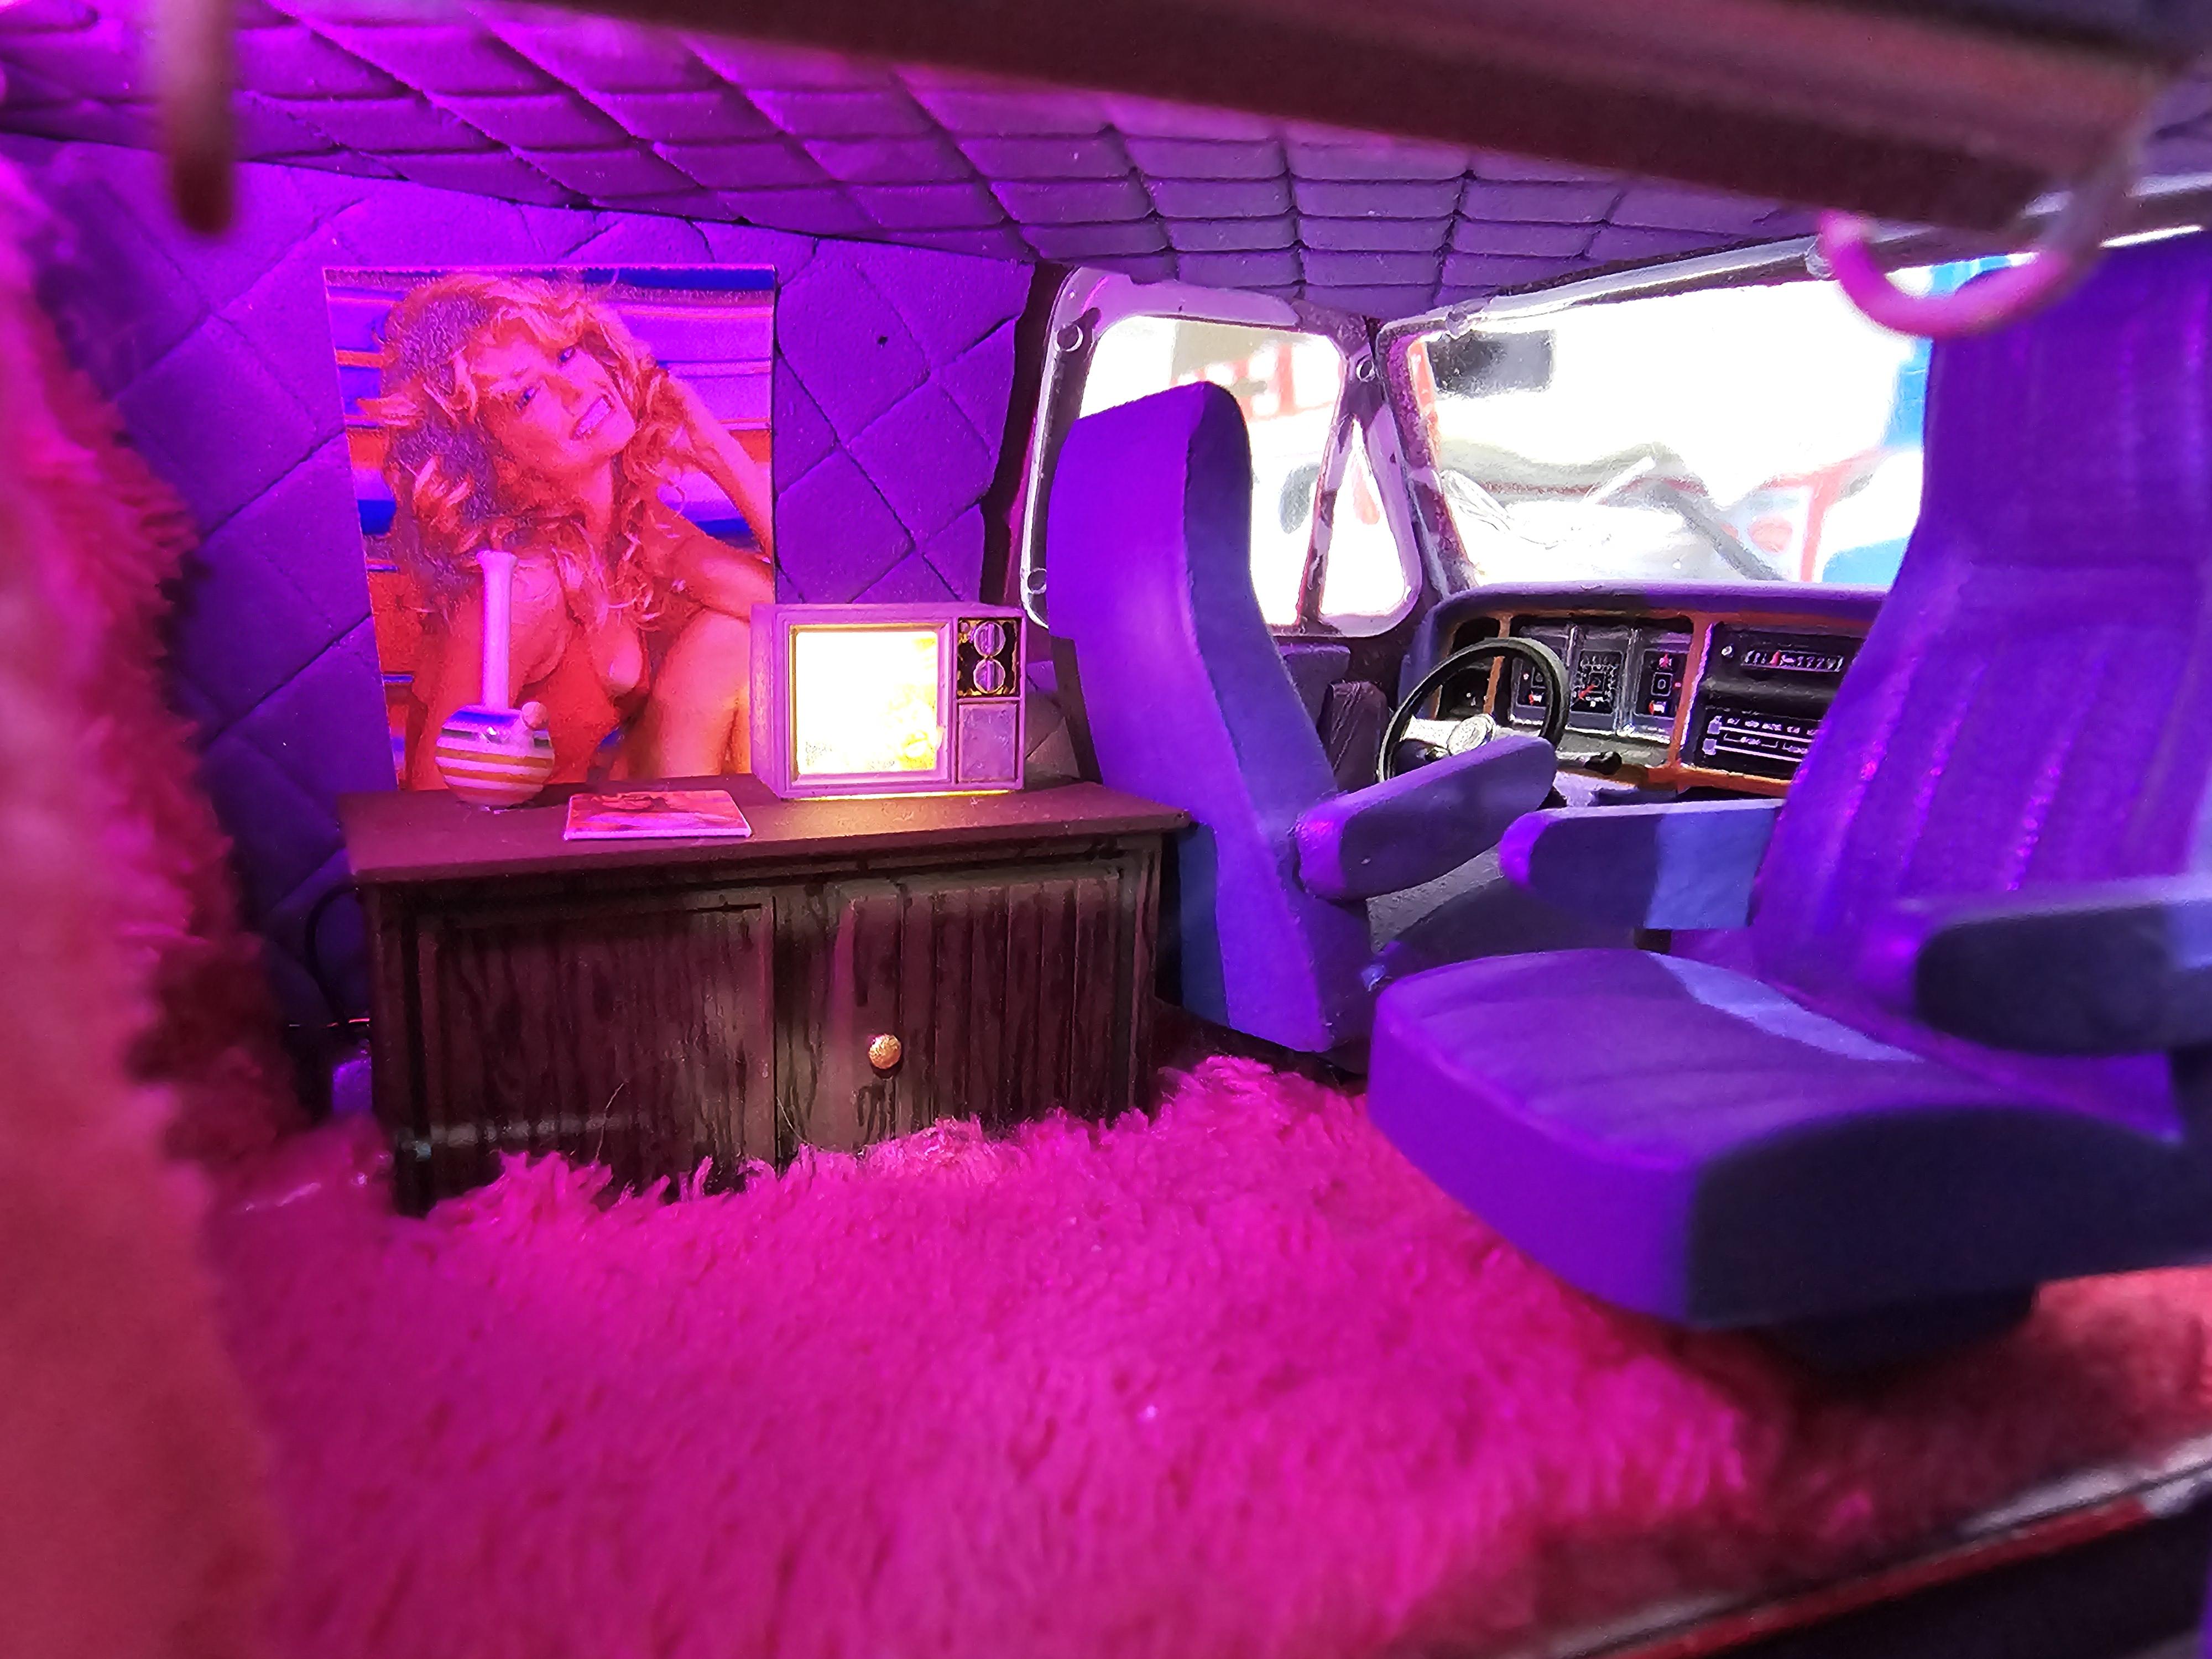
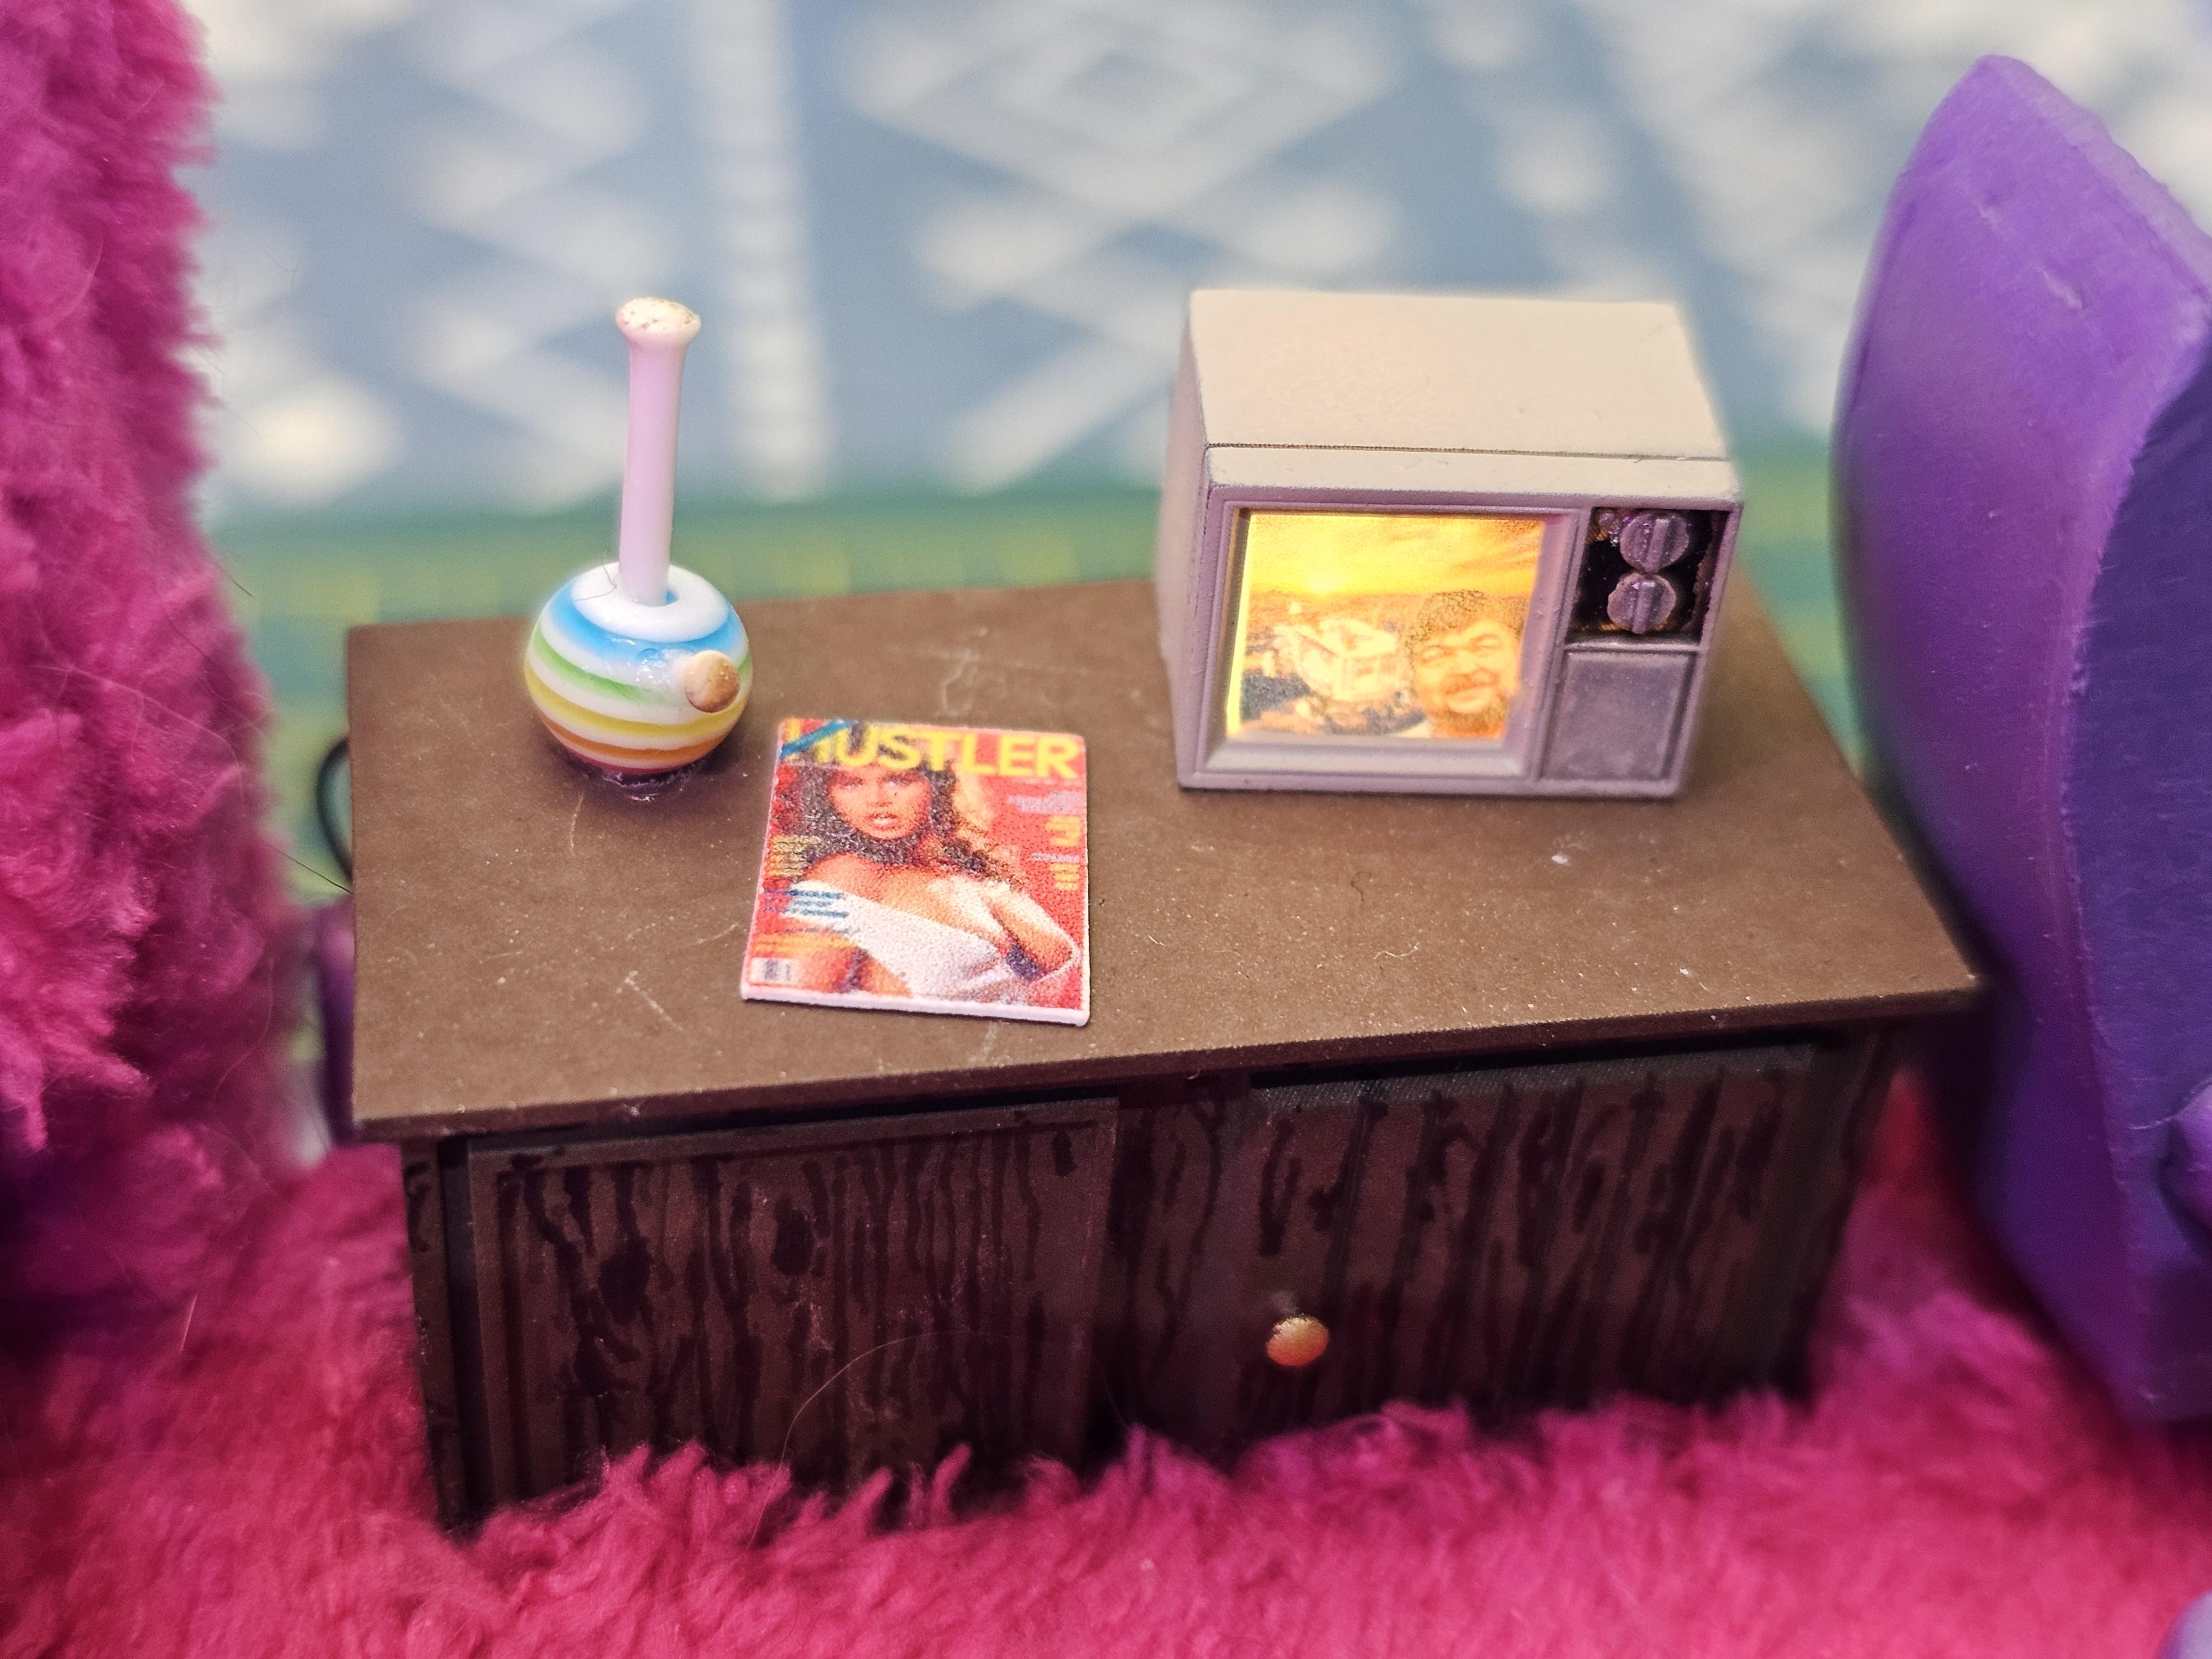
Just finished this one up for a tribute build and auction at Herk's Modelworks on Facebook. Herk passed away in December and a bunch of us in the group are doing builds to auction off on March 16th, sending the proceeds to his family. I'm quickly learning that AMT's kits are a hot mess anymore, at least a lot worse than I remember them being when I was younger, but I still had fun with it. Hopefully he would be proud of it. Paint is from Tropical Glitz using their hot pink basecoat called "Miami Nightlife" and airbrush fade of violet candy around the lower 1/4. I designed and printed the TV, the bar cabinet, and the side pipes. LEDs from Evan Designs (two pink lights in the rear cabin and a warm white for TV backlight). Shag carpet courtesy of a hot pink kids coat from Goodwill, foam bed is covered in some hot pink zebra striped kid's coat material from Goodwill, and diamond stitched interior panels are made of craft foam. Gull wing side door, and some Slixx decals. Also made the pic of Herk with his ice cream truck build for the TV. Threw some magazines on the dash and cabinet, made a "fancy smoking pipe" from a bead set I found at Hobby Lobby, and added a Farrah Fawcett poster to the wall. I think that's about all, but probably forgetting something. Hope you dig it. 😎🤙
-
Thank you for the wonderful responses guys. I really appreciate it. Didn't do well in the monthly build off, but I'm not discouraged at all. Had a great time building and learning.
-
Thanks guys. I will recommend another kit if you plan on building this car.
-
Thank you guys.
-
Last part was to give it some track grime. I used the airbrush with some black acrylic to lightly mist a bit here and there, to the centers of the rims, behind the wheel arches, and a few other spots all around the body and chassis. Then I used a toothbrush dipped in the black to flick tiny drops for rubber chunks behind the wheels. I finished it off with some Rustoleum clear which I tried spraying lightly for a mild gloss to closer replicate the original 70s single stage, but after two attempts that were way too dry I gave up and the third coat went on wet as heck. Frustrated, I took a coffee break and sat to shoot the breeze with my friend that had come over to watch me airbrush. 15 minutes later I checked the model out and to my surprise it had dulled down to the perfect sheen. Thank goodness for cheap rattle can clear I guess. I doubt it will win the competition, but I still had fun building. I can say for certain I will NEVER build another of these kits though.
-
Next was adding the decals. After fighting the long red stripes which I would have preferred painting, I only tore off two small pieces thankfully. I was able to stick one piece down, and touch up the other with some red paint. Then came eleventeen million more decals and I was done. The Goodyear decal on the driver fender is the one from the Mike's Decals, the one on the passenger side is from the Davey Allison kit. I locked the decals down with two coats of Krylon satin clear when done. I didn't like the raised letter tires that were included with the kit, so I ordered some from PPP. I decided after about 5 seconds of hand sanding that I was done with that mess and made a quick sanding jig for my drill using some washers, a bolt, and a couple nuts. I had a horrible time getting the chassis fitted to the body due to the secondary firewall and trunk divider. I shaved a good 1/16th of an inch off each, and still couldn't get the fit I wanted, but decided that was enough trimming and called it quits. If I had trimmed anymore off the firewall, the engine would have pushed the hood off anyway. The whole chassis sits toward the passenger side and is crooked. UGH! This kit was a serious test of patience. Next up was gluing my fingertips and some string to my cutting mat and some masking tape in an attempt to make window net. Not a fun process. I glued the net to the rollbar, then to the body.
-
Decided to try entering a builder's contest on a Facebook group to see if I was up to the challenge. I'm pleased with the outcome, it's full of flaws, but I'm not beating myself up as it was definitely a learning experience. The group I'm in does a monthly contest and this month's was "Builder's Choice", but it had to be a fresh kit, not a rebuild or previously started. I've had this 75 Laguna kit stashed away for about 6 years or so. I've built quite a few models in my day, and while I don't think of myself as an expert, I've got the basics down by now. This darn kit tested my patience every freaking step of the way. It is hands down the worst quality kit out of the box I have ever dealt with. Nothin fit right, flashing was awful, it just seemed overall like they didn't even care that this thing was garbage when they re-released it. It had the incorrect rear suspension with a leaf spring instead of the trailing arm suspension it should have had. The slip chassis for different wheelbase sounded neat, but lacks a good half inch between the end of the chassis and the rear bumper. They used a Chrysler or Ford engine with a front mount distributor instead of a rear mount like a Chevy should have. 100% JUNK! The chassis got a kit bashed rear axle & suspension from eBay and airbrushed satin black with some silver on the floor pans. I used some wiring from a USB cable for the battery cables, a bit of painted masking tape for seat belts with chrome backed carboard for the buckles and brackets. I dotted all of the rivets and the battery terminals with a silver sharpie. All other details were brush painted. There was a pre-existing hole in the back of the intake manifold, so I drilled through that into the block and added an Arrowhead Aluminum pre-wired distributor. I used some very small shrink tube for the plug boots, and scratch built a coil out of scrap styrene. Decals were from Mike's Decals, and they were very good quality with one exception. I could not find a second straight Goodyear decal for over the front wheels to save my life. I even looked all over this picture I had taken for a good 30 minutes while taking a break or two to let my eyes adjust, still nothing. I scrounged through my spare decals and came up empty. Finally broke down and opened an old 1991 Davey Allison kit and found one there. It was a bit more dull than the original, but same exact size, so that worked out well. I chose to go with craft store acrylics from Michael's and Hobby Lobby as I thought I would be able to find more color choices there to try replicating the original car. I matched the decal colors the best I could and rolled with it. Very happy with the colors. I started with a white base, then added the "ripe apricot" orange color, last topped off with the red.
-
1976 Chevy Boogie Van
KurseD replied to KurseD's topic in WIP: Model Trucks: Pickups, Vans, SUVs, Light Commercial
Eh, I'm more of an ELO, Black Oak Arkansas, and April Wine kind of guy myself. 😁 -
1976 Chevy Boogie Van
KurseD replied to KurseD's topic in WIP: Model Trucks: Pickups, Vans, SUVs, Light Commercial
Thank you. I can do a video on it soon hopefully, pretty crazy schedule at the moment, but I will try to get one done for you. Honestly it just take lots of practice and finesse. I lay all my colors on extremely lightly with the airbrush and the a lot of time while spraying. Slowly building up my colors until I'm happy with the amount I've laid down. -
KurseD changed their profile photo
-
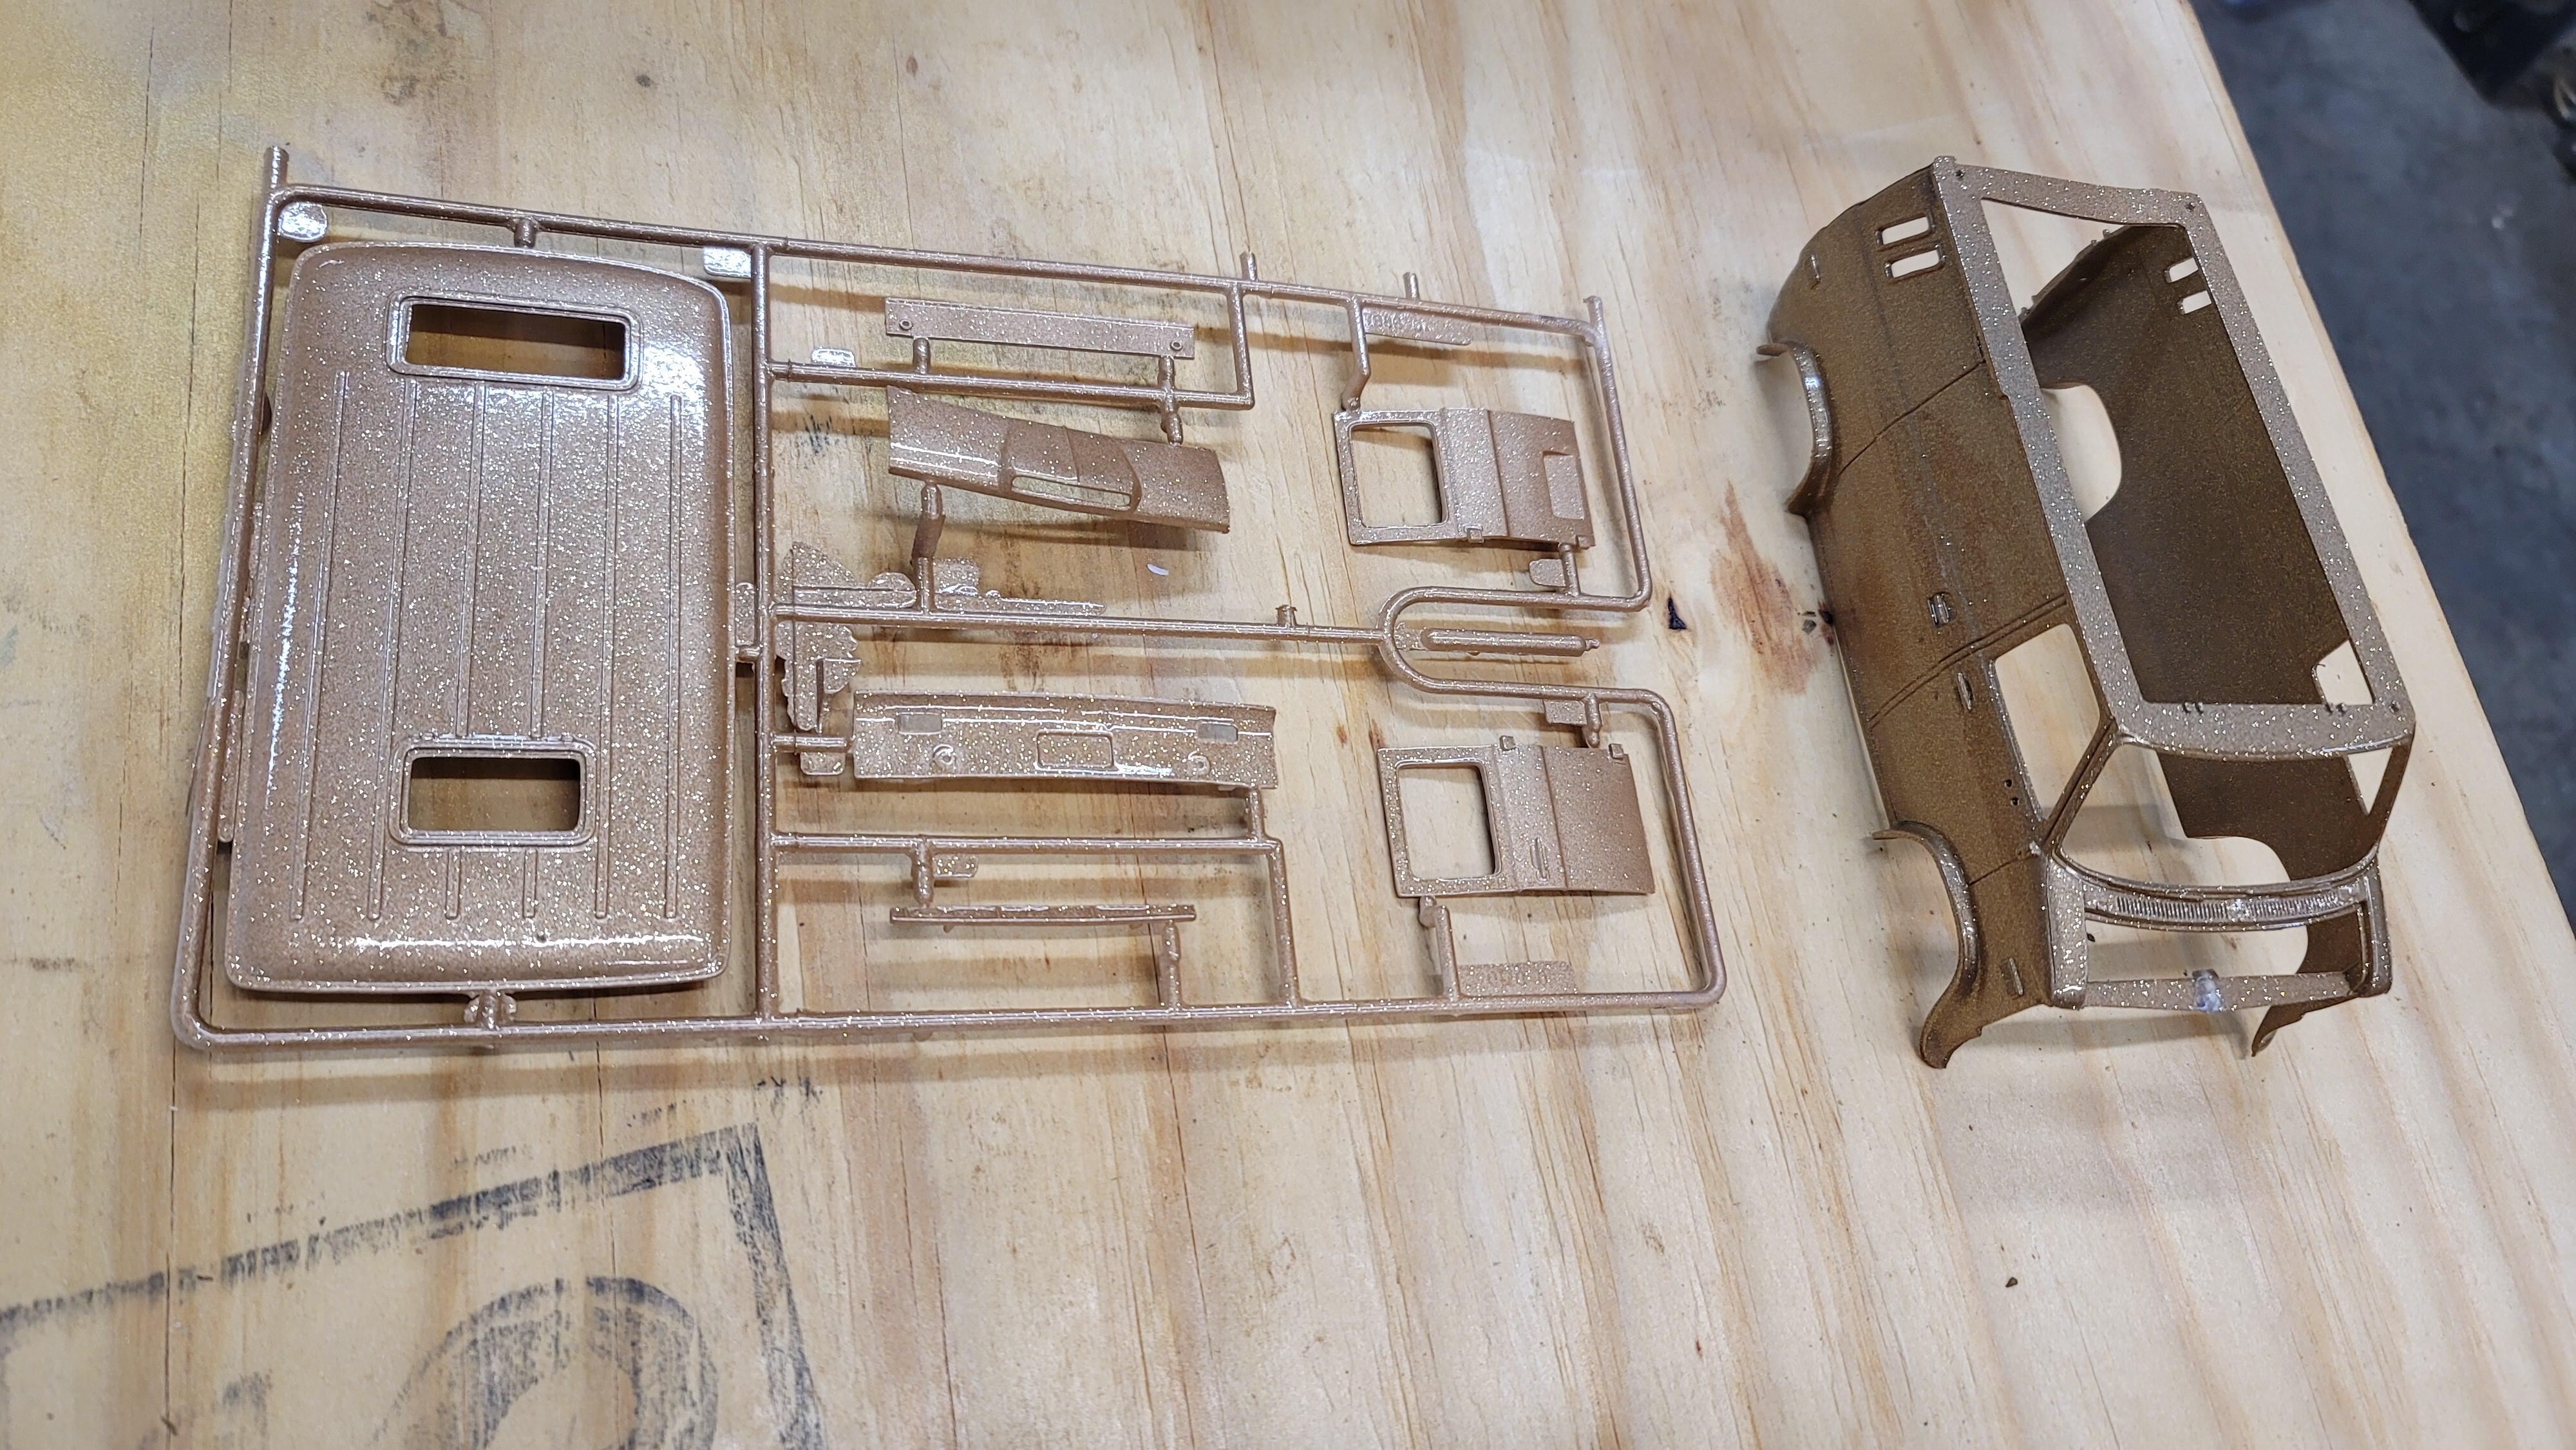
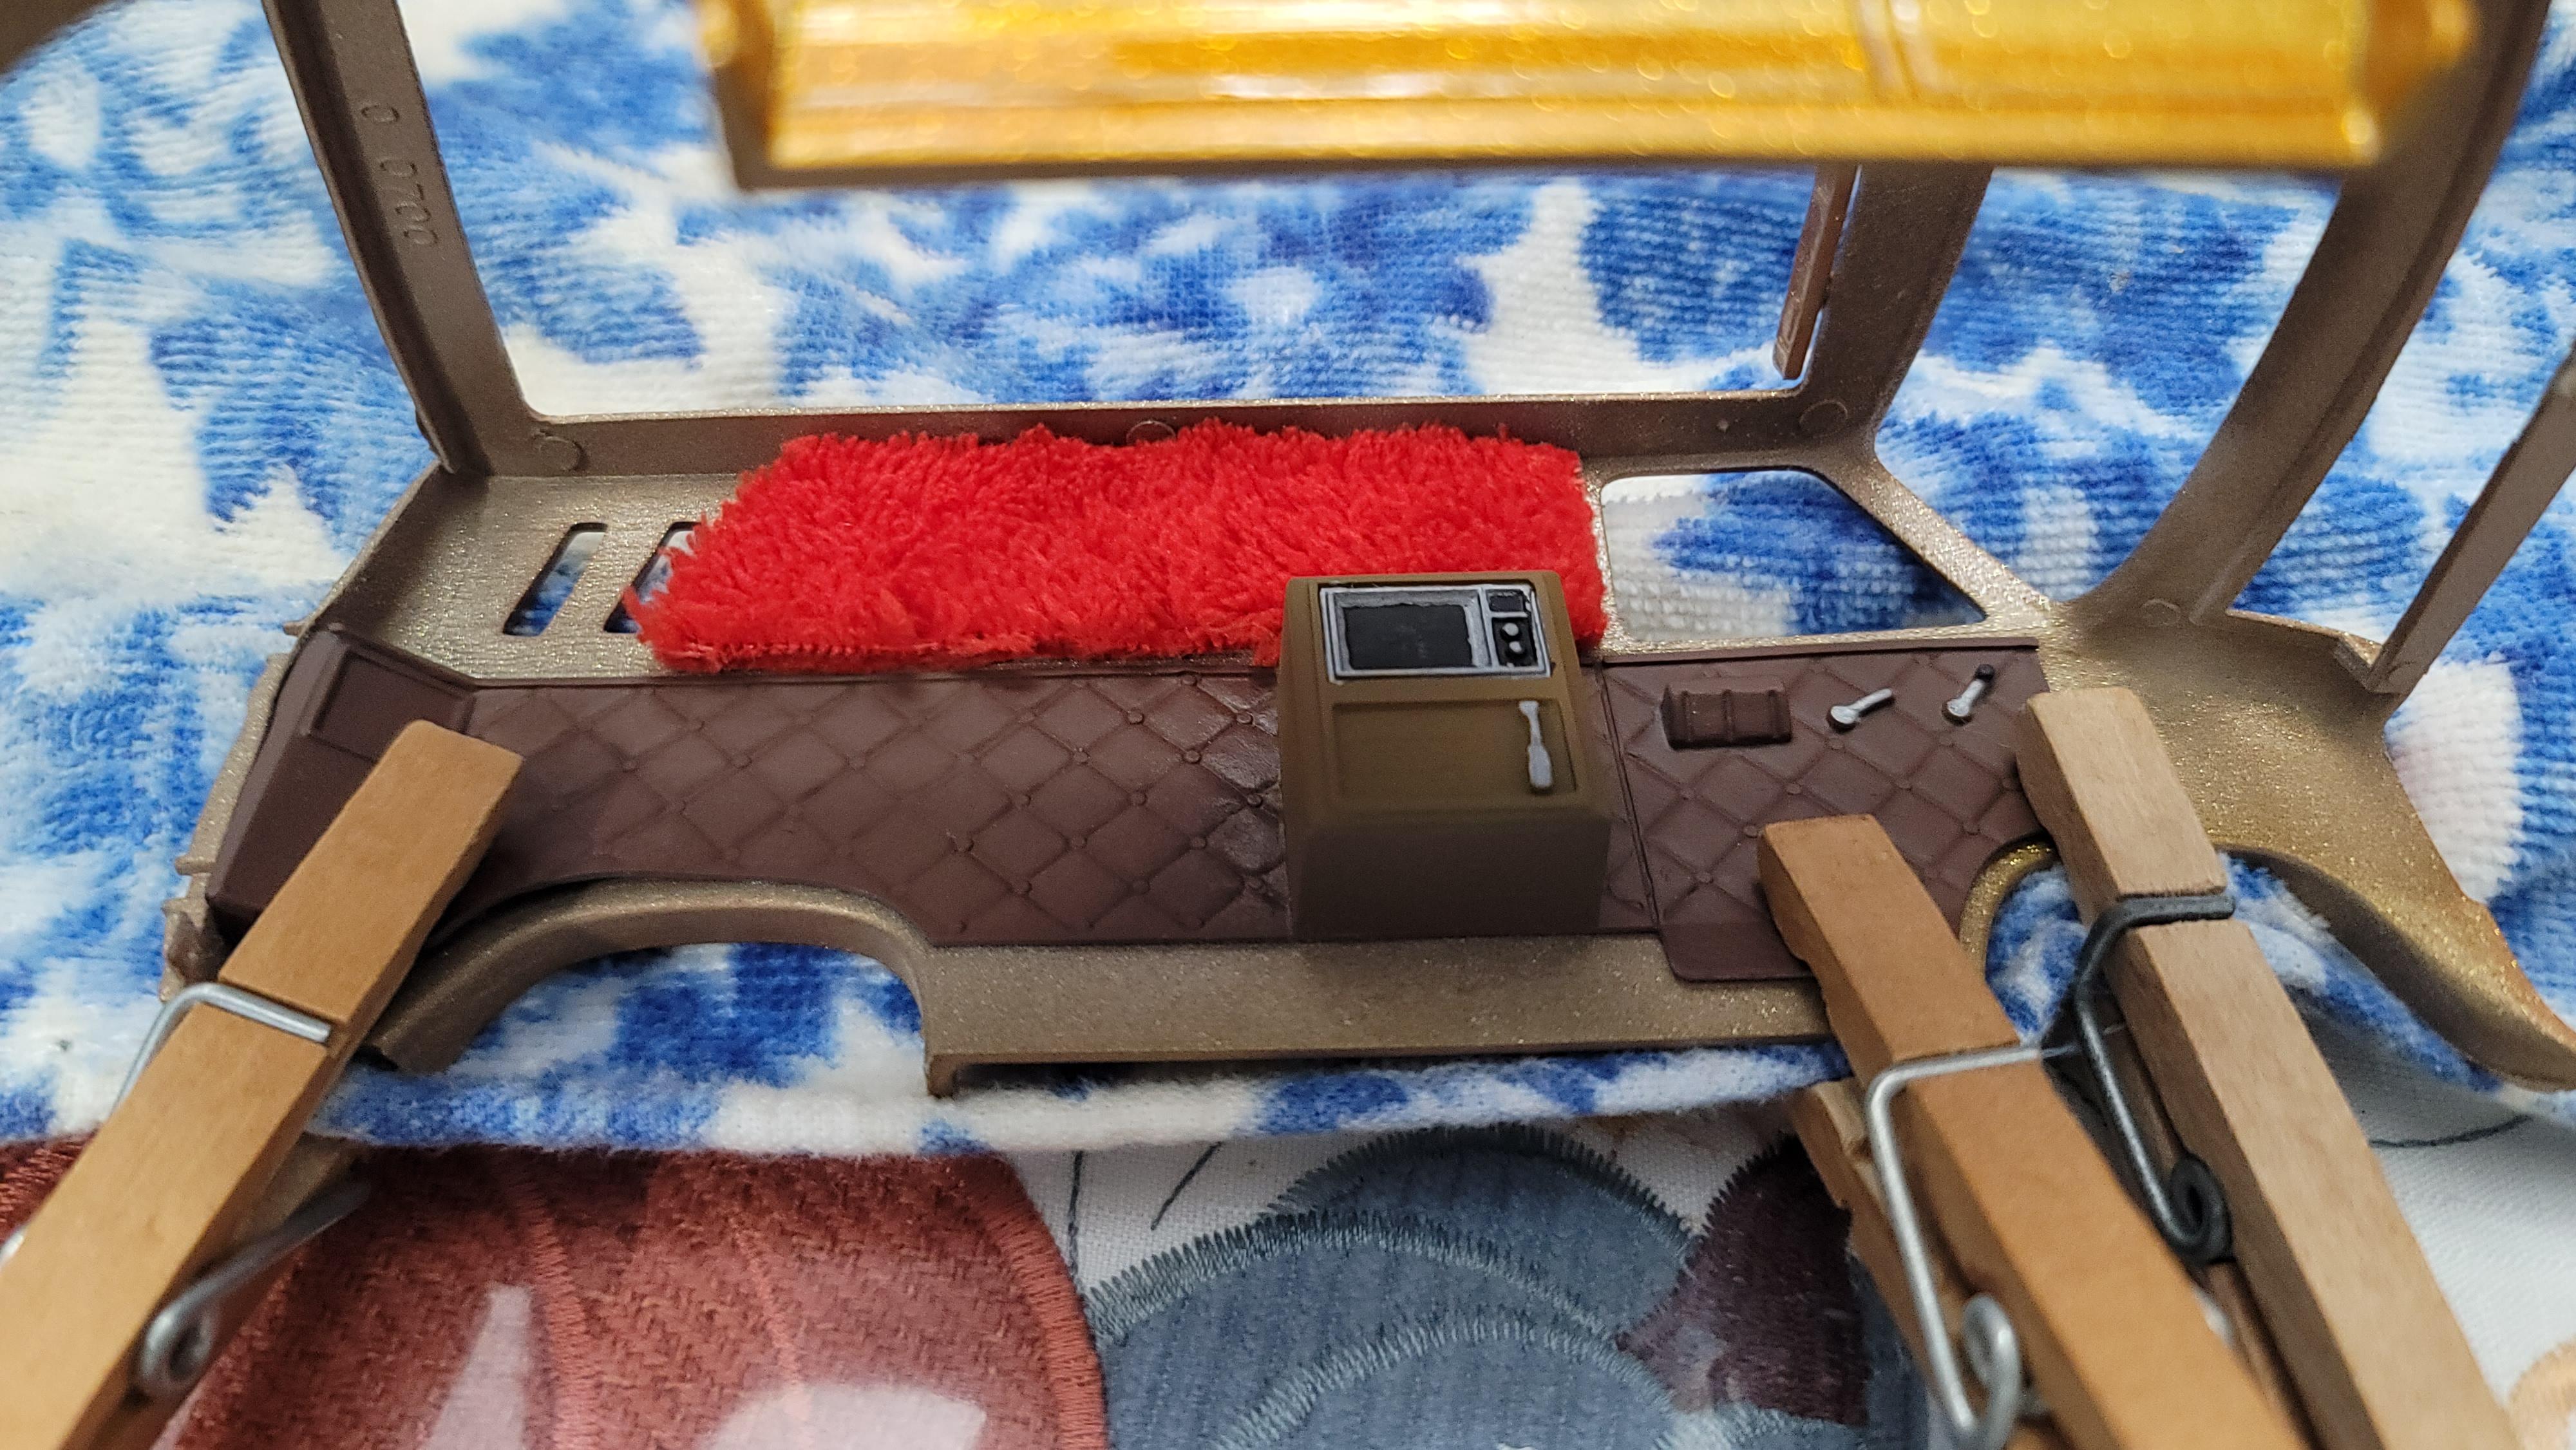
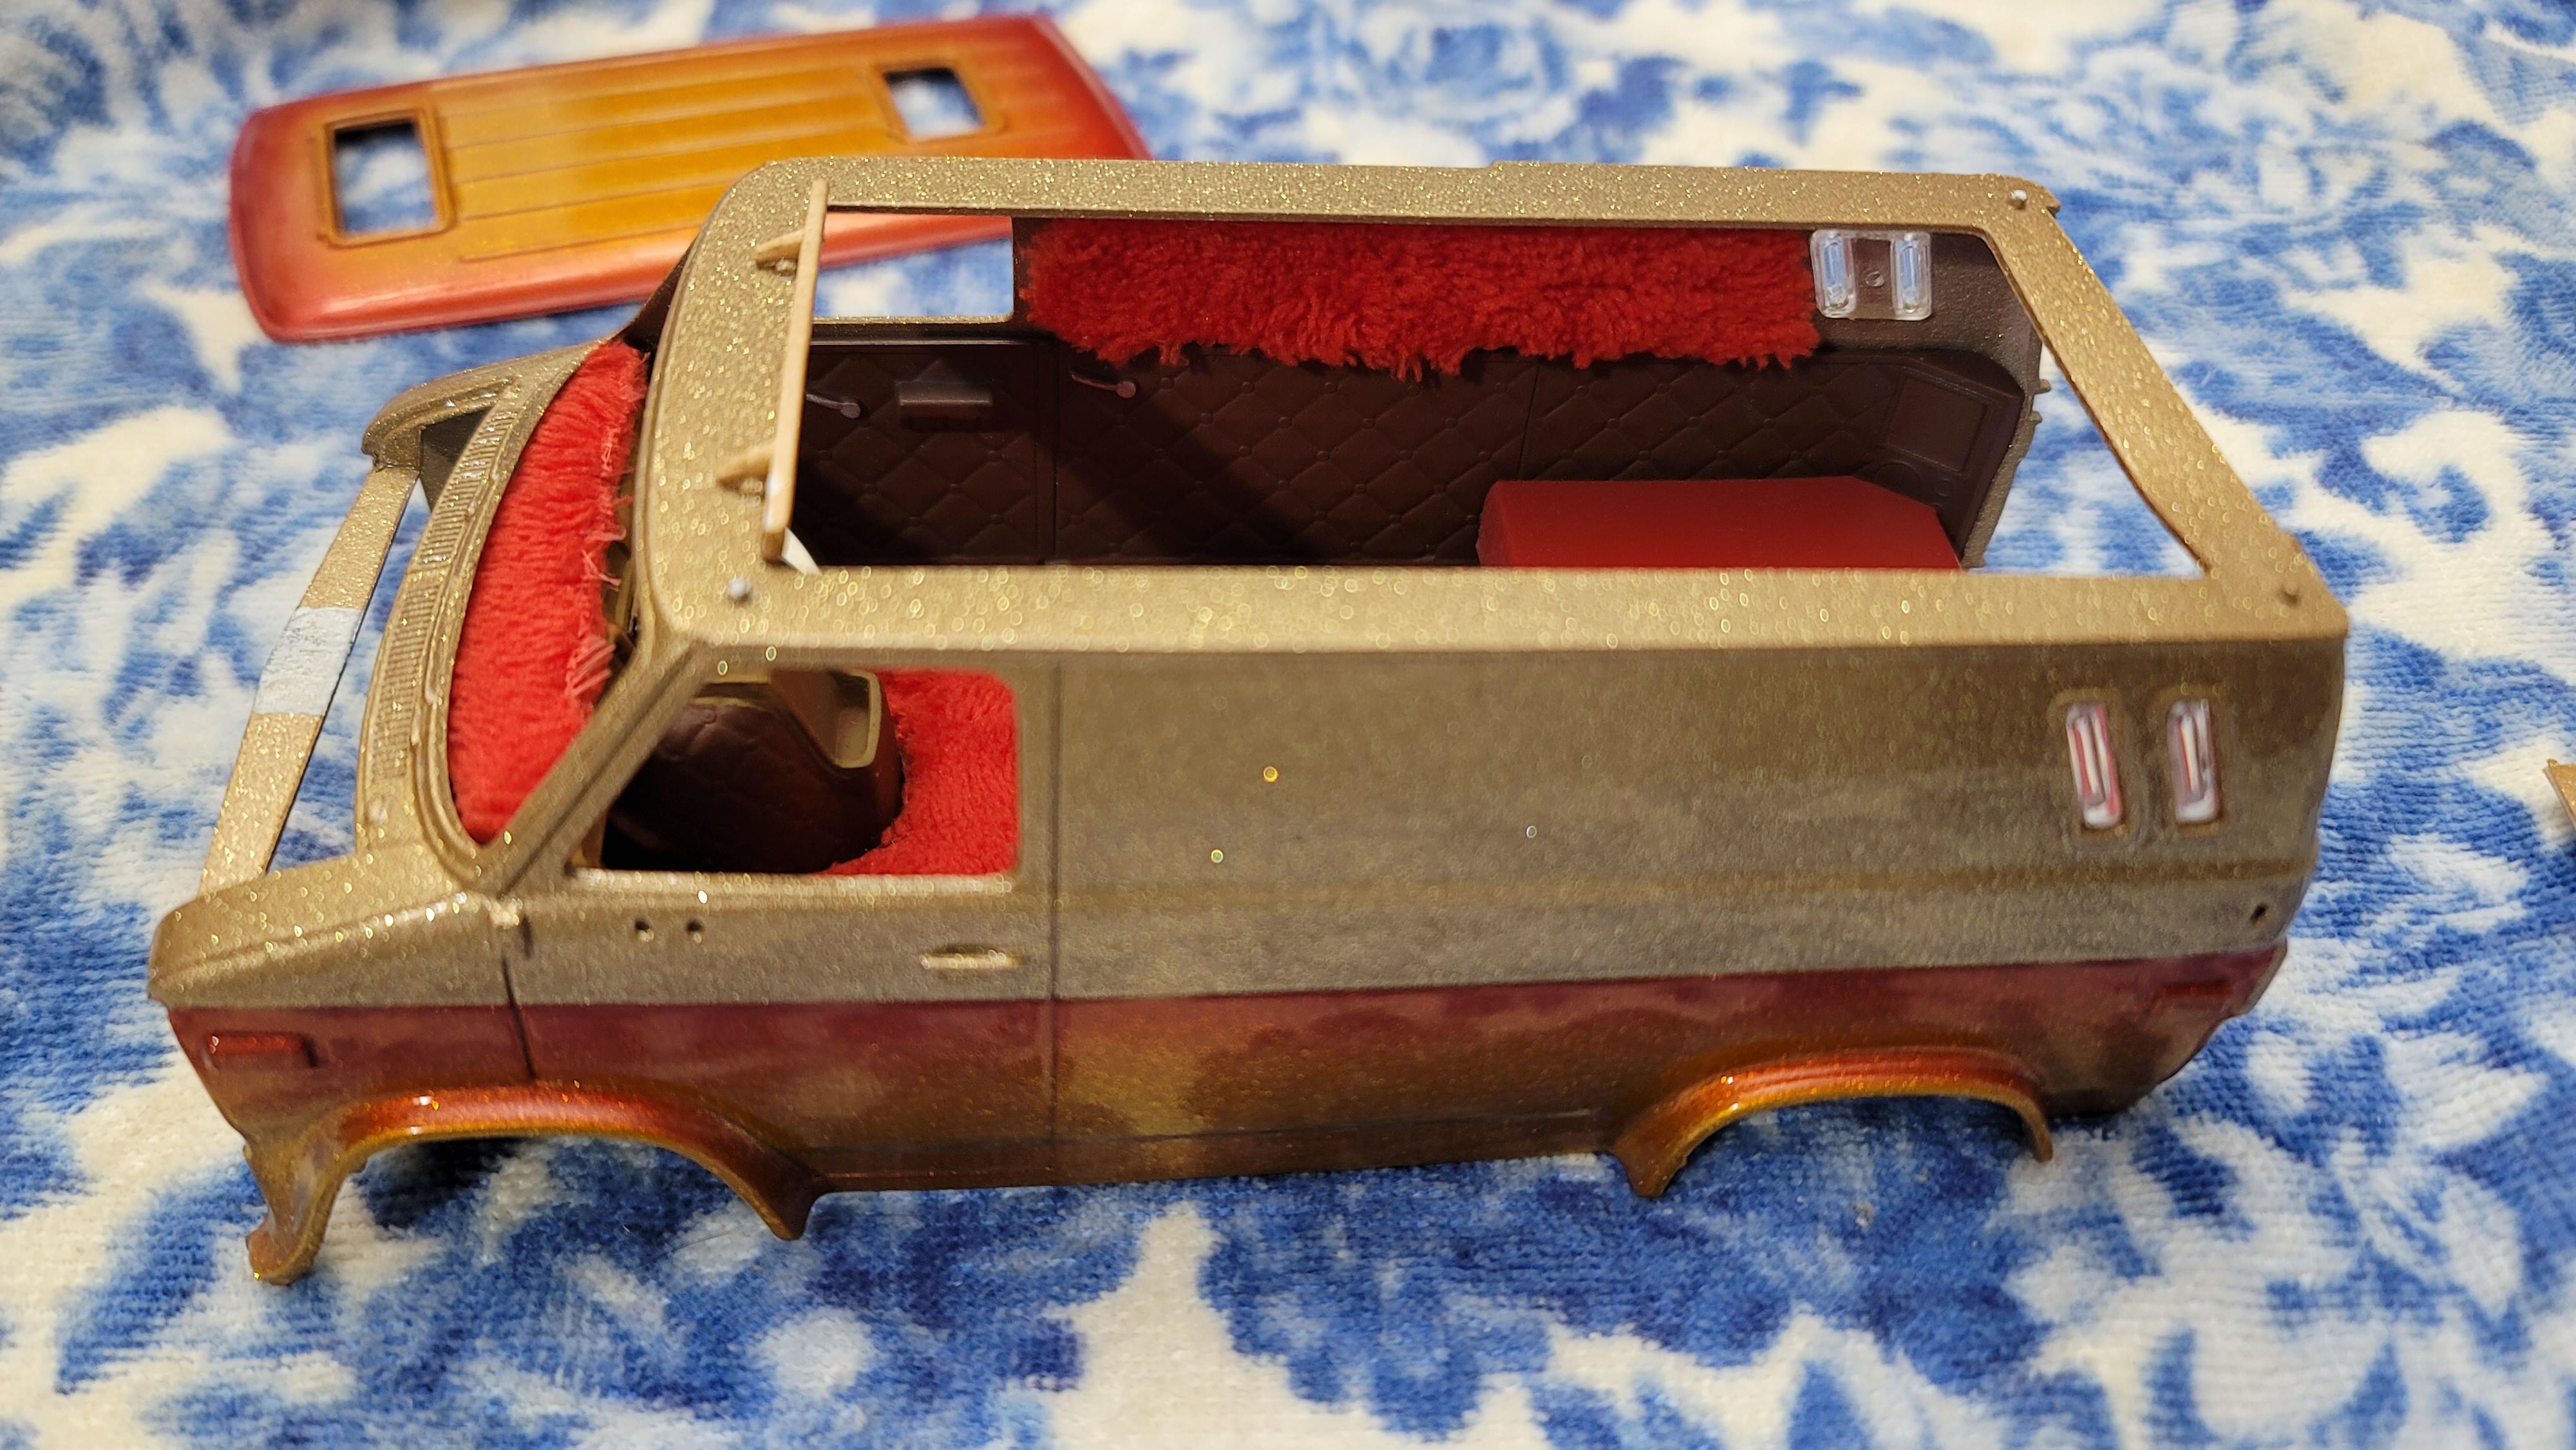
Haven't built a model in several years, life always seems to get in the way, but I'm back into it again. Planning on building an art studio out of a big sun porch at my house, so I will definitely be building a dedicated model building bench before long. I've been struggling with PTSD since my 2005 tour to Iraq, and this seems to be a huge stress relief for me (also finally seeing a counselor over the past year and now have a service dog in training which helps tremendously as well). Anyway, I'm getting ready to paint a 1:1 custom chopper for a friend, so I needed to refamiliarize myself with my paints, paint guns, and airbrushes. So I decided to built this kit I've had sitting on the shelf for a couple years. I'm not spending a lot of time removing mold lines and doing hyper detailing. The kit overall gets a big thumbs down on quality from me, but it has been a fun build regardless. The body is flimsy and warped, lots of details are totally incorrect for a 76 Chevy van (I'm building a 1:1 82 boogie van and have owned several others over the years). With that said, it's been a fun challenge to polish a turd I suppose. I started on Monday Feb 28th by opening up my tackle box full of Testors and Model Master paints that I'd collected over the years, only to realize it got completely ruined in a basement flood at my old house a couple years back. So I'm building back my supplies slowly and trying acrylics where I can. First thing I did was to paint the body. I figured on a color scheme and went to town. I started with Transtar 2in1 primer in aerosol, then Nason gold metallic base sprayed through a $14 Harbor Freight detail gun. Next was some Custom Shop .004x.004 micro gold flake shot through an old Harbor Freight 2.3 nozzle gun mixed in some Axalta clear as a carrier. Then I airbrushed Createx Blood Red and Tequila Yellow fades sprayed with an Iwata HP-CS. Lastly I top coated with Axalta 7776S clear through the $14 HF detail gun. Pretty happy with the outcome of the paint. Still have a couple dirt nibs to sand out, one small chip above the rear doors to touch up. Next I started my usual routine of hopping back and forth painting some parts with rattle can, others with acrylics, brush painting some enamels. A few on the parts trees, some on the alligator clip sticks, and just slowly getting the basics of the engine and chassis together. I started on the interior last night. I wanted to replicate 70s shag carpet, so off to Goodwill for some fabric. I found an old Elmo kids jacket which works perfect. I make tape templates on the body parts I want to cover, then stick the tape template to some really thin cardboard from a cereal box. I glue the fabric to the cardboard template using 3M upholstery adhesive, then glue those panels to the model body. I did shag on the inner sides of the body, floor, and a dash cap. I have to head to the craft store in a little while to see if I can find a few supplies, then I'll get back on this thing tonight and see if I can knock a little more out. Hope you guys enjoy. 76 Chevy Van Model 001.mp4
-
AMT Rescue Van to 70s Custom Van
KurseD replied to KurseD's topic in WIP: Model Trucks: Pickups, Vans, SUVs, Light Commercial
Thanks man. -
AMT Rescue Van to 70s Custom Van
KurseD replied to KurseD's topic in WIP: Model Trucks: Pickups, Vans, SUVs, Light Commercial
Still can't find the darn chassis. Hope it didn't get tossed in the garbage by accident. With the body just sitting on the workbench, I couldn't leave it alone. Sprayed the roof with a lace pattern, but it came out horrible. The green I mixed this time was way off in the color spectrum, and I laid it on way too thick. The cheap pinstriping tape I'm using is pulling the basecoat off in areas too. So I stripped the paint off the roof, redid everything, and added some diamond shape candy splashes to the sides as well. 70's tacky paint job achieved. LOL