

A20havoc
-
Posts
7 -
Joined
-
Last visited
Recent Profile Visitors
1,226 profile views

A20havoc's Achievements
MCM Member (2/6)
-
B.R.B.O. 352 Peterbilt
A20havoc replied to Ken Gilkeson's topic in WIP: Model Trucks: Big Rigs and Heavy Equipment
Ken, That is a jaw dropper. You have the knack for making it real. Do you have any tips on the pin striping and paint for us rookie hamfists? -
Peterbilt 352 Revell
A20havoc replied to A20havoc's topic in Model Trucks: Big Rigs and Heavy Equipment
I made the decals on clear film. They work nicely on the white cab. I think jbot or model truckin make similar stripes though. The cummins above frame is scratch built from balsa skinned in 10 thou plastic. The turbo is twisted spruce. I interpolated some from the amt cummins. Since I opened up the screen on the back of the cab it needed something. So it got the Shepard Payne style cummins. The underside block molding has pretty nice detail. Thanks for the comments. You guys do some nice work here. Tons of inspiration. -
Peterbilt 352 Revell
A20havoc replied to A20havoc's topic in Model Trucks: Big Rigs and Heavy Equipment
I realized I left out a few painful details. To me the biggest knock on the cab molding is the thickness of the window pillars on the windshield. I thinned the areas where the windshield rubber meets the cab and formed new windshields from clear vac packaging. I really like the fine-ness of the molding and rivets otherwise. To me the 1/25th amt rivets are a little over scale on cabs. The visor is also scratch built, and the grab handles as well. The kit grab handles are way clunky. I ordered some 32nd scale tires from aoshima, but they failed to ship from hong kong. I did get my money back though. I may try to cast some up in resin with nicer tread detail. notice the thickness of the cab walls around the windshield. Thanks for the comments -
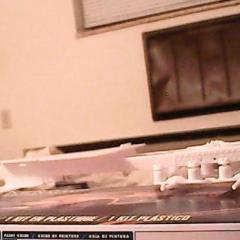
Here is my 1/32 Revell monogram Peterbilt 352. I collected a few of these as a kid but did not get all of them. Now I watch for them to be re-released, and hopefully build them at a higher level too. Anyway... The current release gives you stickers vs decals, and the plastic is a little brittle. I do like the cab detail for the most part. The chrome on this one was pretty nice and even. Plugging some holes and open up back of the cab. My way of dealing with hollow wheels. I made a tool and used drywall mud. Here I have added some plumbing for the Cummins. Foiled tanks, new mirrors, scratched mud flaps. I have been lurking for a while and enjoy the forum. I'm more old school classic 70s and 80s. Thanks for looking.
-
Post your "Snap" kits.
A20havoc replied to Petetrucker07's topic in Model Trucks: Big Rigs and Heavy Equipment
Here is my 1/32 Snapper. Hope this works. Does anyone have tips posting from photobucket ? http://i1347.photobucket.com/albums/p719/A20havoc1/1-32 Peterbilt 352/IMG_0759-1_zps6milzijn.jpg -
Making Your own Bare Metal Foil (BMF)
A20havoc replied to MoparWoman Jamie's topic in Tips, Tricks, and Tutorials
I have had good luck with Mona Lisa sizing adhesive. It is water based. I have thought about just trying varnish as well. -
Casting multiple copies?
A20havoc replied to Racerchad2's topic in Car Aftermarket / Resin / 3D Printed
Smooth on Oomoo 30 is pretty easy to use 1 to 1 by volume and cures quickly. I use a pressure pot for resin and rubber, but if your careful you can get great results without pressure or vacuum.