Randy D Posted October 28, 2012 Share Posted October 28, 2012 Hi Tyrone, Just awesome work!!!! Always been a fan of your work and this is just killer!!!! Randy Quote Link to comment Share on other sites More sharing options...
outragis Posted October 29, 2012 Share Posted October 29, 2012 As always Awesome work...pm sent Quote Link to comment Share on other sites More sharing options...
John Teresi Posted October 29, 2012 Share Posted October 29, 2012 Tyrone.......you just keep getting better and better.........love your work. Quote Link to comment Share on other sites More sharing options...
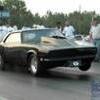
zz383mero Posted October 29, 2012 Share Posted October 29, 2012 I just joined this forum and saw this thread. I am working on a similar build. This is what I am starting with. I am cutting the driver's door off to make it functional and I am tossing around the idea of a one piece flip-up front! Quote Link to comment Share on other sites More sharing options...
RIC417 Posted October 29, 2012 Share Posted October 29, 2012 GREAT BUILD I LIKED THIS MODEL TYRONE Quote Link to comment Share on other sites More sharing options...
tubbs Posted October 29, 2012 Share Posted October 29, 2012 Thanks again fellas for all the nice comments... While I'm gonna be waiting a few days to mess with the 57, I decided to go ahead and stretch the rear wheel openings.. I've also been working on the cage, and I have opened up the doors ... thanks for looking and comments welcome... nice job on that stretch! filled in your caps real nice. that is the same place i did mine, but i wiped out the body molding when i sanded it down. be careful. i know cut ABOVE the bodyline and have a little more area to sans in without screwing up that line. stretching that wheelwell looks killer when done right. Quote Link to comment Share on other sites More sharing options...
Mister Twister Posted October 29, 2012 Share Posted October 29, 2012 You know I have a soft spot for sportsman cars Tyrone but it is especially true with (any Chevy II or Nova up to '72) for me. My replica project for my Nova will start soon. You should do a replica of your Camaro.....That would be a cool build. Quote Link to comment Share on other sites More sharing options...
tyrone Posted November 8, 2012 Author Share Posted November 8, 2012 Thanks for the comments fellas.... not much of an update but I did get the doors hinged..... Quote Link to comment Share on other sites More sharing options...
Mooneyzs Posted November 8, 2012 Share Posted November 8, 2012 Tyrone... this one awesome build so far my friend. Looking great. Nice work on the rear wheel wells. Quote Link to comment Share on other sites More sharing options...
pharr7226 Posted November 8, 2012 Share Posted November 8, 2012 Great work Tyrone. As always, I really enjoy watching your projects come together. You decide on a power plant or a paint scheme? Quote Link to comment Share on other sites More sharing options...
Red rocket 10 Posted November 8, 2012 Share Posted November 8, 2012 Tyrone the stance is killer , love this build my friend....................... Leonard Quote Link to comment Share on other sites More sharing options...
FAST442 Posted November 9, 2012 Share Posted November 9, 2012 Tyrone, you are amazing! Ever think about building a "late night grudge car"? Quote Link to comment Share on other sites More sharing options...
gasser59 Posted November 9, 2012 Share Posted November 9, 2012 Awesome project and spot on. Wheel wells and doors look great. This is one of my favorite body styles and I'm sure you'll do it justice. Carry on. Quote Link to comment Share on other sites More sharing options...
vintagedragfan Posted November 11, 2012 Share Posted November 11, 2012 very, very nice Tyrone, (as usual) Quote Link to comment Share on other sites More sharing options...
W-409 Posted November 11, 2012 Share Posted November 11, 2012 Very nice build, as always, Tyrone! I like that body style very much and your building talents are fantastic, so I'm sure it'll be excellent build. I like that roll cage you've done and nice job with the rear fenders too. Quote Link to comment Share on other sites More sharing options...
Prostreet Posted November 11, 2012 Share Posted November 11, 2012 Another killer being built. Really dig the wheel well stretch. Quote Link to comment Share on other sites More sharing options...
tyrone Posted November 14, 2012 Author Share Posted November 14, 2012 (edited) Thanks fellas.. for the kind words,, I appreciate it... Rick I have not decided on a paint color yet.. I'm leaning towards carbs and nos for the engine... I thought about a fuel injected engine also... we'll se... I got the inner door skins made up tonight and I also added some more bars to the trunk area...just threw an old engine in from the parts box for mock ups... thanks for looking and comments welcome... playing with some scoop ideas wiith a hood from an older build... Edited November 14, 2012 by tyrone Quote Link to comment Share on other sites More sharing options...
1320wayne Posted November 14, 2012 Share Posted November 14, 2012 Love the look so far Tyrone. Quote Link to comment Share on other sites More sharing options...
Dr. Cranky Posted November 14, 2012 Share Posted November 14, 2012 OH MY, that's beautiful and it looks so freakin' wicked! Keep it going. Quote Link to comment Share on other sites More sharing options...
pharr7226 Posted November 14, 2012 Share Posted November 14, 2012 I might have a new favorite Tyrone build. The gaps on the doors are your best, I think. They look very tight. I also like the skins and the extensions from the chassis to support the body. Super nice work Tyrone. Keep it up Bro. I wish I could have caught up with you in Atlanta. I arrived later than I wanted also. I only had about an hour to look at the sights. It was like going to a museum for an hour. You just can't cover all that ground in an hour. Quote Link to comment Share on other sites More sharing options...
vintagedragfan Posted November 15, 2012 Share Posted November 15, 2012 beautiful work Mr. Tyrone Quote Link to comment Share on other sites More sharing options...
tyrone Posted November 19, 2012 Author Share Posted November 19, 2012 (edited) Thanks everyone for all the nice comments and interest in this build I really appreciate it... I got some work on this one today.. I tried a mock up with the rear glass from the kit installed and the thickness of the glass was causing the back of the car to sit too high .. the glass was resting on the bars that extend out into the trunk... So I used a very thin piece of styrene and glued it to the inside for the glasses I make out of clear styrene to rest on and also did the front windshield, and the doors and quaters... I added dirt modeler dzus fastener brackets to the front end.. and I also went ahead and got the headers made up ... thanks for looking and comments welcome.... I also got the steering shaft mounted, Edited November 19, 2012 by tyrone Quote Link to comment Share on other sites More sharing options...
vintagedragfan Posted November 20, 2012 Share Posted November 20, 2012 good stuff Tyrone! very nice work bro! Quote Link to comment Share on other sites More sharing options...
tyrone Posted November 24, 2012 Author Share Posted November 24, 2012 Thanks Bill... I've modified the front upper strut mounts and made some coil springs.. I also got the chassis painted and added some carbon fiber decals to the rear tubbs... more to come, and thanks for looking and comments welcome.... before... after.. still not complete.. but here's a quicy mock up.... Quote Link to comment Share on other sites More sharing options...
vintagedragfan Posted November 24, 2012 Share Posted November 24, 2012 oh yea, much better Tyrone, just killer bro! Quote Link to comment Share on other sites More sharing options...
Recommended Posts
Join the conversation
You can post now and register later. If you have an account, sign in now to post with your account.
Note: Your post will require moderator approval before it will be visible.