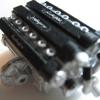
Jeremy Jon Posted July 26, 2013 Share Posted July 26, 2013 (edited) I've always liked the original Coyote - season 1 car - but the AMT/MPC kit never did it justice! The AMT/MPC kit was built using some GT40 chassis parts, and bodywork wasn't very accurate at all There were 2 show cars, the season 1 car, build from the Manta Montage replica of the McLaren M6GT (another personal favorite) The season 2-3 car was built on a DeLorean, and looked significantly different, and doesn't interest me at all This build is not going to be a full-on kit, but rather to correct details & of course bodywork shape, and some engine bay detail for builders to take further if desired, but correct chassis under the body, suspensions, wheels & tires, and interior Starting with a few parts from the AMT/MPC kit, front clip, rear clip and windscreen - thanks Jim - the rest will be substituted or scratch built Looking to wheels and tires, I already have a digital file for the wheels as used in my Vector build, and will alter slightly to make correct for this build, including the spinners The correct looking tires are 50 series BF Goodrich T/As, so I sourced some excellent versions made by Joseph The series 1 car was actually built on a VW beetle - swing axle - chassis and drivetrain, as the replica was designed that way A couple of pics of the kit & then the actual car Edited July 26, 2013 by Jeremy Jon Quote Link to comment Share on other sites More sharing options...
Jeremy Jon Posted July 26, 2013 Author Share Posted July 26, 2013 Getting started, first was to establish the references to the bodywork The new chassis would be scratch built from actual VW pan dimensions, then the body would be from a mix of measurement from photos & visual references Overall it was apparent the model body was to narrow, and the windscreen also, the bodywork will follow after I started with the front windscreen & canopy structure first! Constructed one from some clear plastic - gingerale bottle in this case - to make a temporary & more accurate sized and shaped windscreen The pillars of the canopy were to vertical, not enough inclined angle, as can be seen between them, and the forward shape to pointed, needing to be more rounded Quote Link to comment Share on other sites More sharing options...
Pat Minarick Posted July 26, 2013 Share Posted July 26, 2013 I have to watch this I don't know why ,but I always liked that car. Quote Link to comment Share on other sites More sharing options...
Bill Edman Posted July 26, 2013 Share Posted July 26, 2013 watch mode engaged as well Quote Link to comment Share on other sites More sharing options...
slusher Posted July 26, 2013 Share Posted July 26, 2013 I remember the show well and watched but l did not notice any differance in the cars. l want to watch your build very interesting subject. Quote Link to comment Share on other sites More sharing options...
Jeremy Jon Posted July 26, 2013 Author Share Posted July 26, 2013 (edited) Thanks guys! Good question Carl, the cars were decorated in similar fashion, so as a kid to me they seemed the same also Here are a few pics of the DeLorean based Coyote used in seasons 2 & 3, you can see the square windscreen & gull wing doors, but also the way they tried - I use the word loosely - make it styled like the season 1 car You can see why I prefer the - McLaren M6GT replica - season 1 car! IMO the AMT/MPC kit seems to have been a combination of the 2 show cars somehow, so as a result it really doesn't look like either, it also used some existing parts from the GT40 kit, so why it is out of balance in so many ways Edited July 26, 2013 by Jeremy Jon Quote Link to comment Share on other sites More sharing options...
Jeremy Jon Posted July 26, 2013 Author Share Posted July 26, 2013 (edited) The quick-made windscreen has the basic dimensions for me to use, but the front contour is to strong of a curve, so needed to make a new one for a flat surface So using masking tape, covered the green windscreen, and cut out for a pattern, then transferred to a piece of white styrene Since this is simply a model form buck, to be later used to vacu-form a clear screen, it doesn't matter that it is opaque During this same time, it becomes apparent the whole roof section is too low, and will need further work, so is chopped Edited July 26, 2013 by Jeremy Jon Quote Link to comment Share on other sites More sharing options...
JDGREEN Posted July 26, 2013 Share Posted July 26, 2013 I like it Quote Link to comment Share on other sites More sharing options...
Jeremy Jon Posted July 26, 2013 Author Share Posted July 26, 2013 (edited) Thanks John! Video of show & intro http://www.youtube.com/watch?feature=player_embedded&v=GIMAfwJSfKw http://www.youtube.com/watch?v=PXynZMZUywY&feature=player_embedded http://www.youtube.com/watch?feature=player_embedded&v=o7YLrUFzMjw Edited July 26, 2013 by Jeremy Jon Quote Link to comment Share on other sites More sharing options...
cobraman Posted July 26, 2013 Share Posted July 26, 2013 Pretty cool project. Quote Link to comment Share on other sites More sharing options...
'70 Grande Posted July 26, 2013 Share Posted July 26, 2013 One thing that always surprised me was the overall "size" of the Coyote... it was a really long and extremely-wide car built on top of a relatively small VW chassis platform! The B&W photo of the 1:1 really emphasizes the car's size to me; Hardcastle inside the cockpit looks tiny to my eye! I've always thought this car would have made a fantastic, phantom race car build as well, (but at 3/4's of its actual size)! I'll be watching this build, too. You're off to a great start! Quote Link to comment Share on other sites More sharing options...
Wonderbread Kustomz Posted July 26, 2013 Share Posted July 26, 2013 This should be cool! Quote Link to comment Share on other sites More sharing options...
Ace-Garageguy Posted July 26, 2013 Share Posted July 26, 2013 (edited) One thing that always surprised me was the overall "size" of the Coyote... it was a really long and extremely-wide car built on top of a relatively small VW chassis platform! The B&W photo of the 1:1 really emphasizes the car's size to me; Hardcastle inside the cockpit looks tiny to my eye! All you guys may already know this but a smaller race-car of the period that had a lot of McLaren influence was the Chevron B-16 (available new as 'continuation' cars again since 2006). The proportions kinda work better for a small-engined car. Just a thought. Not intending to stick my big nose in your project, and I'll gladly remove this post if you'd like. Chevron B-16 Edited July 26, 2013 by Ace-Garageguy Quote Link to comment Share on other sites More sharing options...
Jeremy Jon Posted July 27, 2013 Author Share Posted July 27, 2013 (edited) Thanks Ray, Mark & James! You're not wrong Mark, that B&W photo is the season 2+3 car, which was built on a DeLorean, so larger, and ungainly IMO The Manta replica kit car - season 1 car - is much more compact, not nearly as large or bulky as the DeLorean version, here are pics of the actors beside the season 1 car The B-16 was a great period race car Bill, I've only seen one scale resin kit of it done, can't remember who at the moment? and none of the M6GT in 1/24 resin Edited July 27, 2013 by Jeremy Jon Quote Link to comment Share on other sites More sharing options...
Jeremy Jon Posted July 27, 2013 Author Share Posted July 27, 2013 (edited) Okay, so started on the chassis now! As the replica / show car used the VW pan as it's basis, so will this re-build I'm not making it to be an all-out detailed kit, so this pan is a best representation of that Instead of using a donor kit, I decided to simply scratch build the chassis, and took measurements from early swing-axle style VW drawings to construct it Edited July 27, 2013 by Jeremy Jon Quote Link to comment Share on other sites More sharing options...
slusher Posted July 27, 2013 Share Posted July 27, 2013 Jeremy l see the difference since you pointed it out. l do remember him going in thru the windows. l think l was 13 when the show was out. l also remember the truck kit that was out also. Keep up the good work.... Quote Link to comment Share on other sites More sharing options...
Jeremy Jon Posted July 29, 2013 Author Share Posted July 29, 2013 Thanks Carl! Yes, the two cars were decorated to look similar on TV, but very different cars The M6GT / Manta replica is the one I prefer, even with the bump on rear deck, I'd enjoy building a 1:1 version of my own one day for summer drives, but then I'd likely make an all custom chassis & drivetrain if that were to happen I have to find out exactly what color of red paint they used for the shows hero car, and make some decals for the rocker panels yet too! Quote Link to comment Share on other sites More sharing options...
hjracing Posted July 29, 2013 Share Posted July 29, 2013 Cool project, come nicely! Quote Link to comment Share on other sites More sharing options...
Jeremy Jon Posted August 1, 2013 Author Share Posted August 1, 2013 (edited) Thanks Jose! My OCD struck dang it! The chassis was originally just supposed to mild detailing, but after getting hold of some better diagrams, I noticed that much detailing needed changing to be correct, changed belly pan detailing ribs, added the front + rear center beam ends, gear shift and ebrake mounts, and the transaxle incorporated as part of the rear chassis base ....so in typical fashion, very much work was done, yet with a primer coat looks almost the same! Start of the bodywork, the first immediate issue is the kit body being to narrow, so 4mm added into the center, of both front & rear clips, which will match up to the modified and widened windscreen + canopy The body is going to need quite a lot of modifications yet to make it look right! Edited August 1, 2013 by Jeremy Jon Quote Link to comment Share on other sites More sharing options...
jeffs396 Posted August 1, 2013 Share Posted August 1, 2013 Very cool project! Quote Link to comment Share on other sites More sharing options...
Kennyboy Posted August 1, 2013 Share Posted August 1, 2013 Jeremy your work amazes me! I just gotta watch this. Always wanted the kit car when I was a kid.......finally got it and in typical dumb young kid fashion I destroyed it with glue, paint, etc. Quote Link to comment Share on other sites More sharing options...
revshag Posted August 1, 2013 Share Posted August 1, 2013 You're pretty brave to make the corrections to that body! I've been working on a Coyote build myself. I stumbled onto this website: http://public.fotki.com/Rockinroller/plastic/hardcastle--mccormi/ I used all the pictures for reference. I made a few changes (e.g. different seats due to availability, differences in assembling scratch-built elements). Good luck on the build! Chris Quote Link to comment Share on other sites More sharing options...
Jeremy Jon Posted August 2, 2013 Author Share Posted August 2, 2013 Thanks Jeff! Thanks for the props Kenny! Ya, me too, I see lots of rare kits, and think I glue bombed one of those as a kid! LOL Thanks Chris! Those pics look great, very nice work! I do a lot of scratch building, make kits, etc, so for me this is a fairly nice kit rebuild in between a couple of other more involved projects, but definitely I'm doing because I want one for my own collection but with correct bodywork, this one will get copies made also Quote Link to comment Share on other sites More sharing options...
Jeremy Jon Posted August 4, 2013 Author Share Posted August 4, 2013 (edited) Start of the body work re-vamp, some major work is needed here First 4mm added width to the whole body, then rear fenders added 1mm width on each side of canopy, then fenders moved back of canopy leading edge & section increased, after the tail aft of the rear wheels wells needs 5mm added, so tail cut off in prep Begin re-shape of the nose, center (would be radiator cover) area changed from recessed to more flat, the headlight buckets / area will need extensive re-work yet also Edited August 4, 2013 by Jeremy Jon Quote Link to comment Share on other sites More sharing options...
Bill Edman Posted August 4, 2013 Share Posted August 4, 2013 amazing Quote Link to comment Share on other sites More sharing options...
Recommended Posts
Join the conversation
You can post now and register later. If you have an account, sign in now to post with your account.
Note: Your post will require moderator approval before it will be visible.