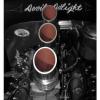
JasonFL Posted August 26, 2012 Share Posted August 26, 2012 (edited) What's one to do when they are in a jam with their other two builds.....start another of course. After seeing everyone building up some really cool mercs I thought I would finally take mine out of the box and give it a go. I'm going with the Revell 49' Mercury Coupe, nothing to crazy, just simple clean mods, slammed, and a wild set of flames. Just your typical run of the mill hotrod. I started by just laying down a couple sets of different sized flames to get an idea how I want it to look before I start the work. Edited March 13, 2015 by JasonFL Quote Link to comment Share on other sites More sharing options...
JasonFL Posted August 26, 2012 Author Share Posted August 26, 2012 Some of the lines were really bothering me so I scribed in new trunk lines to match the rear window. Still unsure if I'll open it up or not. Quote Link to comment Share on other sites More sharing options...
JasonFL Posted August 26, 2012 Author Share Posted August 26, 2012 (edited) Then I moved to the hood lines. My plan was to use the all smooth hood but on my first attempt I cut the new lines downward instead of sideways which gave me huge ugly gapped lines so I had to go with the louvered hood. I guess its a good thing they give you a spare hood. (If anyone knows how to shave the louvers off without leaving indents behind lmk, thanks) I made the corners more straight edged to match the line of the trunk opening. I also shaved the front marker light holes, bumper holes, and the middle grill holes. Then I had notched the front for the new bumper. Edited August 26, 2012 by JasonFL Quote Link to comment Share on other sites More sharing options...
JasonFL Posted August 26, 2012 Author Share Posted August 26, 2012 I cut the middle pillar out to give it a longer look. I like the lines around the window, so I scribed new ones to keep the flow, then I shaved the top of the old door lines and the hole for the mirror. Had to continue the line so the door could open so this is what I came up with. I'm pretty happy with it. I might put the mirror here slopping down. I use the lamp sometimes to help me scribe, thought this was a cool shot. Gives you more of an idea what it looks like. Quote Link to comment Share on other sites More sharing options...
jcbigpaw Posted August 26, 2012 Share Posted August 26, 2012 Lookin good. Can't wait to see more. Those flames look great too. Keep it comong Quote Link to comment Share on other sites More sharing options...
Gluhead Posted August 26, 2012 Share Posted August 26, 2012 Nice start. Quote Link to comment Share on other sites More sharing options...
Dr. Cranky Posted August 26, 2012 Share Posted August 26, 2012 Excellent work, keep it going. Quote Link to comment Share on other sites More sharing options...
58 Impala Posted August 26, 2012 Share Posted August 26, 2012 Nice work so far, looking forward to seeing more. You're good at rescribing lines, I tend to jump out of the groove at the worst times. I like the flame job you're plotting out. What colors were you thinking of using? Quote Link to comment Share on other sites More sharing options...
Jantrix Posted August 26, 2012 Share Posted August 26, 2012 Your scribing skills are impressive. What tool do you use for it? Quote Link to comment Share on other sites More sharing options...
crazyjim Posted August 26, 2012 Share Posted August 26, 2012 Looks most excellent. Quote Link to comment Share on other sites More sharing options...
Bartster Posted August 26, 2012 Share Posted August 26, 2012 Looking good, Jason! lt's all flowing together nicely. GREAT job on re-scribing the body lines. l think l understand your last e-mail now. Lotsa great minds here! Carry on! Bart.Looking good, Jason! lt's all flowing together nicely. GREAT job on re-scribing the body lines. l think l understand your last e-mail now. Lotsa great minds here! Carry on! Bart. Quote Link to comment Share on other sites More sharing options...
Joker Posted August 26, 2012 Share Posted August 26, 2012 Wow...the rescribed trunk is a "why didn't I think of that" forehead slapper. So simple yet subtle..great improvement and it just ...connects with the curve of the Merc. Keep up the good work and don't get overwhelmed with too many projects. The hood work ...ROCKS ! Quote Link to comment Share on other sites More sharing options...
Draggon Posted August 26, 2012 Share Posted August 26, 2012 Very nice work so far! I dig those wild flames, it reminds me of something Watson might do. Quote Link to comment Share on other sites More sharing options...
Ace-Garageguy Posted August 26, 2012 Share Posted August 26, 2012 Man, that is some beautiful work you've got going on there so far. I'm dyin' to see those flames in color....... As far as getting the louvers off withoug leaving indents, I use a small flat-file, followed by 180 grit and then 600 grit paper (either free-cut paper used dry or preferably wet-or-dry paper used wet) wrapped around a very flat sanding stick. Finger-nail emery boards will work too. Just watch out for the peak in the hood. I'll usually run a line of masking tape down the crease on the side I'm not sanding on to protect it. And go s l o w. Quote Link to comment Share on other sites More sharing options...
JasonFL Posted August 26, 2012 Author Share Posted August 26, 2012 Lookin good. Can't wait to see more. Those flames look great too. Keep it comong Thanks Joe. Nice start. Thanks Chris. Quote Link to comment Share on other sites More sharing options...
JasonFL Posted August 26, 2012 Author Share Posted August 26, 2012 Excellent work, keep it going. Thanks Doc. I figured with all the inspirational mercs you build I'd better at least give it a shot. I will admit it has been a lot of fun so far. Quote Link to comment Share on other sites More sharing options...
JasonFL Posted August 26, 2012 Author Share Posted August 26, 2012 Nice work so far, looking forward to seeing more. You're good at rescribing lines, I tend to jump out of the groove at the worst times. I like the flame job you're plotting out. What colors were you thinking of using? Thanks Tom. I've jumped the lines here and there but I find if you put a piece of tape down and do your first few lines REALLY slow it's well worth it. It's teaching me a lot about patients...lol. Do to funds I only have two colors, flat black and lime ice. Im going to do something a little different and do the body lime ice and the flames flat black. Not sure what color pin stripe, maybe orange. Your scribing skills are impressive. What tool do you use for it? Thanks Rob, appreciate it. I just use the back of my exacto knife, I'm not even sure what size I use.(everyone on the forum seem to all suggest a #11 blade) I just start with the thinnest blade and go thicker if I need to. Then I just hit the edges with some sandpaper when I'm finished to dull them down a little. Quote Link to comment Share on other sites More sharing options...
JasonFL Posted August 26, 2012 Author Share Posted August 26, 2012 Looks most excellent. Thanks Jim. Looking good, Jason! lt's all flowing together nicely. GREAT job on re-scribing the body lines. l think l understand your last e-mail now. Lotsa great minds here! Carry on! Bart. Thanks Bart I appreciate the compliments. I figured I'd stop jamming your email up with photos and share with everyone..haha. Which one of the 20 emails are you referring to? I'm guessing the one about the clearence issue. Quote Link to comment Share on other sites More sharing options...
JasonFL Posted August 26, 2012 Author Share Posted August 26, 2012 Wow...the rescribed trunk is a "why didn't I think of that" forehead slapper. So simple yet subtle..great improvement and it just ...connects with the curve of the Merc. Keep up the good work and don't get overwhelmed with too many projects. The hood work ...ROCKS ! Thanks James. I was thinking the same thing about the trunk line, I was shocked when I couldn't find one person who changed it. Same with the hood lines, I made the corners more straight edged to match the line of the trunk opening. I'm trying to make this the "simple" build as to not get overwhelmed. So far so good, thanks again. Very nice work so far! I dig those wild flames, it reminds me of something Watson might do. Wow! Thanks Glenn. That is one heck of a compliment, I'm glad you like them so far. Hopefully they come out that good with paint. Quote Link to comment Share on other sites More sharing options...
JasonFL Posted August 26, 2012 Author Share Posted August 26, 2012 Man, that is some beautiful work you've got going on there so far. I'm dyin' to see those flames in color....... As far as getting the louvers off withoug leaving indents, I use a small flat-file, followed by 180 grit and then 600 grit paper (either free-cut paper used dry or preferably wet-or-dry paper used wet) wrapped around a very flat sanding stick. Finger-nail emery boards will work too. Just watch out for the peak in the hood. I'll usually run a line of masking tape down the crease on the side I'm not sanding on to protect it. And go s l o w. Thanks Will. It will be a while until I can get the flames in color, I need to get me some sealer and clear. Thanks again for coming to the rescue with some knowledge. I talk to Bart (Bartster) a lot through email and he was telling me the same thing. I was hoping there would be another way. I'll just have to leave them until I get some supplies. Quote Link to comment Share on other sites More sharing options...
JasonFL Posted August 26, 2012 Author Share Posted August 26, 2012 Wanted to keep the chrome look so I had to carefully cut the bumpers and mod them up. Here's the bumper and the exhaust opening I found off a chrome tree I took the rear bumper, cut it in half, shortened them up, brought them a little closer to the body, and then dropped them down just a hair or two. Then I sanded the sides of the chrome cones down and I'm able to hide it behind the bumpers so it all looks connected. Here it is all together kinda just sitting there but you get the idea. A little more tightening up and it should be there. Any opinions on weather I should move the tailpipes out further and make room for a license plate? Quote Link to comment Share on other sites More sharing options...
slusher Posted August 26, 2012 Share Posted August 26, 2012 Awsume work so far... Quote Link to comment Share on other sites More sharing options...
rhs856 Posted August 26, 2012 Share Posted August 26, 2012 Love the exhaust, and I vote no on a plate. Quote Link to comment Share on other sites More sharing options...
Bartster Posted August 27, 2012 Share Posted August 27, 2012 l see a custom to this extent as a trailer queen, which means you don't need plates. But if you DO wanna drive it you could use magnets & stick it anywhere on the back~ Quote Link to comment Share on other sites More sharing options...
Olskoolrodder Posted August 27, 2012 Share Posted August 27, 2012 WOW,that things looking GREAT!!! Quote Link to comment Share on other sites More sharing options...
Recommended Posts
Join the conversation
You can post now and register later. If you have an account, sign in now to post with your account.
Note: Your post will require moderator approval before it will be visible.