Speedfreak Posted January 1, 2014 Share Posted January 1, 2014 Nice looking ride Karl, What engine does that kit come with? Quote Link to comment Share on other sites More sharing options...
W-409 Posted January 1, 2014 Share Posted January 1, 2014 (edited) Well since it's January 1st in here (Now 9:45PM) I started building my '69 Charger Daytona. Well, I can say that AMT's kit definitely has a lot to improve, so I'm not running out of things to do. Parts don't fit very well together and there is a lot of stuff to clean up and ejector marks to fill. It's not the worst possible kit, though, and I believe that it can be built into a nice looking model...Let's see... Here's the kit: I started by gluing the nose on place. I can't say that the fitment is good, since there are a couple of gaps that I need to fill. The fender extension parts don't look very good, either, but I hope that with some styrene and putty I can get them good. I'll remove the seam between the nose and body, since I want it to be like one piece. Next step with this is styrene to fill the gaps and lots of putty... On the underside there is a massive gap that I want to fill with styrene. Then I removed exhaust pipes from the rear axle. My build will use a NASCAR Style exhaust with exits on both sides before rear tires. The rear axle needs some sanding and other work before I can paint it. Engine block halves were glued together, too. Tamiya's Liquid Glue worked well on here. Spoiler parts had huge ejector pin marks... I've seen large ejector marks before, but these were extremely deep. I already put the first round of putty to cover them, but I'm quite sure that they'll need more putty as well (The picture is before any putty). This is where I am at right now. I'll continue tomorrow with some bodywork. Edited January 1, 2014 by W-409 Quote Link to comment Share on other sites More sharing options...
DriftingRookie Posted January 1, 2014 Share Posted January 1, 2014 my kit has changed to the 67 Malibu ss Quote Link to comment Share on other sites More sharing options...
DriftingRookie Posted January 1, 2014 Share Posted January 1, 2014 parts Quote Link to comment Share on other sites More sharing options...
DriftingRookie Posted January 1, 2014 Share Posted January 1, 2014 the kit Quote Link to comment Share on other sites More sharing options...
DriftingRookie Posted January 1, 2014 Share Posted January 1, 2014 first coat of primer Quote Link to comment Share on other sites More sharing options...
hvymtl Posted January 1, 2014 Share Posted January 1, 2014 Well i checked the stash and all i can do is a 2 n 1 Nova i will use that as the base but use copo parts to make it a non SS I hope DanB is cool with me also doing a nova if there is any probs let me know OK guys pics to follow Michael Quote Link to comment Share on other sites More sharing options...
64SS350 Posted January 1, 2014 Share Posted January 1, 2014 (edited) Thanks Gene, I am going to do some research and comparison to other kits to find out. The 442 was a 455ci engine, but the Ralley 350 that I will do carried a 350ci with around 310 hp, I believe it was called a 350 Rocket. Edited January 2, 2014 by 64SS350 Quote Link to comment Share on other sites More sharing options...
DriftingRookie Posted January 1, 2014 Share Posted January 1, 2014 using textured spray paint for the interior, the body finally got some clear so it's currently drying for a few days. Quote Link to comment Share on other sites More sharing options...
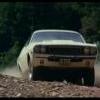
Lunajammer Posted January 2, 2014 Share Posted January 2, 2014 The Lunajammer Torino begins. Quote Link to comment Share on other sites More sharing options...
hvymtl Posted January 2, 2014 Share Posted January 2, 2014 Ok can i just place this on the starting line please oh well Now this is the image maybe color i am going for Michael Quote Link to comment Share on other sites More sharing options...
slantasaurus Posted January 2, 2014 Share Posted January 2, 2014 A couple years ago I bought a built up of an XR6 off of ebay. When the kit arrived I found that it was incomplete but there were actually enough body parts for 2 XR6's. One of them was in decent shape, the other was a glue bomb. I will be using the better of the 2 bodies, the only chassis included, front suspension (VW torsion bars) and rack and pinion. It did come with the kits Slant 6, but I will be replacing it with one from the Lindberg 64 Belvedere. This is the glue bomb body parts This won't be a copy of the 1962 XR6 but a 21st Century interpretation of it. I already have a few changes in mind for it beginning with losing the goofy looking fenders (witch weren't included with my kit anyway). I just hope I have enough of a parts box to fill in what I'm missing since my real parts stash is still back home in Chicago. I might just scratchbuild what I need. Quote Link to comment Share on other sites More sharing options...
freakshow12 Posted January 2, 2014 Share Posted January 2, 2014 I will be bringing a wide body 69 super bee and maybe one more Quote Link to comment Share on other sites More sharing options...
Jantrix Posted January 2, 2014 Share Posted January 2, 2014 When I see that XR-6 all I can think of is what a cool dry lakes racer that would make. Quote Link to comment Share on other sites More sharing options...
Zarana-X Posted January 2, 2014 Share Posted January 2, 2014 I've watched these for the last few years. I need to watch all those movies again, though. I'd like to actually enter this year with a 1972? Datsun 510. I'm using the last Revell version of this kit, sold as: http://www.internetmodeler.com/2002/september/first-looks/revell_datsun.htm I'll try to get photo's of my kit this weekend. I started, but put it aside awhile ago. I glued the engine block together and painted the body, but that's it. I have a Monogram Datsun truck also, but its a 720, and appears to be a 80-83 body style. Too new for the guidlines. Quote Link to comment Share on other sites More sharing options...
DriftingRookie Posted January 2, 2014 Share Posted January 2, 2014 Back at the bench and here is some updates on the Chevell The interior: The chassis pan, I sprayed the textured paint over the primer and then the flat black on top of the textured paint. The engine block painted body color The body after a few coats of clear. Still trying to find a good wax to use and will be getting some bmf to try on it. All comments welcomed. Quote Link to comment Share on other sites More sharing options...
maltsr Posted January 2, 2014 Share Posted January 2, 2014 You're certainly off to a flying start Ashley! Body colour looks nice and I recommend you try BMF, it takes a little practice but is far better than silver paint. One thing, it's a bit hard to see your progress because the pics are little grainy - can you try taking pictures in better light? Quote Link to comment Share on other sites More sharing options...
DriftingRookie Posted January 2, 2014 Share Posted January 2, 2014 yea I'm going to buy a desk lamp today and I'm using a cheap android phone to take pictures Quote Link to comment Share on other sites More sharing options...
Speedfreak Posted January 2, 2014 Share Posted January 2, 2014 Ashley, What color is that body? It looks like Sublime Green. It's cool on that car whatever it is. Gene Quote Link to comment Share on other sites More sharing options...
DriftingRookie Posted January 3, 2014 Share Posted January 3, 2014 Ashley, What color is that body? It looks like Sublime Green. It's cool on that car whatever it is. Gene it's krylon fluorescent green Quote Link to comment Share on other sites More sharing options...
DriftingRookie Posted January 3, 2014 Share Posted January 3, 2014 I just sprayed it over the primer, I'm thinking I'll have to do a whit base next time for it to really show as the fluorescent green Quote Link to comment Share on other sites More sharing options...
DriftingRookie Posted January 3, 2014 Share Posted January 3, 2014 Have the tail lenses sitting in smoke by tamiya trying to get the darker looking effect on the tail lenses Quote Link to comment Share on other sites More sharing options...
Pat Minarick Posted January 4, 2014 Share Posted January 4, 2014 These are the kits I will be using '78 Li'l Red Express Truck ,Will have to make a '79 grill, Nascar Truck Chassis ,and the Hemi out of the Dart kit. I'm going to use a set of Pagasus Hellas's rims and tire for a modern looking slot . Quote Link to comment Share on other sites More sharing options...
knarf Posted January 4, 2014 Share Posted January 4, 2014 i like it! Quote Link to comment Share on other sites More sharing options...
Speedfreak Posted January 4, 2014 Share Posted January 4, 2014 So all of our WIP gets posted in this thread? Quote Link to comment Share on other sites More sharing options...
Recommended Posts
Join the conversation
You can post now and register later. If you have an account, sign in now to post with your account.
Note: Your post will require moderator approval before it will be visible.