diymirage Posted March 5, 2010 Share Posted March 5, 2010 (edited) hey guys i build my first (scale) flip flop hinge yesterday and i thought i would share how i did it first off, the tools needed we have gleu super gleu metal rod styrene tube a knife sidecutters we start of by putting a little angle on the rod (i used metal but you can use whatever you like) this little angle will end up being the hinge point on the hood (or trunk if thats what you are building) once we have the first angle in there it is time to consider how long the first part of the hinge needs to be it should reach from where ever you put the hinge on the frame to a point past the front bumper BUT it should NOT be longer then the space between the hood and the top of the frame or the hood wont close once we have decided on the right length we can make another 90 degree angle in the rod, this one facing away from the first angle by 90 degrees (hard to explain so here is the picture) Edited March 5, 2010 by diymirage Quote Link to comment Share on other sites More sharing options...
diymirage Posted March 5, 2010 Author Share Posted March 5, 2010 (edited) now it is time to put the third angle in the rod (once this angle is in the little hinge point on the very top and the long end of the rod should be pointing the same way) the one thing to consider when making this angle is that in order to lift the hood over the front end of the car this section needs to be AT LEAST as long as the distance from the top of the frame (if thats where we mount it) to the top of the front end congratulations, we have now made one side of the hinge this is the time to cut down the styrene tube and slide it on the rod make sure it is long enough so that the hinges will clear then engine but narrow enough to fit in the engine bay the car i used to do this on was perfect for this since it doesnt have inner fenders if your car does have those you might want to consider cutting a groove in them for the hinges to travel in with the styrene tube in place it is time to repeat the first steps and replicate the hinge on the other side of the rod once that is done it should look something like this and with the "hood" open as you can tell i have allready gleud my hinge in place now is also the time to build the hinge points for the hood for this we will cut two little pieces of styrene tube and put them on the very ends of the hinges now it gets tricky we have to figure out a way to mount the little styrene hinge points to the hood i did the following...i mocked up the body and the frame and then put a tiny drop of superglue on each one of the styrene hinge points then i put the hood in place and while holding it with my hand i turned the model upside down with the remainder of the styrene tube i reached through the bottom of the frame and pressed each point down for about 10 seconds for the superglue to settle this is what it looks like closed on its way open and open all the way well, there you have it this is the way i do it let me know what you think Edited March 5, 2010 by diymirage Quote Link to comment Share on other sites More sharing options...
Blake Rogers Posted March 5, 2010 Share Posted March 5, 2010 great idea man i love it Quote Link to comment Share on other sites More sharing options...
diymirage Posted March 5, 2010 Author Share Posted March 5, 2010 great idea man i love it thanks ive been meaning to try this out on a model once and this lowrider was perfect for it Quote Link to comment Share on other sites More sharing options...
vaughn Posted March 5, 2010 Share Posted March 5, 2010 that is pretty cool and I like what you did to the hood. Thought about puttin Pink Lady on my next build but goota get done with Jimmie first. I sprayed gloss enamel clear coat today and it seems pithy lookin...not smoooth. And thru the advise from the hobby shop..I sprayed with the windows in. Might have been too cool. Can I lightly buff the body and respray.Without messin up the decals ? Should have sent you a picture but still workin on that. Maybe later. thanks Quote Link to comment Share on other sites More sharing options...
diymirage Posted March 5, 2010 Author Share Posted March 5, 2010 that is pretty cool and I like what you did to the hood. Thought about puttin Pink Lady on my next build but goota get done with Jimmie first. I sprayed gloss enamel clear coat today and it seems pithy lookin...not smoooth. And thru the advise from the hobby shop..I sprayed with the windows in. Might have been too cool. Can I lightly buff the body and respray.Without messin up the decals ? Should have sent you a picture but still workin on that. Maybe later. thanks as you can tell, the body on mine isnt done yet either, i just sprayed on two quick coats of clear to keep from rubbing the paint while handling it thanks for the compliments what do you mean with the windows in? you mean you glued the glass in place and then clear coated it ? thats new to me anyway, yes, you can buff the paint but what i usually do is wetsand it first go on ebay and look for a "polishing kit" it should run you less then 20 dollars shipped and include several cloths ranging from 4000 to 12000 grit that should smooth your paint right out HOWEVER keep in mind that when you polish the high spots get more of a treatment then the low spots so be very careful around edges i always put 2-3 coats of base down and 3 coats of clear and it is not uncommon for me to polish down to the primer Quote Link to comment Share on other sites More sharing options...
vaughn Posted March 6, 2010 Share Posted March 6, 2010 as you can tell, the body on mine isnt done yet either, i just sprayed on two quick coats of clear to keep from rubbing the paint while handling it thanks for the compliments what do you mean with the windows in? you mean you glued the glass in place and then clear coated it ? thats new to me anyway, yes, you can buff the paint but what i usually do is wetsand it first go on ebay and look for a "polishing kit" it should run you less then 20 dollars shipped and include several cloths ranging from 4000 to 12000 grit that should smooth your paint right out HOWEVER keep in mind that when you polish the high spots get more of a treatment then the low spots so be very careful around edges i always put 2-3 coats of base down and 3 coats of clear and it is not uncommon for me to polish down to the primer Quote Link to comment Share on other sites More sharing options...
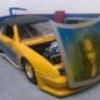
vaughn Posted March 6, 2010 Share Posted March 6, 2010 (edited) This is after one coat of clear...are you sayin I can lightly buff without messin up the decals and then recoat? Sorry to bother you Edited March 6, 2010 by vaughn Quote Link to comment Share on other sites More sharing options...
slant6 Posted March 6, 2010 Share Posted March 6, 2010 If I had seen this a month ago I would have done this a little differently. Im gonna keep this in mind for a future project though, great tip! Will it work the same for trunk too? Quote Link to comment Share on other sites More sharing options...
diymirage Posted March 6, 2010 Author Share Posted March 6, 2010 This is after one coat of clear...are you sayin I can lightly buff without messin up the decals and then recoat? Sorry to bother you that came out pretty nice i see you figured the picture posting down aswell, good if you ONLY buff it with some compound then you should be ok BUT i always apply at least 3 coats of clear then again, i do wetsand my paintjobs If I had seen this a month ago I would have done this a little differently. Im gonna keep this in mind for a future project though, great tip! Will it work the same for trunk too? love the paint sceme on that one it might not be to hard to redo the hood but then again, if you are pleased with it you can always save this for a future build as you said it should work the same way for a trunk might even be easyer because there is more room in the trunk for the hinges plus, you can go with the "standard" way of flipflopping a trunk (like such) or you could go with a radical but completly useless flip flop and put the hinge in the same way as the front is done and have the trunklid sit in the back of the car what would be really spiffy is if you were to build a james bondish pickup truck with this hinge under the bed so that the bed could hinge up to display the missle launcher Quote Link to comment Share on other sites More sharing options...
vaughn Posted March 6, 2010 Share Posted March 6, 2010 On the posting thing...kinda. I go around the world to get across the street, if you know what I mean. I could probaly cut out about half of the steps I go thru. will get better. Quote Link to comment Share on other sites More sharing options...
B_rad88 Posted March 6, 2010 Share Posted March 6, 2010 nice job Eelco, i did something sorta like that on my toyota tacoma/hi lux its called "low 'n' slow", you did a nice job man! Quote Link to comment Share on other sites More sharing options...
diymirage Posted March 6, 2010 Author Share Posted March 6, 2010 nice job Eelco, i did something sorta like that on my toyota tacoma/hi lux its called "low 'n' slow", you did a nice job man! thanks i thought it suited this build Quote Link to comment Share on other sites More sharing options...
Recommended Posts
Join the conversation
You can post now and register later. If you have an account, sign in now to post with your account.
Note: Your post will require moderator approval before it will be visible.