DoctorLarry
-
Posts
951 -
Joined
-
Last visited
9 Followers


Recent Profile Visitors
8,001 profile views


DoctorLarry's Achievements
MCM Ohana (6/6)
-
Looking For A Special Glue
DoctorLarry replied to oldcarfan's topic in Model Building Questions and Answers
Just a general question about using epoxy, Steve. After you mix it, do you apply it with toothpicks and do you let it tack for a minute before assembly? -
Who did the wheels and tires? Another super clean build.
-
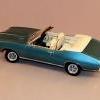
Looks great, Gerald. I have a soft spot for green cars and that was a beautiful GM color.
-
Thanks, guys!
-
Got the foil done and started decals. I had three sets of decals and two sets disintegrated. I took the remaining details and coated them with three coats of clear lacquer, which stabilized them. I got one side moved too far and so am waiting on another replacement set to finish it. They were too large and had to be shortened to fit so a major headache.

-
Mpc 1970 Mercury Cyclone Spoiler 70’s street machine flavor
DoctorLarry replied to GoodbuildNY's topic in Model Cars
Captures the street freak vibe to a tee. Very nicely done! -
My suspicions as well. Thanks!
-
Is there any way to remove decals after they have set without destroying them?
-
I'll check it out. Thanks!
-
Great idea which I will try. Where did you get the punches?
-
Any tips on how to make headlights look realistic? They sort of have a bluish silver look but any ideas on how to duplicate it? I bought some decals but they don't look great in my opinion.
-
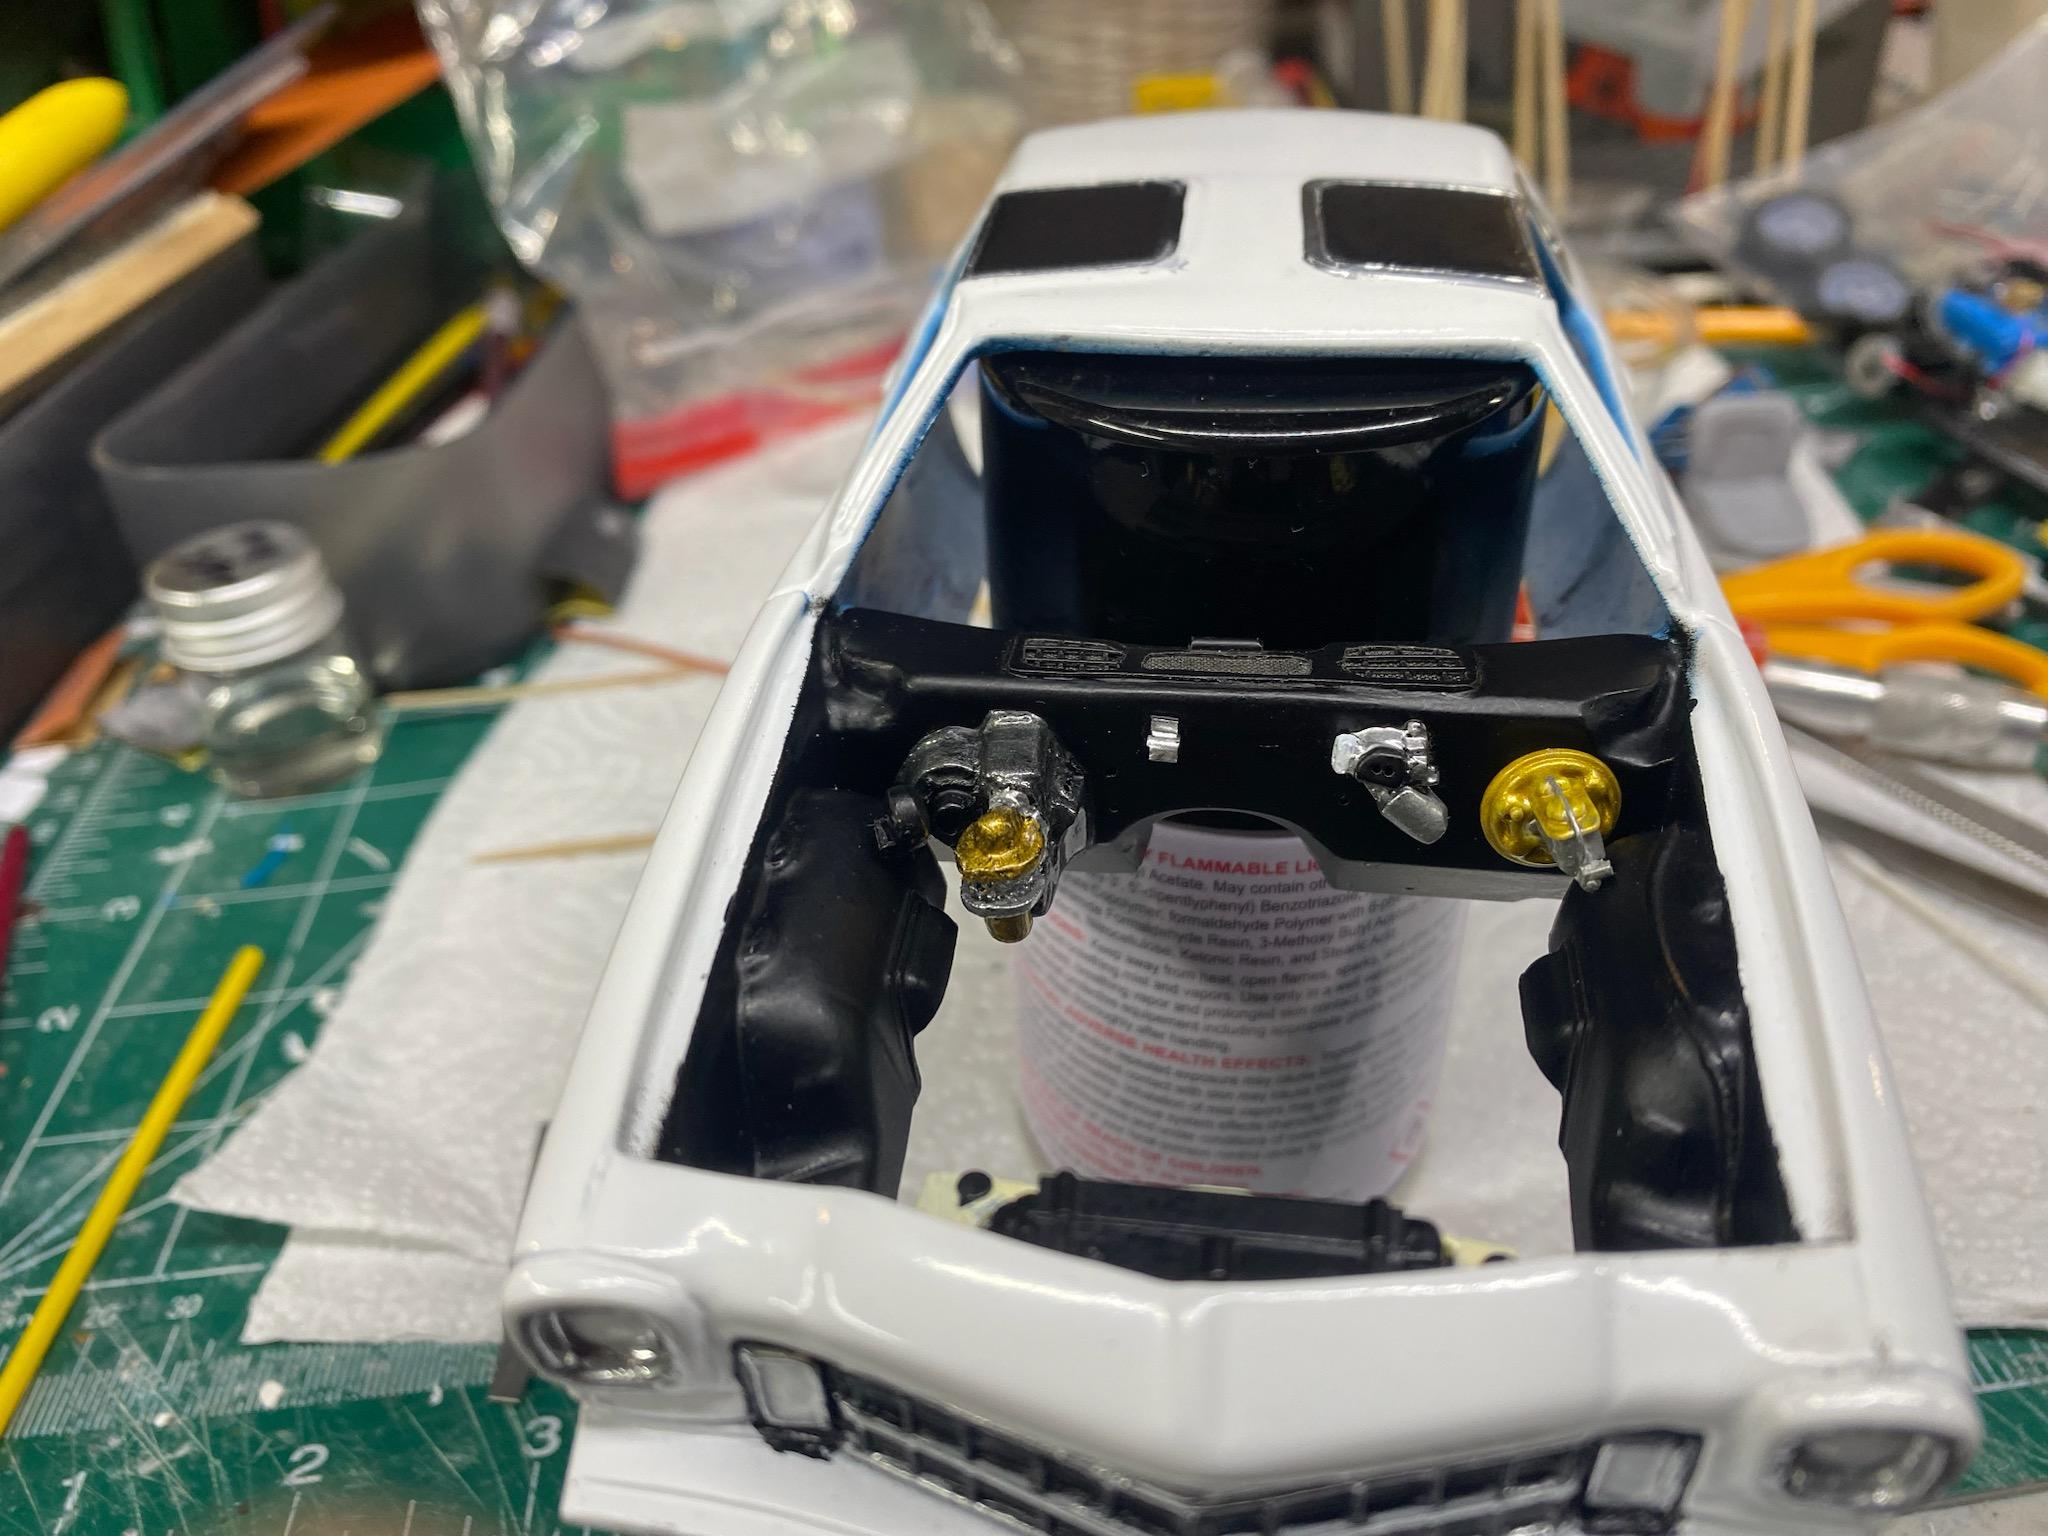
Plugging along. I painted the body, interior and engine compartment. Got a little bleed through in a couple of places to fix. Started detailing the engine bay. I need to tome down the cad colors on the brake booster and VIR. The master cylinder is just sitting there now so it is crooked. I started foiling the body and detailed the front grille. Lots of big decals on this one.
-
There is a great resin six cylinder on EBAY https://www.ebay.com/itm/134506785863?itmmeta=01HQX8ZSNDTQWRY0EFZVE6K4MK&hash=item1f513aac47:g:iAwAAOSweHhkIH11&itmprp=enc%3AAQAIAAAA4N%2BUDFfq4oD1Czm%2FpaomEhJRerYMB%2FkjtaZU5shpXjNyBYTTt6LGSNs3xvk%2FbHBeFgrEynZSzkKVN%2BN%2BQfNbkLeaY8LE2P0ynrNyTc7y%2BtNxZc3Y2%2FXdxOAffa3V4xzzSFyQoVBmf6frNZTKAonc%2BYk16A2BpVrNr%2BXCF%2B5OKYlQh%2B9FMSyKuWKNceEulfDcbuHe2AdwdD2hWMM7ohekWh3sc4MatFqEn3S3a0PenYGzjve1ntMx5WGTI9NJR8ZckesTOMz4JsYbtcCMZiCjcTOZ%2BxnC4M0Yg5zilZoNYxnW|tkp%3ABFBM8Jr_qL9j
-
Do you use a lighter color or one close to the shade?
-
I have done that as well. Hobby Lobby has very thin felt squares that are 12x12 for less than a buck. I used that for a saddle interior. They have a bunch of colors but mostly things like black red and gray. Yours makes it near to the color of the seats.