1 bad55 stan Posted July 29, 2015 Share Posted July 29, 2015 It just get better every time,its amazing. Quote Link to comment Share on other sites More sharing options...
futurattraction Posted July 30, 2015 Author Share Posted July 30, 2015 Thank you Stan. Trying to keep it moving along, however slow my progress might be. Quote Link to comment Share on other sites More sharing options...
blackbeard Posted July 30, 2015 Share Posted July 30, 2015 its summer time to take time on builds Quote Link to comment Share on other sites More sharing options...
futurattraction Posted July 30, 2015 Author Share Posted July 30, 2015 Good theory but, for me anyway, it's oftentimes difficult to put into practice. Quote Link to comment Share on other sites More sharing options...
blackbeard Posted July 30, 2015 Share Posted July 30, 2015 very true and he truly sings after hours Quote Link to comment Share on other sites More sharing options...
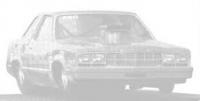
futurattraction Posted August 4, 2016 Author Share Posted August 4, 2016 (edited) Time for an update. After a lengthy stretch of not having the time, losing my sense of direction and my work space being such a disaster it was difficult to get motivated, I finally took the plunge and jumped back into my Fairmont. A major step was I finally took a deep breath and opened up the doors. I am in the process of adding door jamb detail which, so far, I'm pretty happy with. It will be interesting to see how I get along with mounting the doors. I intend to use a combination of RB Motion rod ends and bolt pins to allow them to be removable. One of the next steps I'll be doing is removing the front end. While it will make this a bit more flexible than I would prefer, it will help me to at least see what's going on at the front of the door and front door jamb. As can be seen on the first pic, I have added some material to the forward and/or trailing edges of the doors to get them reduce the door gap. This really is a lot of what motivated me to open the doors on this build. I intend to have a number of pieces easily viewable, such as the pedal assembly, steering wheel, gauges and Lenco lever assembly when all is said and done, with the trans tunnel out of the car when on display. Other recent developments are the creation of a 3D-printed version of my original central frame rail section. While my hand-built version filled the bill, I was always a bit unhappy with how some of the joints looked and this was a way to have something that is as close to perfectly finished/fitted as is possible. I will have to go back in and add seat mount brackets, slide-in trans mount and drill for brake line clamps, but none of those should be a big deal. I finished getting my rear wheels drilled for functional wheel studs, got the holes drilled for valve stems and assembled the front and rear halves together. The last "new" detail is that I have come out with updated 14x32 and 16x33 slicks. The 16x33s have a somewhat smaller ID and the rubber is stretchy enough that the slicks can be fitted over the assembled wheels. Sorry for the "soft" photo... Finally, a high shot of the whole shebang... Comments and suggestions welcome! Edited August 6, 2016 by futurattraction Quote Link to comment Share on other sites More sharing options...
Codi Posted August 4, 2016 Share Posted August 4, 2016 Scott, shove that other stuff aside and keep this one going. The changes you're making do make a difference. Cheers, tim Quote Link to comment Share on other sites More sharing options...
blackbeard Posted August 5, 2016 Share Posted August 5, 2016 x2 keep on going its looking killer Quote Link to comment Share on other sites More sharing options...
MrObsessive Posted August 5, 2016 Share Posted August 5, 2016 OOOH! Scott, you are a brave man! I take it this is a resin body and you've cut the doors out! Kudos for tightening up the shut lines--------not always and easy thing to do with resin and from what I see, the fit is excellent! Quote Link to comment Share on other sites More sharing options...
Nytrozilla Posted August 5, 2016 Share Posted August 5, 2016 Scott, you are a nut case. You restart a build after a 1 year hiatus and say, "Time for an update." Who do you think you are? Chris Sobak? Great to see you came back at it with such a ferocity. Quote Link to comment Share on other sites More sharing options...
3men2s Posted August 5, 2016 Share Posted August 5, 2016 OUTSTANDING!!!!GLUED TO THIS BUILD SINCE DAY 1 Quote Link to comment Share on other sites More sharing options...
Mooneyzs Posted August 5, 2016 Share Posted August 5, 2016 Scott... what can say but it is so great to see ypu back at the bench with this build. I am.loving the progress you are making. It is looking so good and I am loving the attention to detail. This is such am awesome build keep up the great work and I look forward to you next update. Quote Link to comment Share on other sites More sharing options...
gasser59 Posted August 5, 2016 Share Posted August 5, 2016 It would seem you haven't lost or suffered any decrease in your skills during your hiatus. My word that is outstanding and your a brave man for opening up the doors. I applause you sir. Dialed in and back in the front row. Quote Link to comment Share on other sites More sharing options...
10thumbs Posted August 5, 2016 Share Posted August 5, 2016 Hello Scott, really great to see this project back in the works. Your parts are just top notch and they look wonderful. Good stuff for sure. Quote Link to comment Share on other sites More sharing options...
Red rocket 10 Posted August 6, 2016 Share Posted August 6, 2016 Hey Scott, good to see you back buddy , I'm looking forward to the next update the car is looking real nice. Quote Link to comment Share on other sites More sharing options...
futurattraction Posted August 6, 2016 Author Share Posted August 6, 2016 Hey guys, Tim - It feels good to get back to this. I'll try to keep a place cleaned off so I continue to make progress! I appreciate your looking (and chiming) in, Henry. It is, indeed, resin Bill. Have been wanting to incorporate this mod into my build for a long time, so it feels good to have "broken through"... There's not doubt I'm a nut case, Joe. You did know that Mr. Sobak and I are brothers, didn't you??? Thanks Danny! You are a patient man, is all I can say. LOL Hey Chris. Thanks brother. I sort of feel like I've regained a direction and motivation for this project - I appreciate your encouragement! Thank you, Brad. Keep on keepin' on, I guess. My head is so full of what I'd like to do on this. Lord willing, I'll be able to accomplish a good share of them, anyway... Thanks for your kind words and encouragement, Michael. Leonard - Thanks for popping in! It's always nice to hear from you and see what you've got going on for projects. Quote Link to comment Share on other sites More sharing options...
Nytrozilla Posted August 6, 2016 Share Posted August 6, 2016 ***There's not doubt I'm a nut case, Joe. You did know that Mr. Sobak and I are brothers, didn't you??? *** So, it's Chris and John and me. Now we have you too? Who's gonna' tell Mom? Quote Link to comment Share on other sites More sharing options...
Jmaracing Posted August 6, 2016 Share Posted August 6, 2016 Looking awesome Scott. great job... Quote Link to comment Share on other sites More sharing options...
DrKerry Posted August 8, 2016 Share Posted August 8, 2016 Great progress Scott, looking good!!!!!!! Quote Link to comment Share on other sites More sharing options...
futurattraction Posted August 9, 2016 Author Share Posted August 9, 2016 (edited) Hey Joe - I guess we're gonna have to draw straws to see who tells Mom. I don't relish experiencing her reaction when she finds out she's got all of us as sons. LOL Thanks Joe. Here's to more progress... I appreciate it Kerry. How've you been doing, buddy? Okay - as long as I've got the ball rolling I'm going to keep nudging it along as best I can. I got the passenger side door jamb installed a couple nights ago. I also went ahead and removed the front clip. I'm not certain yet whether it was the wisest time to remove it, but the driver's side A-pillar had already broken and I was concerned that with all the inserting and removing the chassis that I'm doing that it was only a matter of time before I break the other pillar or one of the rocker panel-to-fender joints. I decided I'll just live with whatever extra hassle it might be to deal with to at least control when stuff comes apart... LOL Although I don't have any pics of the WIP door itself, here are a couple of the door hing pivots at the front bulkhead/jamb: We've all seen discussions about "floating" alternators. In a similar fashion, I'm trying to figure out how, or if, there is a way to constructively deal with "floating A-pillars". This is just a plain, weird shot, but thought I'd include it... Let me know whatcha' think! Edited August 9, 2016 by futurattraction Quote Link to comment Share on other sites More sharing options...
blackbeard Posted August 9, 2016 Share Posted August 9, 2016 scott that is looking killer all the mock up is fantastic Quote Link to comment Share on other sites More sharing options...
DrKerry Posted August 9, 2016 Share Posted August 9, 2016 Hey Scott, not to bad, been working third shift lately and not really liking it much..... Got another month or so then I go back to first, can't wait!!!!!!! Quote Link to comment Share on other sites More sharing options...
MrObsessive Posted August 9, 2016 Share Posted August 9, 2016 (edited) Scott. your super excellent work continues, but oooooh those free standing A pillars! Is there any way you can maybe temporarily support those? I was thinking perhaps take some plastic square rod the height of the distance from the rockers to the base of the pillar and very lightly superglue those in place. After you've got the additional structure you need, you can always cut them away. Just thinking out loud here. Unlike plastic, resin as you know can be quite unpredictable! Edited August 9, 2016 by MrObsessive Quote Link to comment Share on other sites More sharing options...
bobthehobbyguy Posted August 9, 2016 Share Posted August 9, 2016 Haven't looked in on this in a while. Very impressive. Quote Link to comment Share on other sites More sharing options...
Plasticfanatic Posted August 9, 2016 Share Posted August 9, 2016 This looks spectacular, and the detail is superb! the photoecht detail is simply amazing.I have to finish my 1978 Glidden car which is using one of your bodies, I also removed the front clip, trunk but only opened one door, the driver side, Scott casting was/is so sharp and beautifuly cast that made these modification an easy choice for me.....as well as the engine which is also from Scott, great piece!! Quote Link to comment Share on other sites More sharing options...
Recommended Posts
Join the conversation
You can post now and register later. If you have an account, sign in now to post with your account.
Note: Your post will require moderator approval before it will be visible.