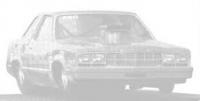
futurattraction Posted August 16, 2012 Author Share Posted August 16, 2012 Here is a progress shot of how the center frame section fits in the pan. Though the rail section may not be placed quite where it will be when finished, you can see how the rear, main crossmember intersects with the guides/uprights that will mount my photo etch 4-link frame brackets. I get a kick out of seeing new build mockup shots to see how they set, so here’s my requisite mockup. I’m still undecided about tires and wheels, but for the sake of having some type of rolling stock, here are Monogram Pro Stars from the ’87 Glidden T-Bird. I’m debating between them and some custom-made 15” Cragar SuperTricks with true-to-scale 14x32s. I’m sure I’ll post pics of those at some point in the future. Not quite head-on… Lower side shot. Quote Link to comment Share on other sites More sharing options...
tyrone Posted August 16, 2012 Share Posted August 16, 2012 She's looking good Scott... love the stance bro... Quote Link to comment Share on other sites More sharing options...
Prostreet Posted August 16, 2012 Share Posted August 16, 2012 Nice Scott i like it, Old school prostreet. Quote Link to comment Share on other sites More sharing options...
agmaciej Posted August 16, 2012 Share Posted August 16, 2012 Coming along nicely, Scott, looking forward to seeing this finished. Al Quote Link to comment Share on other sites More sharing options...
nascarfan Posted August 16, 2012 Share Posted August 16, 2012 Looking tough Scott!!!! Quote Link to comment Share on other sites More sharing options...
Mooneyzs Posted August 16, 2012 Share Posted August 16, 2012 Scott... nice work so far buddy. It is looking great!!! Quote Link to comment Share on other sites More sharing options...
Foxer Posted August 16, 2012 Share Posted August 16, 2012 These on line builds are fun, so don't sweat exposing all ... that's the fun of it. I've had a thread running since Sept. 2010 building my daughter's GMC van and it's still going on. I can't offer much help with the type of vehicle you're building but I'm enjoying it just the same! Quote Link to comment Share on other sites More sharing options...
Red rocket 10 Posted August 16, 2012 Share Posted August 16, 2012 Scott the car looks real sharp, how can I get one.................. Leonard Quote Link to comment Share on other sites More sharing options...
James2 Posted August 16, 2012 Share Posted August 16, 2012 (edited) Very Nice! Edited August 16, 2012 by James2 Quote Link to comment Share on other sites More sharing options...
cobraman Posted August 16, 2012 Share Posted August 16, 2012 That car is looking sweet ! Quote Link to comment Share on other sites More sharing options...
1320wayne Posted August 16, 2012 Share Posted August 16, 2012 Progress is looking good Scott. Quote Link to comment Share on other sites More sharing options...
Fuel Coupe Posted August 16, 2012 Share Posted August 16, 2012 great work and beautiful resin, I'll be in touch to get one of these... Quote Link to comment Share on other sites More sharing options...
futurattraction Posted August 17, 2012 Author Share Posted August 17, 2012 Hey Tyrone – thanks buddy. I think it sets pretty nicely… Thanks Joe – it could easily pass for a pro streeter if there’s room under there for mufflers. LOL Al – I’ll keep plugging away at it. Thanks Jason! Appreciate it… J Hey Chris – thanks for kind words, bro. Thank you for the reminder, Mike. It’s real easy for me to let this get more serious than it deserves… Hi Leonard – thank you for the compliment. I PM’d you about how to get in touch. James – thanks for the compliment. I like your sig a bunch. Character is all-important! Thanks Ray. I’m tryin’… Wayne – I appreciate it. Got more pics I can post. Just hope I can keep up the momentum… LOL Thanks Shane. The Lord gave me a lot patience to work through this project – and I have to give Ed Fluck credit for the casting work. He’s a great guy and does excellent work. Quote Link to comment Share on other sites More sharing options...
Plasticfanatic Posted August 18, 2012 Share Posted August 18, 2012 With your attention to detail and superb accesories,this is going to be stunning indeed. Quote Link to comment Share on other sites More sharing options...
Mister Twister Posted August 19, 2012 Share Posted August 19, 2012 Good stuff Scott! Quote Link to comment Share on other sites More sharing options...
GoatGuy Posted August 19, 2012 Share Posted August 19, 2012 Looks really good Scott. I'll be watching your build. Quote Link to comment Share on other sites More sharing options...
futurattraction Posted August 26, 2012 Author Share Posted August 26, 2012 Fred - thanks for your kindness and support. Sorry for being late posting something. Been busy with life and trying to get some bench time to make some progress on this... Thanks Darryl. I'm planning to get another pic update, here shortly, but wanted to let you know I appreciate your comment. Hey Dave - Some new stuff will be coming shortly! Quote Link to comment Share on other sites More sharing options...
futurattraction Posted August 26, 2012 Author Share Posted August 26, 2012 I was able to make some progress on the X-members for the central frame rail section this week. Got them finished mid-week. Wasted some styrene before I got the fit I was looking for, for the full-length diagonal. Thanks to Chris, I've learned that it's better to keep doing it until you're happy with it rather than settle... As you can see above, I used masking tape to make sure I the pieced diagonals are straight. Sighting across them, I think it worked! LOL The main lower control arm is .050 stainless tubing with RB Motion 1504 rod end and nut where it will attach to the chassis bracket. .8MM brass nut, bolt and washers are from Scale Hardware. Lower strut mount is .100" styrene rod, drilled to accept the stainless tubing and provide a receiver for the lower strut mount. I cut tiny pieces of .080 brass to serve as spacers between the photo etch A-arm mounting tabs. The tabs slide over the .062 tubing and positively locate them. The width of the tabs matches (more or less) with the .080 OD of the rails. I'll have to do a tiny bit of gap filling, but it shouldn't be much. The front frame rails are constructed out of .063 brass tubing telescoped inside .080 brass. I tried to use a file to gnurl the .063 to make the fit a bit tighter. You can see where the scuffed area is. Hopefully I'll get another update posted before the end of the weekend... Comments welcome! Quote Link to comment Share on other sites More sharing options...
Prostreet Posted August 26, 2012 Share Posted August 26, 2012 Wow, nice clean work Scott, Not sure how you guys work with such small stuff, i have a hard time with 1/16th scale lol Quote Link to comment Share on other sites More sharing options...
Ben Posted August 26, 2012 Share Posted August 26, 2012 Awesome work Scott! I can't wait to hear it run! Quote Link to comment Share on other sites More sharing options...
comp1839 Posted August 26, 2012 Share Posted August 26, 2012 scott, i can't believe you are working in 1:25 scale (or 1:24 i'm not really sure. it's so tiny.) the control arm is smokin' hot. as are the little tiny brackets that you're using!!!!! keep up the unbelievable craftsmanship!!!!!!! Quote Link to comment Share on other sites More sharing options...
futurattraction Posted August 27, 2012 Author Share Posted August 27, 2012 Thanks Joe - it's getting tougher and tougher to work in this scale. My eyes and fingers don't always cooperate! LOL Hey Ben - Yeah, getting those roller rockers adjusted is a pain because I can't find a feeler gauge that is thin enough... Thanks for the kind words, Dave. I'm going to be doing several things on this that I've never done before and I'm sure you and others will be called upon to (hopefully) get some of the details right. Quote Link to comment Share on other sites More sharing options...
C.C.RACER Posted August 27, 2012 Share Posted August 27, 2012 Scott, just found your build and looks like a GREAT start. Ill keep checking in time to time. By the way I have the first coats of paint on mine and should have it done in the next couple weeks. Everybody the casting on this car is the BEST I have ever seen. Thank you Scott. Good luck and waiting for the next update. Clay Quote Link to comment Share on other sites More sharing options...
futurattraction Posted August 27, 2012 Author Share Posted August 27, 2012 Hey, thanks Clay. I'll look forward to some pics of yours when you're ready... Quote Link to comment Share on other sites More sharing options...
Mooneyzs Posted August 28, 2012 Share Posted August 28, 2012 Scott... your skills amaze me Brother!! Nice work on the lower control arm. Looks sweet!! Quote Link to comment Share on other sites More sharing options...
Recommended Posts
Join the conversation
You can post now and register later. If you have an account, sign in now to post with your account.
Note: Your post will require moderator approval before it will be visible.