Albie D Posted June 5, 2012 Share Posted June 5, 2012 (edited) Been a while since I last posted. Long story short my last project (mid 50's East Coast 32) was wrecked right before completion. Note to self; never try to finish a model drunk, tired, and fustrated. They end up in a thousand pieces after you huck them against the wall. Anyway, took a break for a few and recently the itch is back. Wanted something easy so I picked up AMT's 93 Issue of the venerable 64 Impala. Im going for mid 60's vibe with this one. A Bellflower kustom , built right before the time the Anglo and Chicano "lowriders" made thier split. Think the Beach Boys "409", rather than "Gin and Juice". This thing low for sure, but the Cragars, shaved trim, emblems and future mild body mods bring back the mid 60's. Paint will be Watson inspired panels, but Im unsure of the colors. Im unsure of everything else for that matter, but so far I modded the pan and did a lot of tweaks here and there to nail the stance. Shoes come courtesy of Hoppin Hydros. I was hoping they would be a tad bigger to emulate the 14", 195/75/14 kustom foot wear of 45+ years ago, but they look killer none the less. And we all know that wheels and stance is EVERYTHING. More updates soon. Edited July 5, 2012 by Albie D Quote Link to comment Share on other sites More sharing options...
BOSWELL891 Posted June 5, 2012 Share Posted June 5, 2012 Looks cool I like the stance Quote Link to comment Share on other sites More sharing options...
c-man405 Posted June 5, 2012 Share Posted June 5, 2012 where did you get the Cragars? thanks carter Quote Link to comment Share on other sites More sharing options...
Albie D Posted June 5, 2012 Author Share Posted June 5, 2012 The wheels are from Hoppin Hydros. O.G. Blvd. Quote Link to comment Share on other sites More sharing options...
RedBanditCustoms Posted June 6, 2012 Share Posted June 6, 2012 Looks cool man! Quote Link to comment Share on other sites More sharing options...
Qwit Pushin Posted June 6, 2012 Share Posted June 6, 2012 Your work looks great. I can't wait for someone to come up with an improvement for the flat, 'snow-plow' front end of the '64s. Quote Link to comment Share on other sites More sharing options...
espo Posted June 6, 2012 Share Posted June 6, 2012 Looken Good. What are you thinking for colors? I lived in SoCal at about the time of which you speak. Mid sixties many of the guys would use a light colored bottom, sometimes even a pearl clear coat. The roofs were often metalflaked in a darker shade or masked with a table cloth lace and spray with a darker color. Just some ideas. Quote Link to comment Share on other sites More sharing options...
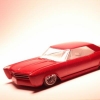
Guest Darkside Customs Posted June 6, 2012 Share Posted June 6, 2012 This will be cool to watch... Heres some motivational pics.... Quote Link to comment Share on other sites More sharing options...
Albie D Posted June 6, 2012 Author Share Posted June 6, 2012 Thanks for the motivation guys! Mike, I sorta dig the flat grill. I know what you mean though. That flat surface is begging for a grill swap or somethin. David, you dont have any old snapshots lying around do you? Im jealous. I was born wrong time, wrong coast. Ive got a few ideas in my head that along those lines.. Quote Link to comment Share on other sites More sharing options...
Albie D Posted June 16, 2012 Author Share Posted June 16, 2012 Made a little progress, Laconia Bike Week is goin down and Ive spent the past week or so on two wheels checking the scene and not much time at the bench. But Im getting a few things done. I got the car to lay rocker by modifying the belly pan some more, so its got a body drop of sorts going on. I sectioned the interior tub along with the core support to get things back in line. This build is morphing into more of a modern iterpretation of a early 60s cruiser. The pan has solid axles with everything molded in so undercarrage detail wont be exstensive. The two show off things this time around are the egg crate grill in the front along with a recessed tubular tail panel bringing up the rear. Guess what Im using for taillights and Id like to know which way you think they look mounted best. Also please note that I just slapped this stuff together for some quick progress pics and theres still a long ways to go, but you get the idea. Thanks for checkin it out! http:// http://http:// [url="http:// %5Burl="http://"]http:// Quote Link to comment Share on other sites More sharing options...
H.A.K Posted June 16, 2012 Share Posted June 16, 2012 Dude like that grill. and the rear end. Great work sofar. Quote Link to comment Share on other sites More sharing options...
deathskull59 Posted June 17, 2012 Share Posted June 17, 2012 cool impala all though becarefull with the chaisses it pretty weak and flimsy and break and fall apart too i know because i onece had this model before. Quote Link to comment Share on other sites More sharing options...
Albie D Posted June 17, 2012 Author Share Posted June 17, 2012 (edited) cool impala all though becarefull with the chaisses it pretty weak and flimsy and break and fall apart too i know because i onece had this model before. I know right? Didnt take much work to get the chassis pan on the floor., I just raised the axle mounts and left everything else pretty much alone. The molded in mufflers and crossmember hang below the rockers though, so I shortened the mounts to tuck the whole pan up where it belongs. Ill get some pics later. The pan may be flimsy, but Im suprised by the amount of flashing on this model, plus the body has more thin spots and dips than some resin kits. Working on the Bellflower tips right now. Edited June 17, 2012 by Albie D Quote Link to comment Share on other sites More sharing options...
Albie D Posted July 5, 2012 Author Share Posted July 5, 2012 Chipping away it, little by little. Startiing to see a little daylight at the end of this project tunnel. Detailed the grill using "The Detailer". I really dig this stuff as its super easy to use.. http:// Got the 409 dressed. Little detailing on the valve covers plus a parts bin air cleaner( needed something low profile as the bodydrop was pushing the motor against the hood). My second plug job. Still gotta remember to leave some slack to avoid the "wires under tension" look. Gonna clean them up at the distributor a little. Macro shows all sins. ">http:// ">http:// My first scratch built parts! Bellflower tips. Round styrene, BMF, and parts bin chrome elbows. Little dab of glue, a brush of paint, I was psyched! ">http:// ">http:// Got the body in Diamond Dust base coat. Ive been using Duplicolor sandible primer. Works great, is cheap, and has no adverse reaction to Testors lacquer Goodbye scratch marks, so long bondo boogers.. ">http:// ">http:// Next up is the gut plus a valiant attempt at some sort of panel paint job. Thanks for looking and the inspiration! Quote Link to comment Share on other sites More sharing options...
91blaze Posted July 5, 2012 Share Posted July 5, 2012 Nice job, I like how this is coming together. Quote Link to comment Share on other sites More sharing options...
Albie D Posted July 6, 2012 Author Share Posted July 6, 2012 Thanks man. Its my 5th build (not counting teenaged rush jobs). This site is really helping me up my game! Quote Link to comment Share on other sites More sharing options...
Hedgehog Posted July 6, 2012 Share Posted July 6, 2012 It's looking great the silver dust is awesome keep it up Quote Link to comment Share on other sites More sharing options...
Albie D Posted July 7, 2012 Author Share Posted July 7, 2012 Thanks Wilbert. The Diamond Dust is awesome and Im excited and curious how it will look though a transparent purple. Still waiting for it to fully cure. Quote Link to comment Share on other sites More sharing options...
CemetaryAngel81 Posted July 18, 2012 Share Posted July 18, 2012 Thats lookin great,nice grill and mods Quote Link to comment Share on other sites More sharing options...
Albie D Posted July 19, 2012 Author Share Posted July 19, 2012 Ugghhh, I made the mistake of shooting Testor's Enamel when it was muggy, man what a mess! I have no luck with those cans..The body is in the purple drink as of right now. Im taking the plunge to airbrushing, got some paints on the way and my brother-in-laws Badger 175 on a long term loan. Will document my first brush job, should be interesting or entertaining at least.. Quote Link to comment Share on other sites More sharing options...
Recommended Posts
Join the conversation
You can post now and register later. If you have an account, sign in now to post with your account.
Note: Your post will require moderator approval before it will be visible.