k100
-
Posts
486 -
Joined
-
Last visited
Content Type
Profiles
Forums
Events
Gallery
Everything posted by k100
-
IH Transtar 4300 converted to a 4200
k100 replied to k100's topic in WIP: Model Trucks: Big Rigs and Heavy Equipment
Thank you for comments Charles yes it help quite a bit, but still need to shim the front of the cab just a little . -
International 4300 tractor
k100 replied to Gary Chastain's topic in WIP: Model Trucks: Big Rigs and Heavy Equipment
Great looking truck , I’m digging the fuel tanks and mounts , what size tubing did you use ? -
IH Transtar 4300 converted to a 4200
k100 replied to k100's topic in WIP: Model Trucks: Big Rigs and Heavy Equipment
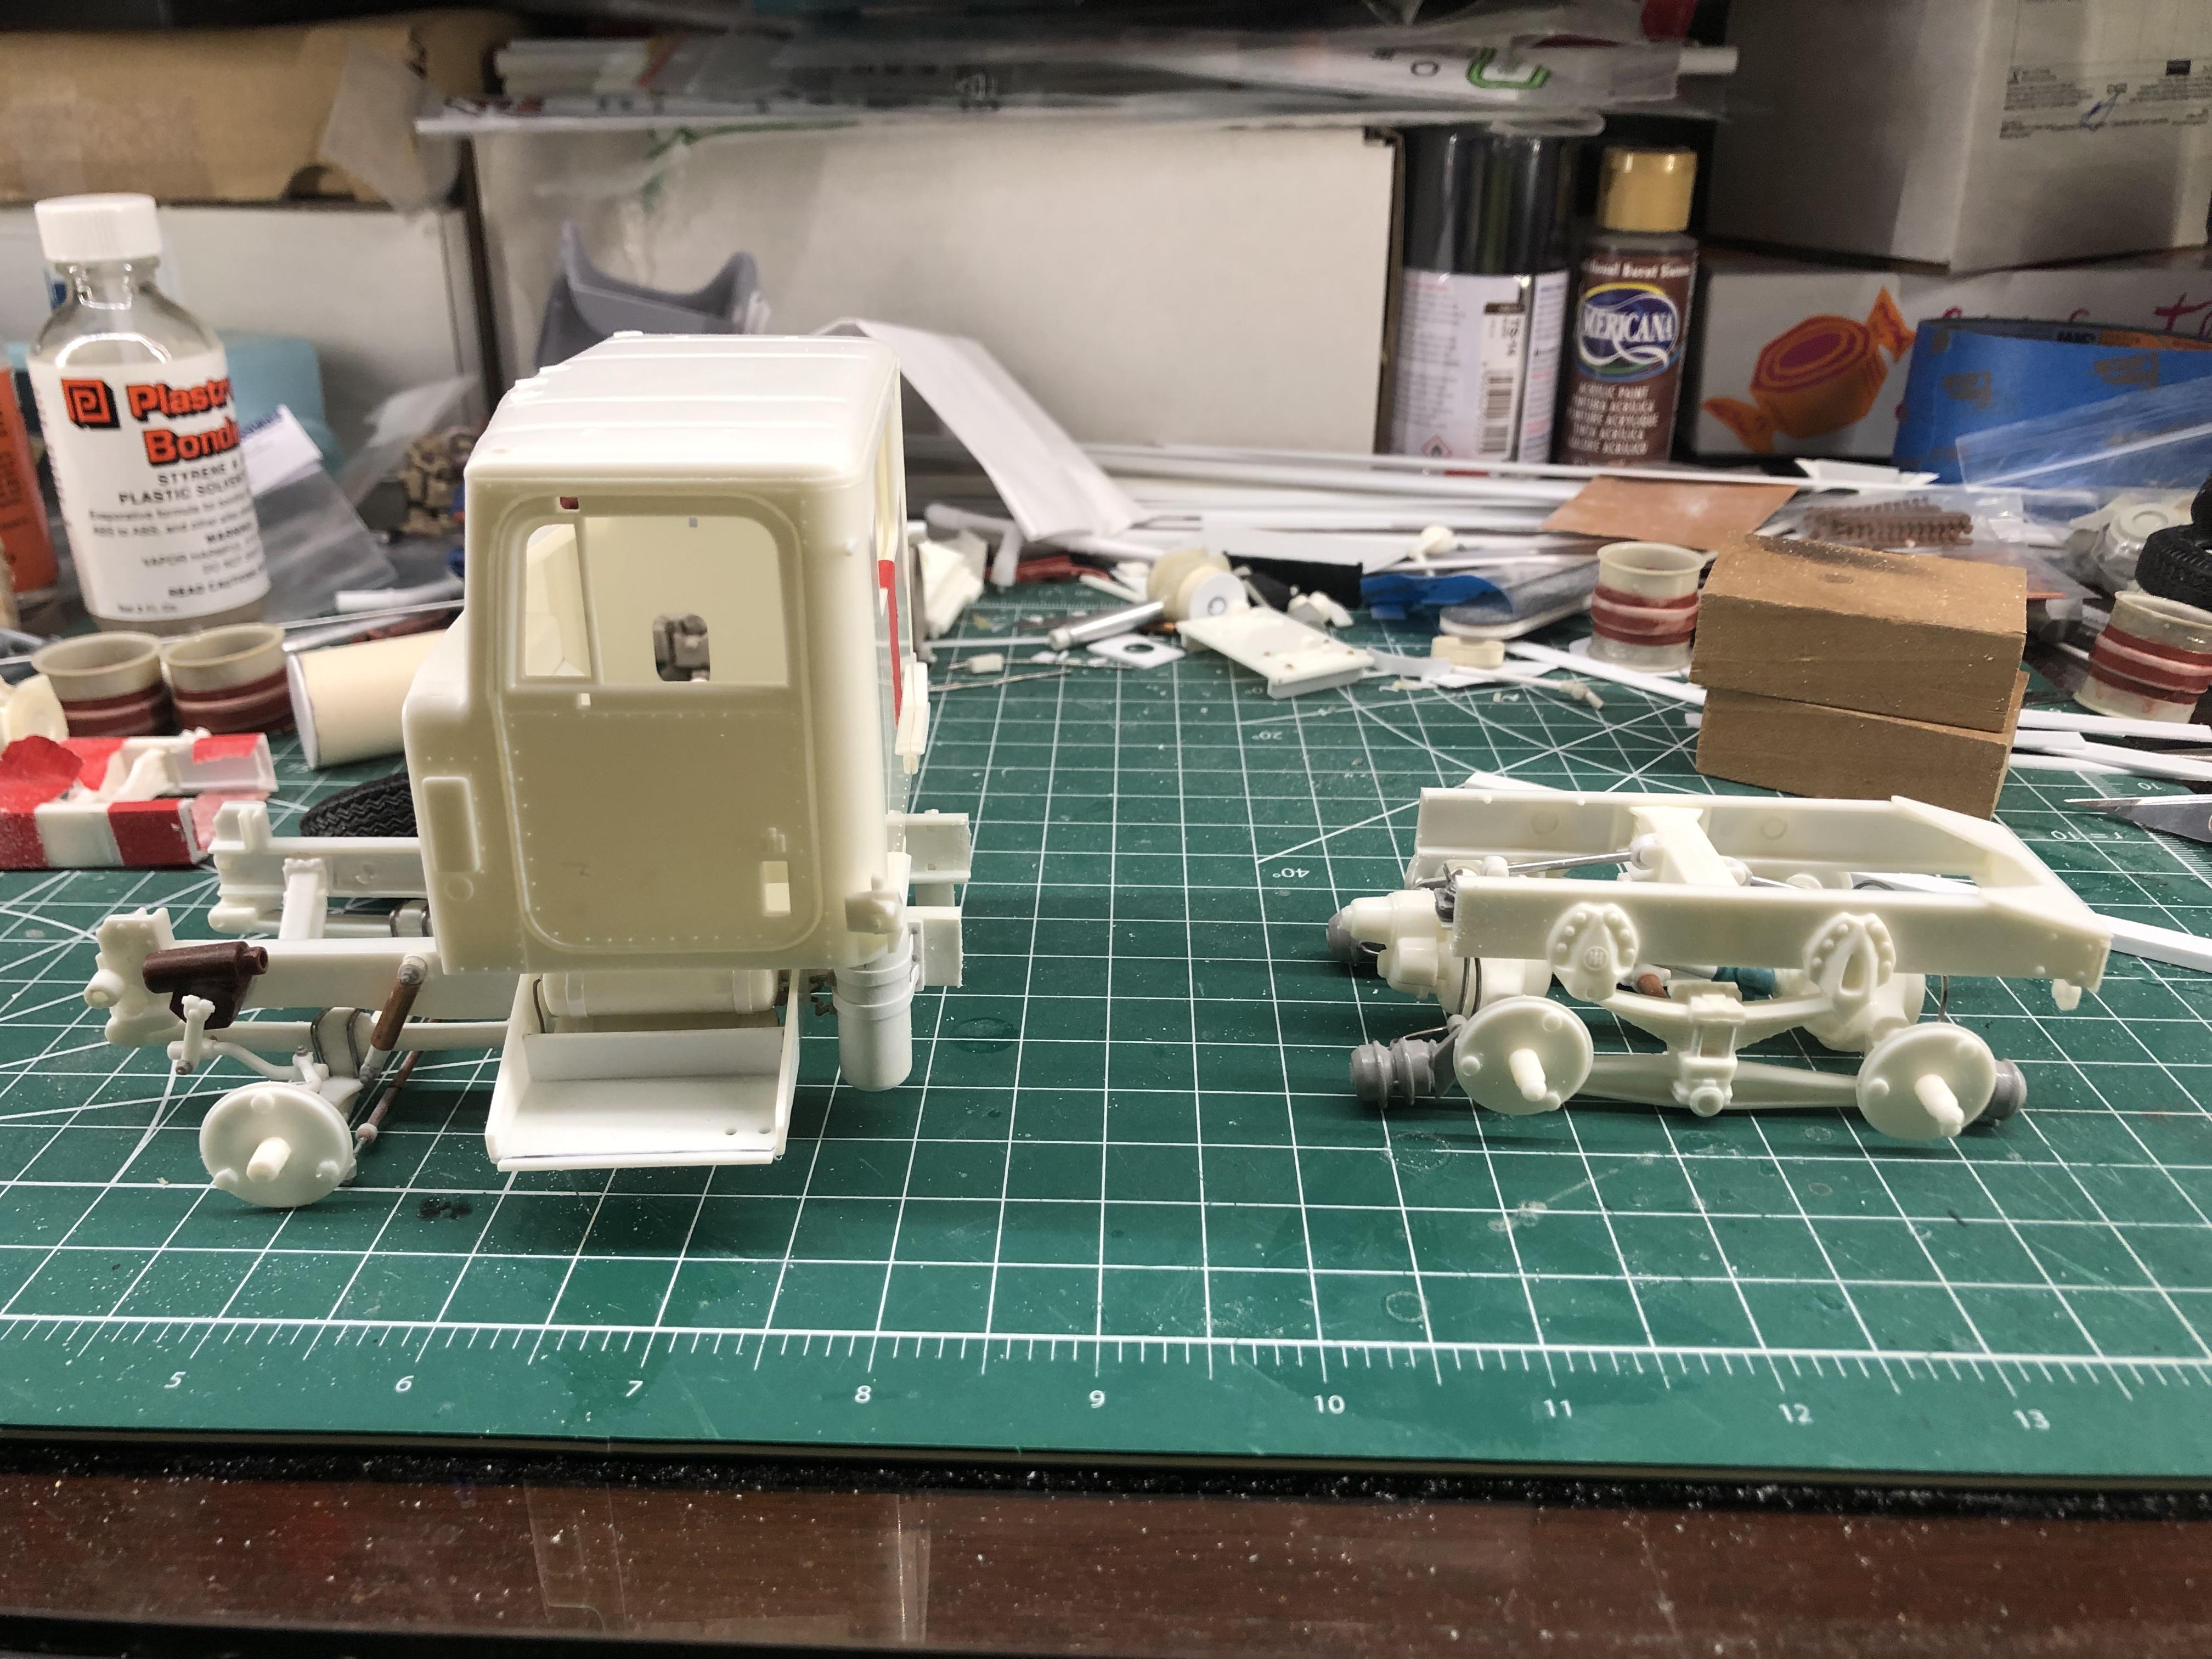
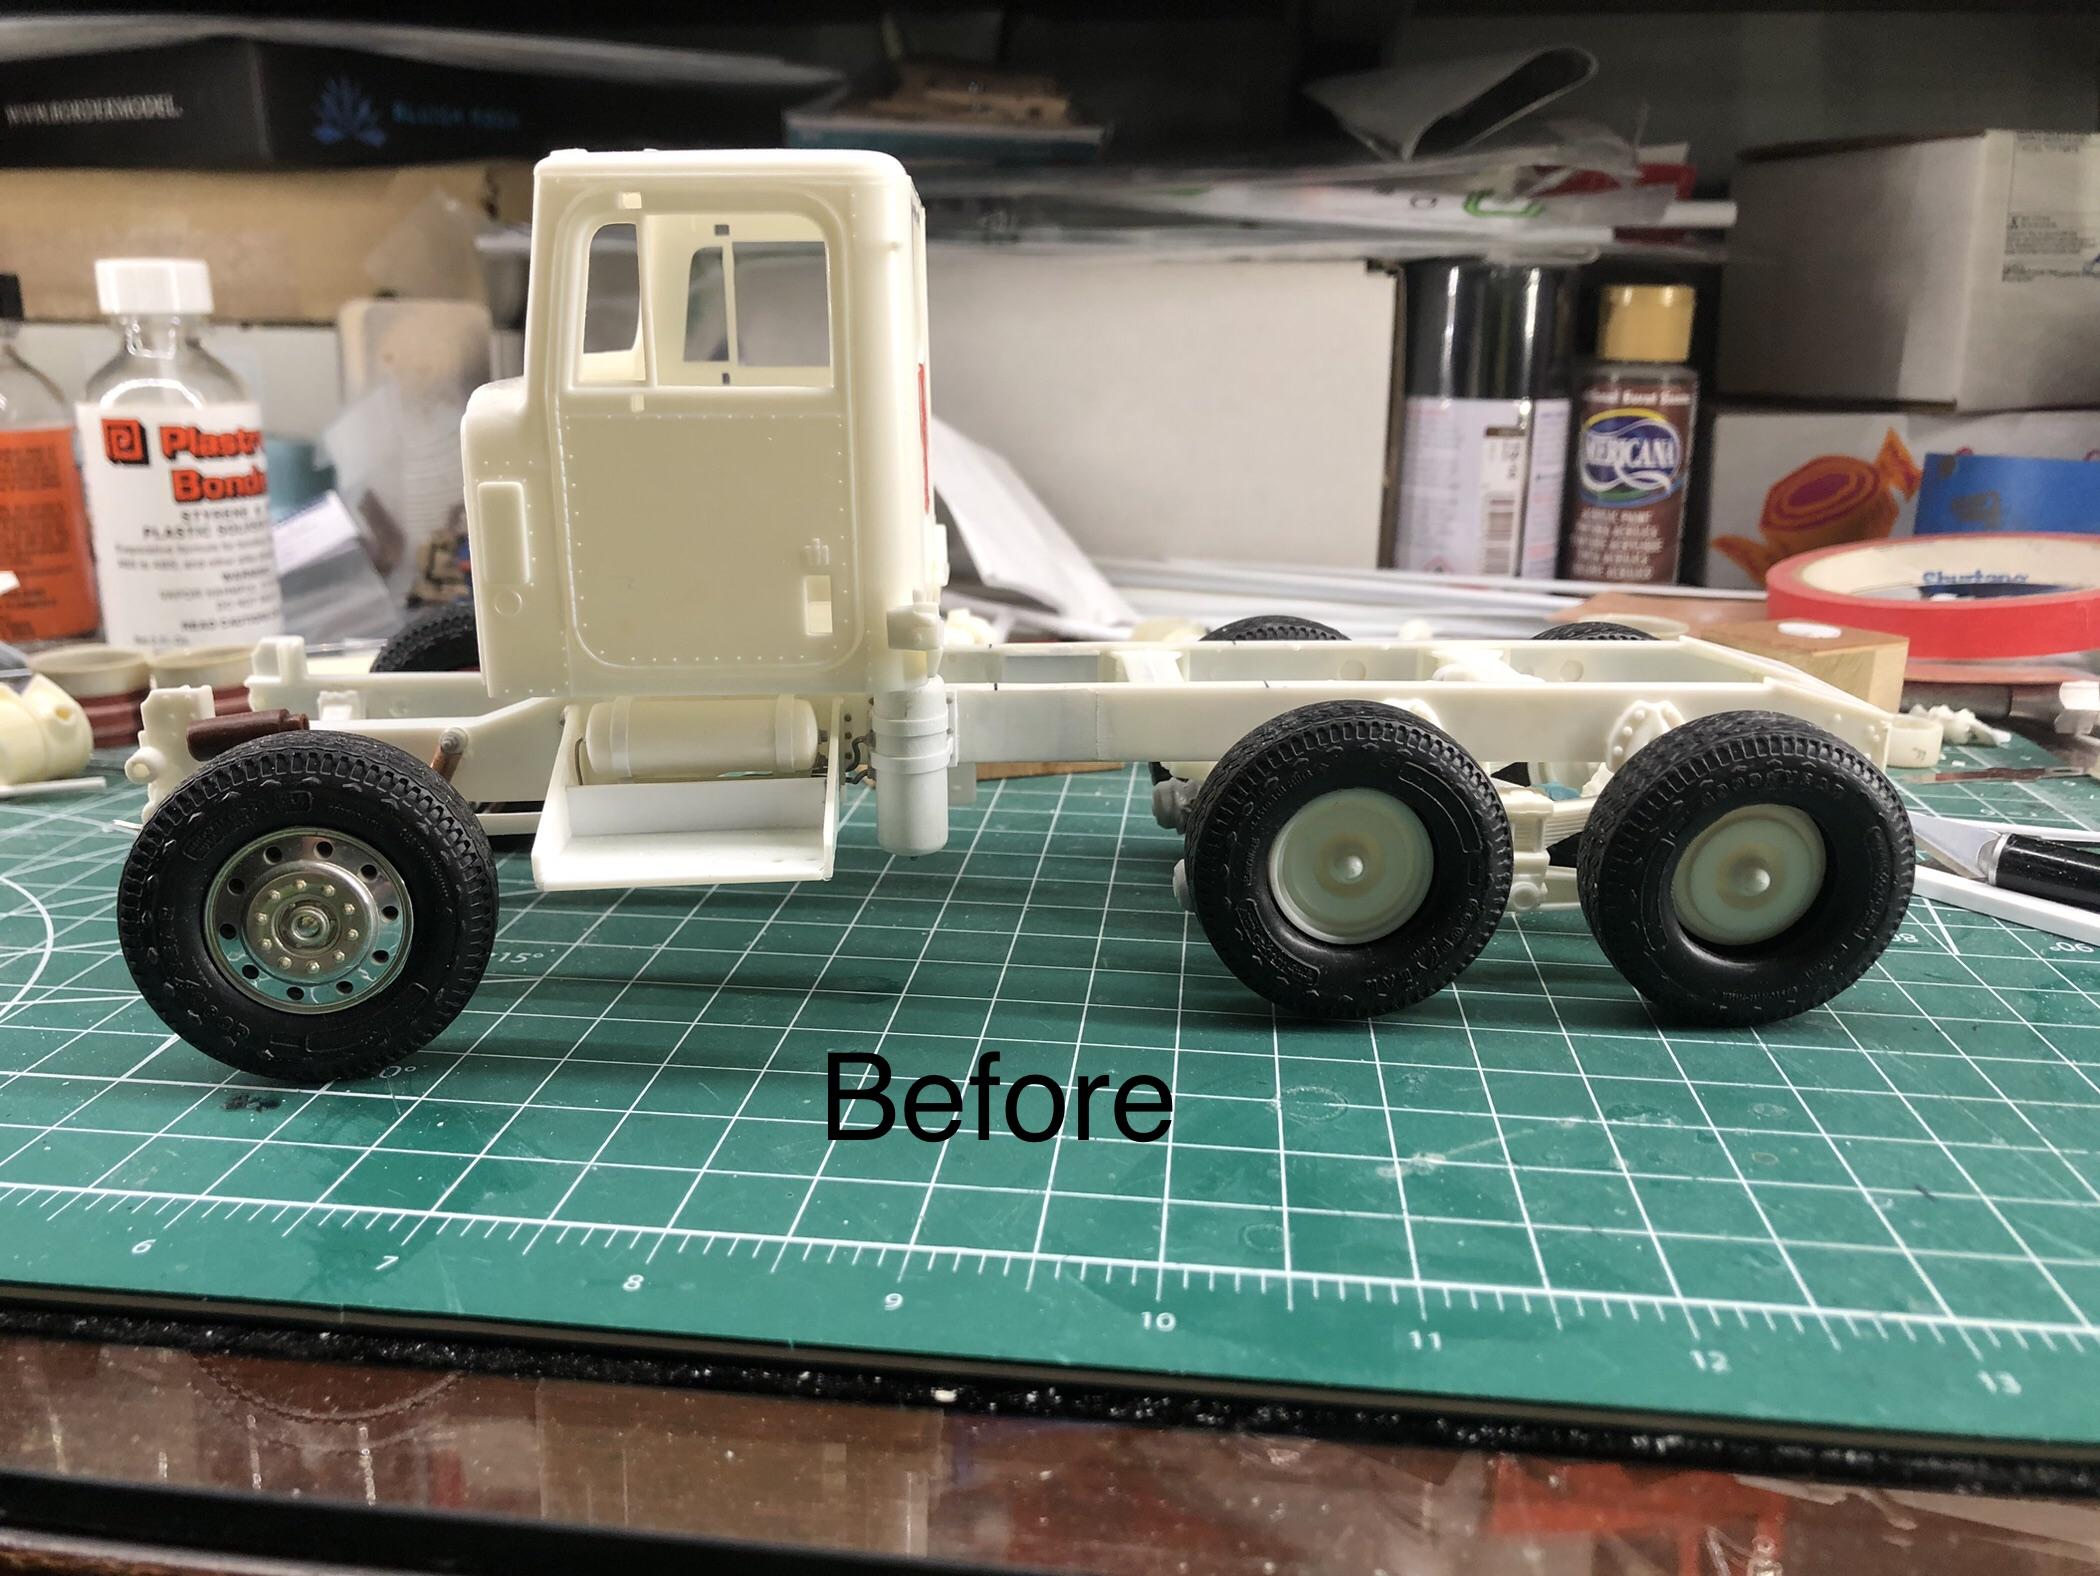
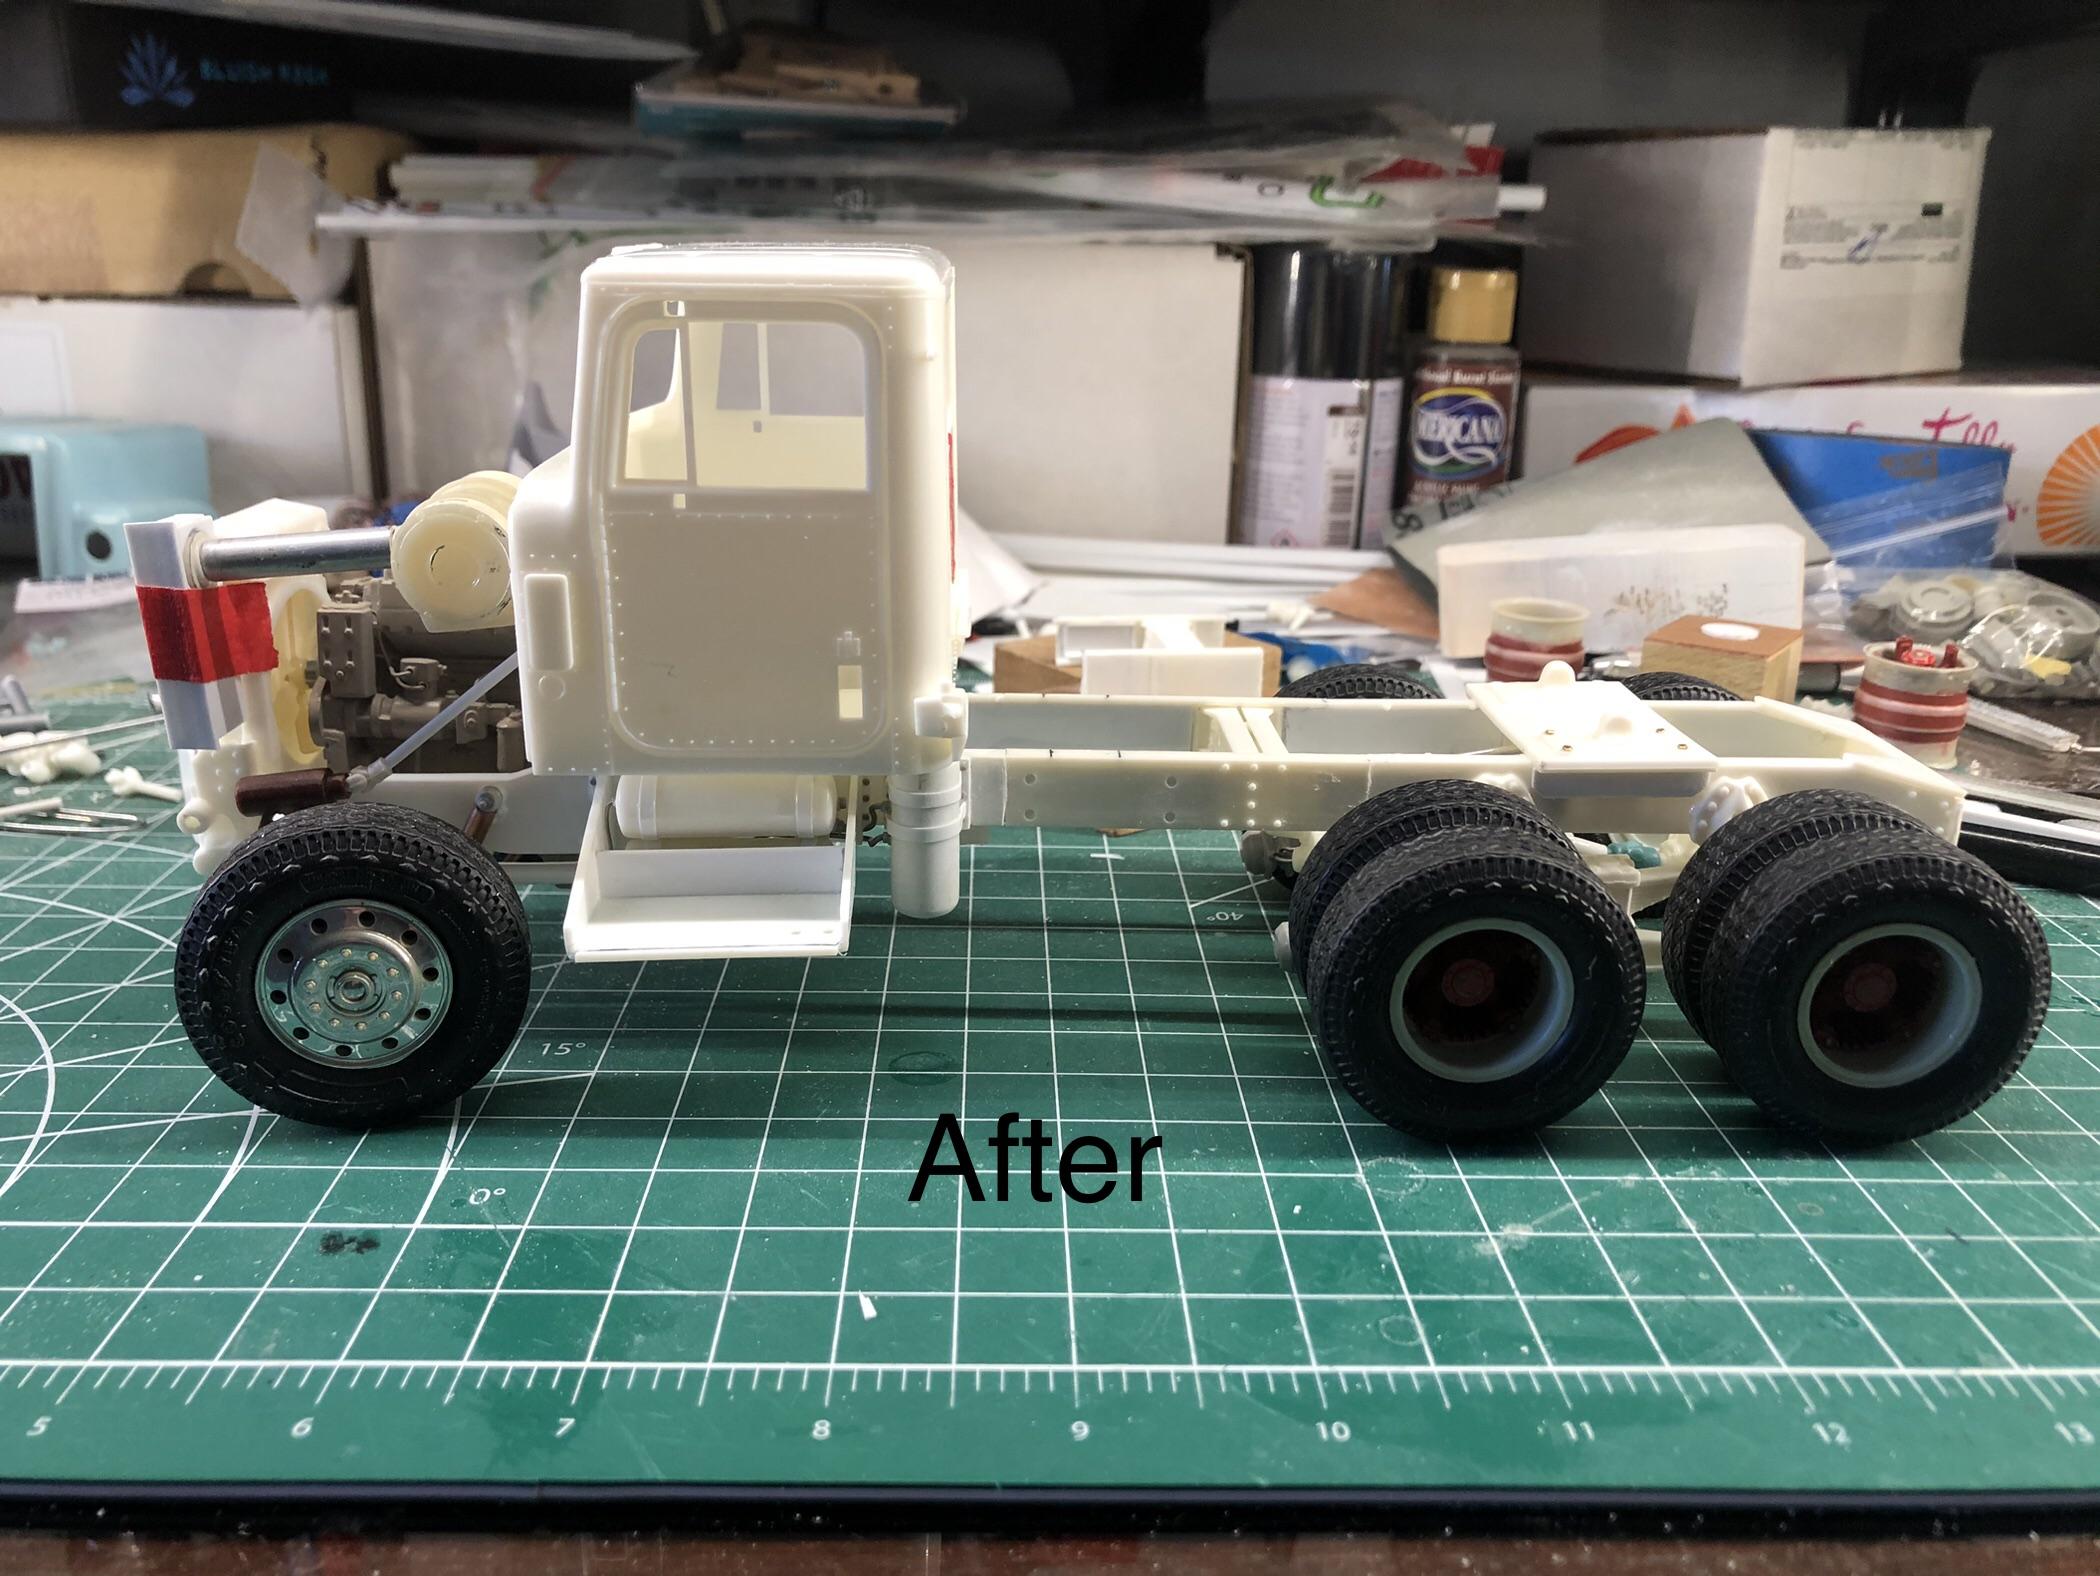
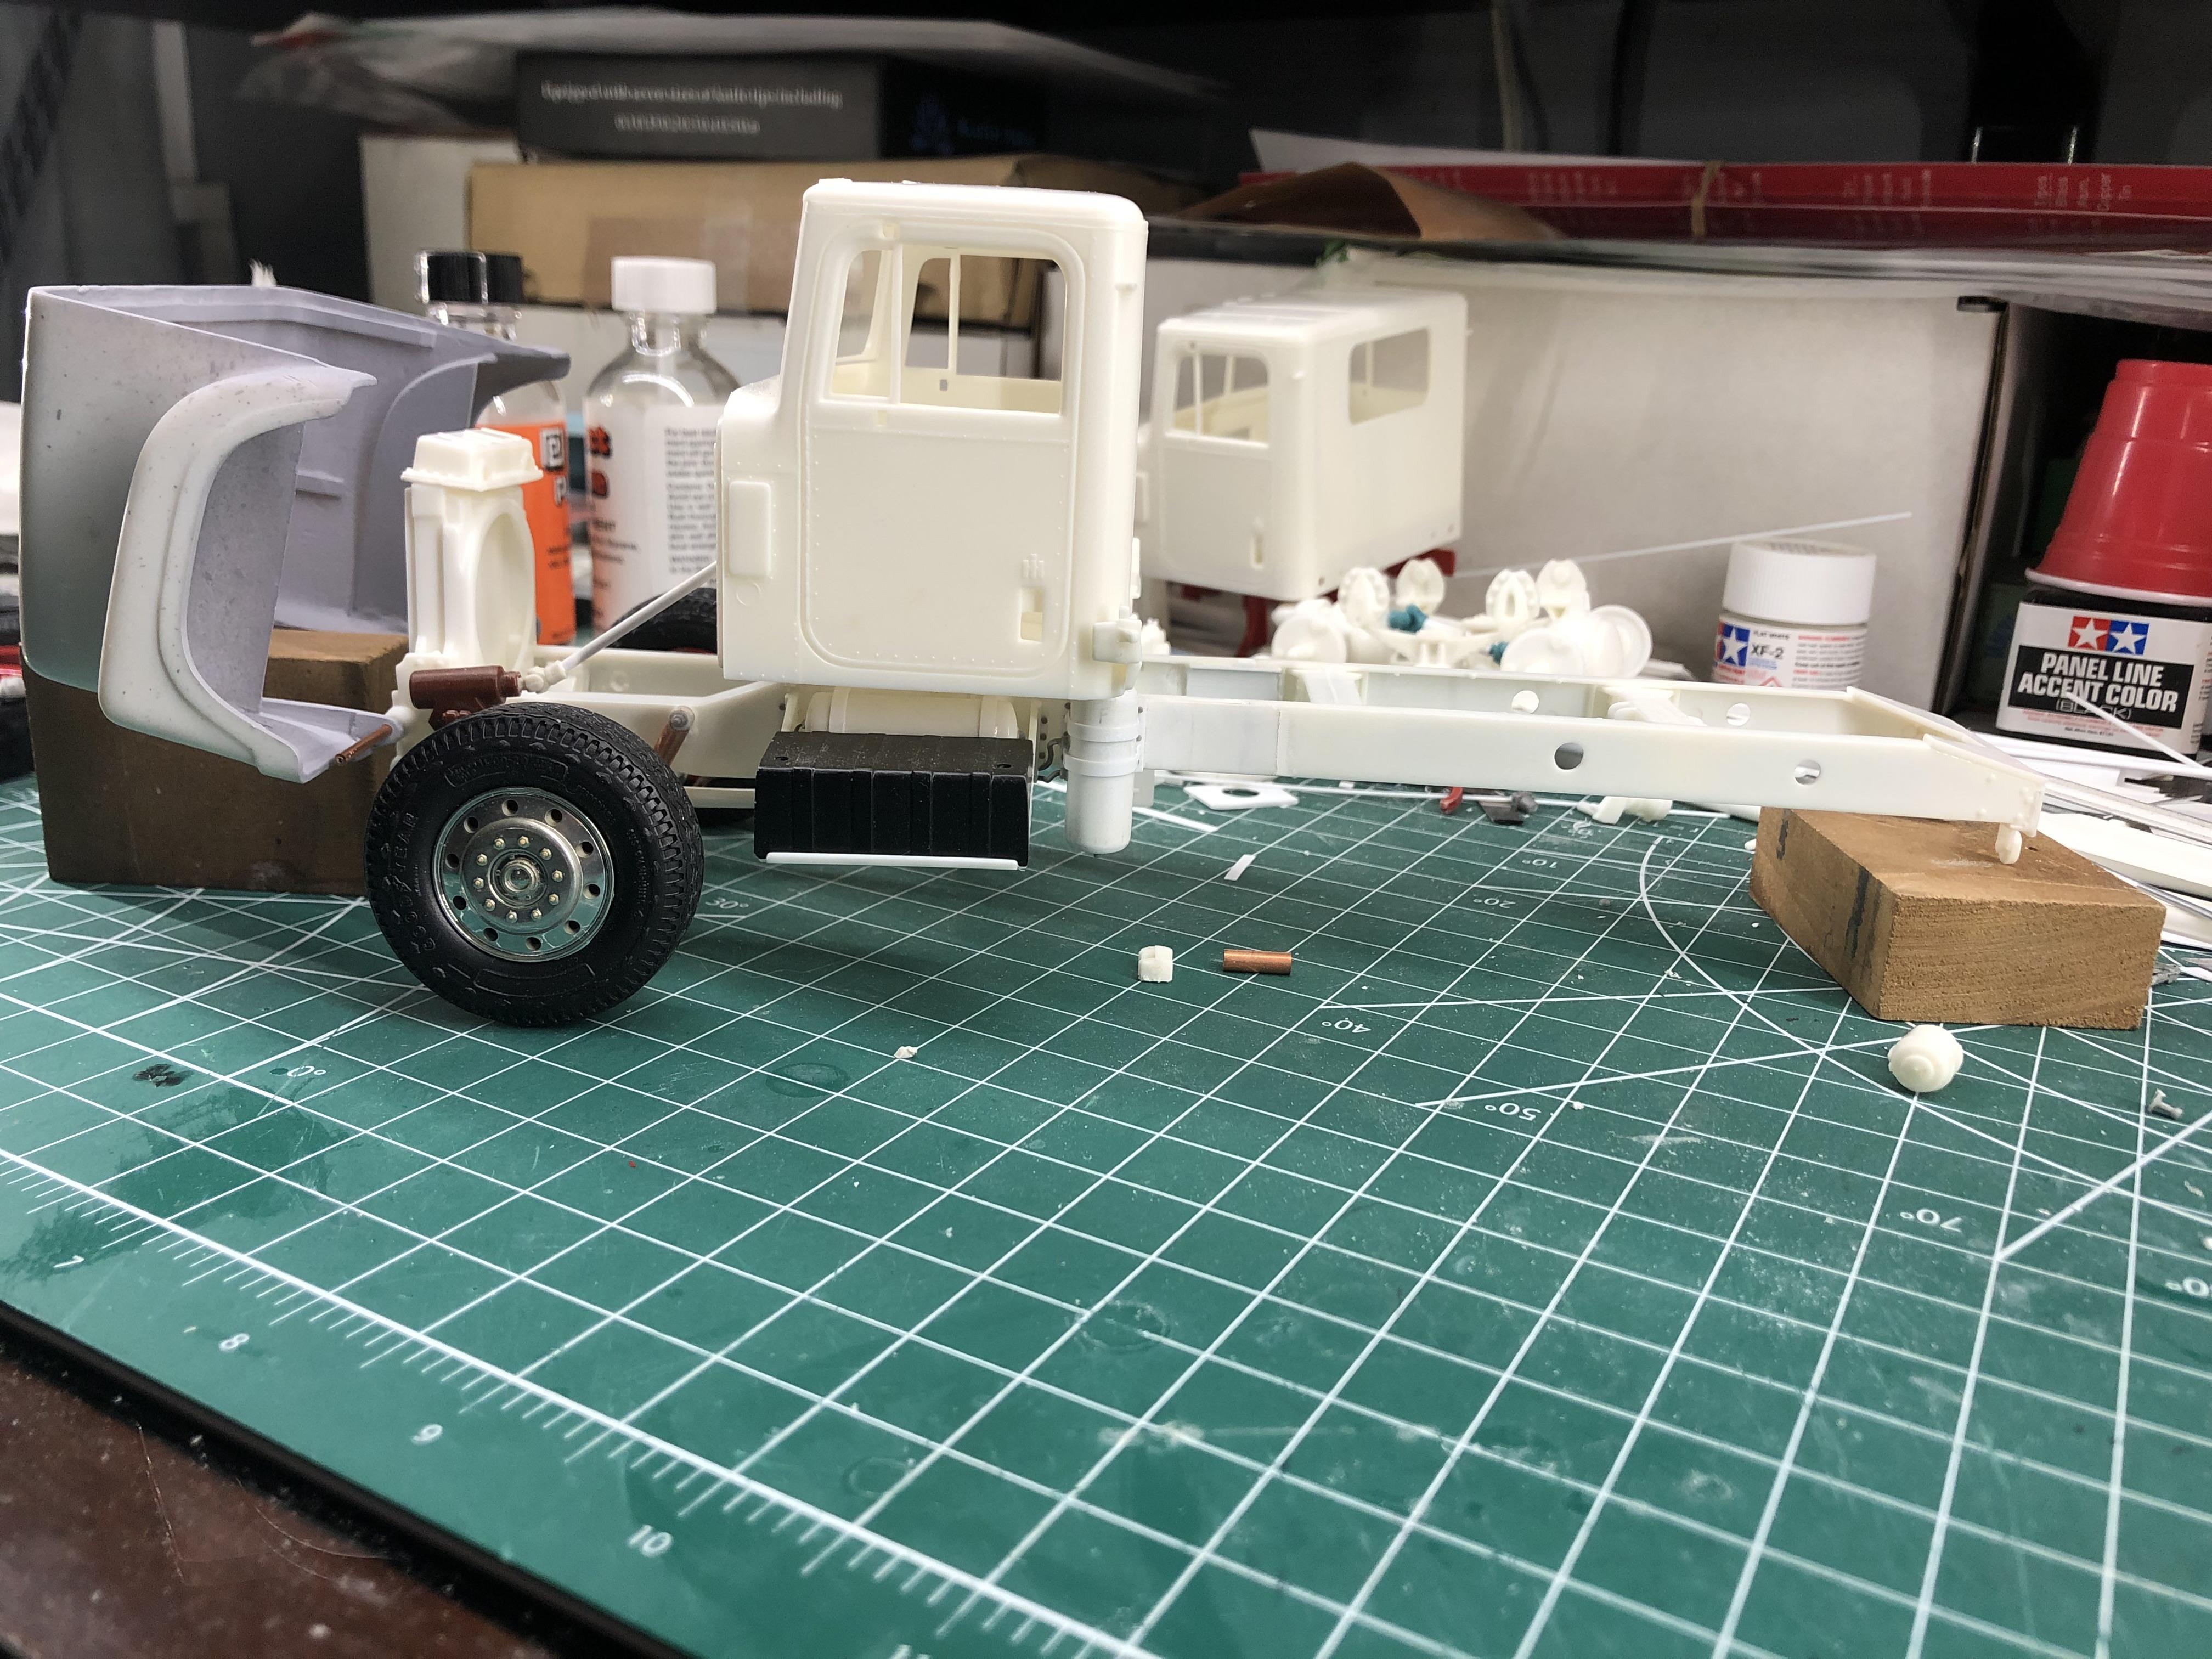
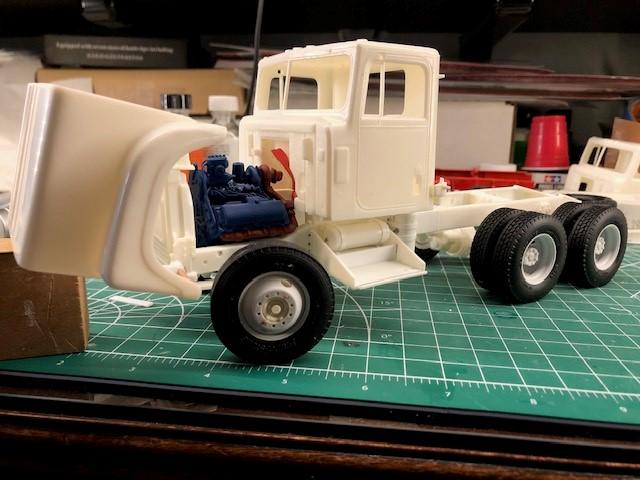
Hello It’s been a while sense I’ve been able to work the Transtar , I decided that frame was a little too short and I didn’t like the look of the cobbled mess of the old spliced area , so carefully cut the frame and added about 3/4 of an inch of frame , also reworked the fire wall area around the motor to make room for the Cummins , and reworked the air intake and filter box . Steve : thanks for the comment the brake Chambers are from a Revell Peterbilt 359 .
-
International 4300 tractor
k100 replied to Gary Chastain's topic in WIP: Model Trucks: Big Rigs and Heavy Equipment
Great job Gary I like look of the wider tries on the front . I was thinking the same way about doing the fuel tank on my 4300/4200 , I’m got a set of Photo etch steeps from Models by Dave I’m going to try those. -
IH Transtar 4300 converted to a 4200
k100 replied to k100's topic in WIP: Model Trucks: Big Rigs and Heavy Equipment
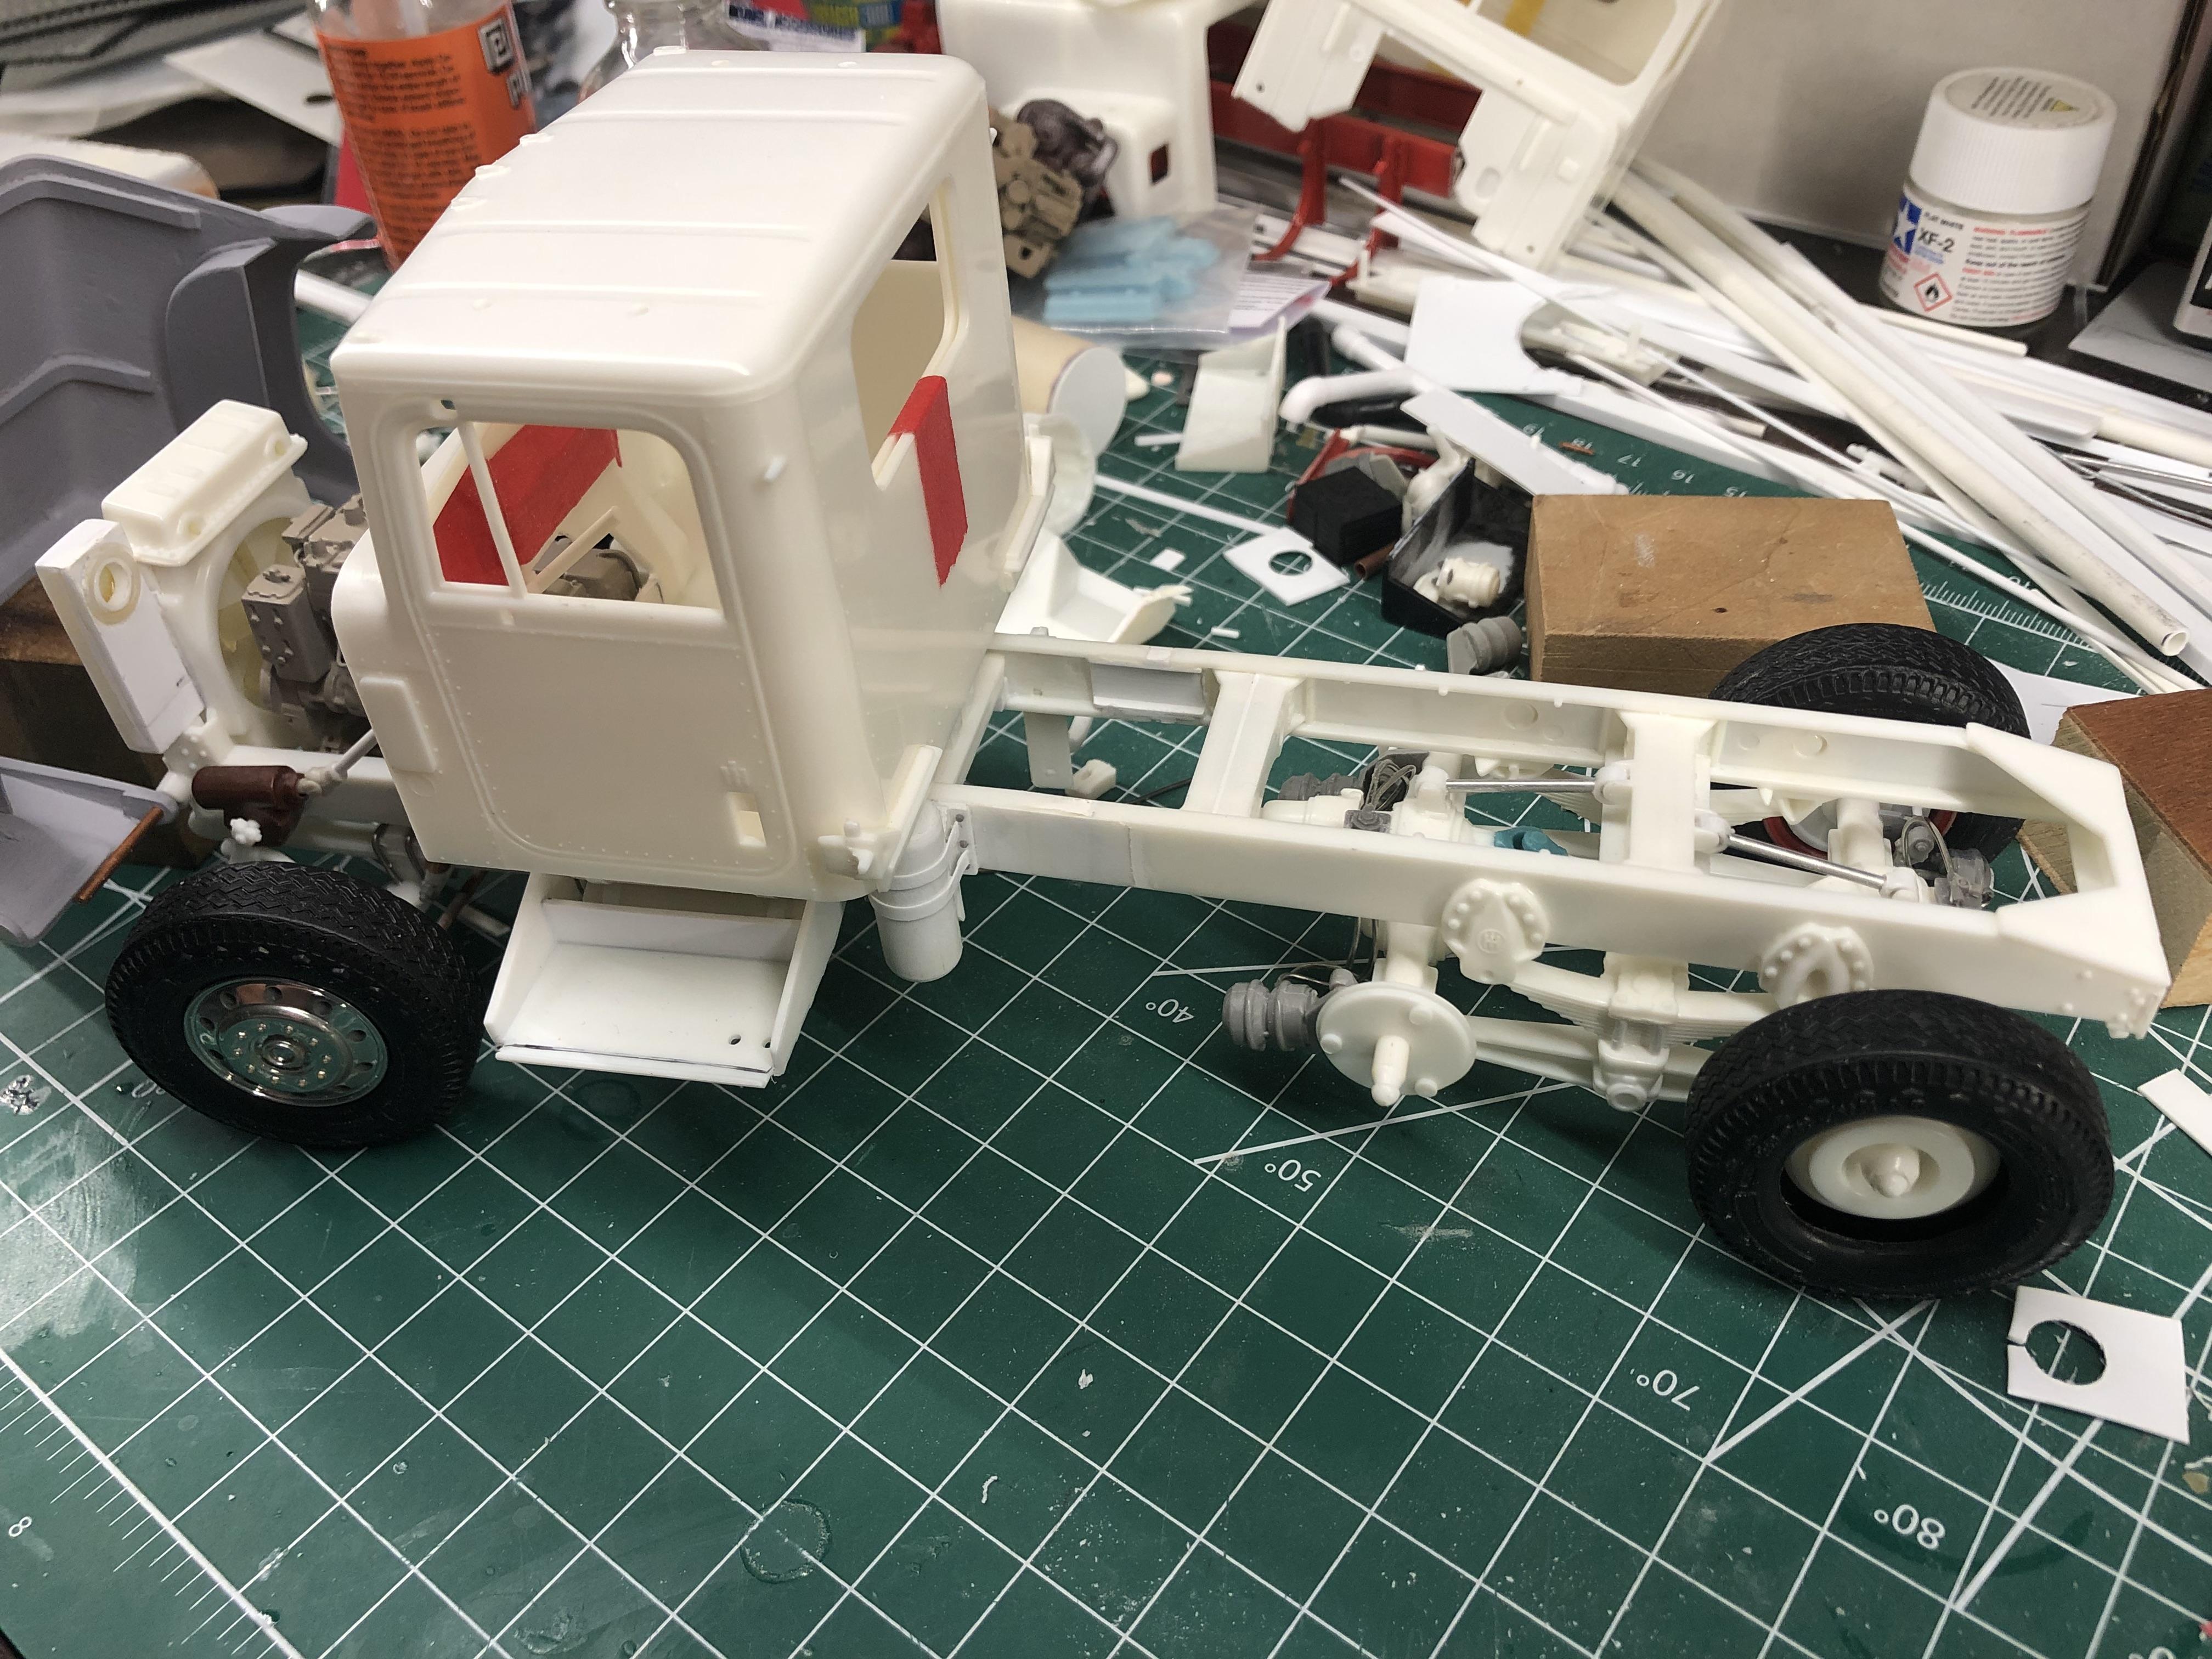
Thank you for the comments. I decided to swap out the IH Engine for Cummins it’s a tight fit but with some modifying of the fire wall it fits in well . Also got the rear suspension mounted and some air lines plumed in . Thanks
-
IH Transtar 4300 converted to a 4200
k100 replied to k100's topic in WIP: Model Trucks: Big Rigs and Heavy Equipment
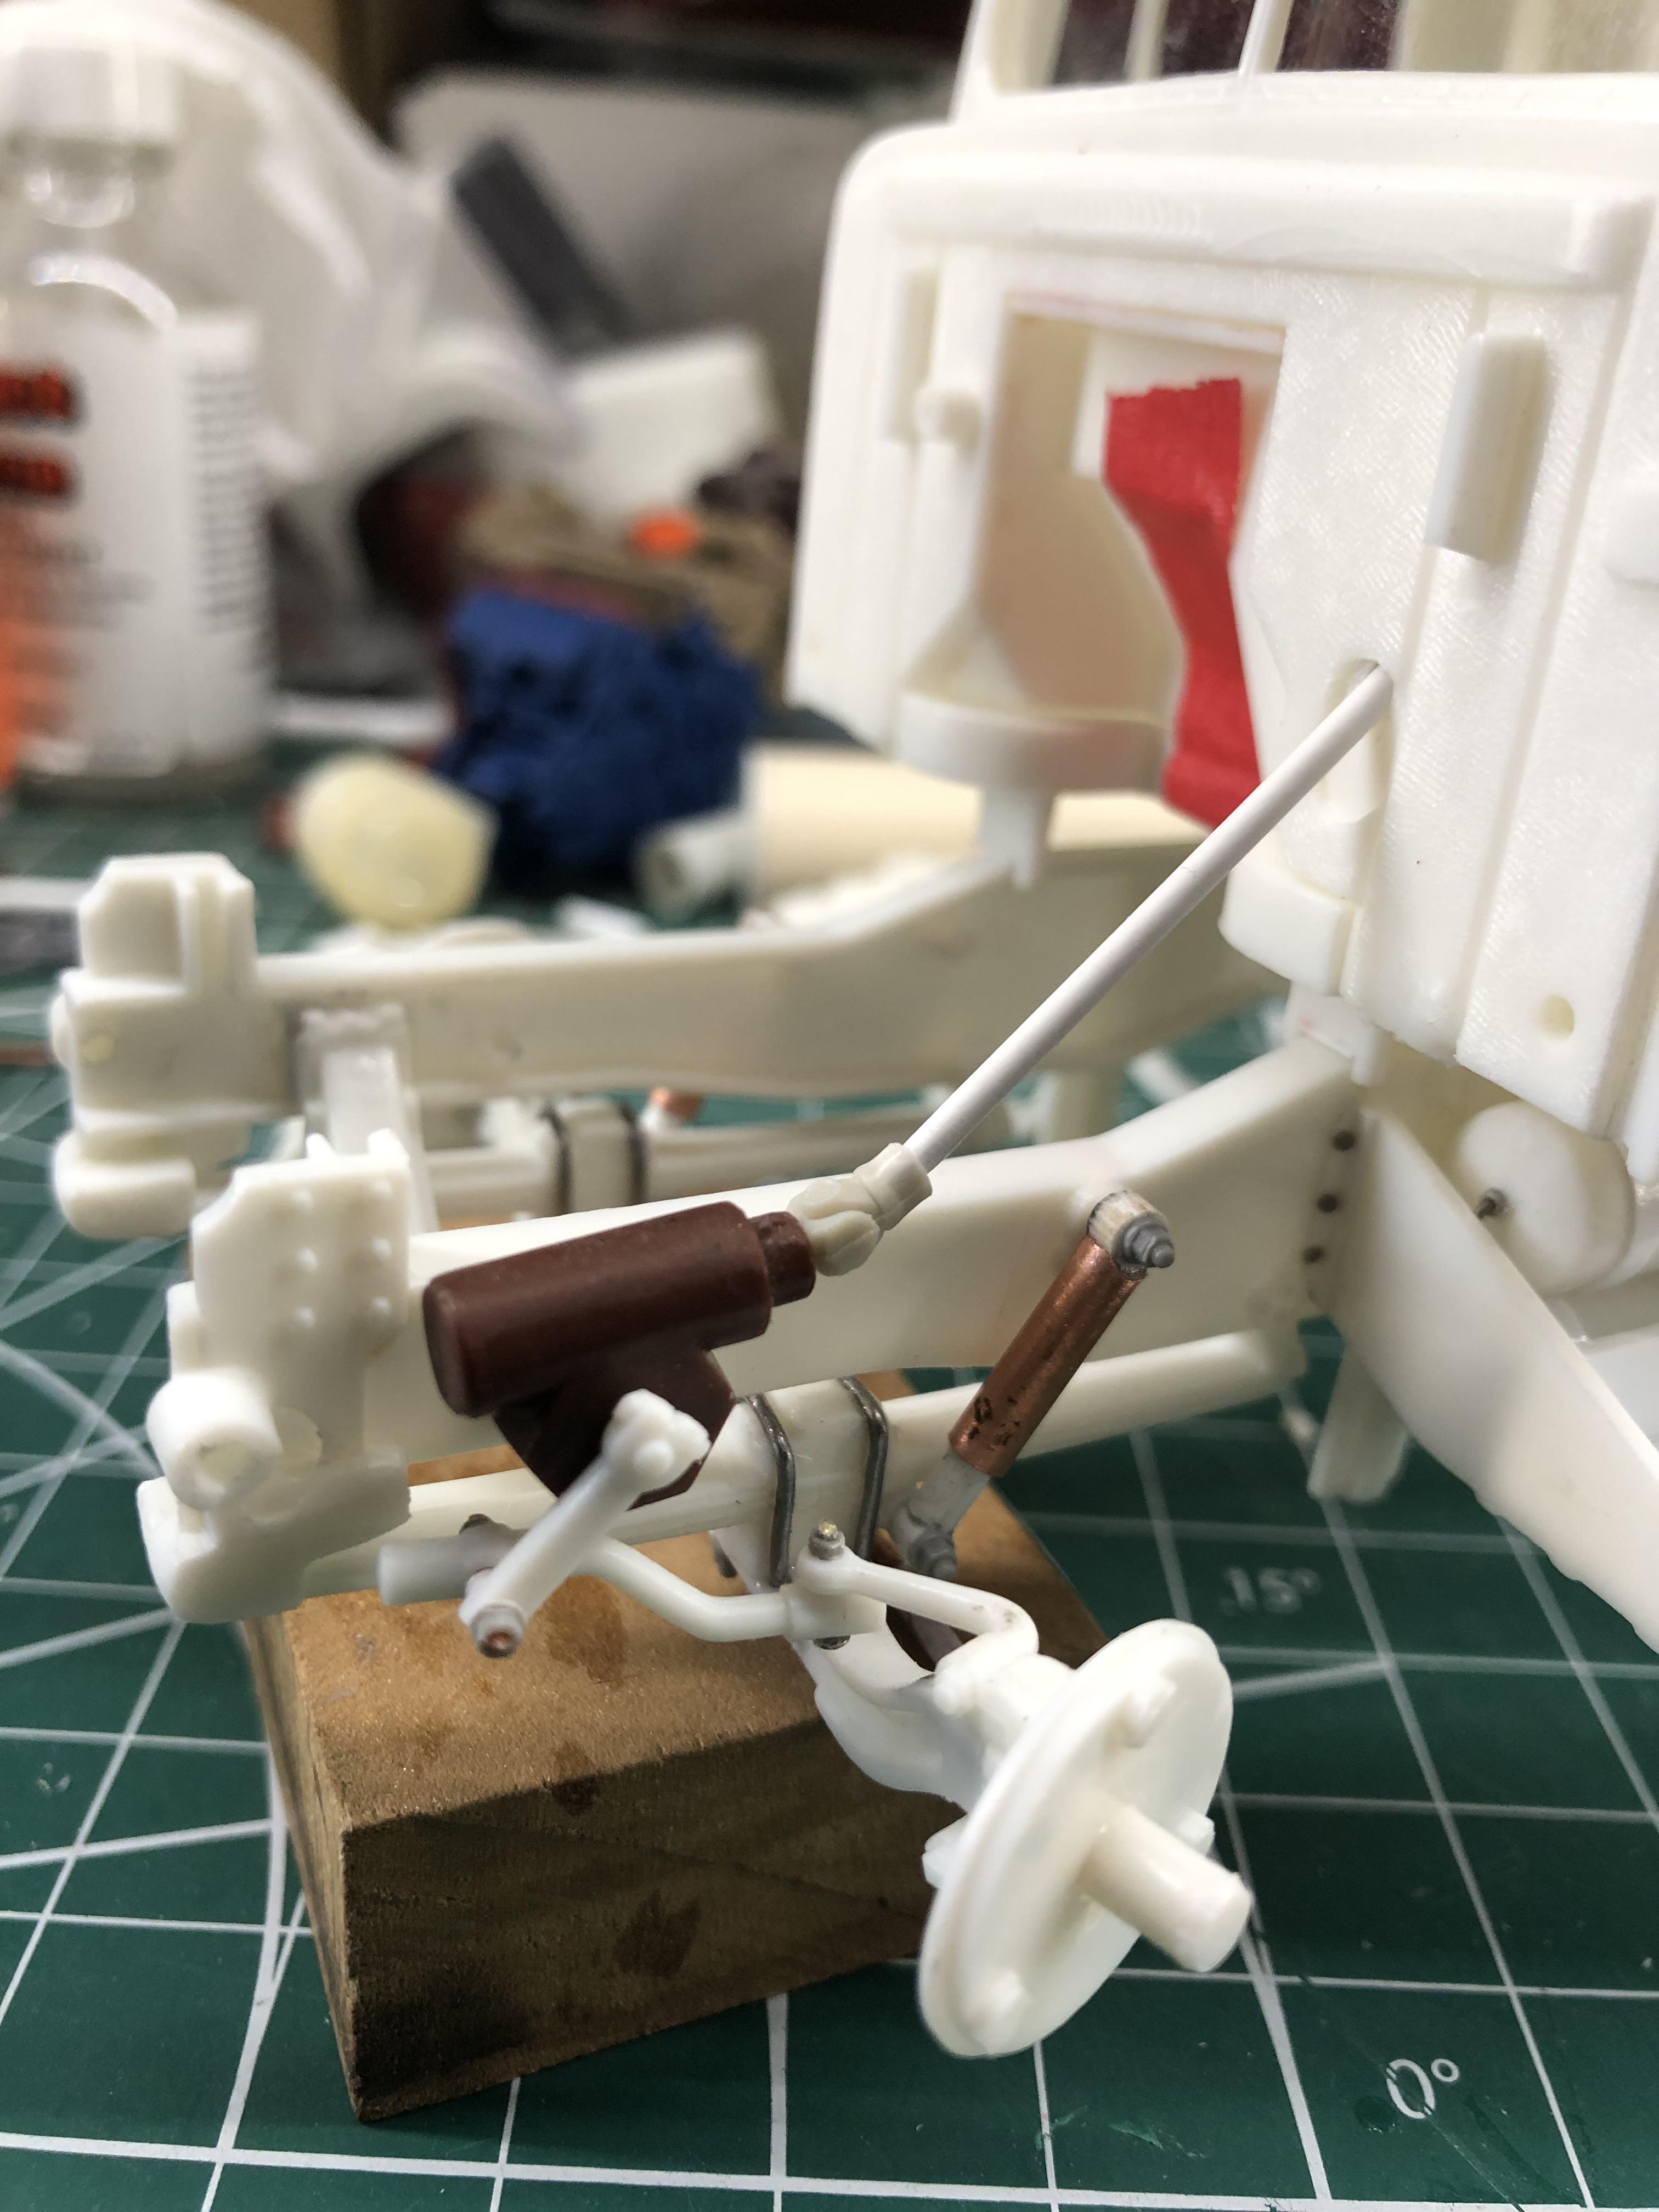
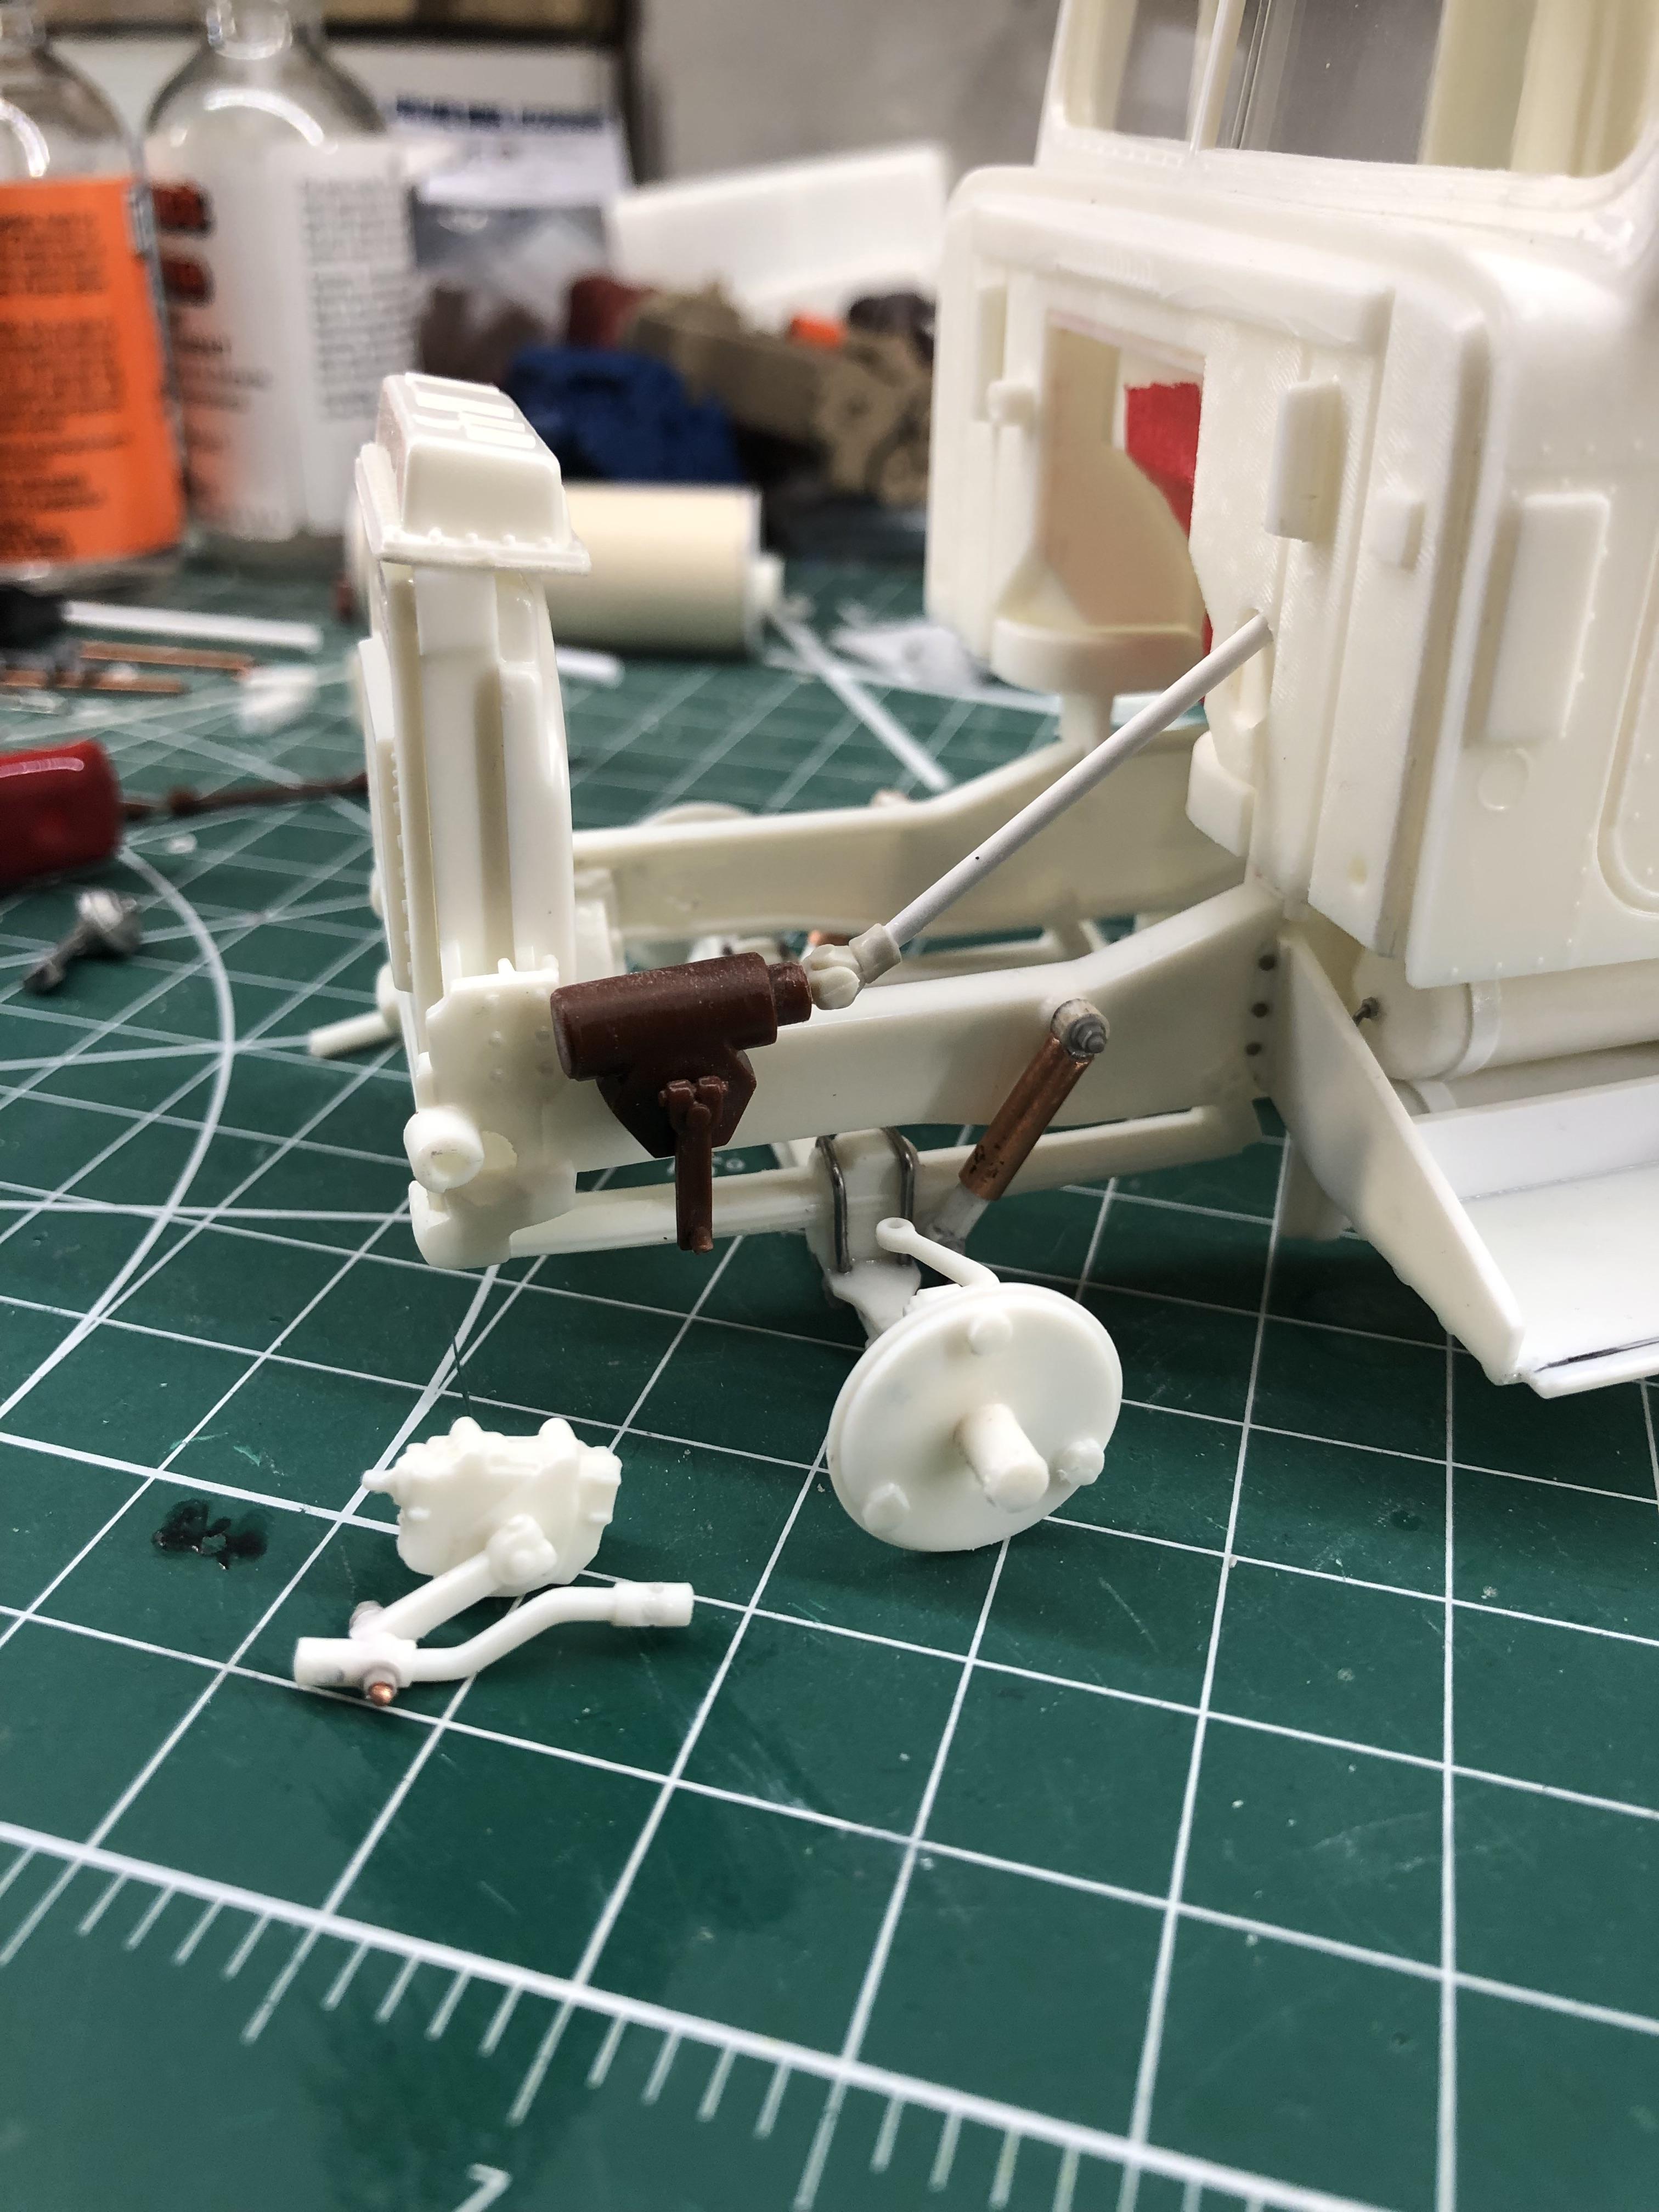
Quick update I got the steering all connected it fell right into place with no modifications.
-
IH Transtar 4300 converted to a 4200
k100 replied to k100's topic in WIP: Model Trucks: Big Rigs and Heavy Equipment
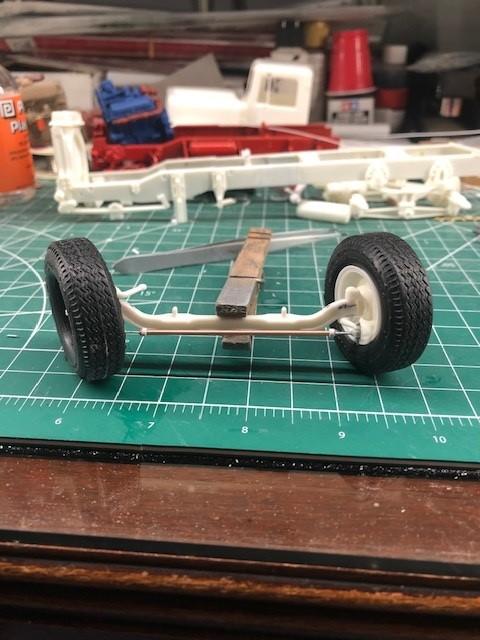
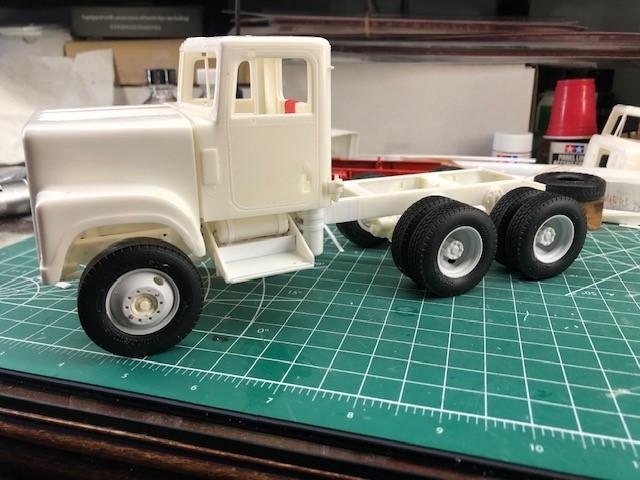
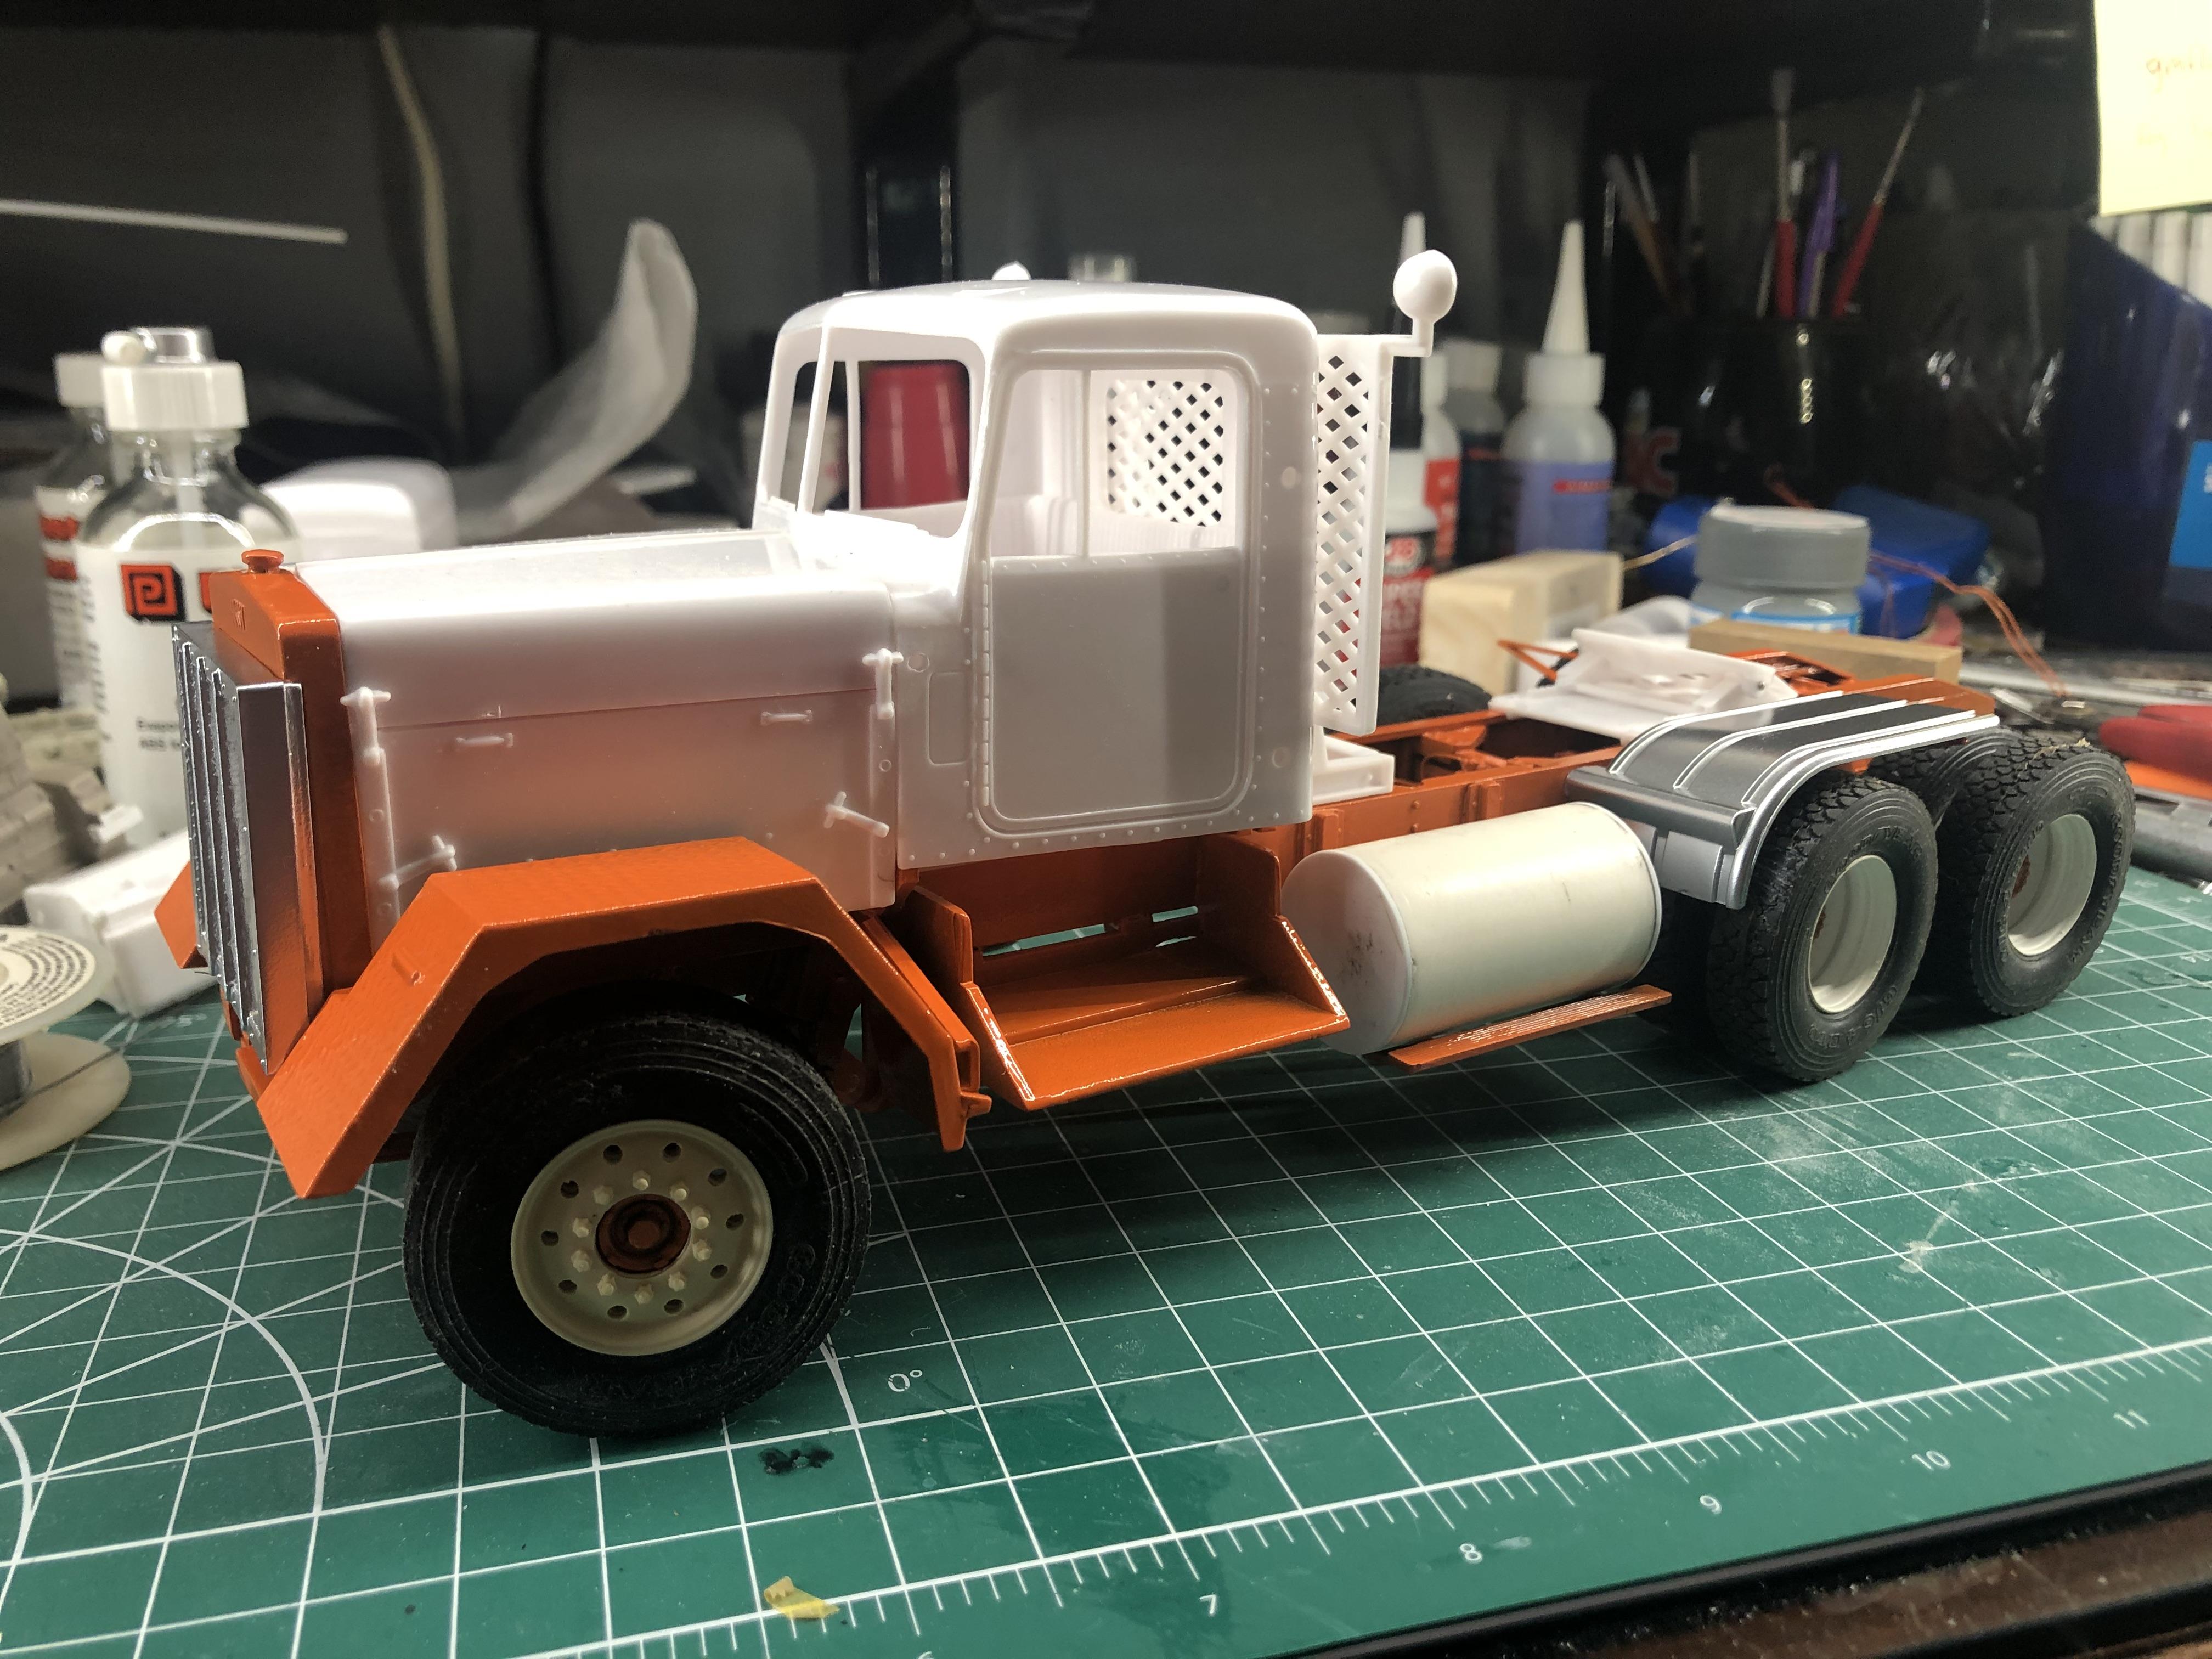
Thanks for the comments . Gary: yes I moved the cab forward about 3/8 of inch from the original mounting Location, as for the firewall just had to sand a little off bottom cab corners , it fits good off the frame I’ll need to do some shimming to get it fit good on the frame . Scott: I’m just using the kit motor in this one , I thought about swapping the motor out maybe on the next one I’ll do that. I got front axle mounted added U bolts & nuts , made new shocks , and mocked up the steering box and shaft , all the pictures I’ve seen online has this type of steering box not like the one in the kit, I have an old S- series in the parts bin I took steering box off that just to see if it would fit , I think it will work . The U joint is from a Moebius Ford pickup kit . The under side of the hood is finished it didn’t turn out too bad. The last picture reminds me of seeing Glider trucks setting in the lots when Intentional Harvester was still in Ft. Wayne . Thanks
-
International 9600
k100 replied to DRIPTROIT 71's topic in WIP: Model Trucks: Big Rigs and Heavy Equipment
Great looking International Brian -
IH Transtar 4300 converted to a 4200
k100 replied to k100's topic in WIP: Model Trucks: Big Rigs and Heavy Equipment
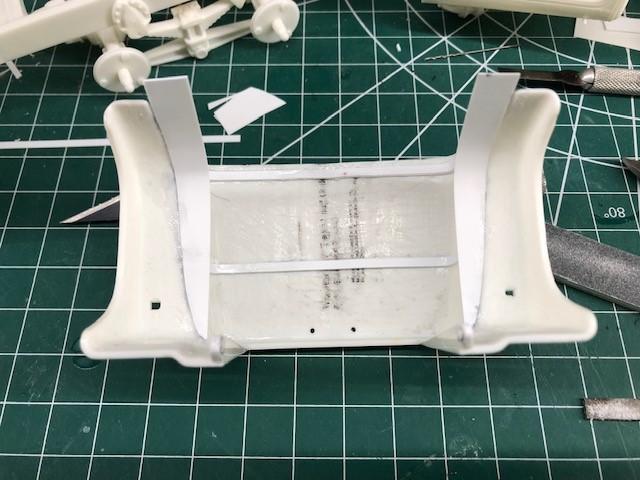
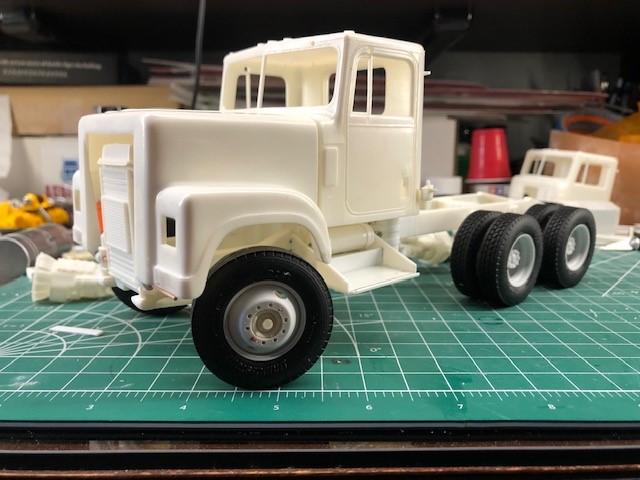
Thank you for all the comments . Steve: thank you, I might put spoke wheels on the rear ,undecided yet . Gary: actually the hood lines up fine off the frame , with the frame twisted Ill have to shim the cab to make it fit correctly. Steve: thank you Started some under hood detail, I added 2 stiffening ribs and trying to make some generic inner fender wells . Also reworked the hood hinges I added some styrene to the original hood hinge so I could drill holes to use brass rod, the hinge mounts on the frame were drill all the way through. Thanks for for looking .
-
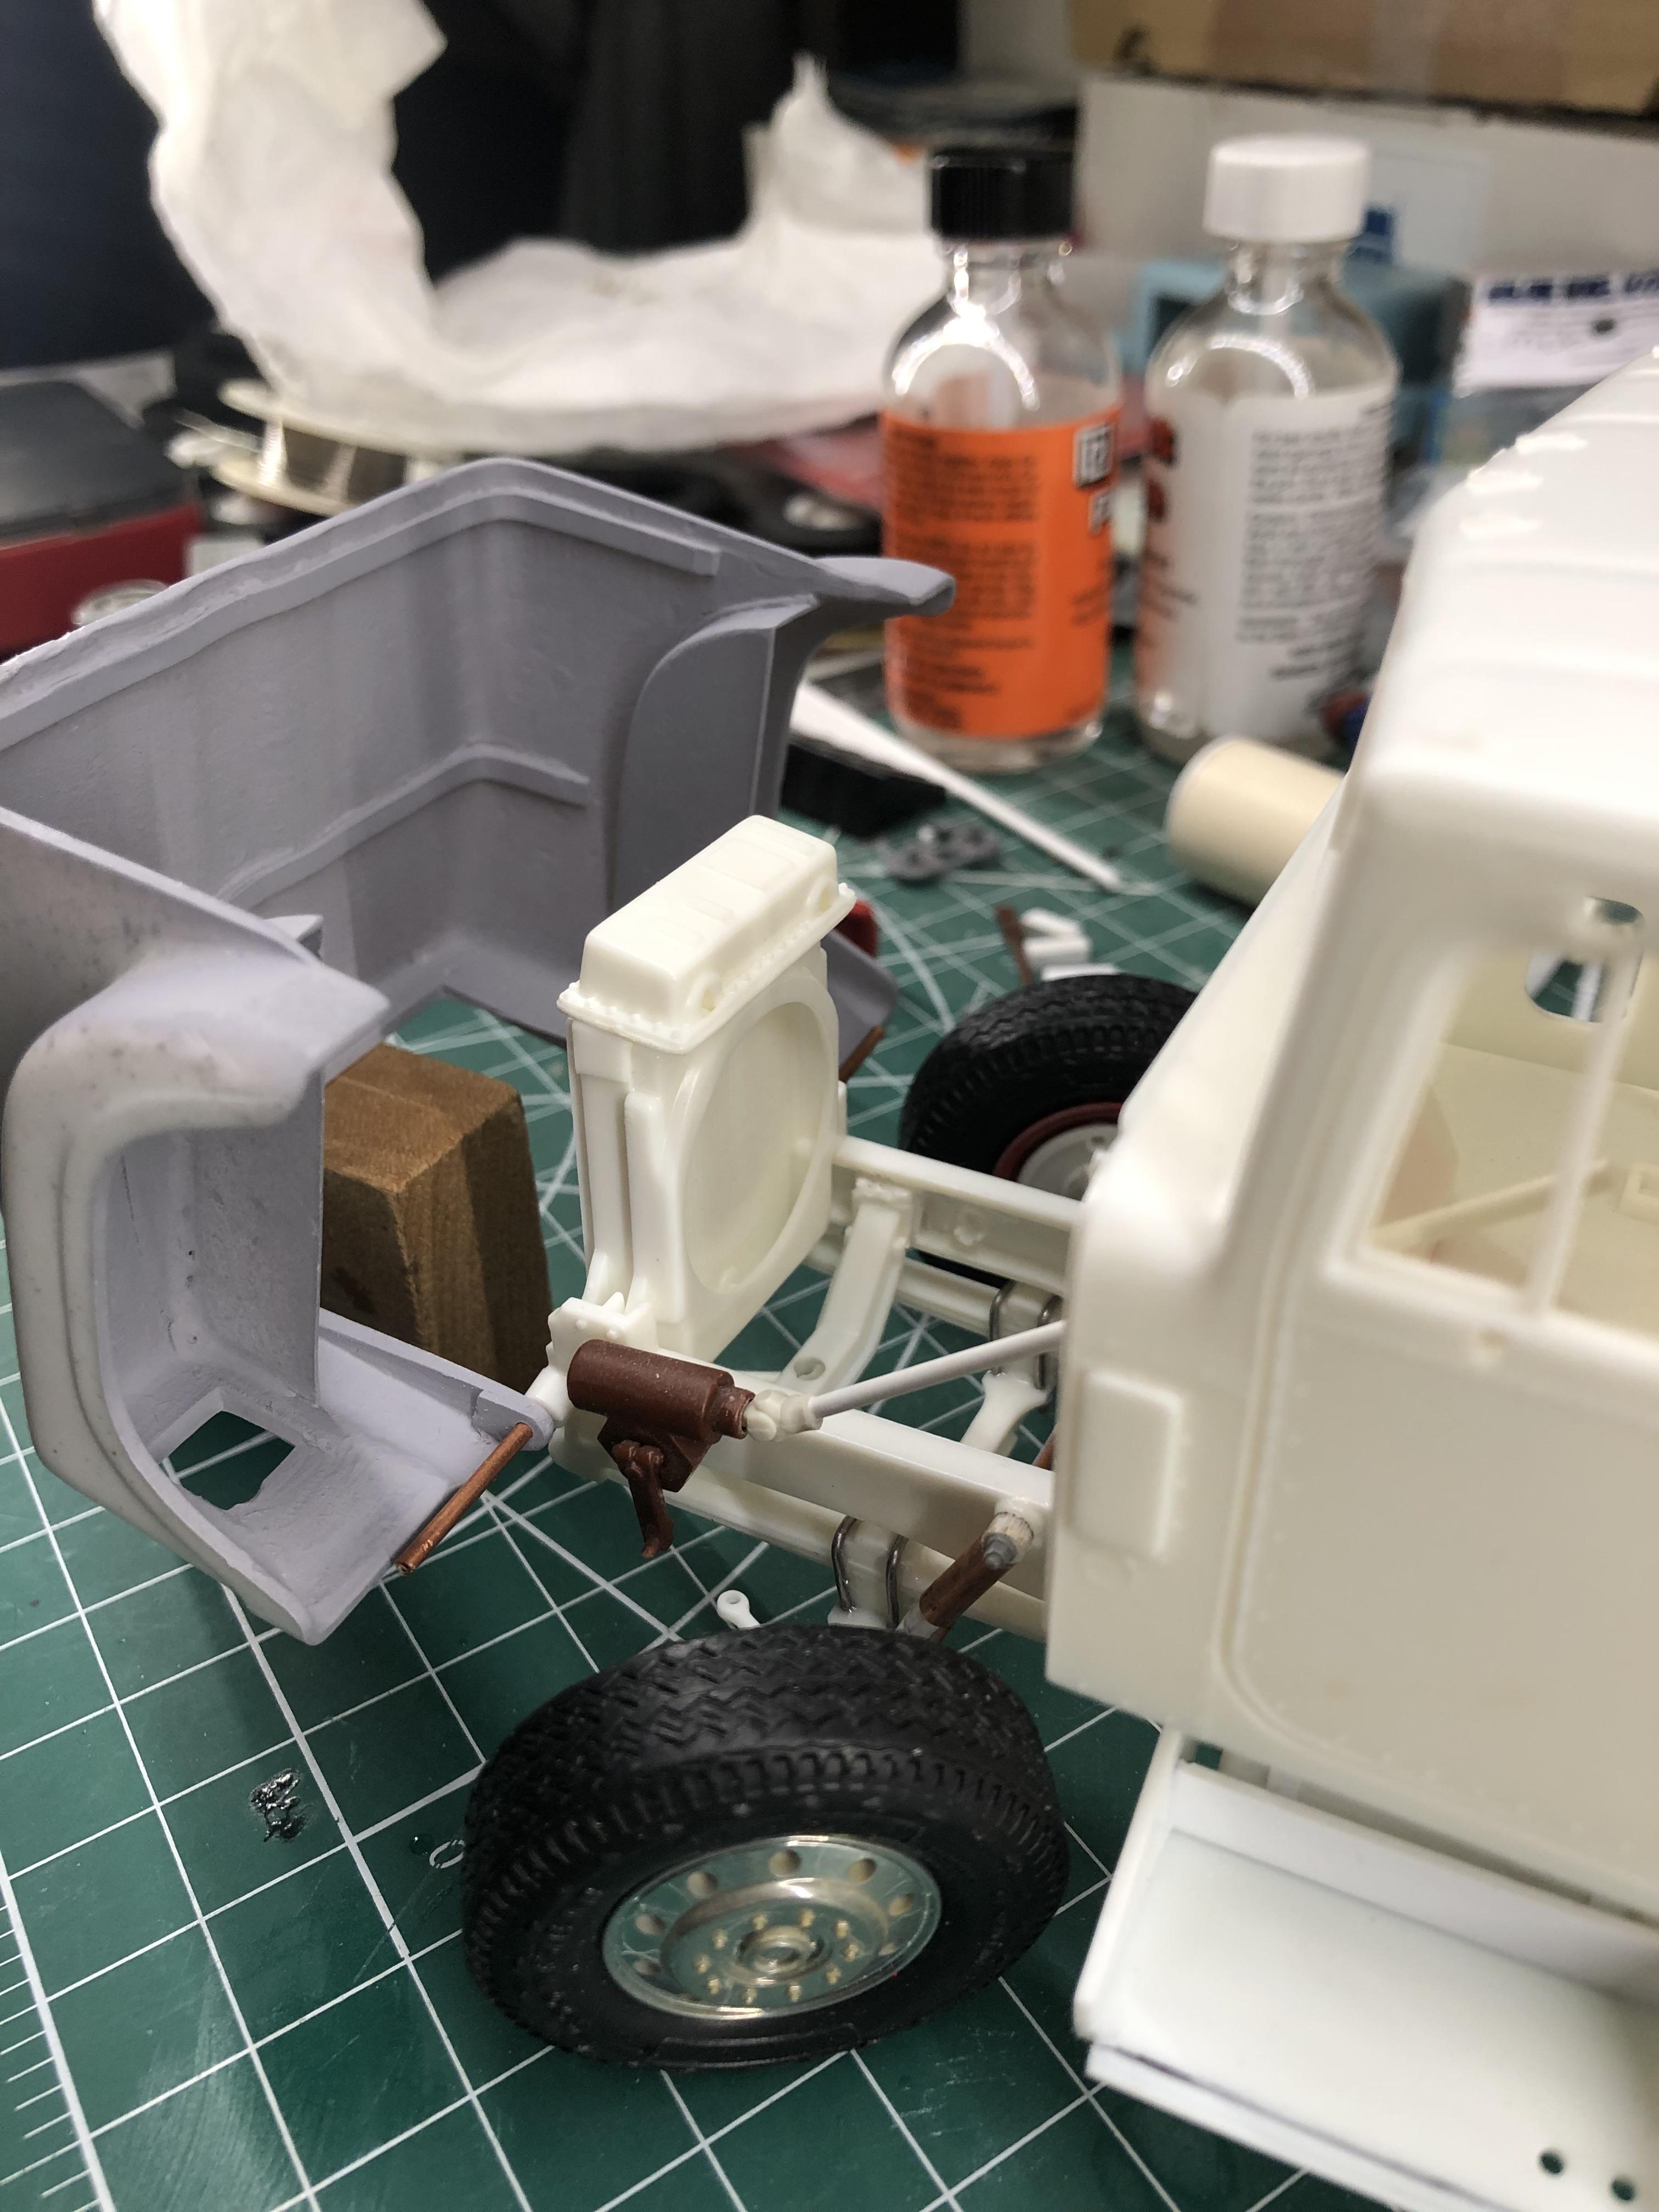
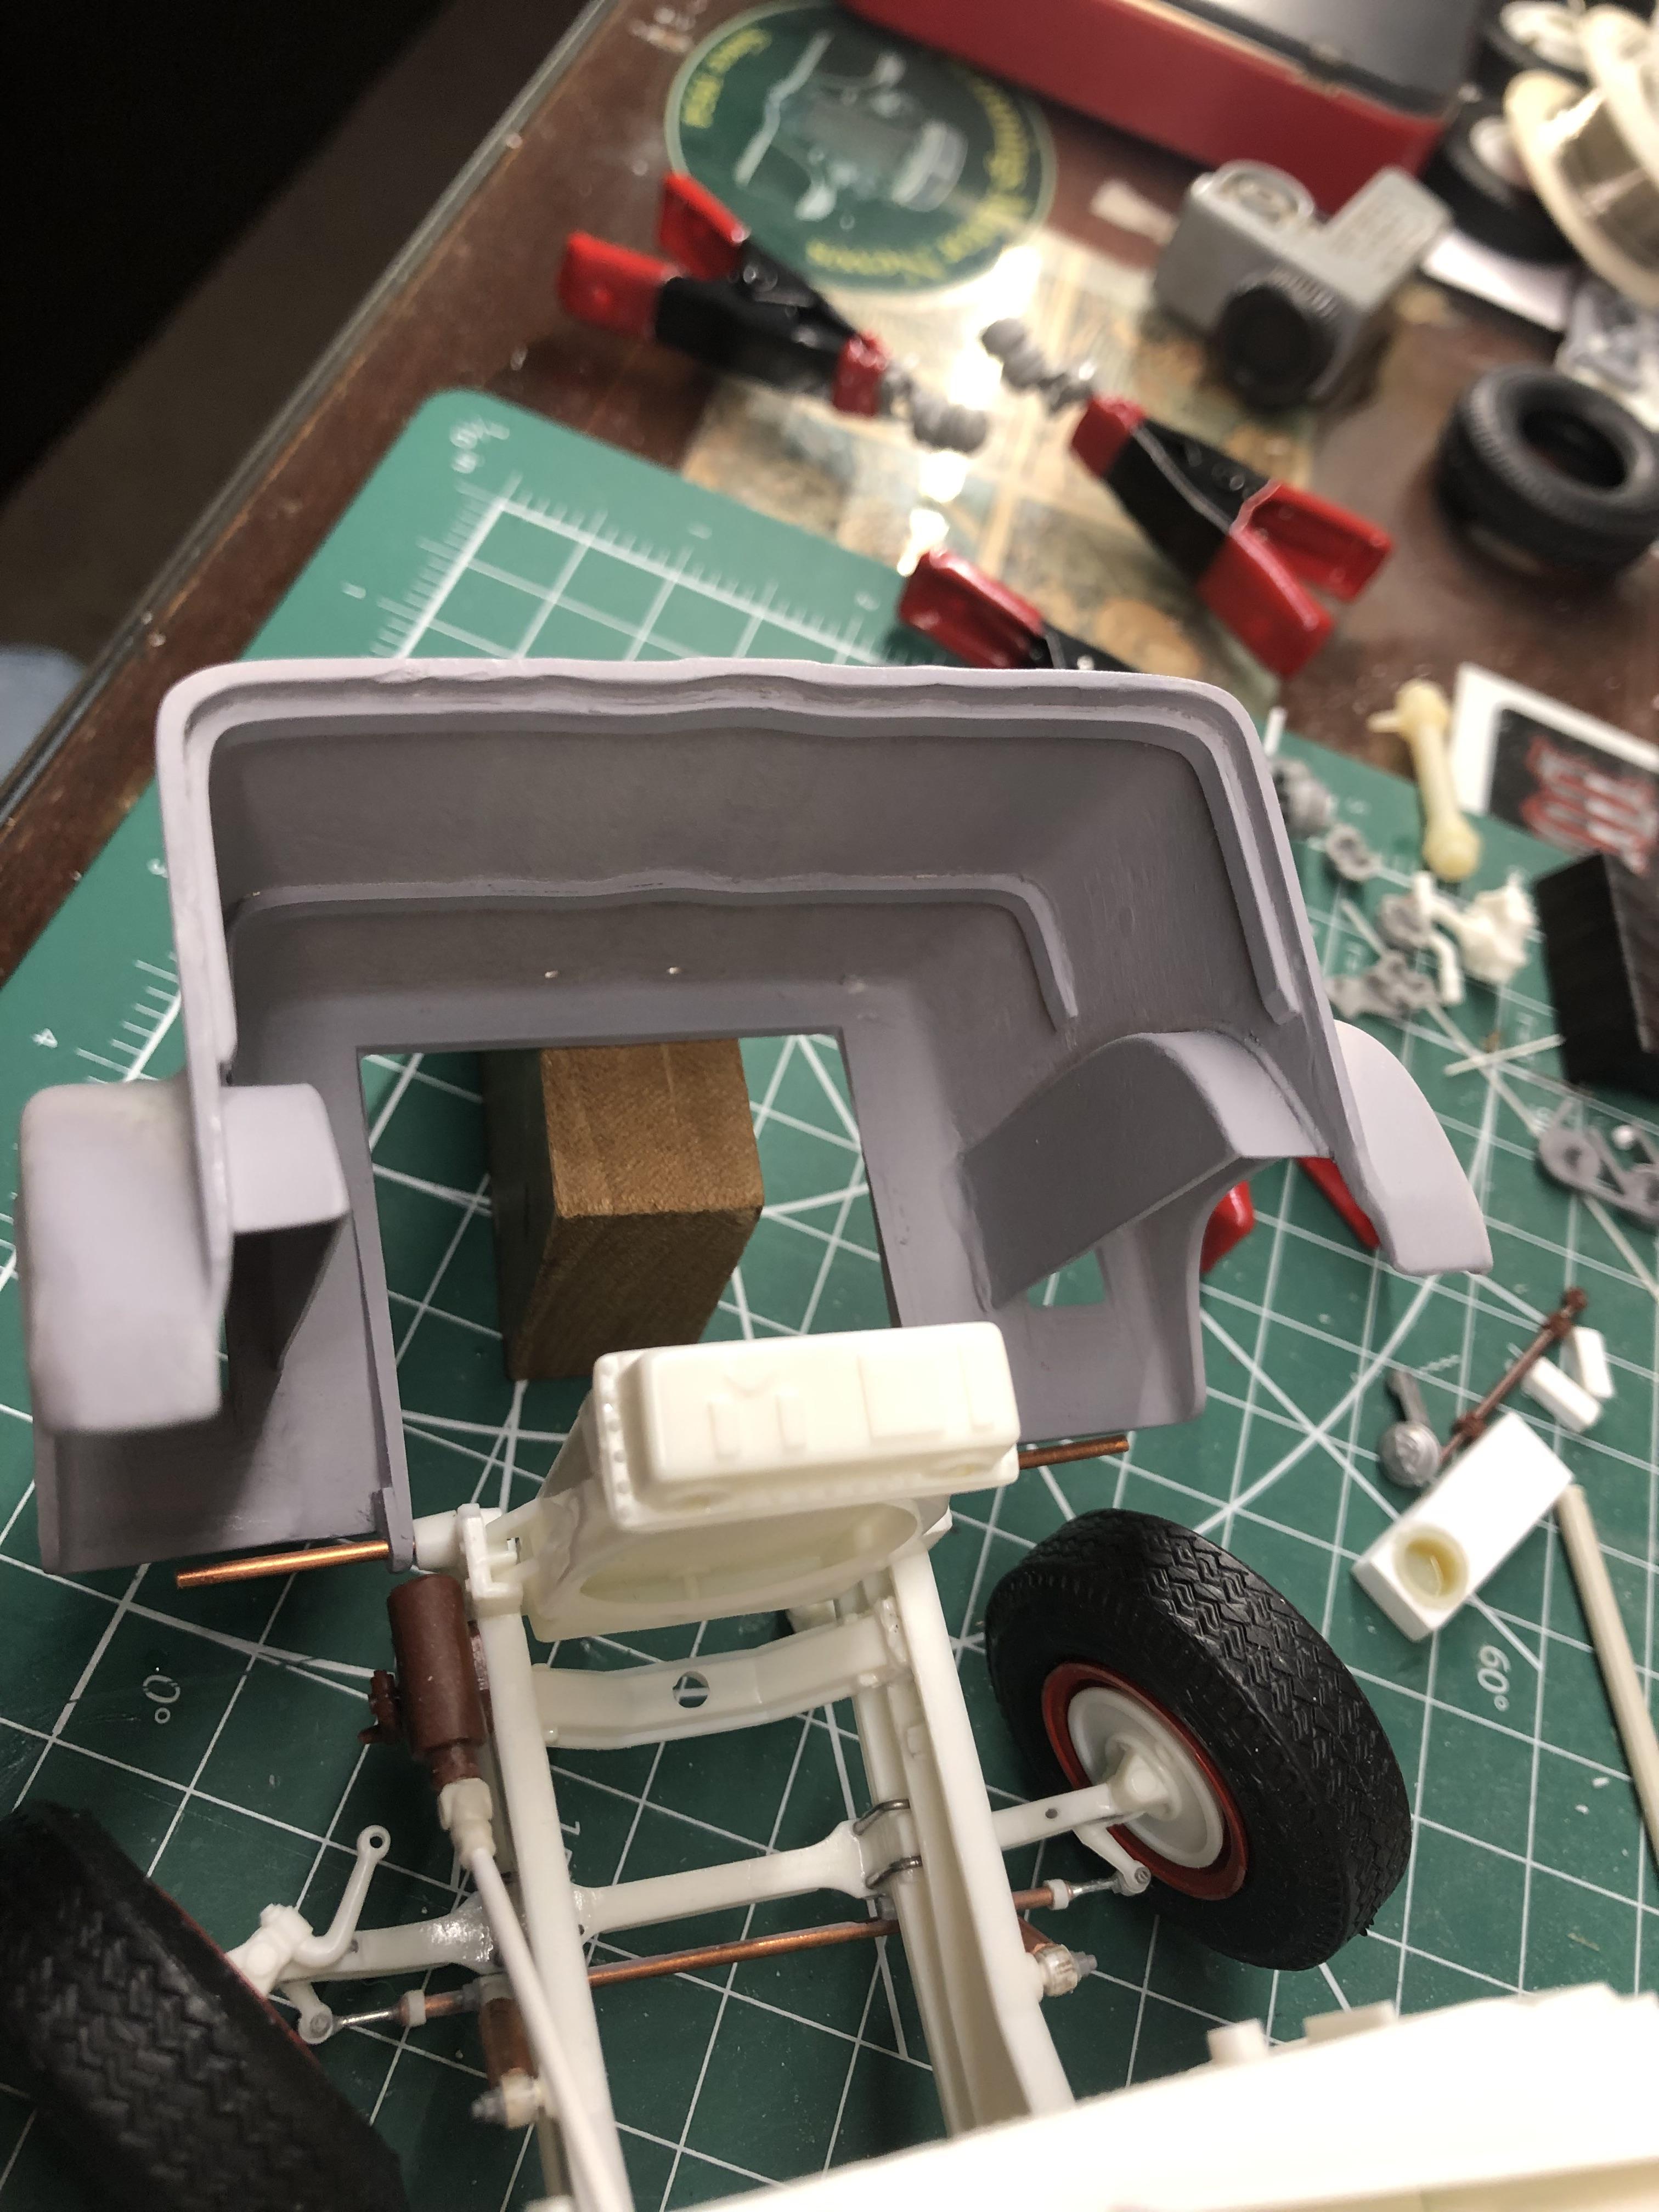
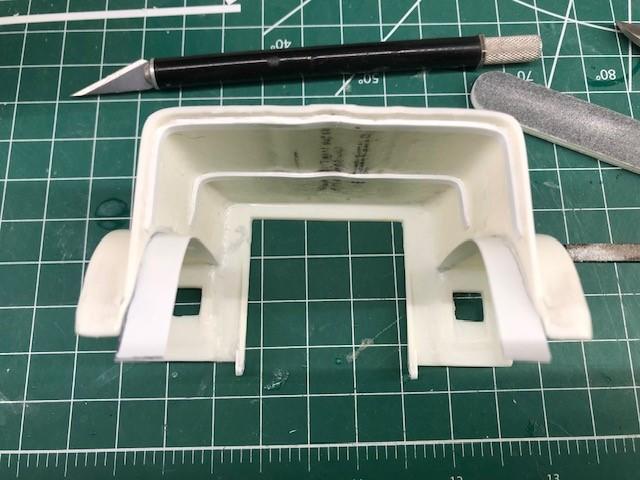
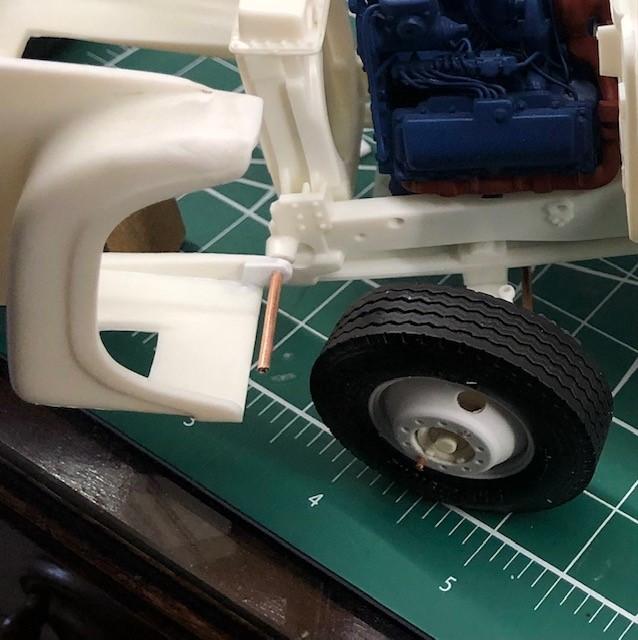
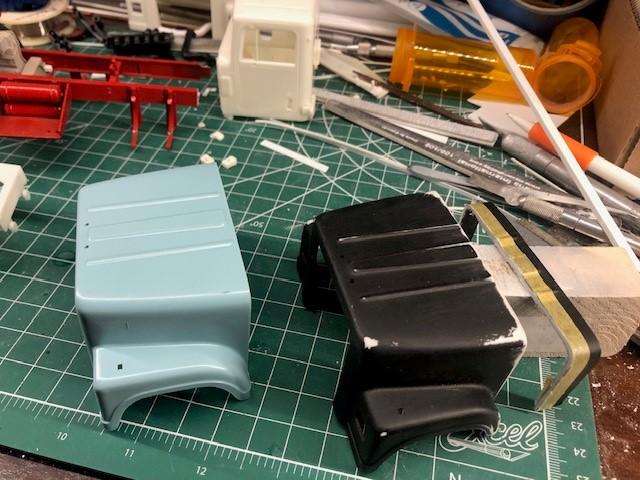
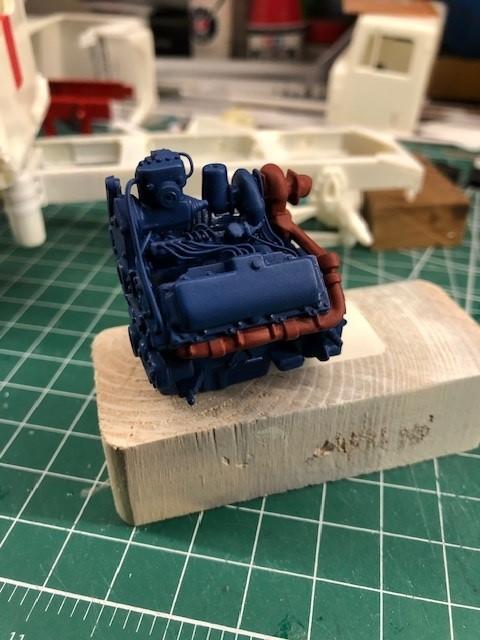
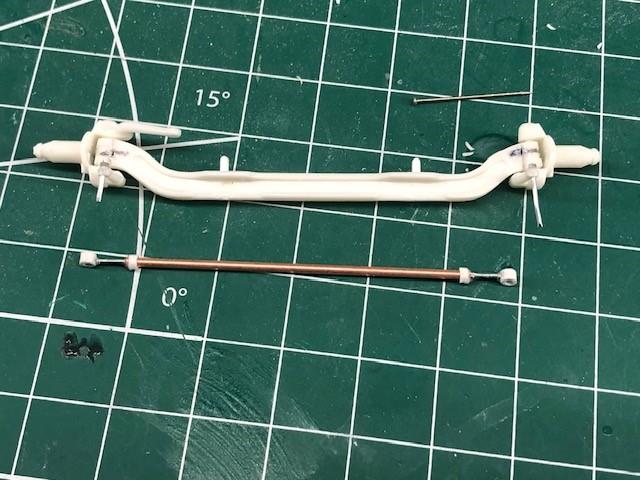
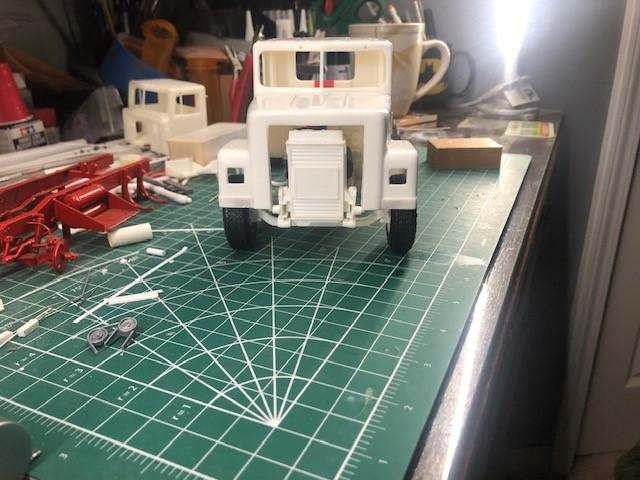
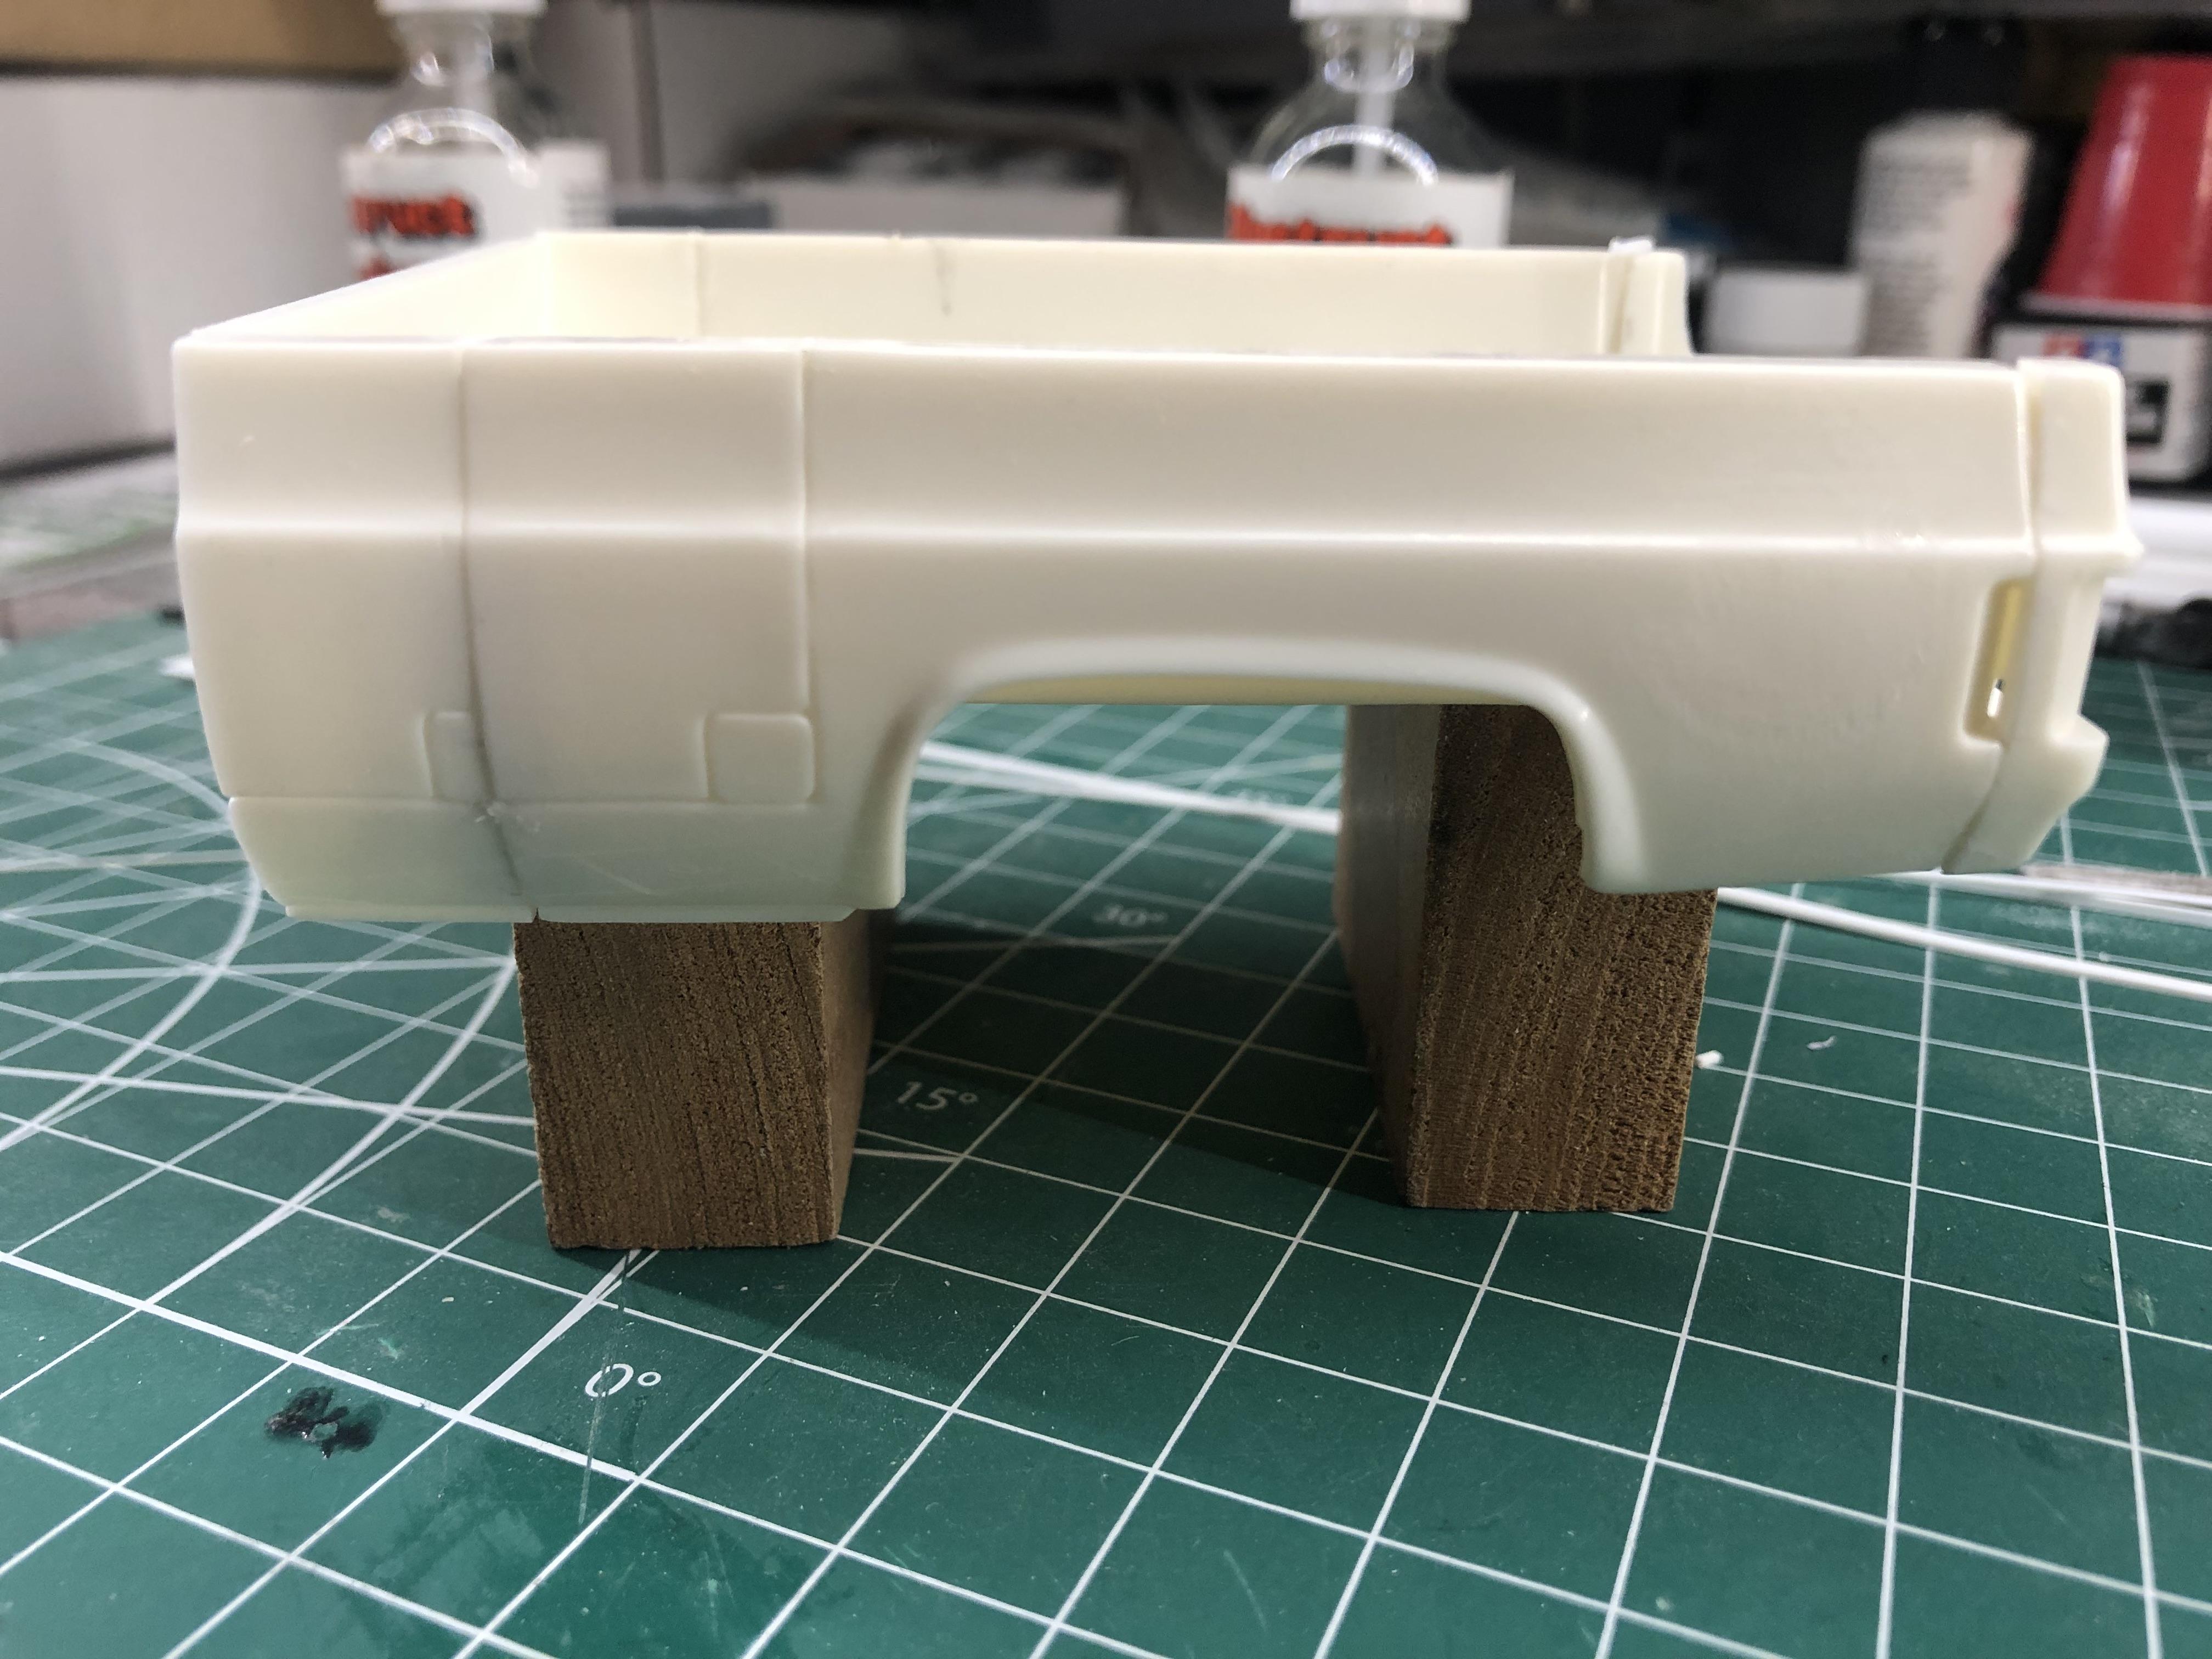
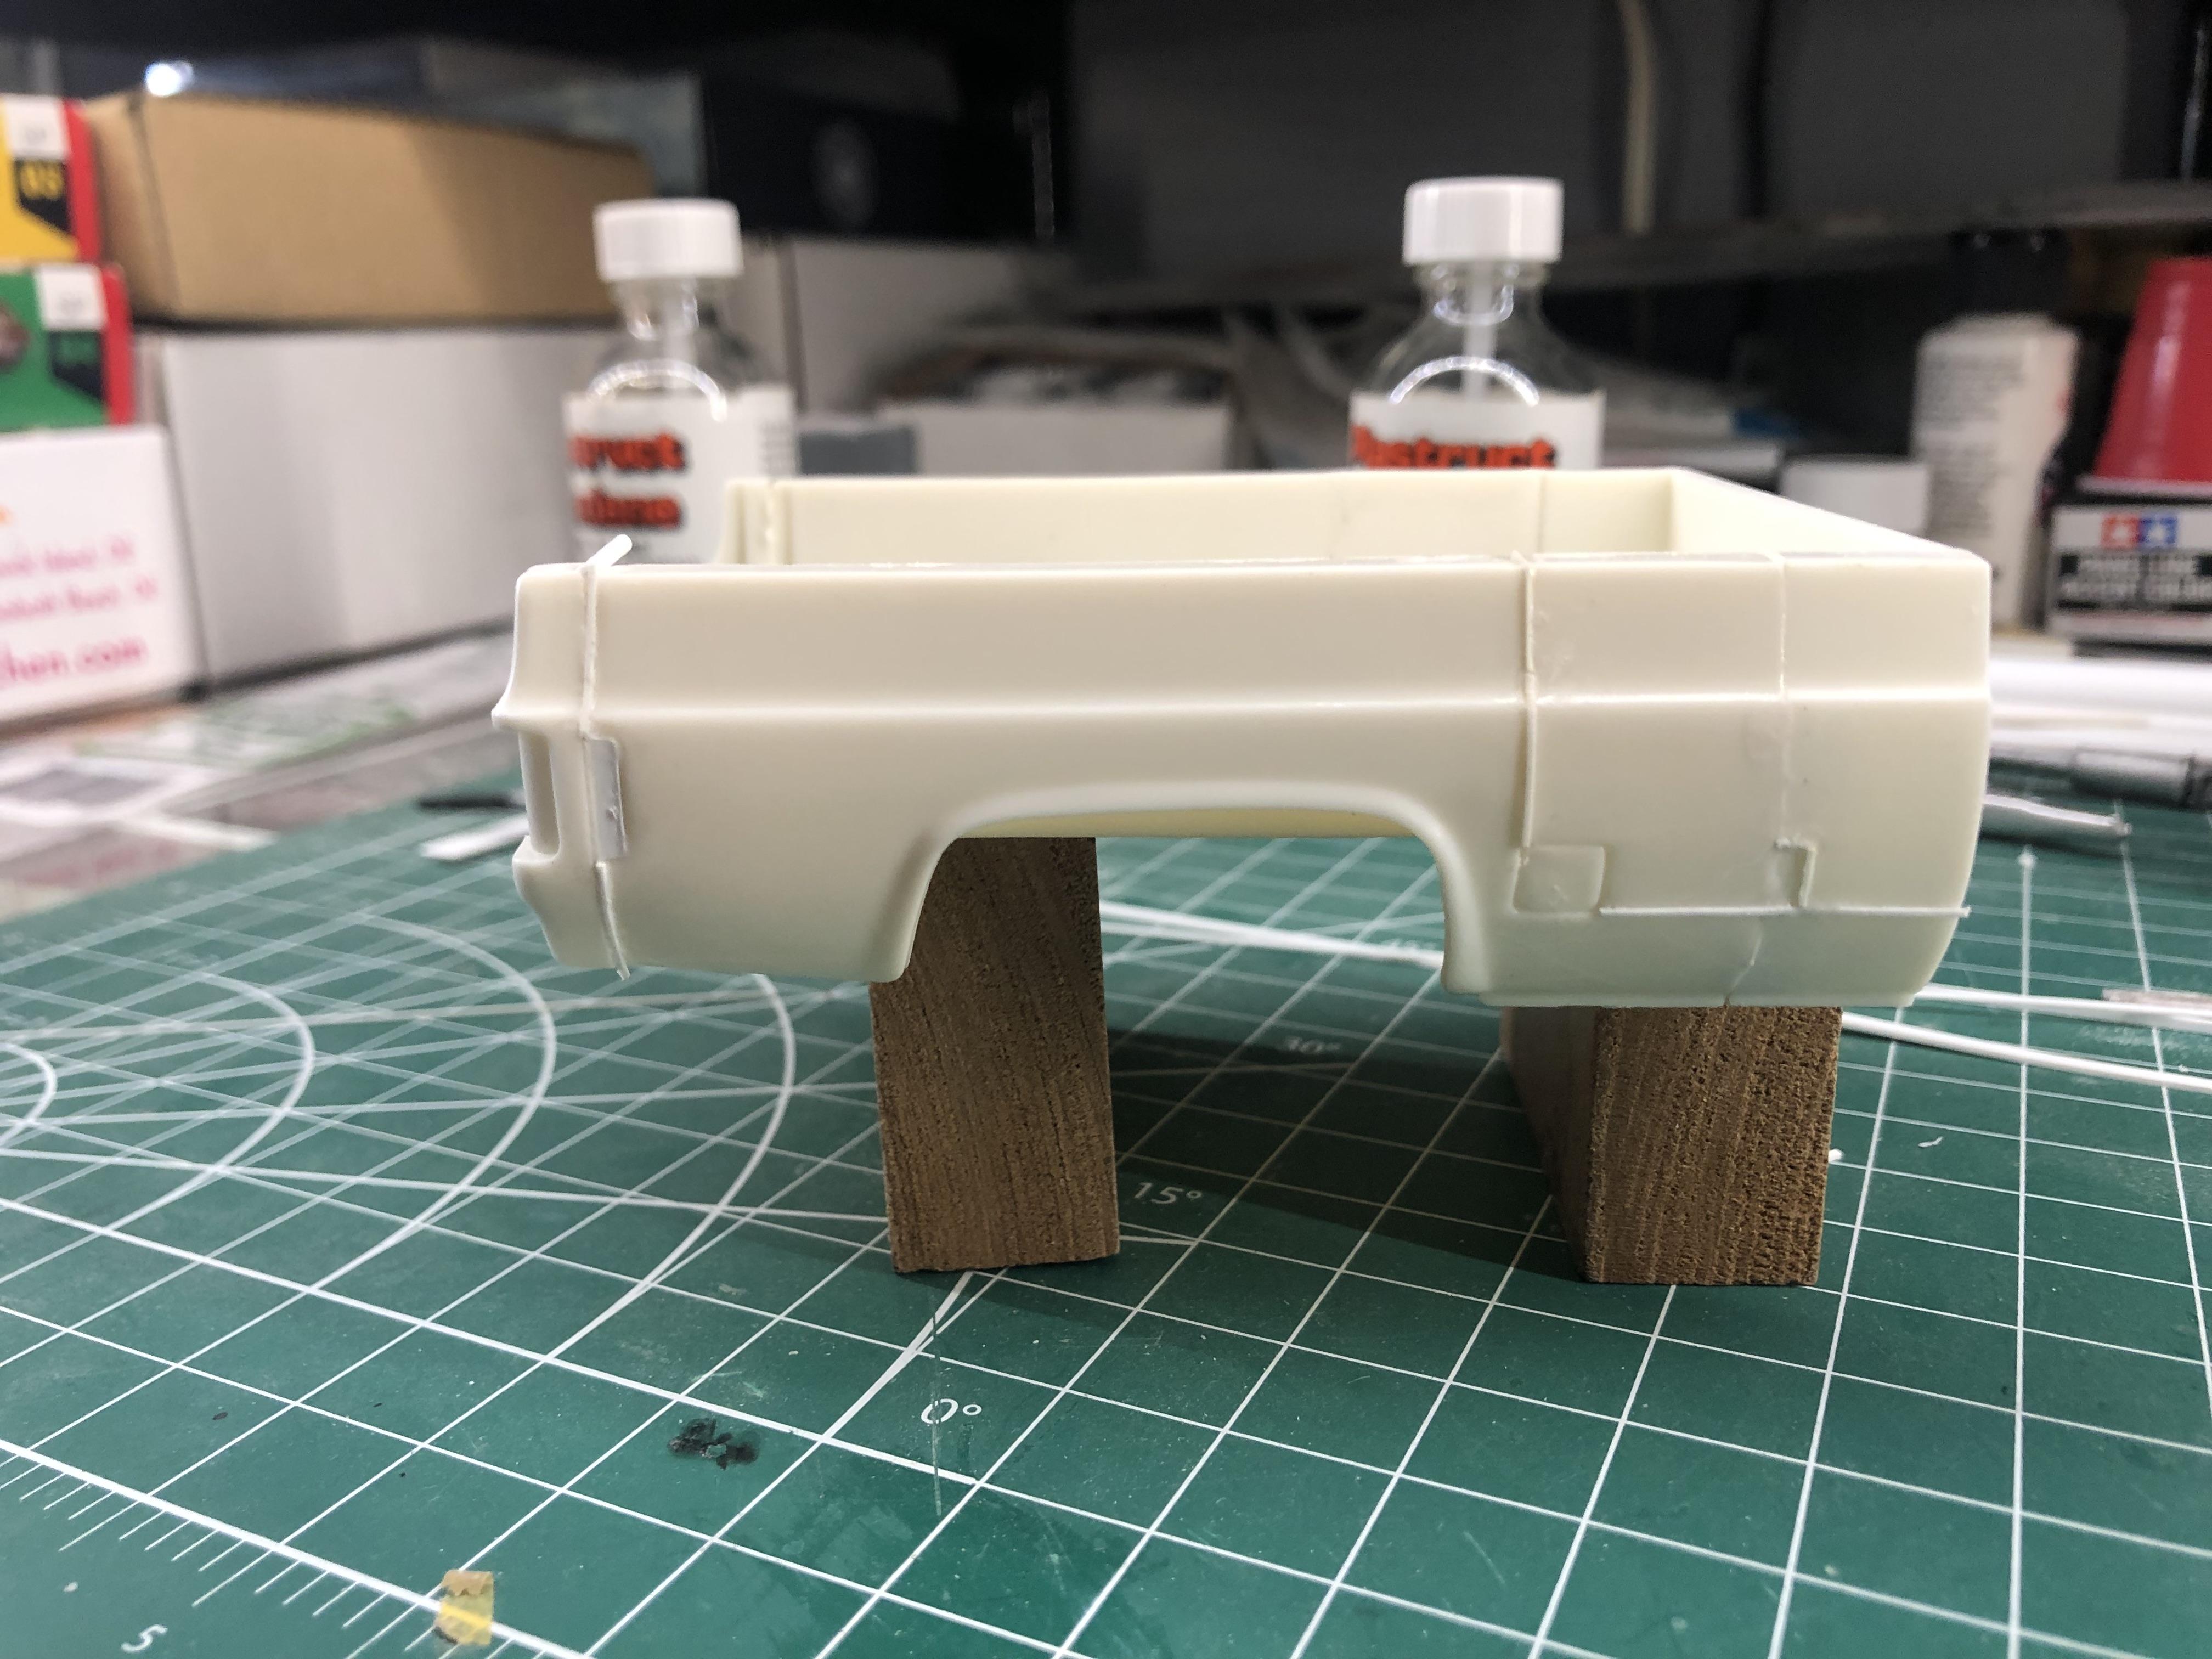
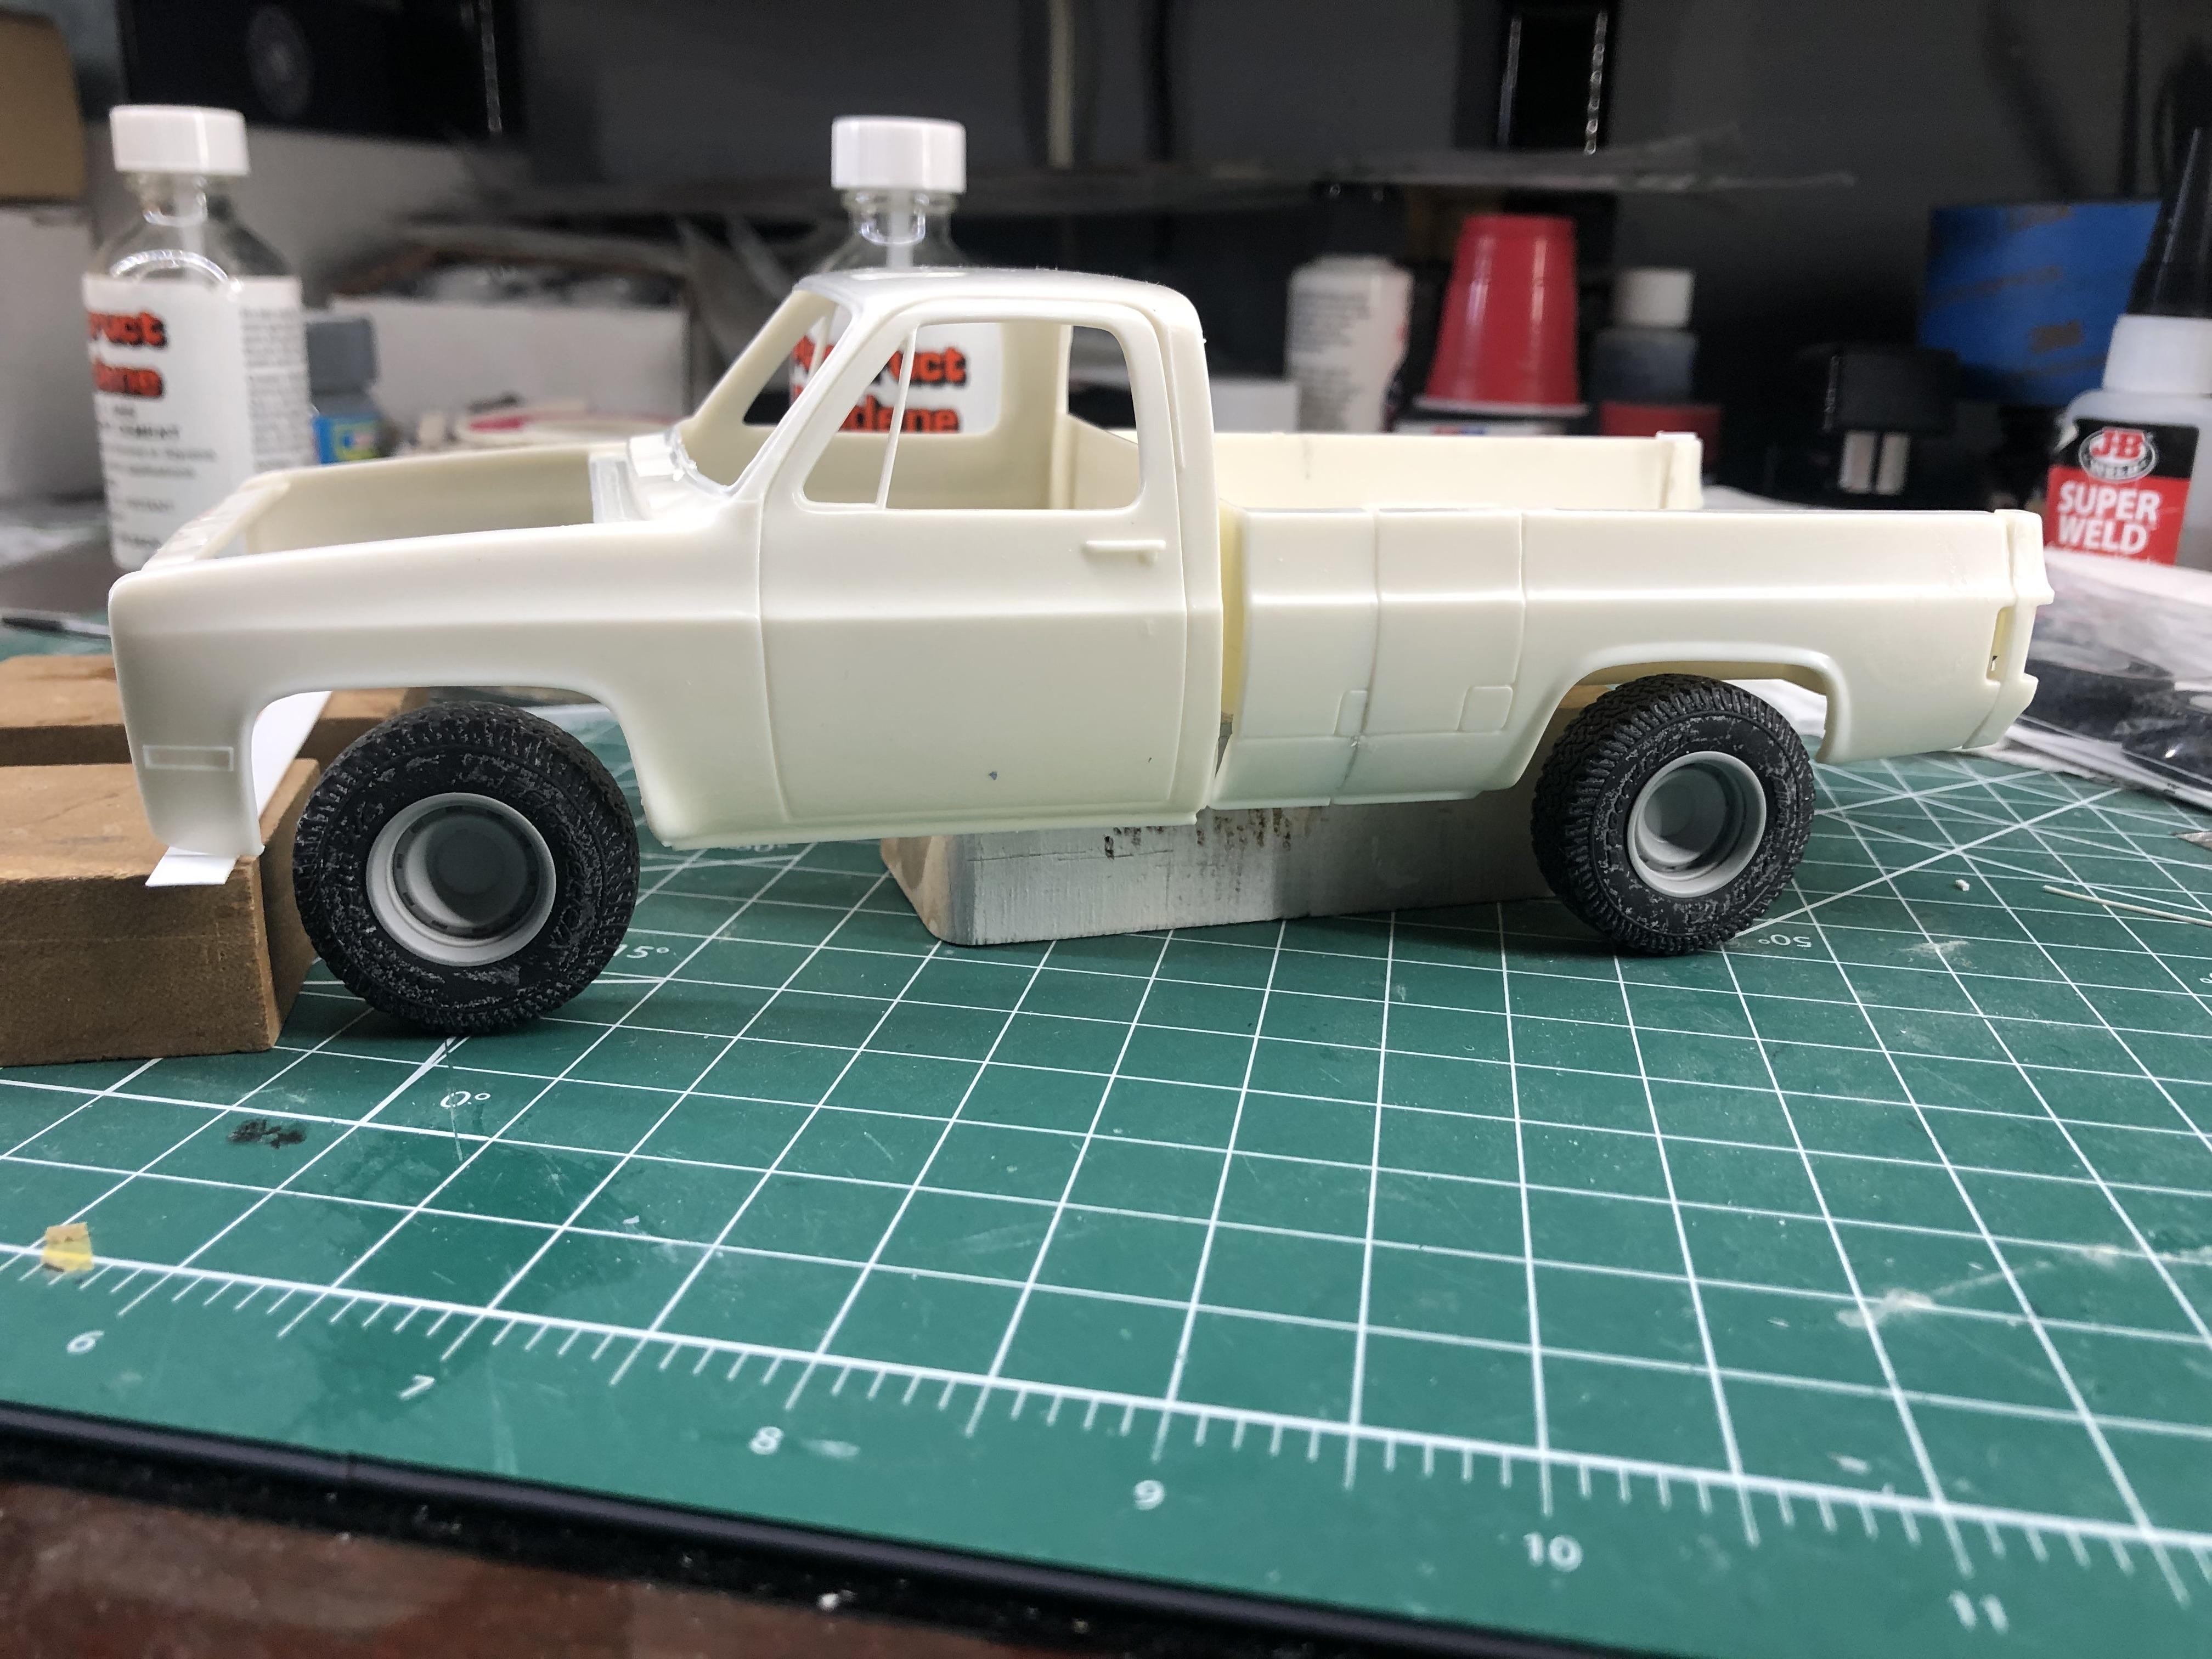
I recently bought a cheap 4300 kit at the local flea market it was a complete kit , the frame had been started but was broken and badly bent I fixed the frame by making it shorter , the 4300 hood and cab on the shorter frame just didn't look right , so I decided to cut the hood down to make it a 4200. I got the engine built ,painted and plumed . I know the front axle is too wide ,so I used the axle from the C0-4070A as a reference to cut the axle down ,also replaced the kits plastic tie rod with brass tubing . Added some detail to the air tanks and battery box , I'm going to use 2 hole Bud wheels and tires from Sense Unlimited. Thanks for looking .
-
Here something I been wanted to do for a while, it pretty easy to do still have a lot work to do yet . thanks
- 1 reply
-
- 3
-

-
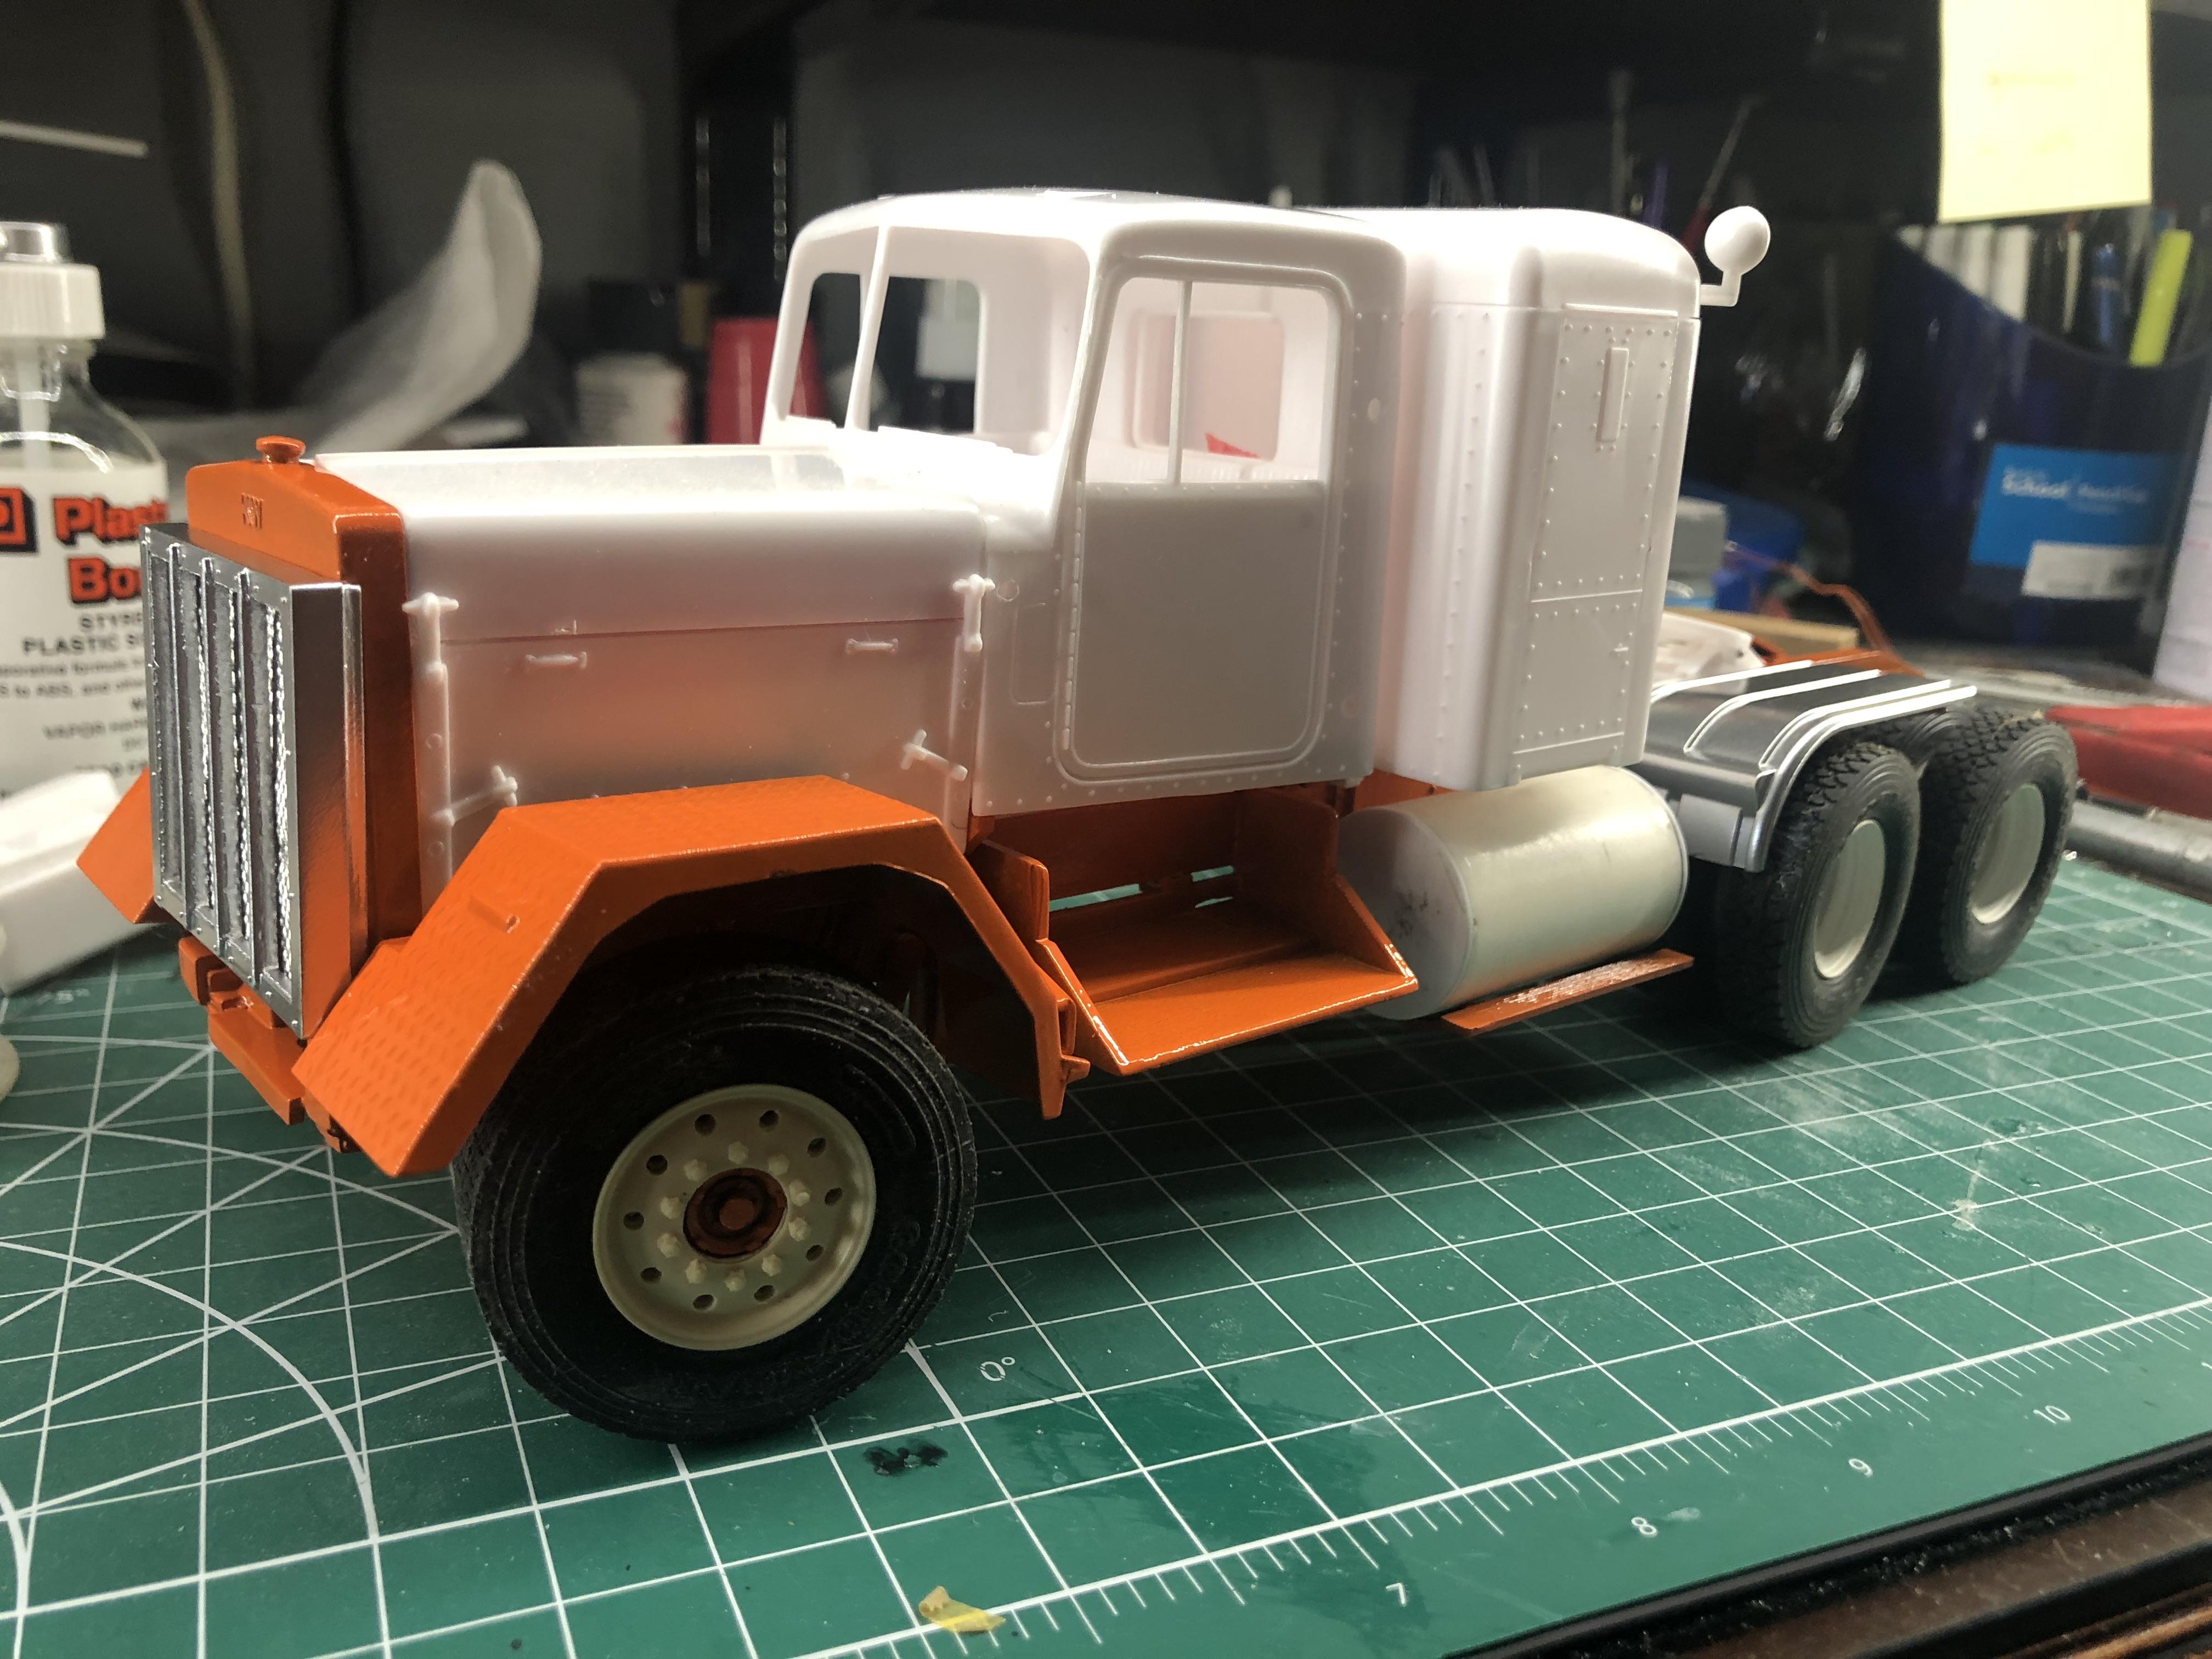
BRGB Kenworth Alaskan Hauler
k100 replied to k100's topic in WIP: Model Trucks: Big Rigs and Heavy Equipment
Thank you for the comments , I didn’t get a June update had some unexpected family issues . I did get some work done over the 4th , got the air lines ran and got the frame painted , made new fuel tanks , I also shorten the frame . Now I can’t decide on day cab or sleeper . thanks Mark
-
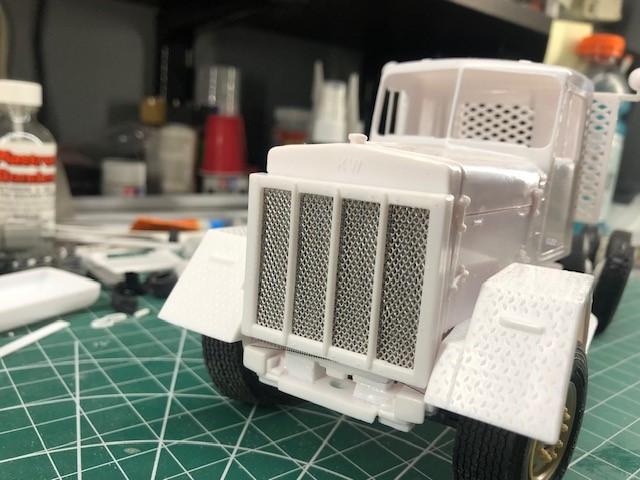
BRGB Kenworth Alaskan Hauler
k100 replied to k100's topic in WIP: Model Trucks: Big Rigs and Heavy Equipment
Jeff & Brian thank you ,you guy's are right about the fit issues , I got the frame pretty square but the rear cab mount is crooked , I had to cut the tabs off just to get the cab lined up with hood . Ben & Steve thank you the comments. Edwin thank you for the tip I will use that next time . Just a little update I decided to open the grill for a more realistic look . Thanks for looking .
-
Mclean White Road Commander
k100 replied to DRIPTROIT 71's topic in Model Trucks: Big Rigs and Heavy Equipment
Great job Brian , very realistic looking . -
BRGB Kenworth Alaskan Hauler
k100 replied to k100's topic in WIP: Model Trucks: Big Rigs and Heavy Equipment
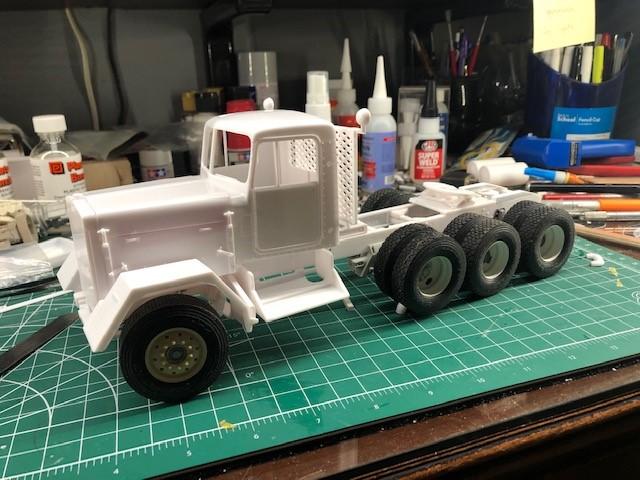
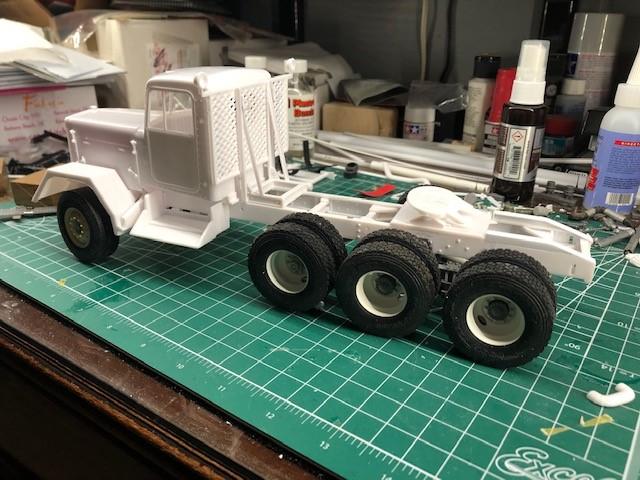
Lee, Brian thank you for the comments . This is how my version of the Alaskan hauler is turning out ,after fighting with the alignment of the hood ,cab, and sleeper I decided to omit the sleeper all together . After some shimming and a few swear words I got the hood and cab lined up fairly decent . The rear suspension is now mounted in place , I decided to add a tag axle . The frame is almost complete need to add air tanks and the fuel tank . Thanks for looking Mark
-
BRGB Kenworth Alaskan Hauler
k100 replied to k100's topic in WIP: Model Trucks: Big Rigs and Heavy Equipment
Ben thank you the comment , Tim’s web site is great place to get ideals from,I seen his Alaskan hauler that gave me inspiration to build this . I also had trouble aligning the cab and hood I ended up cutting off 2 Locating pin on the rear cab mount then I was able to align the cab to the hood and front cab mounts I also had to shim up the right cab mount so the cab would set level . Mark -
Bullnose Kenworth Race Hauler
k100 replied to DRIPTROIT 71's topic in Model Trucks: Big Rigs and Heavy Equipment
Very cool , great build . -
BRGB Kenworth Alaskan Hauler
k100 replied to k100's topic in WIP: Model Trucks: Big Rigs and Heavy Equipment
Thank you guys for all the information , it’s good know , I was just assuming they were straight . I worked on modifying the right air cleaner added a warm air intake and modified the hood side panel . I know this isn’t the correct set up for this truck but I like the looks of this better than having it running down to the lower panel . still have some clean up to do but wanted to do a quick mock up . thanks Mark
-
BRGB Kenworth Alaskan Hauler
k100 replied to k100's topic in WIP: Model Trucks: Big Rigs and Heavy Equipment
Thank you Rockford and Force for the good information , I should have been a little more clearer on the drive shaft ,the shaft from the mid bearing to the front axle is off center. Maybe that’s the way it’s to be . thank you Mark
-
BRGB Kenworth Alaskan Hauler
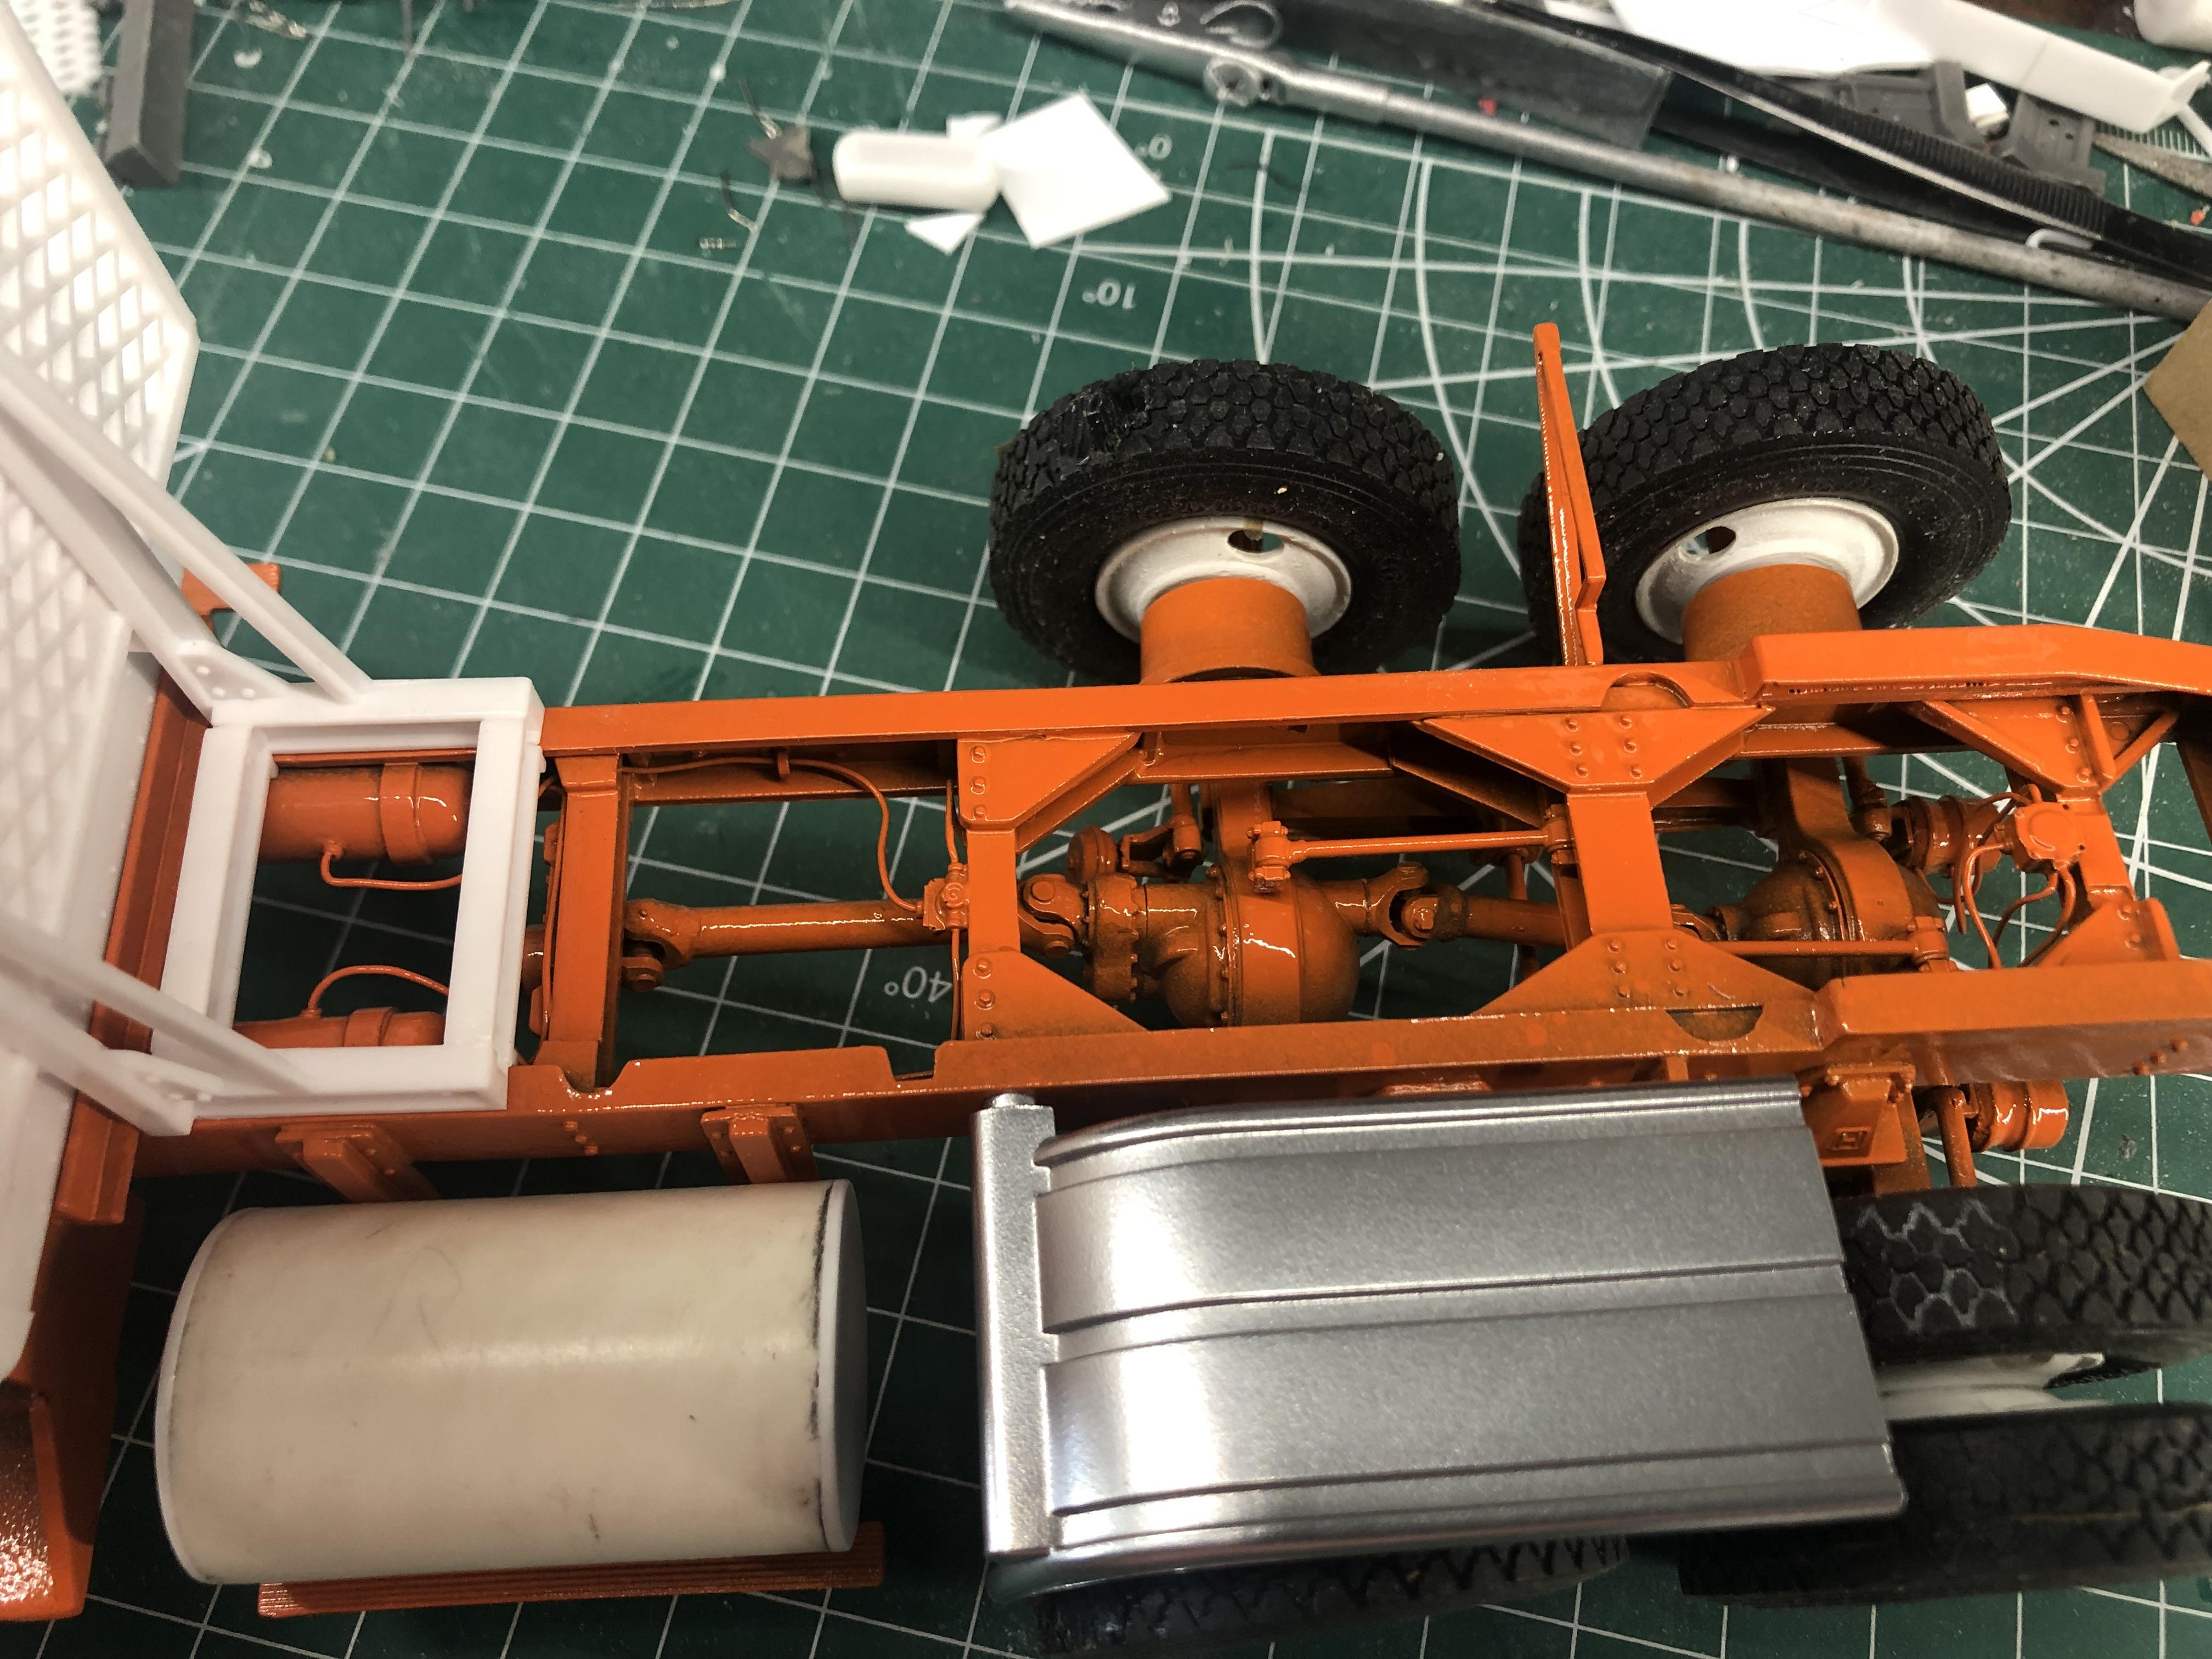
k100 replied to k100's topic in WIP: Model Trucks: Big Rigs and Heavy Equipment
Thank you for the comments . I was able work on the rear suspension this weekend all tho it’s not finished yet have add the air brakes ,man it was a Challenge getting everything lined up , there are located pins but they are very shallow and hard to keep inline, it took a lot patients . The instructions are just pictures and are hard to till where exactly the parts to go . Im not happy with the way the drive shaft is off center but it is what it is I guess . I used U joints from ST Supply and made the drive shaft . I had to add some shims to make the frame set level. After I took the picture of the suspension I knocked it off the desk and broke the rear axle off , luckily I was able to repair but it’s alittle crooked . thanks for looking Mark
-
BRGB Kenworth Alaskan Hauler
k100 replied to k100's topic in WIP: Model Trucks: Big Rigs and Heavy Equipment
Thank you for the comment Rockford Force I thought this truck would be a good candidate to try this suspension on. Spent most of Sunday cleaning up some of the parts still have a lot more to do . Here what it looks like cleaned up. thanks for looking mark
-
BRGB Kenworth Alaskan Hauler
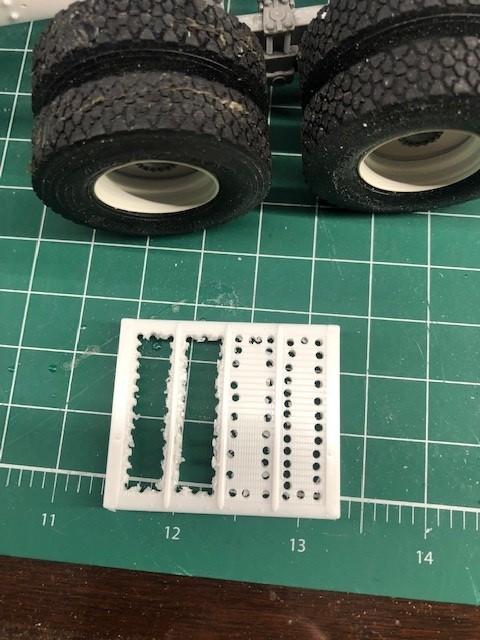
k100 replied to k100's topic in WIP: Model Trucks: Big Rigs and Heavy Equipment
Thank you Ronnie for the comment , the wheels are from Moluminum the tires are from Gary Wallace . I open rear suspension pack "WOW" there is a lot of little parts , gave them a good soaking , will be spending some time on cutting and cleaning up everything . Thanks for looking . Mark
-
BRGB Kenworth Alaskan Hauler
k100 replied to k100's topic in WIP: Model Trucks: Big Rigs and Heavy Equipment
Thank you for all comments . James, Ill be adding newer style door handles and reworking the right side hood panel . I got the frame together ,I added a steerable front axle from the parts box (Revell Peterbilt) made new shocks and added U bolt detail . Im hoping to start the rear suspension this weekend we'll see how that goes . Thanks for looking Mark
-
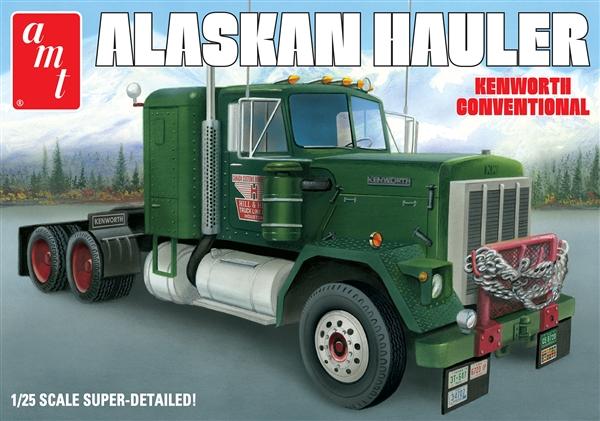
This is entry into the BRGB it is AMT Kenworth Alaskan Hauler , I’m going to go with different wheels and tries I’m also going to try out the resin Hendrickson rear suspension from CTM . Thanks for looking Mark
-
BRGB 2023 Official Thread
k100 replied to Pete68's topic in WIP: Model Trucks: Big Rigs and Heavy Equipment
I would like to join , I'm going to go with the Kenworth Alaskan Hauler . Mark