

FordGuy1984
-
Posts
45 -
Joined
-
Last visited
Content Type
Profiles
Forums
Events
Gallery
Posts posted by FordGuy1984
-
-
-
Out of curiosity, what kit are you using? ( I can't see any photos in your first post, though all others show fine)
I dig a good Chevelle built any way that's crafted right!
I purchased the AMT kit first at a local hobby store. Got it home, opened it up and threw it all back in the box after cutting the motor off the trees. Other than the motor that is pretty much a garbage kit. So then I ordered the Revell kit on eBay, it is the 'Donks' version which was fine with me since it included all the original parts from the 'Streetburner 3 n 1'
Not sure why the pics didn't load the first time, I'll try loading them again.
Also, I'm not gonna lie to you guys... I forgot that Gran Turismo Sport is being released in a few days so this will probably be a slow build considering I have been waiting almost two years for it!

-
-
I will be building this one as a highly modified Grand Tourer Rest-Mod featuring independent rear suspension, custom front suspension, a ProCharged LS3 with a custom engine bay and custom interior.
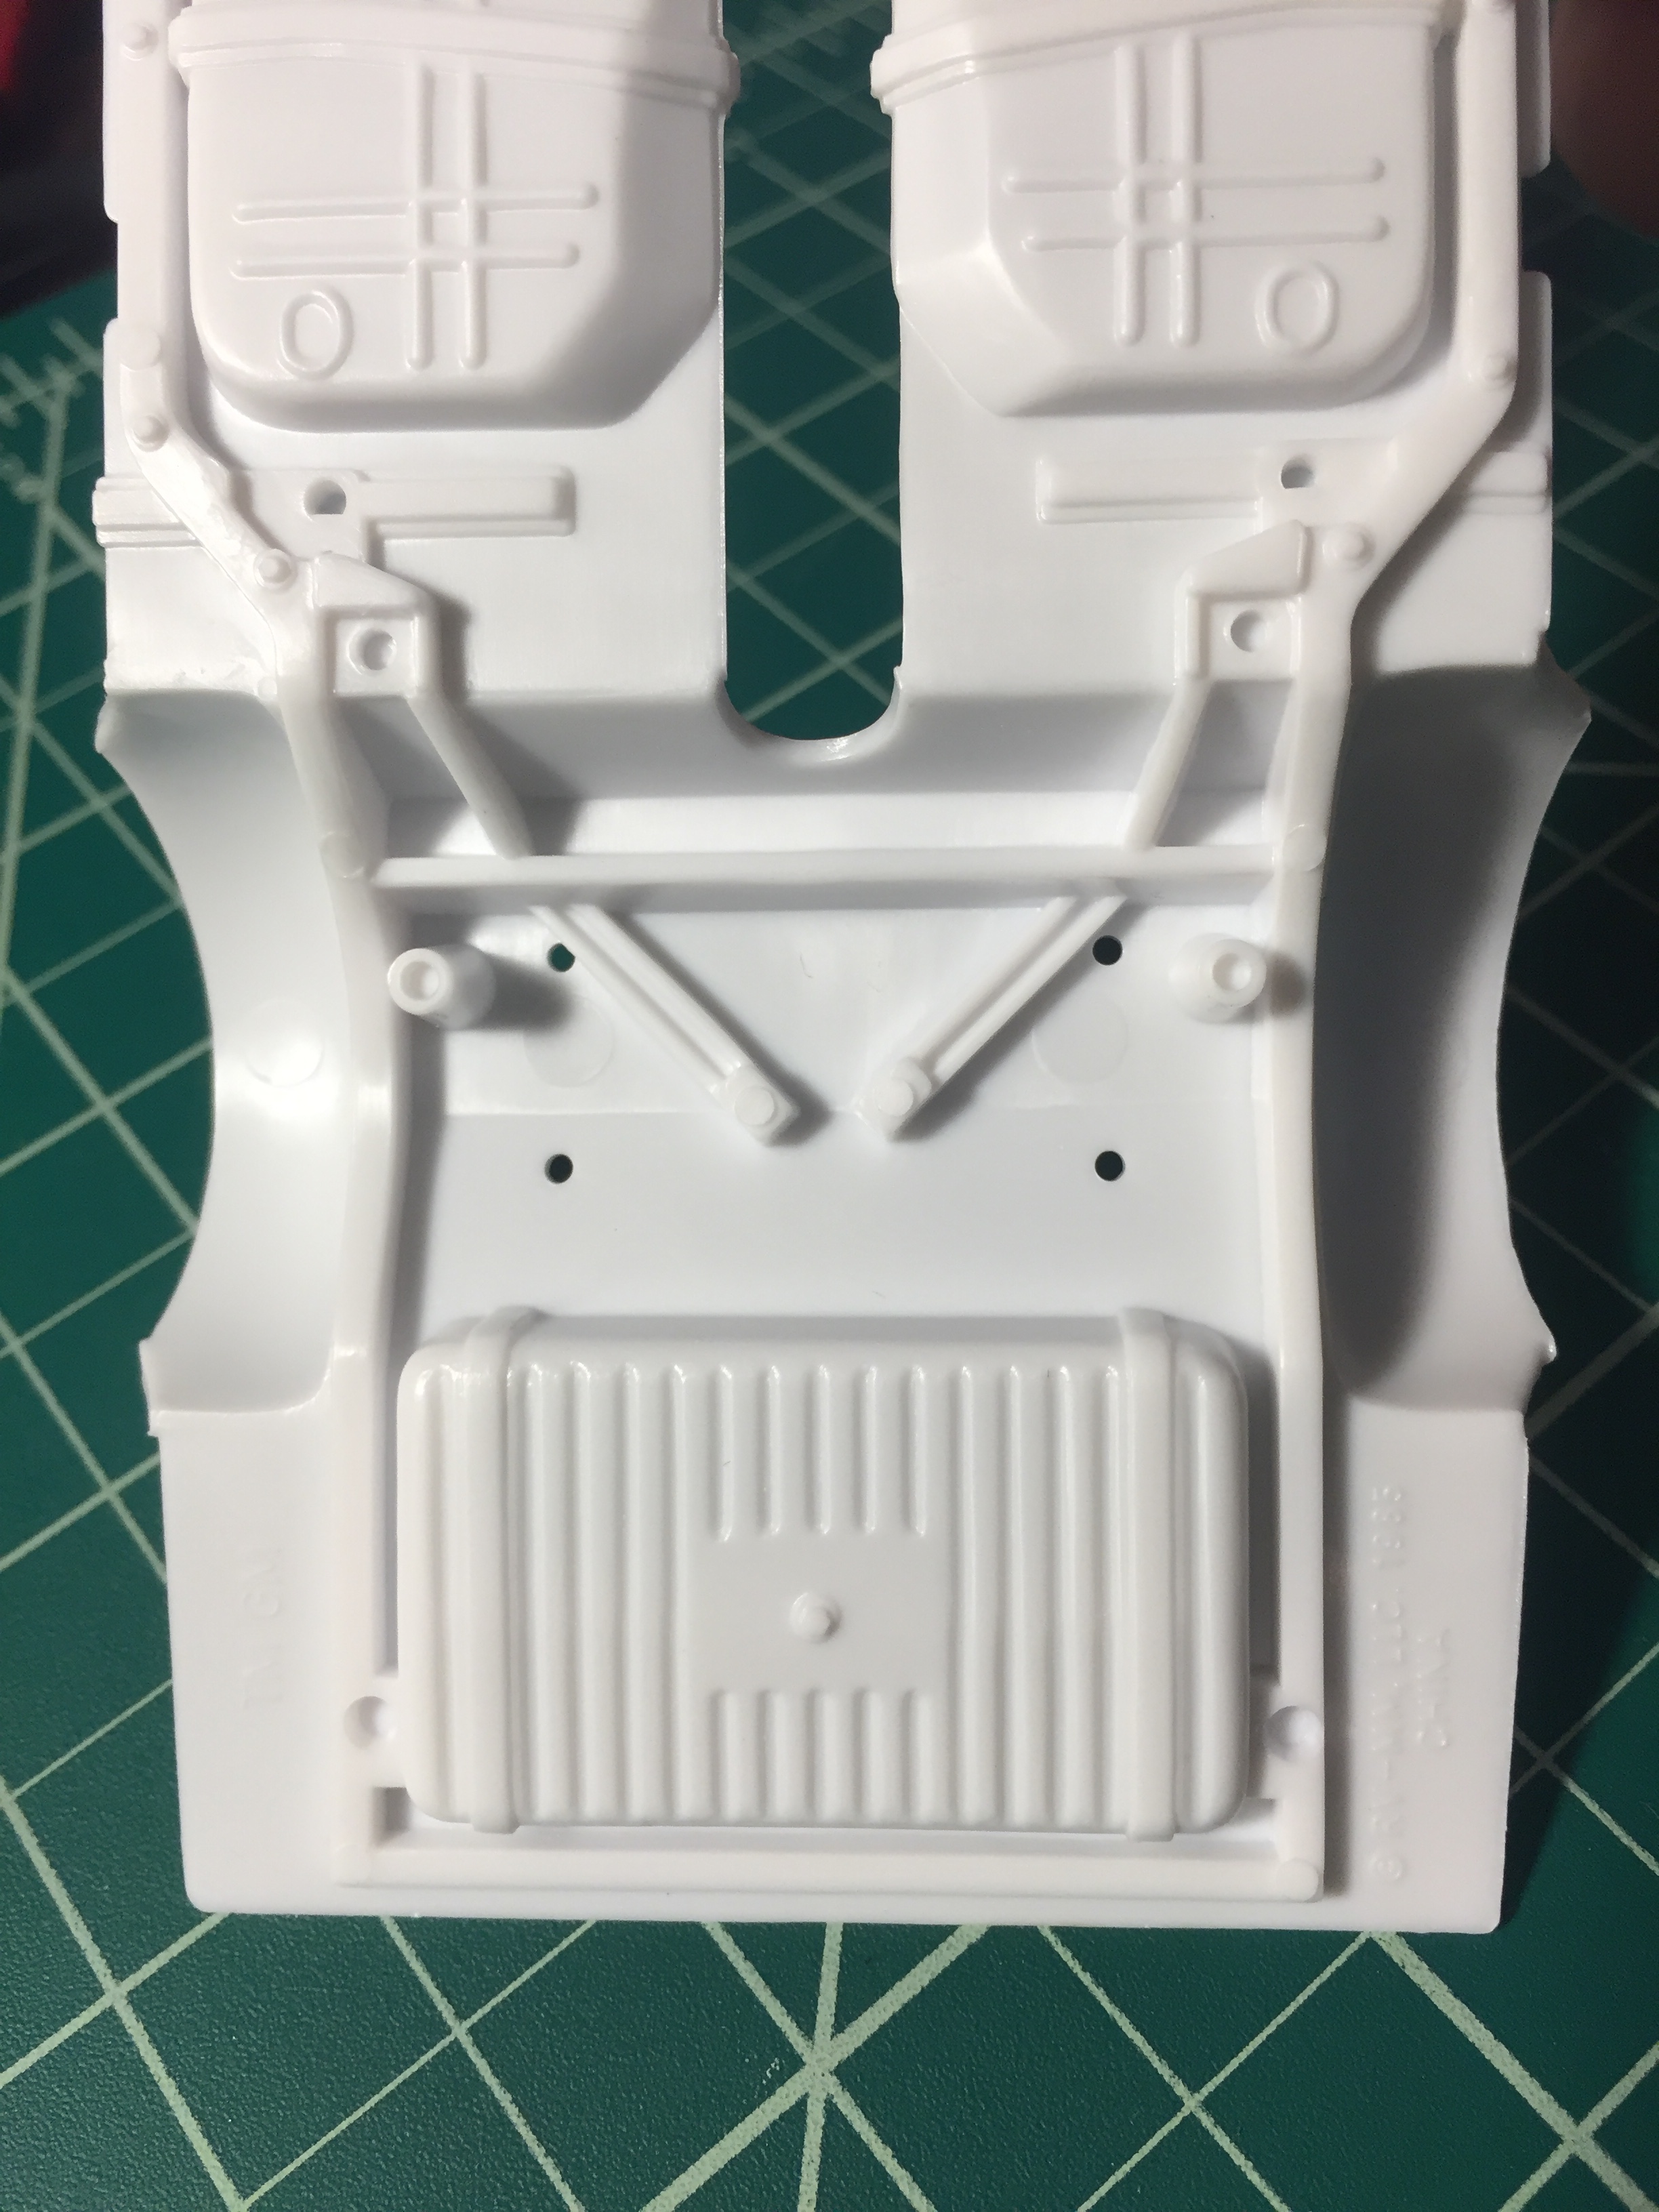
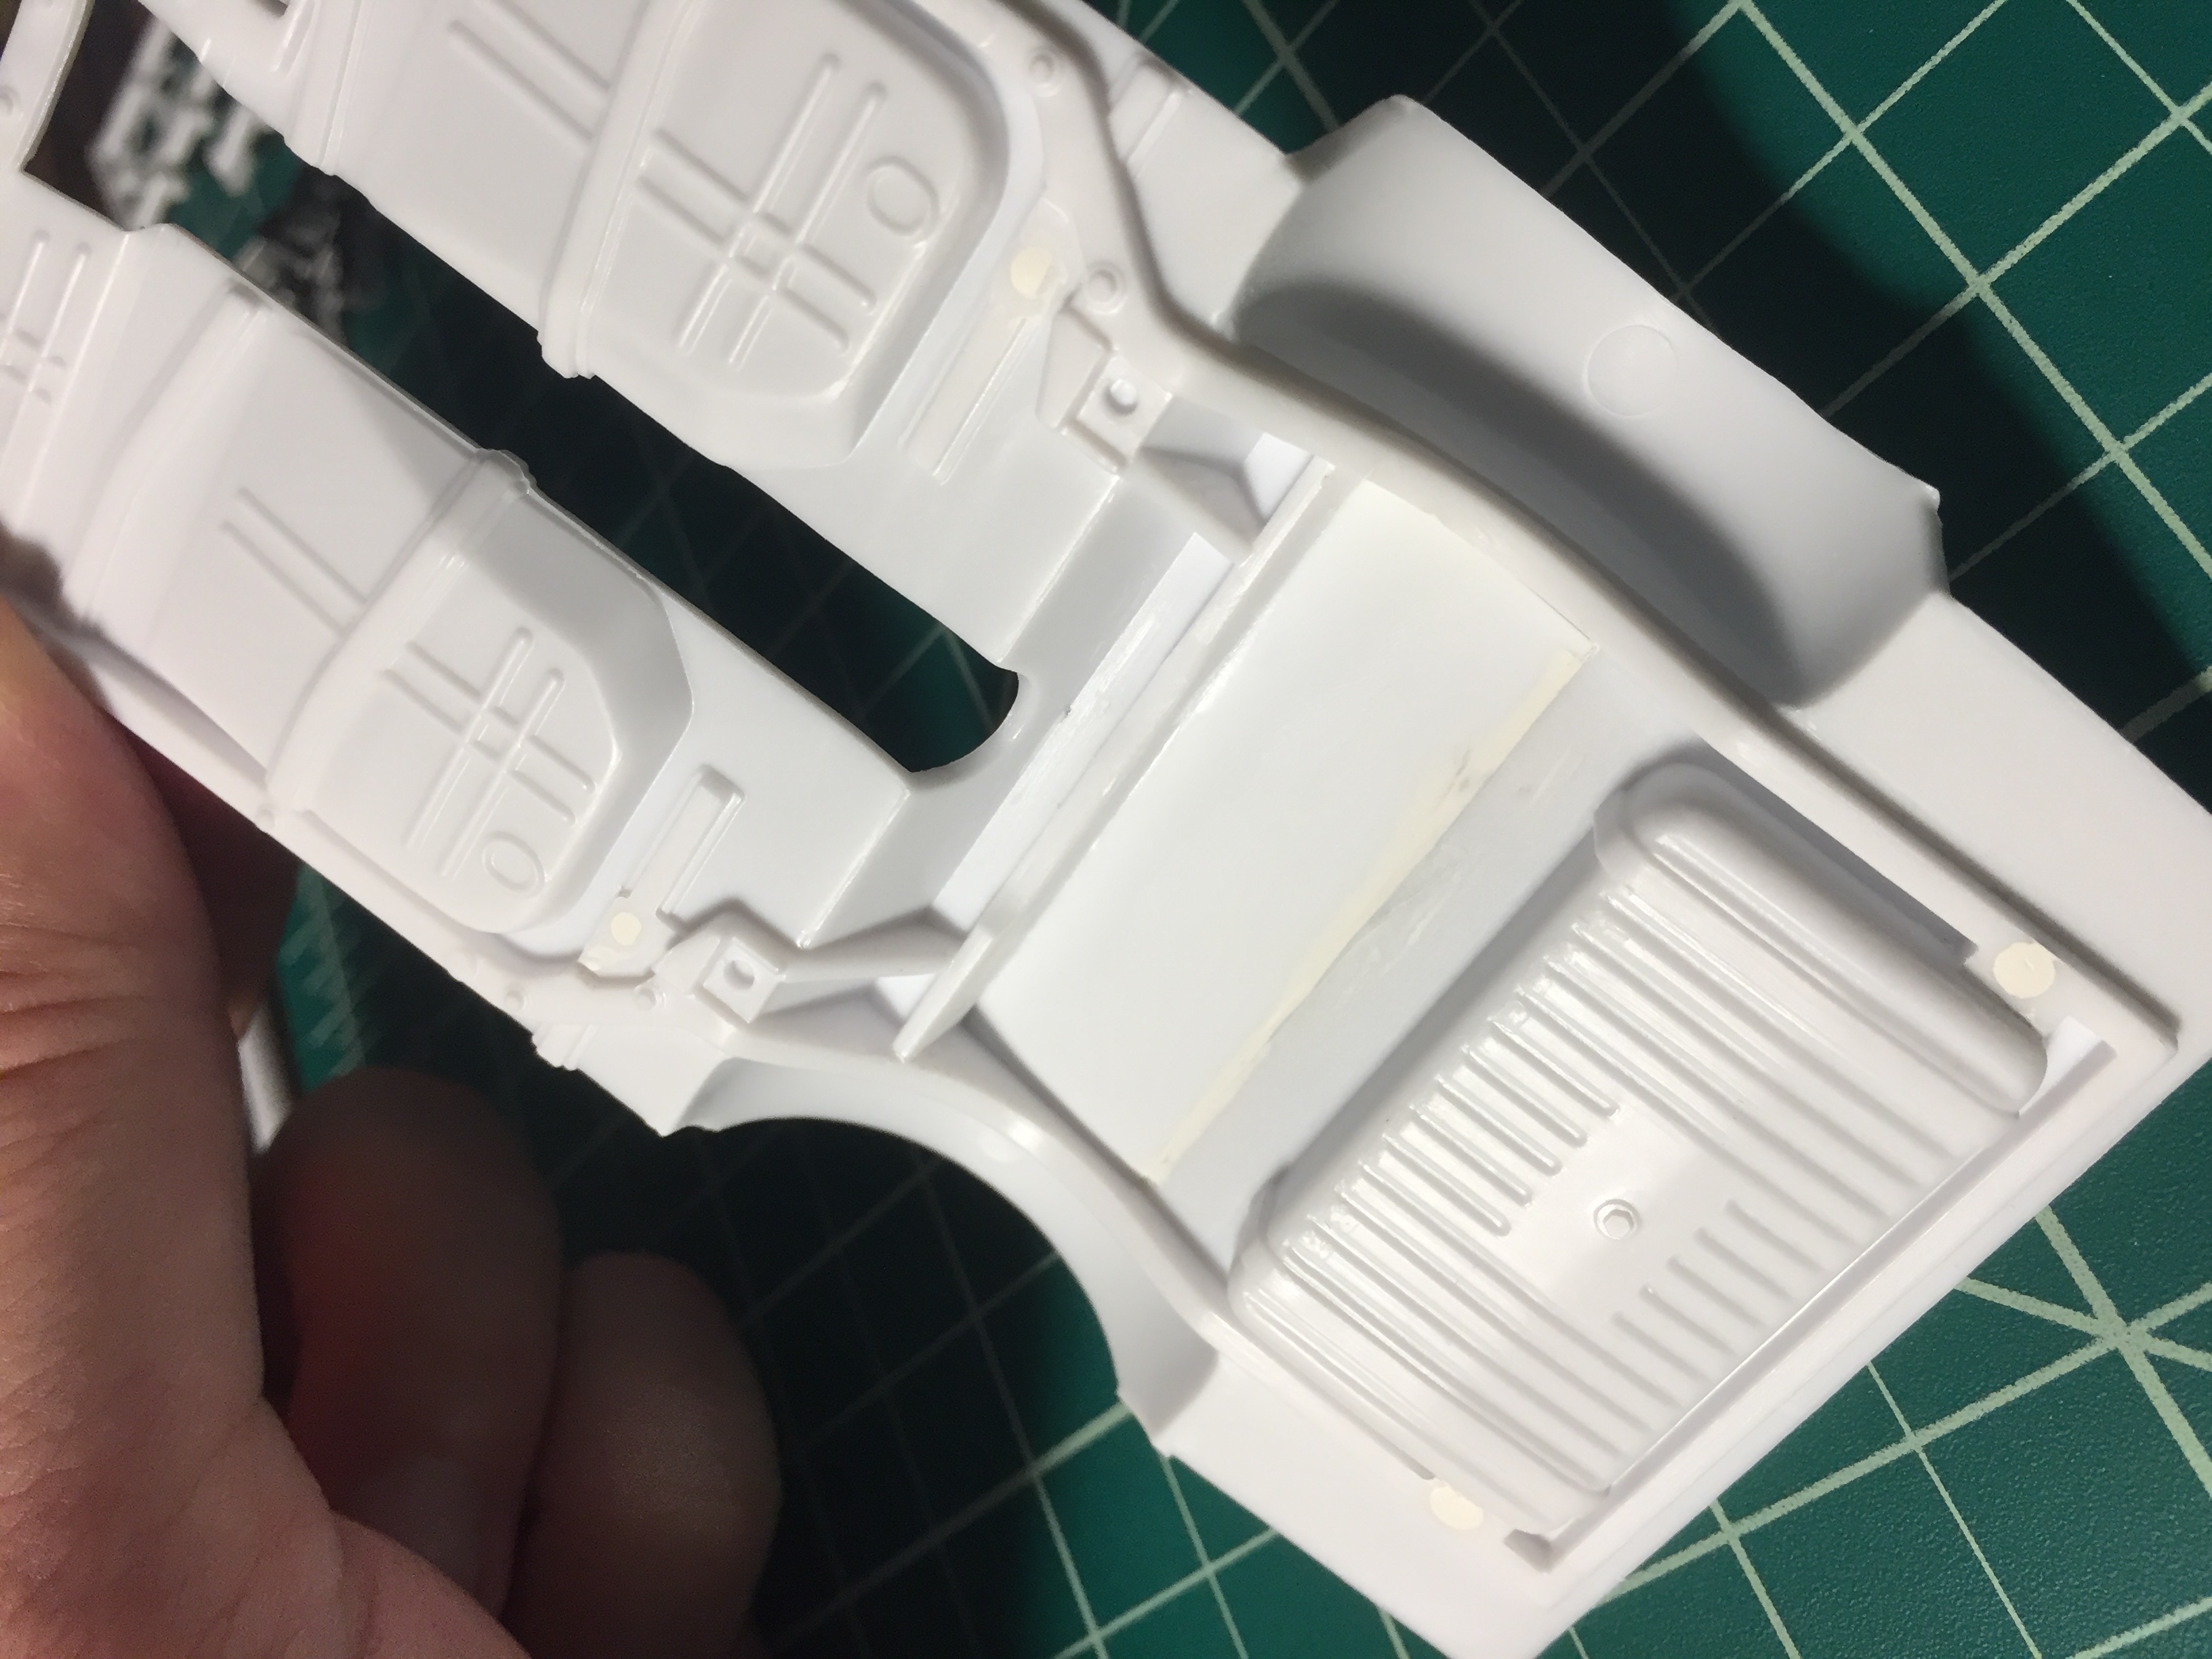
I started by filling all of the random unused holes on the chassis and cutting out the section of the trunk floor above the axle (seemed easier to cut that piece out and replace it rather than trying to cut out the control arms and fill the other random holes).
I found the independent rear suspension setup in the parts box, I think it came from a Supra kit. Still debating on the front suspension if I should go with a typical coil over setup or maybe the front end out of a Shelby Cobra.
So far with the body I have shaved all the marker lights, door handles and badging.
I'm waiting to get the engine, intercooler and seats that I ordered from clearly scale before I get too wild modifying the front of the chassis and engine bay.
-
I've built a few of these with all the carbon fiber, and PE parts sets. The last one I did, I used both the ScaleMotorsport and the Studio27 PE sets. This kit build a great model and you're doing it justice so far!
-
Slick build. The 2 tone looks good on it. I bought 3 at Ollie's - 1 to build (in final assembly now) and 2 for parts.
That's the only reason I have this one, got it off the hobby lobby clearance rack for 8 bucks. Hard to pass on that.
-
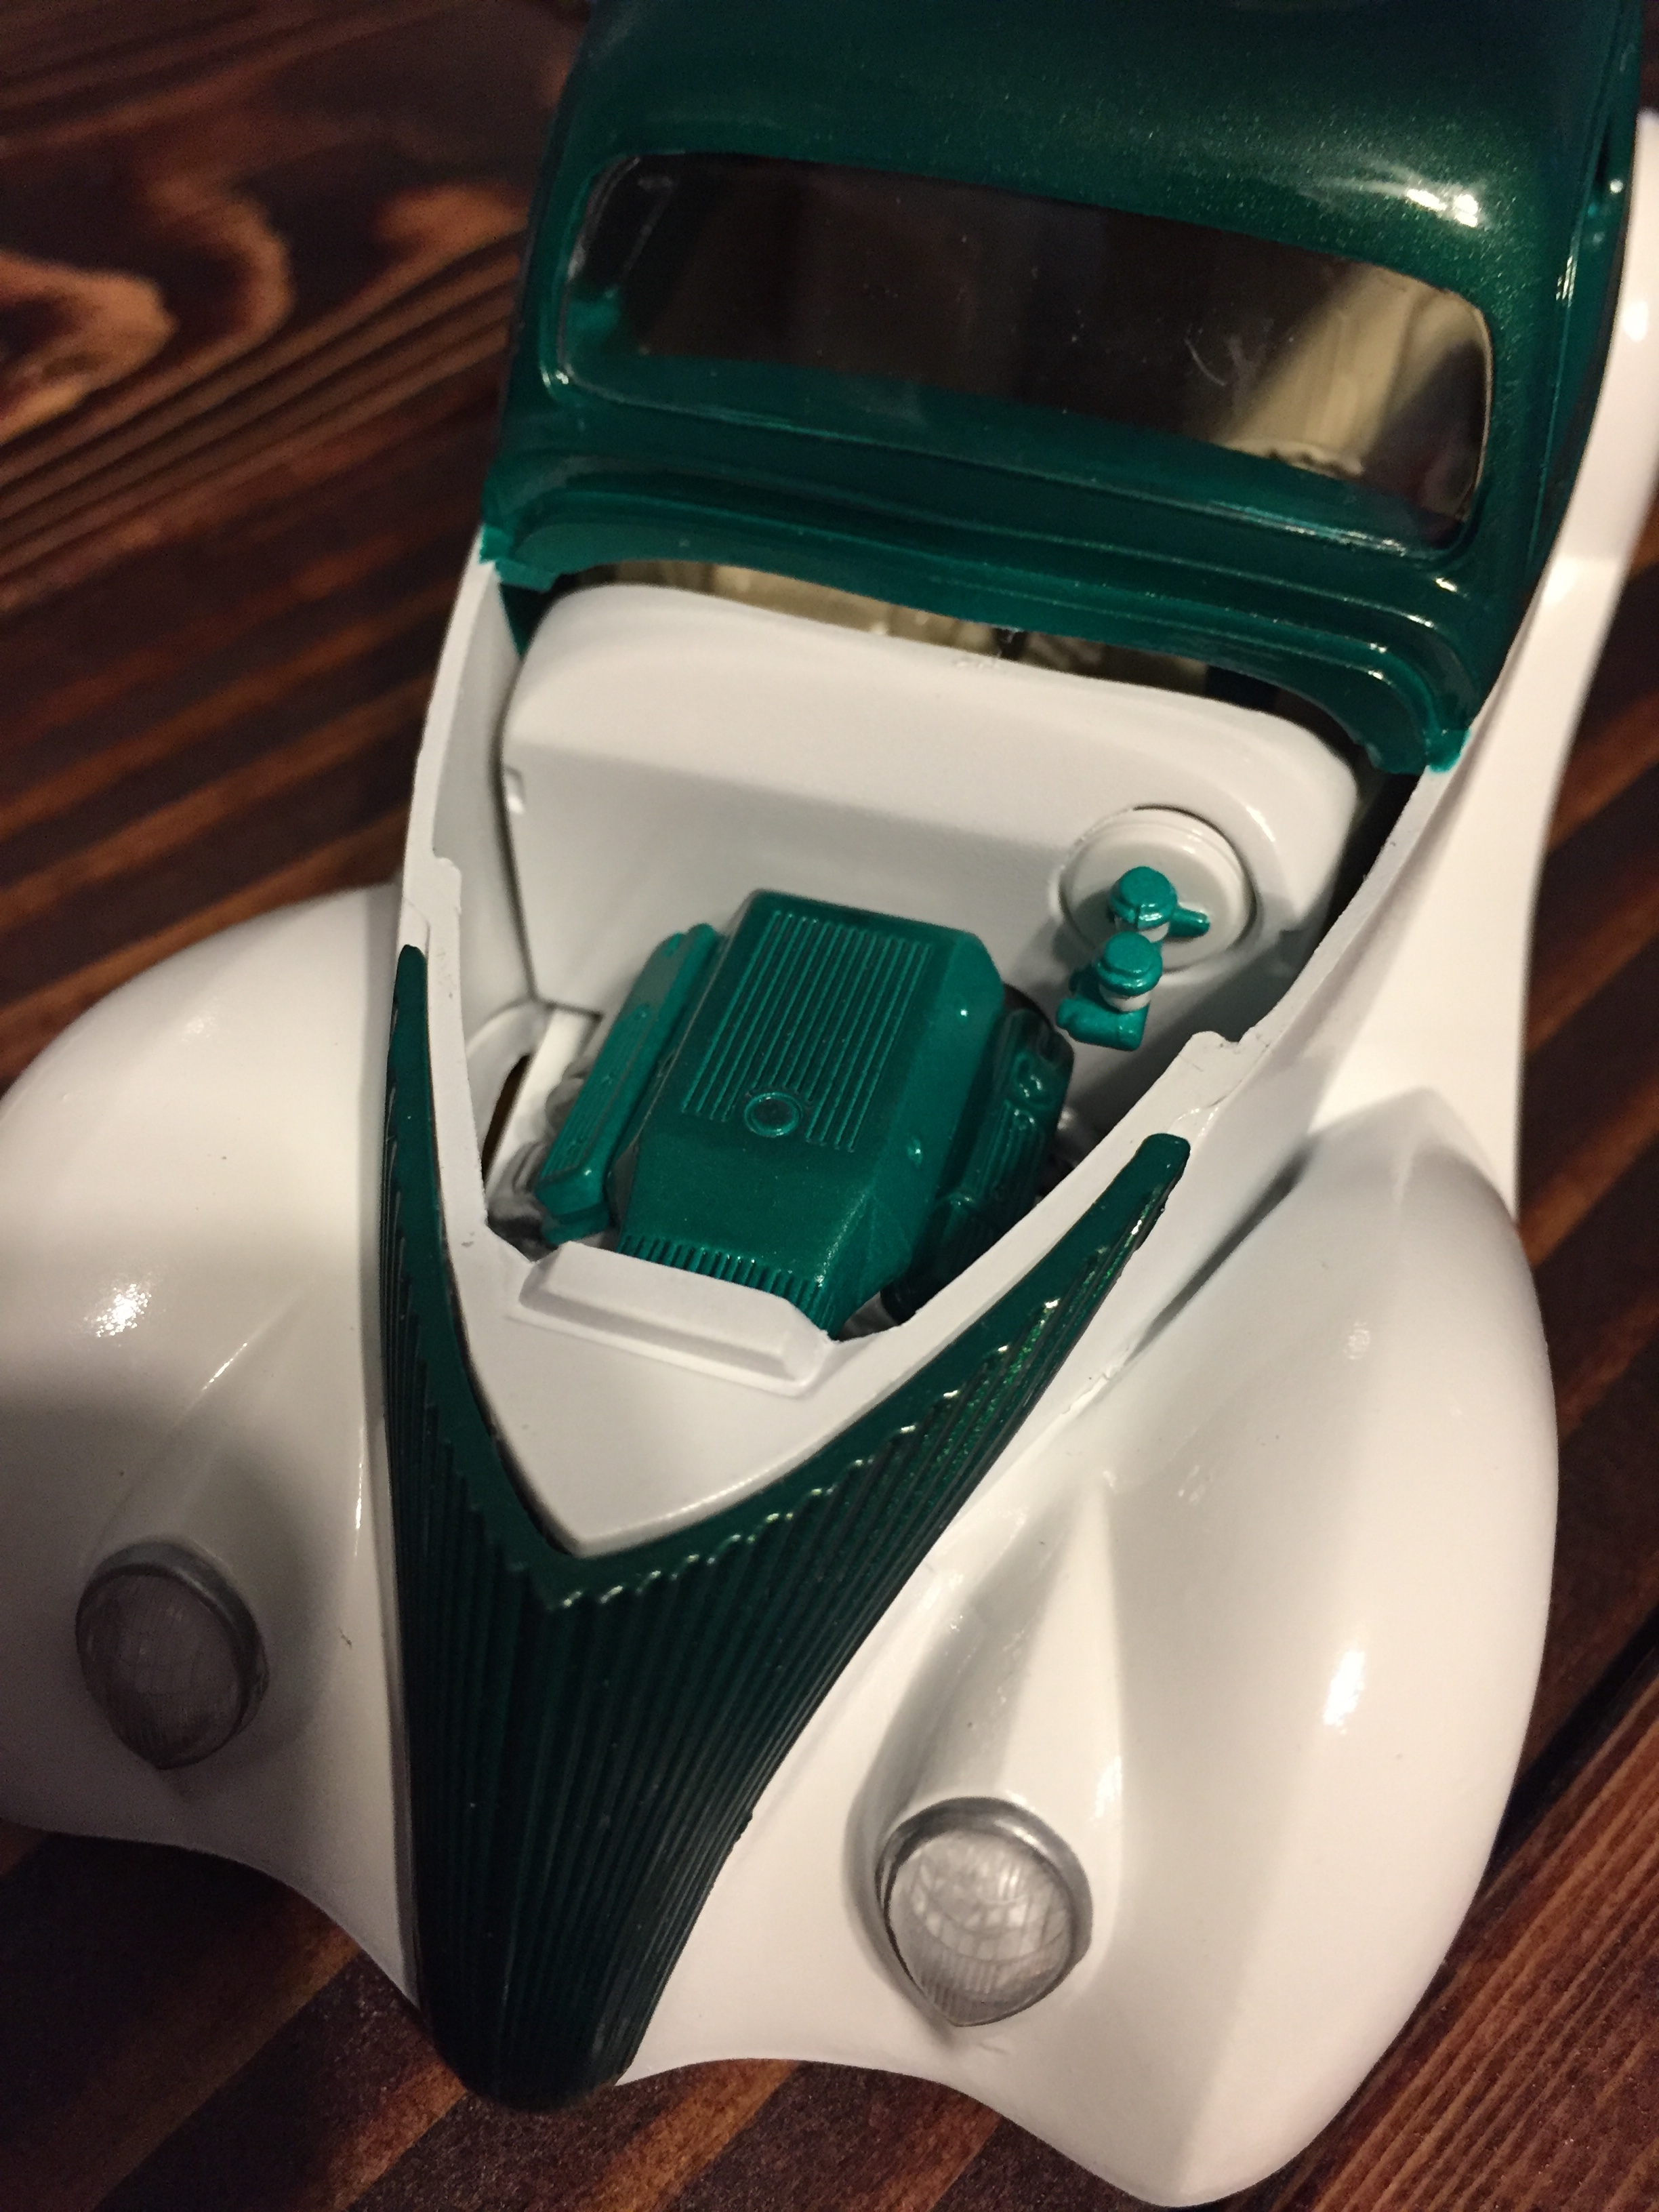
Never been much of a fan of these customs, but this one is really sharp. Makes me want to take another look at one. That is one nice paint scheme and choice of colors. Not trying to be critical, but it seems as if the firewall does not fit very well.
They aren't bad kits. I built the roadster version of it several years ago. There are some improvements to be made but overall not bad. Better than most of the 'cheaper' kits.
-
Never been much of a fan of these customs, but this one is really sharp. Makes me want to take another look at one. That is one nice paint scheme and choice of colors. Not trying to be critical, but it seems as if the firewall does not fit very well.
Yeah, I didn't have a clamp big enough to keep it in place and it moved before the glue dried. I'll try and fix that one of these days.
-
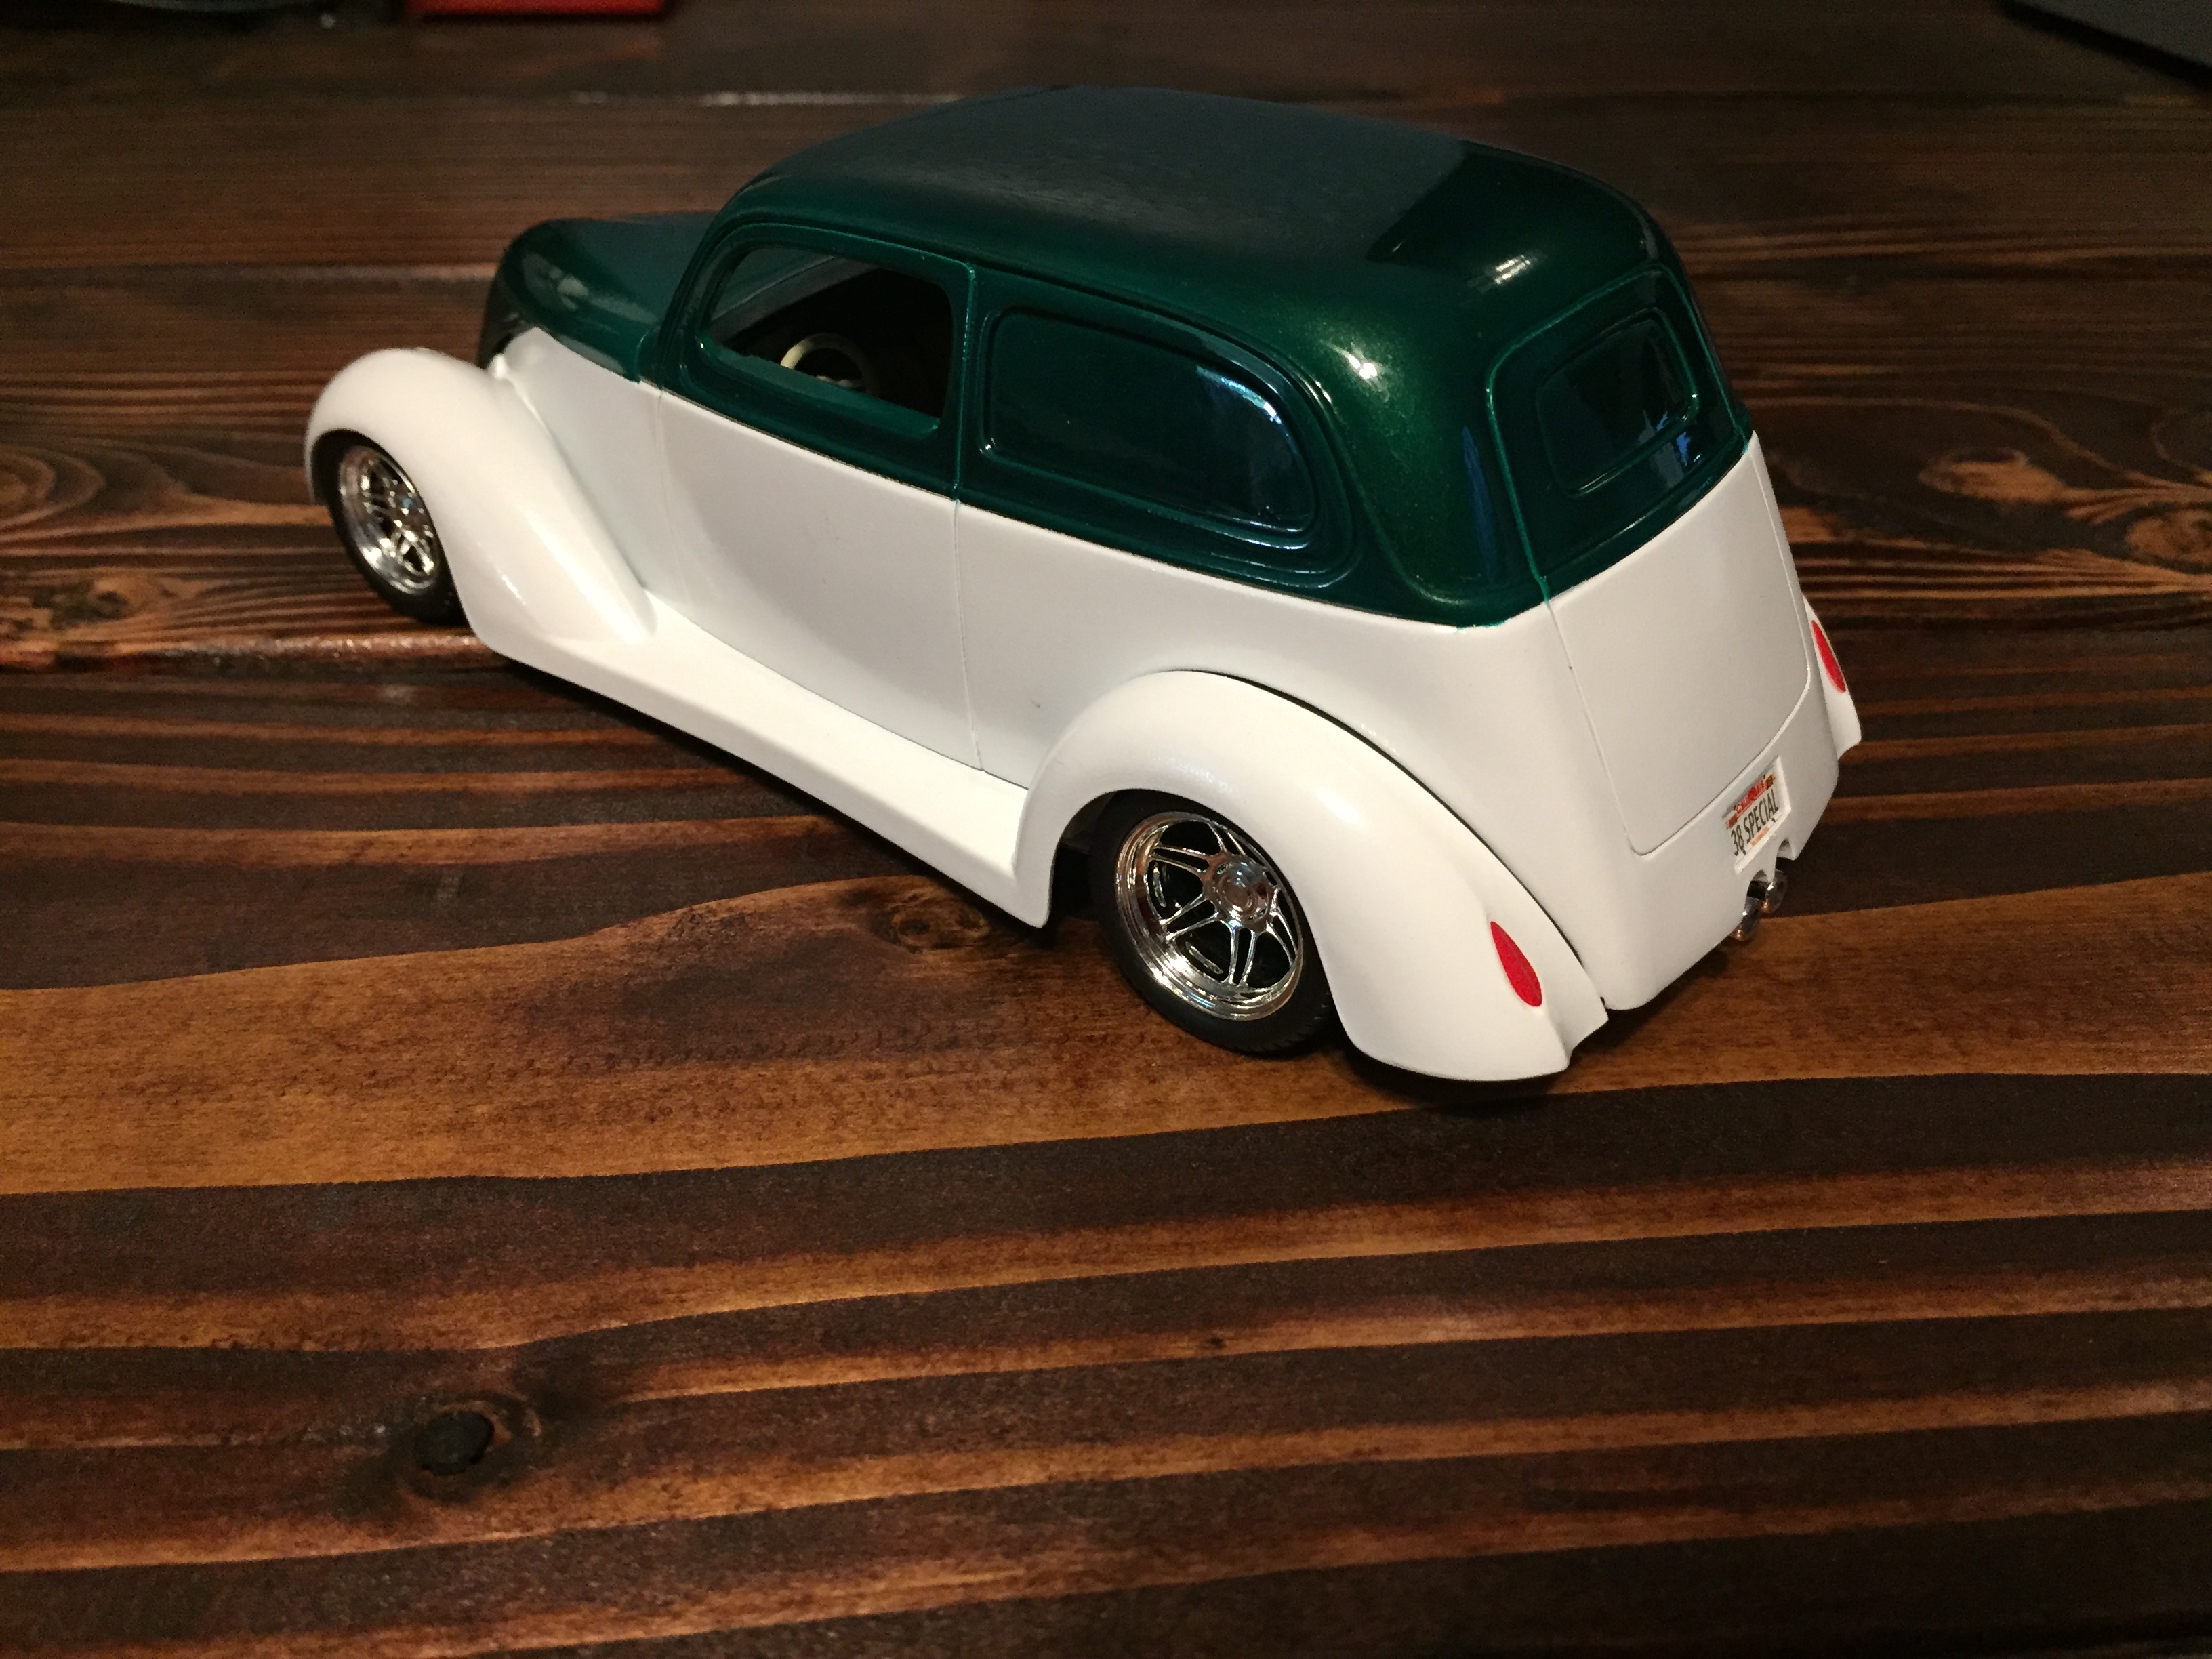
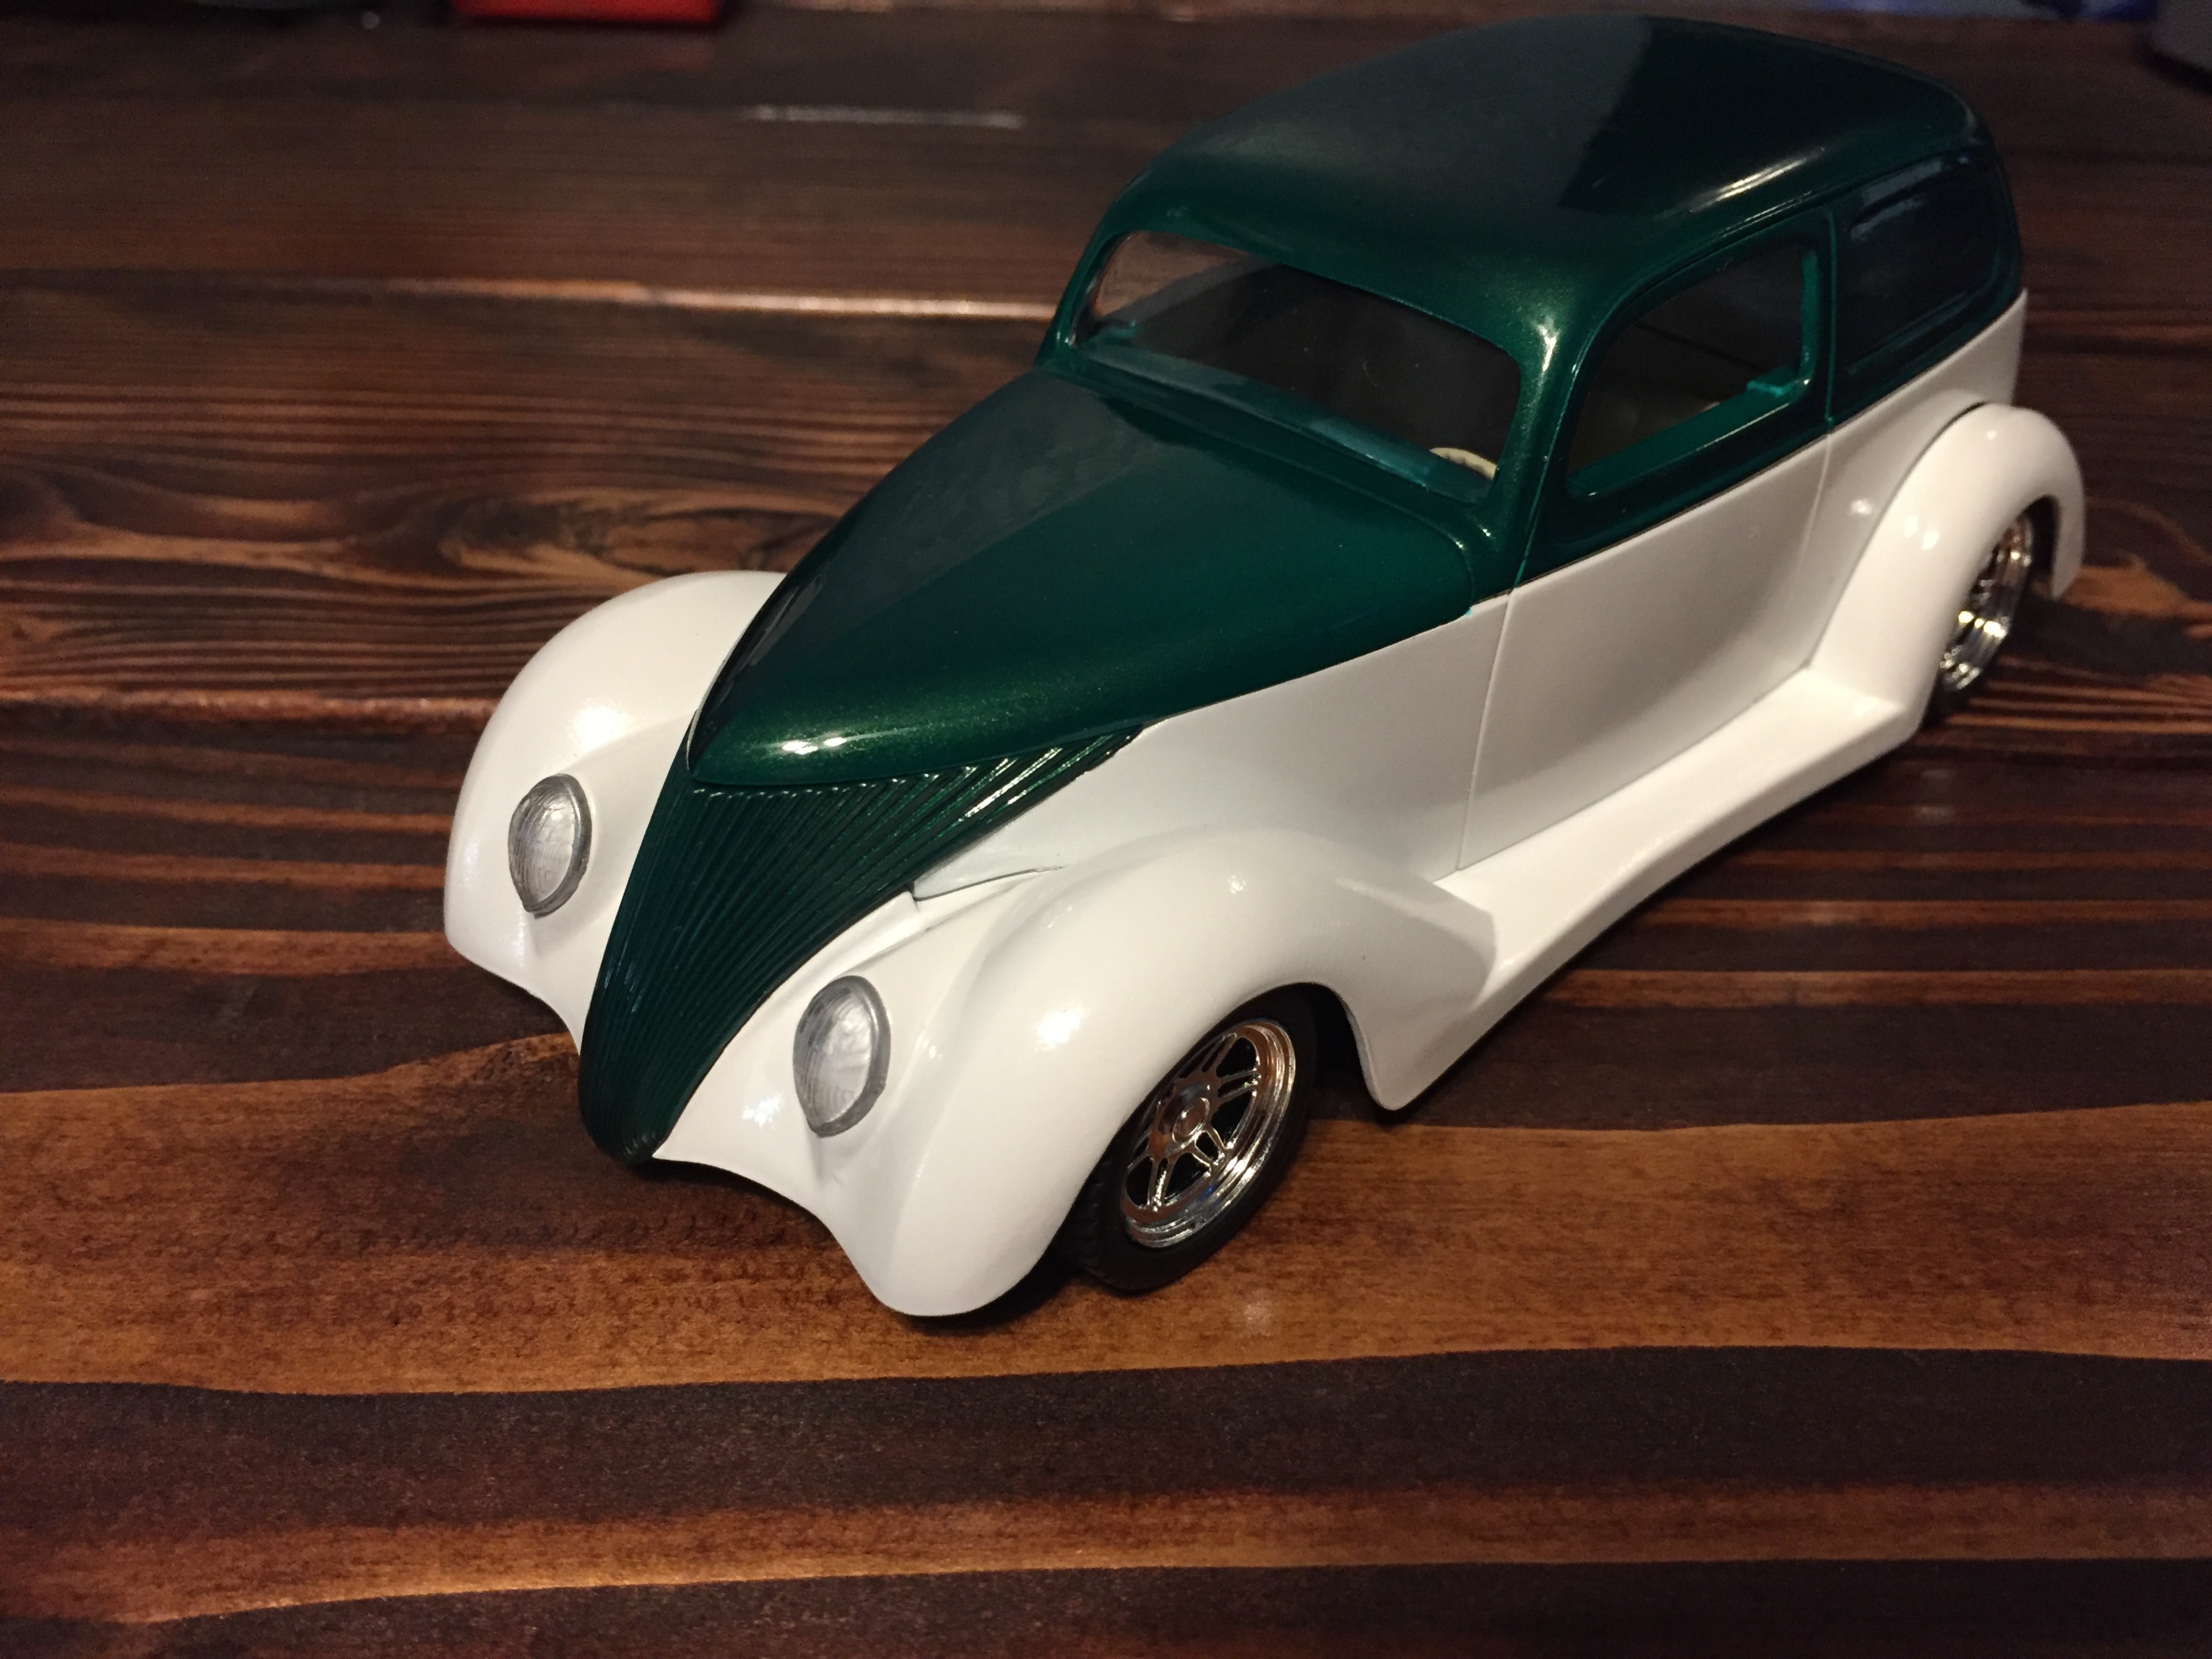
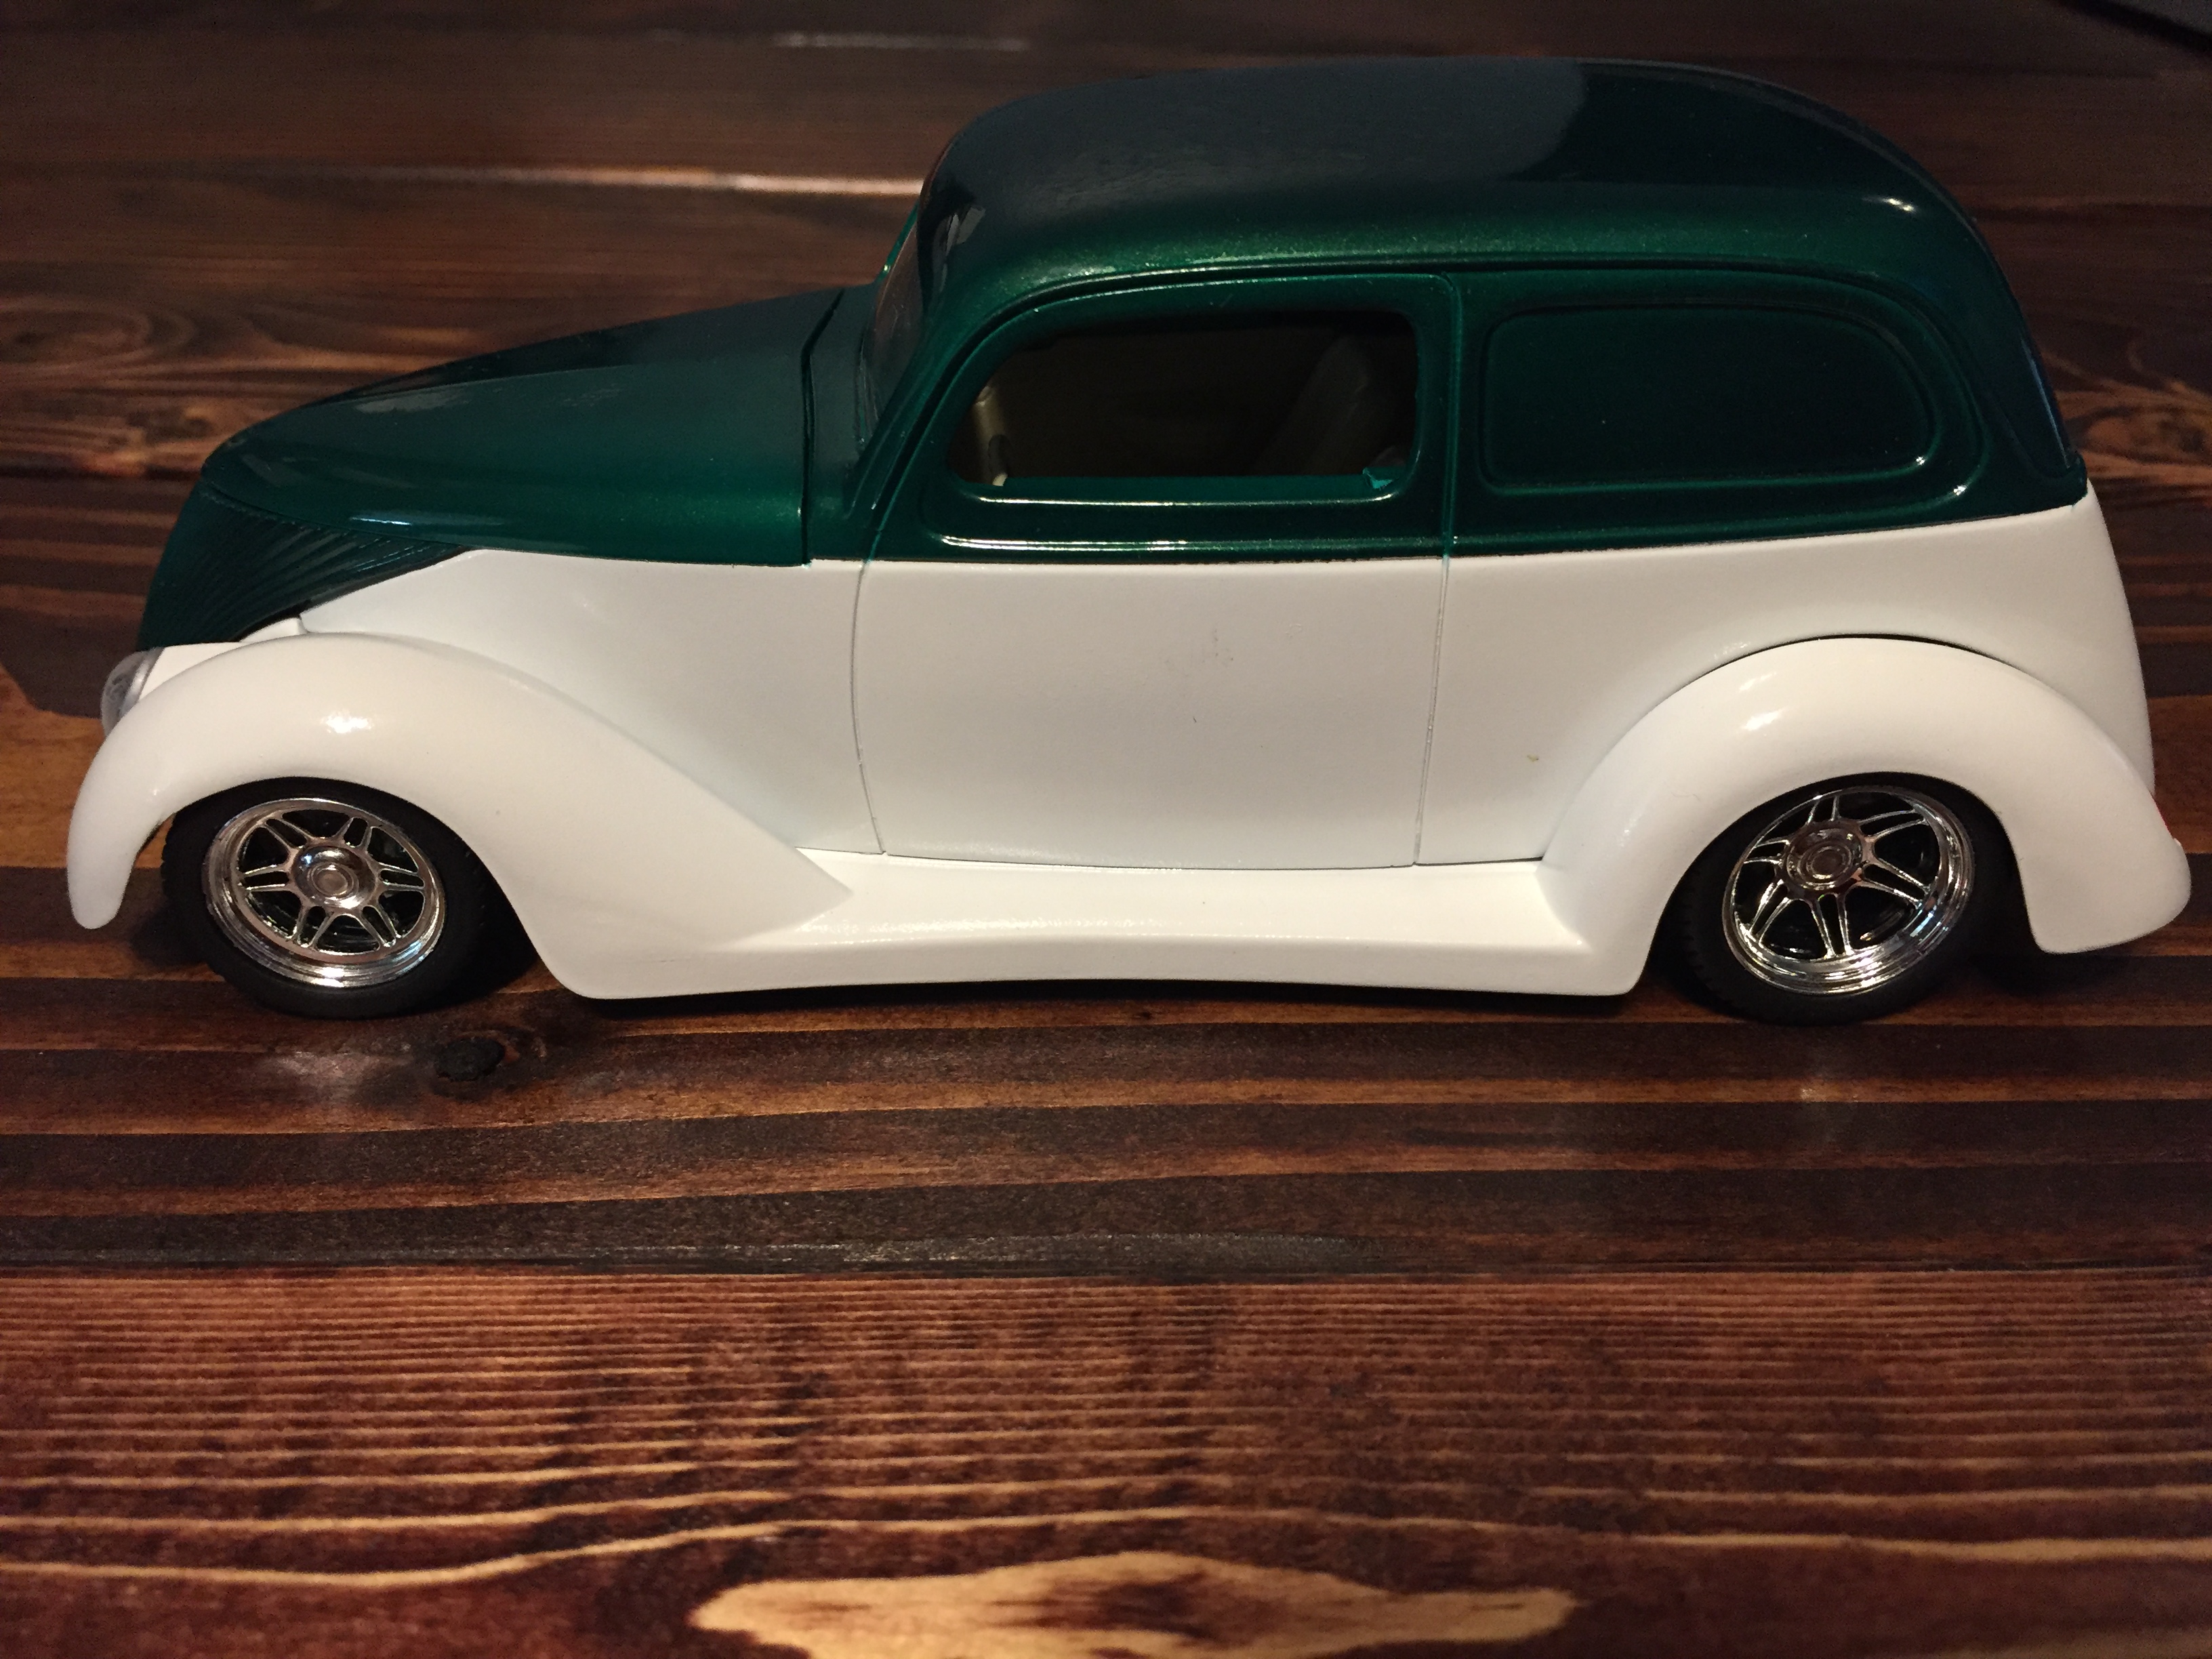
Sorry, I know the lighting could be better.
Built this one box stock. Stripped all the chrome (not really a fan of chrome) other than the wheels. Interior is a light almond, most everything else is classic white and green metal flake, fitting for a hot rod I think.
-
Interesting, the different kits come with different decals. I did the Lindberg kit and it didn't come with those flying 8 decals, also mine did not come with the foil for the chrome strip that is molded on the the back of the body. My only complaints about the kit was the headlights and tail lights. I would have liked to see the tail lights as a separate piece from the body and a better thought out headlight lenses instead of just making it one piece out of clear plastic. Other than that its a great kit.
-
Man, that thing is cool! It's not full detail though, is it?
-
Ok, took me a while due to moving my modeling station to a different room and some home improvement projects and just life stuff. But I have managed to get the interior done.
Here is a shot of the dash, notice the air vent to the left of the steering wheel has an nGauge tuner mounted in it. I just took an image from google, shrunk it down and glued it in. The dash is from the 2014 mustang kit because its like the dash in my car (non touch screen).
Here are the door panels with added seat belts.
Engine bay minus the firewall.
And a couple shots of the completed interior with it flocked.
-
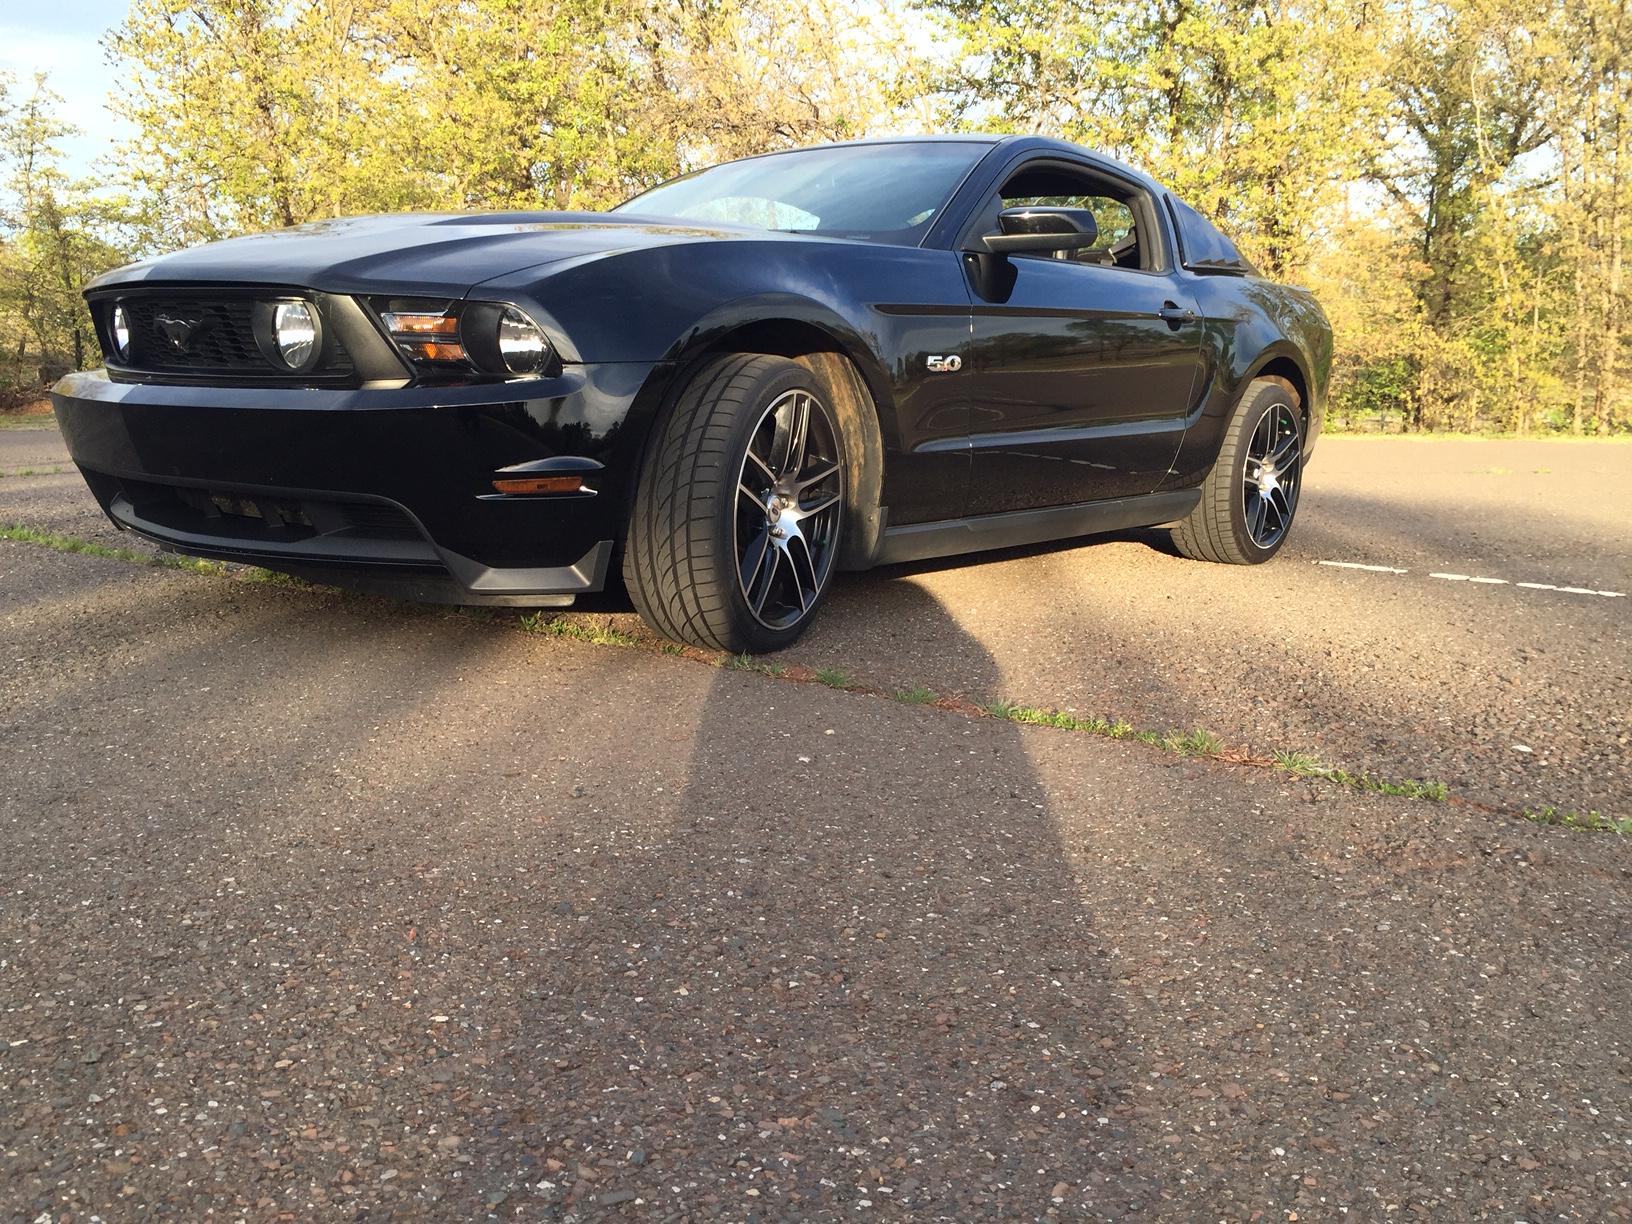
Hey guys, I decided to build a model of my car, its a 2012 Mustang GT which makes it a little bit of a paint since they made a model of the 2010 Mustang and of the 2014. The 2010 is the same body as my car but it has a 4.6L, the Coyote 5.0 came out in 2011 so I had to buy both of the kits to make my car.
Here are a couple of pictures of my car, don't mind it being dirty.
Notable things I have done so far, had to cut out the rear wheel wells so that the wheels I am using would fit and I had to cut out some of the chassis to fit the differential with it being lowered (my 1/1 car isn't lowered yet but I have all the parts, just waiting for cooler weather).
I made a rear seat delete and had to do some filling in the middle of the package tray, I guess the 2010 had two small humps in the package tray but my car just has one large hump.
Started making the window louvers today, daunting task but hopefully they turn out okay.
-
My first car was an '84 300ZX 5 speed, non turbo. That car was an absolute tank. I have a very healthy respect for Nissan, as far as imports go they are my favorite.
As far as me being a Ford fan, yes I love Ford, hell my boat has a 302 in it. Although the new F150 and Mustangs are a bit on the ugly side. Oddly, my daily driver is an '07 Tahoe... Mainly because the Expedition has always been a bit lacking in almost every way in my opinion. The only thing it has over the Tahoe is independent rear suspension.
And yes, there may be no point in putting a big HP V8 in a 300ZX because I'm sure you could get the same 540 HP out of that twin turbo 3 liter... But the twin turbo 3 liter just doesn't have the cool factor that a supercharged V8 has.
-
I agree! I don't have any wheels/tires to do that with though. I have a fair amount of spare parts and cars laying around but almost no wheels and tires. Not sure how that happens. Those R34 wheels were the best thing I had cause the stock wheels just weren't going to cut it, they are pretty ugly!
-
Started this build on another site and thought I would share with you guys too.
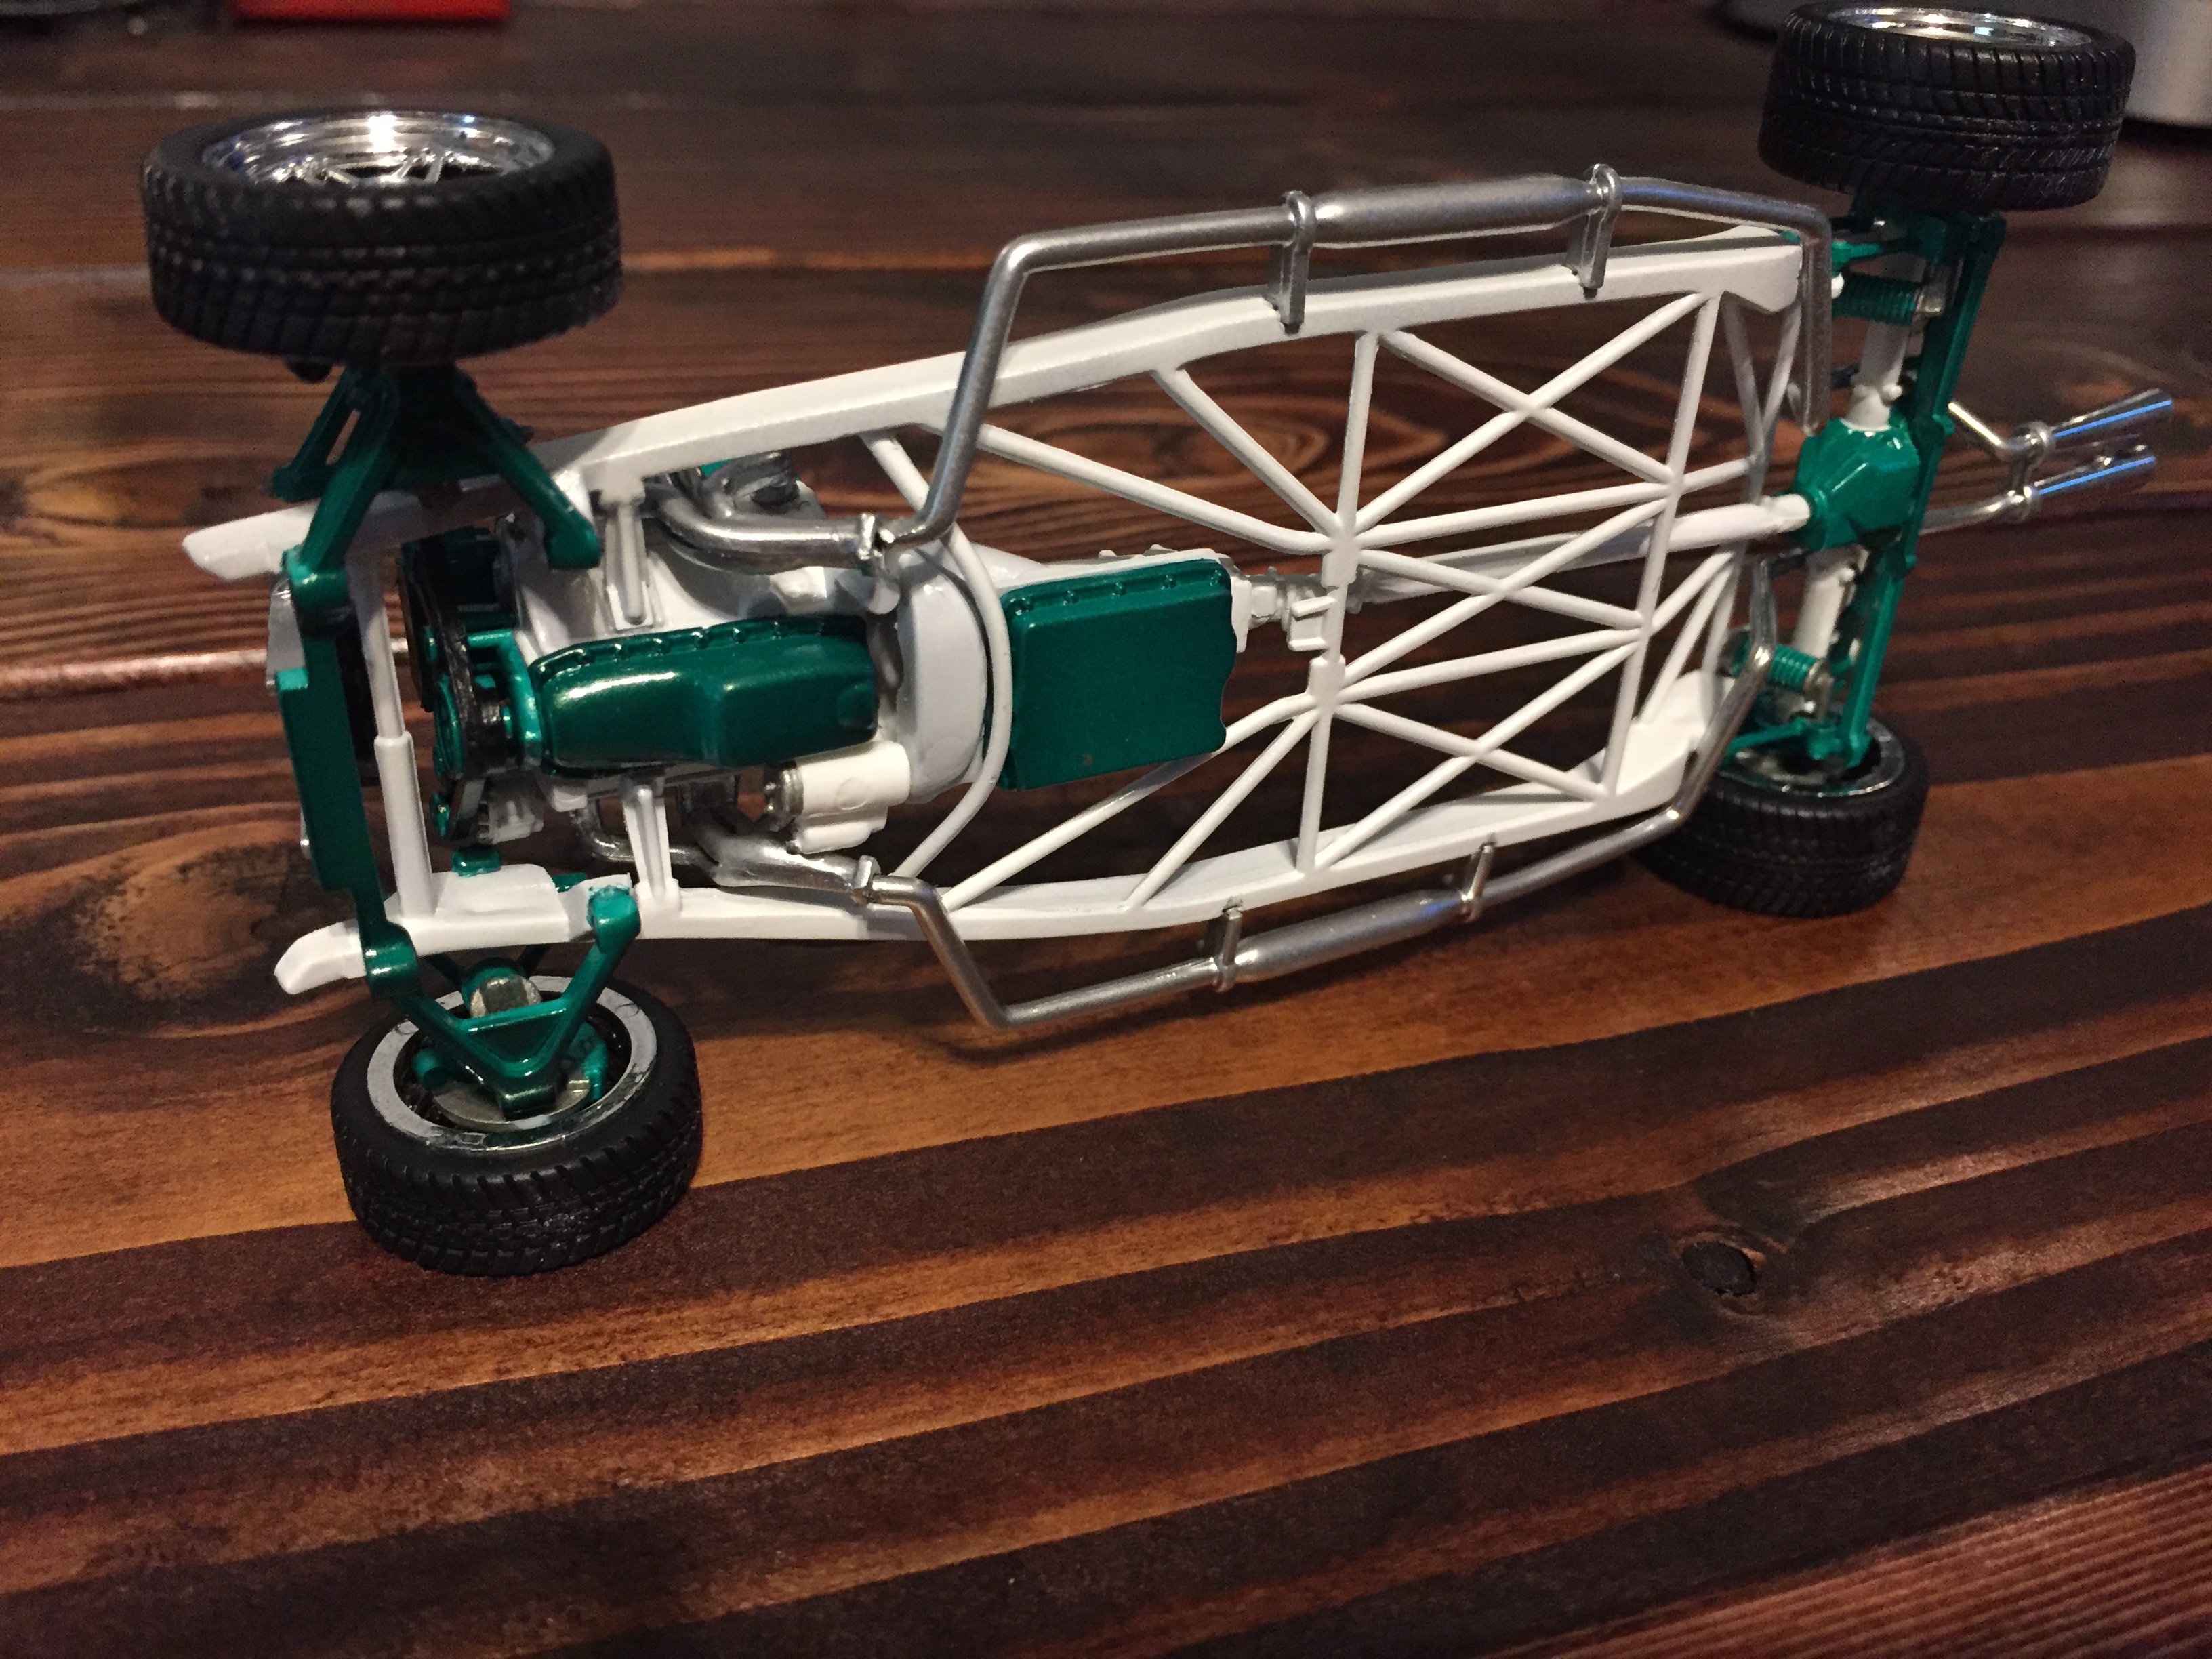
Basic concept is to cram a huge motor in a fairly small and lightweight car. The motor I had that fit the best without being too big was a supercharged 5.4L out of an 08/09 Shelby GT500KR.
The wheels are from a Skyline R34 kit I had.
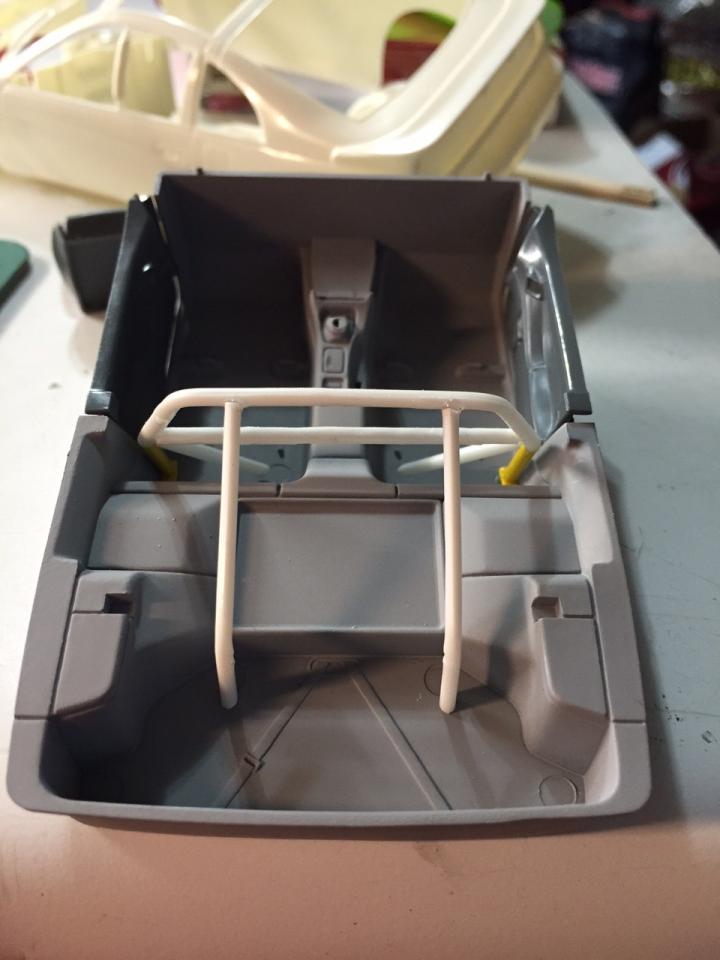
First order of business was to make some space for the tranny. Then I went on to taking the motor apart, stripping the paint and giving it a fresher, more custom built look. Then I went on the building the roll cage.
Now the plan is to finish building the chassis and interior and then getting the body put on and making a small cowl hood so the motor will fit under it. I wont be doing any mods to the body other than the hood. I'm thinking I will paint the body satin black and do the wheels in a bronze(ish) color. After all, I want it to look like a slightly hopped up tuner car but to pack a heavy punch!
That's a scratch built cage from junk I had in the parts box. I was going to do a full 8 point cage but as you can see, there isn't much room between the seat and the door panel so I may just leave it how it is or I may do some tinkering with it.
-
Very nice work. Hopefully I can get started on one of mine soon. It looks great and I am glad the decals worked out for you.
-
I didn't know this kit existed. Saw this post and decided I needed one and I was shocked to see how much they go for... Ouch!
-
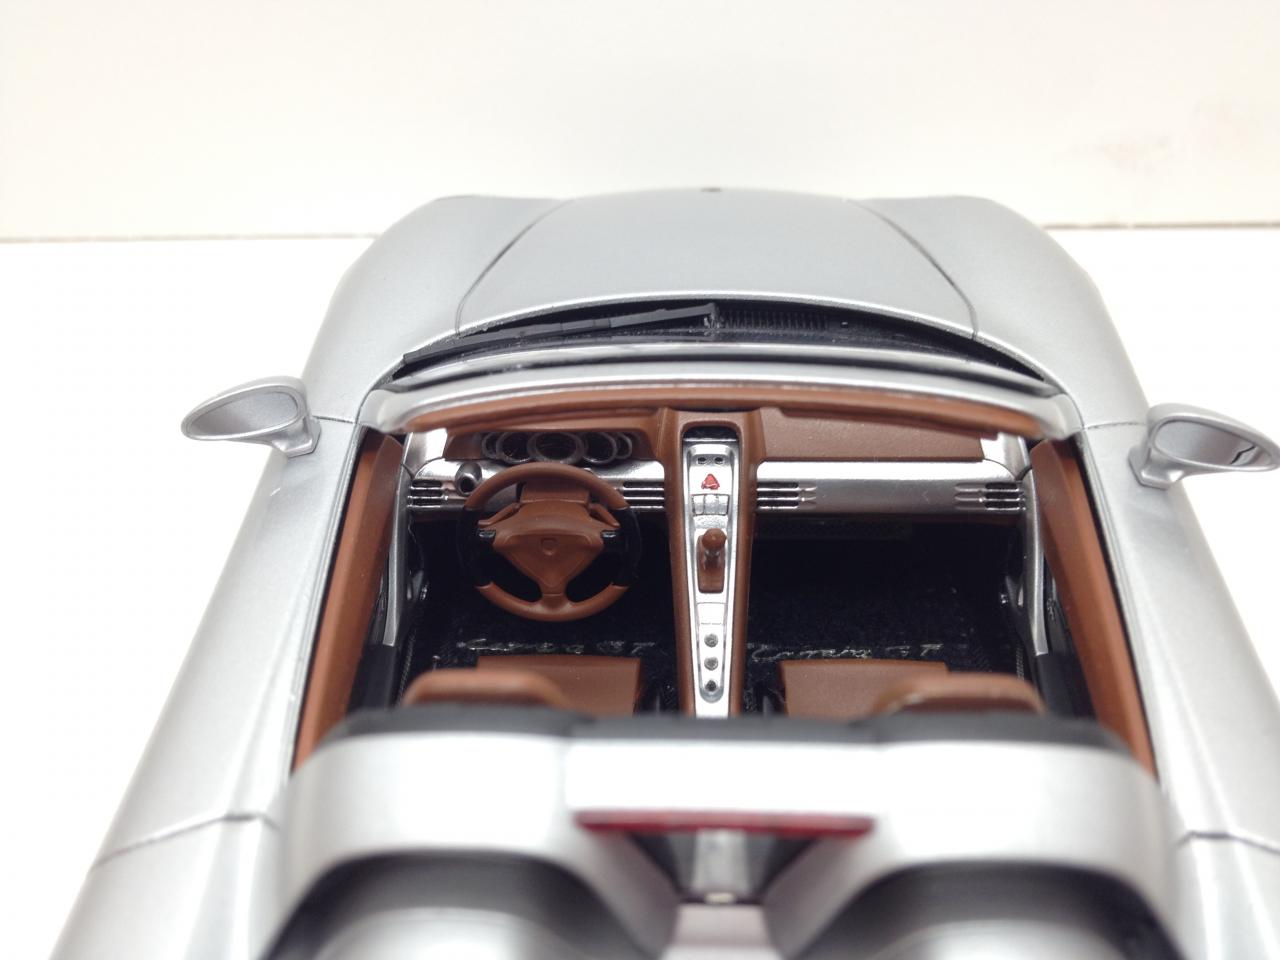
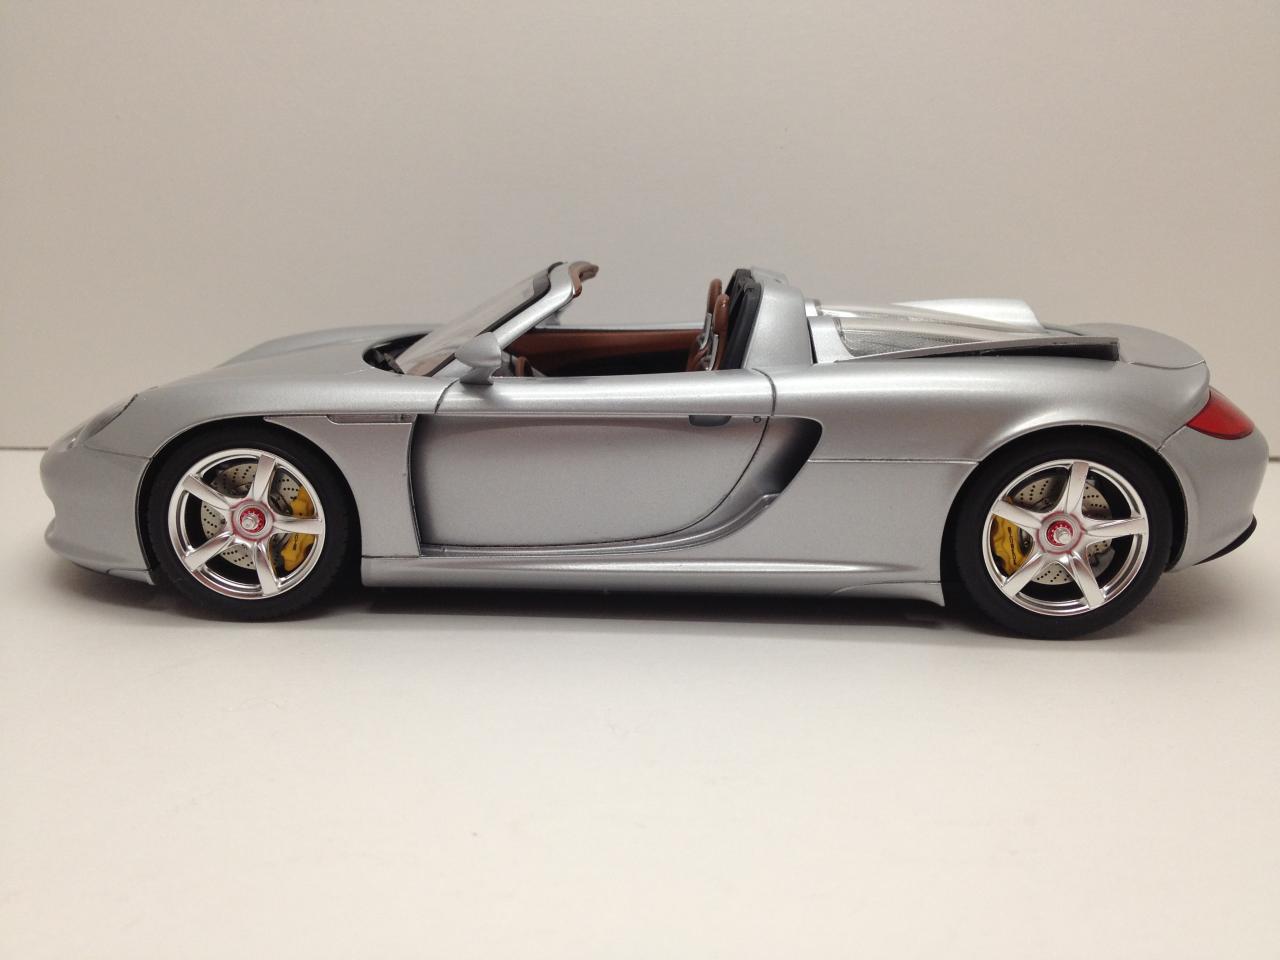
It is actually pretty easy to do. I installed the glass into the cover and then put a couple small dabs of CA glue on the mesh (think of the center of the cover and put one dab of glue on the center side near the cockpit and one near the rear of the car, hope that makes sense) and then after that dried I put a few more dabs of glue working my way to the other side of the mesh, forming it to the contour of the glass as I went. I used the mesh on that piece from the Studio 27 kit, it was pre cut is why I used it but it would not keep the form of the glass on its own. I'm not sure if the mesh you are using will form or not. If it does then I would just lay it over the glass and take a round handled paint brush and roll it across the mesh pushing downward in order to get it to reshape to the contour of the glass. Hope that makes sense. Also, after I did all that I made some templates out of tape and got some old cigarette packs, used the foil out of them and glued them with window glue to the under side of that cover. The 1:1 car does not have heat shielding there but since I wanted to display it with the cover open I wanted a cleaner look to the underside of it.
-
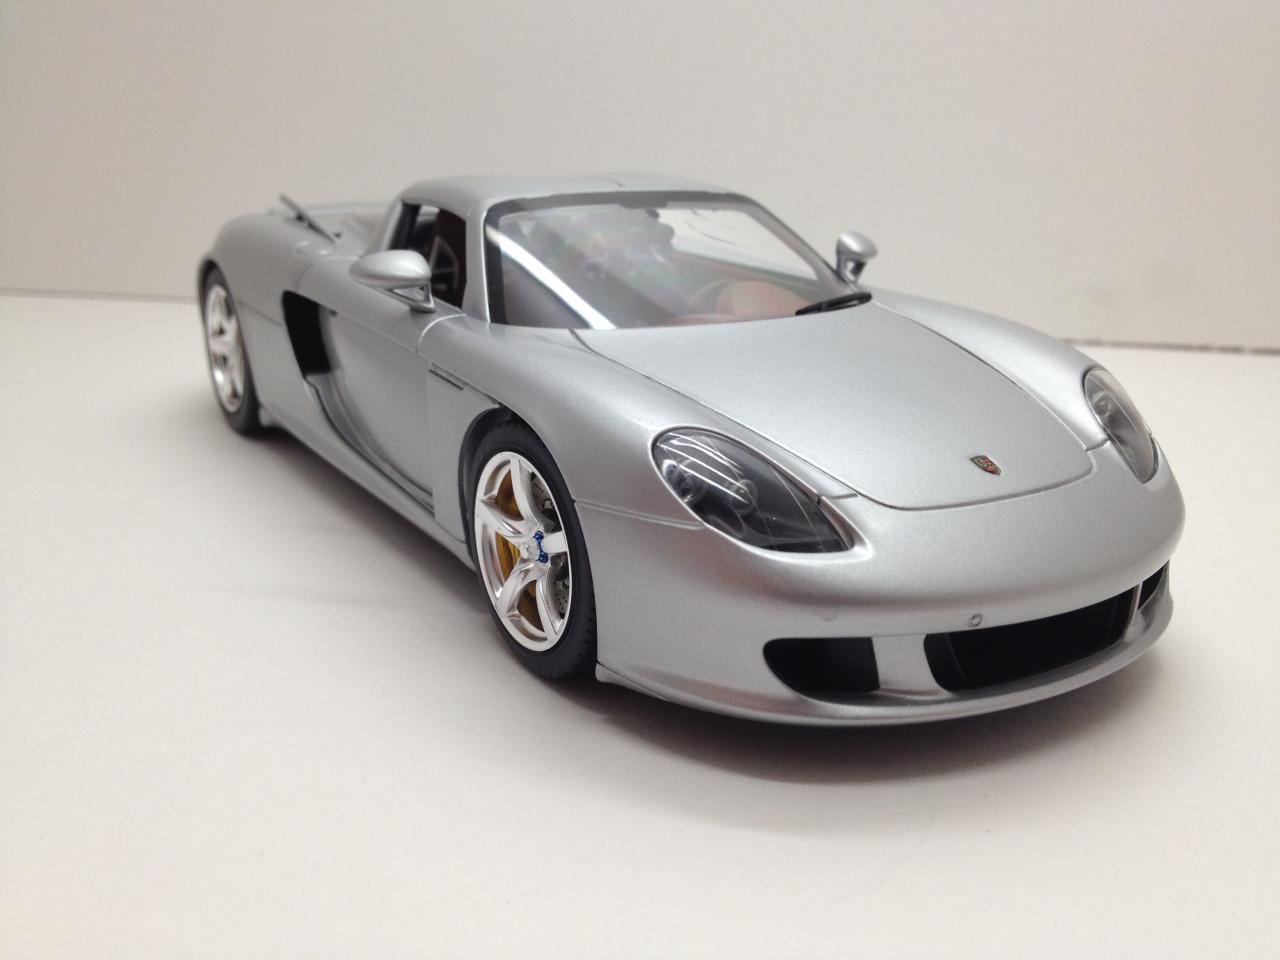
Not any issue with it necessarily. I'm assuming you are talking about it not ring closed all the way in the photos. It was a snug fit without any paint and my paint ended up a little thicker than I anticipated. It will close all the way if I push it down but then it's nerve racking to get it open again without scratching the paint. No biggie as I have it in a display case with the cover propped open anyways. I would suggest that if you are going to build one to do some sanding on the body where the cover sits in to allow a little more clearance if you want the cover to open and close easier.
-
Thanks guys, I appreciate it. I wanted to build a show winner but didn't quite hit that mark but it is still my best work to date.
Joe, I used parts from both of the PE kits. The Scale Motorsports kit had a lot more parts in it and most. Each kit had parts that the other one didn't have. If you only want to buy one kit I would suggest the SMS kit but it was about 45 bucks compared to the Studio 27 that was 15.
I have had my eye on the Gembella Mirage GT transfer kit for this kit so maybe I will be building another one.
-
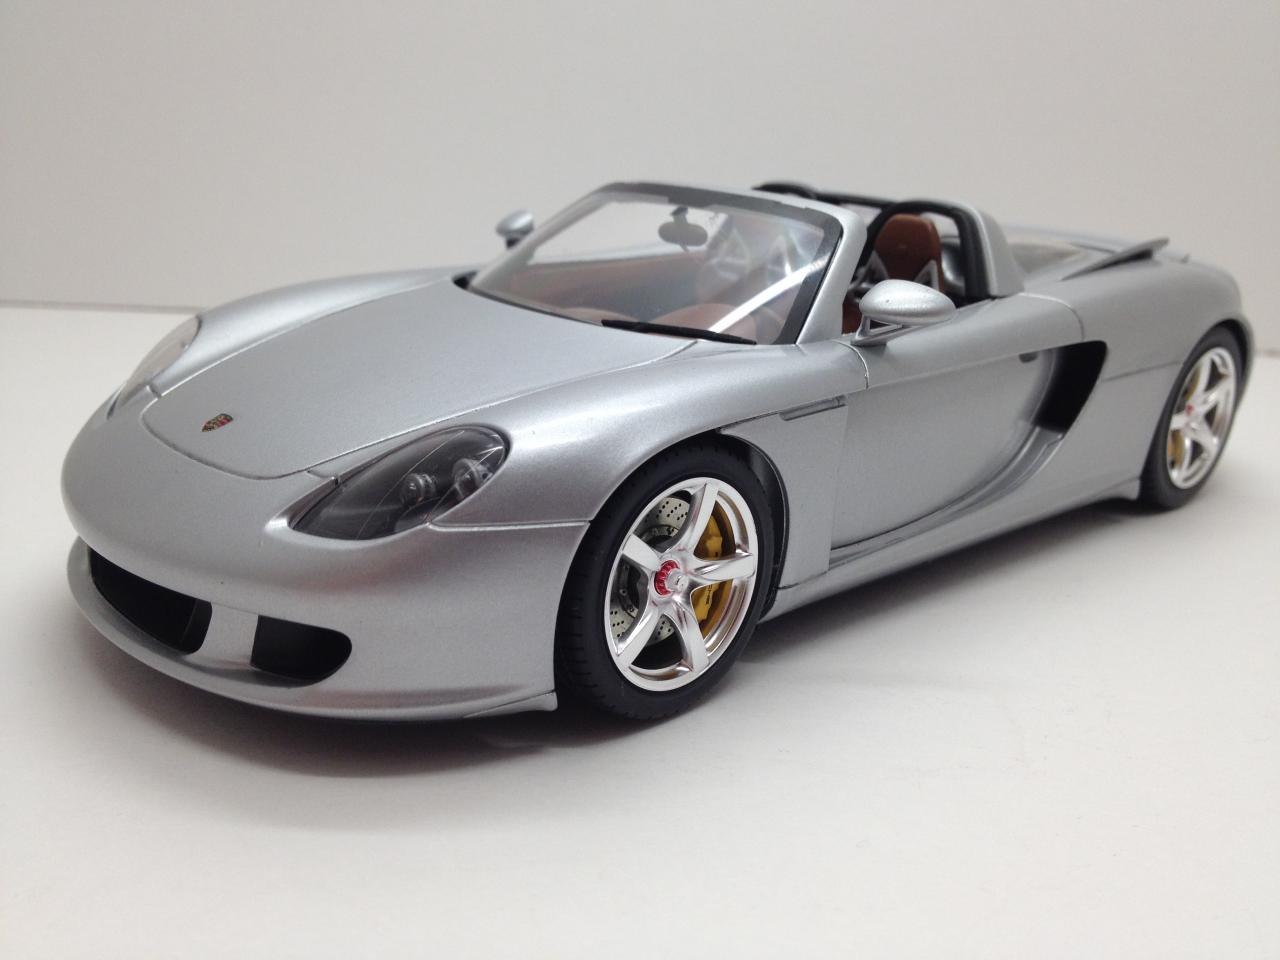
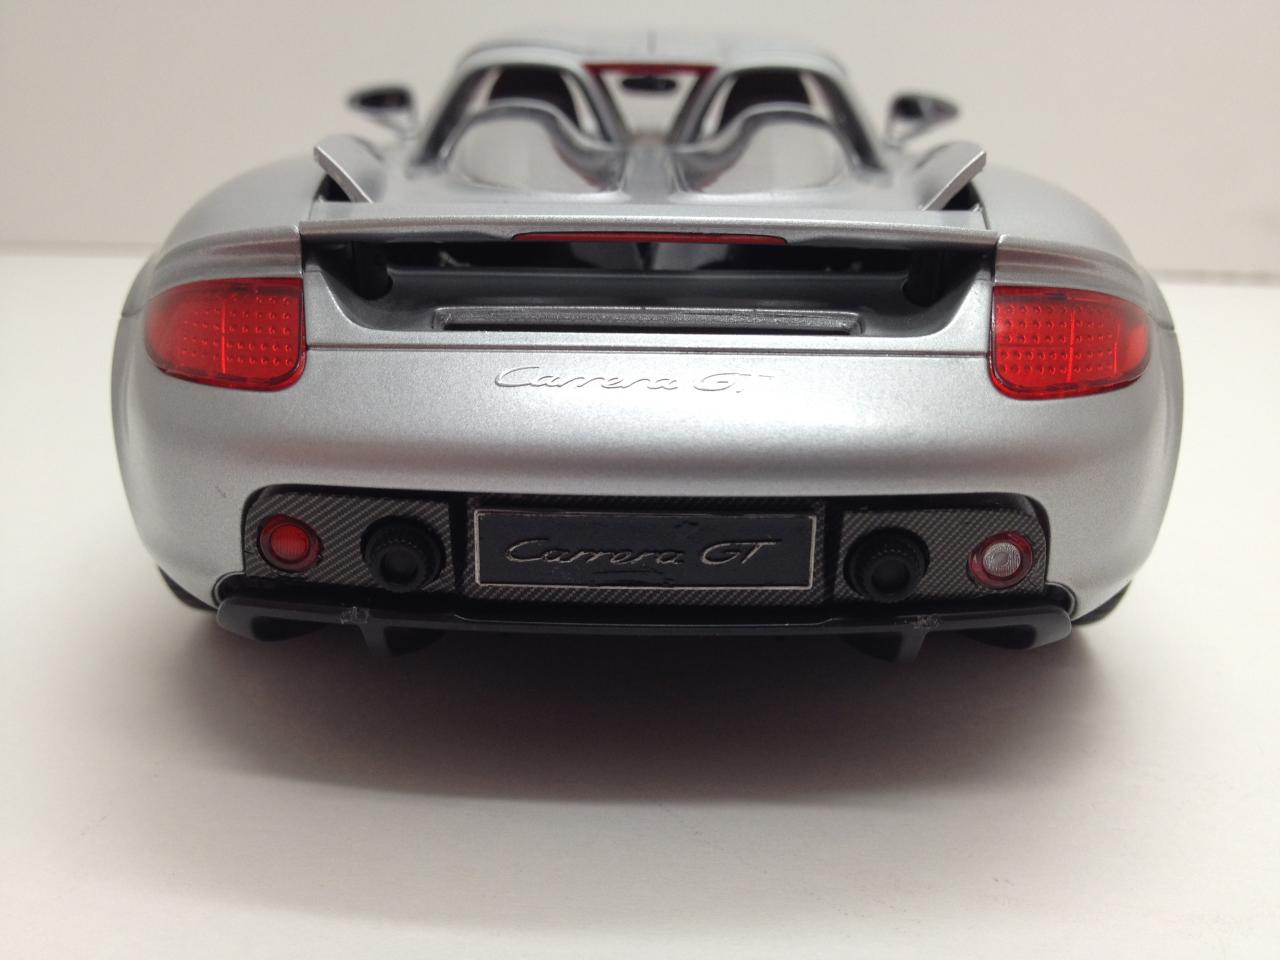
Finished this one a few months ago. It is painted with Tamiya TS-17, interior is MM leather and chrome silver and the floor mats are flocked.. Scratch built the rear suspension and sway bar linkages (this is the only time I have seen one of these with sway bar linkages but I am sure someone else has taken the time to do it). Add ons include a Studio 27 PE set, Scale Motorsports PE set and a lot of carbon fiber decals.
-
As Always don't forget to read the fine print
haha I have no idea how that happened...
-
Nice build you have here!
I have one of these on my work bench at the moment, trying to put the motor from an Enzo in it for a forum project on another site.


300ZX - Suckerpunch
in WIP: Model Cars
Posted
I decided the other day that I had a few too many project started and needed to get some of them wrapped up, starting with this one.
Finished up the interior and got it put together.
Painted the wheels.
And shot the body with a base coat of silver, top coat will be a red. Just wanted to see what it would look like with a silver base coat.