Marc Weller
-
Posts
136 -
Joined
-
Last visited
Content Type
Profiles
Forums
Events
Gallery
Everything posted by Marc Weller
-
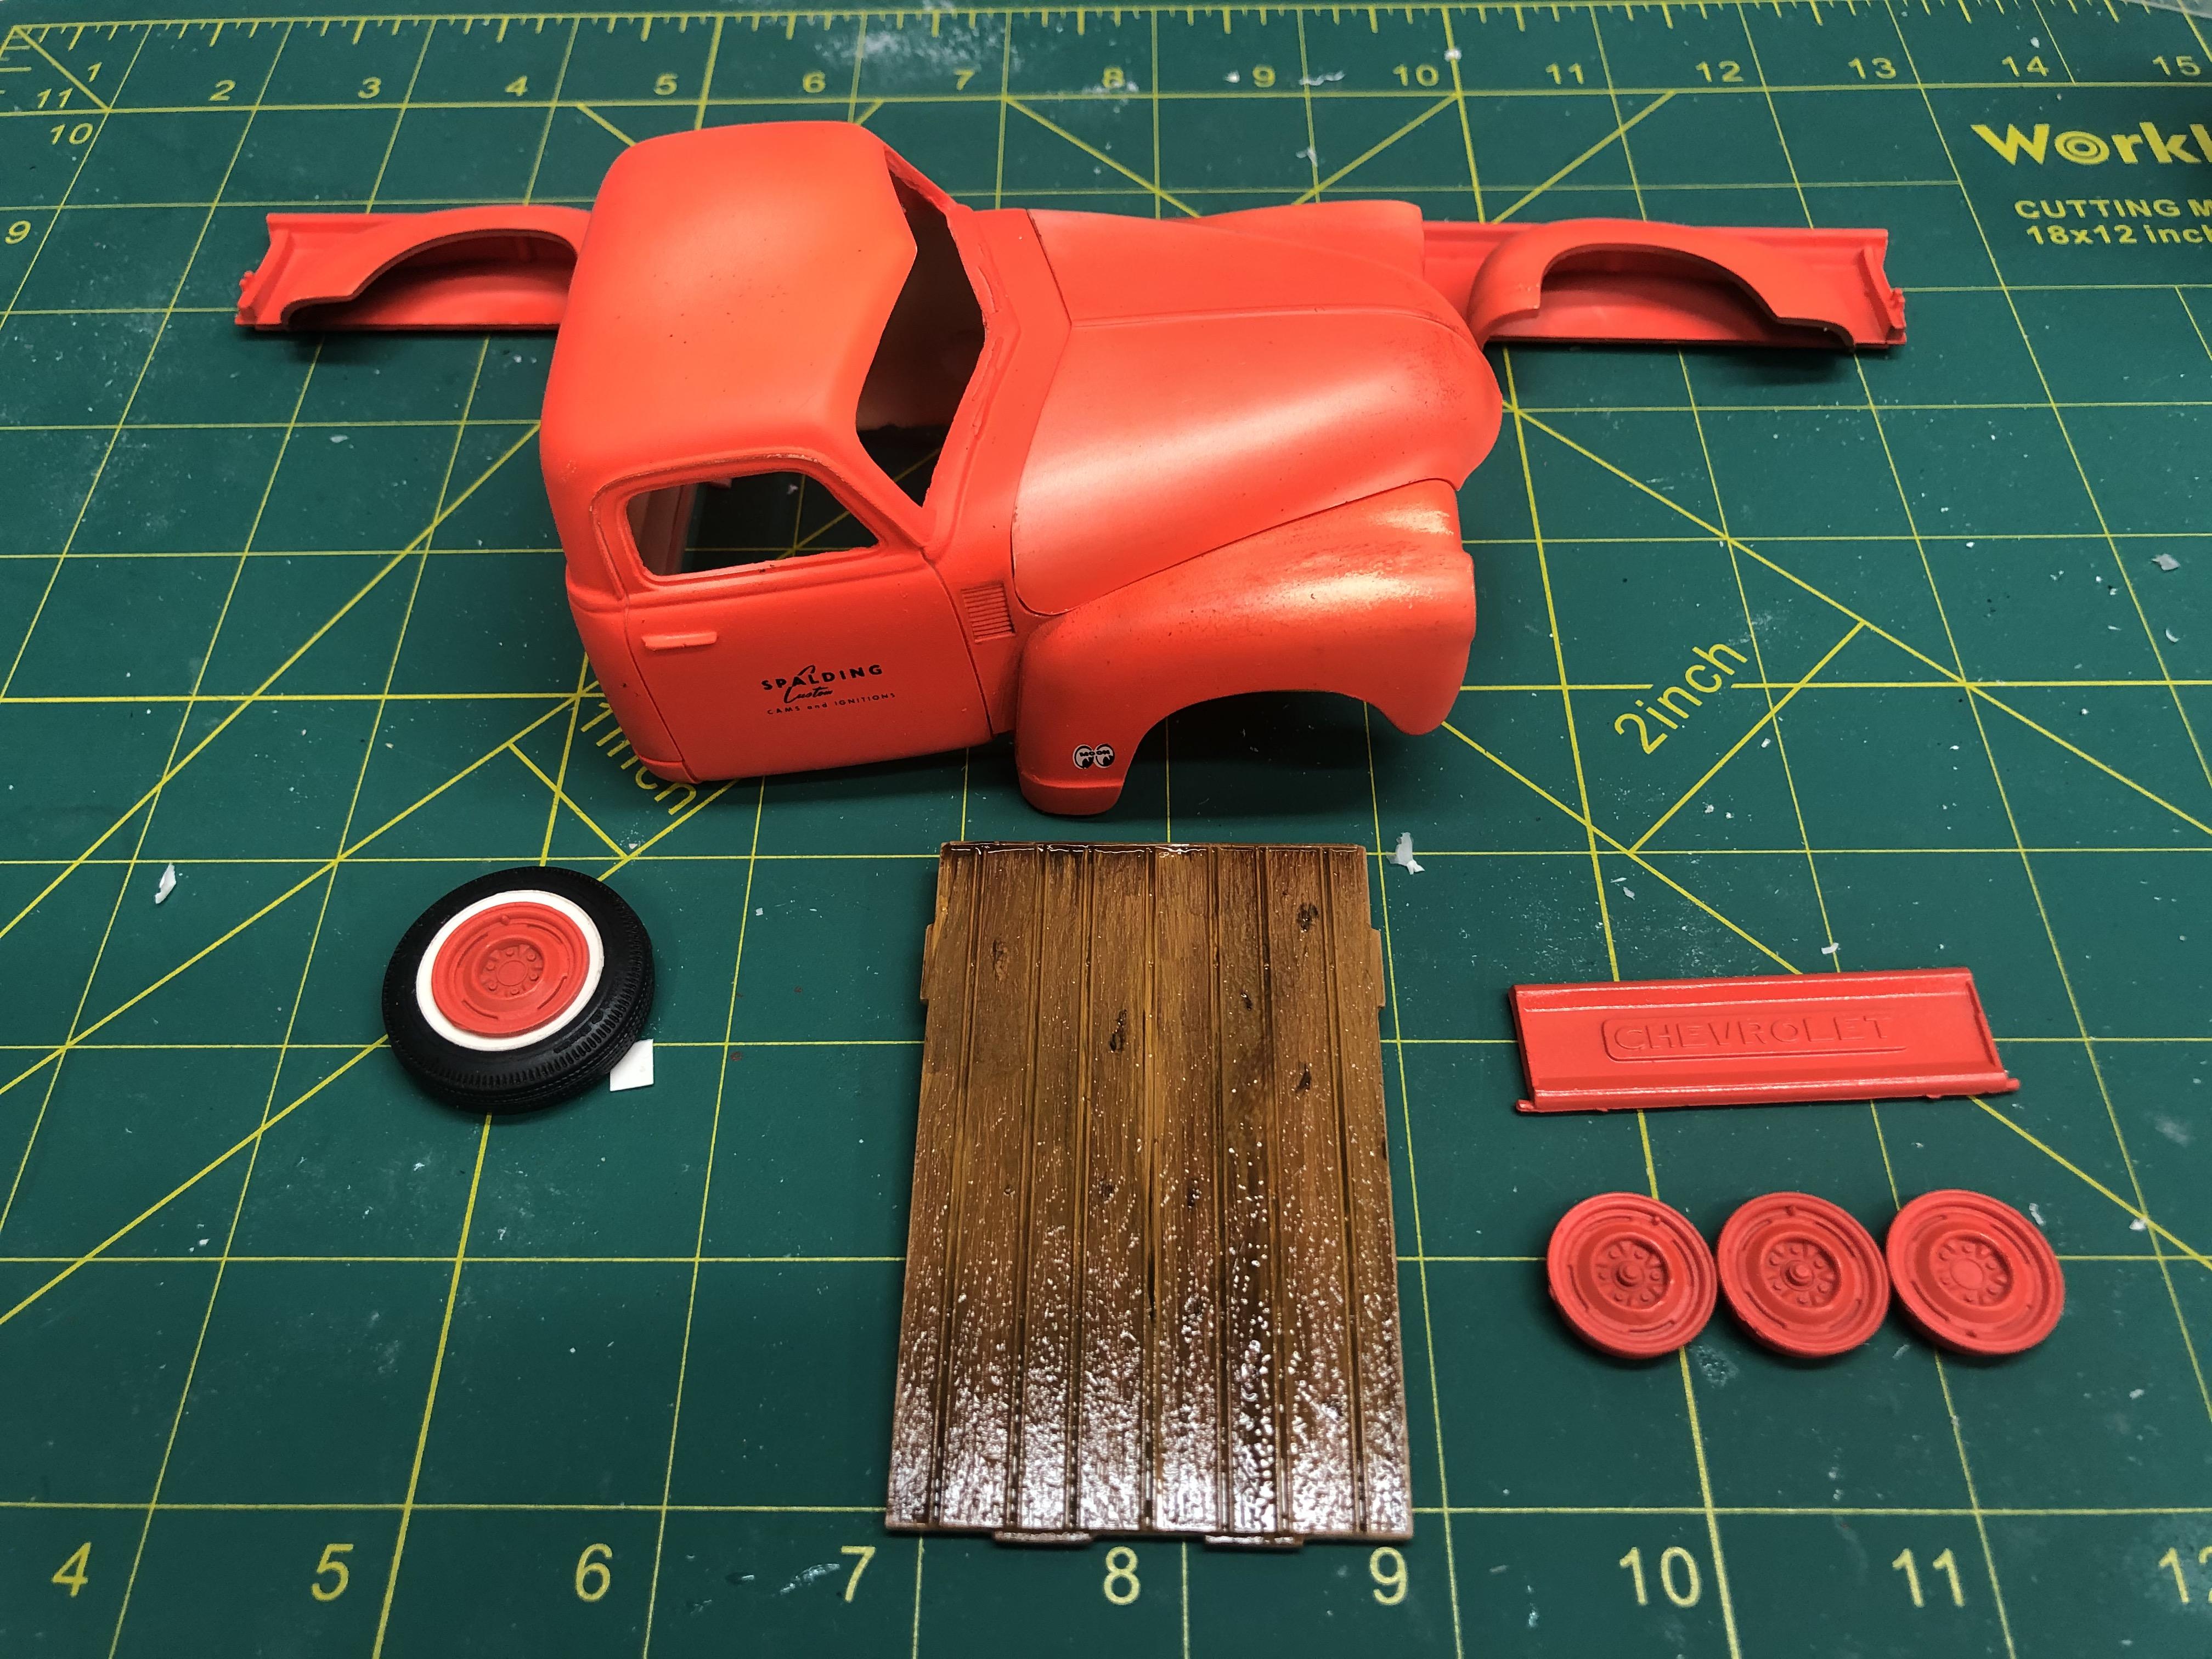
I had planned to use the stock inline six but when I looked in the box it was gone !!! That's because I used it for this So I decided since I have already raided the Cadillac kit for the front suspension I might as well use the engine as well. I even had a set of valve covers that had been plated by Chrome Tech 20 years ago!! I wanted to use to stock engine mounts which set the engine pretty far back .A little surgery on the firewall and I was in business. I painted the body with Testors orange and did some light weathering. Found a really cool Fred Cady nostalgic speed shop decal sheet which provided the signage. I wood grained the bed using artist oils and a technique that can be found at this address http://www.clubhyper.com/reference/woodgrainel_1.htm Check it out, first time I tried this and it turned out great!!

-
Great suggestion David! I actually have those parts left over from a Galaxie ''48 Delivery build which I ended up swapping in a Studebaker with 8 deuces if you can imagine !!
-
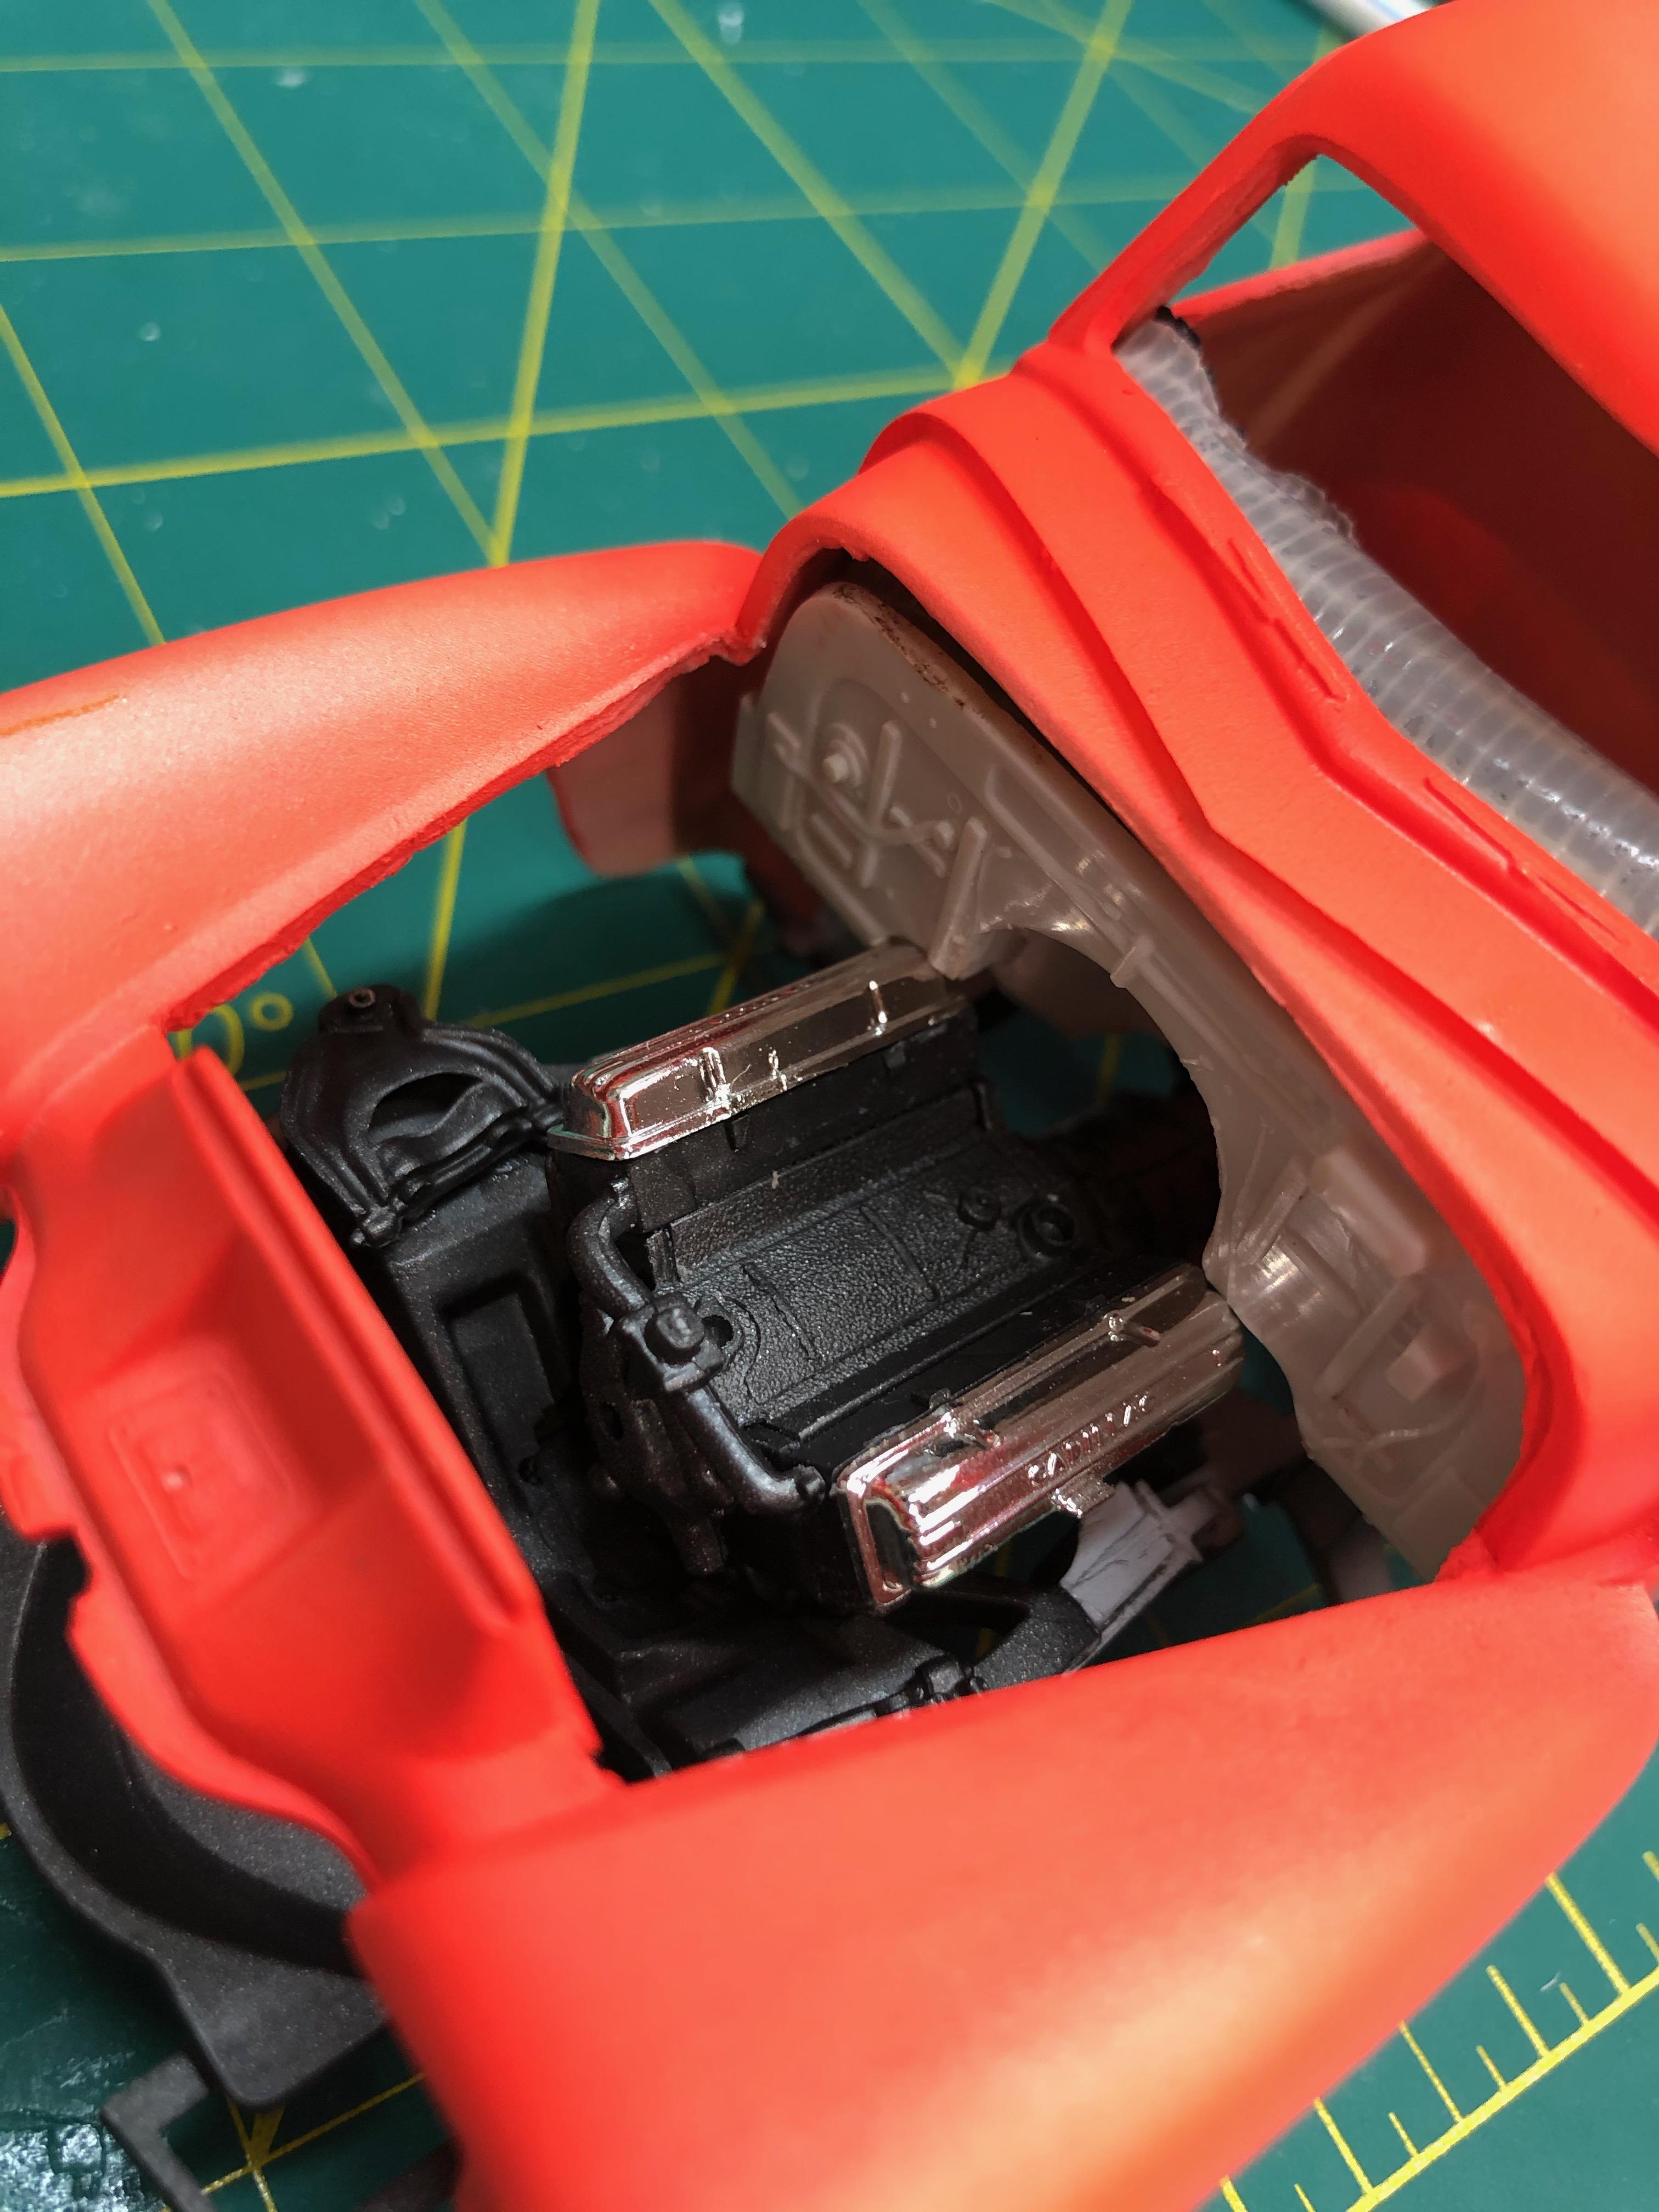
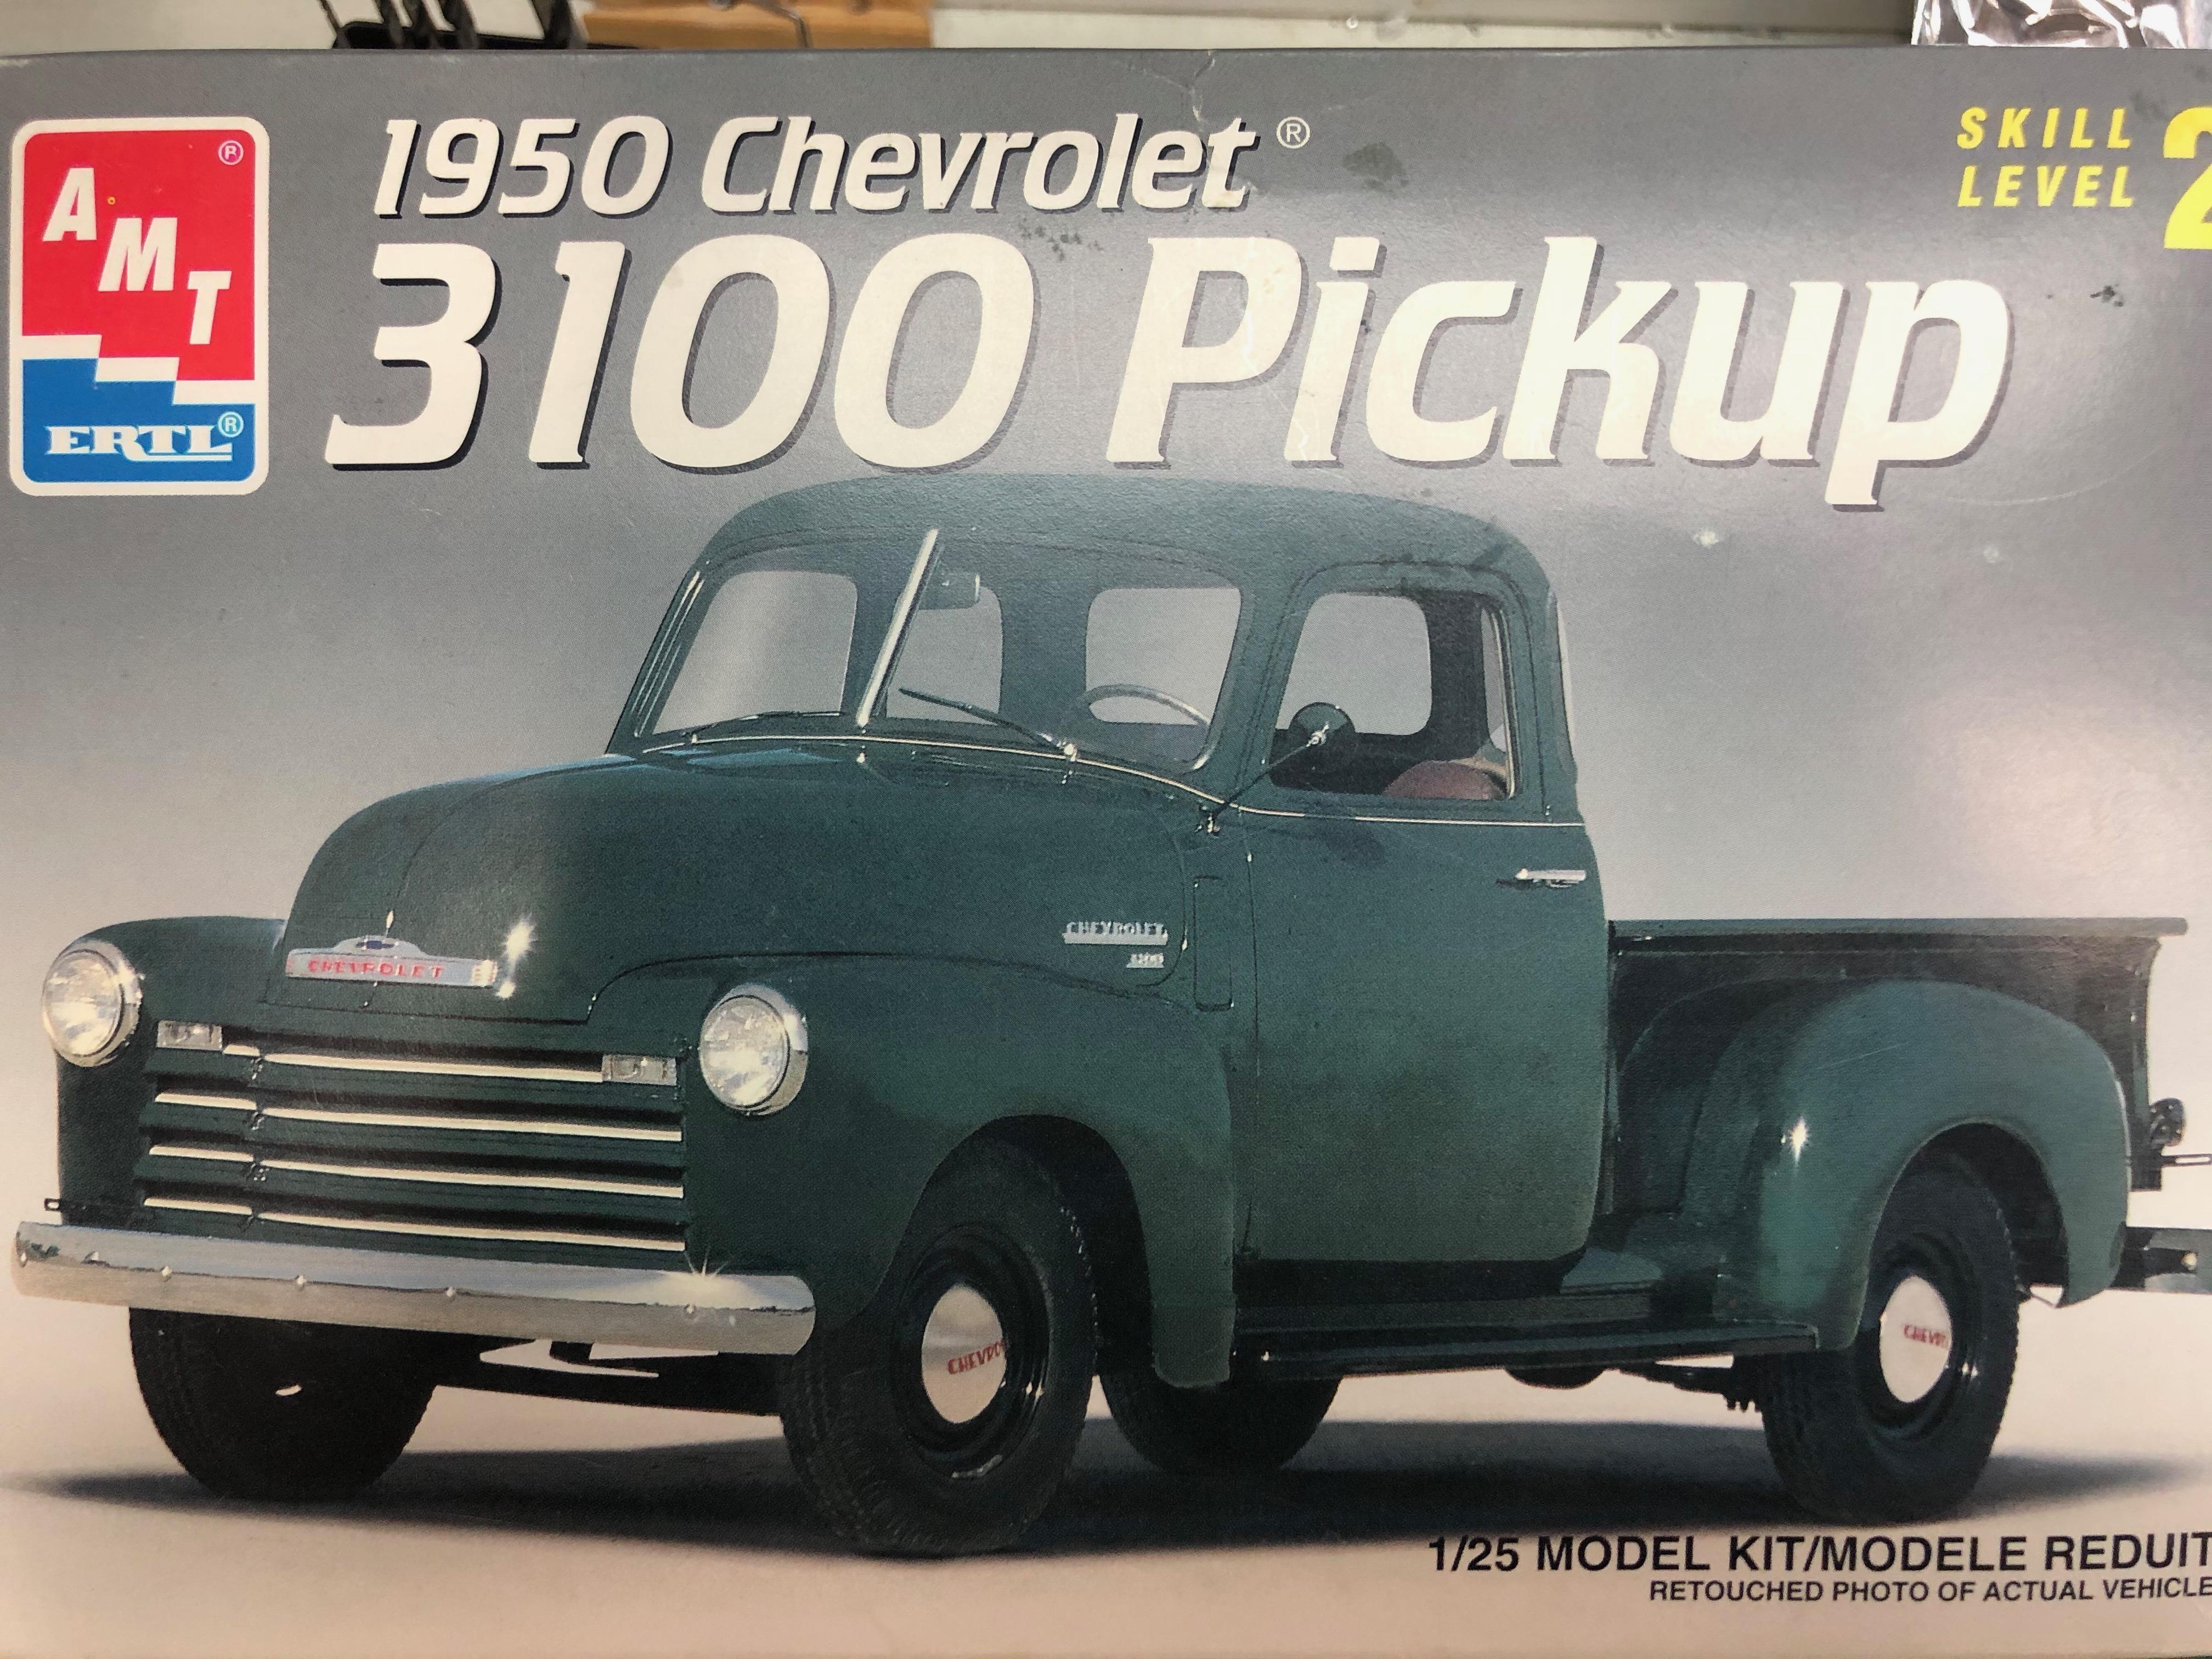
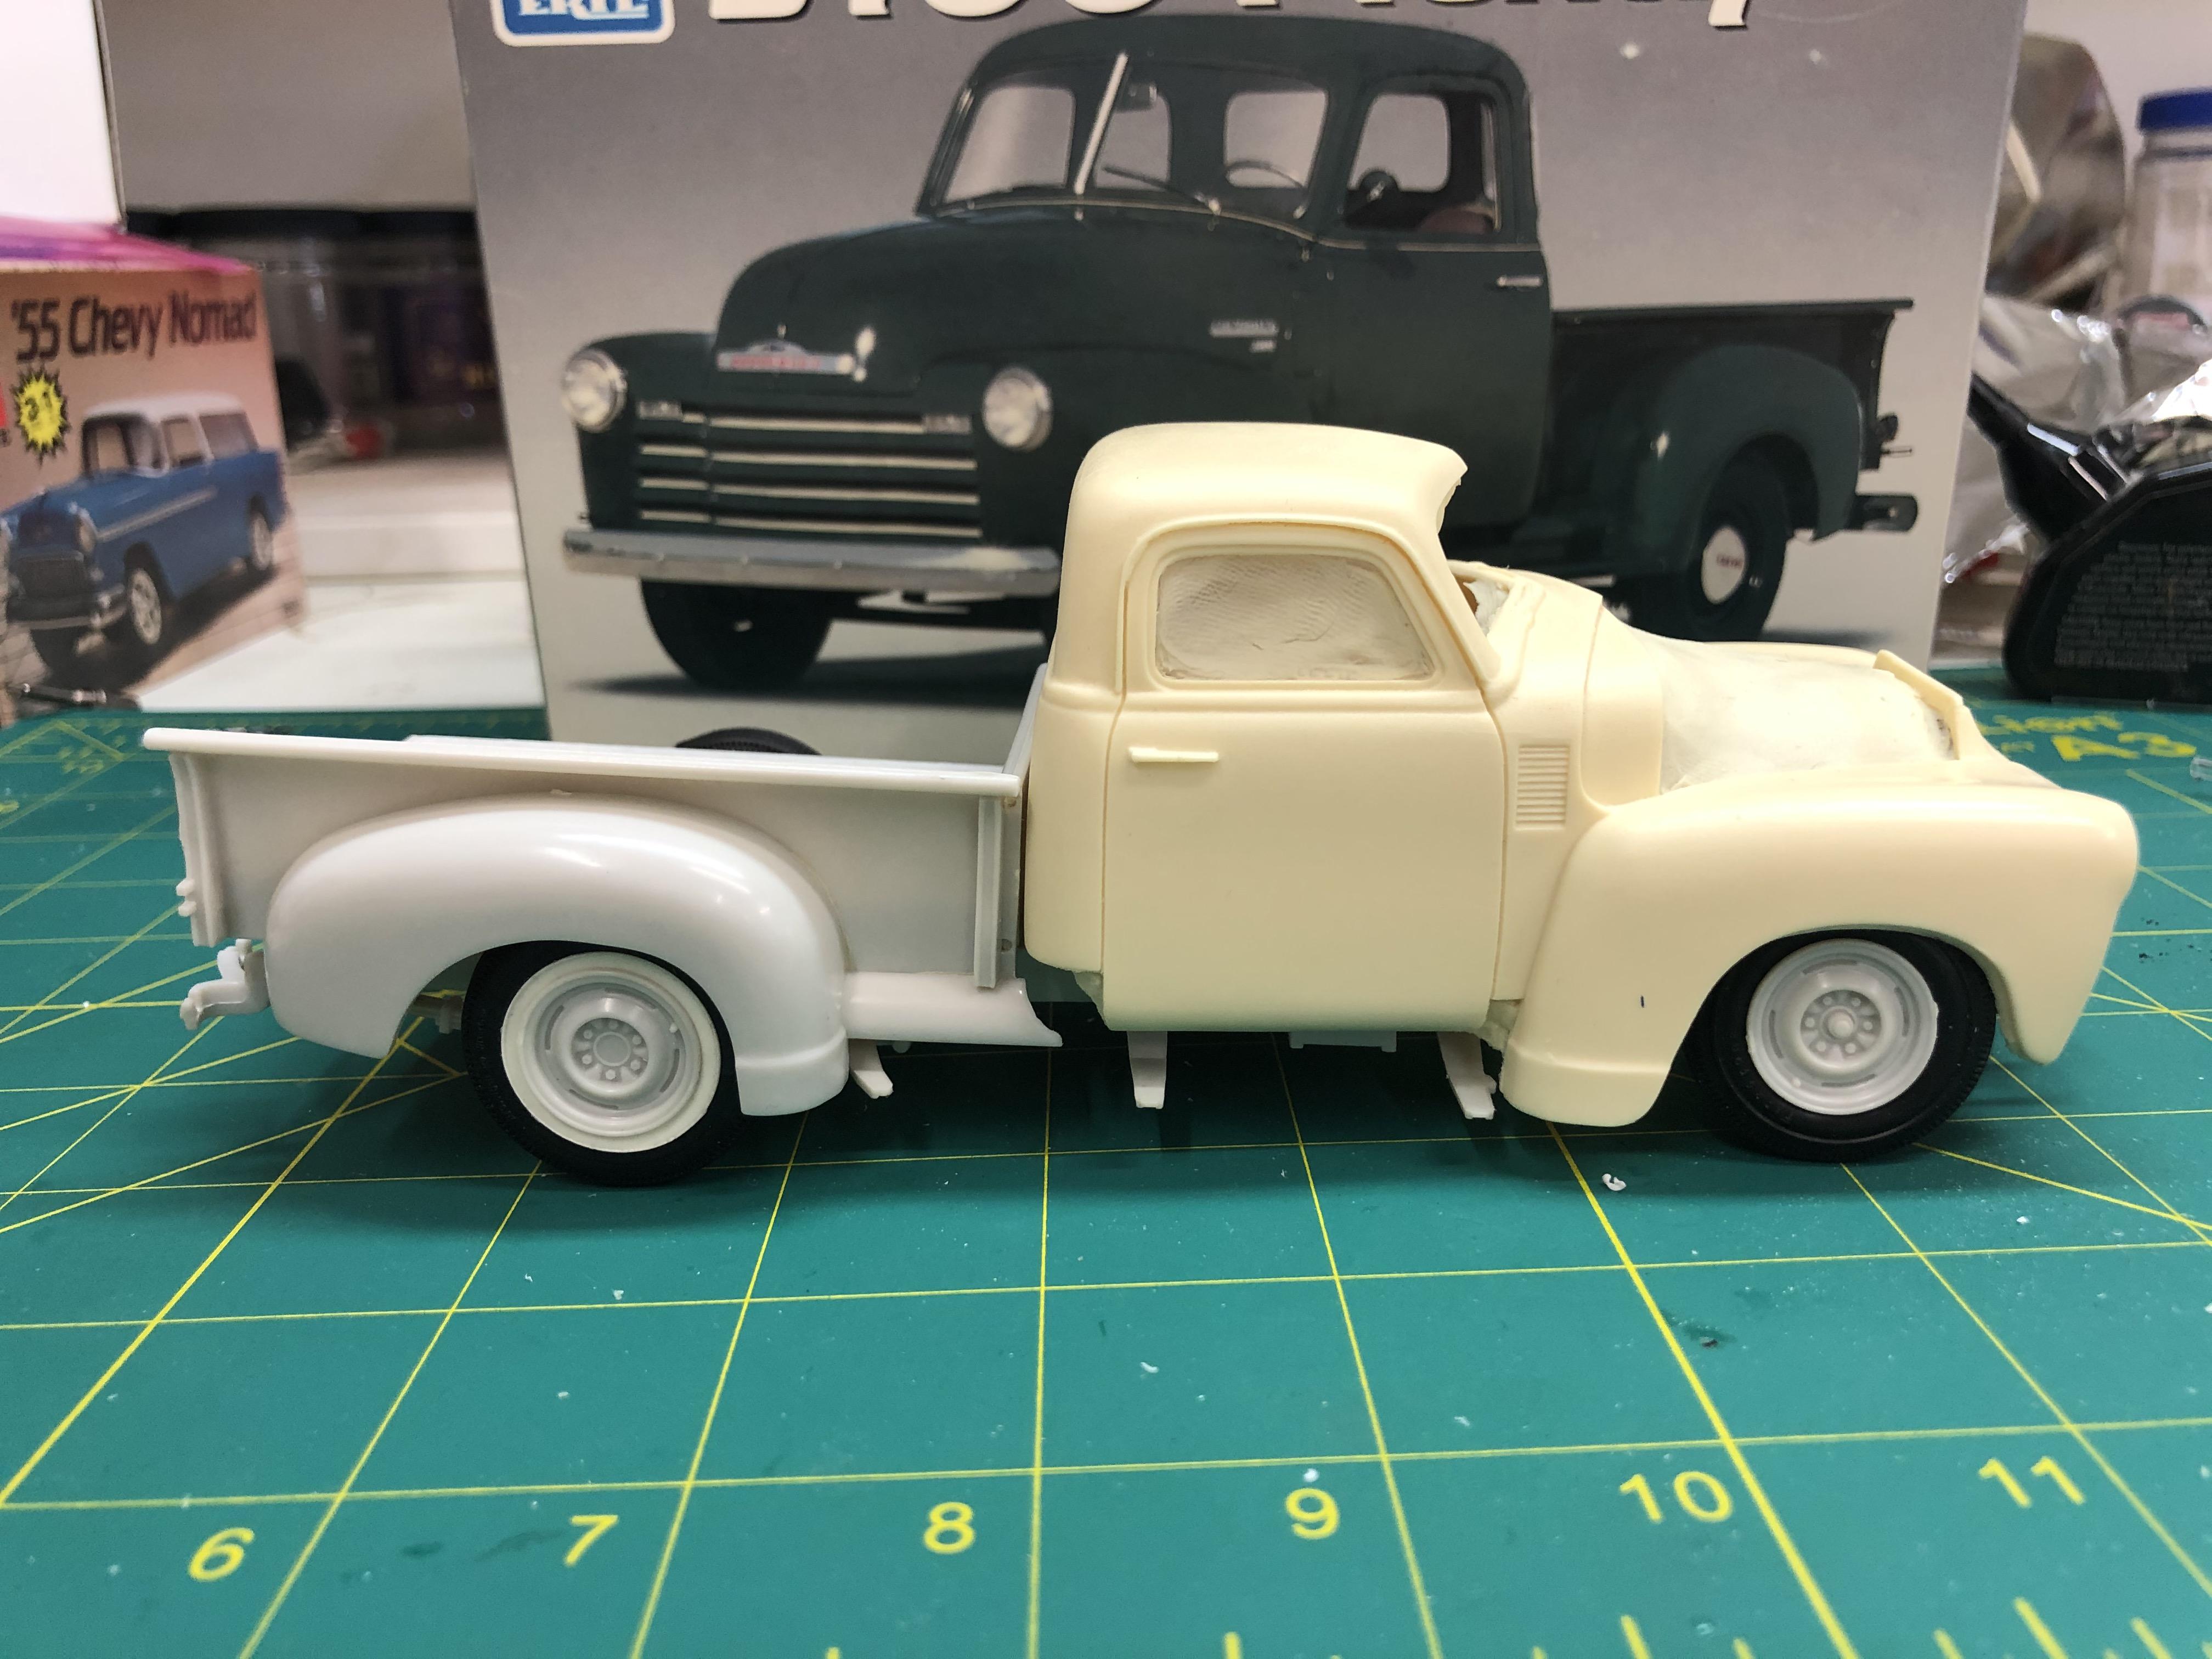
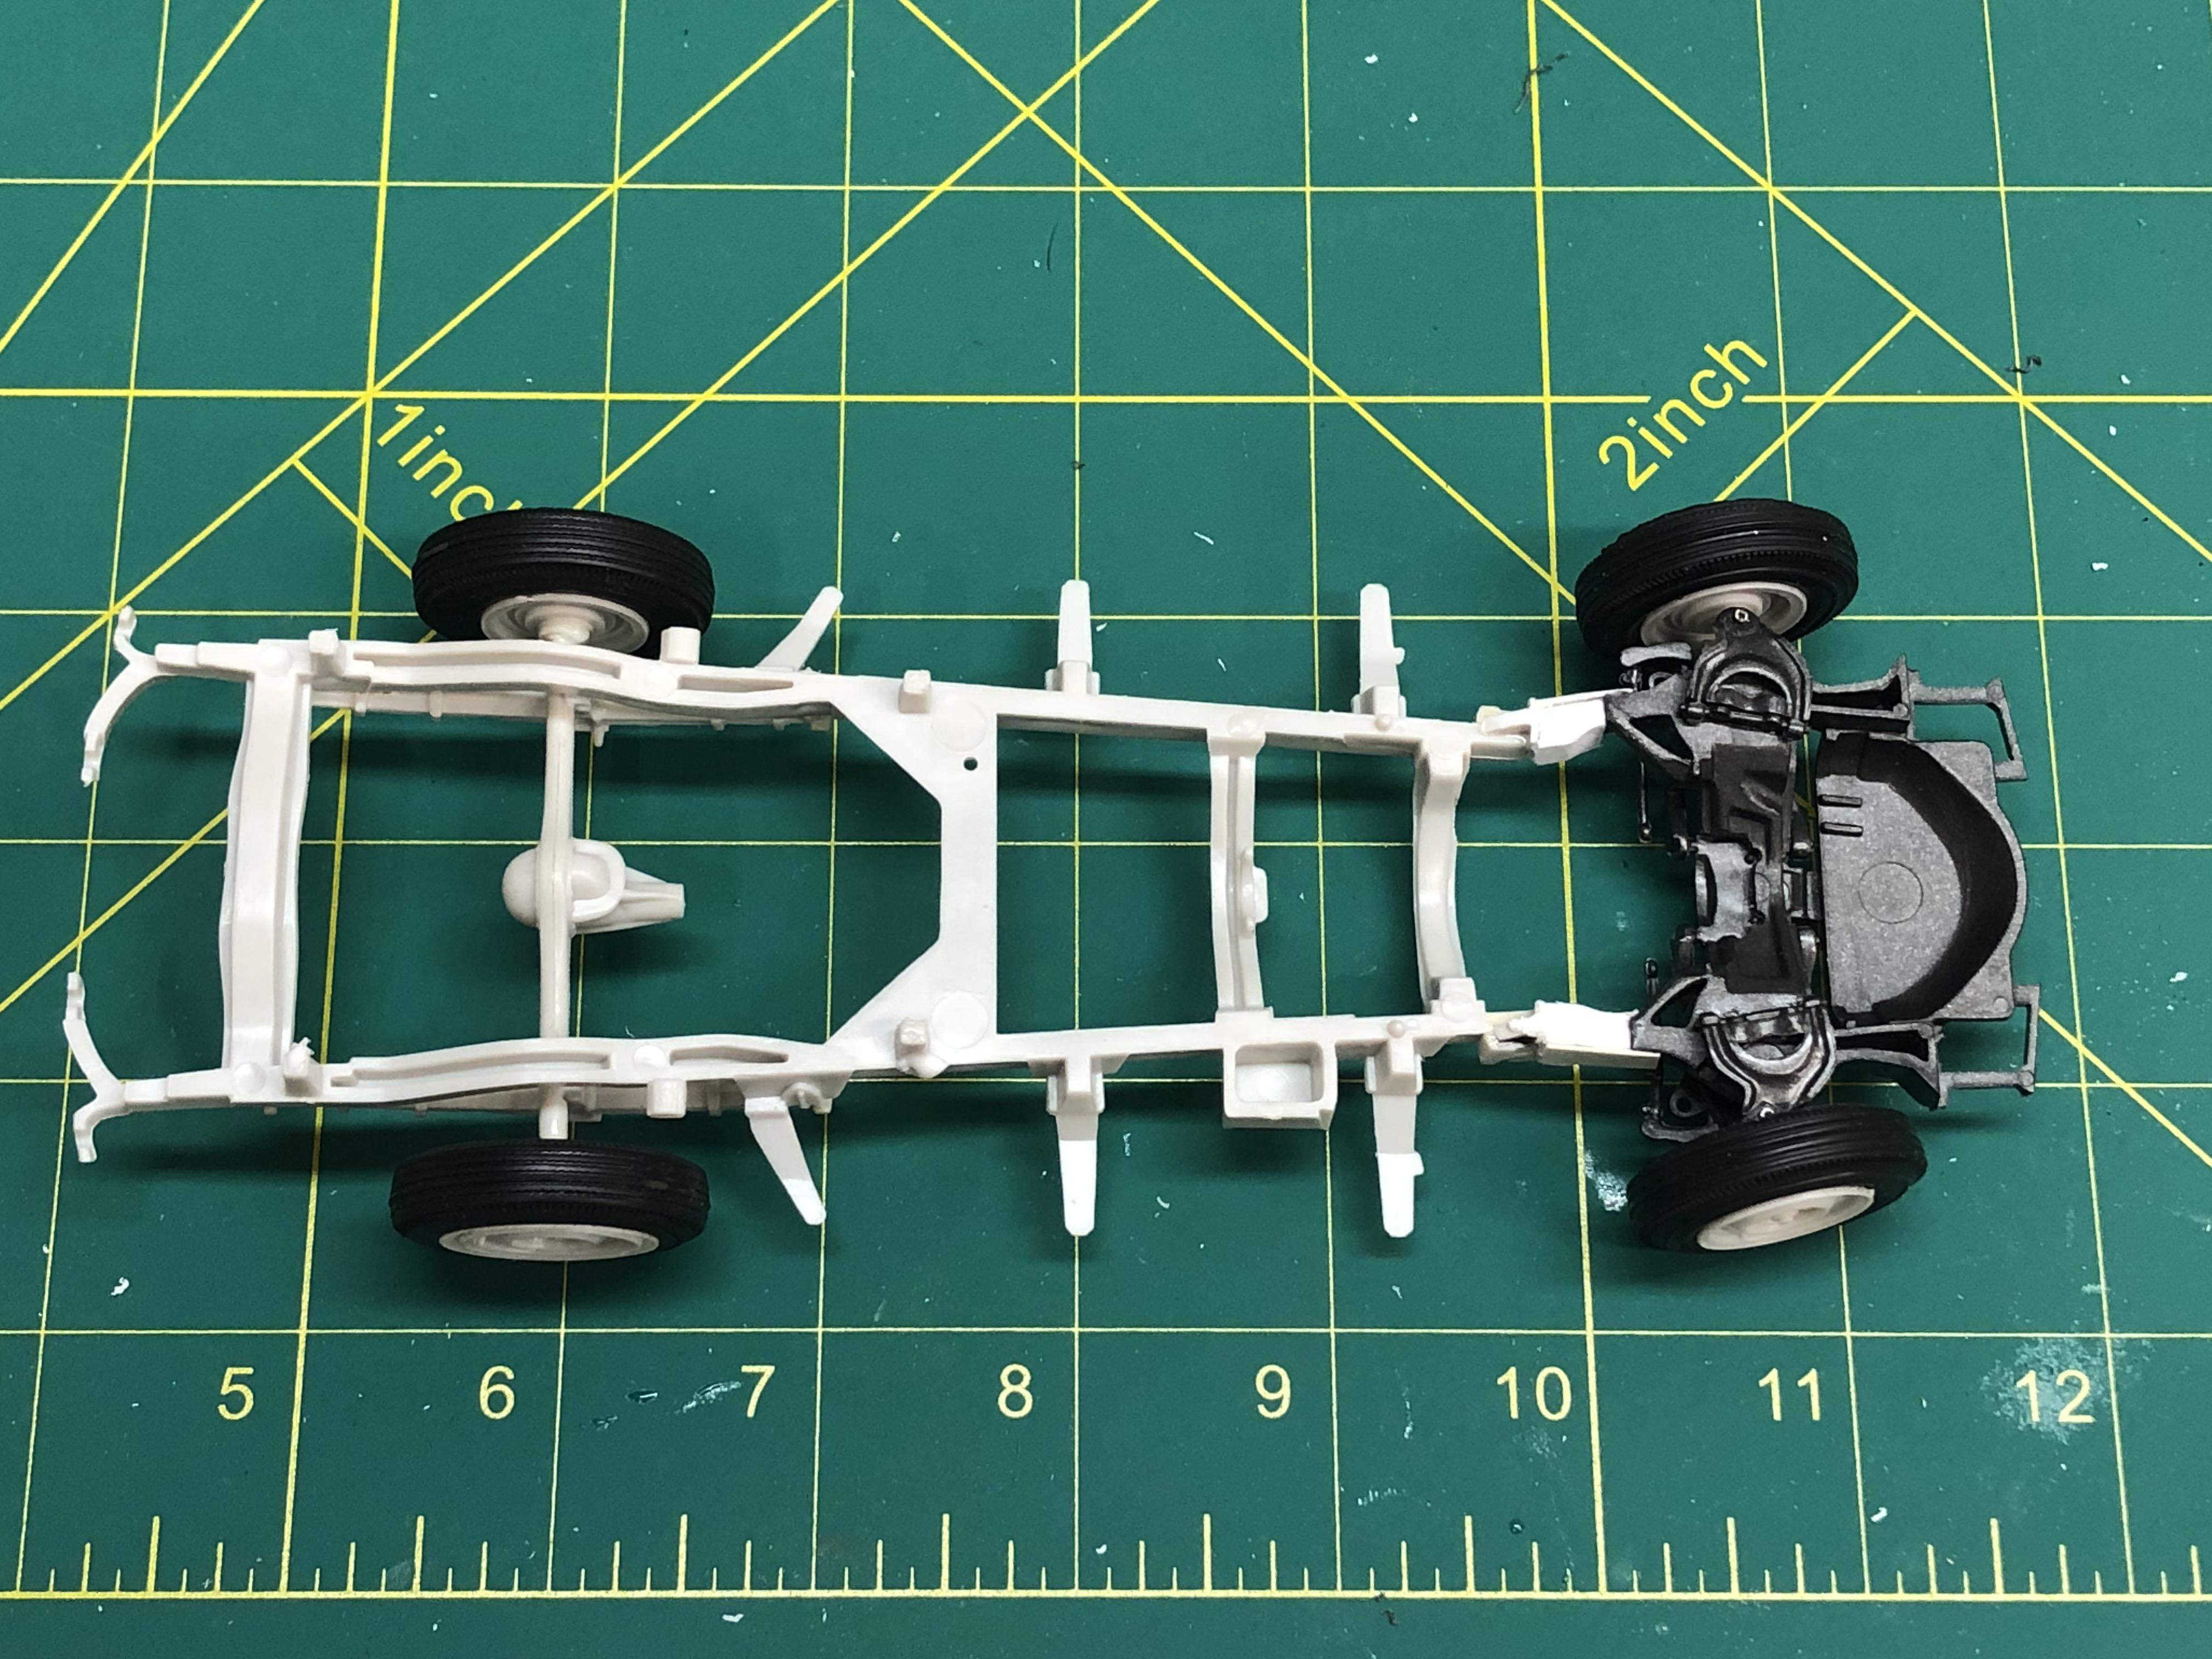
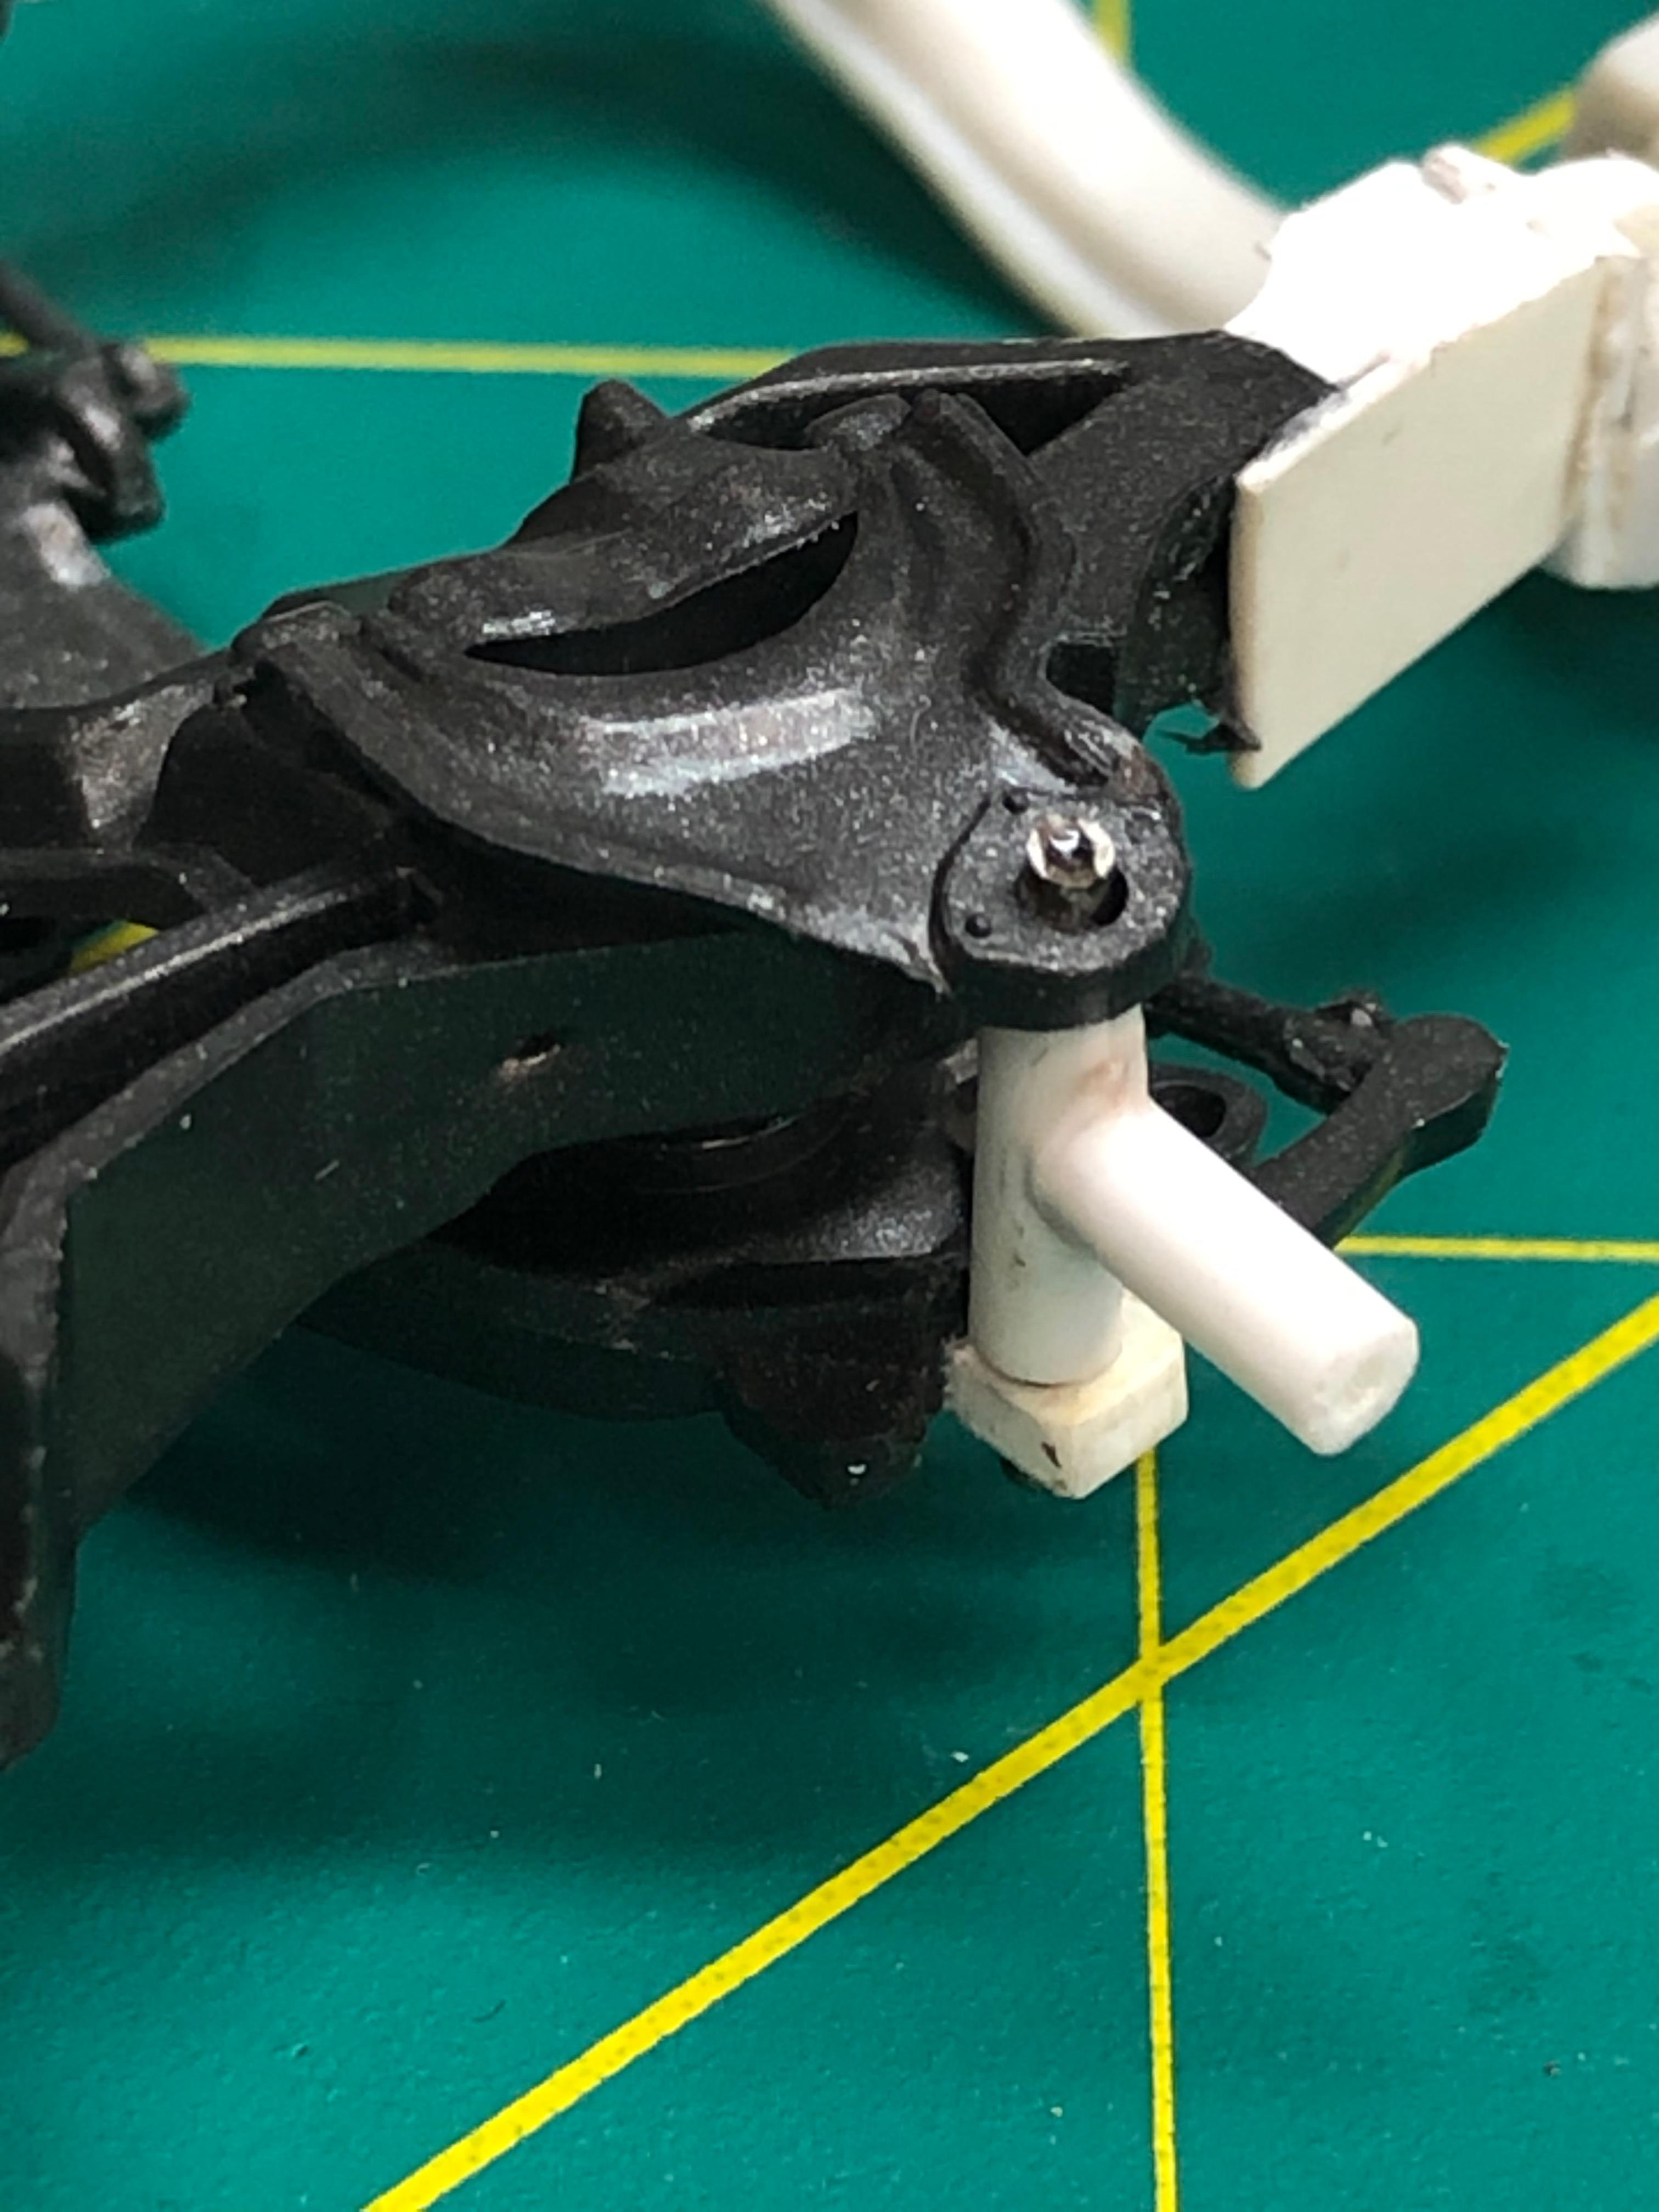
When you consider the fact that I have one of these parked in my garage, It’s about time I got this of the shelf and started rendering something in scale. When I bought this thing ten years ago I had plans of a top chop, front subframe with discs and ifs, LS motor, and a Tremac 6 speed. Fast forward to 2020 and all I have done is rebuild the M-22, throw on some Torque Thrusts, and have some signage added. I’m still running the stock 283 with no other upgrades than a set of headers and an Edelbrock carb. The paint job even dates back to the early 80’s. I’d still like to see it chopped and, since I’m shrinking anyway, it may become practical !!! Stance is everything in any hot rod. On early Chevy trucks the semielliptical front suspension really limits how low you can drop the front end. My ’51 has a Mor Drop front axle and it is anything but in the weeds. My model gets a subframe, in this case the front clip from the Revellogram ’59 Caddy which just happened to be the first kit I grabbed off my shelf. Since the Caddy kit lacks poseable front wheels, I fabbed some spindles from Evergreen and king pins from stainless tubing. I got started on the top chop before I realized I could let Jimmy Flintstone do all of the hard work so I snagged a resin body on Ebay. This is everything I’ve done so far held together with Elmer’s glue. I’m going for a beater vibe, weathered paint but minimal surface rust, tinted glass with a few period decals, using the inline six and stock trans. Stay tuned.
-
Thank you Steve!
-
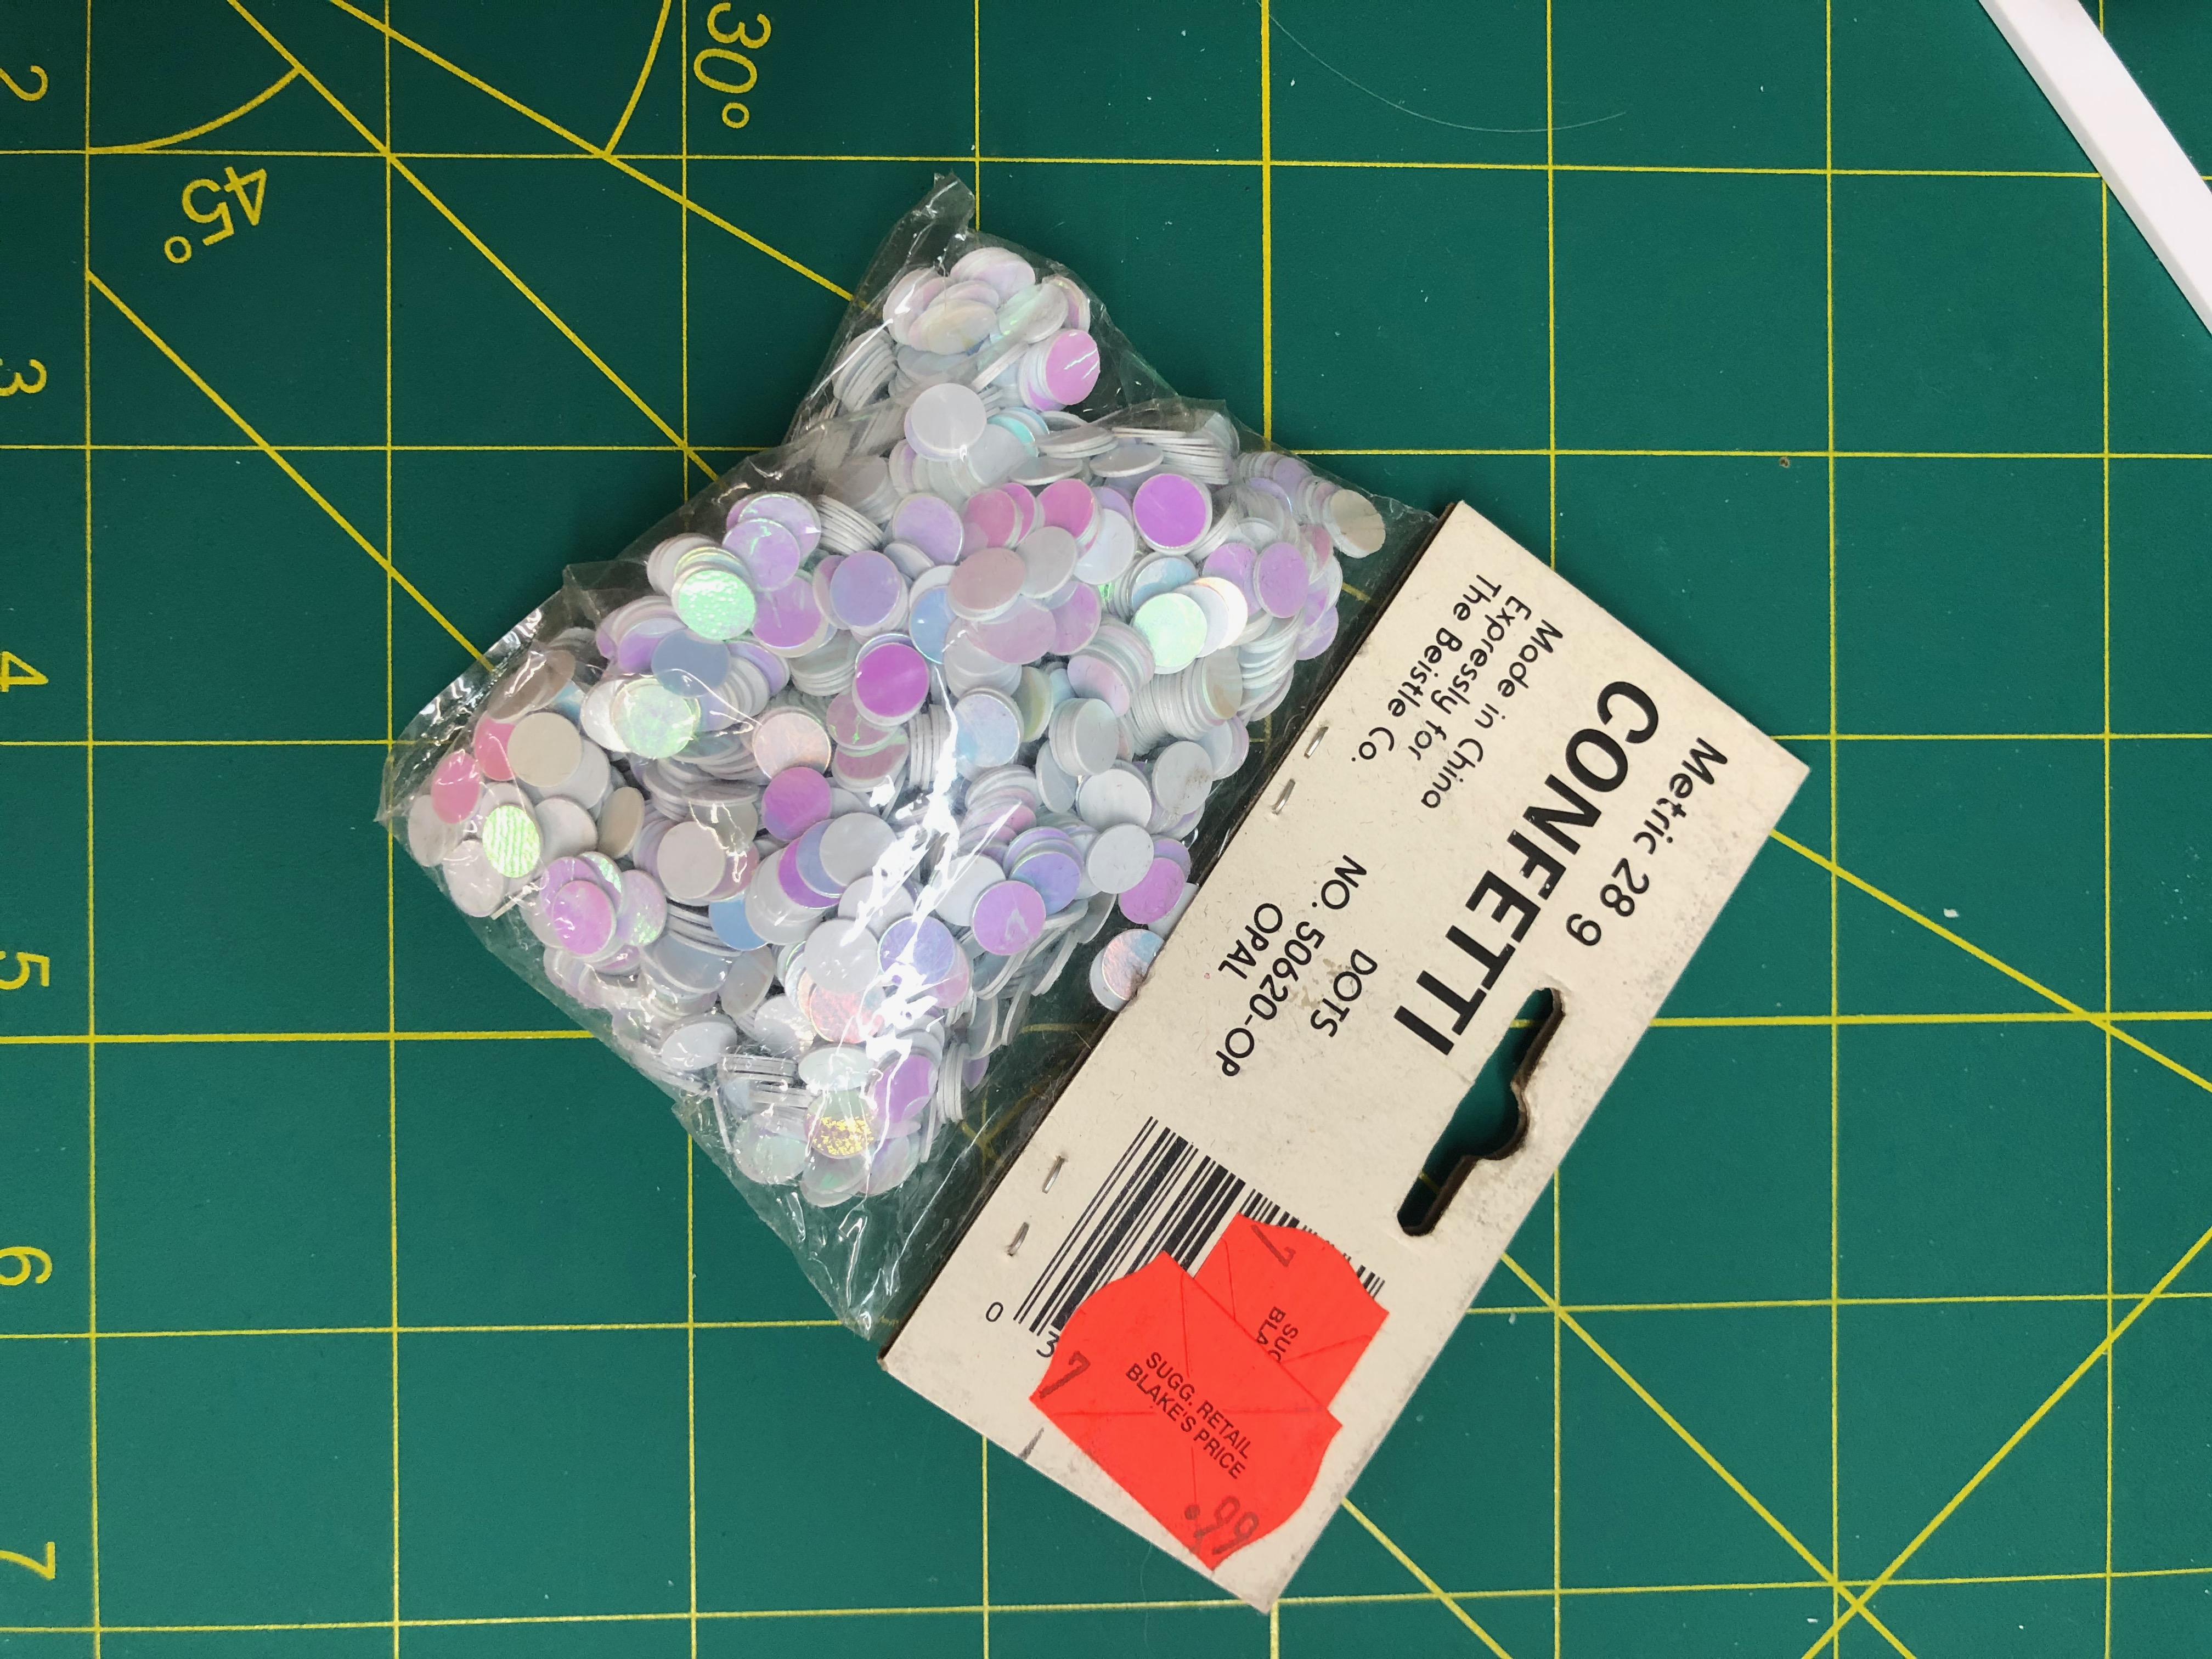
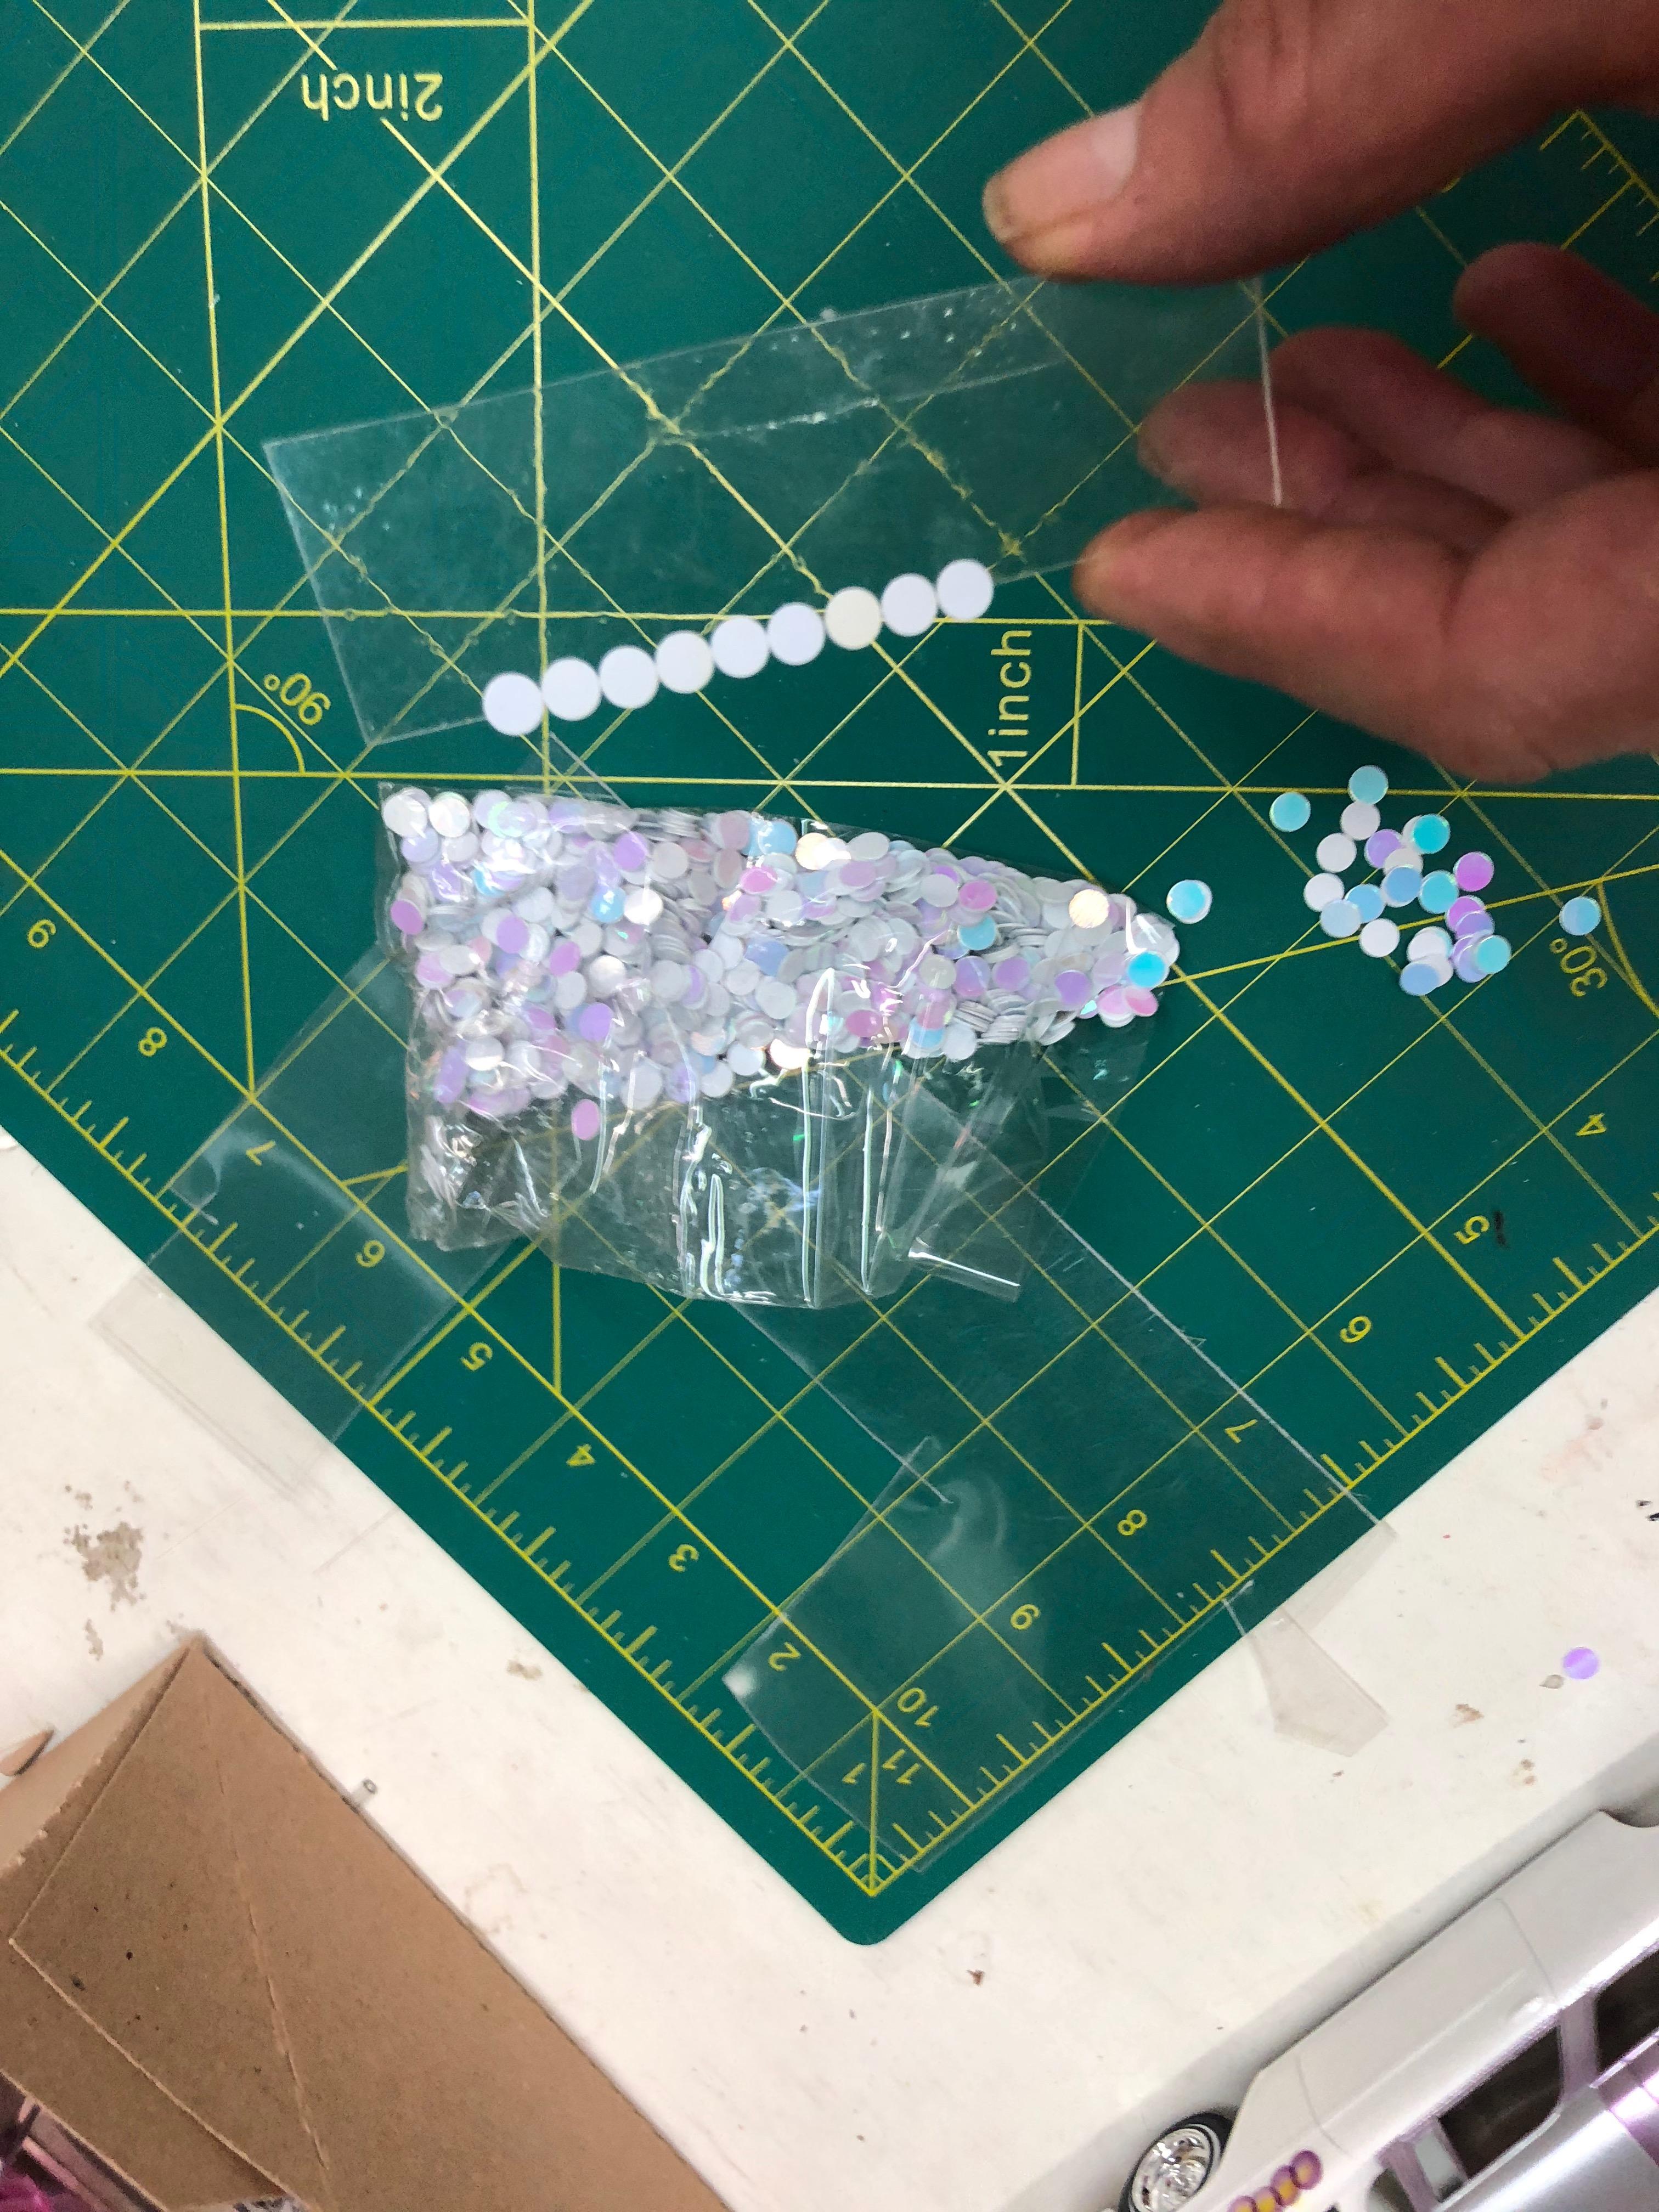
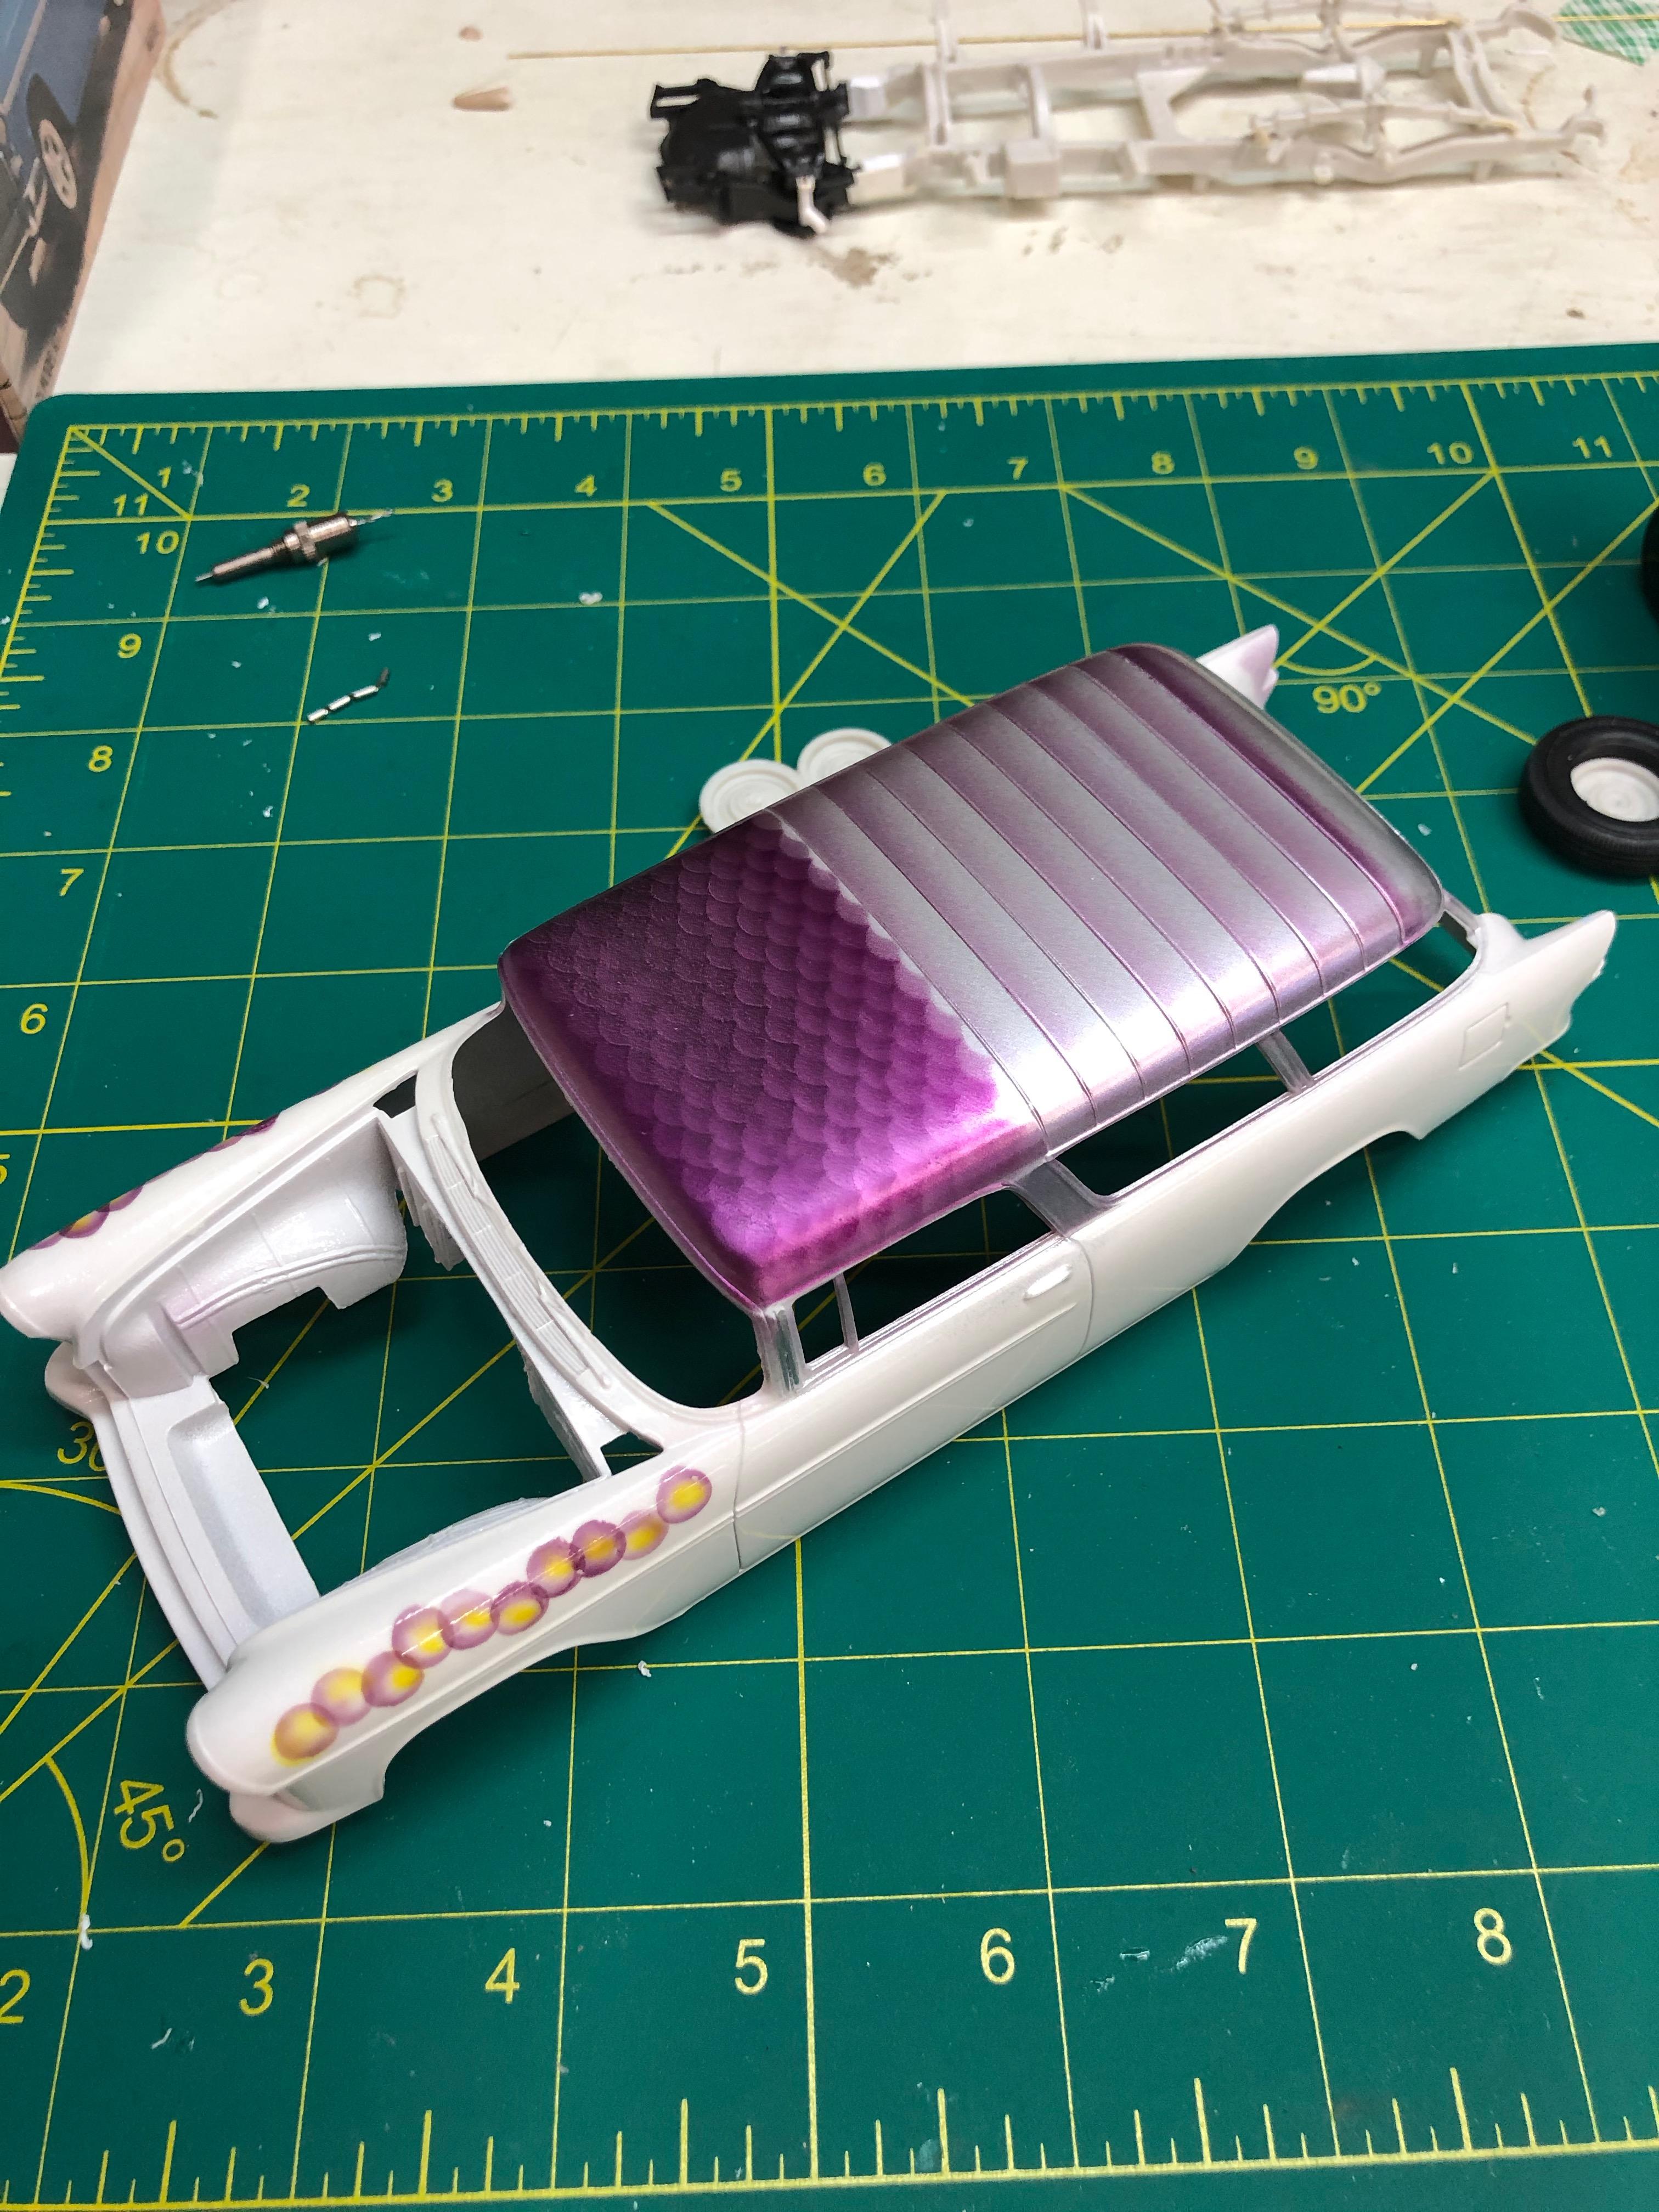
I kept waiting for that geometric roof design to grow on me and it never happened. In fact it started to grate on me !!! so I sanded it off and started all over again. Did some fades on the horizontal roof beads, then decided to do some fish scales on the smooth forward part of the roof. How to create a fish scale mask? I had a bag of confetti that I bought years ago to make 1/16th scale injector blades. I glued a line of them along the edge of some thin sheet styrene and I had my mask. Using HOK purple acrylic lacquer. I'm gonna leave the pattern on the fenders, fish eggs !!! Clear coat tomorrow.
-
Continued the bubble theme onto the front fenders, added some yellow highlights. Gonna add clear coats next. Pretty much decided I’m going to mask and airbrush Alclad chrome on the windshield/window frames. I’ll use Bare Metal on the tailgate chrome as there are no sharp curves. Gonna use the stock engine, already weathered the chassis. Interior will be pearl white and purple.
-
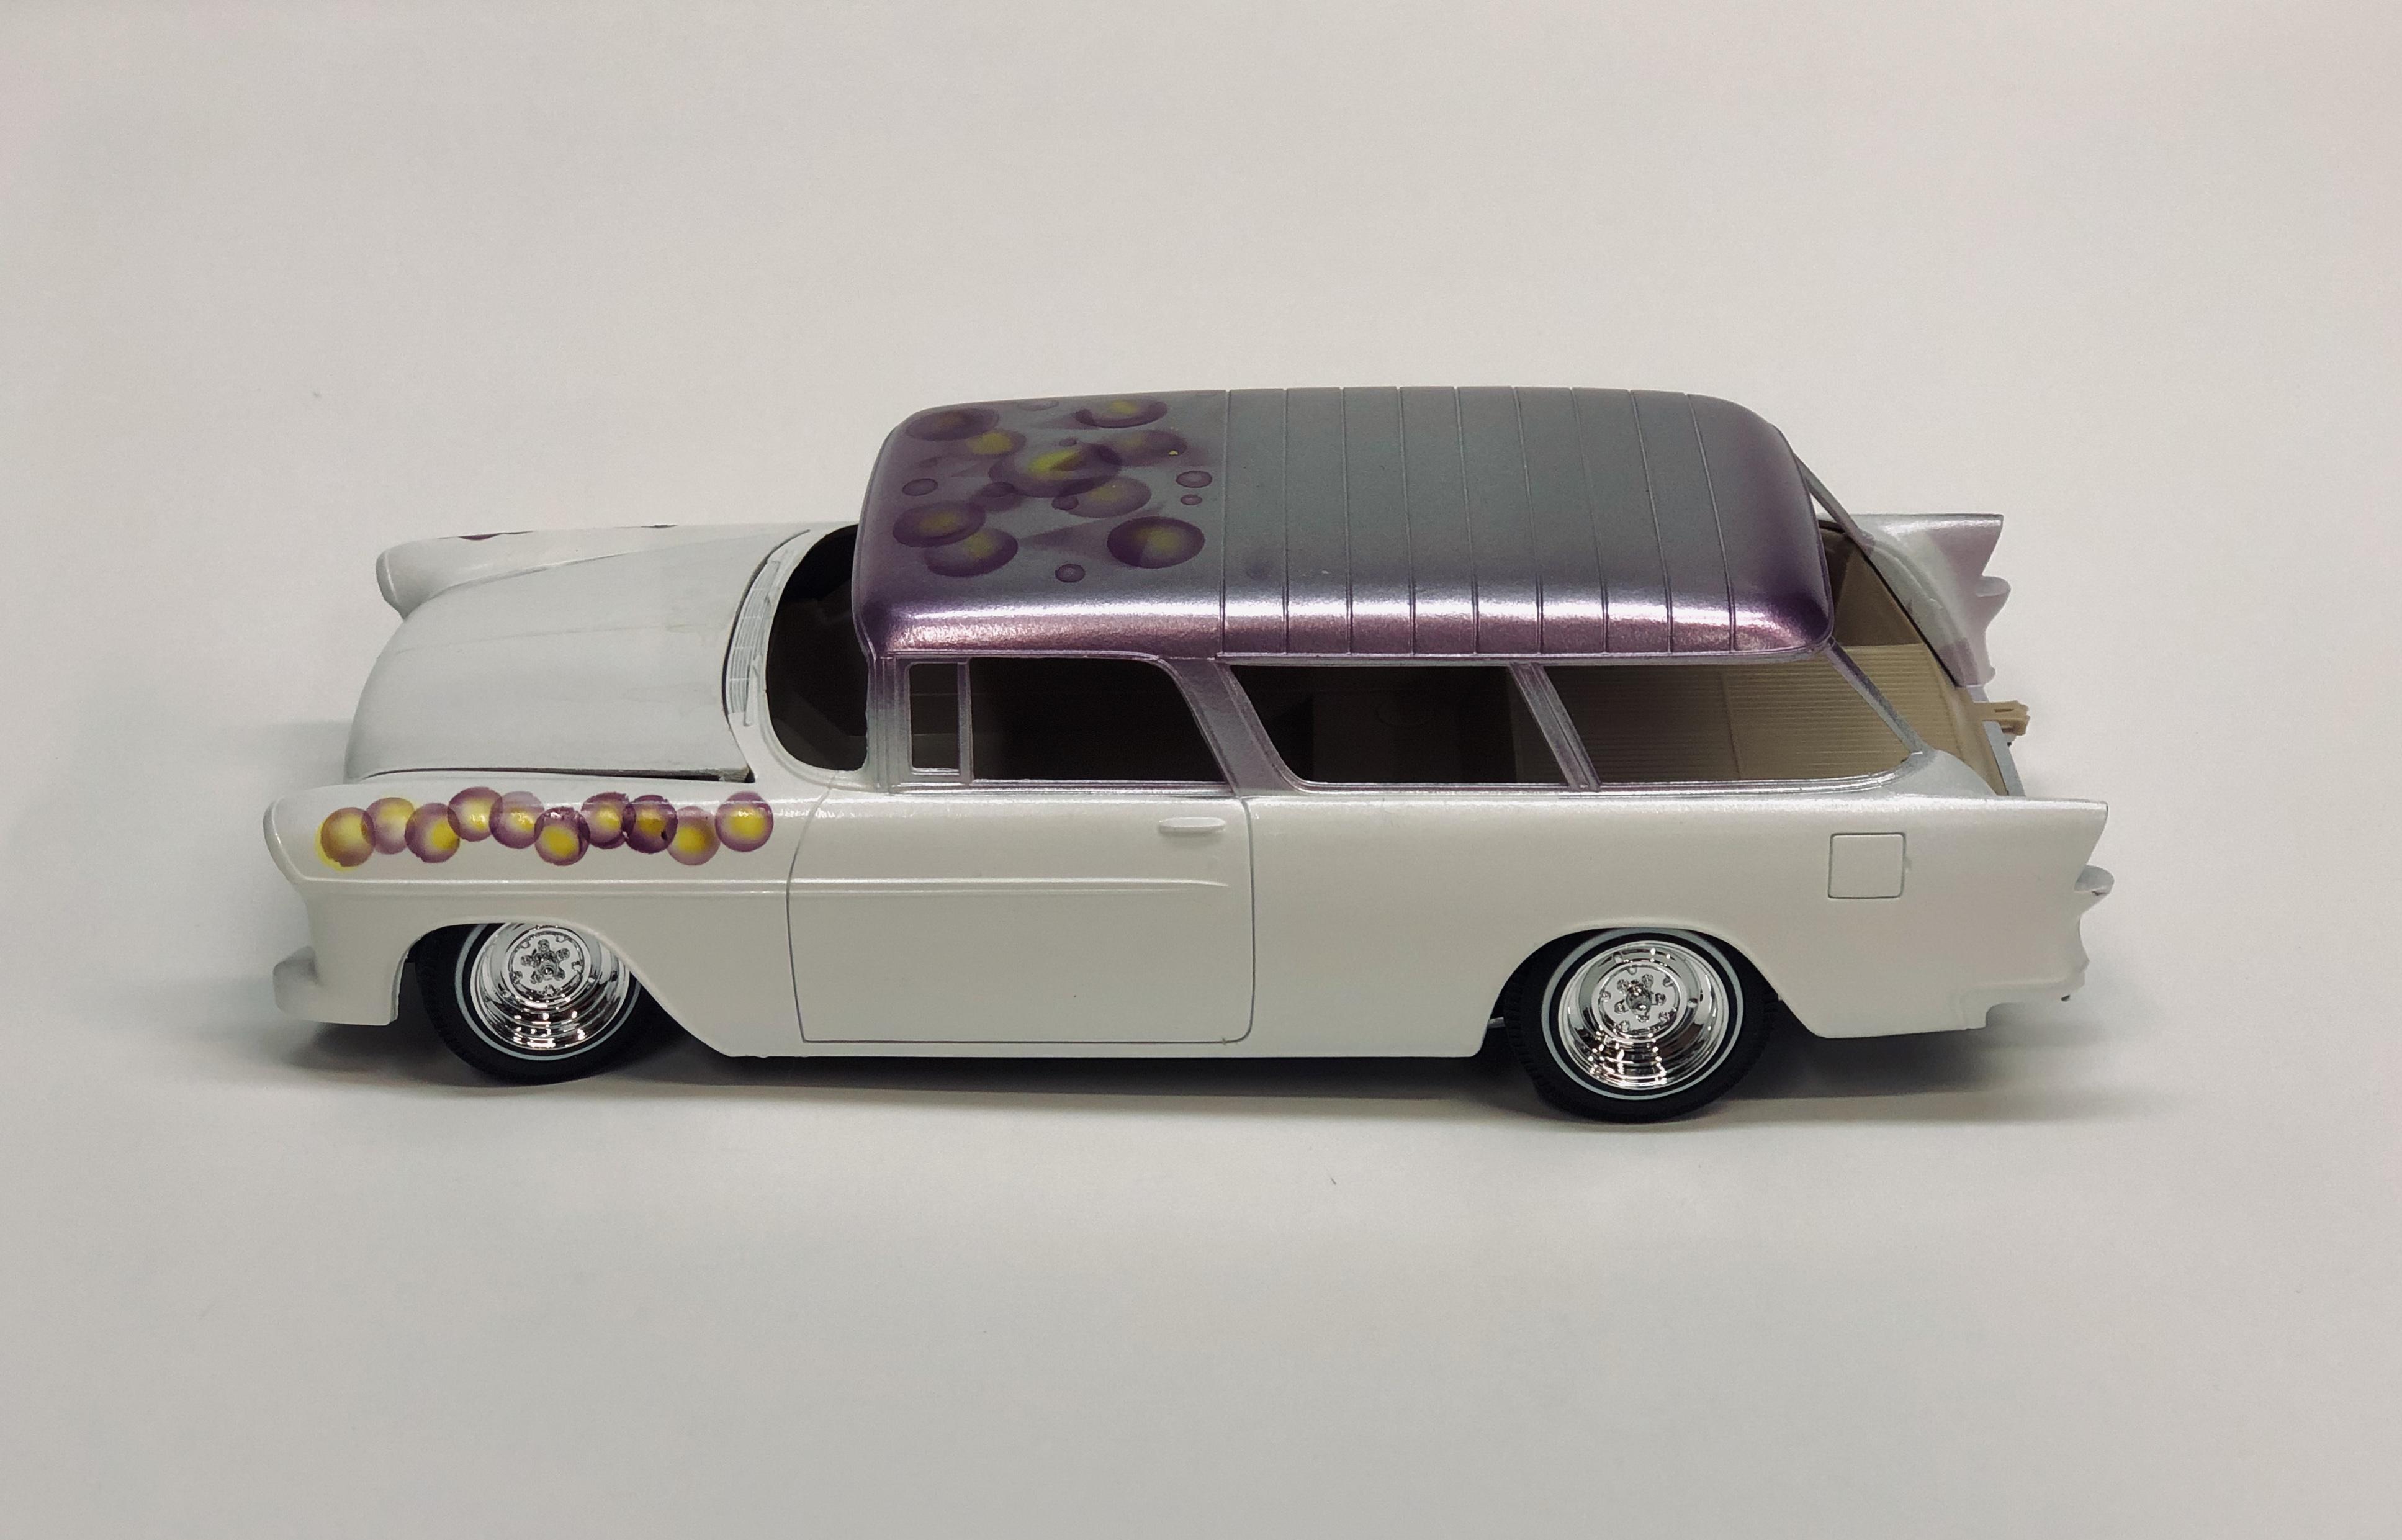
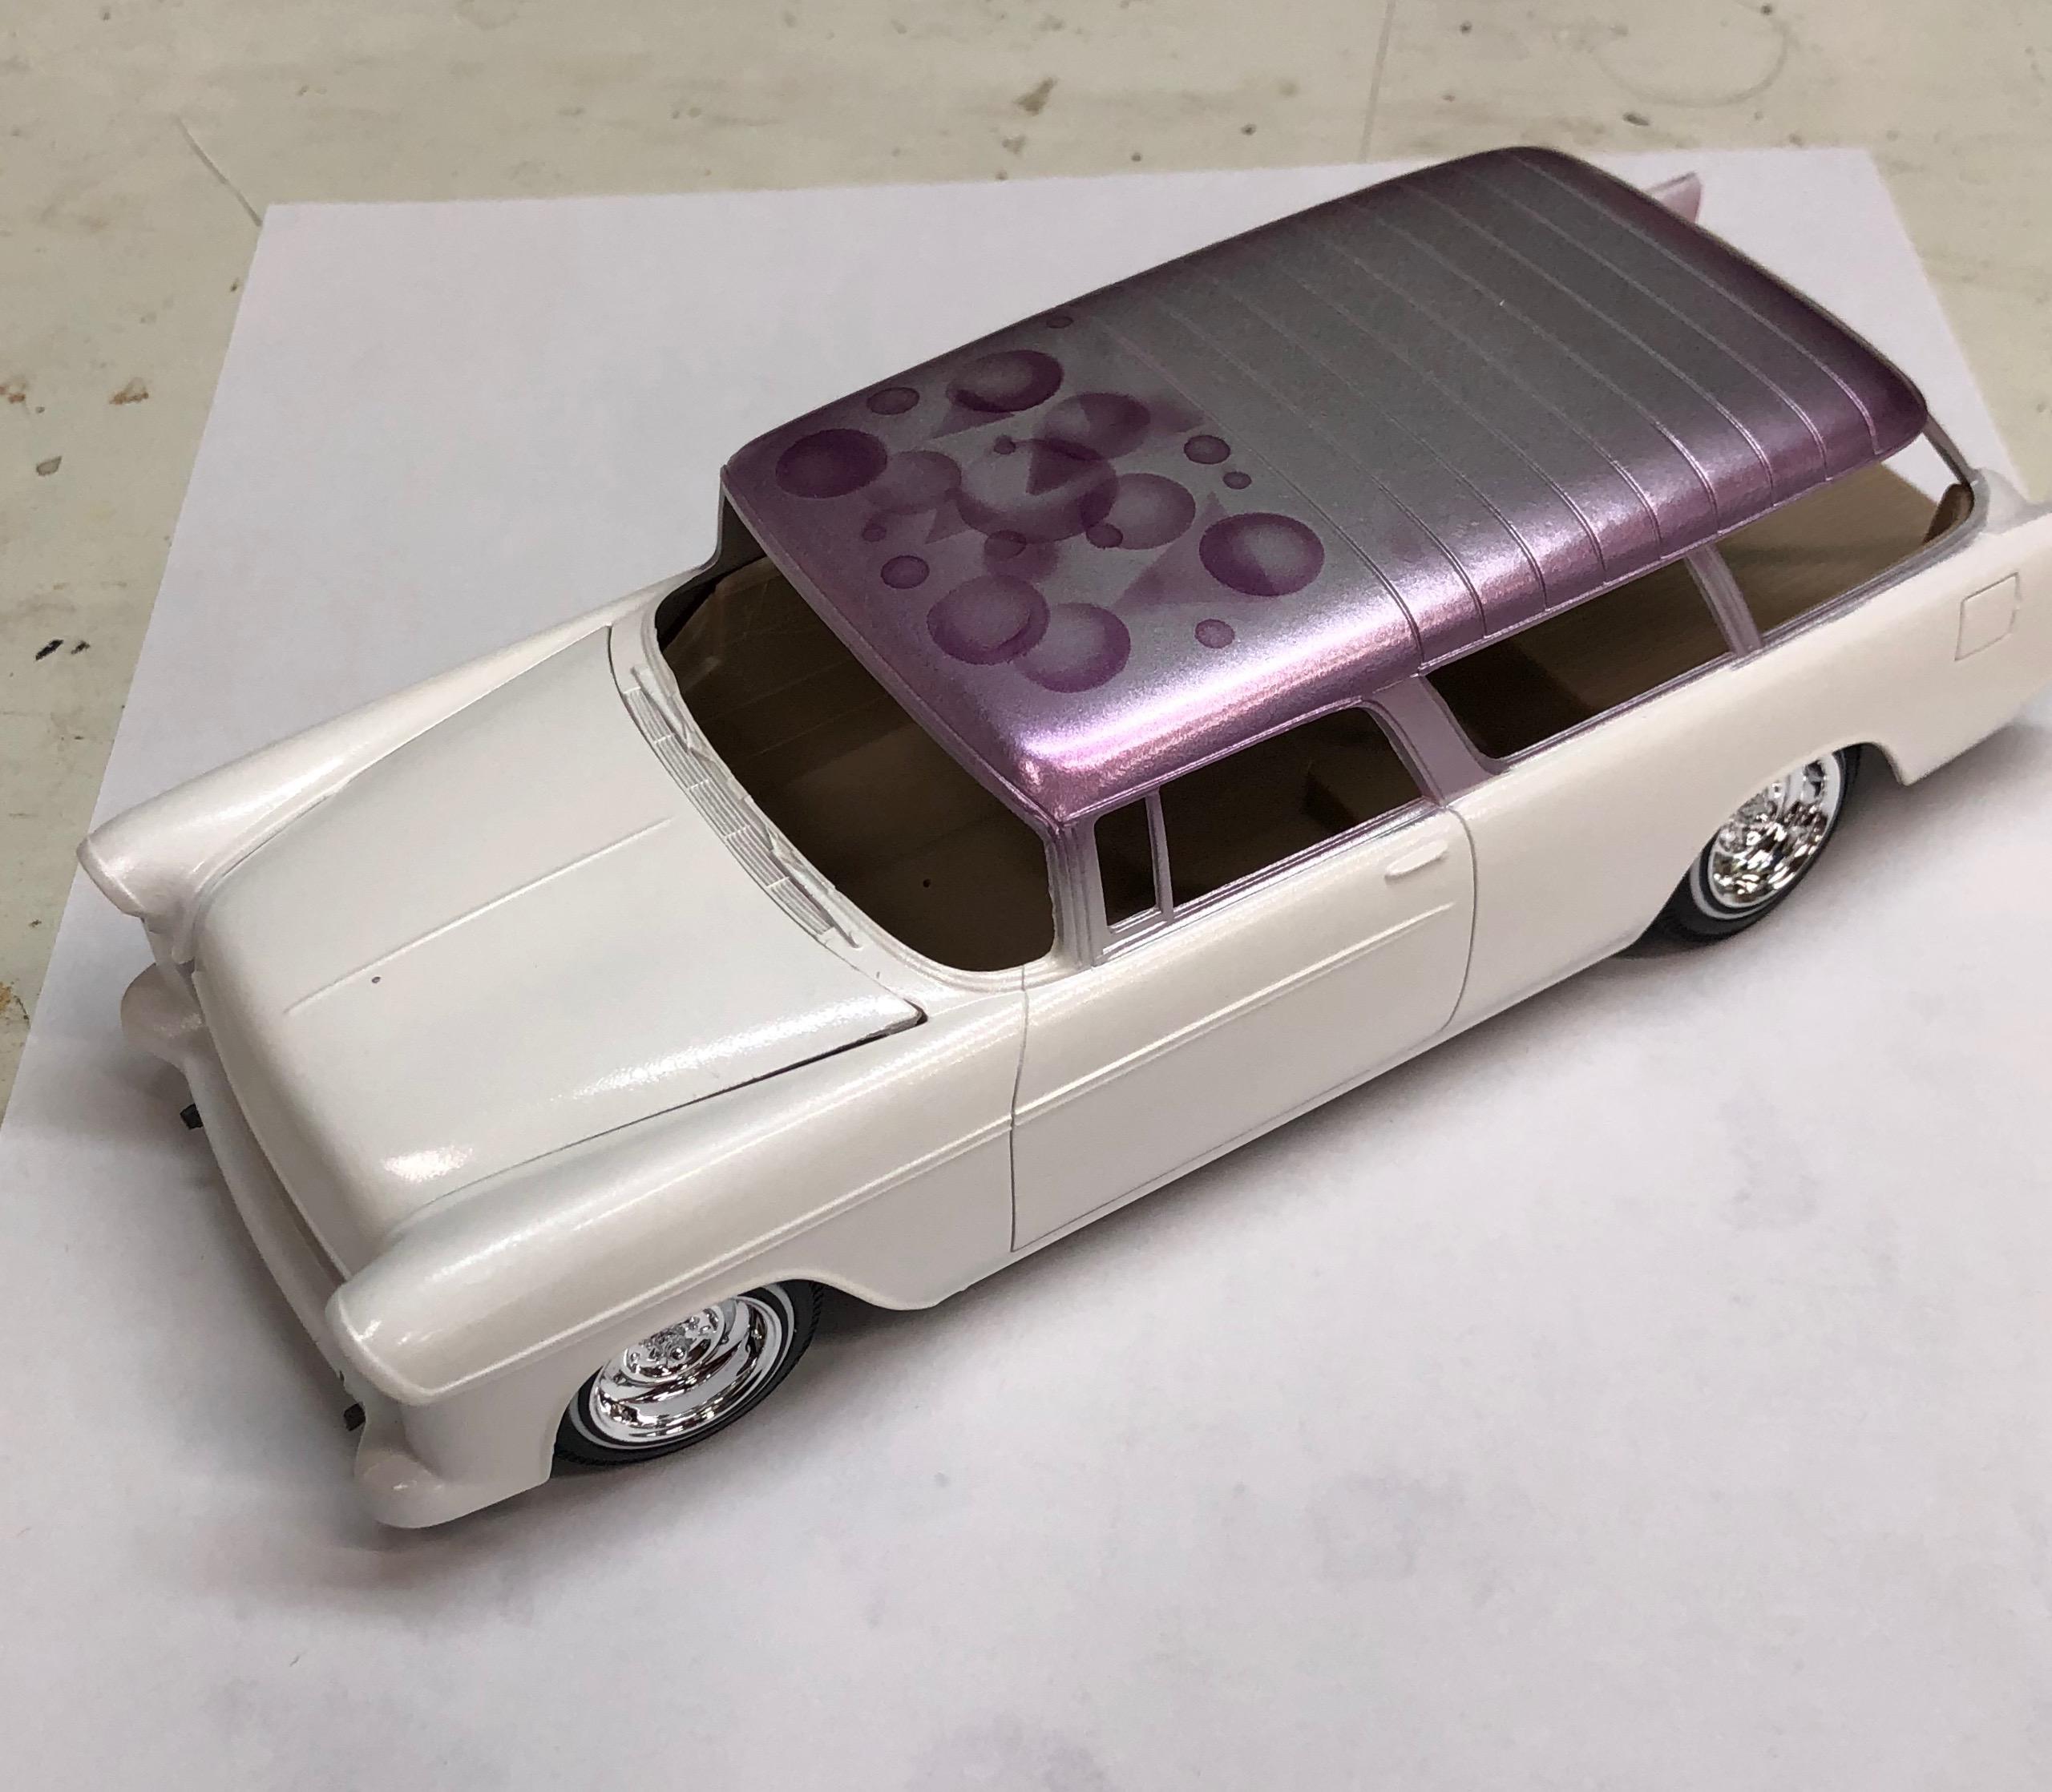
Making some progress. Tamiya white pearl for the lower body, HOK silver flake for the roof with some Timothy Leary inspired graphics. Gonna do more on the fenders with various colored spheres and such. I'm thinking about trying the Mission Models clear. I have urethane but I'm afraid to use it without a hood and I lack one. Too many horror stories about urethanes and lung injury. Anybody try the water based clears?
-
Love the car and love your model. Just great.
-
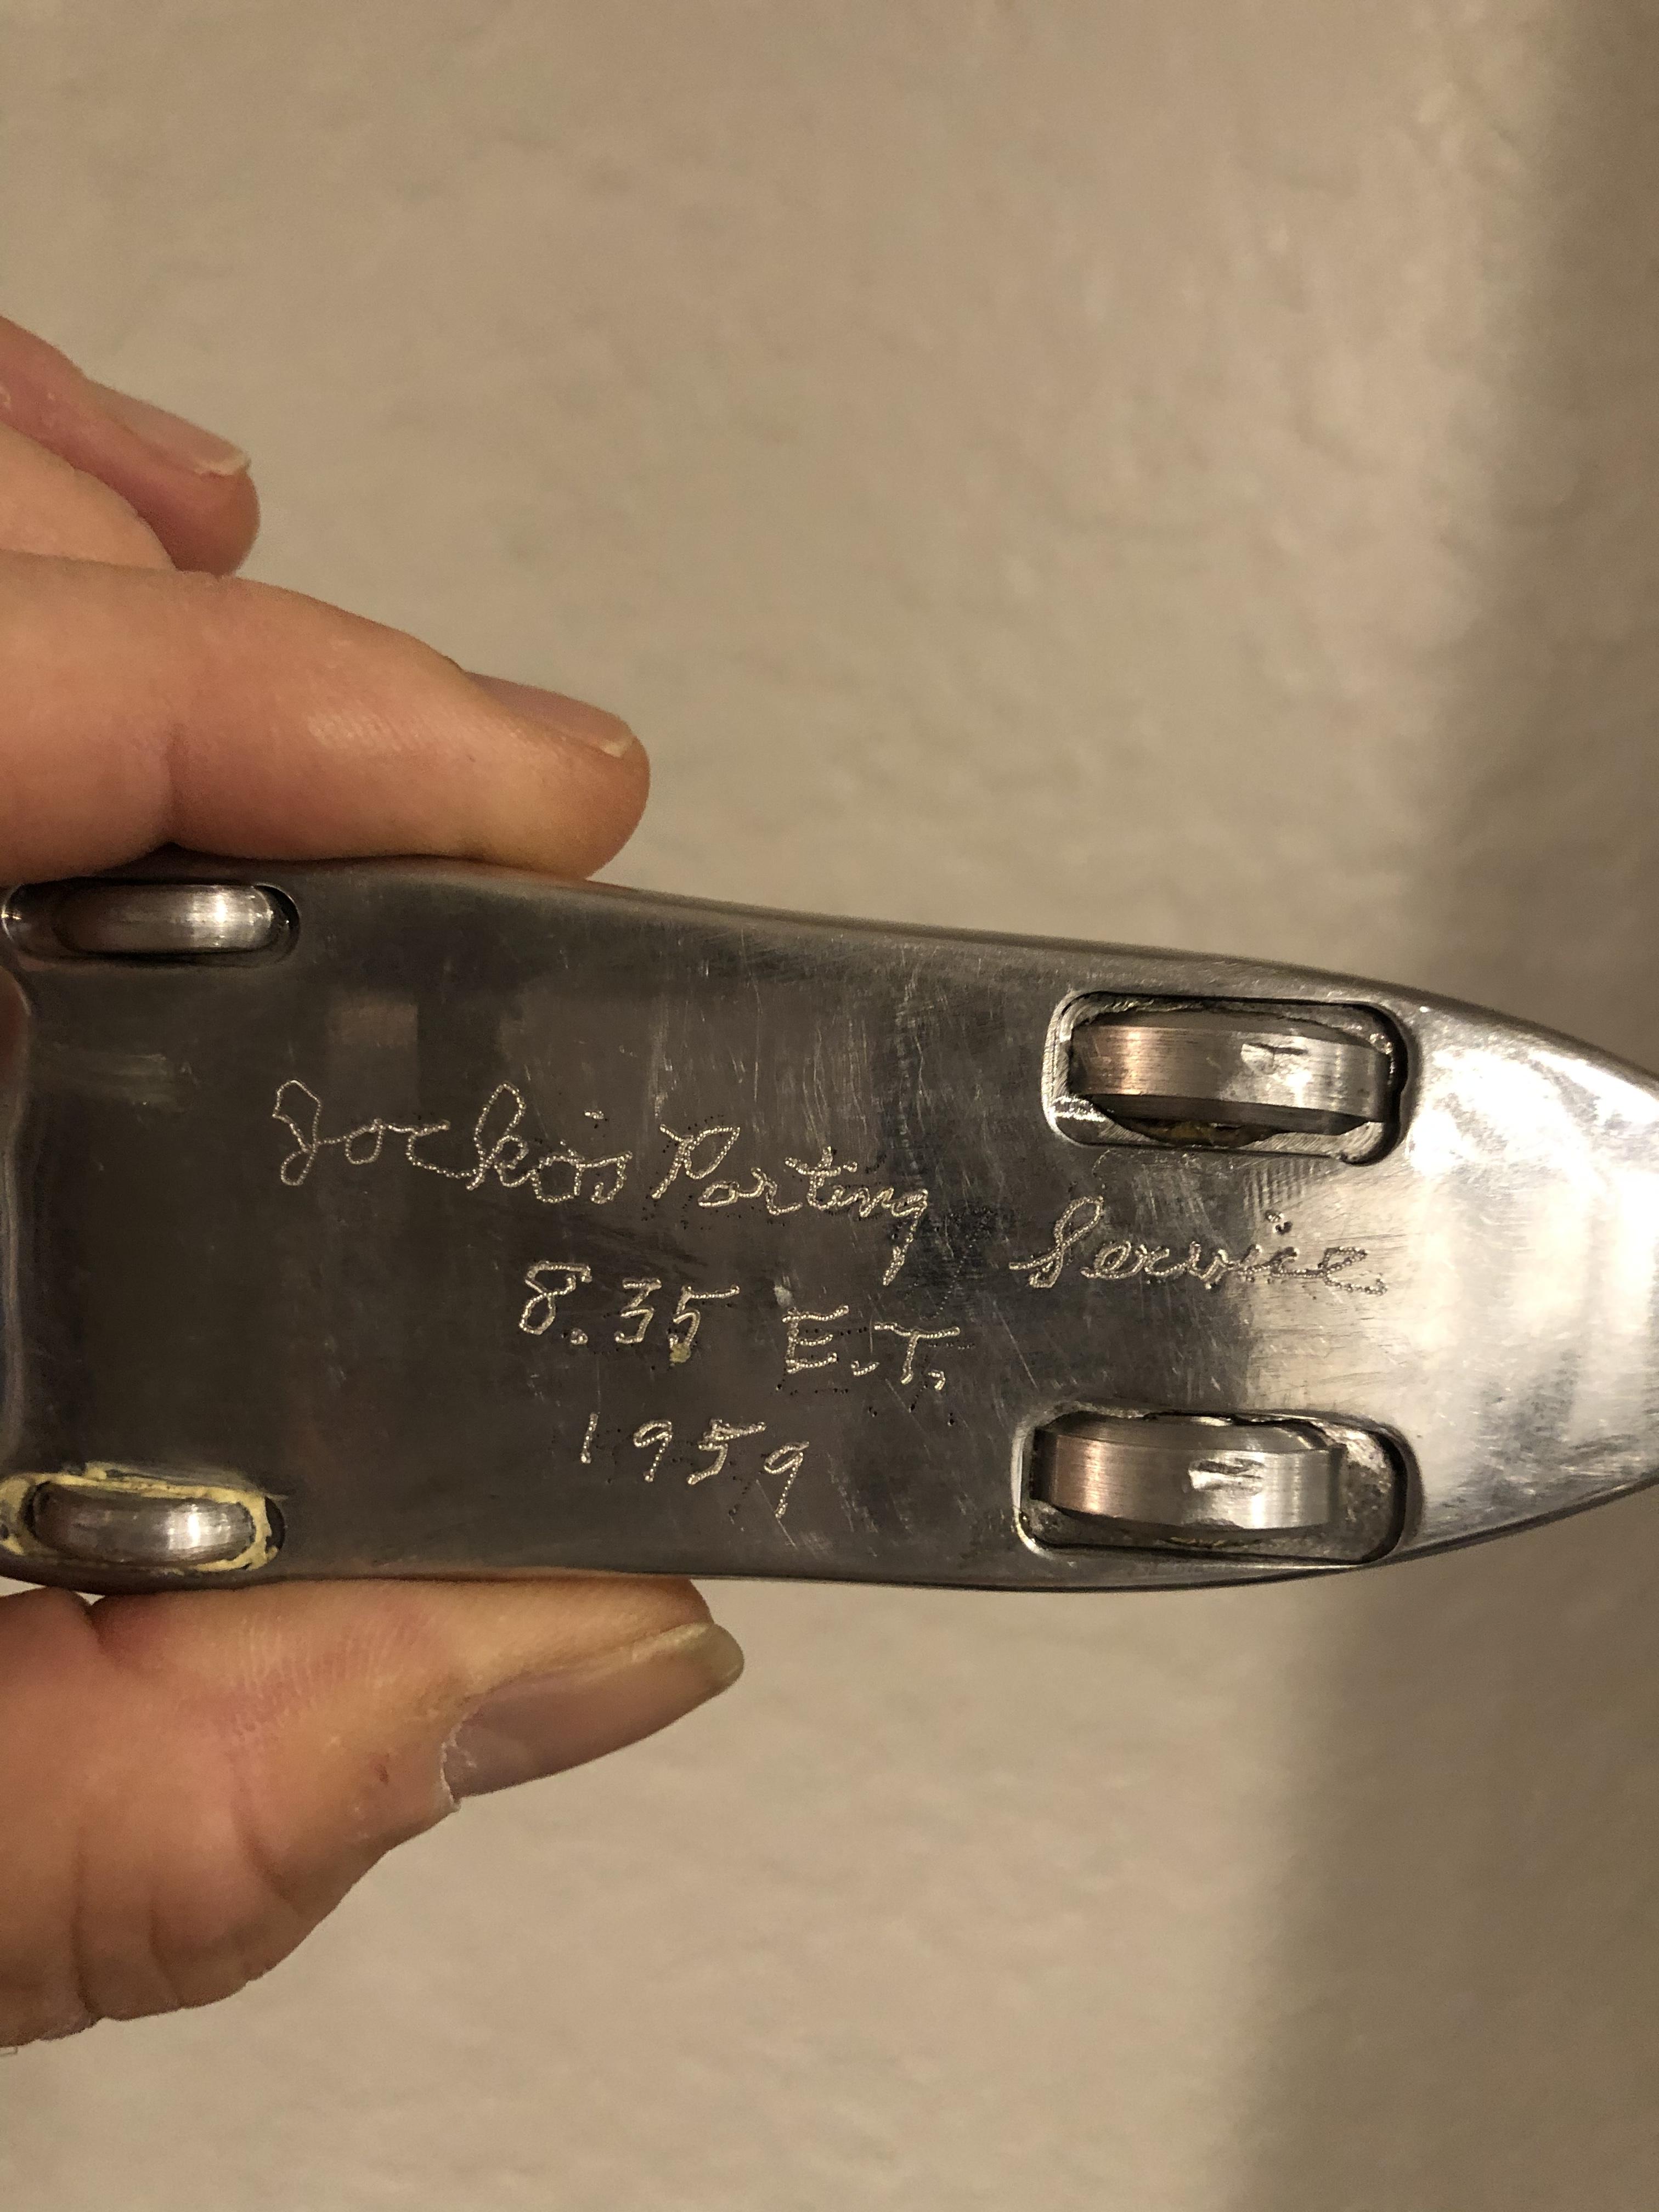
I finished this 20 or so years ago. It's been in the NHRA Motorsports Museum since completion. I visit it occasionally along with all the other great models and 1:1 stuff in residence there. It's pretty much out of the box with the exception of the roll bar (aluminum welding rod), and Roth inspired tall shifter with the skull knob (probably from the Lil Coffin). I bought those tires, actually cast in rubber, from a guy in New York named George something or other. They cost $75 and I had to call him a million times before I finally received them. I airbrushed the whitewalls in white primer and they have yellowed very authentically over the years. When I was hanging out with Jocko he showed me a 1/8 scale Deuce 3W plug he had carved out of hardwood for this same individual. I'd love to know what happened to that piece !!
-
Thank you Casey. OK to post something 1/8th scale in Under Glass then?
-
Tried to start new topic in Big Boyz but when I opened the select forum pull down it is ghosted. Suggestions?
-
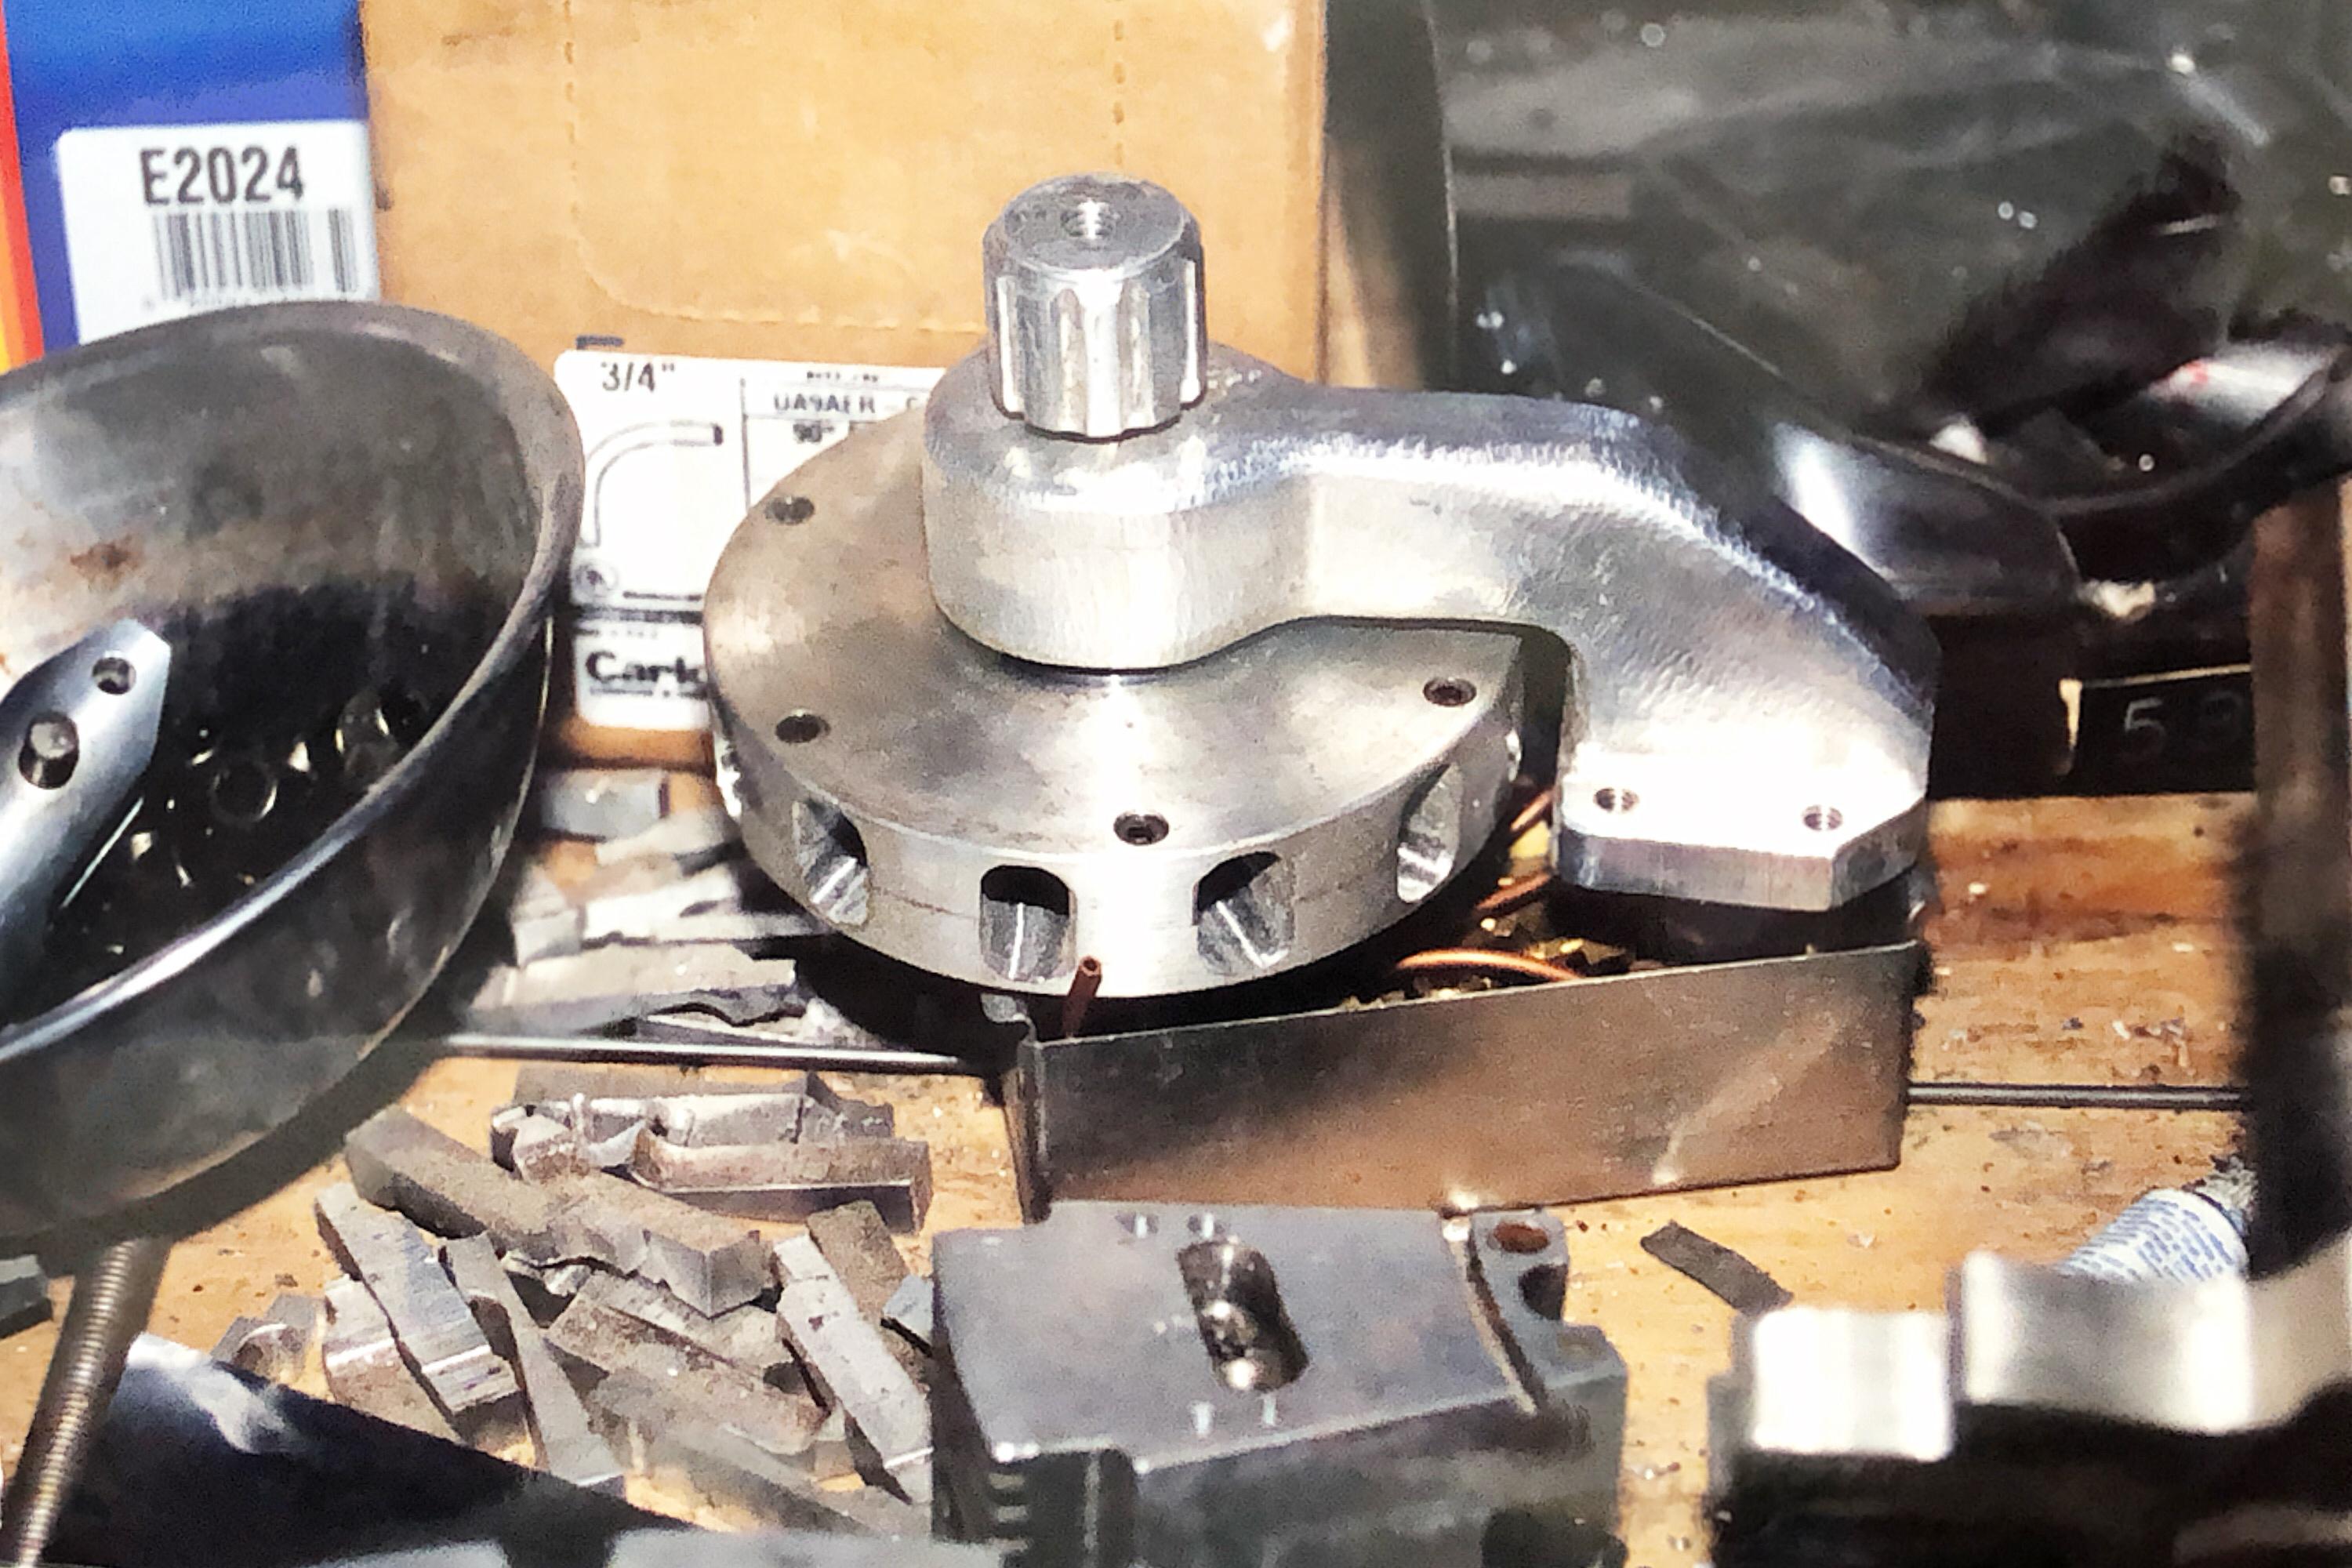
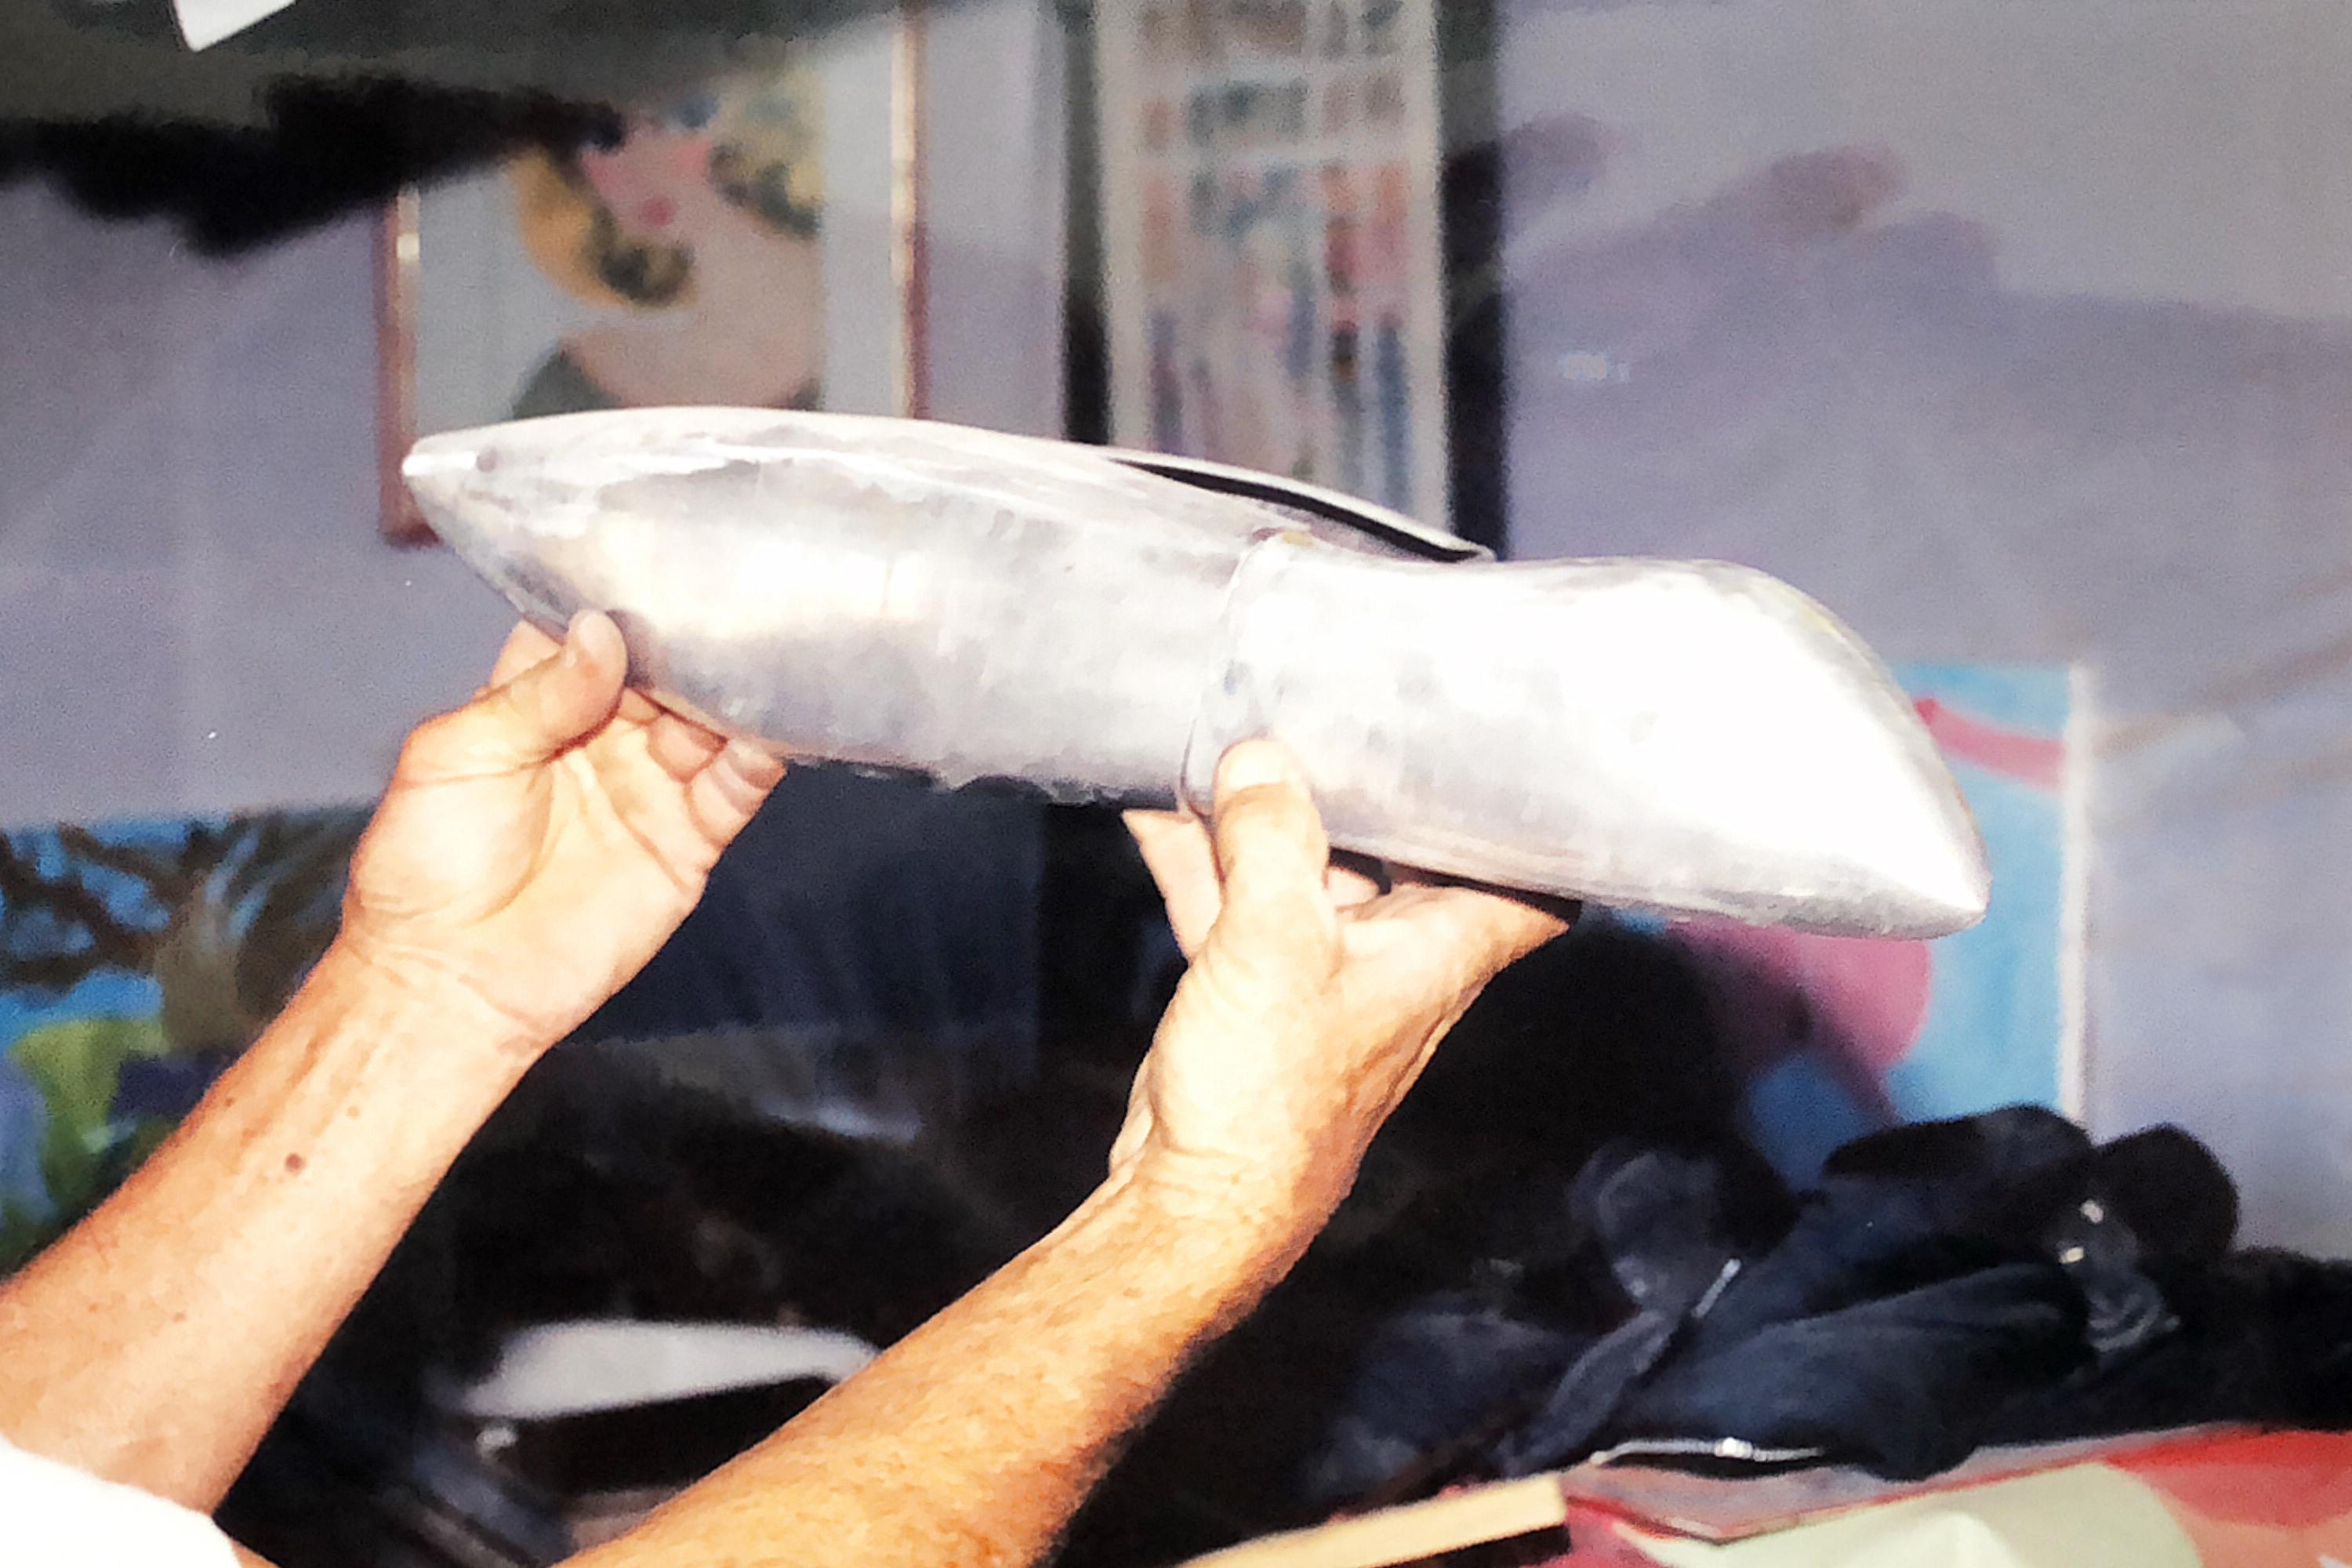
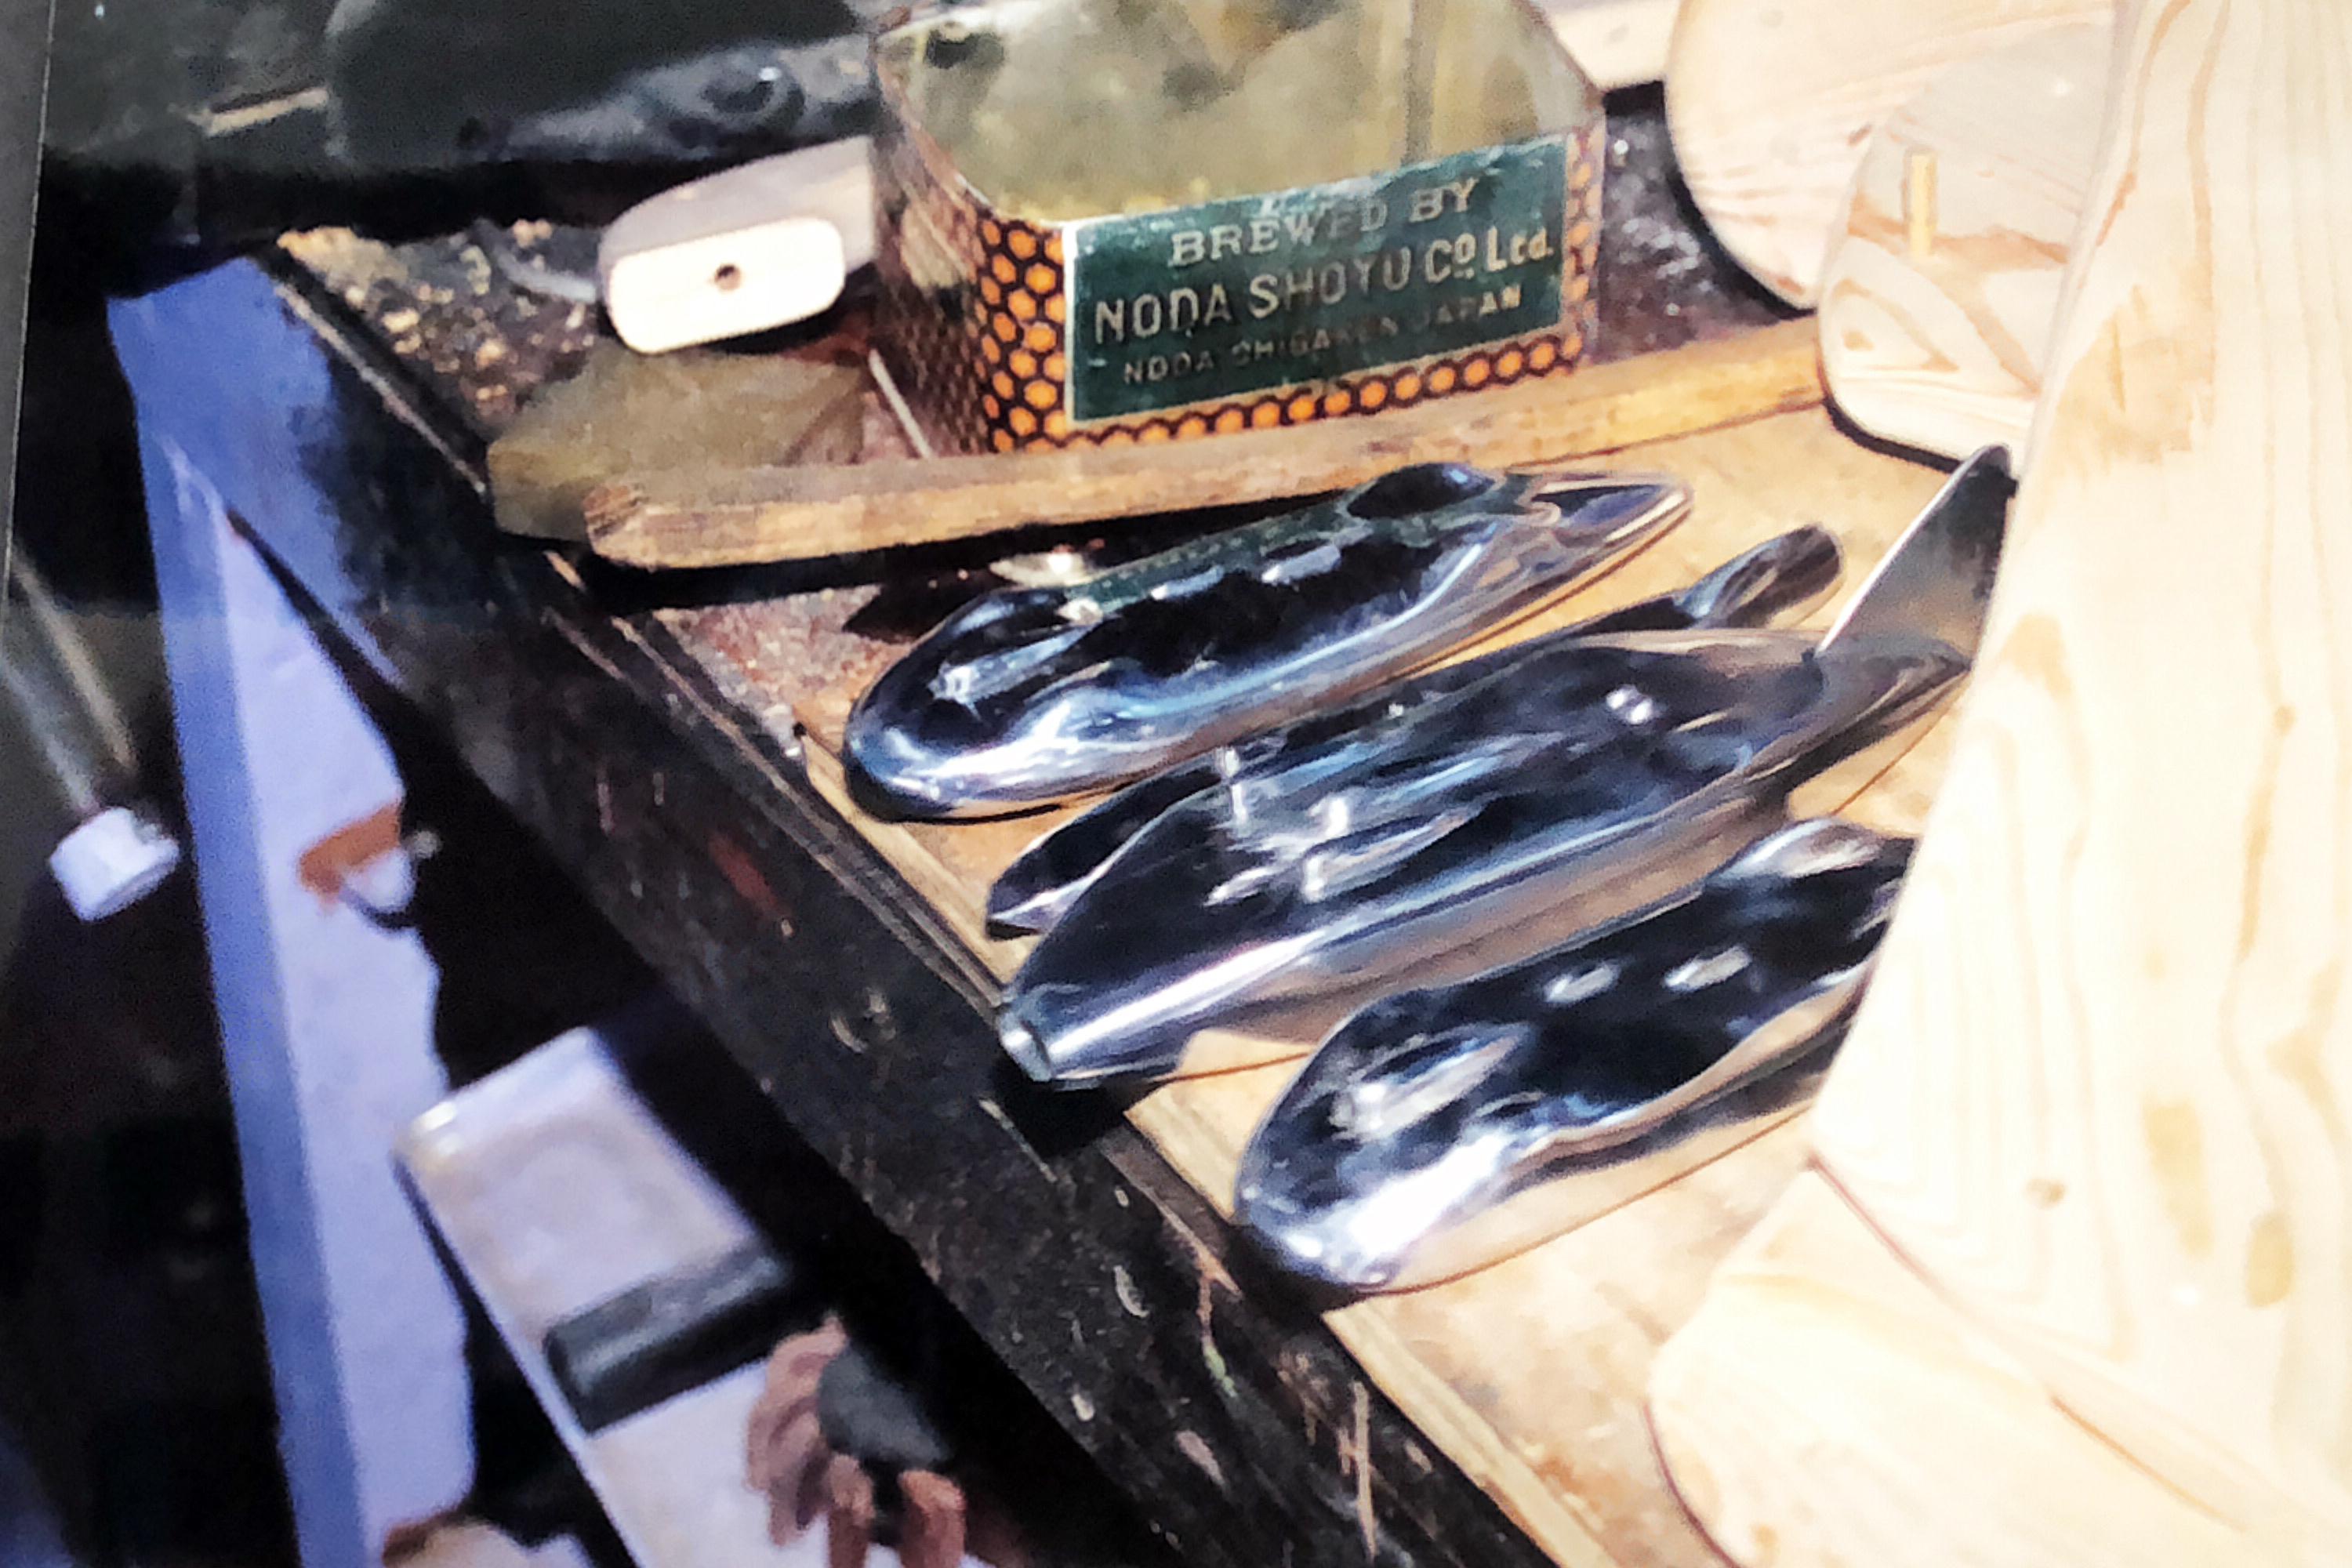
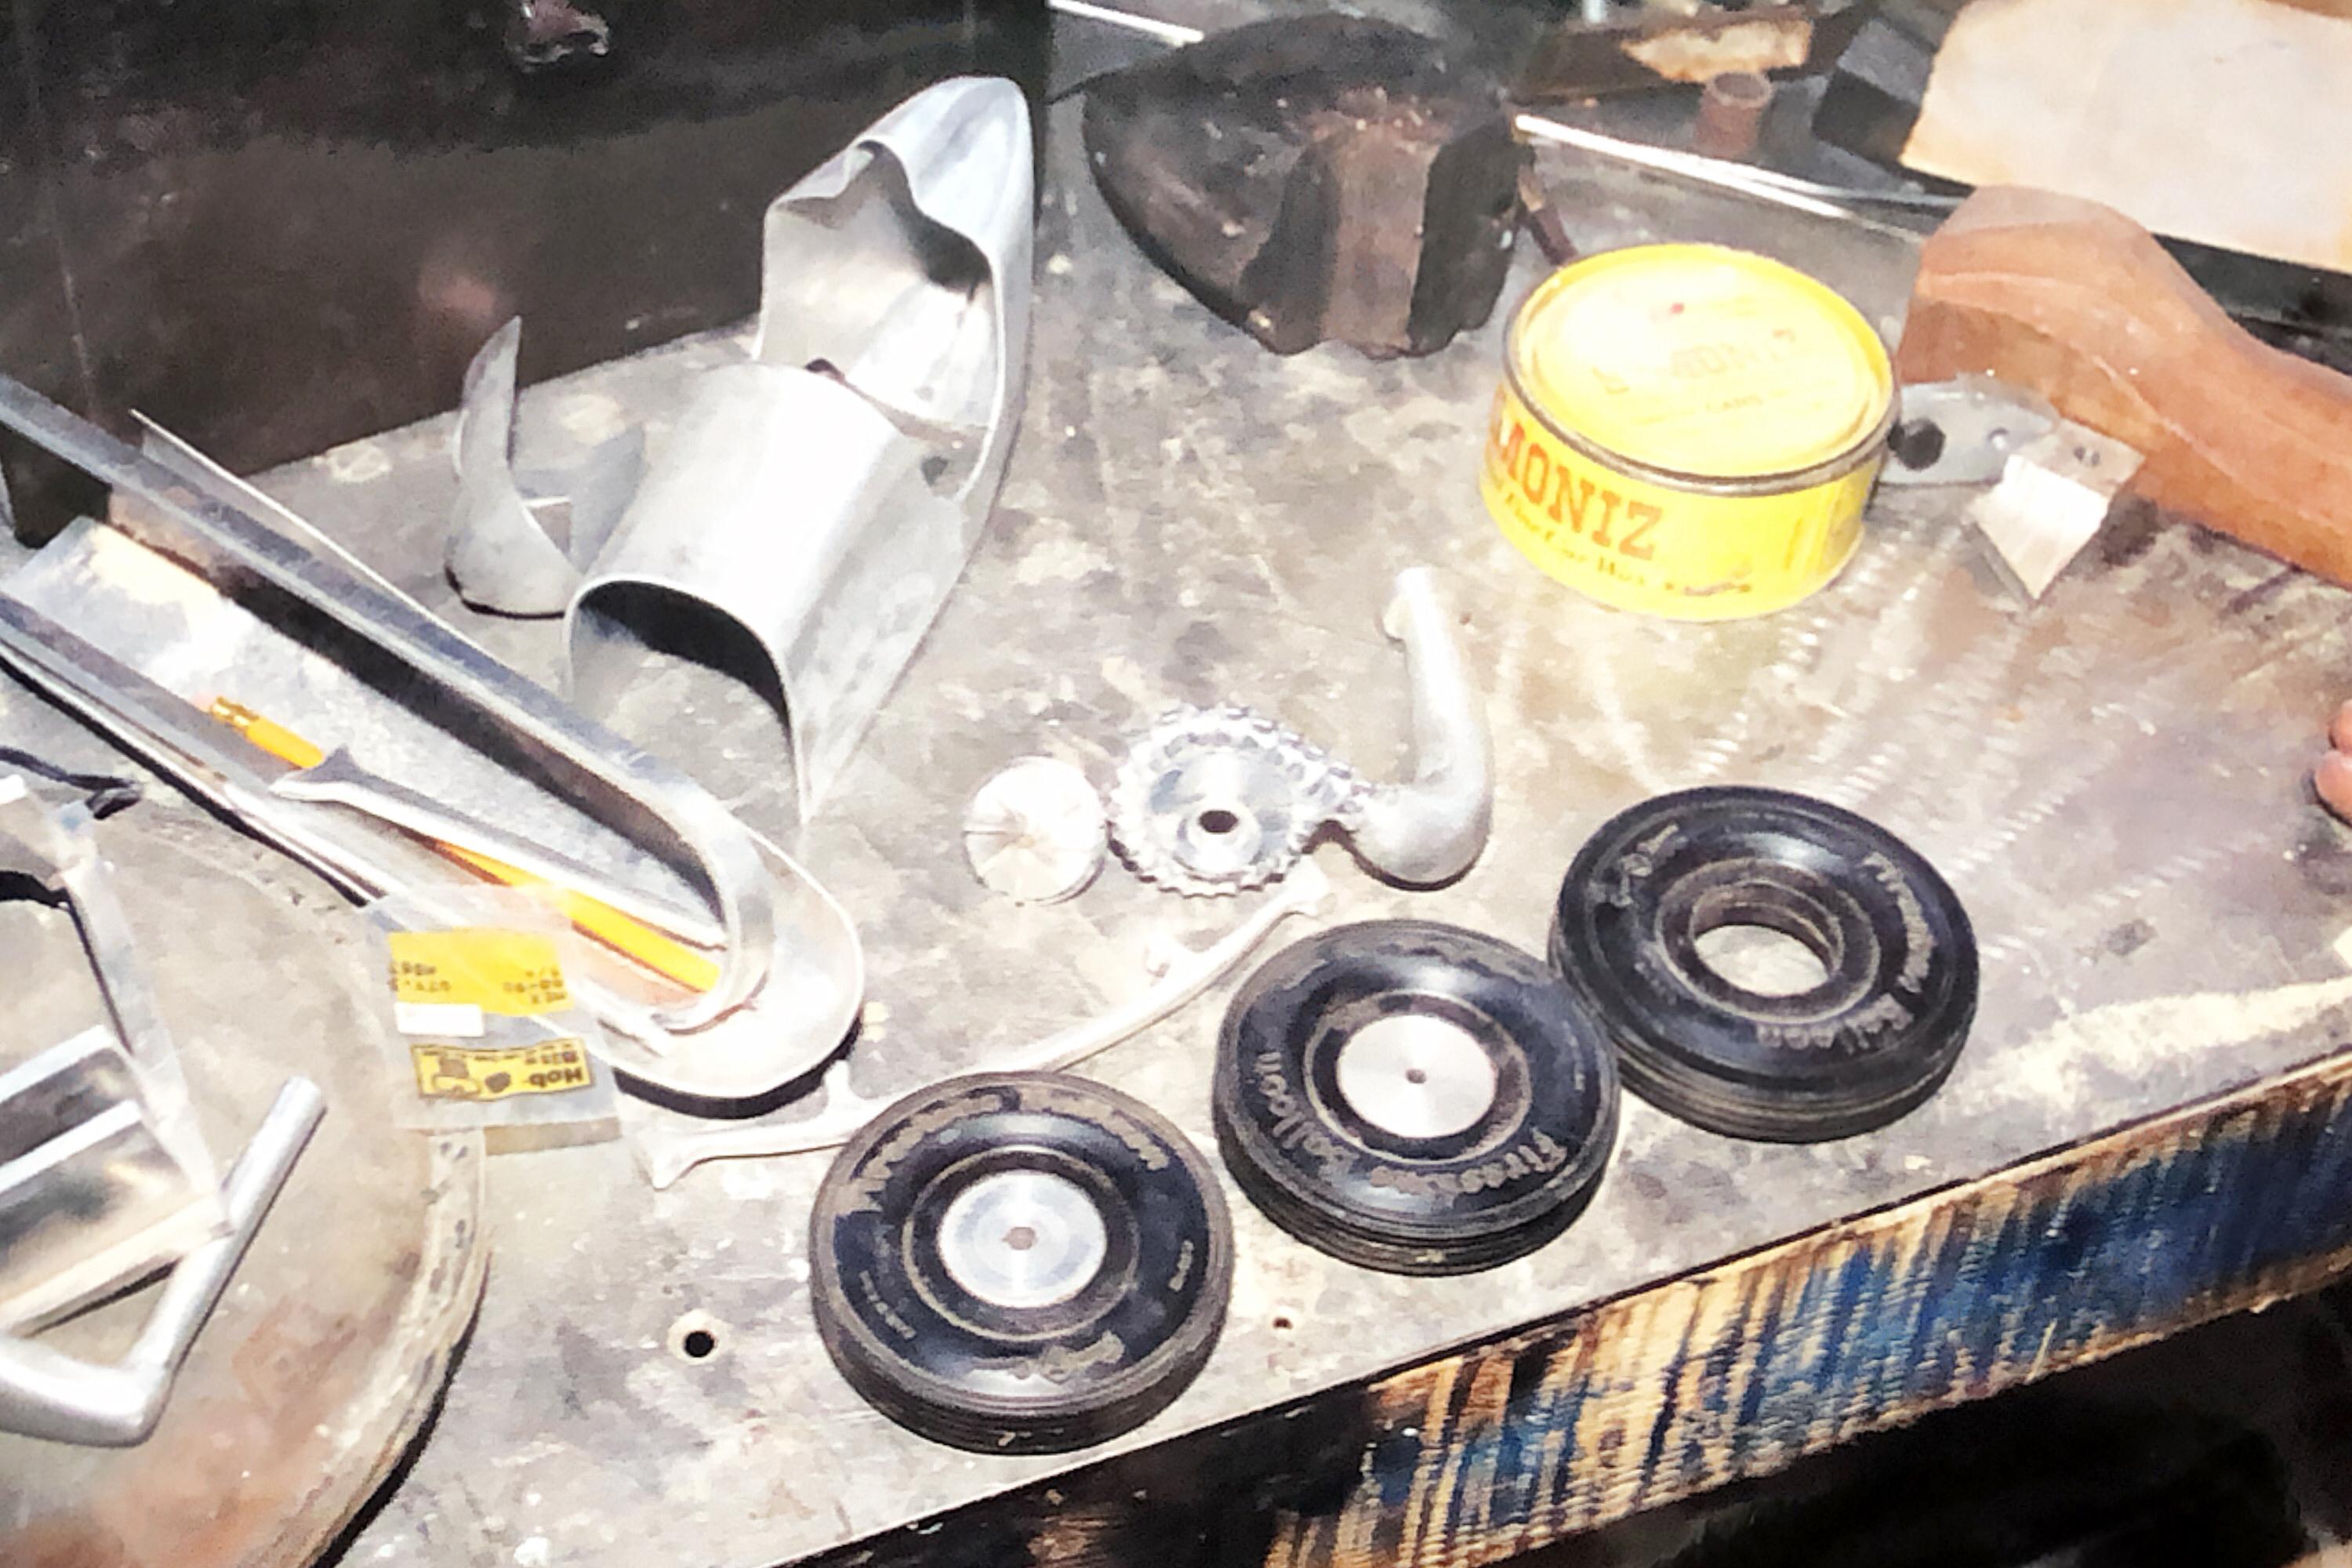
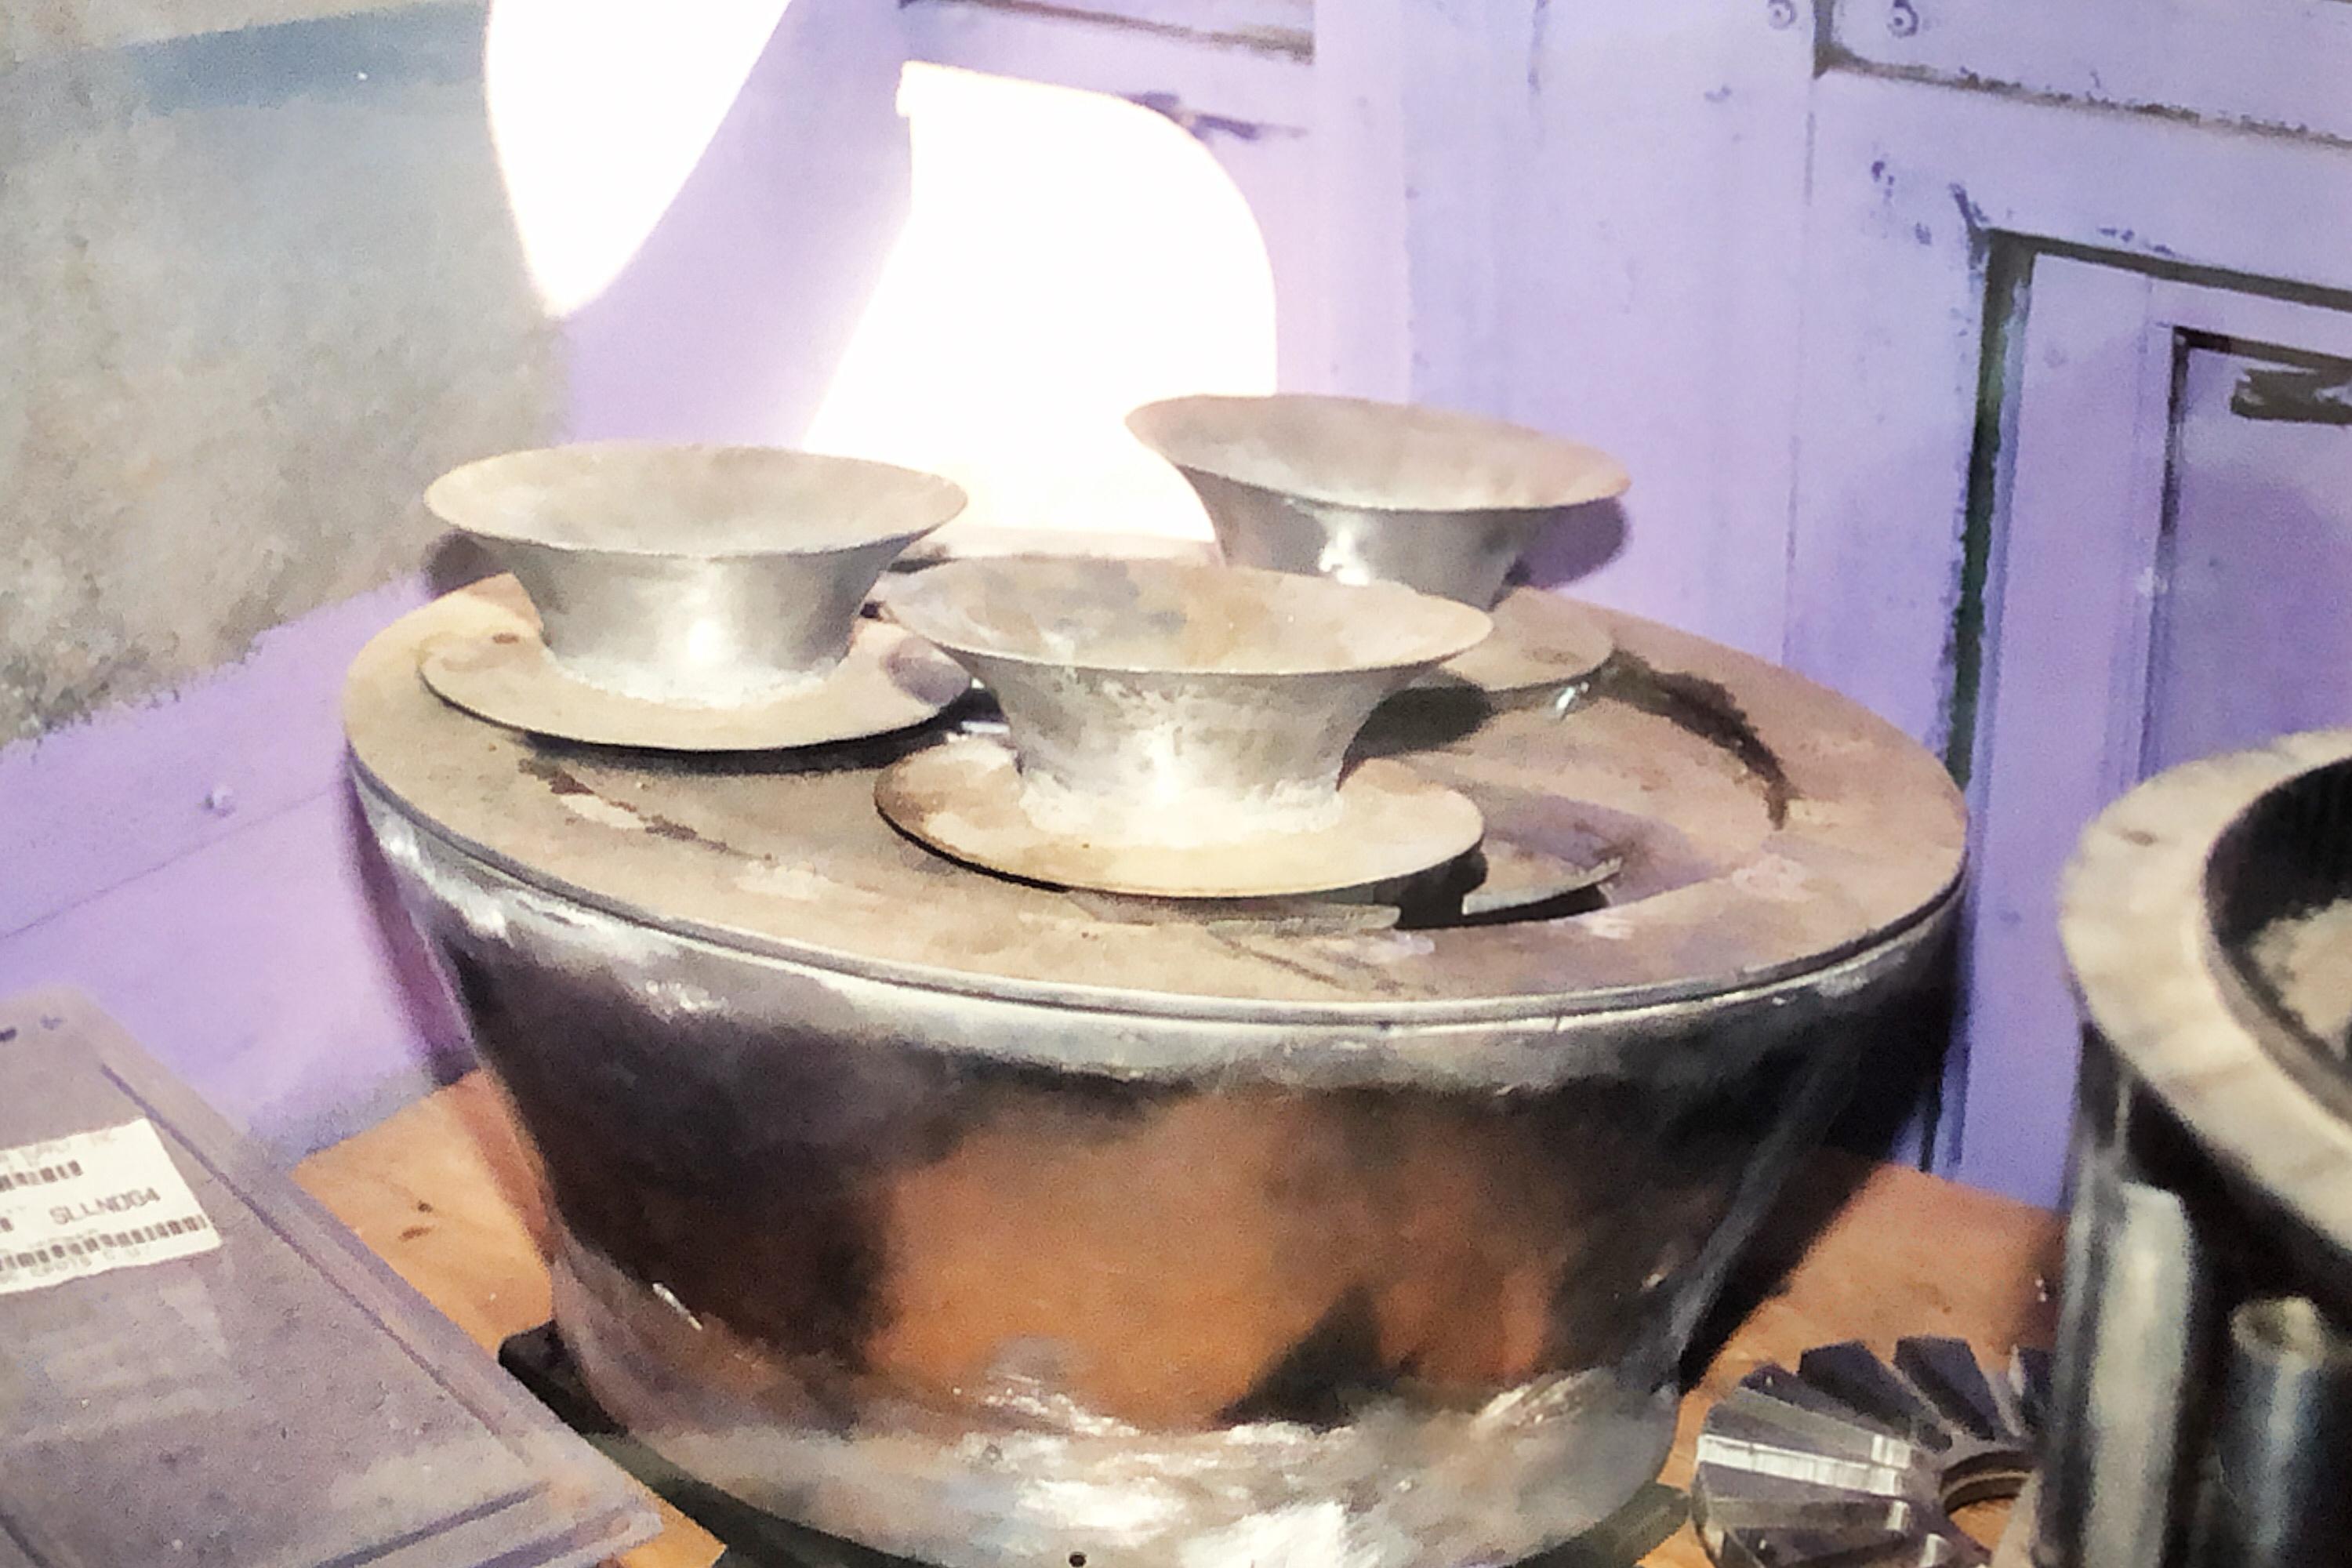
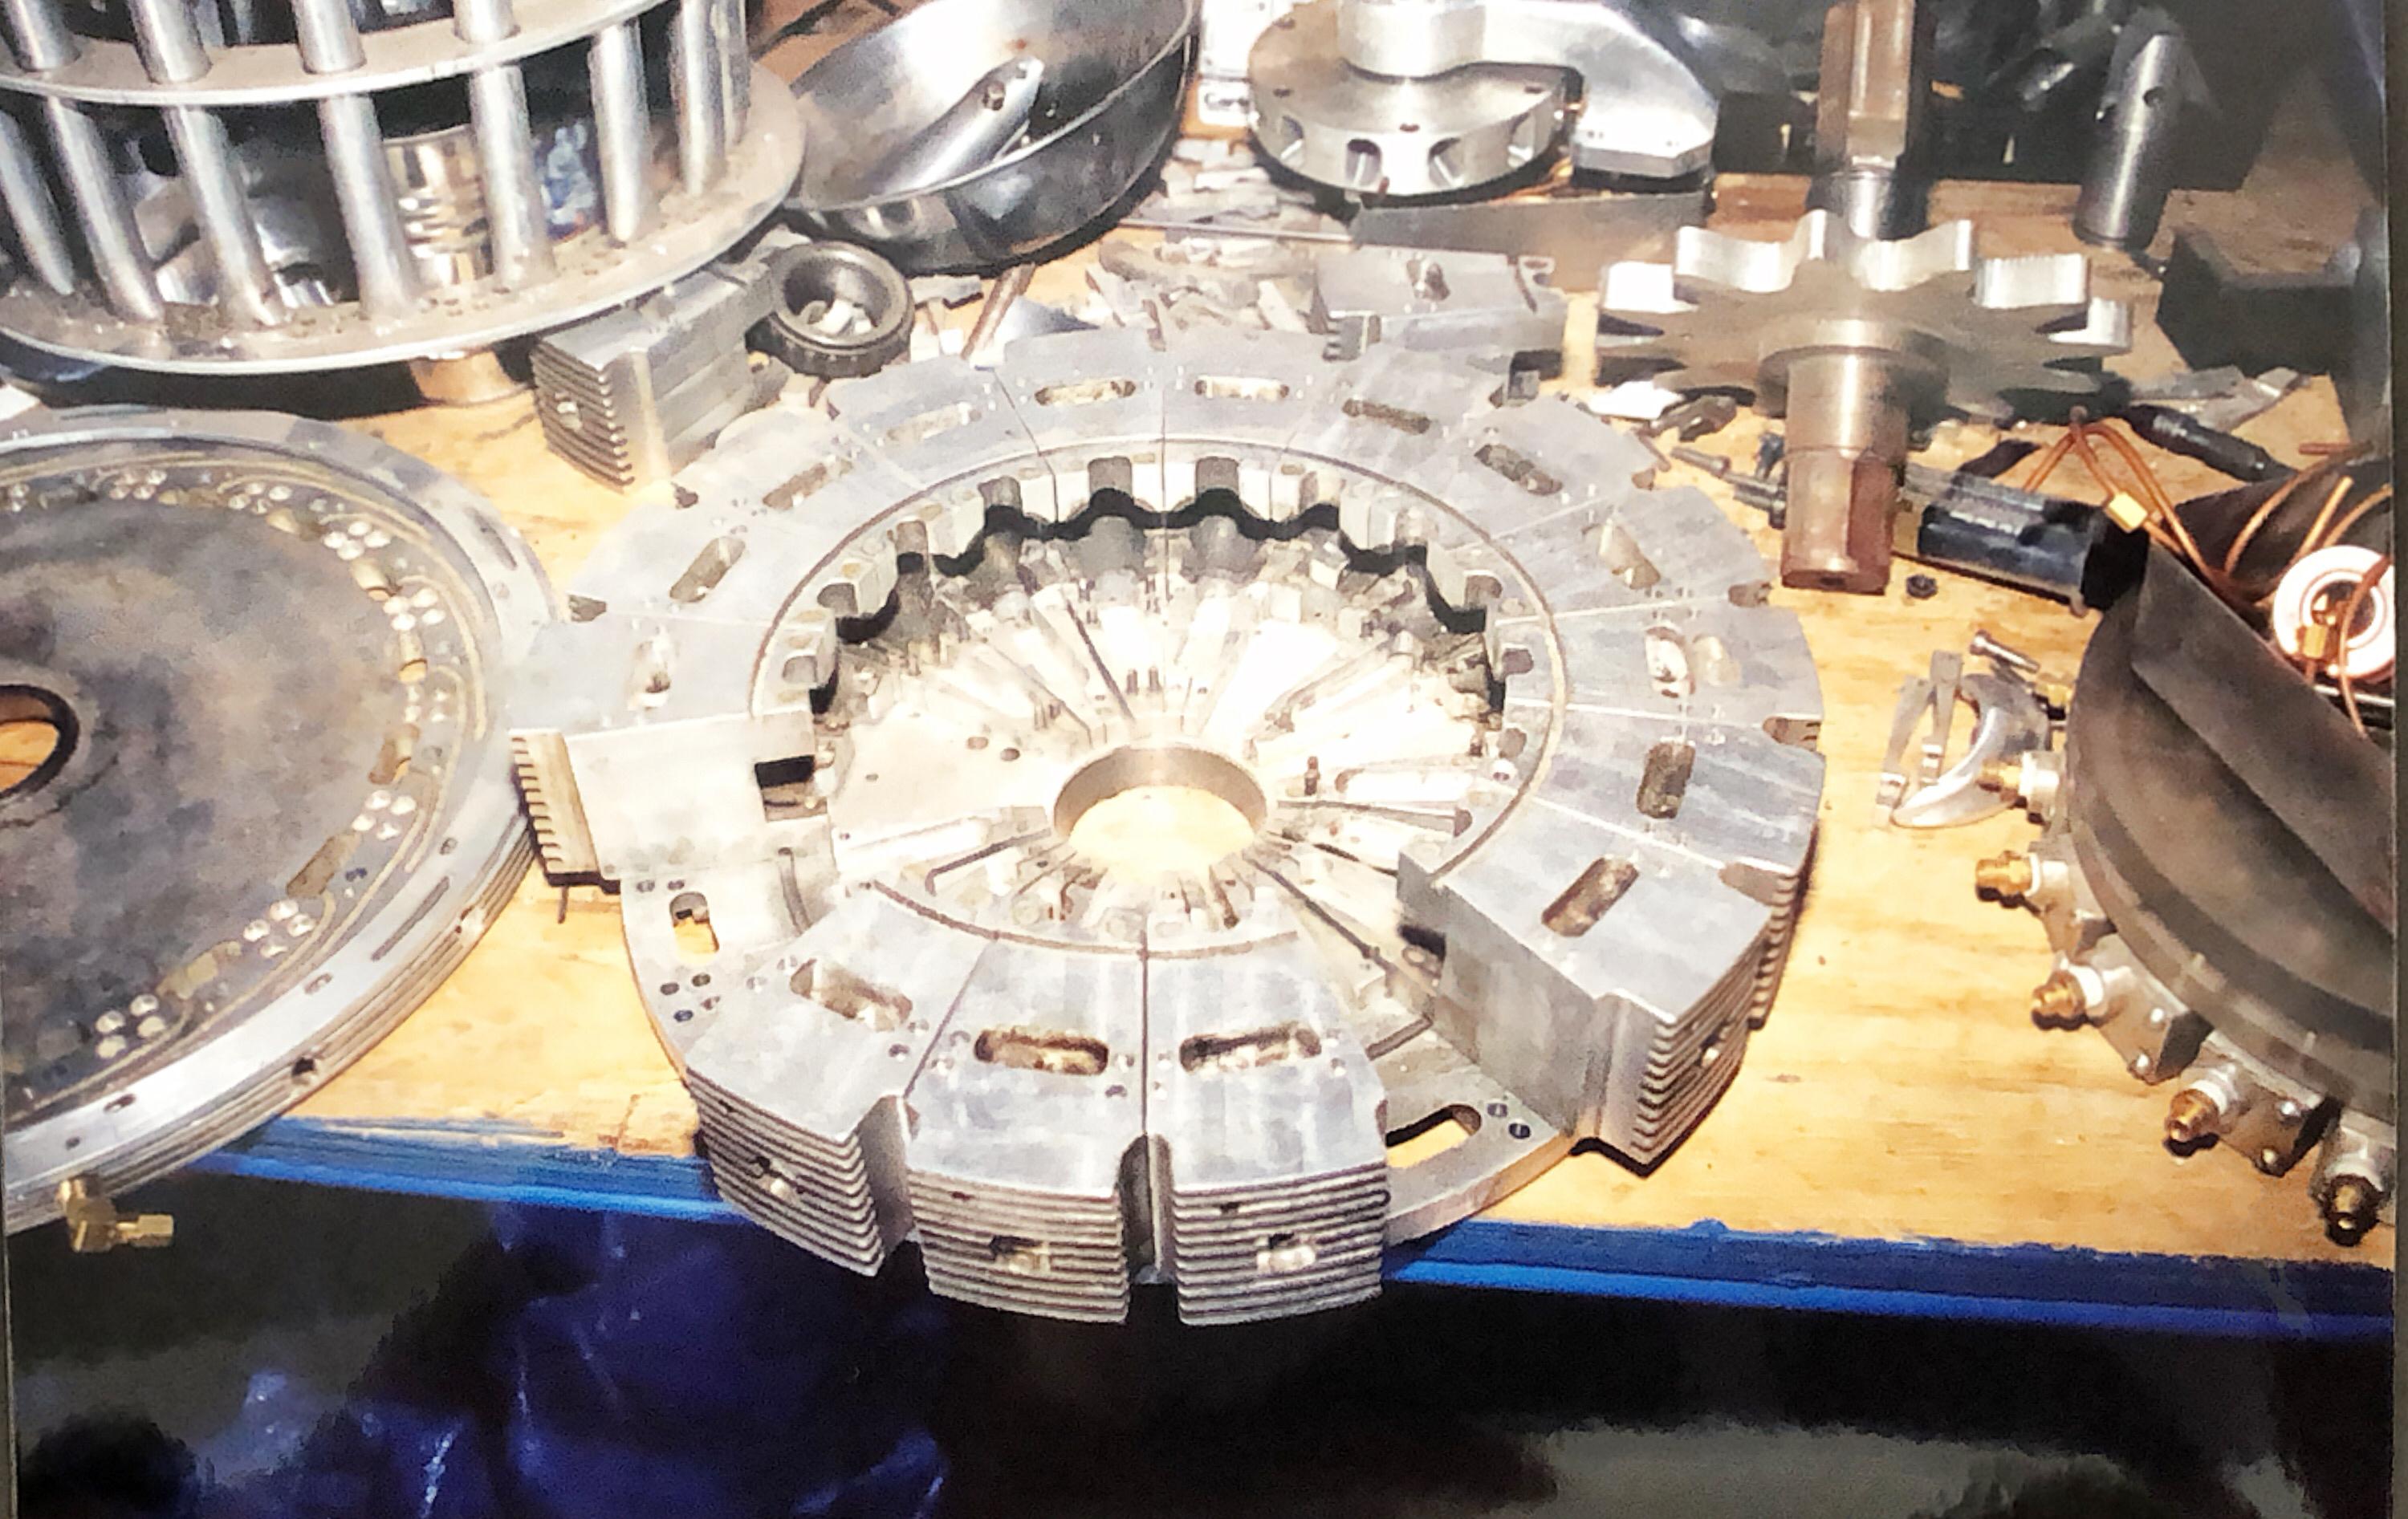
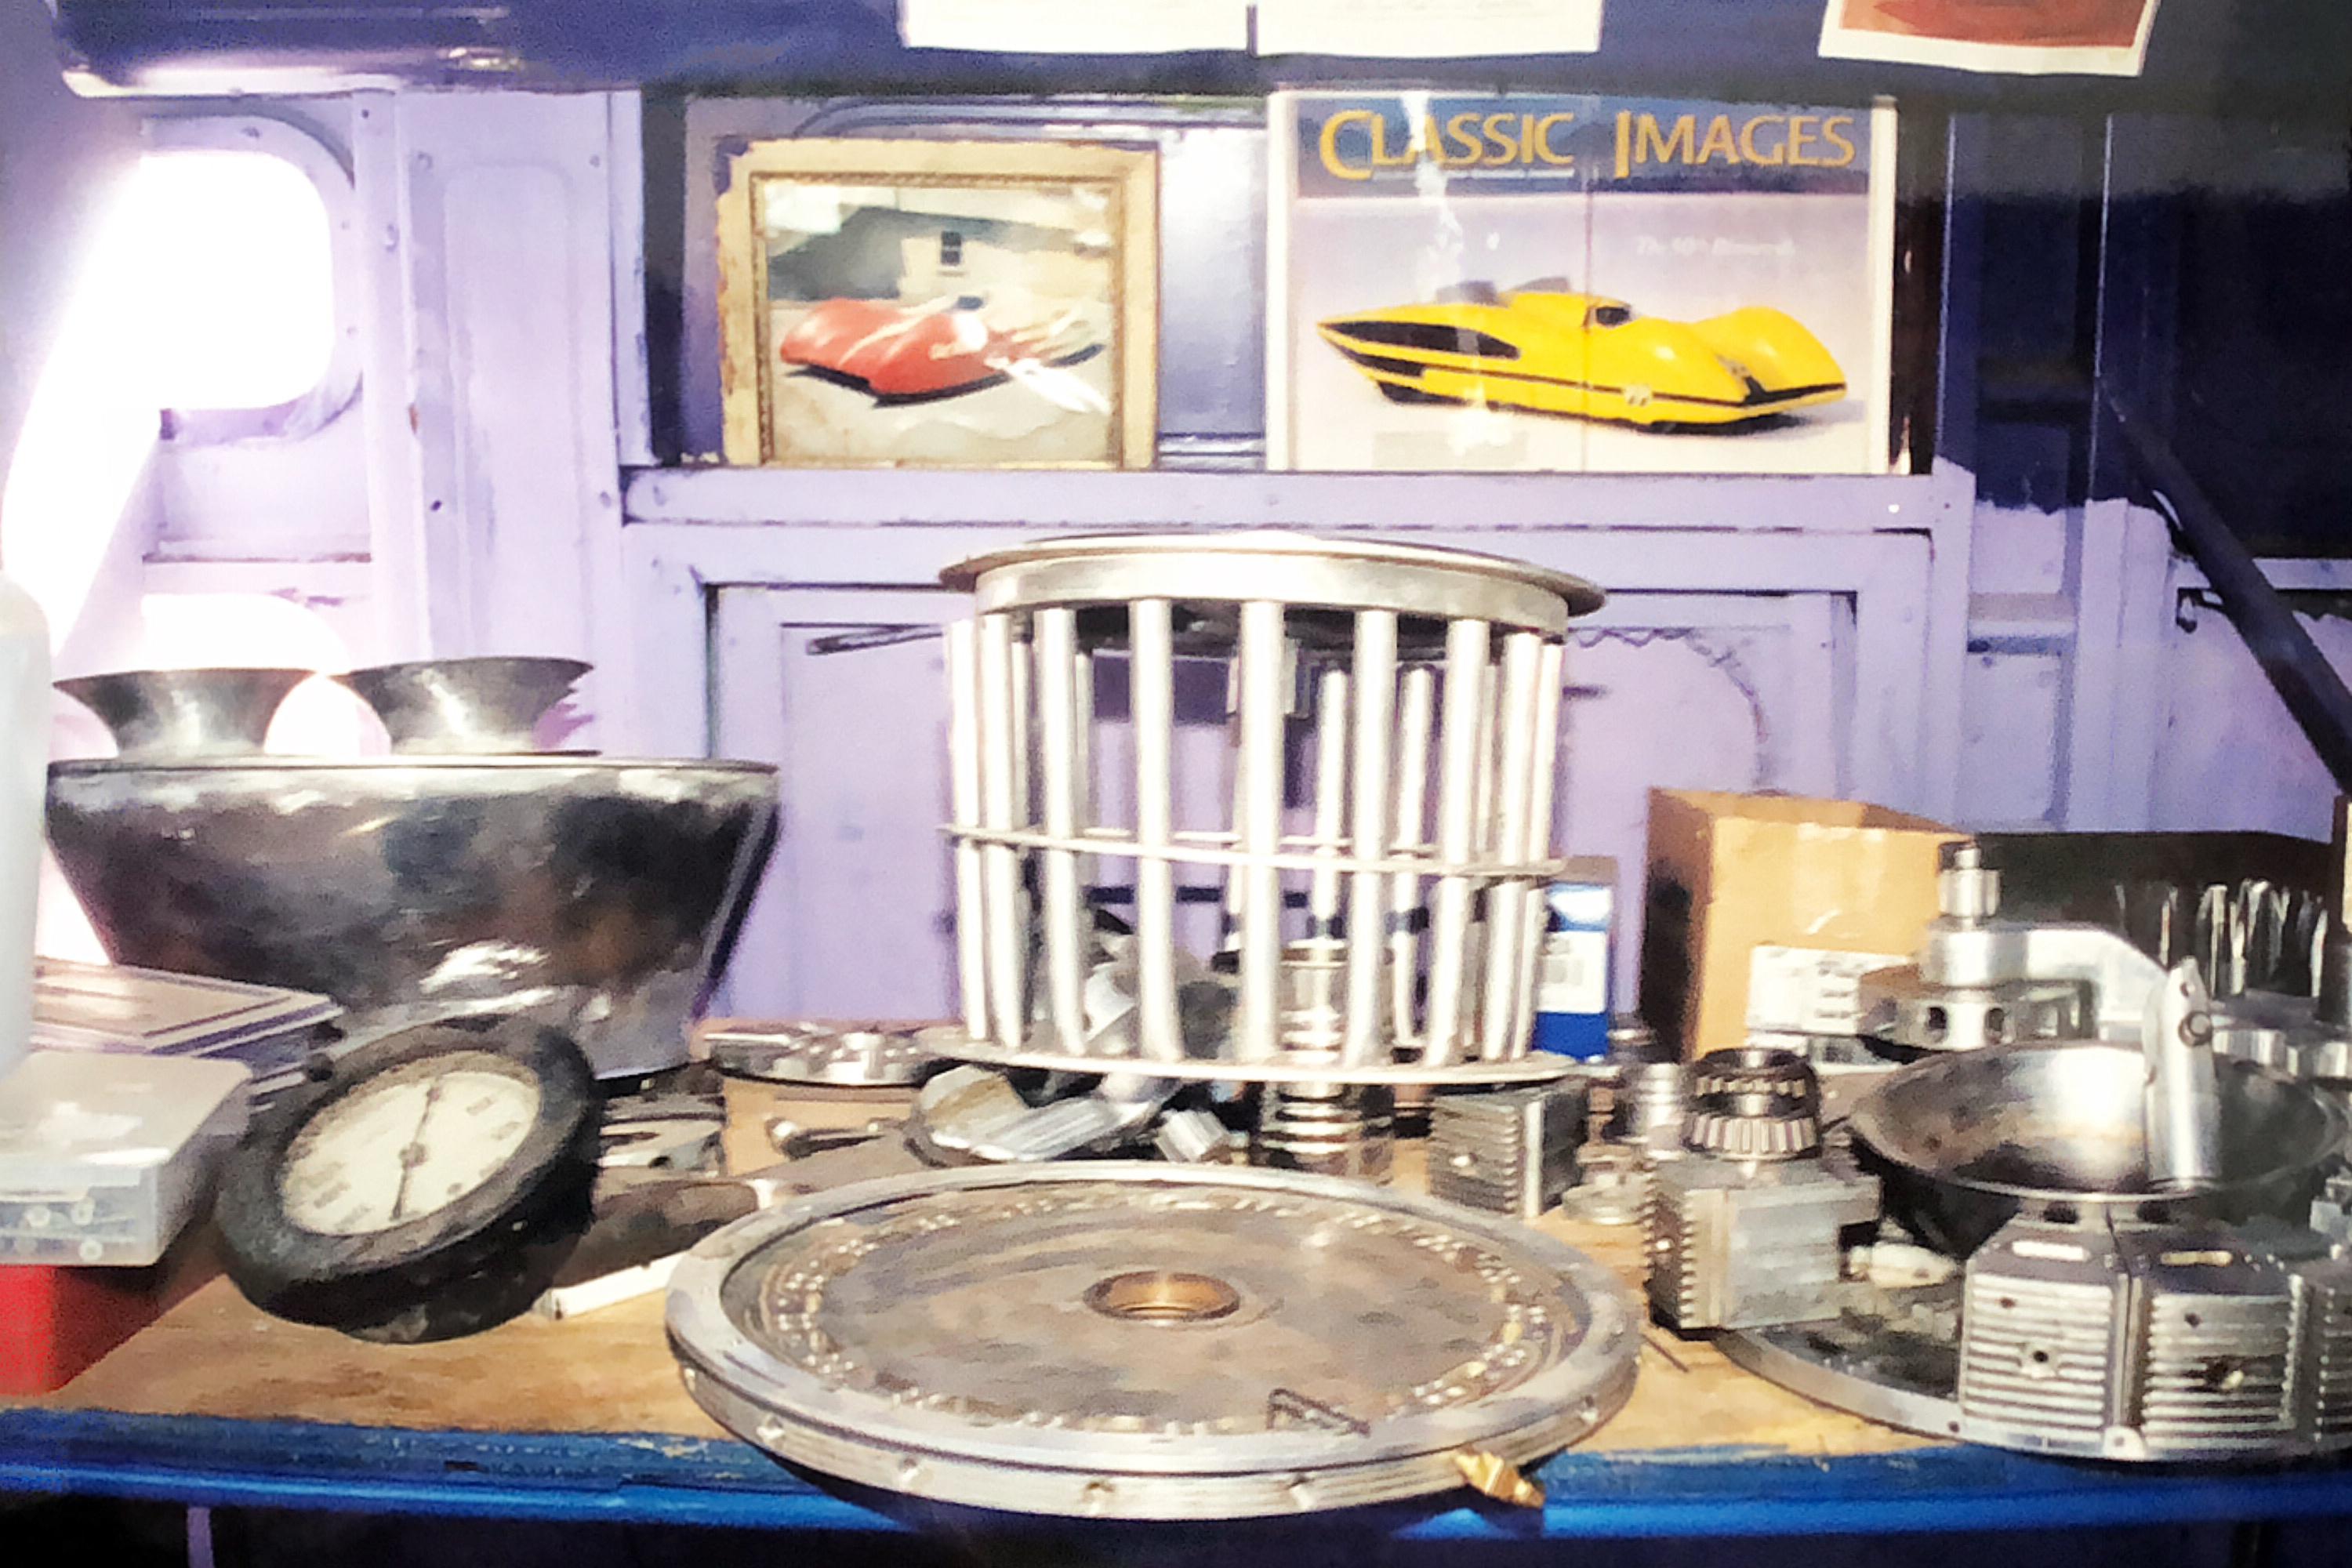
I found some additional Jocko images: These are all formed from sheet aluminum. Jocko had some really tiny English wheels he had fabricated from hand tools (like vice grips for example). He would hammer the various sections from annealed aluminum sheet, planish out the hammer marks with the English wheel, and weld everything together with an oxyacetylene torch. He had half of a pair of cobalt blue goggles he used for this purpose. Here we see two versions of the Railton special, the Thunderbolt and hiding behind the Thunderbolt, the Goldenrod. Incredible models all!! Another 8.35 liner model under construction Jocko's tether cars are amazing. Here we can see the supercharger housing and rotor as well as several body parts This is the crankcase for the PoweRRing 3 cycle motor. PoweRRing intake manifold. More PoweRRing components More PoweRRing stuff. A Beetle roadster Jocko was building for some rock star client. Jocko was a very productive creative genius with many projects going at any given time. He was also a big healthy looking guy. I was really shocked by his premature demise. RIP.
-
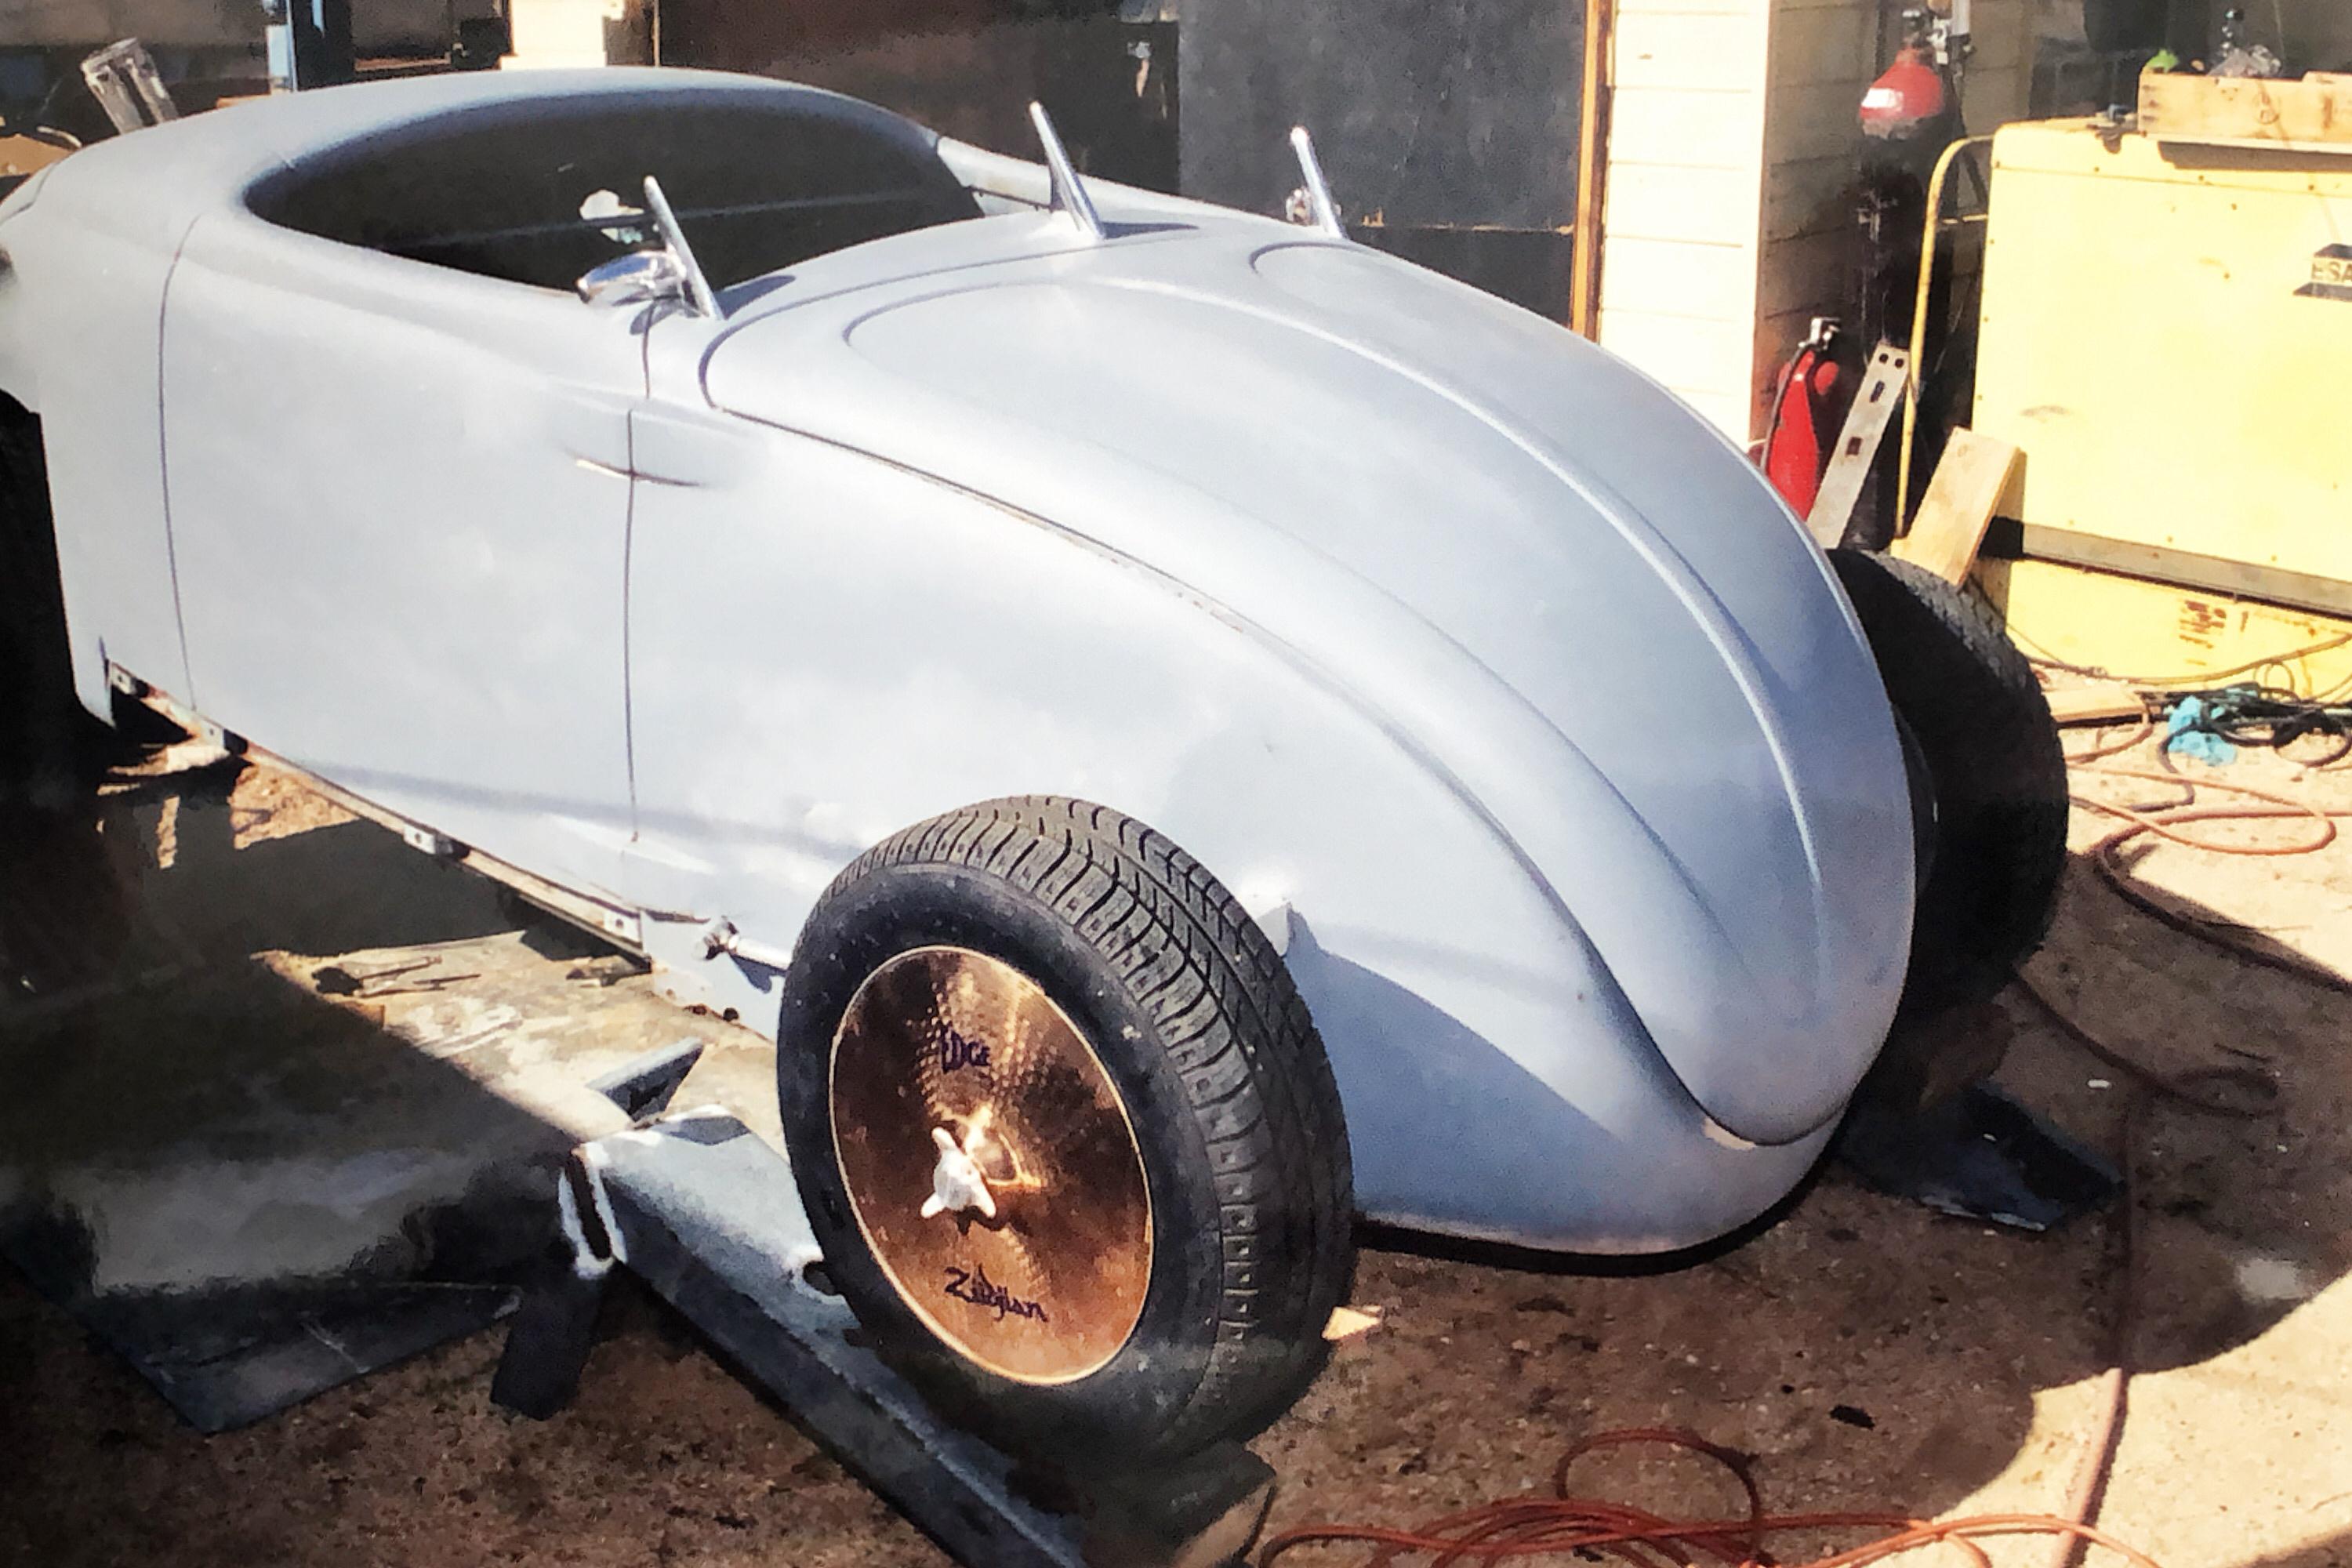
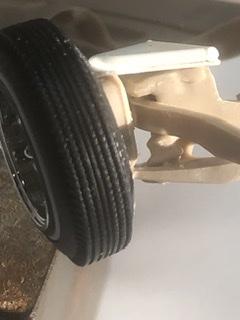
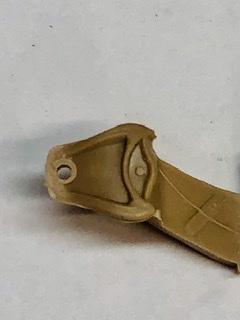
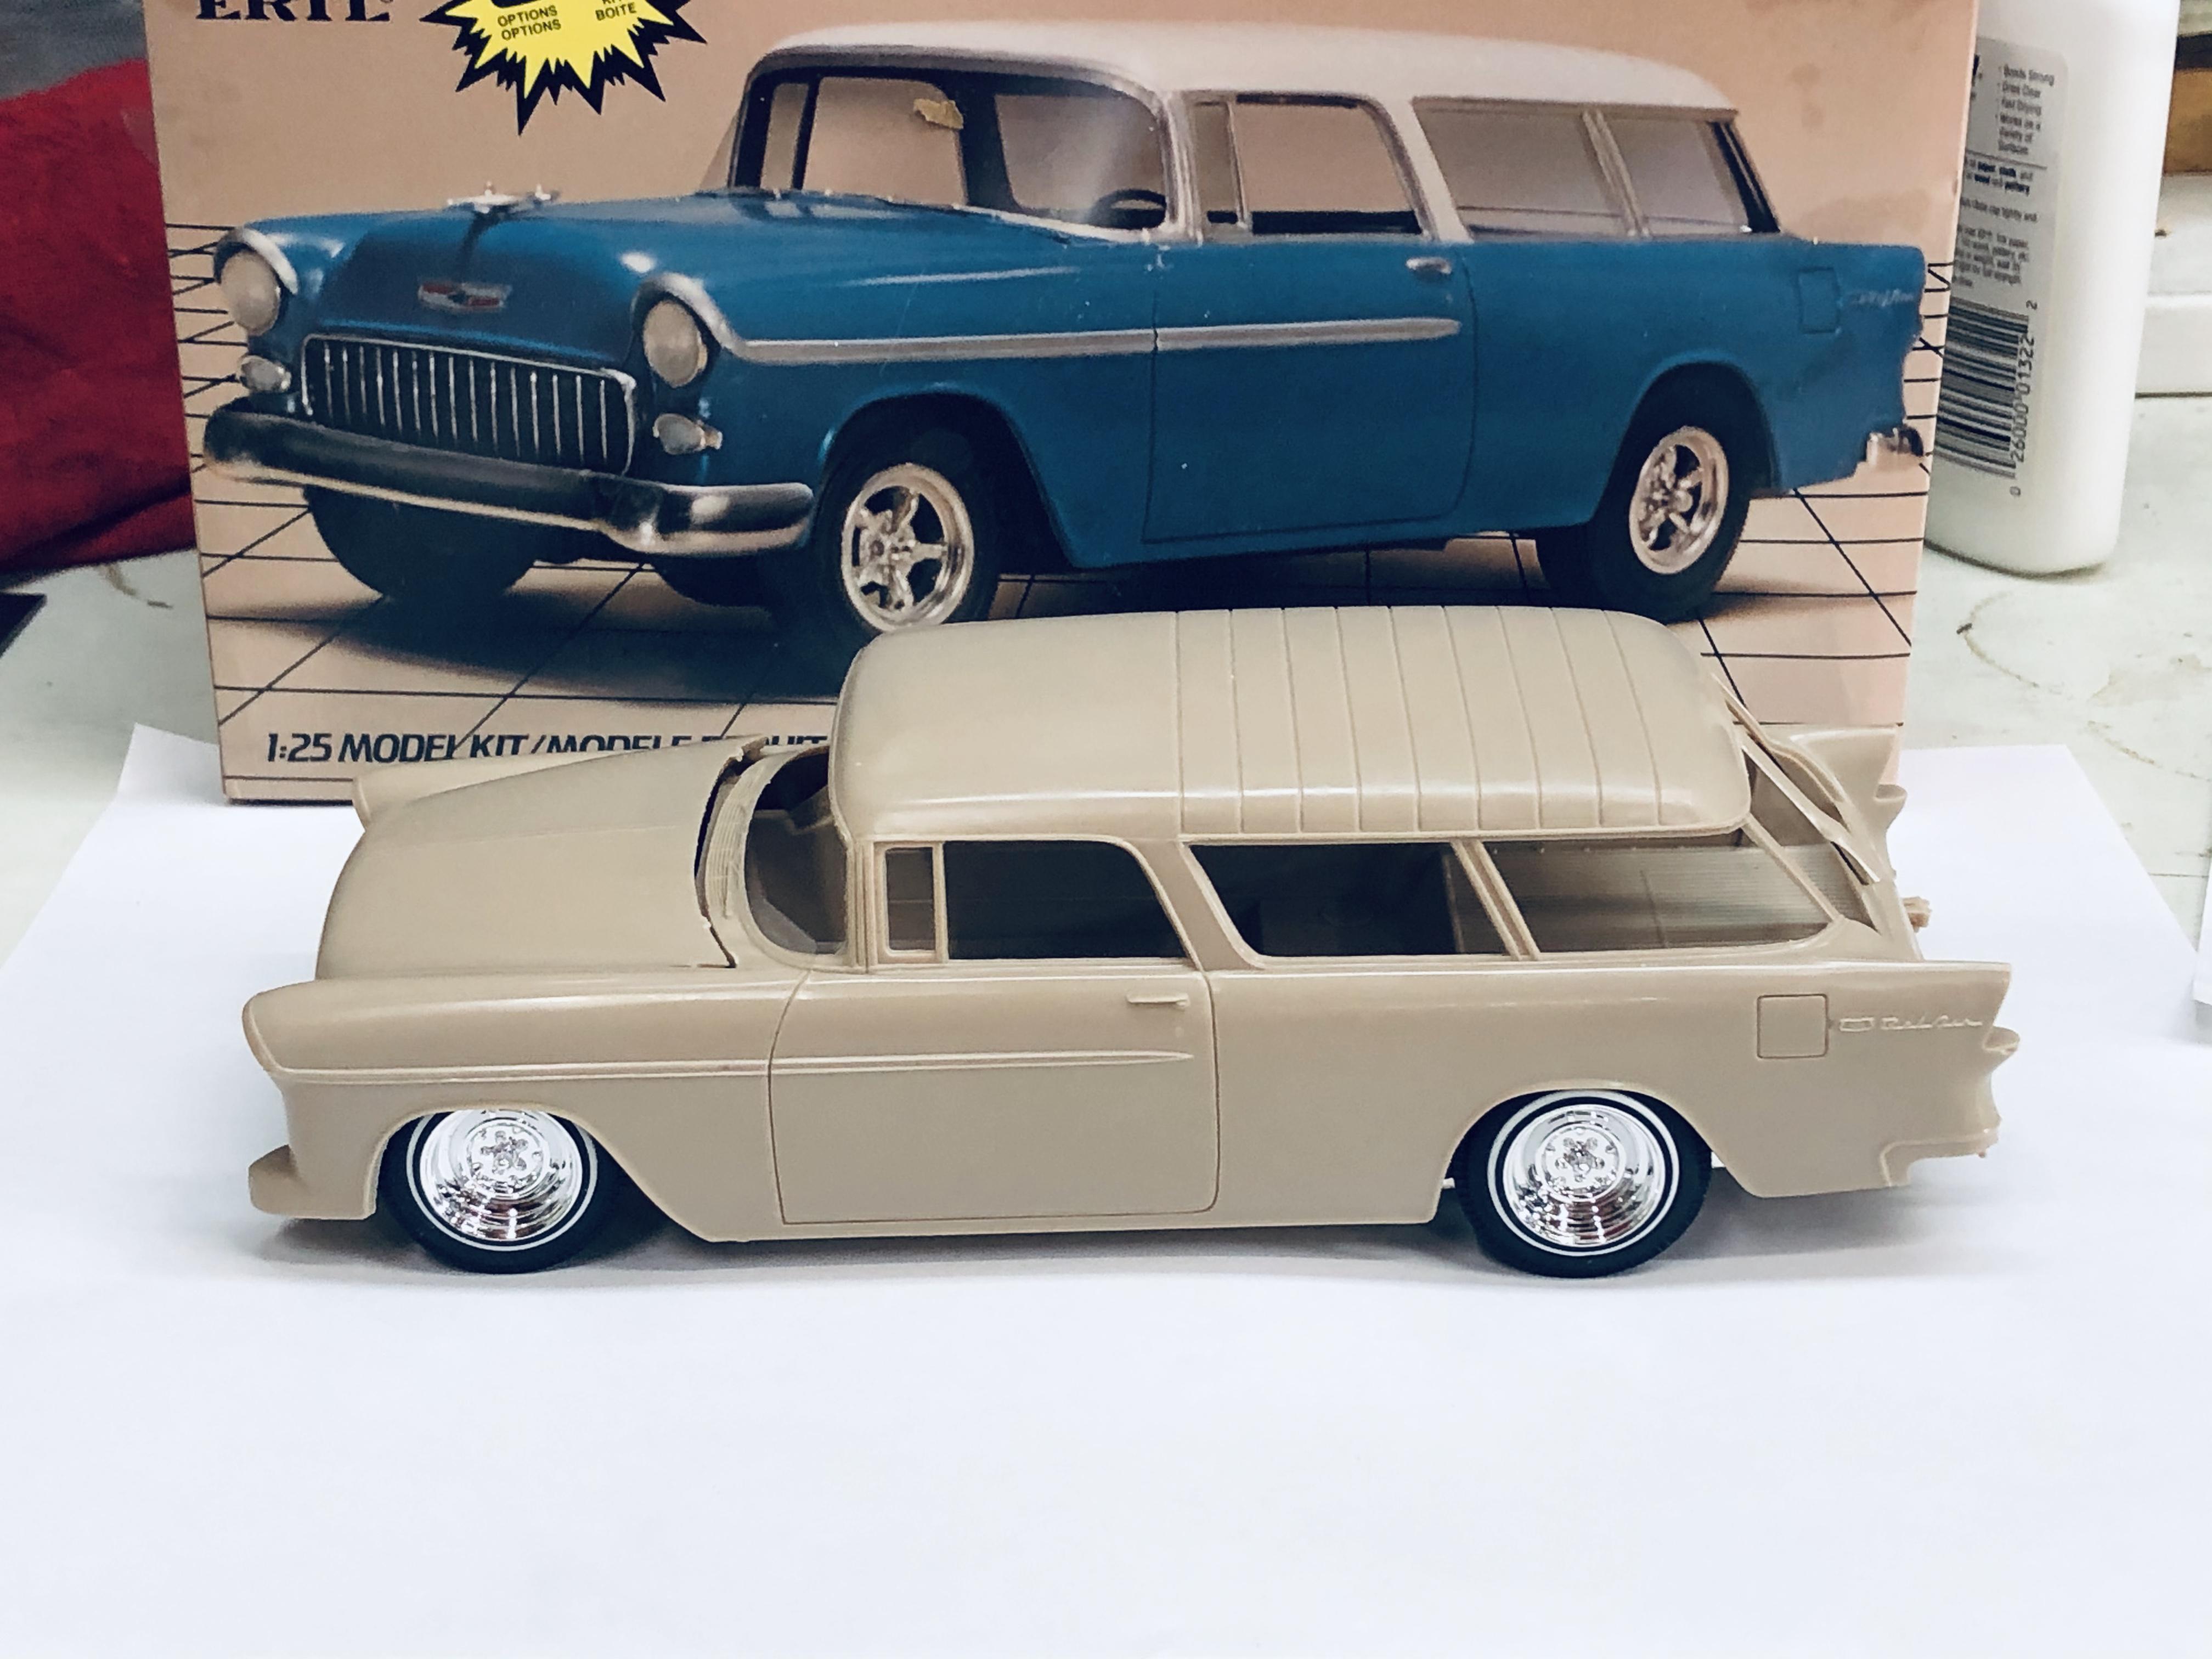
Looking for a suitable canvas for some wild paint. This one has been in my stash for 20 plus years and I’ve got some free time on my hands. Need to get the stance right. The rear is simple enough. Separate the springs from the rear axle and add some lowering blocks. The front end is a little more challenging. I want to cut the coils but the upper A frame is molded to the crossmember. The solution, grind off the upper A frame and fab a tubular replacement. Cut the coils and assemble! . mission accomplished!
-
Here are some shots from Jocko's desert compound. The "Jocko's Stuff" liner is a pedal car version of his acclaimed 8.35 car rendered in aluminum (the original was glass unlike the Moonliner which was is aluminum). When I first met Jocko he was dragging this through the Pomona Swap Meet. I'm particularly fond of the workbench shot of two of Jocko's 1/16th scale 8.35 liner models posed with a bunch of my models. We were having a 2 man NNL that day up in 29 Palms !! Next shot is Jocko posing next to the Spirit of 29 Palms holding a model of same. And lastly, parked next to his bus, Jocko's 3 wheeled half scale version of the 8.35 liner which was functional and powered by a four cylinder bike engine. I can't remember which issue of Scale Auto had my Jocko article but it includes a great picture of one of his tether cars.
-
Jocko finished the body but never completed a chassis or developed a working powerplant of the design described in the Autoweek article. Getting to know him and spending time up there was a great experience. He was building a bike powered three wheel version of the 8.35 liner and had a working chassis. He had all types of wood and metal sculptures and some amazing furniture designs that can still be seen online. He was really into models and had built a large scale aluminum replica of the John Cobb’s Railton Special which was the car that inspired him to build his liner as well as some amazing tether cars. I’m gonna see if I can dig up some photos from my time up there.
-
I spent some time with Jocko years ago up at his compound in 29 Palms learning to gas weld aluminum and create shapes on the English wheel. I even wrote an article about him for SAE. He gave me this aluminum replica of the 8.35 liner as well as some hardwood slap hammers that are still in my toolbox. He was as talented as he was colorful. J
-
Stooges+1969 = 1954 F-100
Marc Weller replied to 1972coronet's topic in General Automotive Talk (Trucks and Cars)
There’s also that great Jarmusch documentary Gimme Danger. This might be the hippest thread ever on Model Cars Mag forum!! -
Like to see this again
Marc Weller replied to Greg Myers's topic in General Automotive Talk (Trucks and Cars)
One of my favorites !! -
Wheels and tires are Modelhaus stuff. Paint is Testors Lacquer and, if I recall correctly, I mixed purple and silver metalflake 50:50 and finished with urethane clear.
-
Jeff is a Fisher Guild alumnus. Had the pleasure of meeting him and seeing the car last year. The book is amazing. Highly recommended.
-
Story of Jo Han models.
Marc Weller replied to GMP440's topic in General Automotive Talk (Trucks and Cars)
Looks like the story has been removed from the site -
Thanks for your interest. I'm using an iphoneX and a couple of studio lights.
-
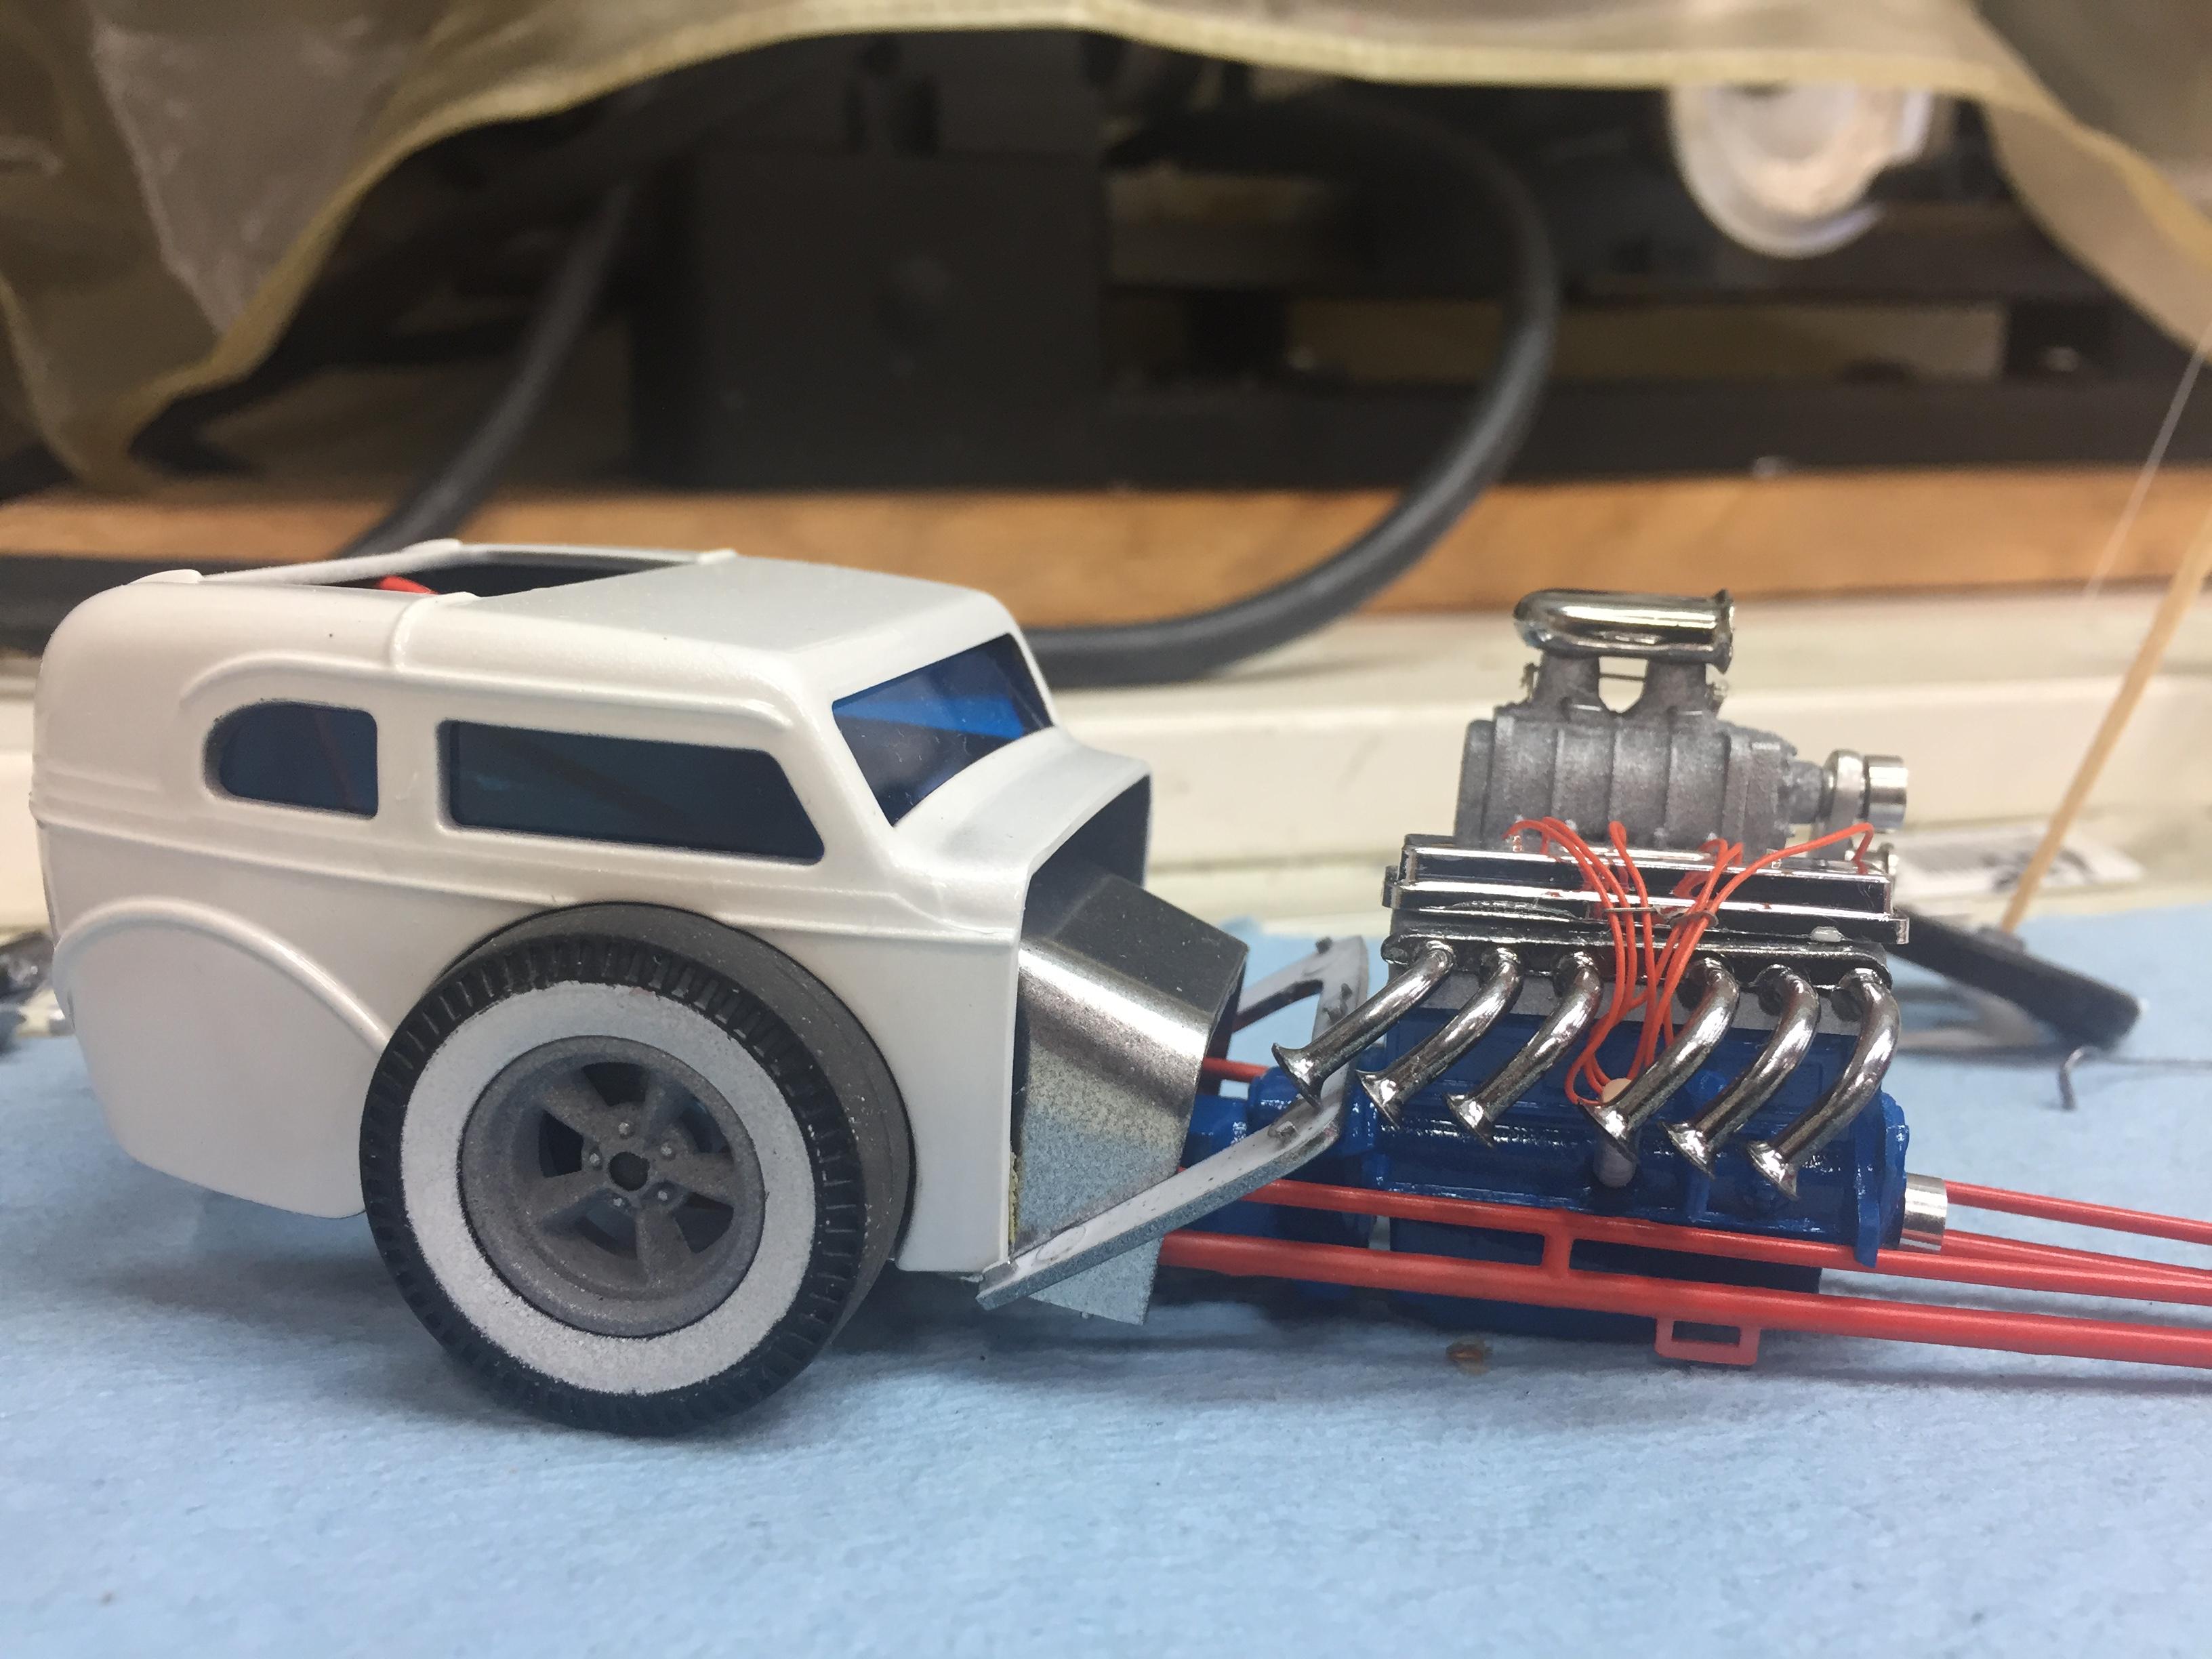
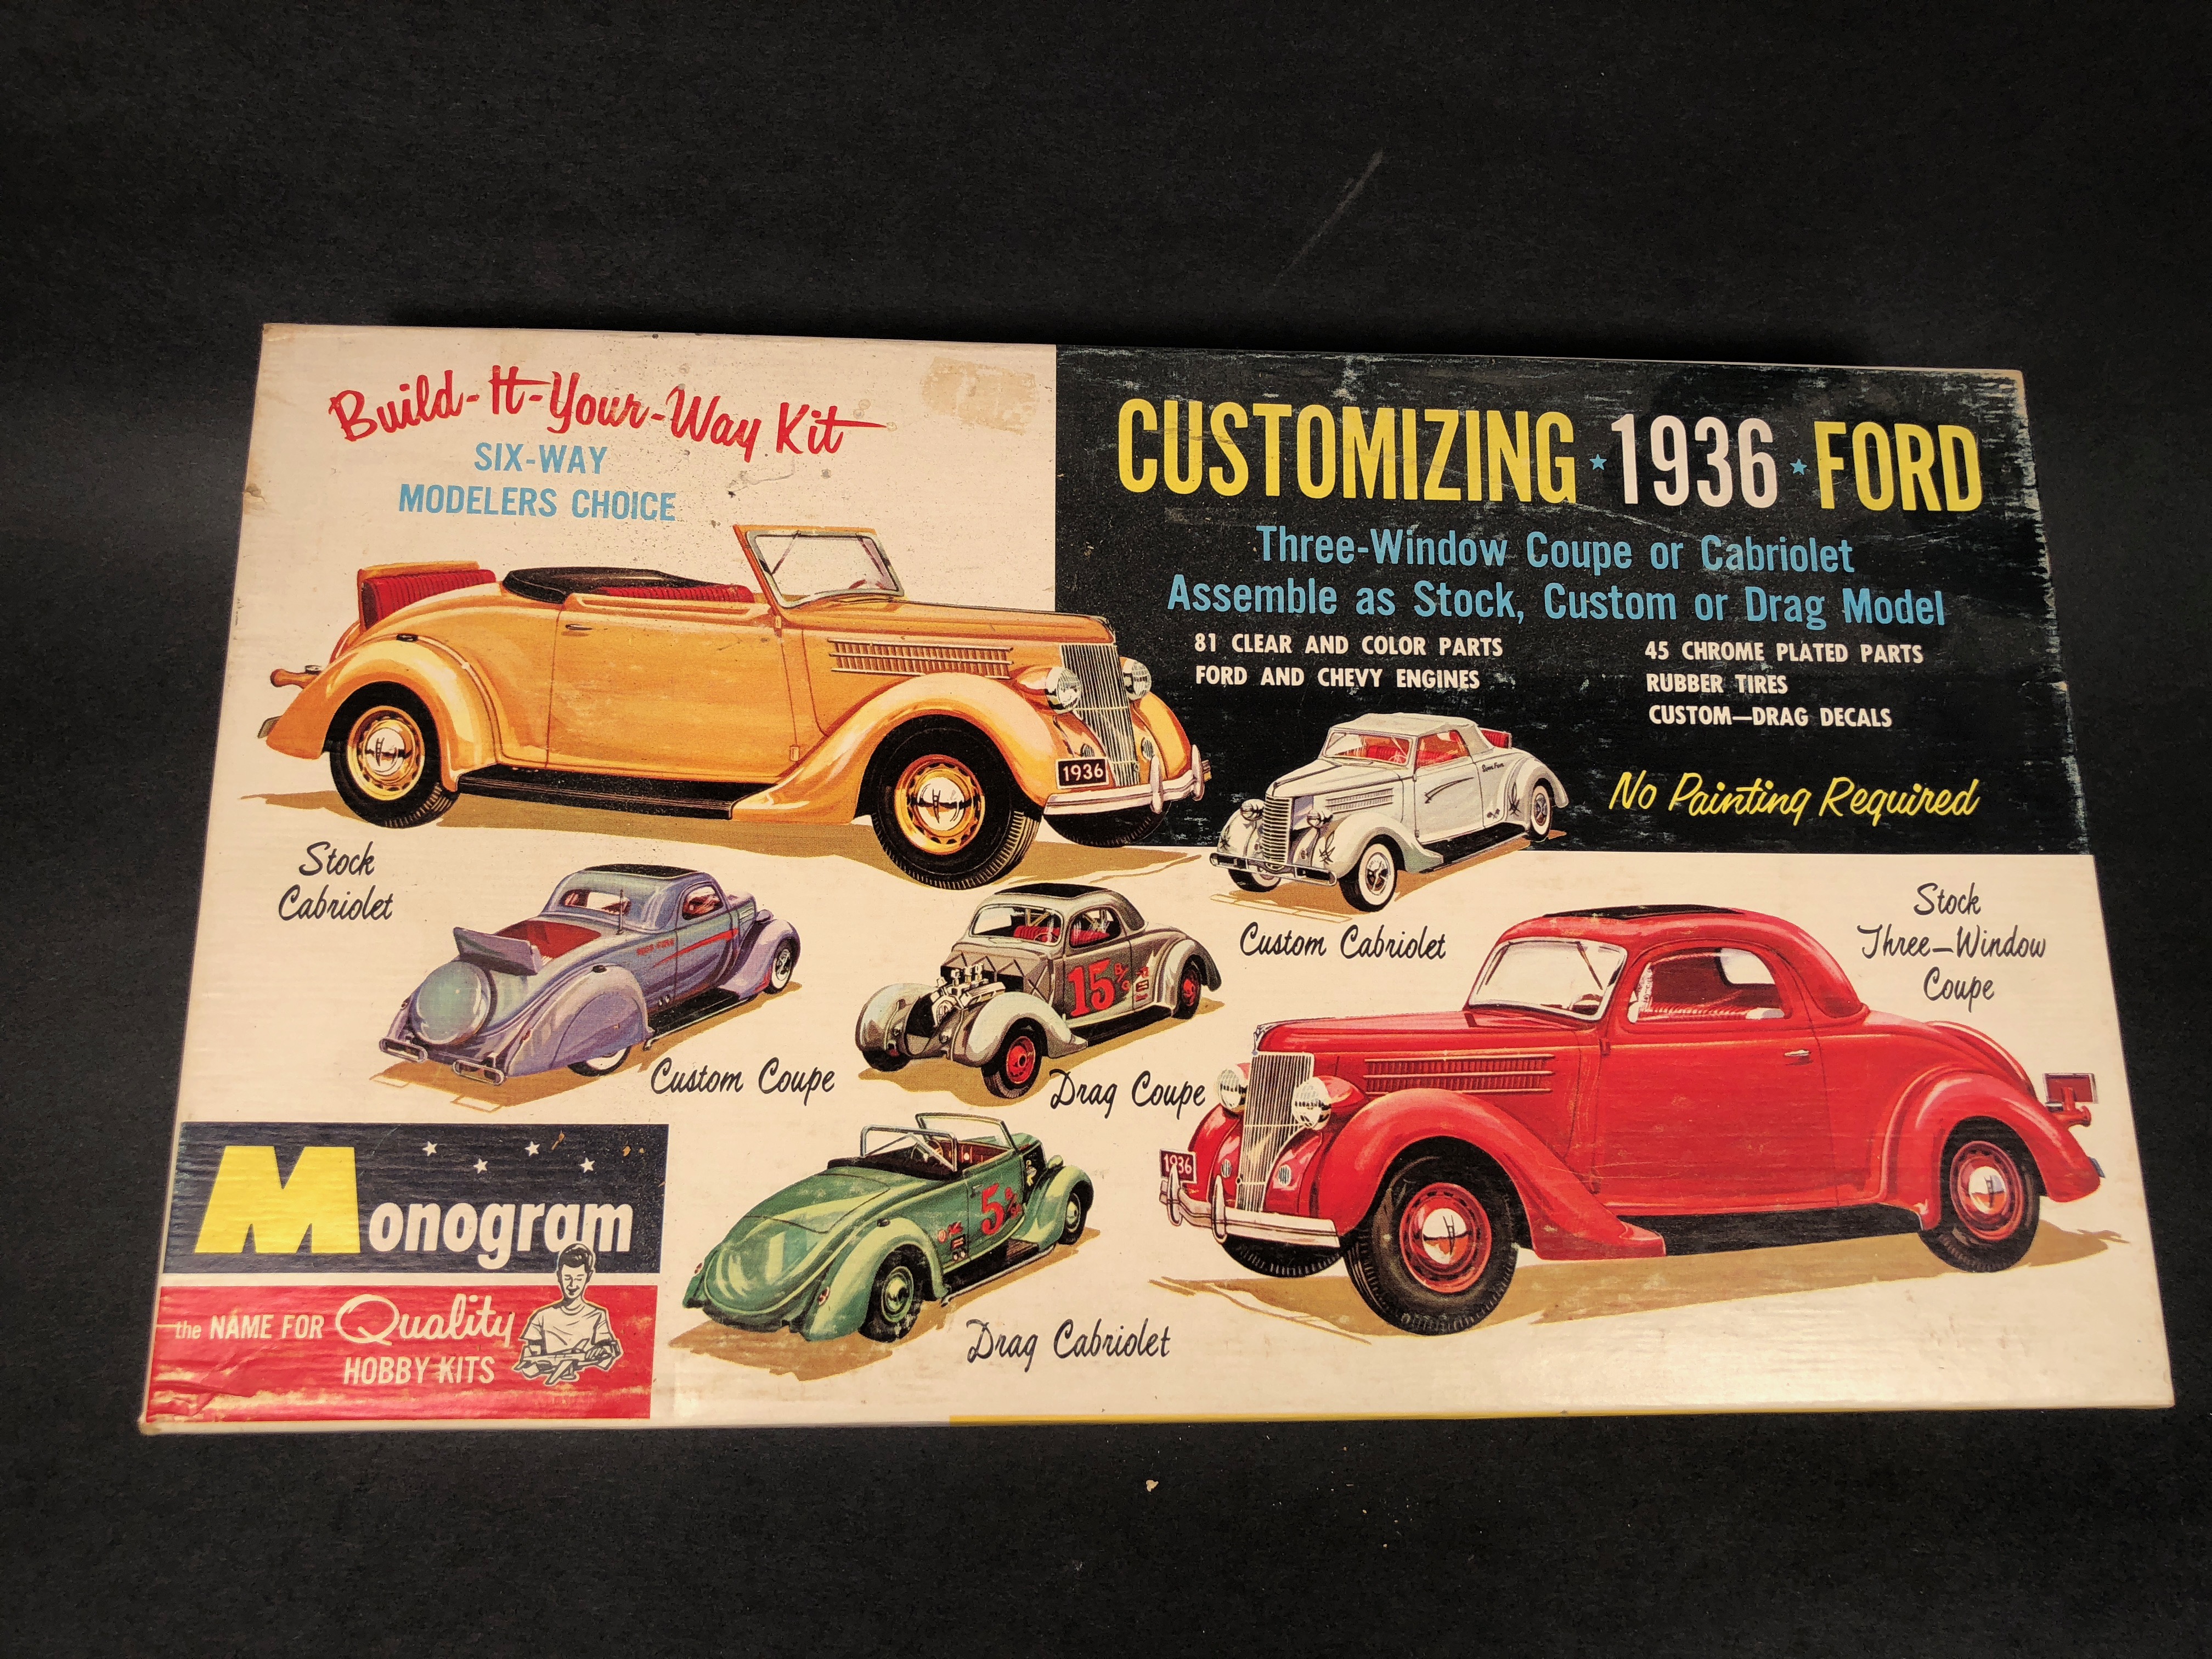
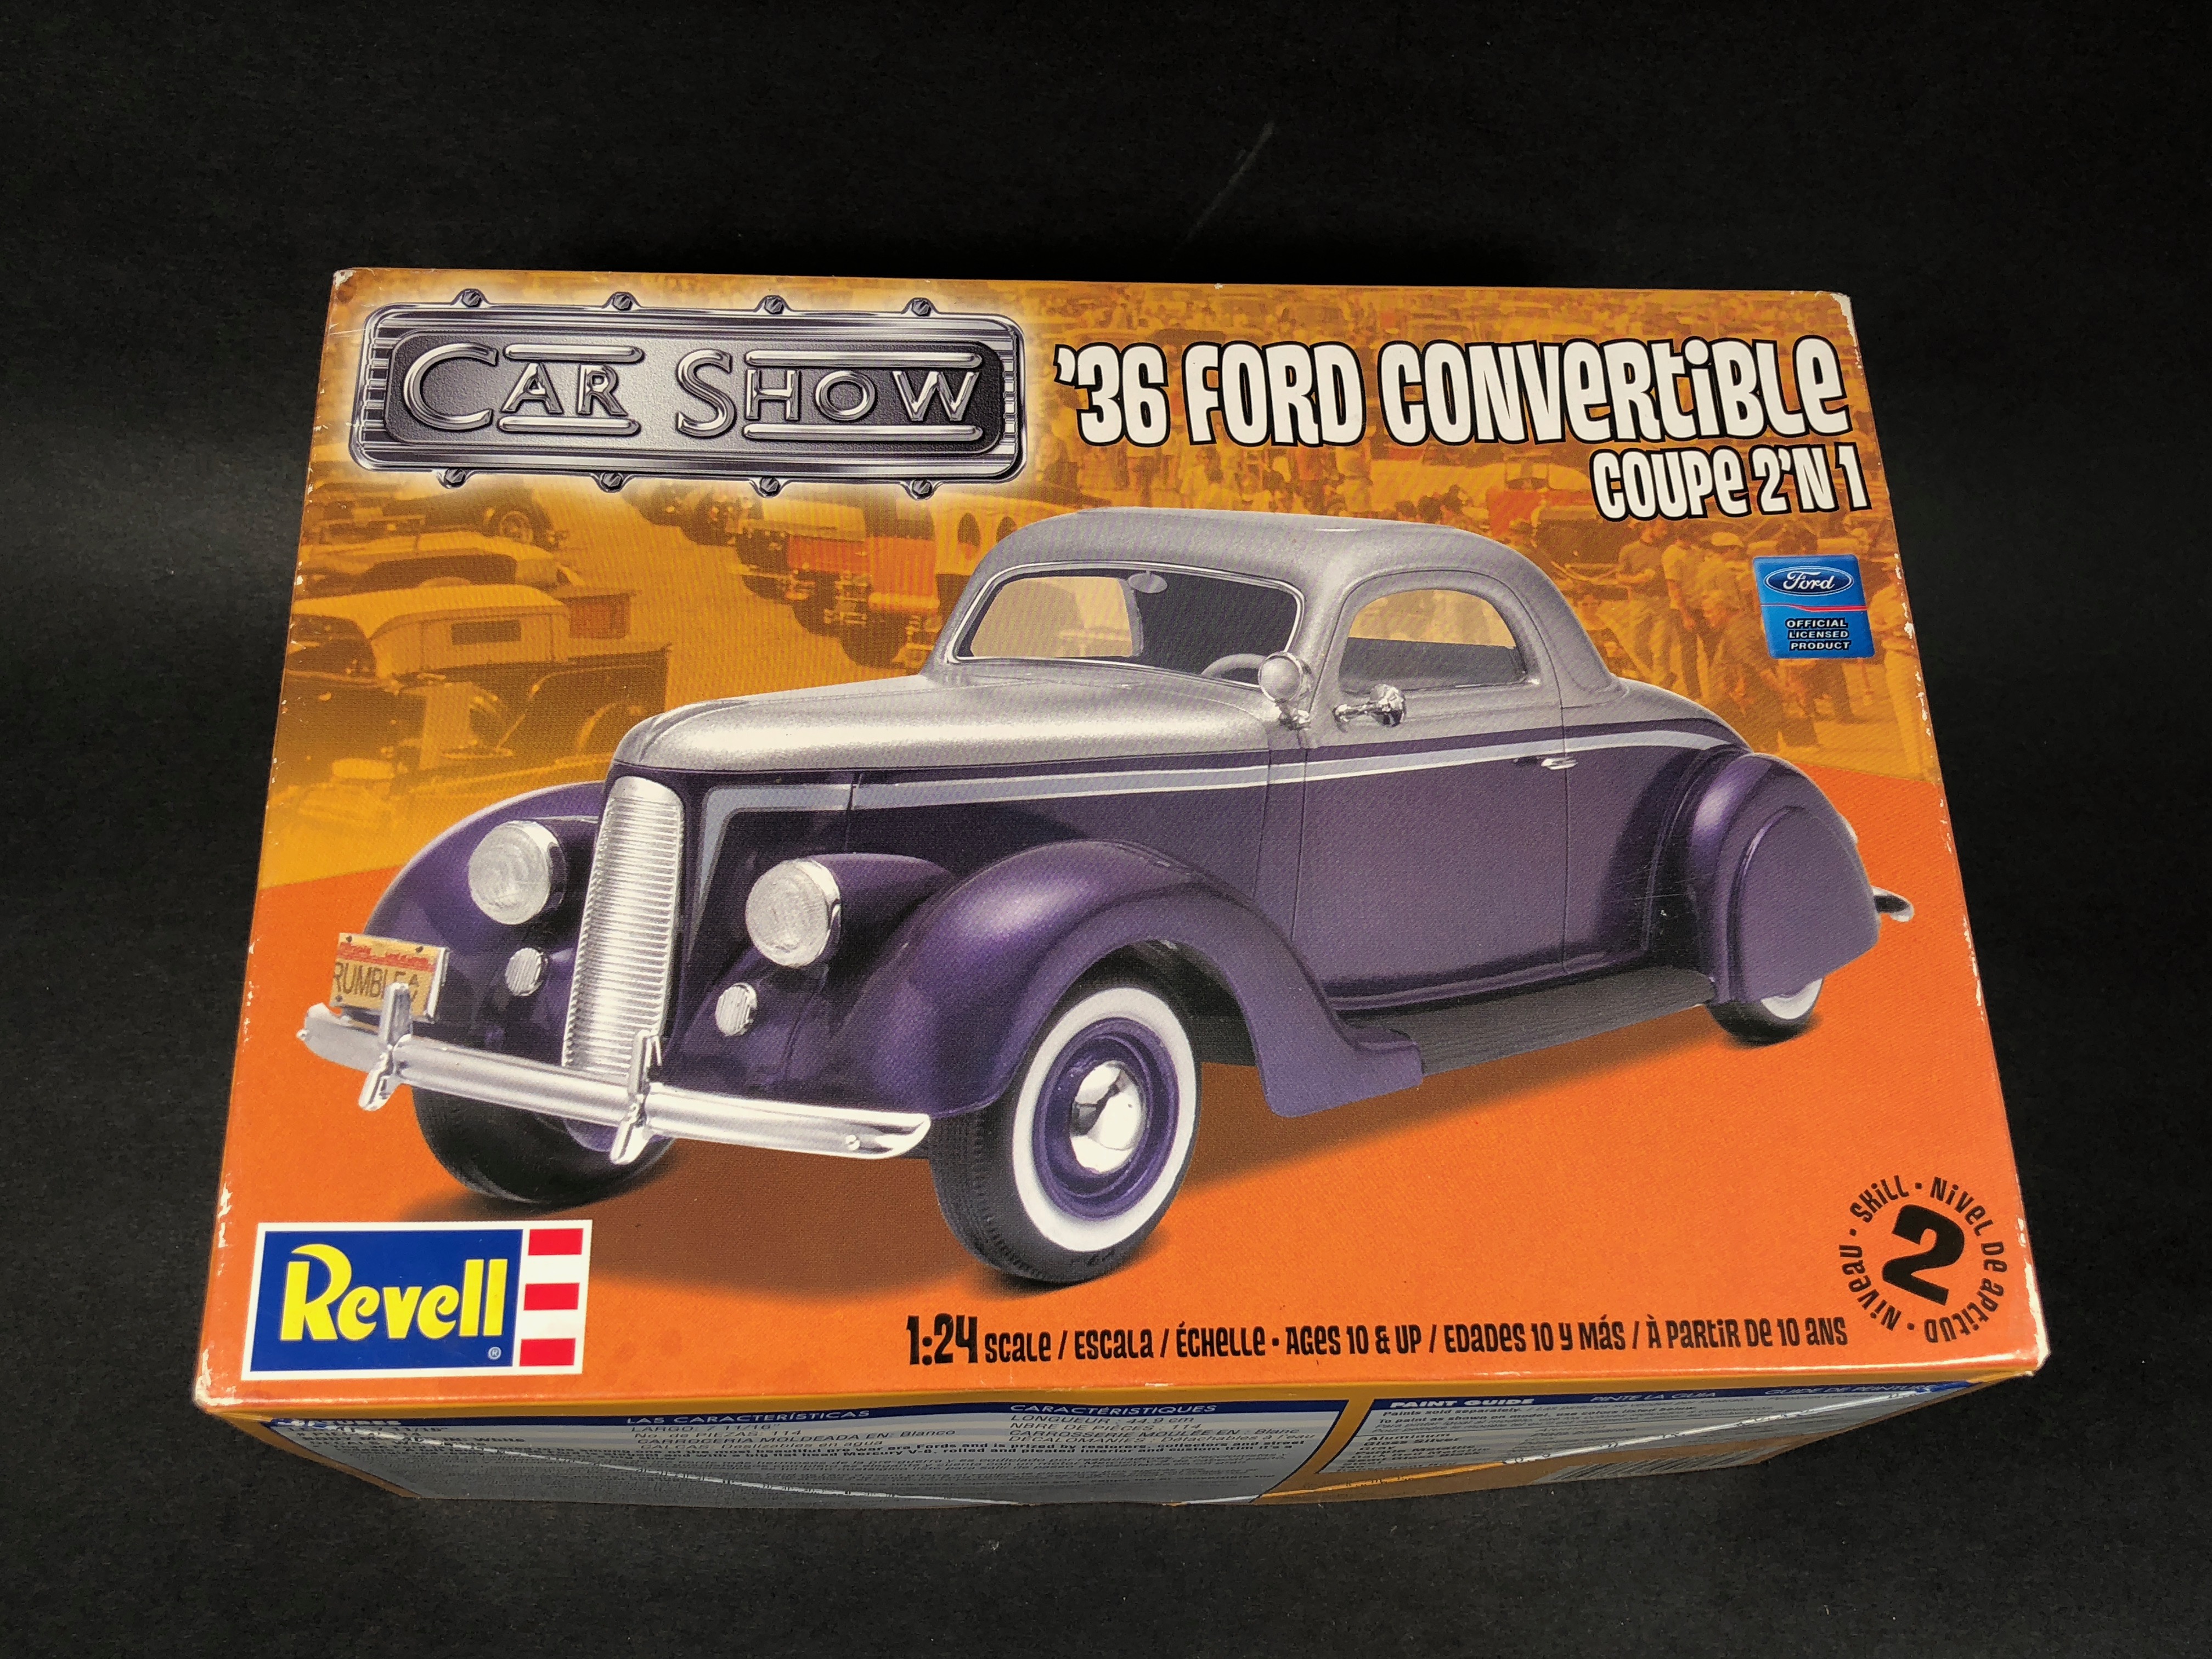
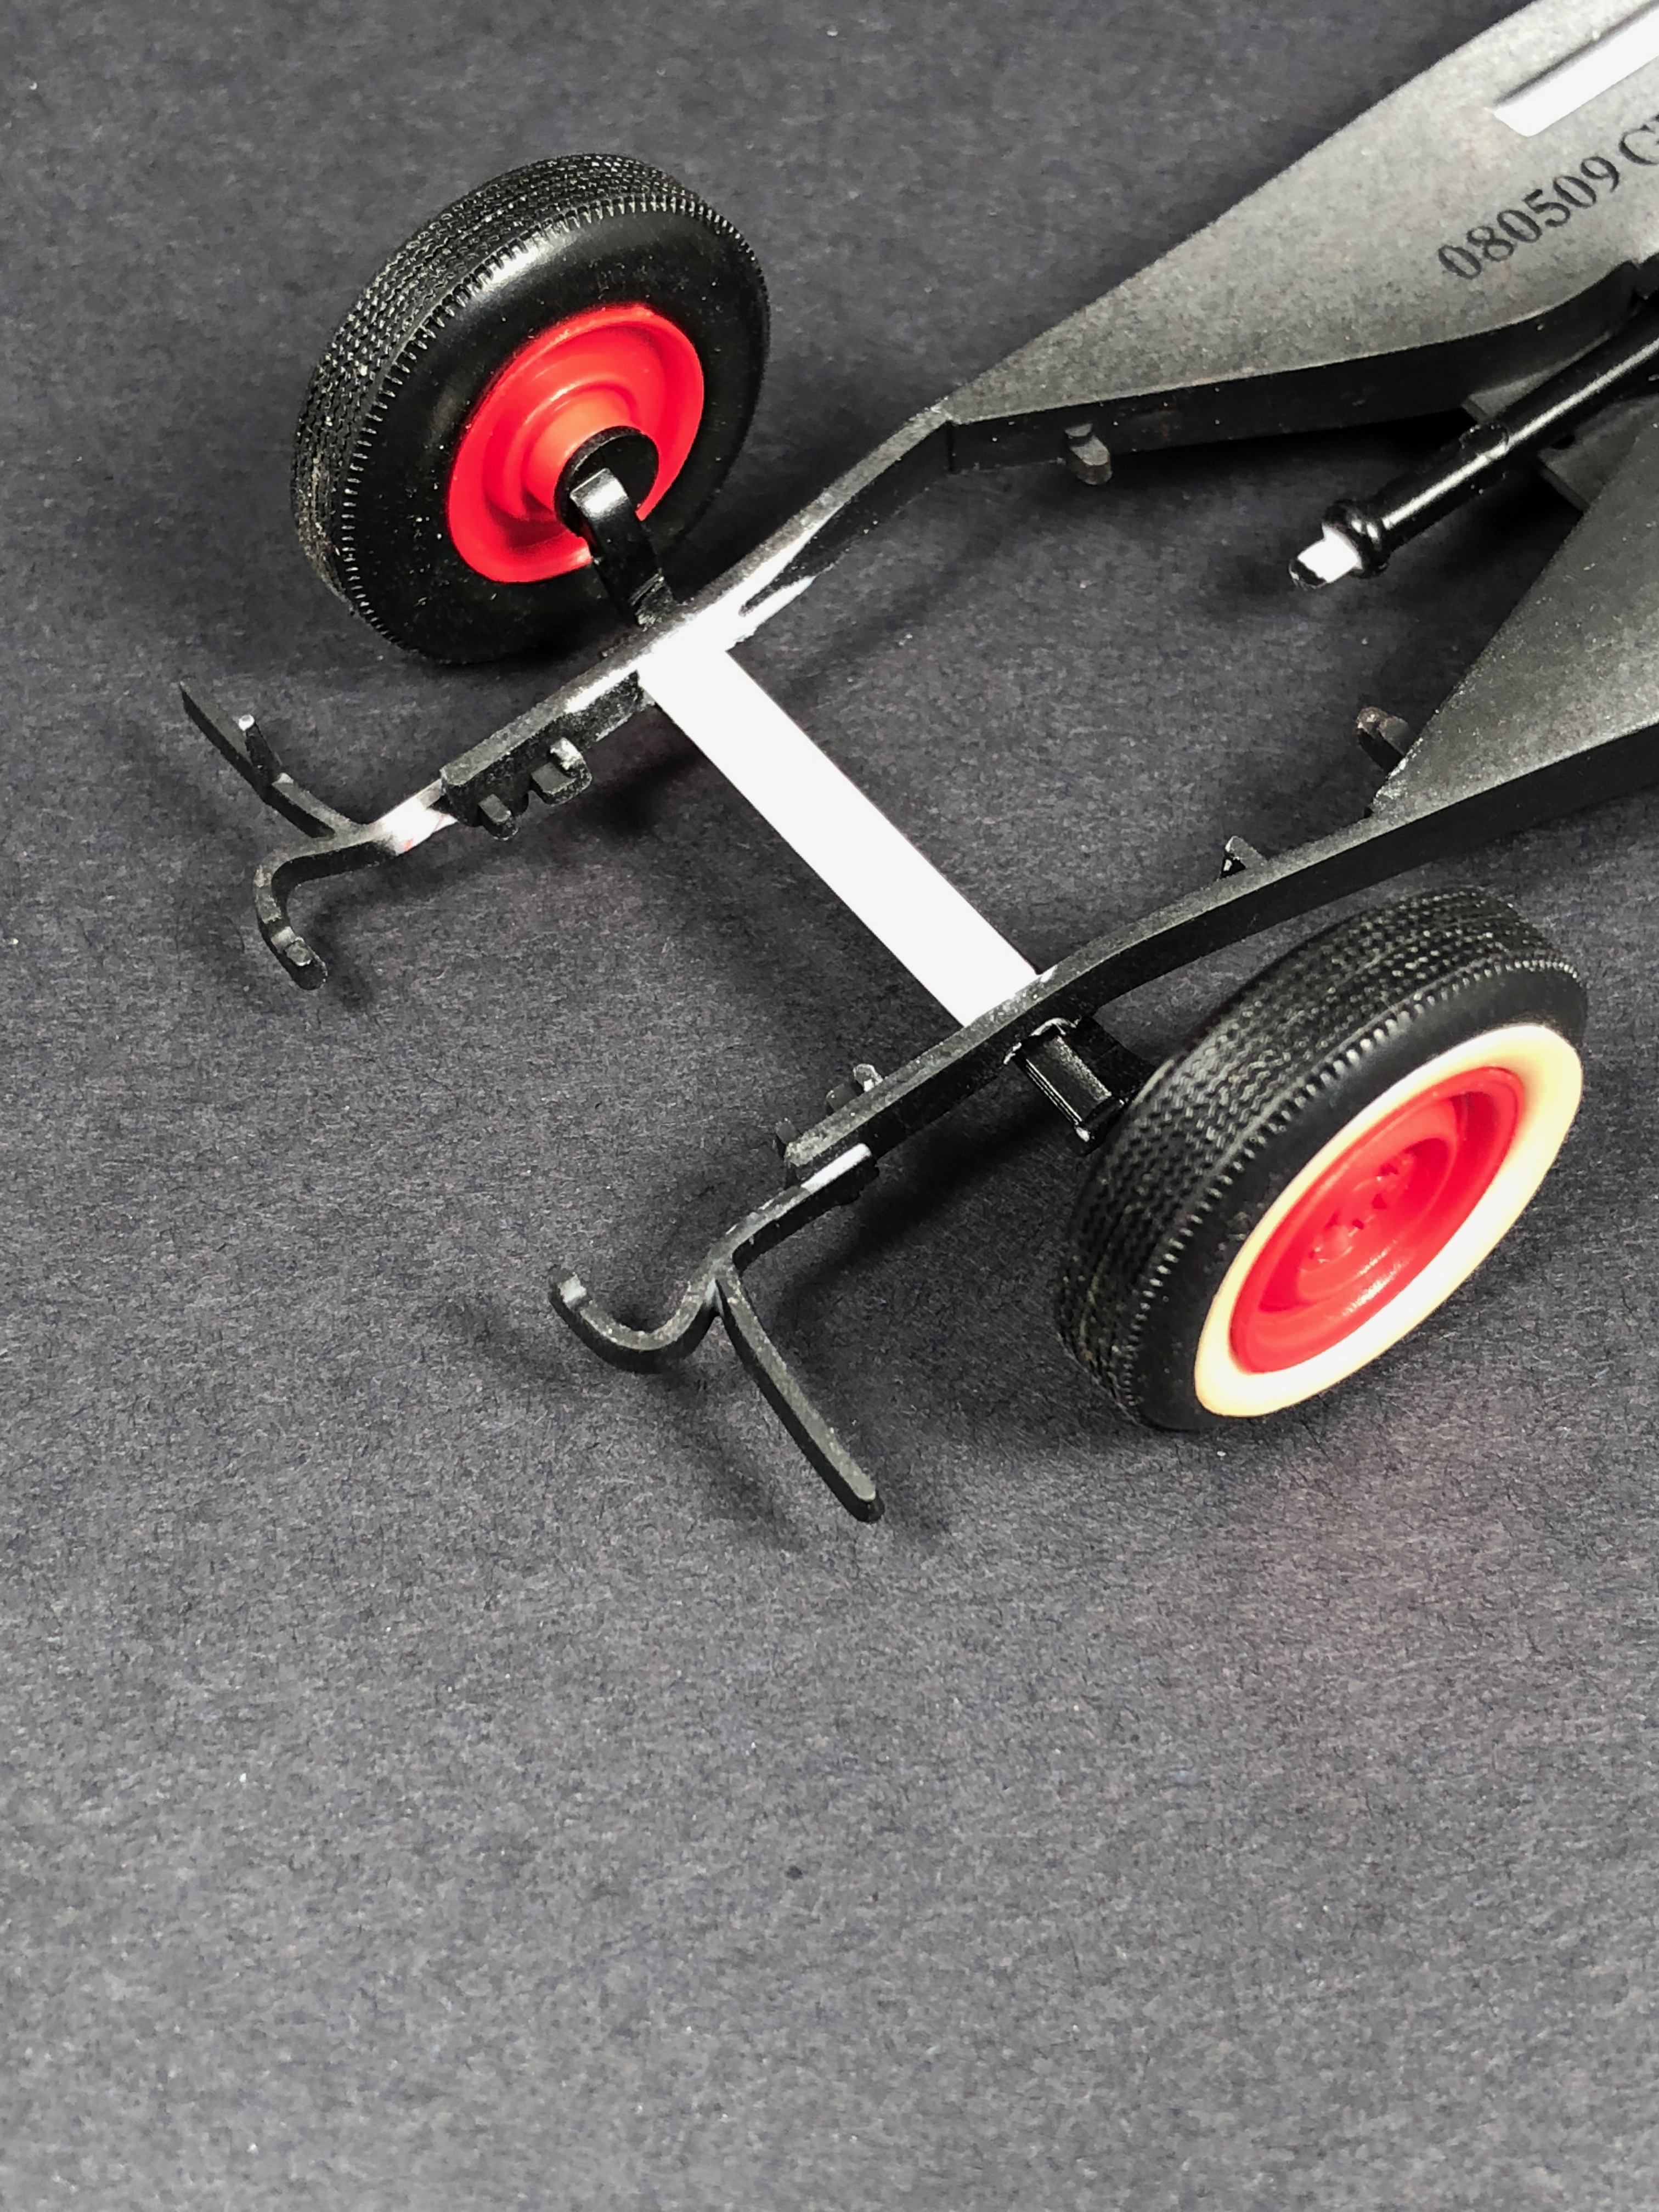
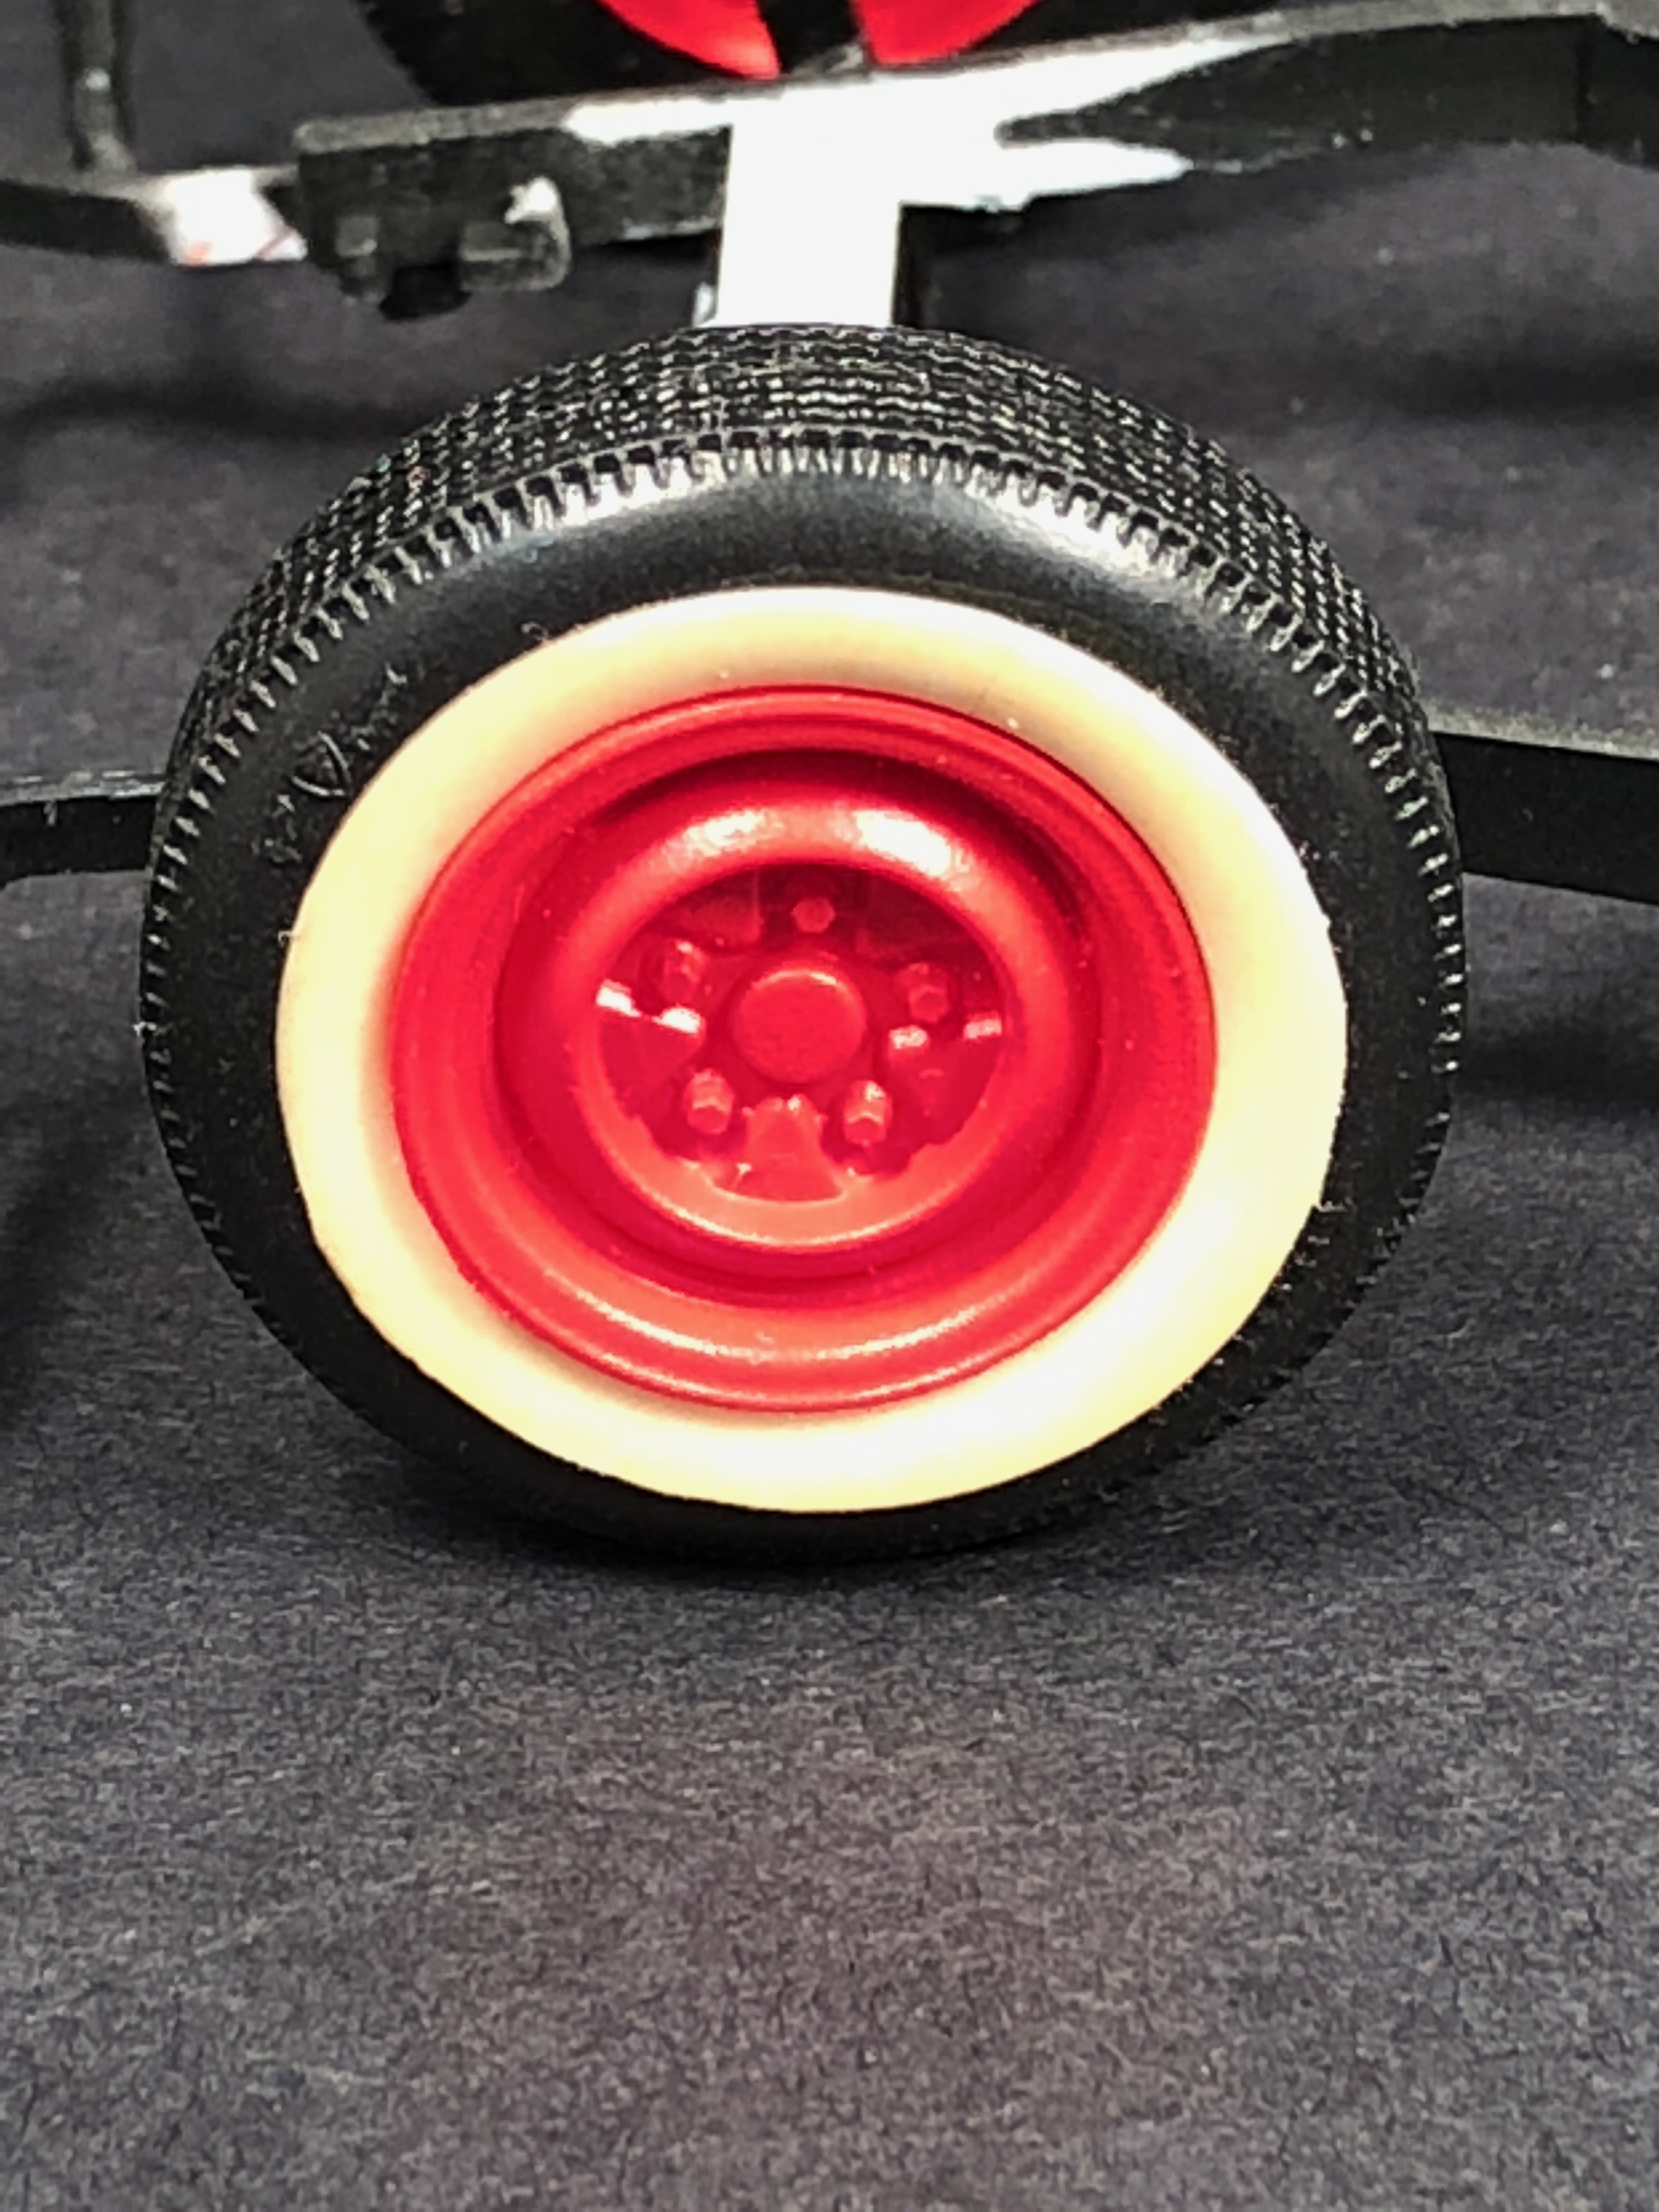
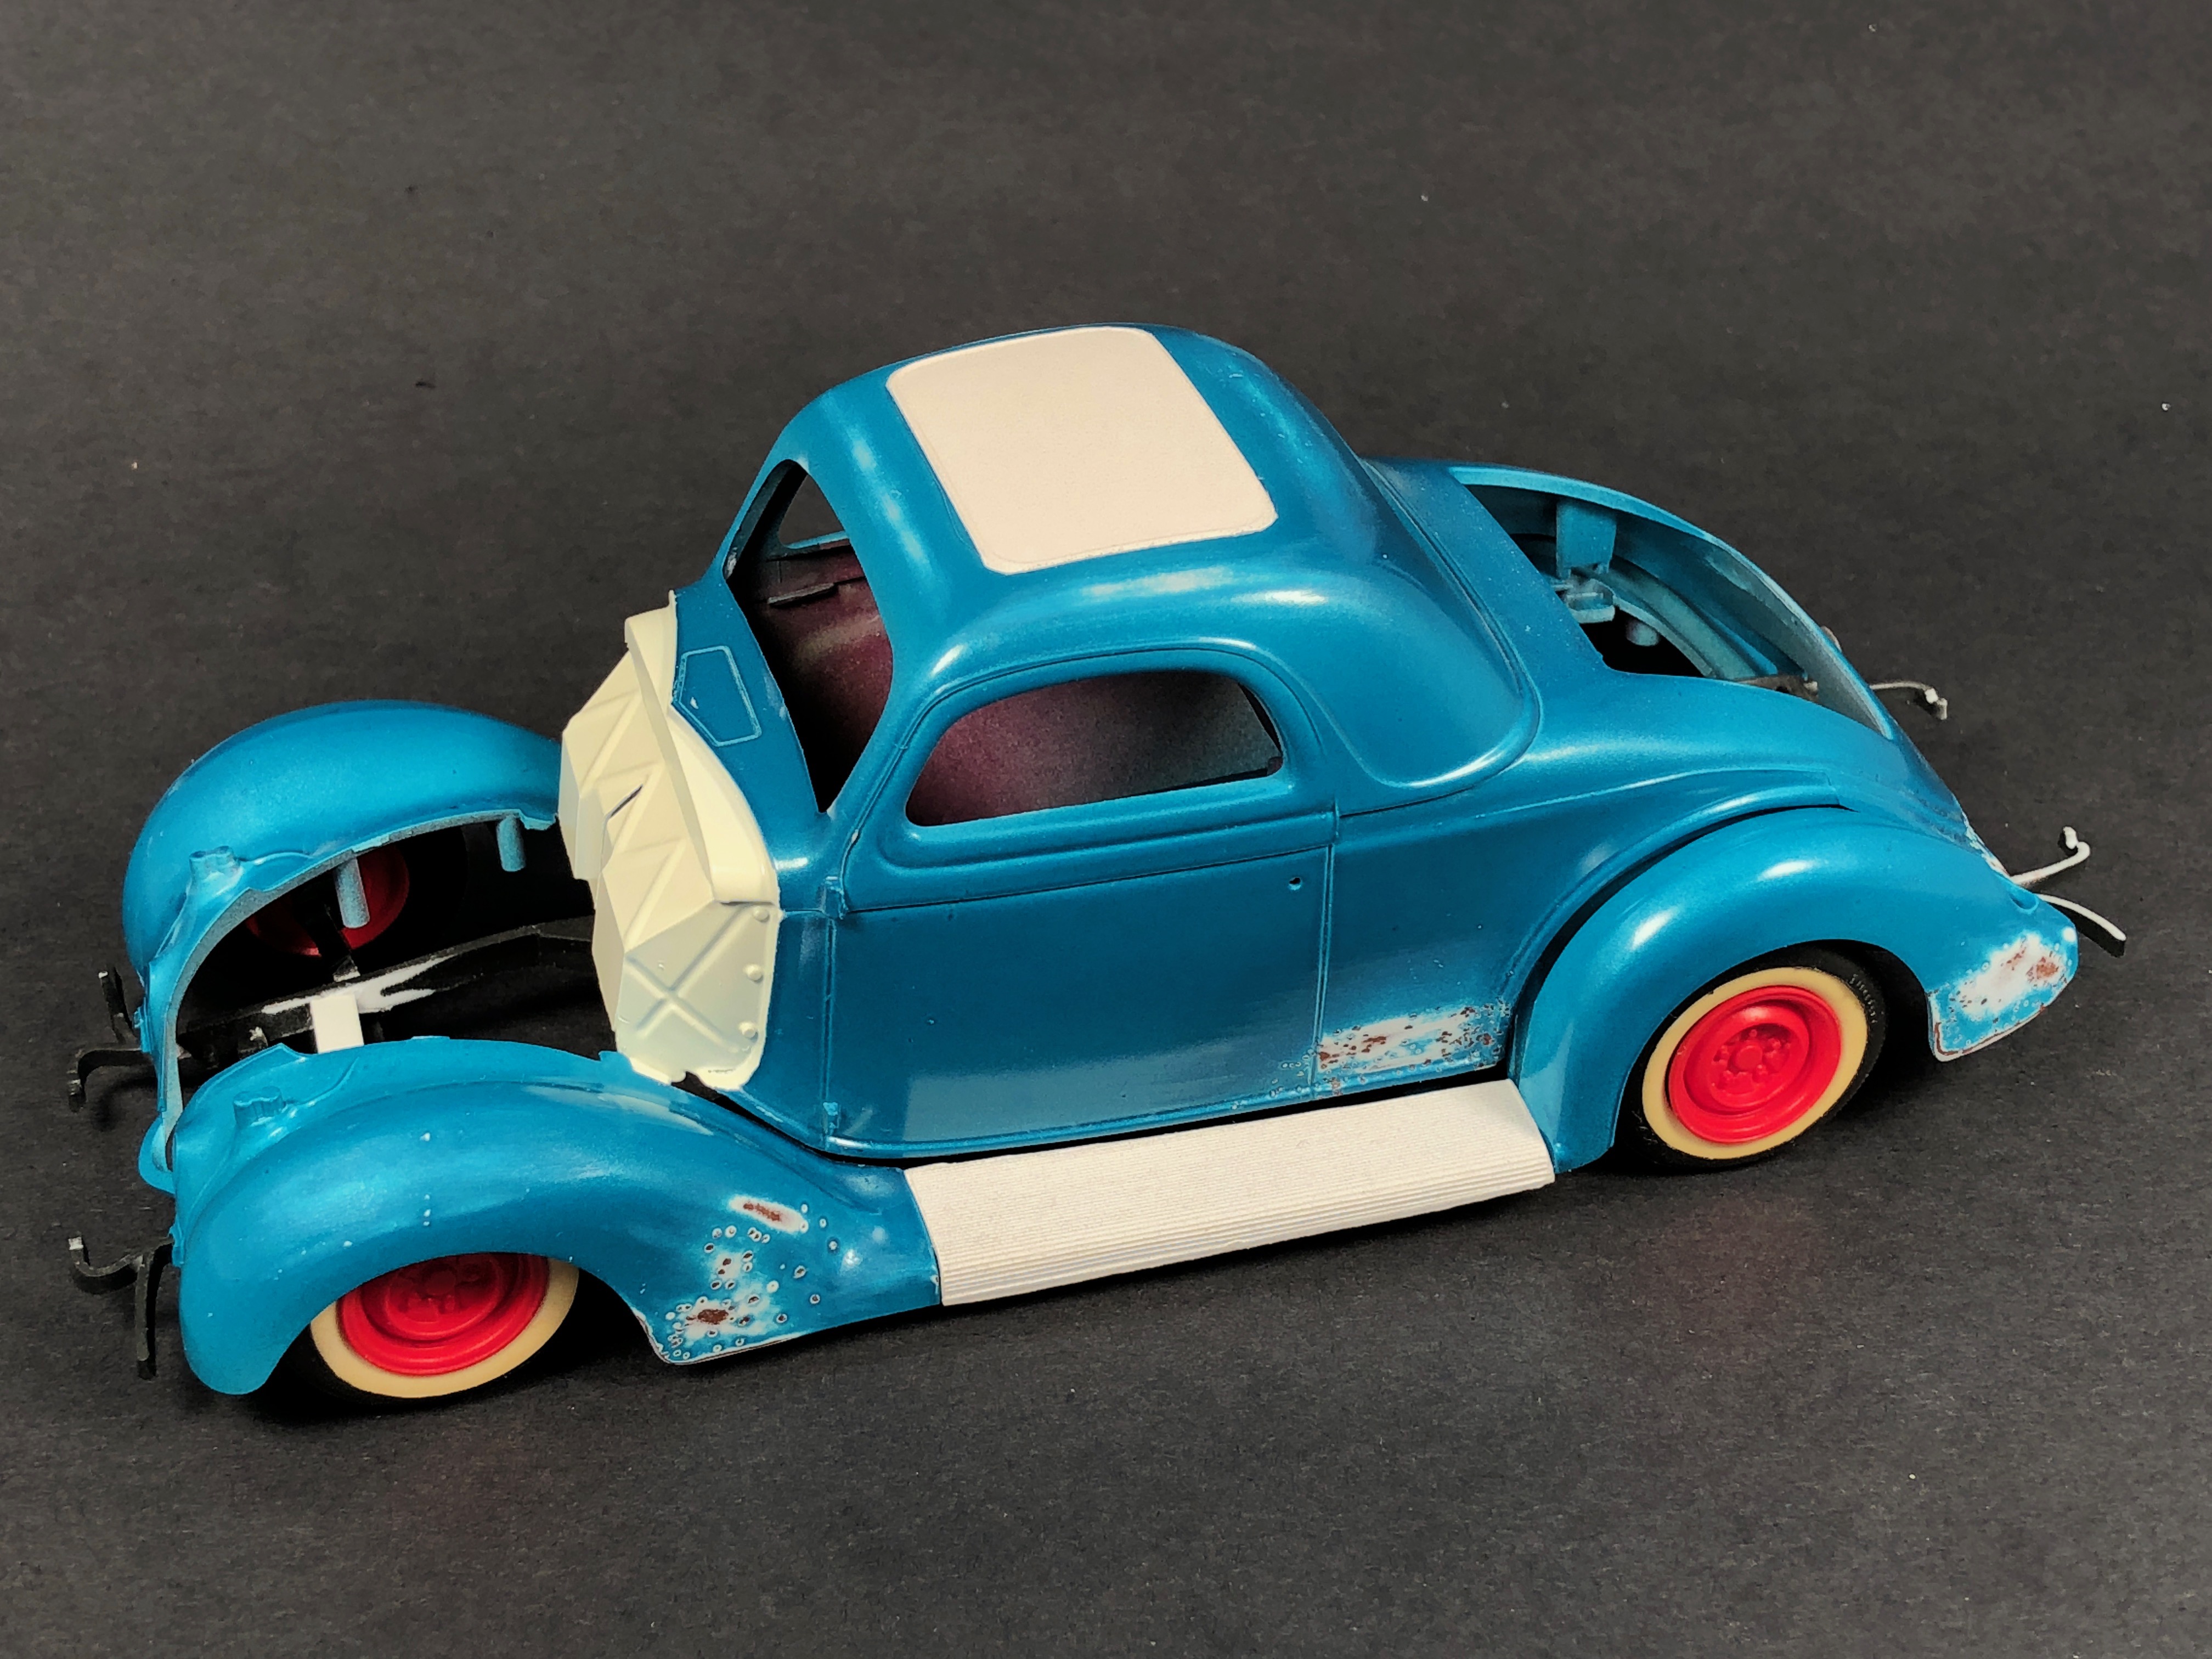
I got started building weathered street rods years ago after reading an article titled "Beaters" by Pryor Passorino in Plastic Fanatic. Since then I've been learning techniques from the military guys and applying them to my hot rod efforts. My latest will be based on the venerable Monogram '36 tool that has been around since I was a kid. I'll be using the Revell 2 in 1 "Car Show " version. Getting the proper stance is no more difficult than substituting a length of evergreen channel for the stock front crossmember. The rear is already perfect. Floquil rust applied to the whitewalls provides a more realistic yellowed appearance. I used the salt and hairspray technique to accomplish the rust spots. I used Testors enamels and Pantene hairspray. The body is first airbrushed with Testors rust, followed by and application of hairspray and a dusting of salt in the desired areas. There are a million Youtubes demonstrating this technique. Next comes a layer of flat white followed by the color which is a 50:50 mix of green and blue metal flake. Finally the salted areas are sanded with 400 grit. I will follow all of this with a layer of Testers Dullcoat. I've decided to go hoodless and will install a blown flathead. More to follow.
-
What do you drive?
Marc Weller replied to gasman's topic in General Automotive Talk (Trucks and Cars)
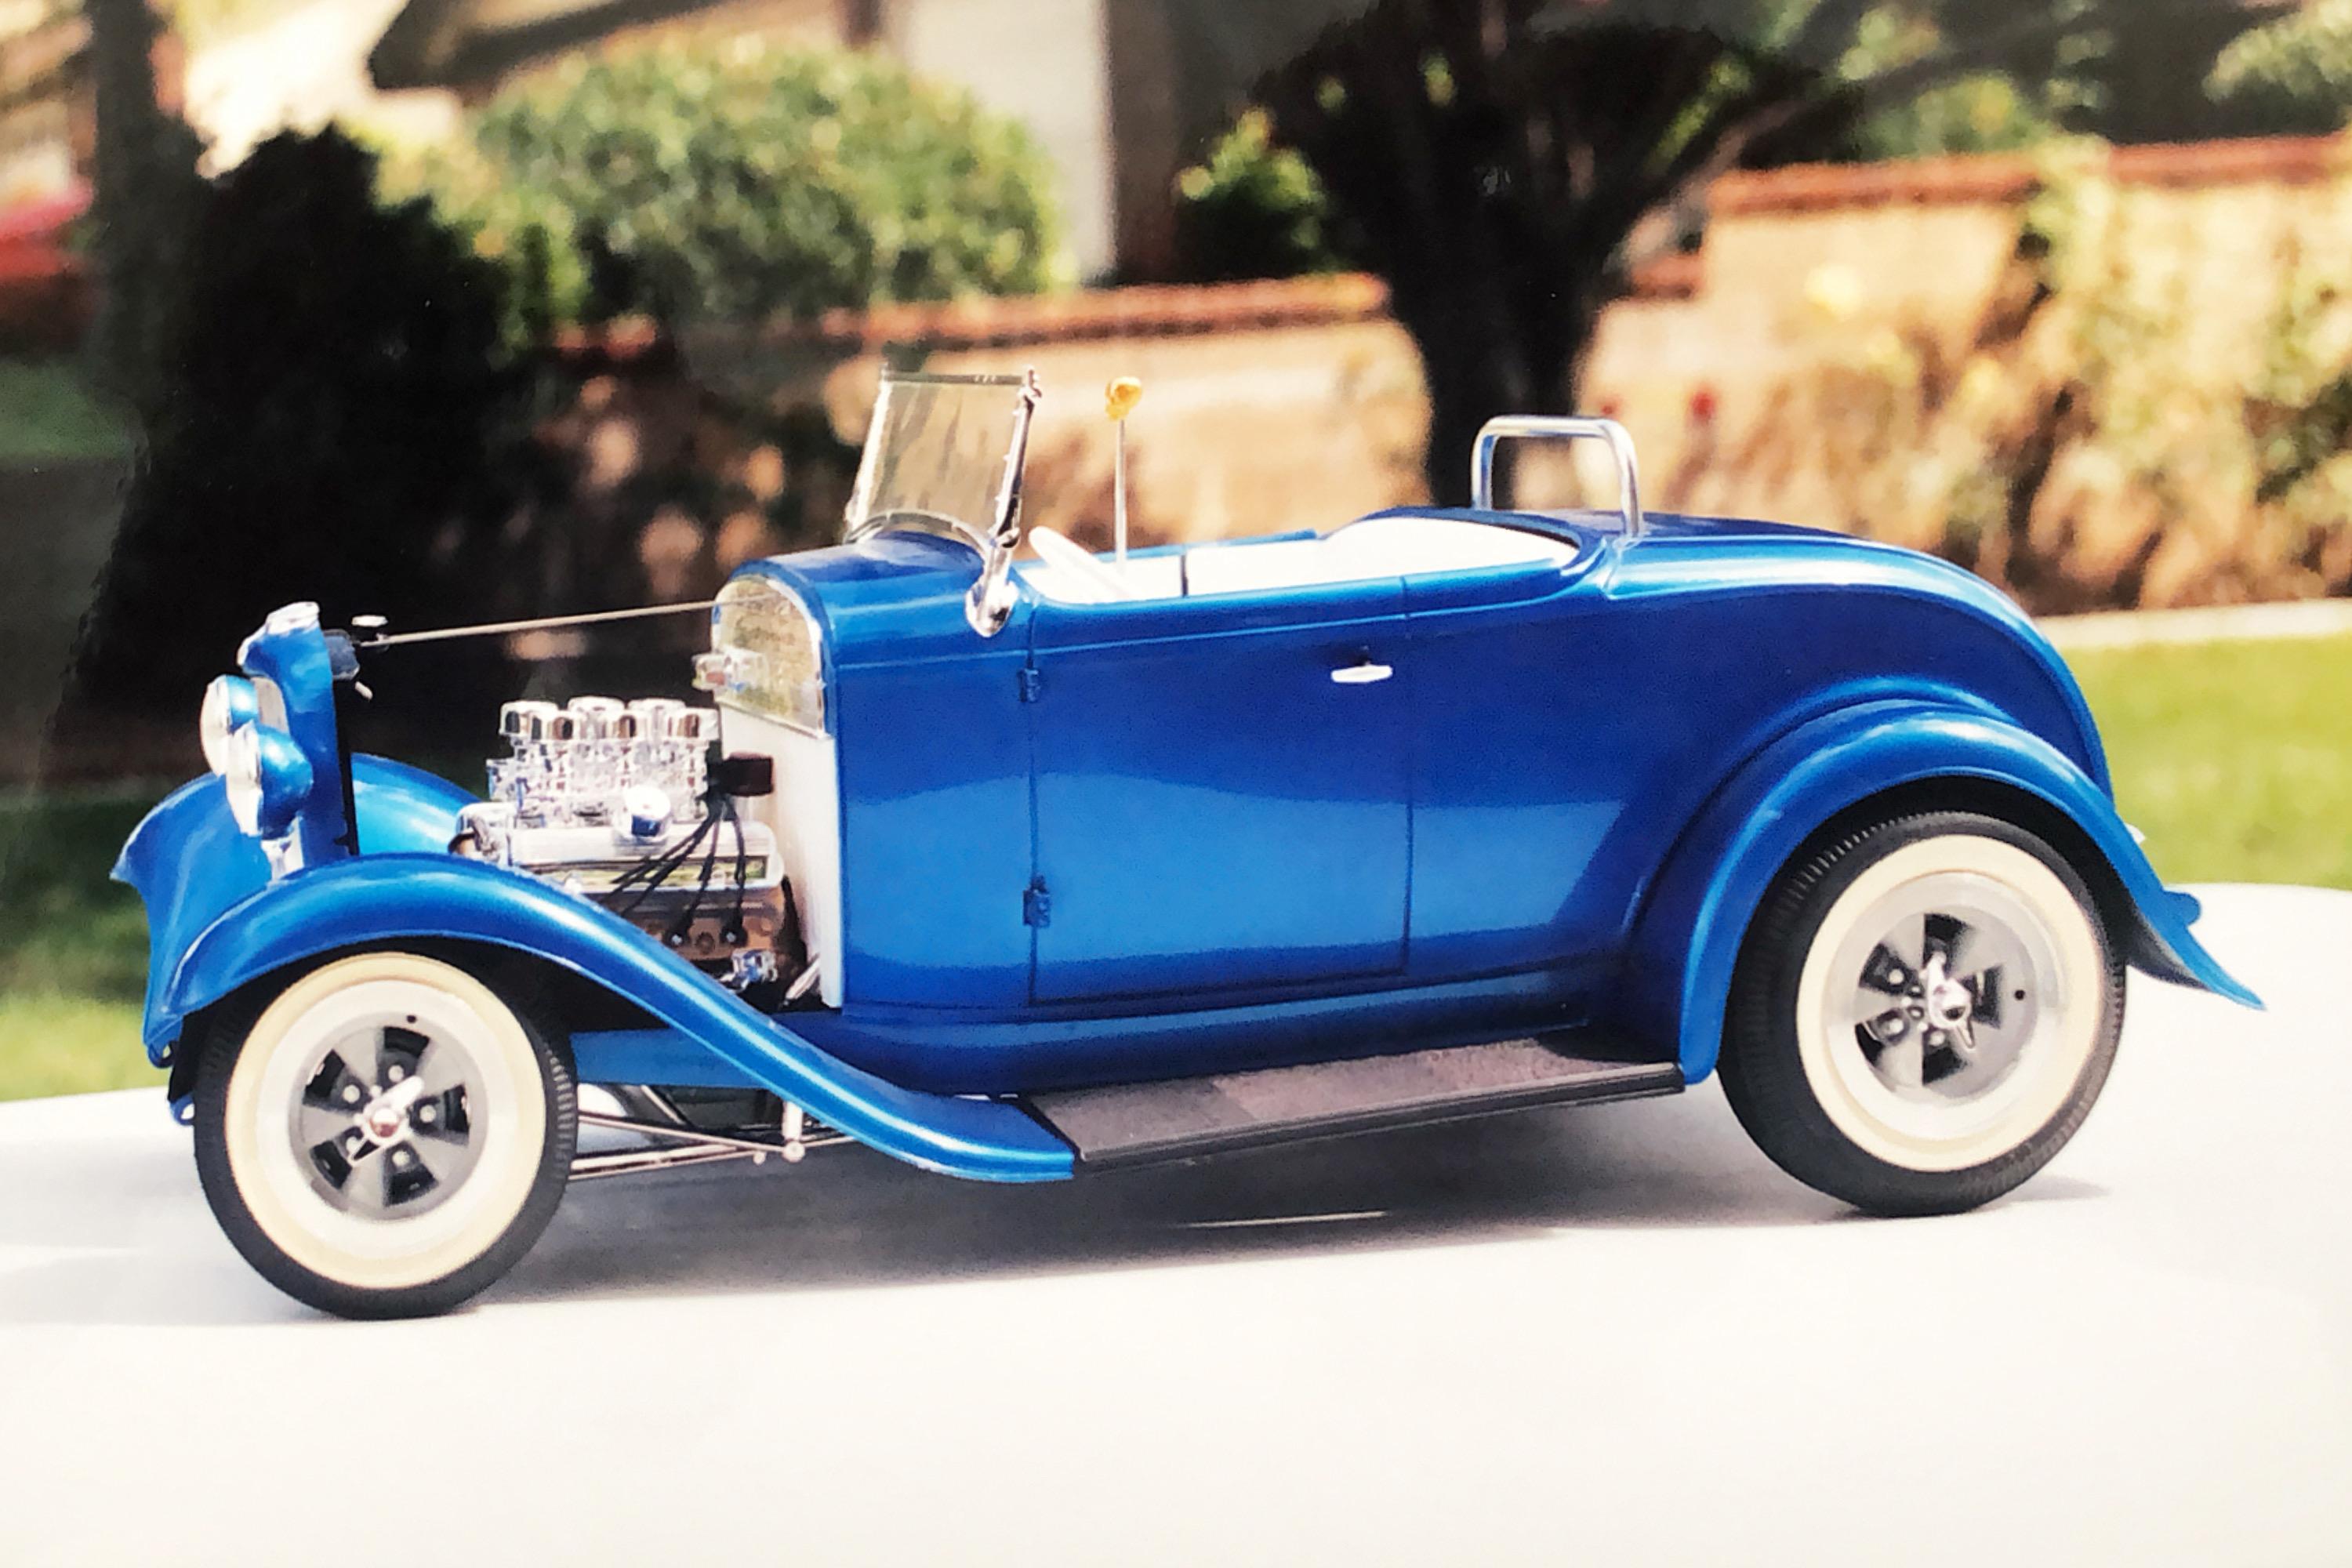
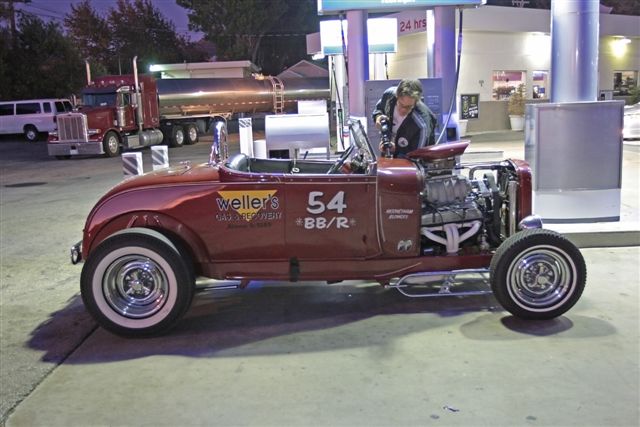
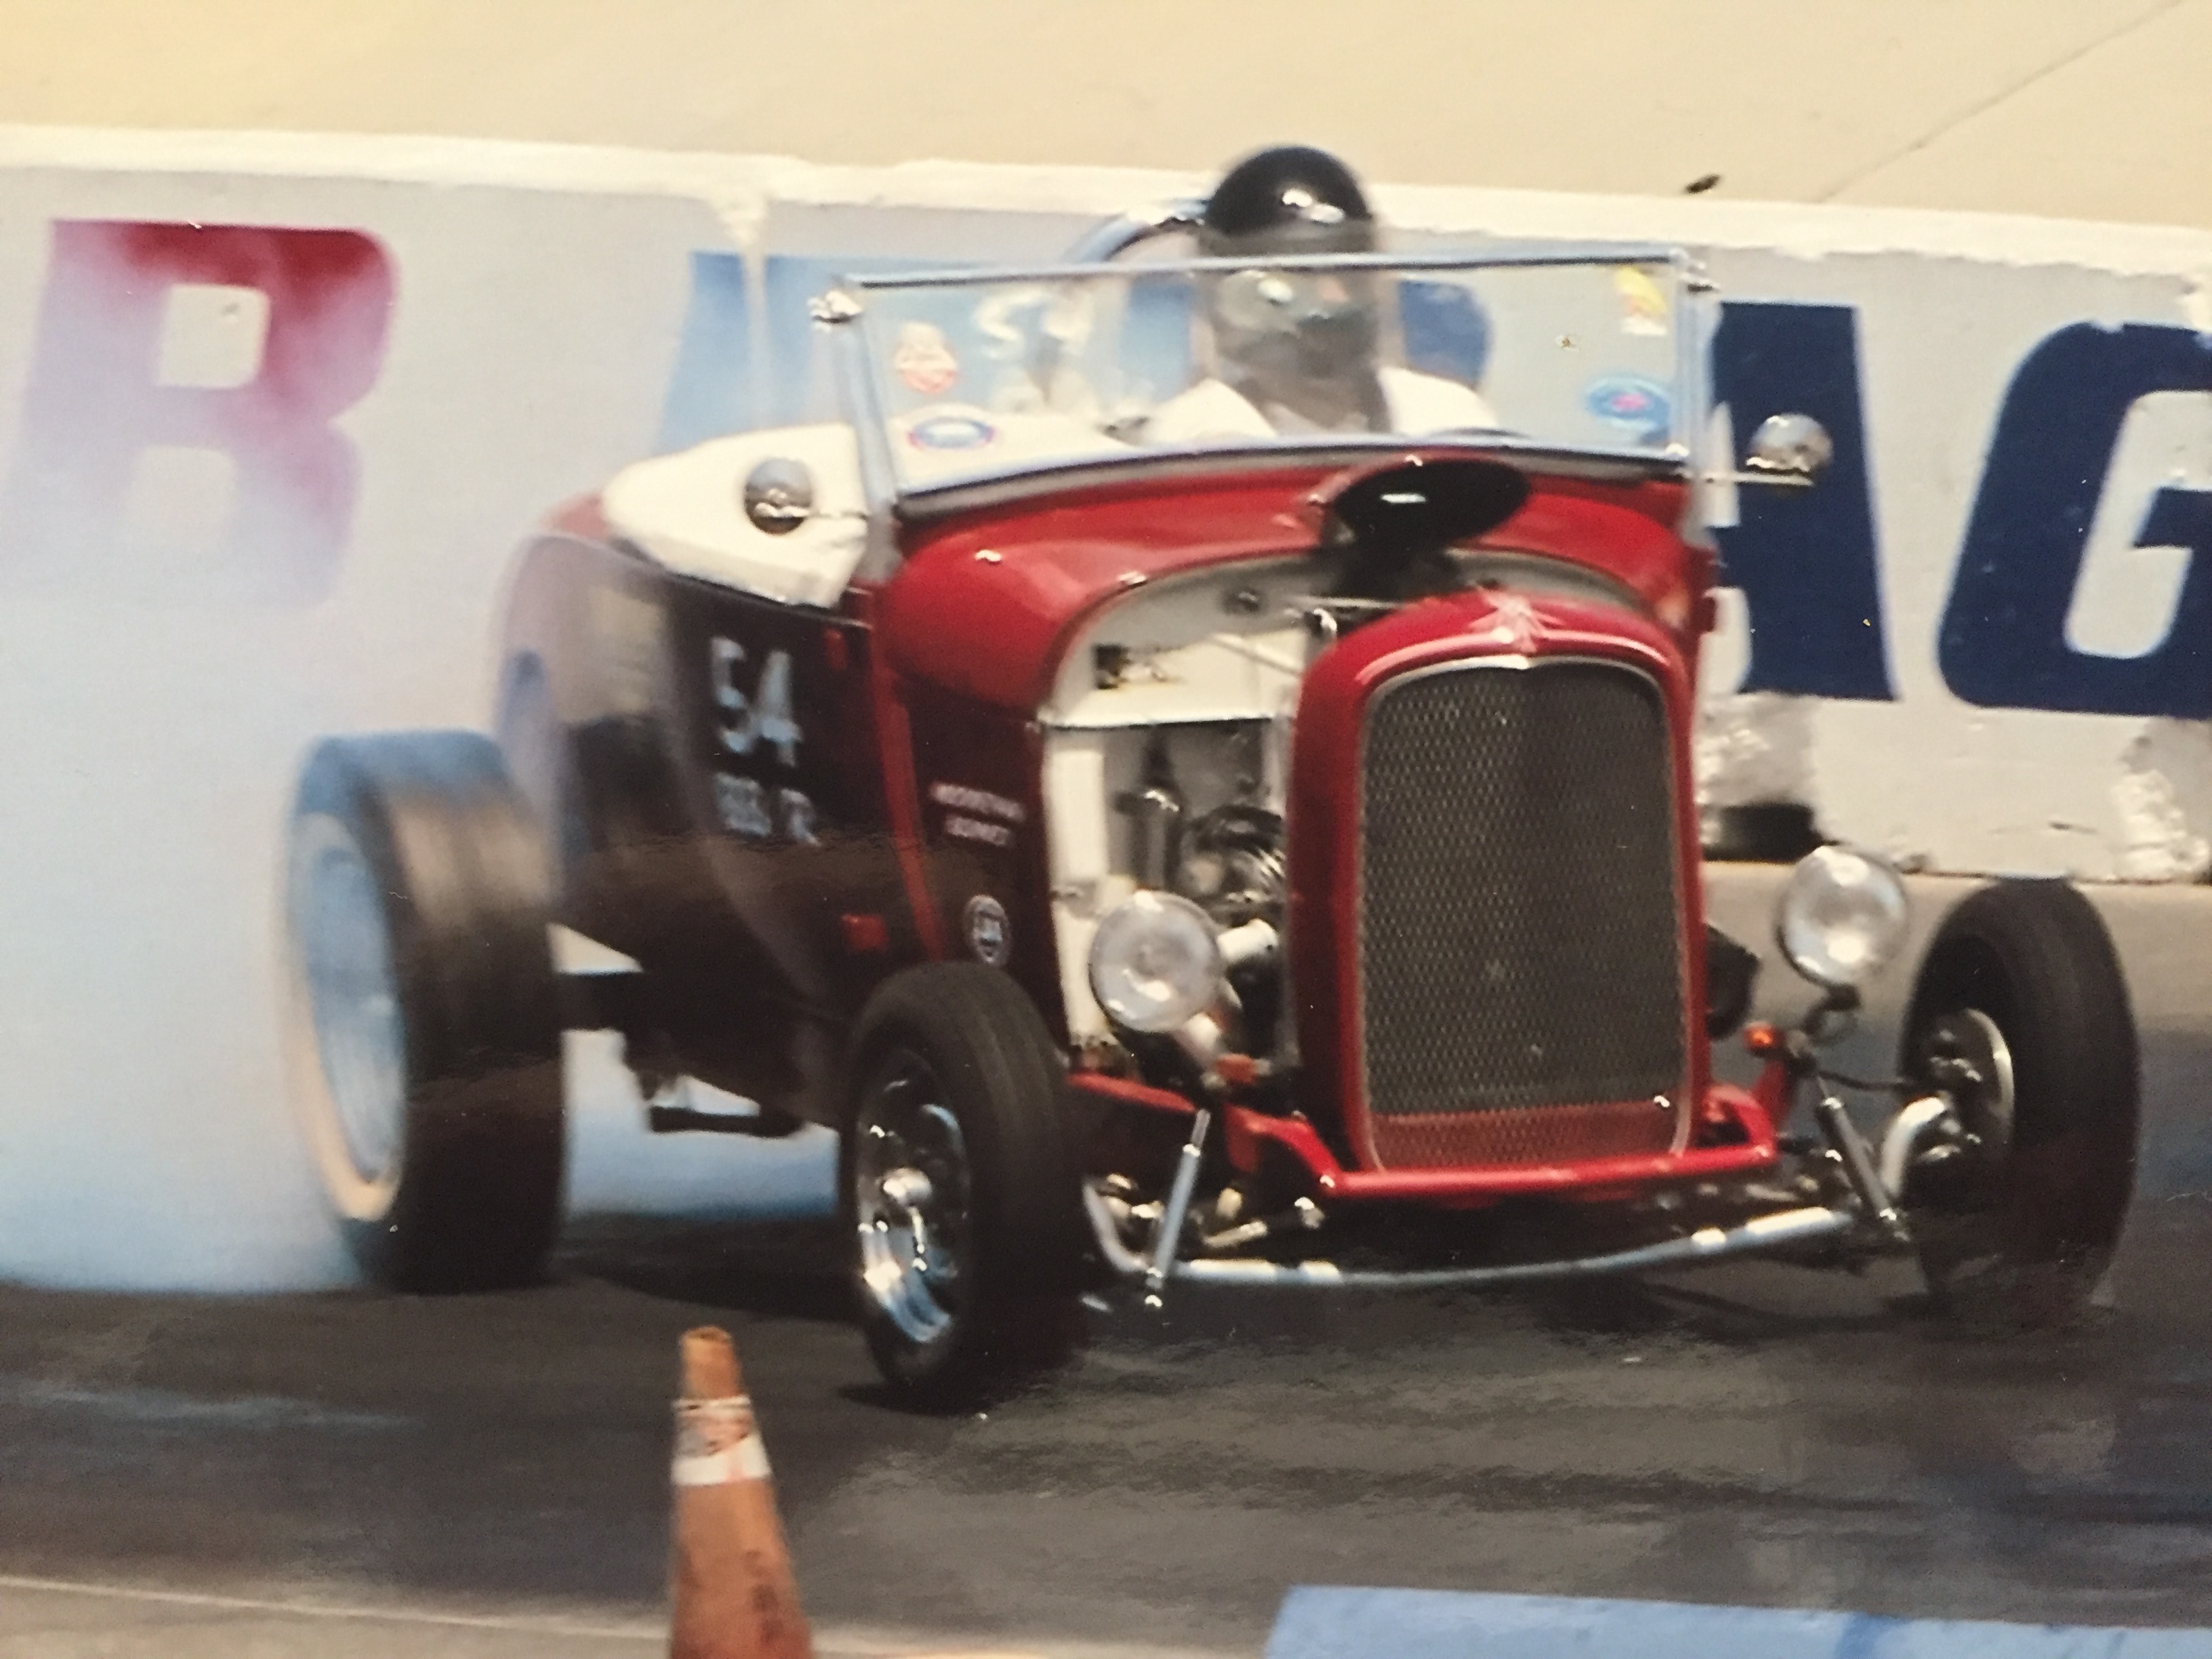
My '29 roadster.
-
You are correct and I considered that but it just looked cooler this way and I'm gonna display it with the hood off.