Doug Bowen
-
Posts
77 -
Joined
-
Last visited
Content Type
Profiles
Forums
Events
Gallery
Everything posted by Doug Bowen
-
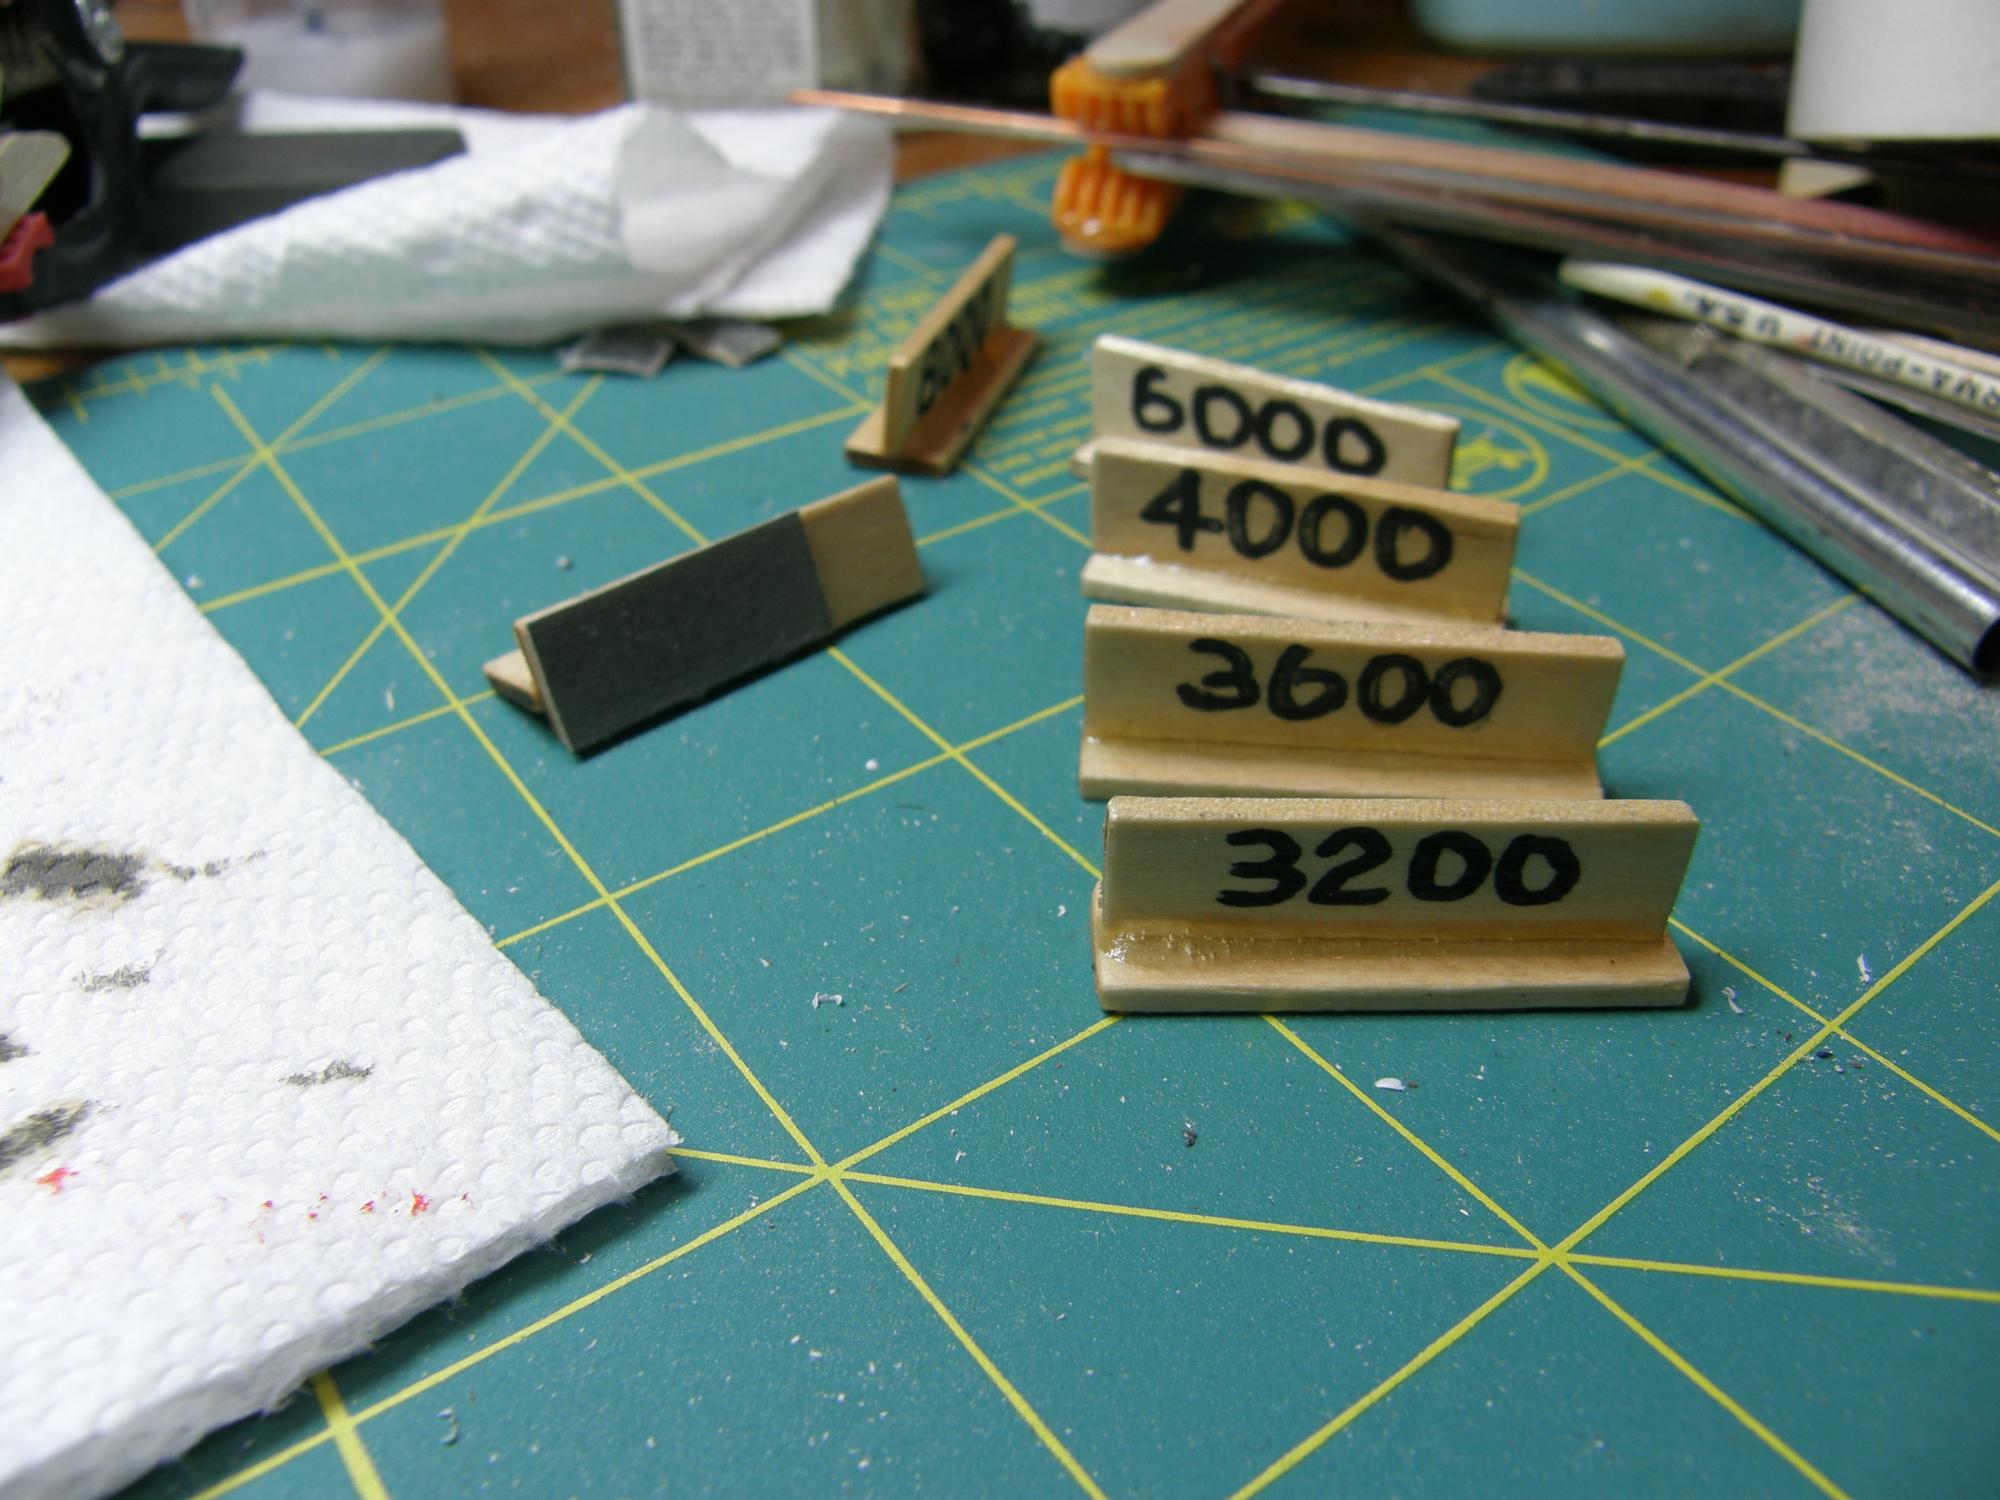
I have arthritis in my thumbs. Lucky me. This makes it kind of hard to hold little bits of sand paper during wet sanding of my paint jobs. So I cut some good old popsicle sticks down, epoxied "handles" at 90 degrees, sealed them with lacquer and used two-sided carpet tape to secure the sandpaper. Mark the grit with a sharpie...and have at it. Makes it a lot easier to hold. Hope this helps! Doug

-
color Recommendations
Doug Bowen replied to mnwildpunk's topic in Model Building Questions and Answers
Dave...go to automotivetouchup.com and have her go through it and pick the color she wants. Enter the make, model and year and you'll get actual factory colors. Maybe she'd like 1967 Chevy Butternut yellow. Always a nice look! D -
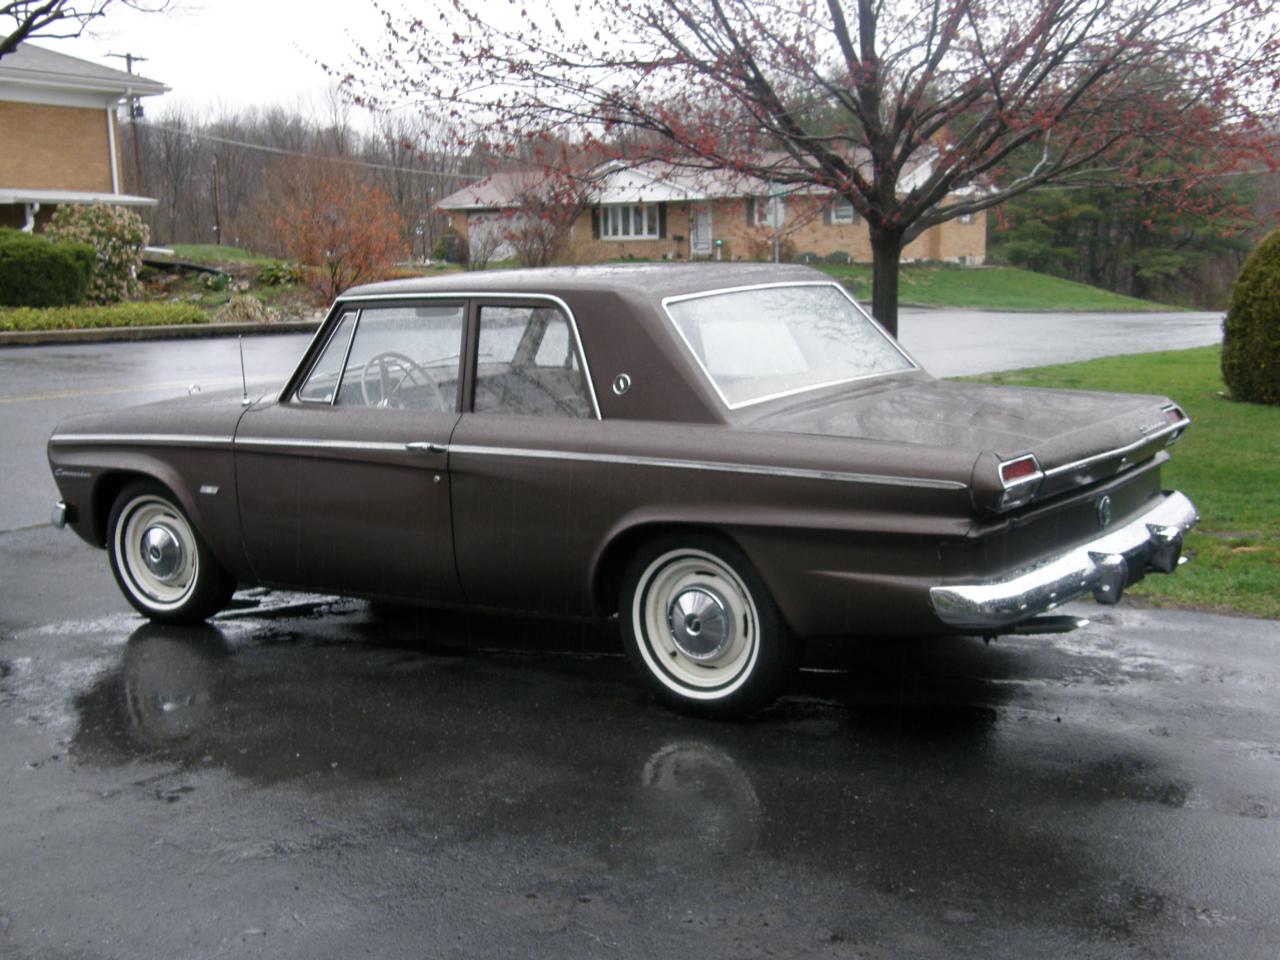
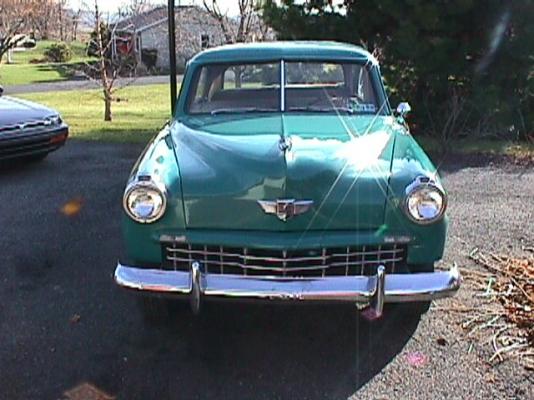
Mike...the red one has American Racing wheels on it, I believe. THAT is what I am going to find and use on this build. (black spokes/centers) I really never could latch on to the "dubs" look of today. I know that big diameter rims and small radial sidewall dimensions handle better because of less flex...but I really LIKE the looks of a 15" rim with a lot of "sidewall"... You don't have to call me old-fashioned...just call me OLD! (my real life '64 Studebaker has plain rims and "dog dish caps", for cryin' out loud!)
-
You can never have too many Deuces! They are spectacular any way you slice them...box-stock to channeled-and-chopped.
-
I always thought that the '60 Ford was a very well thought out design that got very little appreciation at the time of its birth. Great looking cars. Problem was the real ones rotted out like the '58 Chevy did! Not many of the Fords around now. D
-
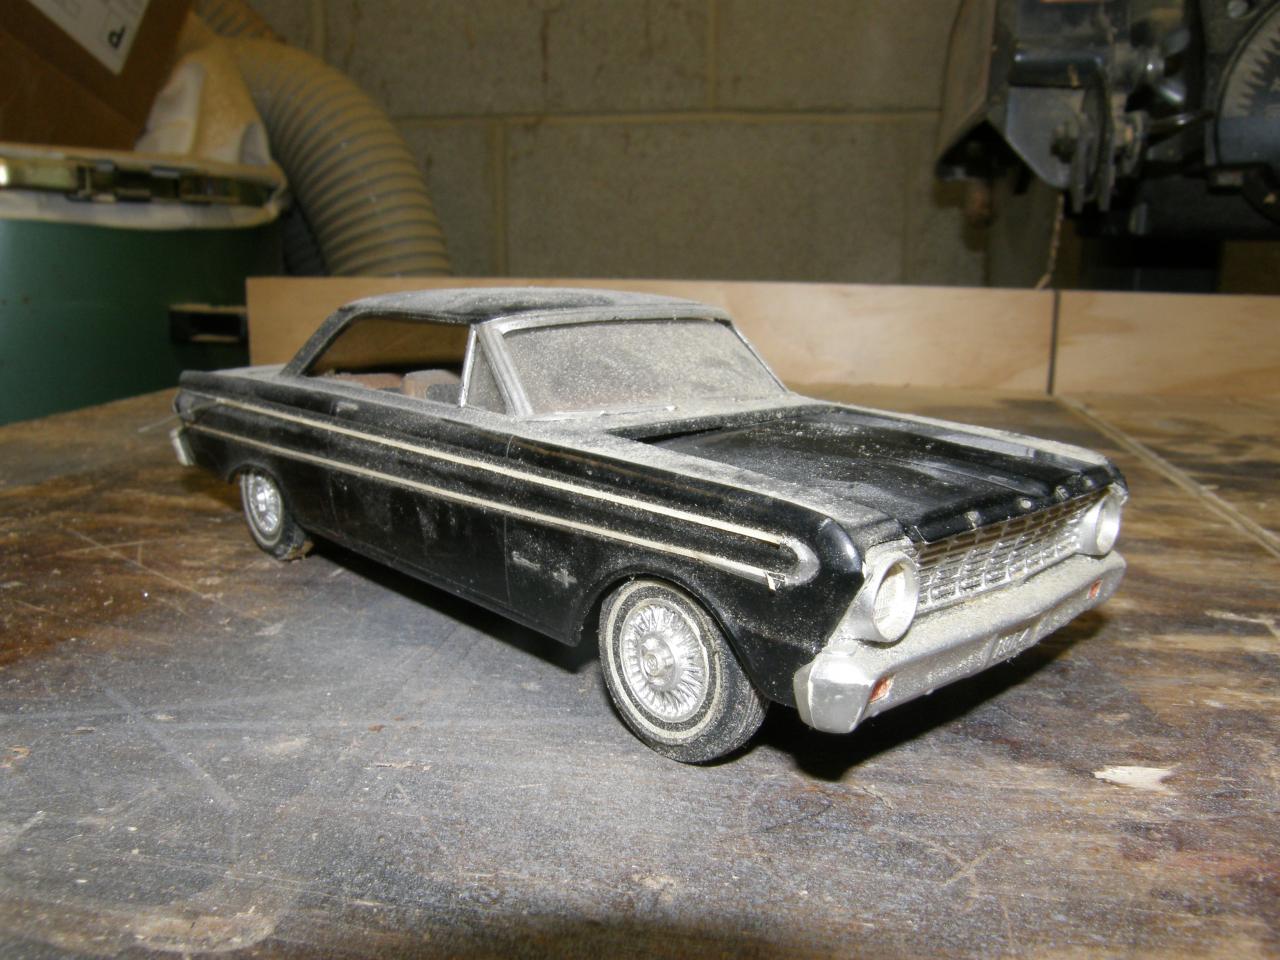
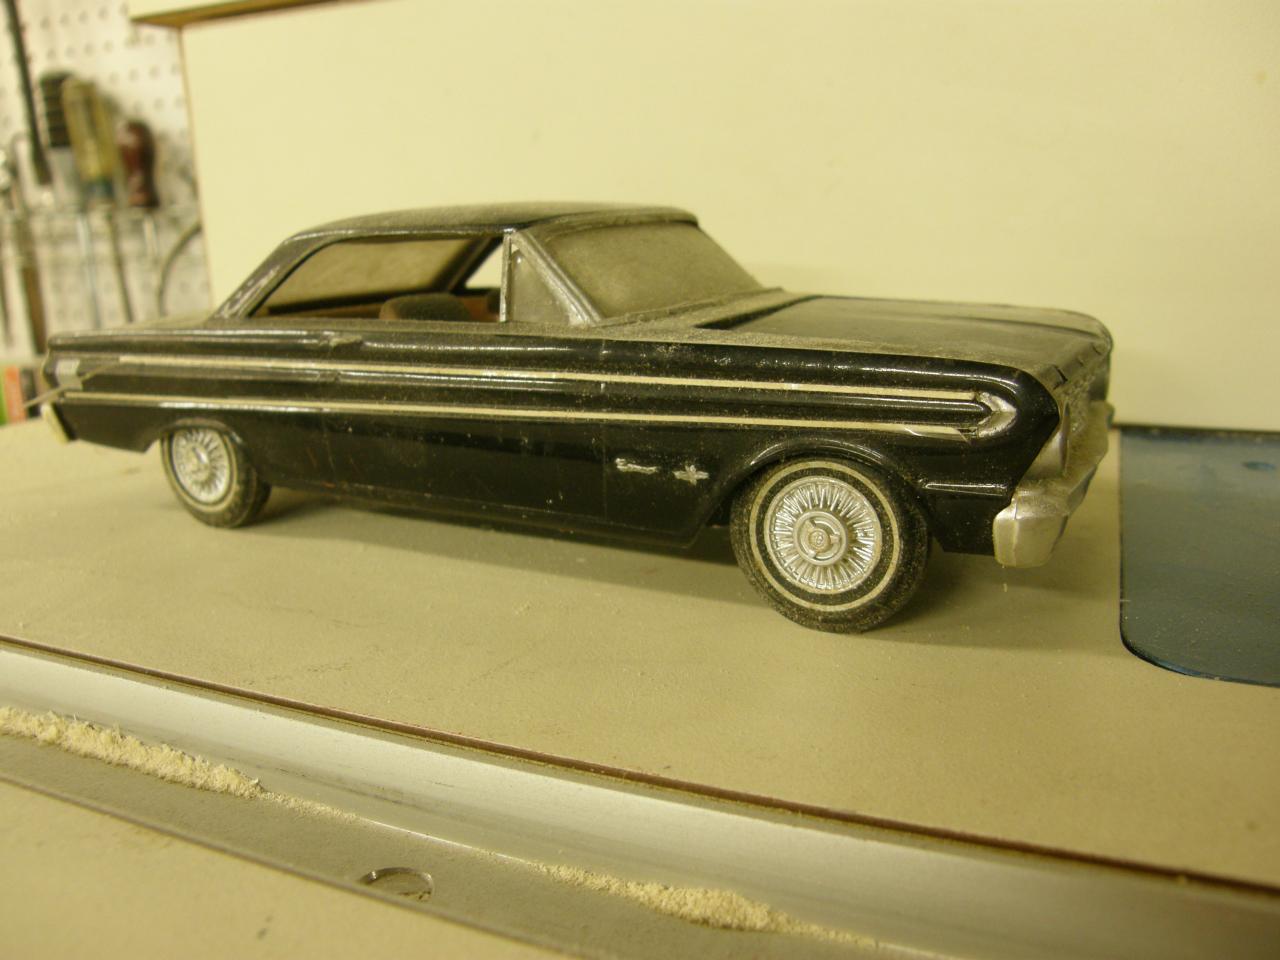
That fact that it cleaned up so nice speaks to the reality that as a 15 year old I simply ripped it out of the box and blew some paint on it!!! No prep work at all!
-
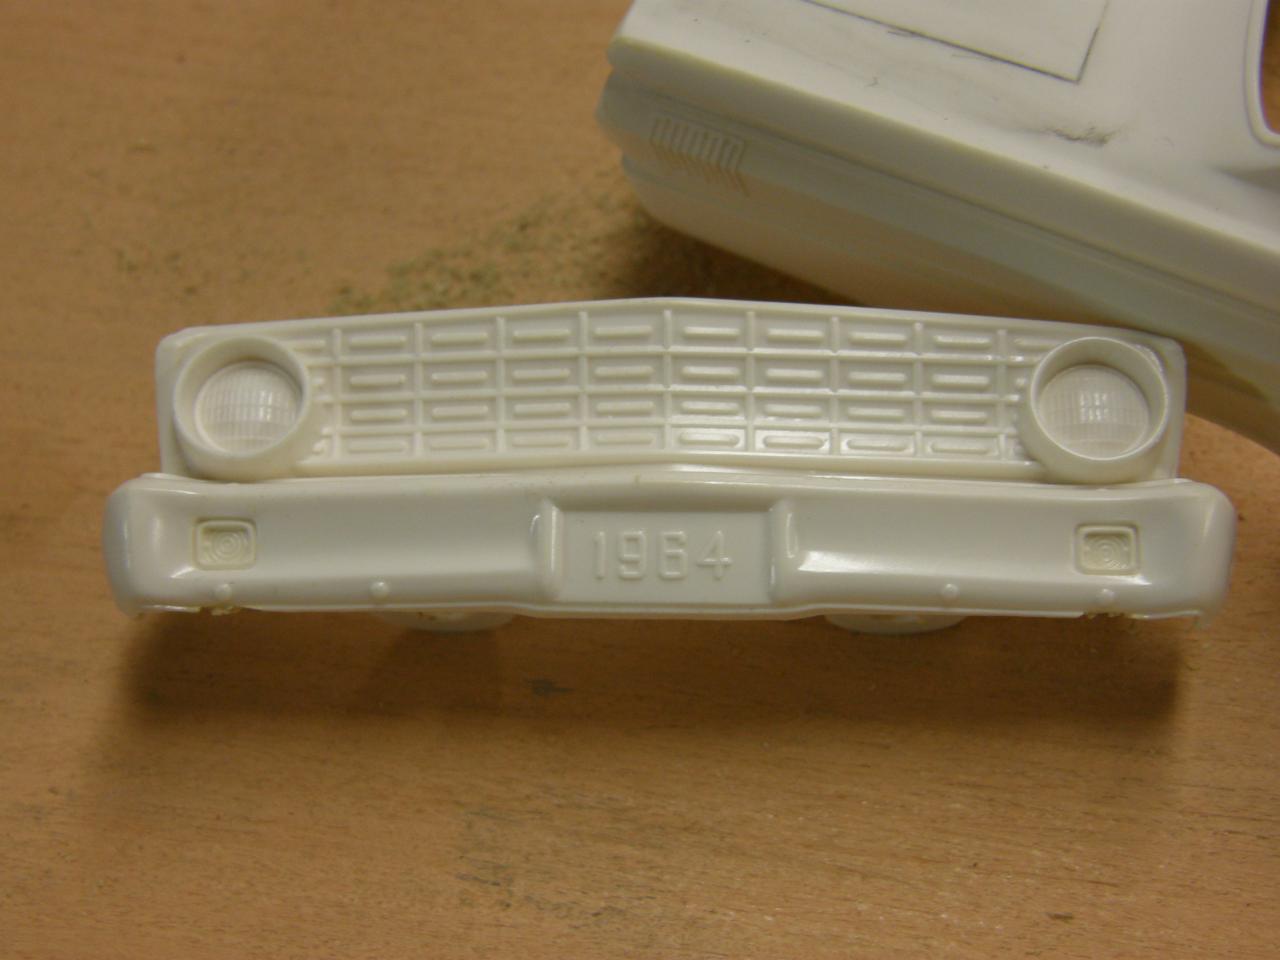
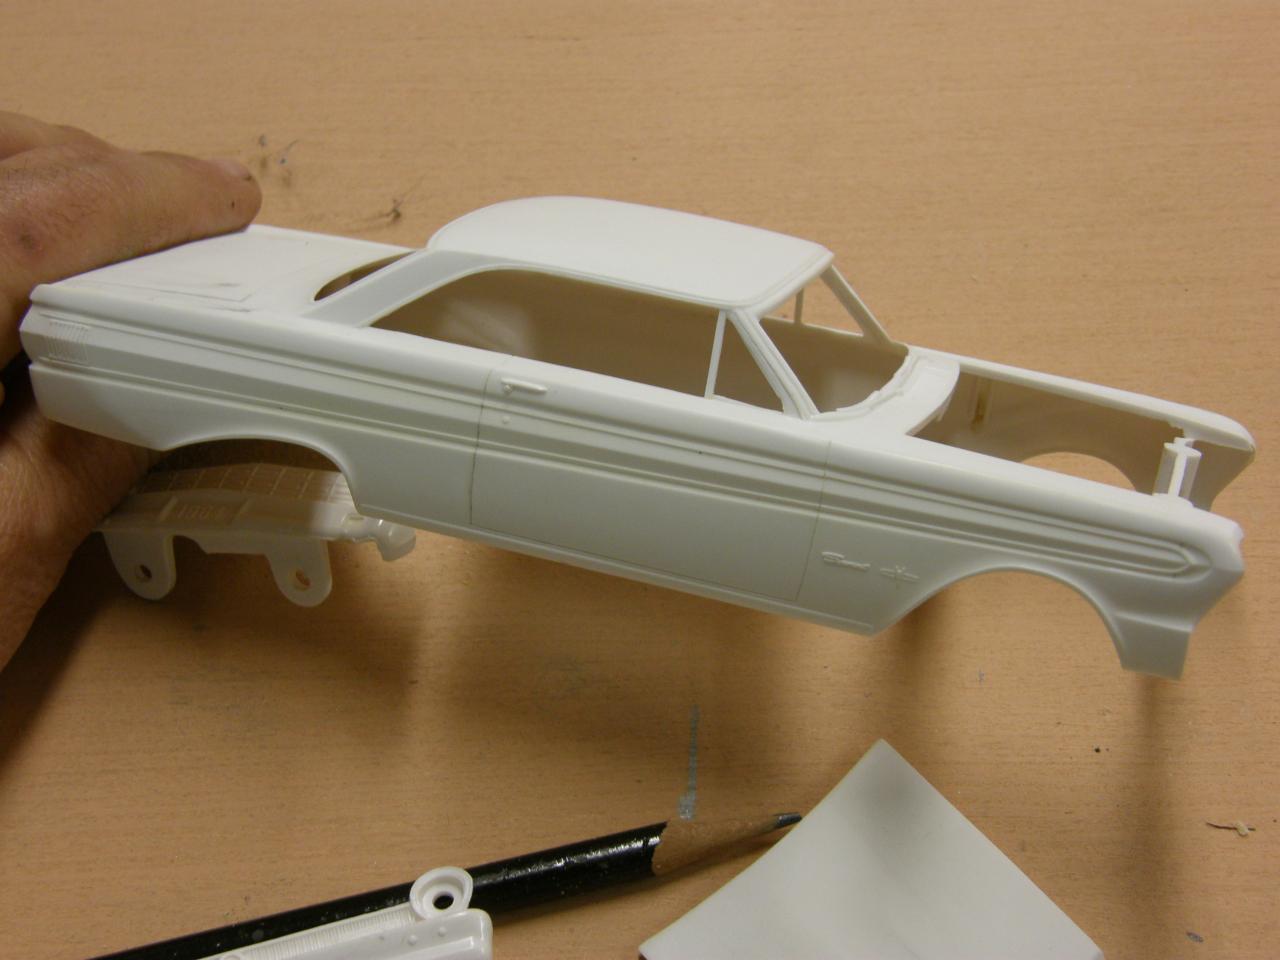
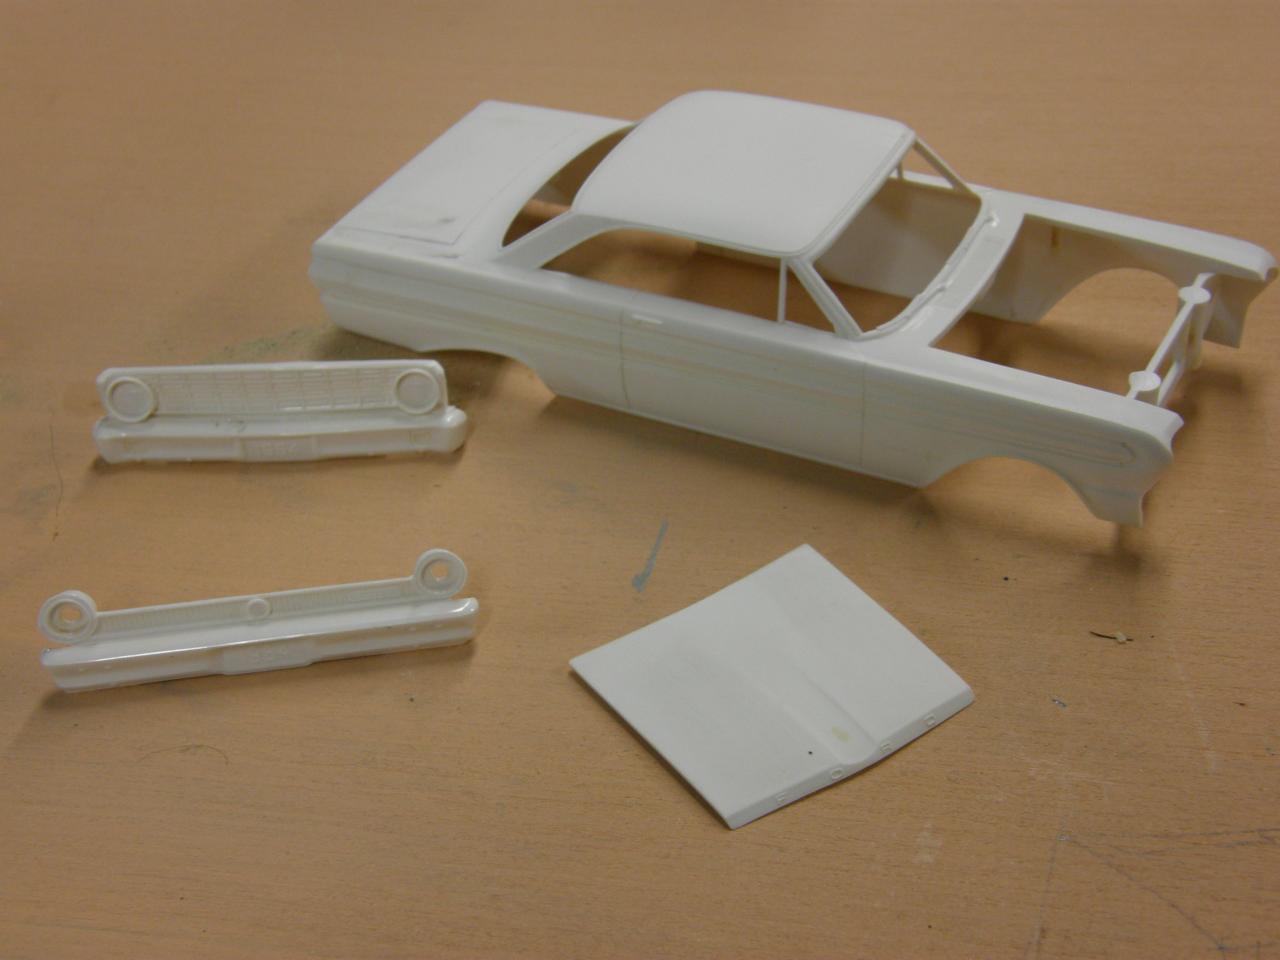
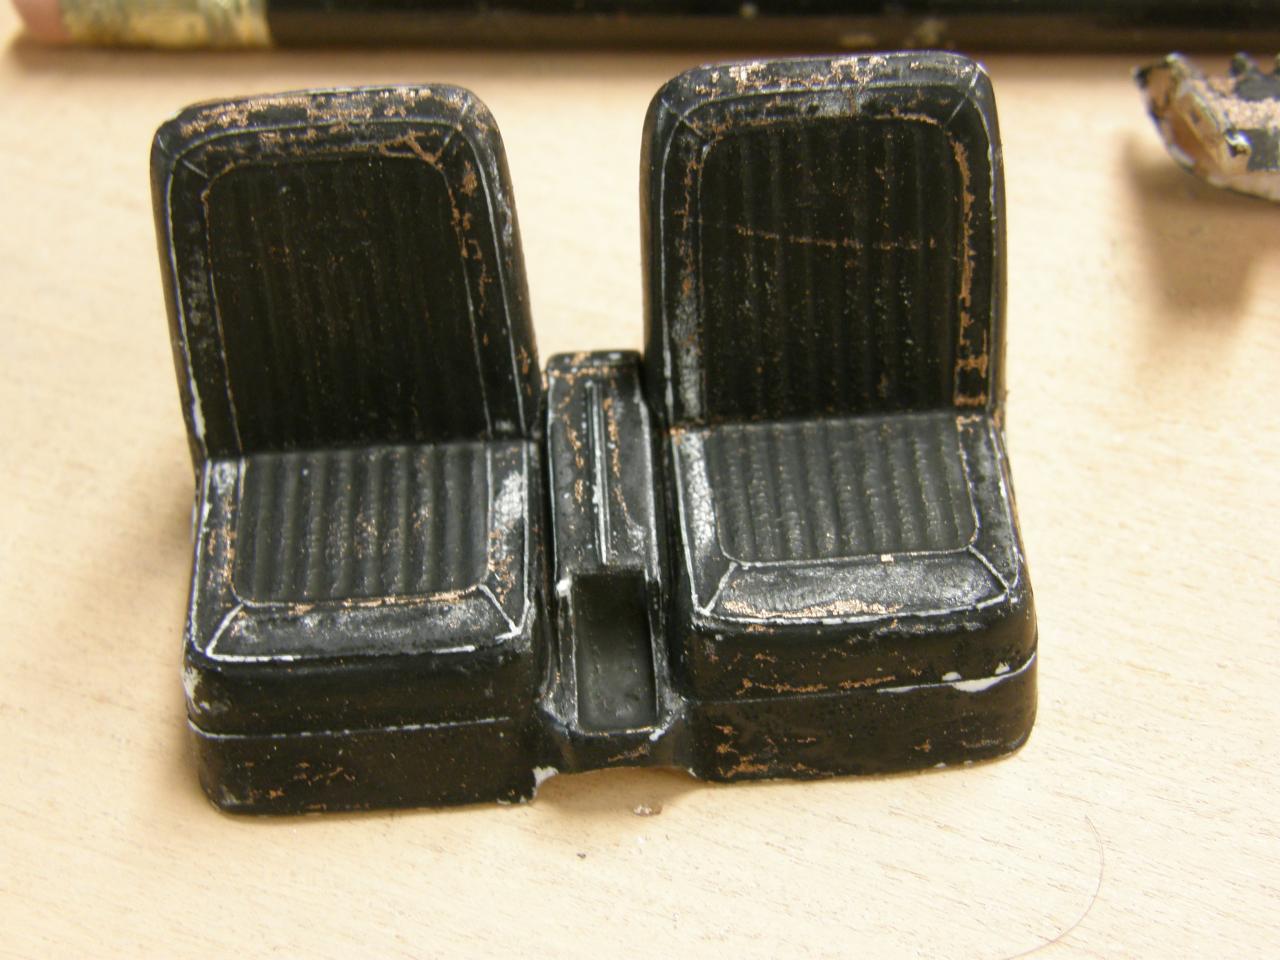
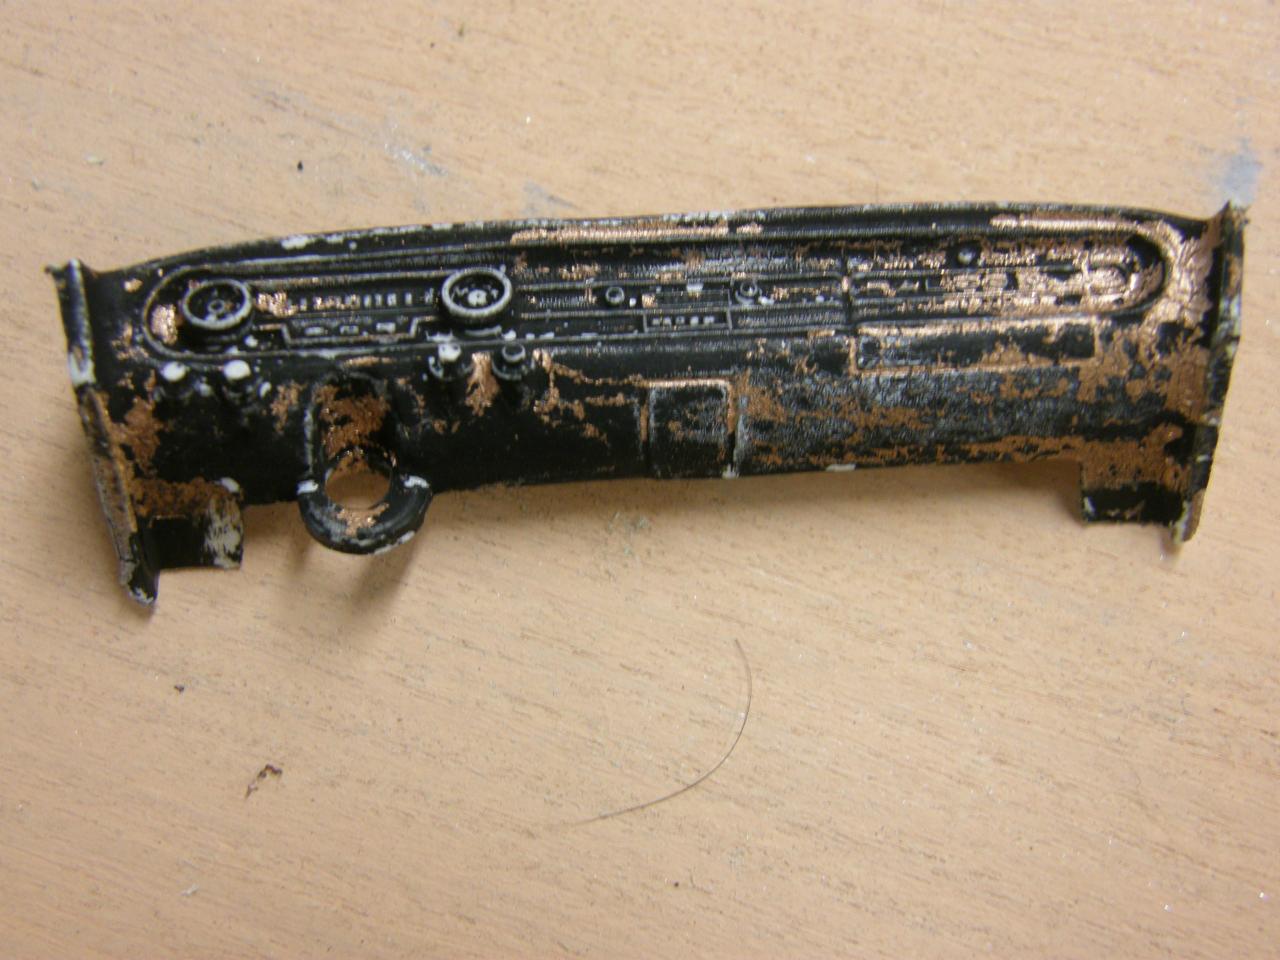
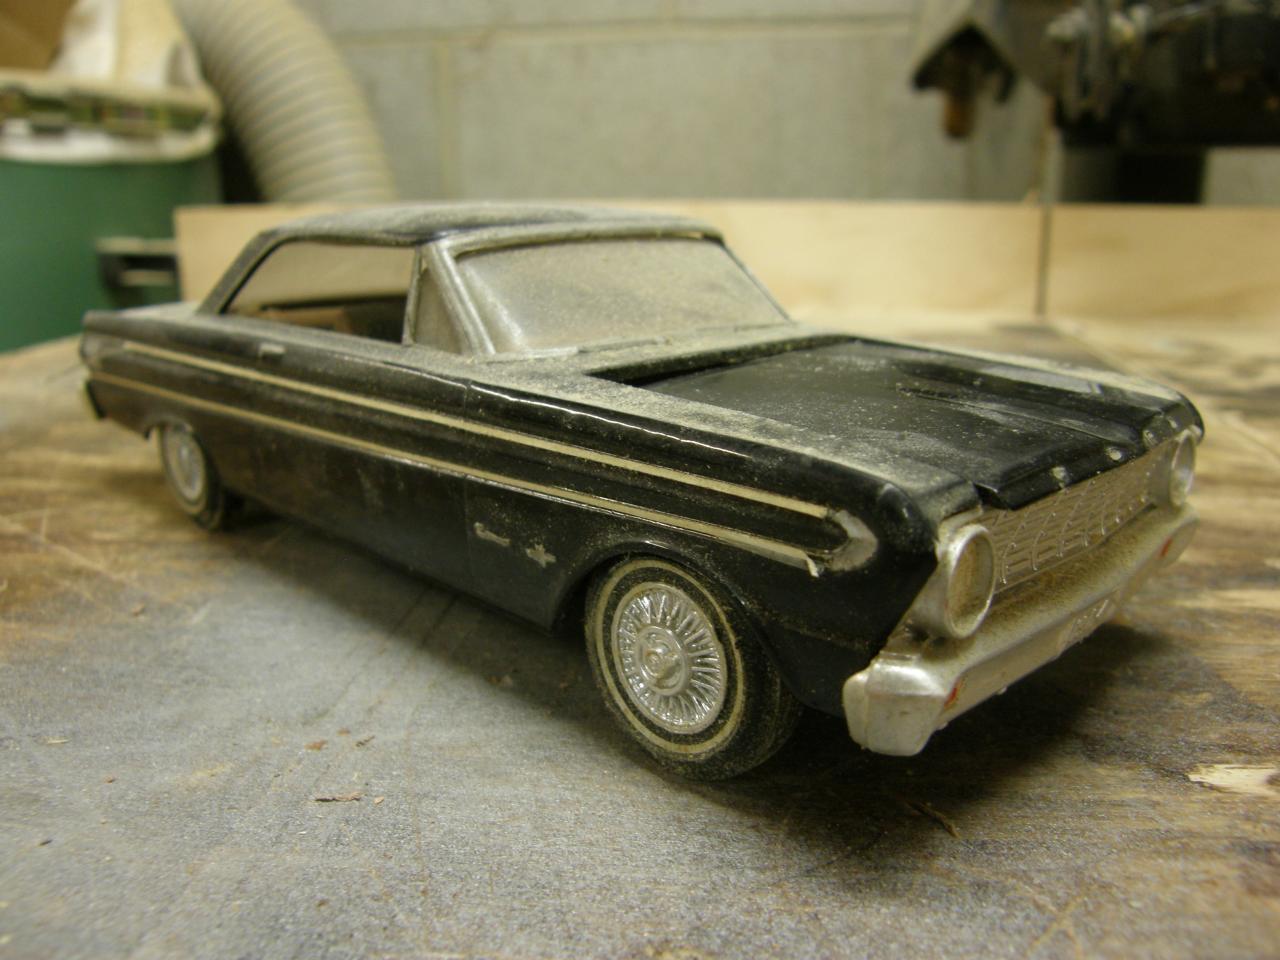
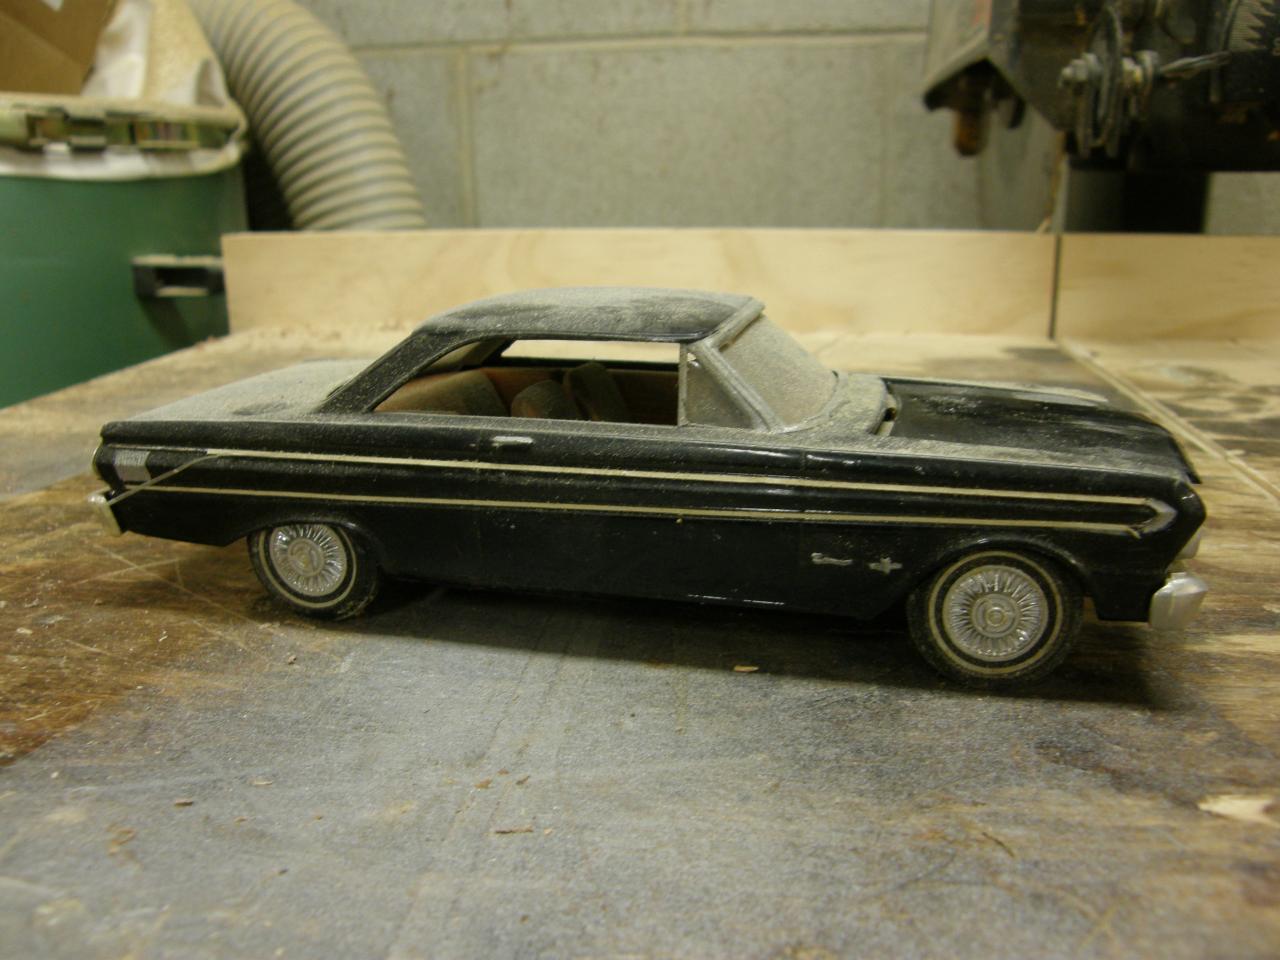
Wow...I just got my old Falcon out of the purple pond. Never used any paint strippers at all before. This stuff really worked nice. The body and bumpers/grill came out like it was fresh out of the box. NOT the same story for the interior, though. I can't remember what that 15 year old sprayed on the interior. Must have been something my Dad had lying about. Guess I'll try 90% denatured alcohol...but it looks as though the surface has been "lacquer" attacked. We'll see. D
-
Beautiful work Steve. How did you do the script on the rear quarter panel? Is that the "foil under the paint" method or ?? That looks factory crisp. Real nice. Doug
-
I just did some investigation on the wine color we saw on the 1:1. Turns out to be "Vintage Burgundy" which is actually a '66 color. Just love it.
-
This weekend my wife and I saw a "wine" colored 1:1. So I decided to take the step of starting the "rebirth" of my '64 Falcon. First put together 50 years ago. (I was 15!!) Now in the Purple Pond. wish me luck. D
-
Mark...I like a challenge. D
-
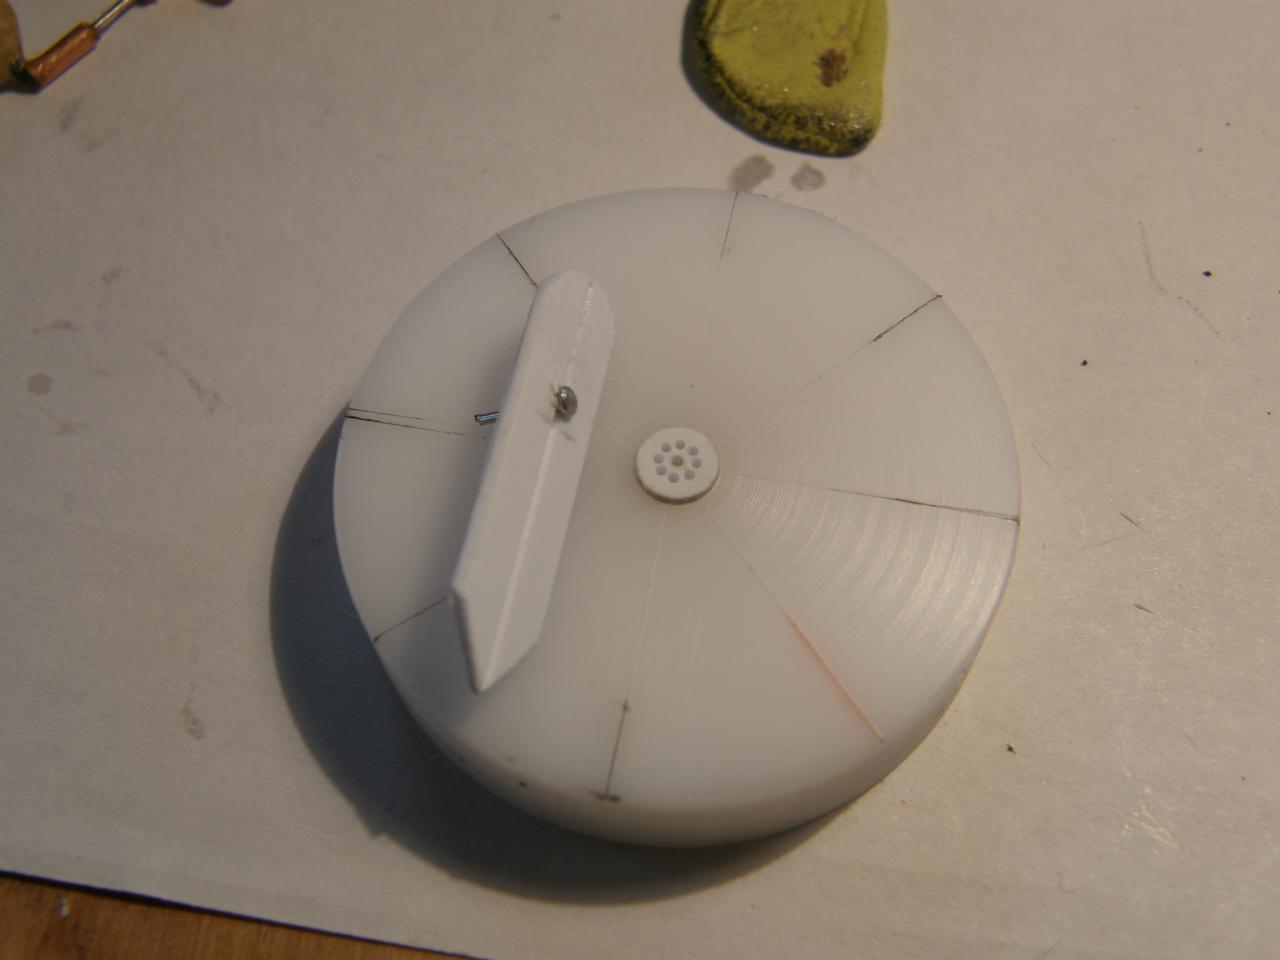
When I wore a younger man's clothes, I used to drill holes in 1/25th distributor caps "by eye". Those eyes are now 65 years old, so with the help of a machinist buddy we came up with this jig to evenly space those darned 8 holes with a coil wire hole in the center. On the opposite side of the jig is a center through hole to locate the coil wire hole...then flip over the distributor (3/16" dia stock) and put in the "pointer", work your way around with a pin vise and DA DA! It worked.
-
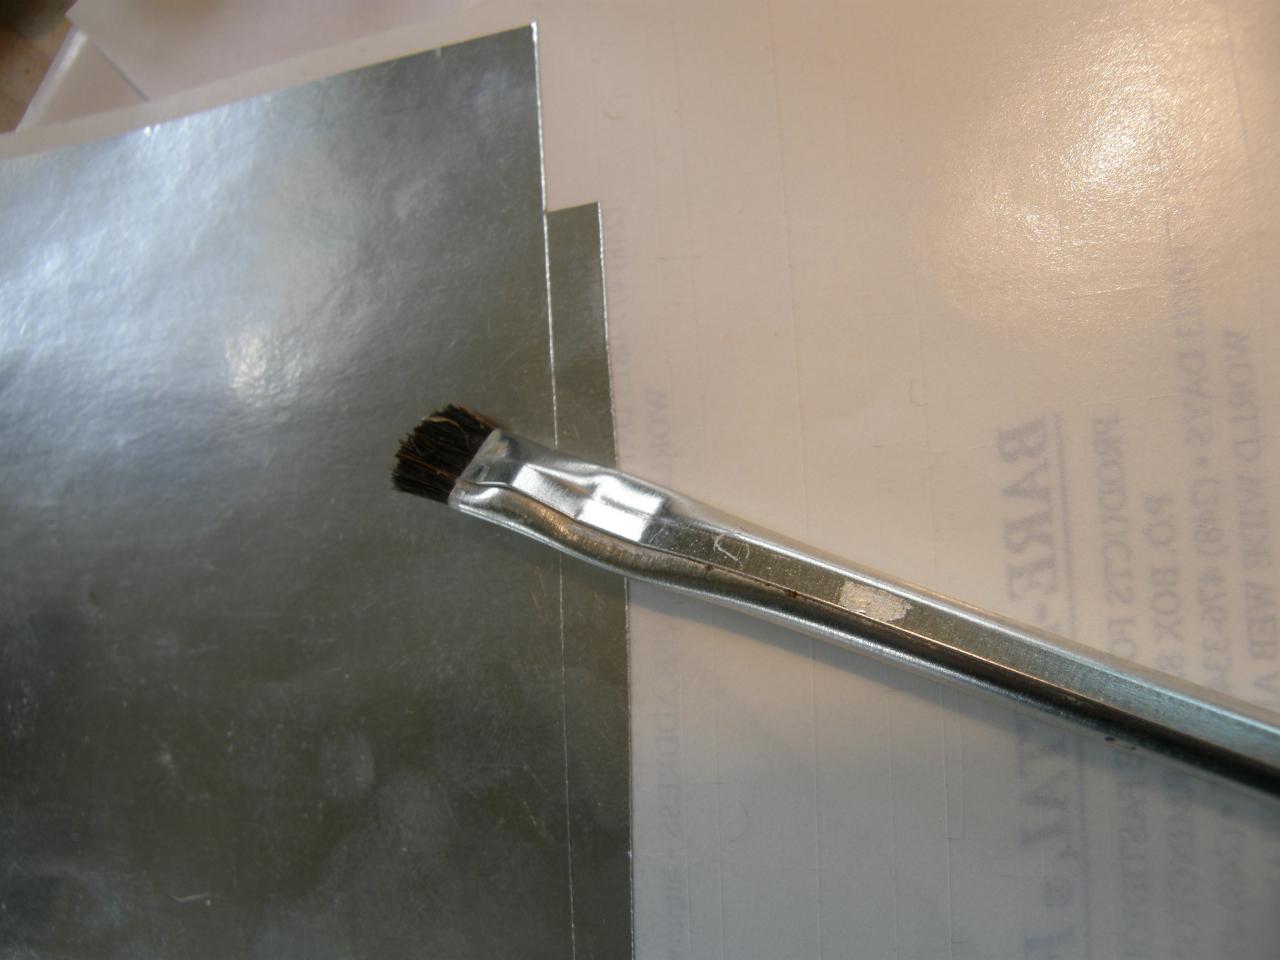
This morning I had a thought and tried it out. I took a "flux brush" (for applying solder when sweating copper tubing) and trimmed the bristles down to about 1/4" long. This worked pretty well to burnish BMF into tight crevices. Its stiff, so you have to be careful with it. I'm sure it will scratch paint if leaned on to heavily.
-
Clear coat sanding...'63 Avanti
Doug Bowen replied to Doug Bowen's topic in Model Building Questions and Answers
CrazyJim...Yeah, I just lean over the old kitchen sink and a cereal bowl of water with a drop or two of Palmolive clear in it. After I sand a little while, I rinse with water, dry the surface with a paper towel and follow a ceiling spot light down the body to check "flatness" I guess would be the word. D -
Clear coat sanding...'63 Avanti
Doug Bowen replied to Doug Bowen's topic in Model Building Questions and Answers
Thanks William...you are correct. The 12000 grit step just knocked my socks off. Amazing. If any body out there hasn't tried this, give yourself a treat. -
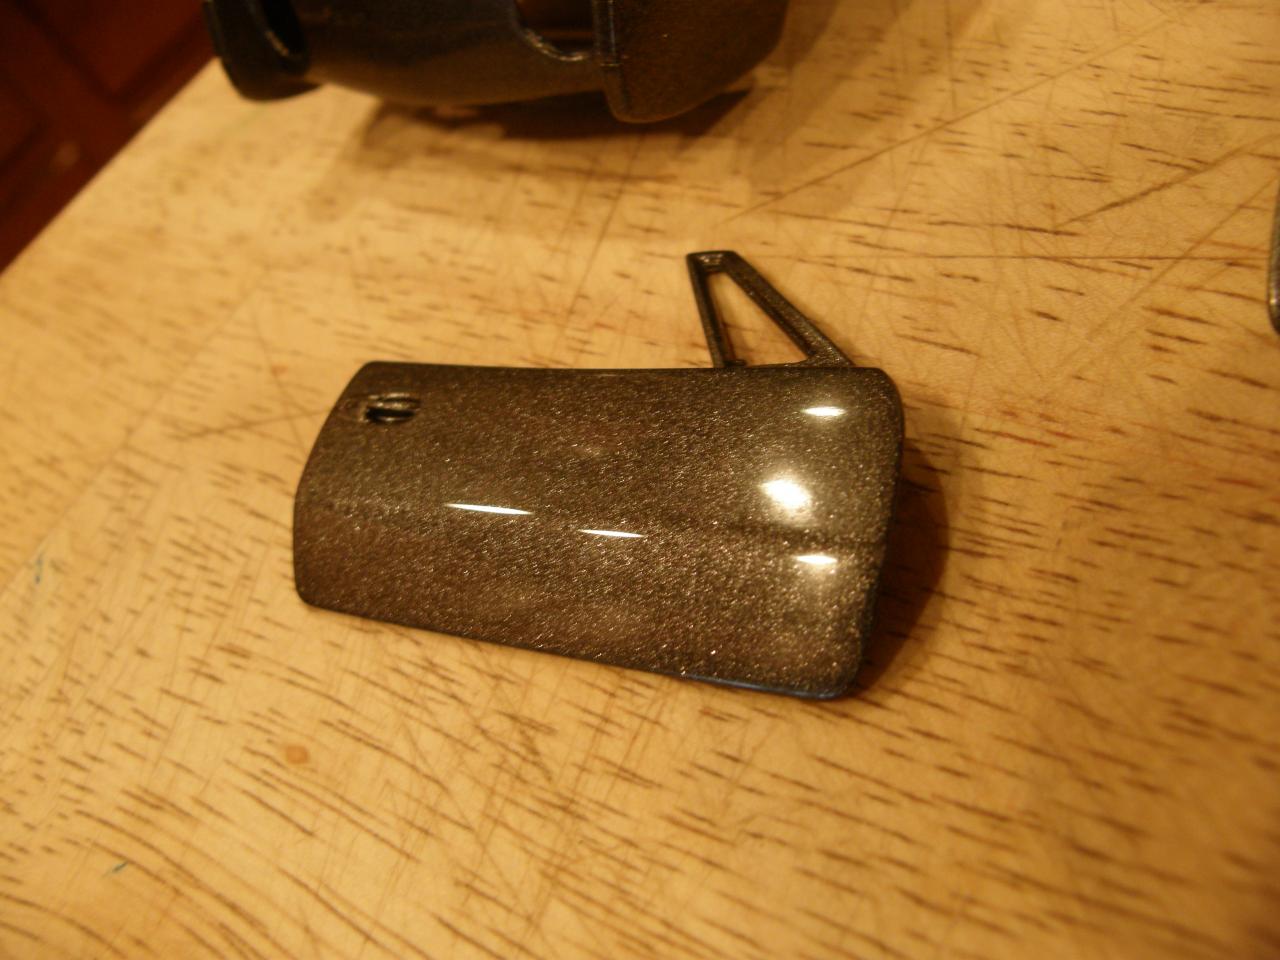
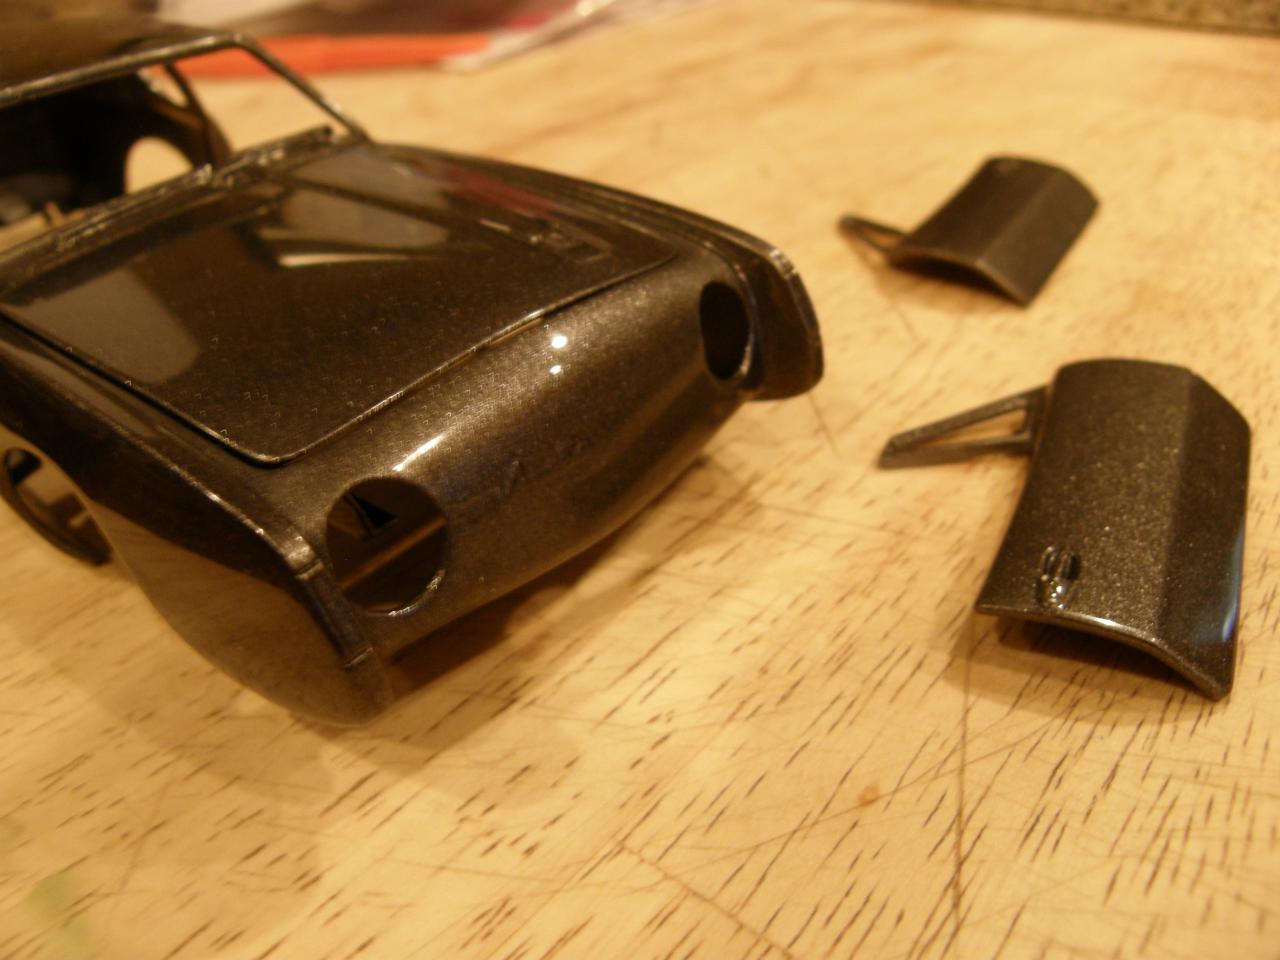
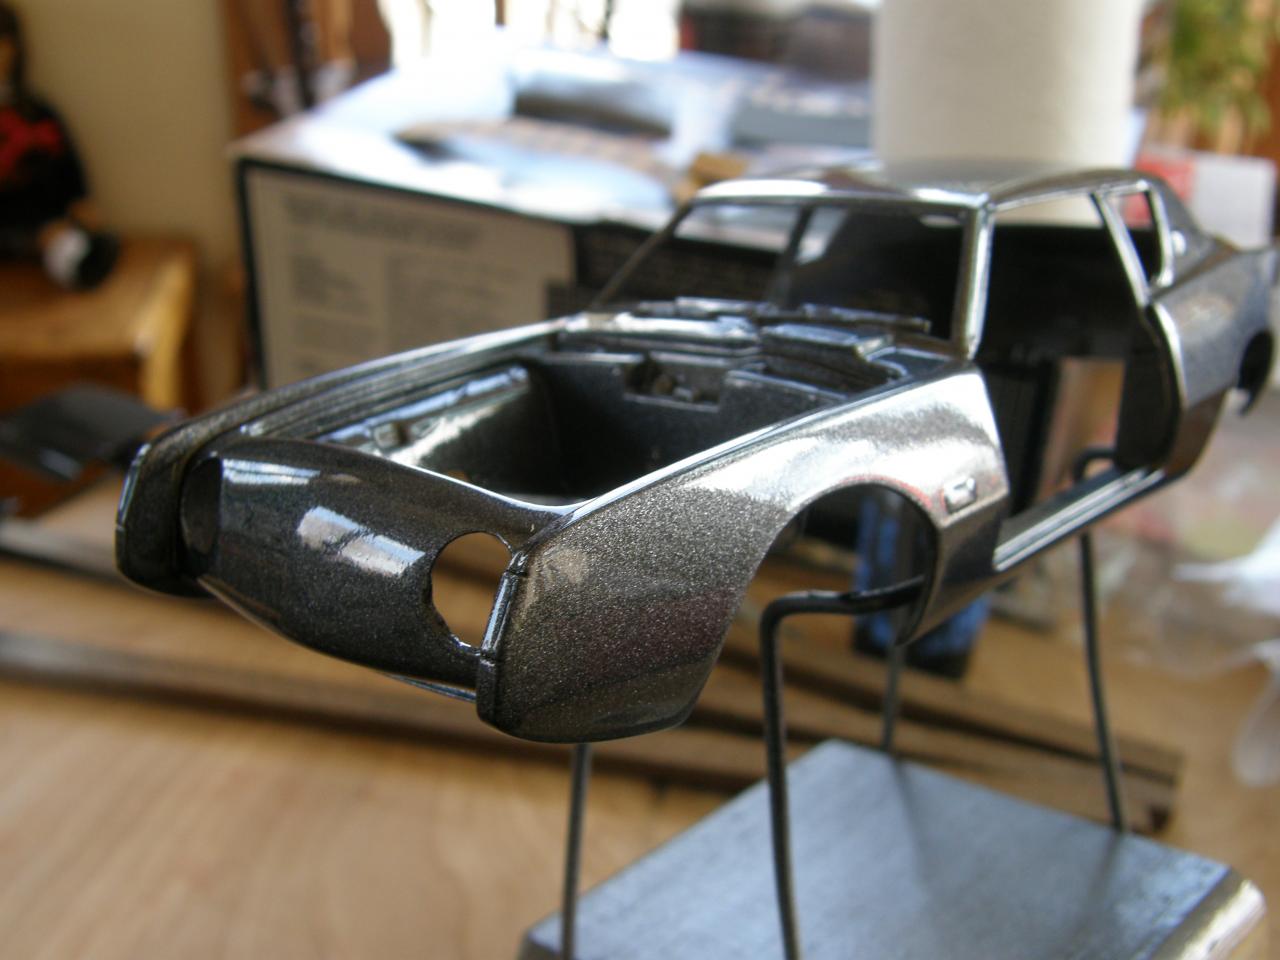
After looking at the pics I just posted, the only thing that I am not tickled to death with is the "scale" of the metallic DupliColor. Looks like a metal-flake job. Oh well.
-
Got some update pics to post. This is the result of wet sanding from 3200 through 12000 grit. Never did this before in my life! Wow am I happy with the results. Burned through (2coats of paint and 3 coats of clear) in only one little spot on the drivers side front fender tip. A little touch-up with brush and 12000 grit should "fix it". Next mission: Bare Metal Foil! Then, I guess Novus 2 and wax. Thanks for lookin' in... D
-
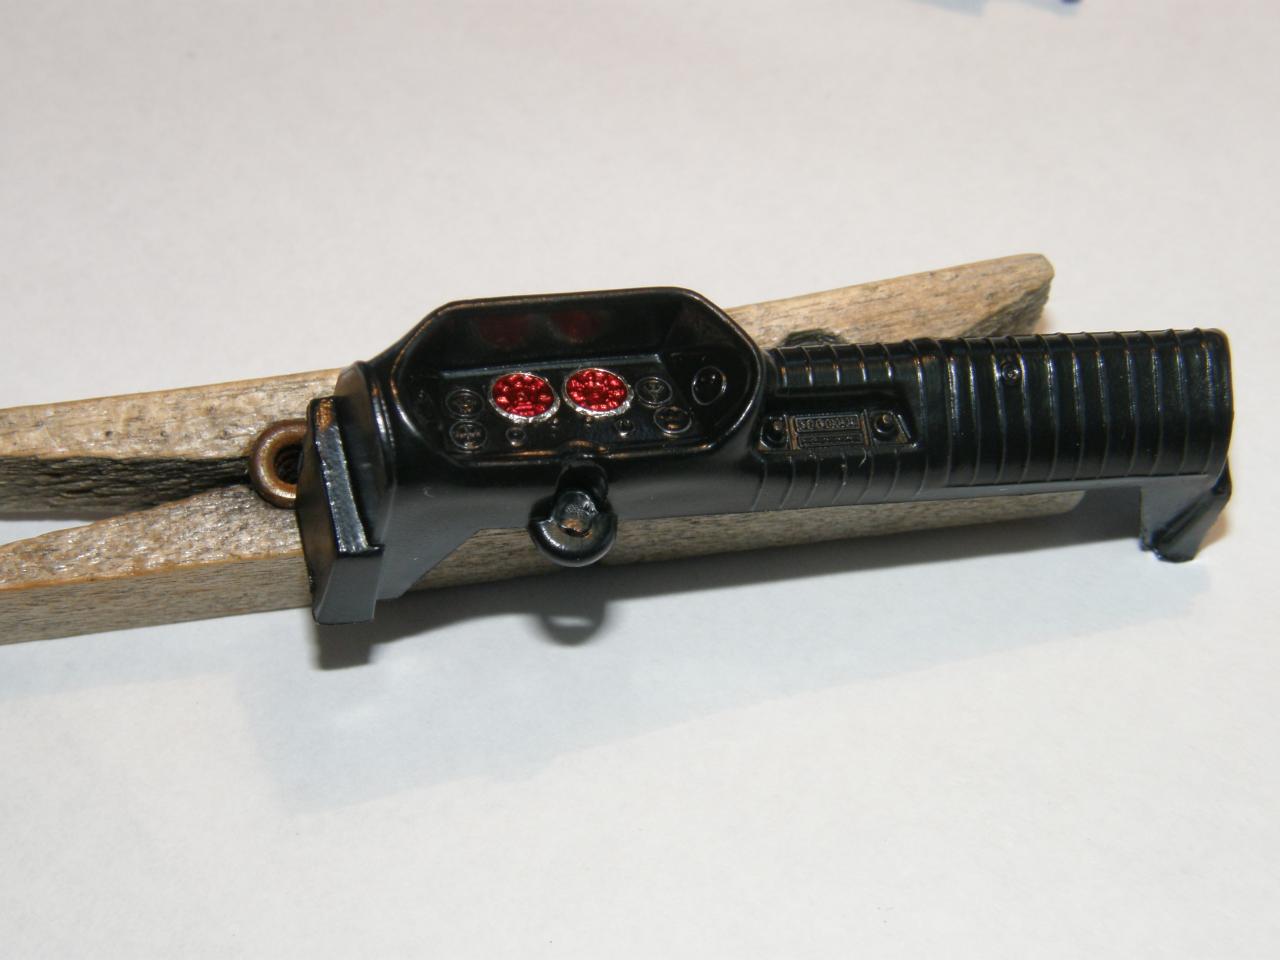
Thanks Ken. All Studes in '63 & '64 had the option to have RED instrument lights. The new CEO at the time was an aviation nut and wanted the dash (especially in the Avanti) to have an aviation theme. I used a circle template and cut out BMF just a little bigger than the outside diameter of the gauges so the outside edge would overlap and give the appearance of a bezel. Then I put a couple drops of Tamiya clear red in the middle and let it settle out. Now I have to do the other 6 smaller gauges the same way. The effect on the radio is purely accidental! (I just picked it up and looked at it under a magnifier and, to my eyes, it doesn't look that way at all.) Go figure. Don't know what it is. I intend to BMF the radio anyway. They always say that "the camera never lies", huh?!. D
-
1951 Chevrolet Fleetline - Custom - W.I.P.
Doug Bowen replied to Ramfins59's topic in WIP: Model Cars
Rich...I'm liking it. Just something about a de-chromed smoothie like these old fast-back Chevys. This will be a fun project for you to build, and for US to watch. Please keep us posted! D -
Clear coat sanding...'63 Avanti
Doug Bowen replied to Doug Bowen's topic in Model Building Questions and Answers
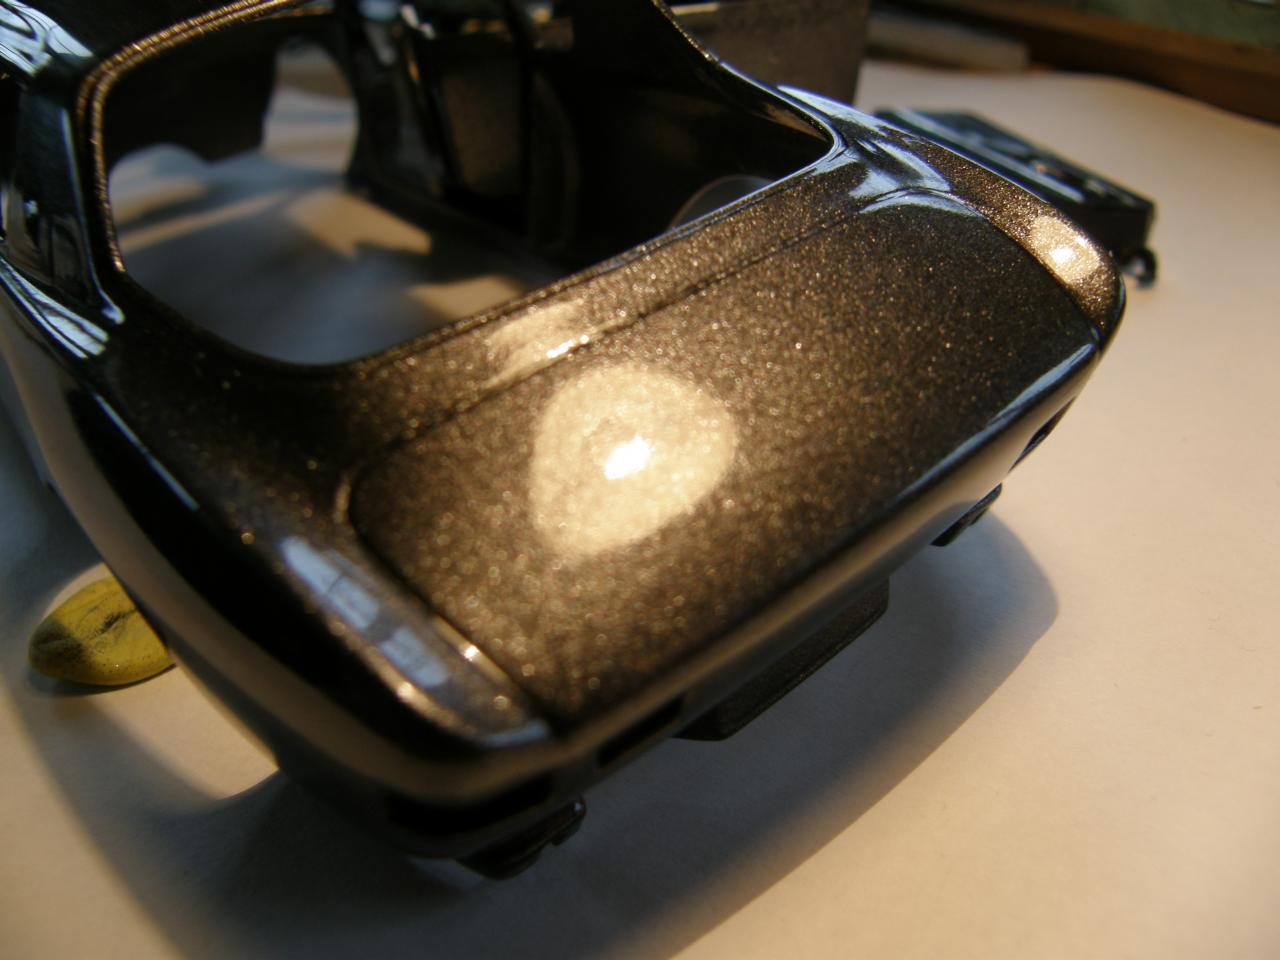
Ok folks...I promised to post the results of my first shot using the Detail Master polishing kit I bought. All I can say is, "holy meadow muffin, Batman!" This worked out splendidly. Give a look. Untouched (3 thin coats) DupliColor clear on the trunk...then 3200 through 12000 on the roof. Unbelievable. I am impressed.
-
Joe...I searched for somebody that had experience with Novus polishes and found your request for info too!! I'm gonna keep searching this site. Somebody has to have something posted on it. D
-
Clear coat sanding...'63 Avanti
Doug Bowen replied to Doug Bowen's topic in Model Building Questions and Answers
Thanks guys...that's what I needed to know. I ordered a polishing kit that goes all the way to 12000 grit. I will post the results. D -
Cutting Chrome strips...
Doug Bowen replied to Doug Bowen's topic in Model Building Questions and Answers
Mike, I succeeded with using the Reynolds wrap and clear acrylic, but I am still going to follow your suggestion and pick up a roll of this aluminum duct tape you mentioned. That may very well be strong enough to allow me to lift the darned little strips off the backing material without them ripping like the BMF does. I will let you know how I make out when I try it. Thanks...D -
Cutting Chrome strips...
Doug Bowen replied to Doug Bowen's topic in Model Building Questions and Answers
Bill J...no offense taken at all. I am familiar with BMF application. Don't really have a problem with it EXCEPT for my 65 year old wobbly fingers trying to cut two parallel lines to make trim. What my mission was with this whole thing was to trim consistent width pieces of foil for door trim and the like. I successfully cut the strips in BMF (using a tip from another gentleman on this site), but when I tried to pick the strips off of the backing paper...they ripped. BMF is so dog-gone thin. I then got them cut out of regular old Reynolds wrap, but then needed a way to glue them in position. Harry suggested using clear acrylic to "glue" the Reynolds into position. It worked pretty well. Hope this makes sense. Thanks...D -
Some updates on the Avanti Final coat of clear applied. Final sanding will be next week. Started work on interior trim and gauges. Lots to finish.