

Armornv
-
Posts
126 -
Joined
-
Last visited
Content Type
Profiles
Forums
Events
Gallery
Posts posted by Armornv
-
-
Looks great Chris. I love Magic Sculpt. It's wonderful for all kinds of model related things!
-
Chris man, those parts look great! Maybe one day I'll get to the point of being able to design such intricate parts, but for now, it's just the basics for me. I especially like the parts for the body cart. those are super cool.
I know all to well how it feels to want to shelf something. It happens a lot more when you suck at building. Trust me on that lol! I say push through it, because what you have done here so far is simply incredible, beautiful, and downright awesome!
Can't wait to see it with all those new parts on it!
-
Great work on the parachute Chris! It really does look the part. And that toggle switch.... insane!
-
Absolutely mind blowing work. Just plain wonderful. Well done sir!
-
Those grips are the bees knees for sure Chris. Really, really nice!
-
Good grief that's a whole lotta machined goodness right there. Absolutely incredible.
-
Thanks Chris. The more stuff I order (it's already getting VERY expensive lol), the more excited I get. Hoping to get some good build time in this weekend.
-
Thanks Tom. The tires (rear) are modeled after 31x18.5-15's. I could have gone bigger now that I have them in hand and shoved them up under the body but I think they'll do fine.
I don't have the actual measurements in front of me at work. I'll take a look when I get home this afternoon.
Edit:
Tom: looks like about 1.93 inches in diameter and 1.10 width overall.
-
Hey Tim! Wonderful work as always. It's still so hard to wrap my around the fact that this is all in 25th scale. Even with the reference pics. (pennies, pencils, tweezers) So incredible man.
-
Looky what I got in the mail today!!!
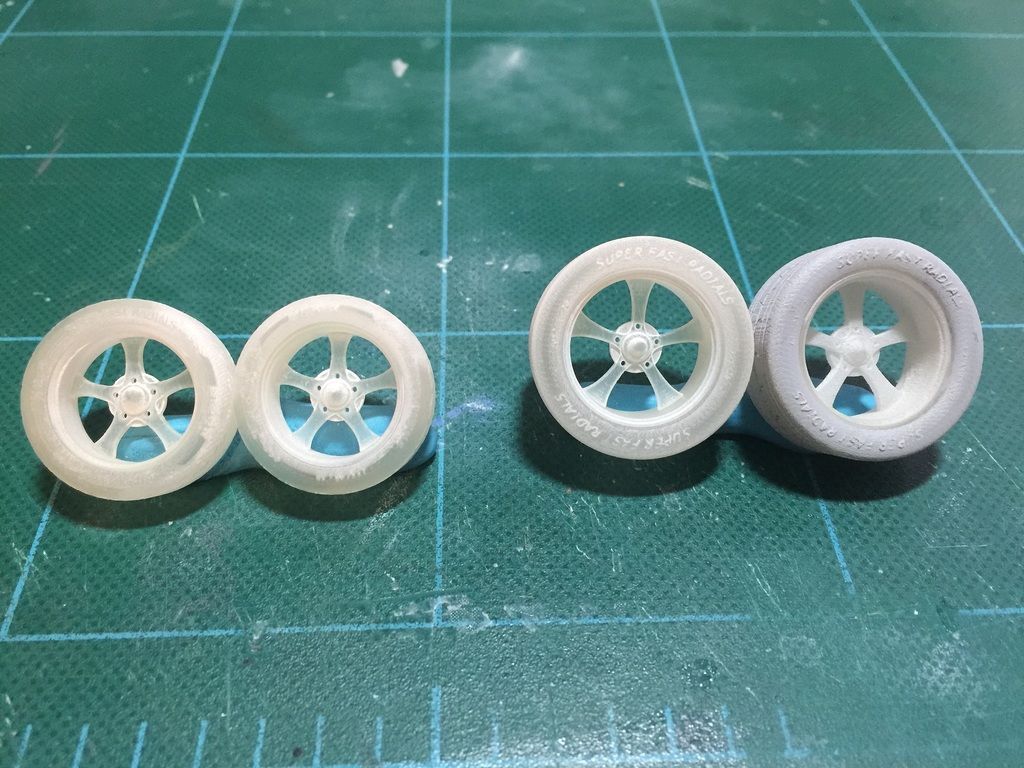
Got the "first draft" of my tires in. I think they look pretty decent if I do say so myself.
") Time will tell if I stick with these or modify/redesign them. These were done in Autodesk Inventor and printed by Shapeways in the strong and flexible polished. I was a bit weary of that material as I've done a couple of pieced in the un-polished and they are ROUGH. At least for 1/25 scale they are. Anyways, I tried the polished for these and they are pretty smooth. Still will need some clean up I'm sure. I'll try and get some primer on them before I do any sanding to see how they look.
Time will tell if I stick with these or modify/redesign them. These were done in Autodesk Inventor and printed by Shapeways in the strong and flexible polished. I was a bit weary of that material as I've done a couple of pieced in the un-polished and they are ROUGH. At least for 1/25 scale they are. Anyways, I tried the polished for these and they are pretty smooth. Still will need some clean up I'm sure. I'll try and get some primer on them before I do any sanding to see how they look.Also got the 9 inch rear end, and the dual carb blower. Both from TDR and both in frosted ultra detail. They are absolutely beautiful! I can't wait to start tinkering with them!
There are still some parts I need to source before I can really dig into it, but I can at least start planning things out. I should be able to get the rear subframe mostly built... I think. I'll need to whip some wheels as I had to wait till I got the rear end here so I could get measurements off the rotor hub to make sure the wheels will fit.
I still need to get a four link from somewhere, the tubing and rod ends to go along with that. Tubing for the axle housing and some coil overs( not sure I could build those from scratch).
I at least did get a tiny start on things. I had enough info to tell me roughly where to cut the frame off the kit. I didn't... but I did cut out the molded in floor between the frame rails. My thought is to keep the kit rails in place until I get the sub frame made to the correct length and height so I'll still be able to put the bumper on... Not sure how well that'll all work, but that's my plan for now.
I did the cutting with a new toy that I picked up a week or so ago. I knew that the Dremel Stylus isn't made anymore. Tim (Codi) seems to be really happy with his. (2 I think
) I just happened across this one on Amazon for a pretty decent price and it had some decent reviews so I said why not? Never heard of the brand Genesis. This is the first thing I have done with it, but I like it so far. That's enough rambling for now. Thanks for stopping by!
-
I gotcha. I know exactly what you're talking about now. The info is very much appreciated.
-
Mark - I'll be using (attempting) a 4 link on it for sure. I did find some instructions on Chris Alston's page that gave me some good info for different measurements that should help me locate things much better than eyeballing it.
All the research I've done, pics I've seen of the frame for 55-57 show it as a standard two rail frame with no lateral deviation except for up towards the front, so I'm not sure where you mean the frame tucks back in?
There is a curved body reinforcement "strip that is located around that area. No sideways dips to speak of around there that I can see.
-
Thanks guys.
Tom - Great idea. Never thought about using card stock, or anything for that matter for a mock up.
Mark - Thanks for the link. I've looked through Alston's and S&W race cars, Haven't looked at art morrison or chassisworks yet though. I have a pretty good idea on how I'm going to go about building it, just can't find any reference on where it's supposed to attach on the 55 frame. Once I get my initial parts in it should get me a better idea at what I need to do.
Thanks folks! Keep the info flowing!
-
I think.... I have a slightly better idea of where to start the back half now. Still can't find more than a couple of pics of where someone has shown it though. I have also come to realize that I need to have at the very least, the rear tires, and rear end before I can start hacking and bending. The rear end is already being printed at shapeways so I decided to whip up some mostly generic rear tires. I'd really like to have Some Mickey Thompson Sportsman Pro's under it, but my 3D skills aren't quite good enough to do that pattern. I instead used a pattern similar to their E/T Street Radial tires. Not perfect but good enough for now I guess.
Here's a shot from Inventor. 31x18.5-15 is the size. Might go a little bigger. I'll just have to see how it looks when I get it.
-
Depends on what parts and scale you're looking for. Here is a listing from these forums for aftermarket sellers. It should get you a decent start on looking.
-
Joe - Yep. It's the old AMT kit that I have. The red and white box art.
Chris - Thanks for stopping by. I'm still quietly lurking around your Army Vega build.... Stunning work as always sir! I have zero problems with you or anyone posting pics in my thread. Especially if they help! I've looked through Chris Alston's site and S&W racecars site a bit. Forgot about Art Morrison though. I'll have a look see when I get a chance.
From what I've found, the frames were the same from 55-57. I found a couple of pics that appear to show the "hump" in the frame above the rear end don't go much higher than stock, but still can't find any that show much of anything else. My only problem is I can't find a good pic of where exactly the "back half" starts on that frame. I don't want to start hacking the kit up only to find out I cut it in the wrong spot. Just don't want to do more work than is necessary. I knew I would have to scratch the back half suspension. I've got a 9 inch TDR rear end on the way and already have the plastic stock for the 2x3 frame rails.
Thanks for the info so far guys. I'll keep digging for more info. Can't wait to get started!
-
Thanks. I'm pretty excited to get started on it.
That's a good idea. I'll have to do a little research to find out what range of years shared the same frame as a 55. I don't recall a 25th scale 55 pro street? I could be wrong. The noggin ain't what it used to be!
-
Not sure if this belongs here or under Big Boyz??
This is going to be a VERY ambitious project for me. A scale I've never touched, scratchin' and fabbin' like I've never done but hopefully... just maybe with some help and guidance, I can create something halfway decent.
To show my complete lack of experience (please don't laugh at me...yet) I have a question that I cannot for the life of me find an answer to. Maybe I'm over thinking it but here goes...
How exactly do you figure out where to start the "back half" for a pro street car?
And how high up to have the frame rails? (the part that goes above the rear end)
I hope I'm explaining those questions well enough.
Is it just a matter of whatever works? I'm sure it depends at least a little bit on the car your building. Is there any kind of standard or rule of thumb to follow?
It's sad that I'm already kinda lost when I haven't even started it yet lol.
If anyone could help me out with that part and get me started in the right direction that would be awesome!
-
Awesome, awesome, awesome. I'm kinda diggin the Javelins. I really like the two Revell Camaros. I knew you folks could scrounge something up!
Never occurred to me to look at touring cars.... I'll have to take a look at that.
Thanks again!
-
I had a feeling there wasn't anything. I don't ever remember seeing any. A shame really.
What I would be able to come up with would probably be closer to a nightmare that haunts your dreams more than anything that resembles a race car lol!
Thanks guys. I guess i'll keep thinking and looking for possible ideas for now.
-
Hiya folks! I did some searching through the forums here so I apologize in advance if I've completely missed it. I couldn't find exactly what I was looking for, so I thought I'd ask.
Are there any models in 25th scale (preferably larger but I don't see that happening) of any of the modern Trans Am series cars? TA, TA2 or TA3 mainly looking for the TA2 or TA3 style cars. I started watching some of the races from this year on youtube and kinda got a bit hooked on it.
TA3 might be possible from a stock body with some effort, but thought I'd see if there are any out there already in kit form.
Thanks gang!
-
Man Chris, you are putting a truck TON of effort into this one and it shows! Very, very nice man!
-
Yep, you are quickly driving me to take up coin collecting Tim! Truly great work. I can't wait to see this one when it's done. Until then, I'll sit back and wait eagerly for every update!
-
So I finally got back to this... I have a tendency to put modeling aside for months at a time (or longer). That, coupled with being a painfully slow builder... Equals few and far between updates! Anyways, still working mostly on the bed. I do have a few pictures to show.
I'm not accustomed to scratch building/ converting things, so these may not be all that great to some of you.
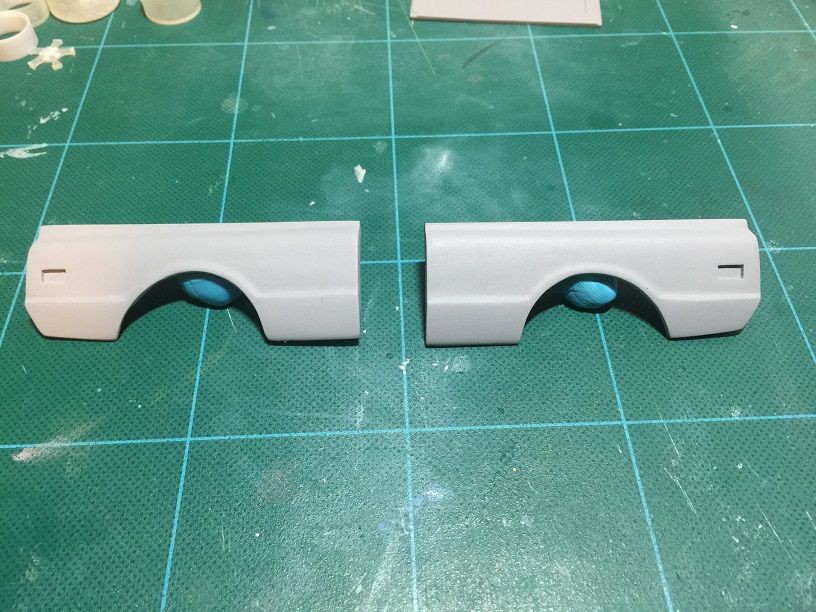
but ya gotta start somewhere right?Ok so last time I showed a bedside that I had cut, shortened, and re-glued. Here are both bedsides after surgery. I have also added the more prominent detail of the inside of the bedsides as well as the rear of the bedsides where the tail light/reverse light goes.
These are the casts I made of my masters. I'm not too swift at casting either but these were the most usable of the ones I made. There are still a few areas that will need work. In retrospect, I could've/should've given more love to my masters, but I didn't. Lesson learned, moving on.
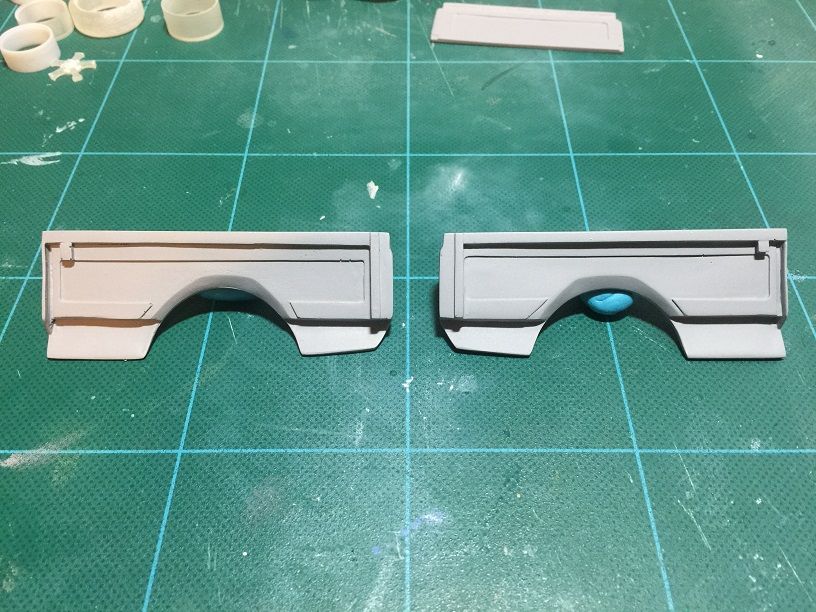
Here is the inside. The stake pockets are not quite "accurate", but still a better representation than box stock. You can't see from the pics, but I left the stake pockets filled as I figured it would be easier to mold that way. Plus, I would've filled them anyways.
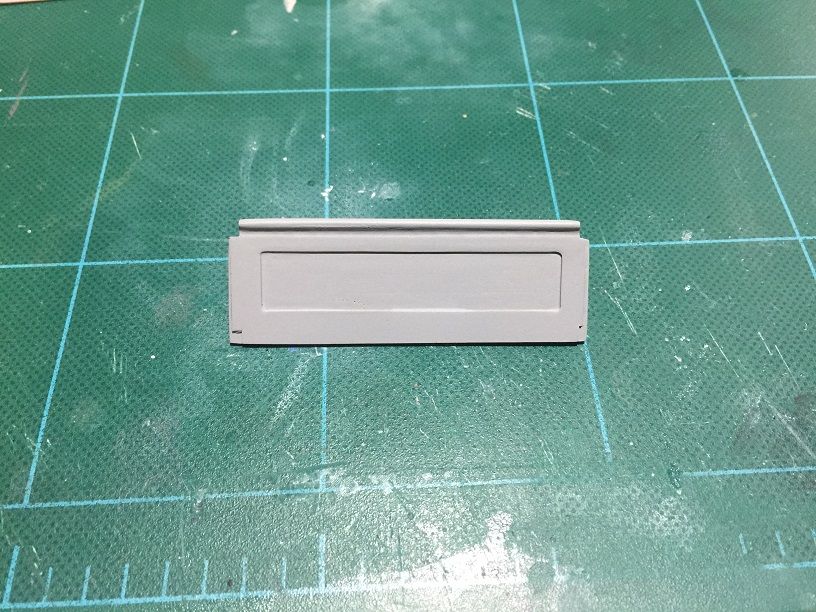
The front bed panel was scratched from plastic sheet. This is another part that wasn't completely accurate and needed to be changed.It still needs a bit of cleanup as well.
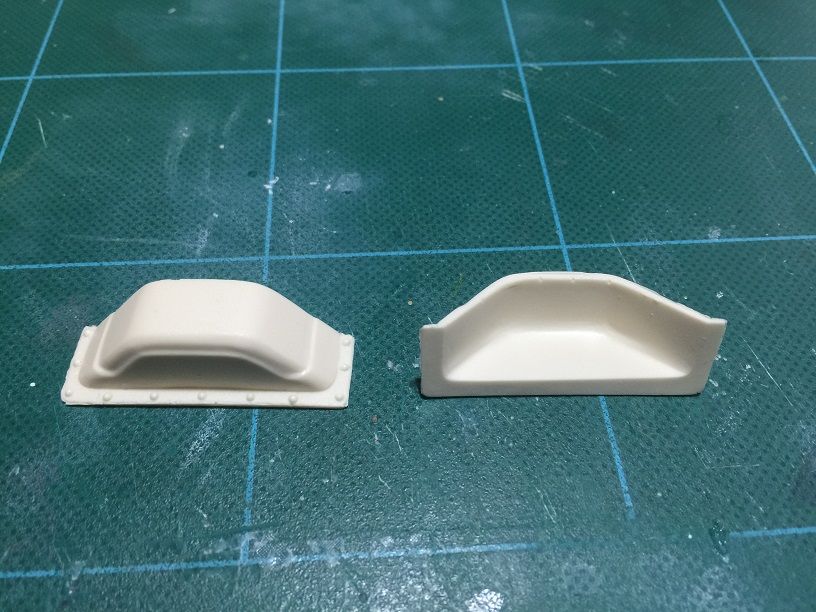
Here is the pic of the rear wheel housing that I modified and cast. Neither have been cleaned up. These shouldn't require too much attention.
And here is a shot of the master.
That,s about it for the bed so far. Oh, I do have the floor made, not sure I'm completely happy with either of the two attempts, but I think it will work. No pic of it at the moment but I'll try and get one on the next update. Once I get the bedsides where I want them, and figure a couple of other things out, I'll get started on the tailgate. Still deciding whether I want to try and modify the kit part, or just start from scratch...
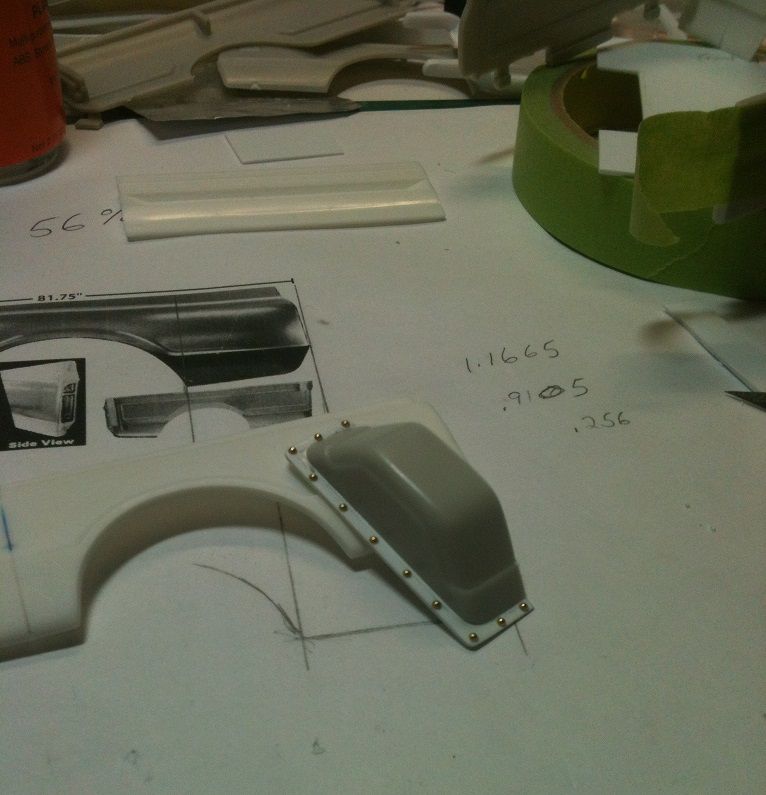
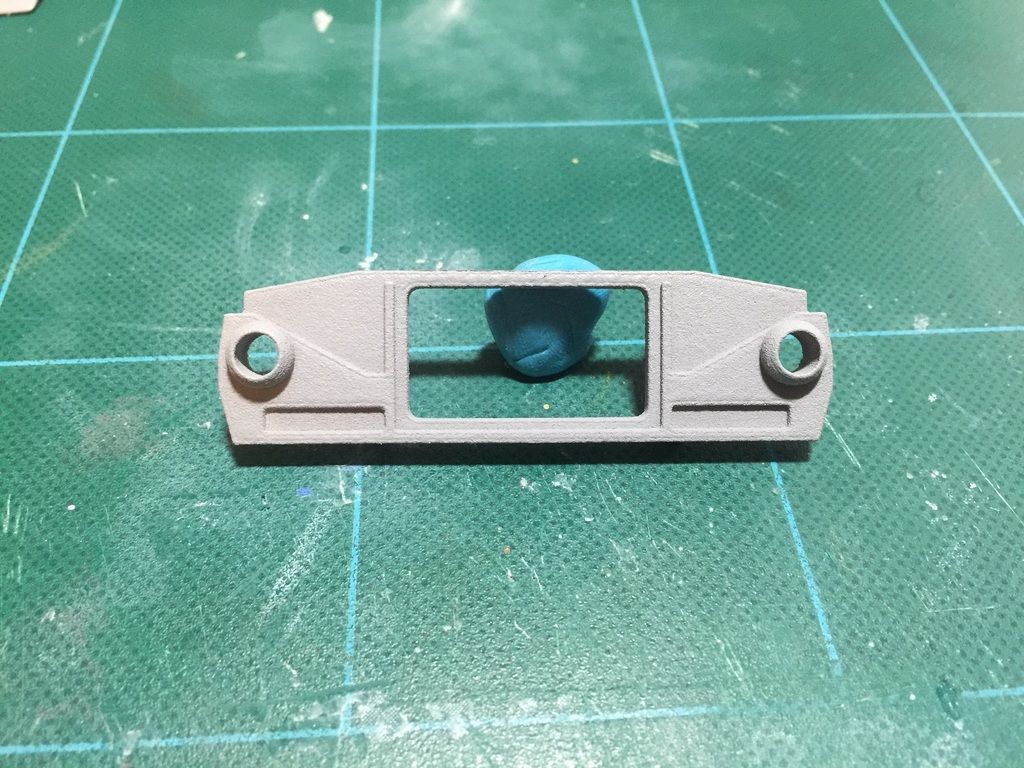
Here's a couple of other parts I've been working on from other areas of the truck. I created a core support in Inventor and had Shapeways print one up. I went with the strong and flexible just to see how rough it is. As you can see.... probably won't go that route again. It's a fairly basic rendering of it, but considering what the kit had as a core support.... pretty big improvement IMO.
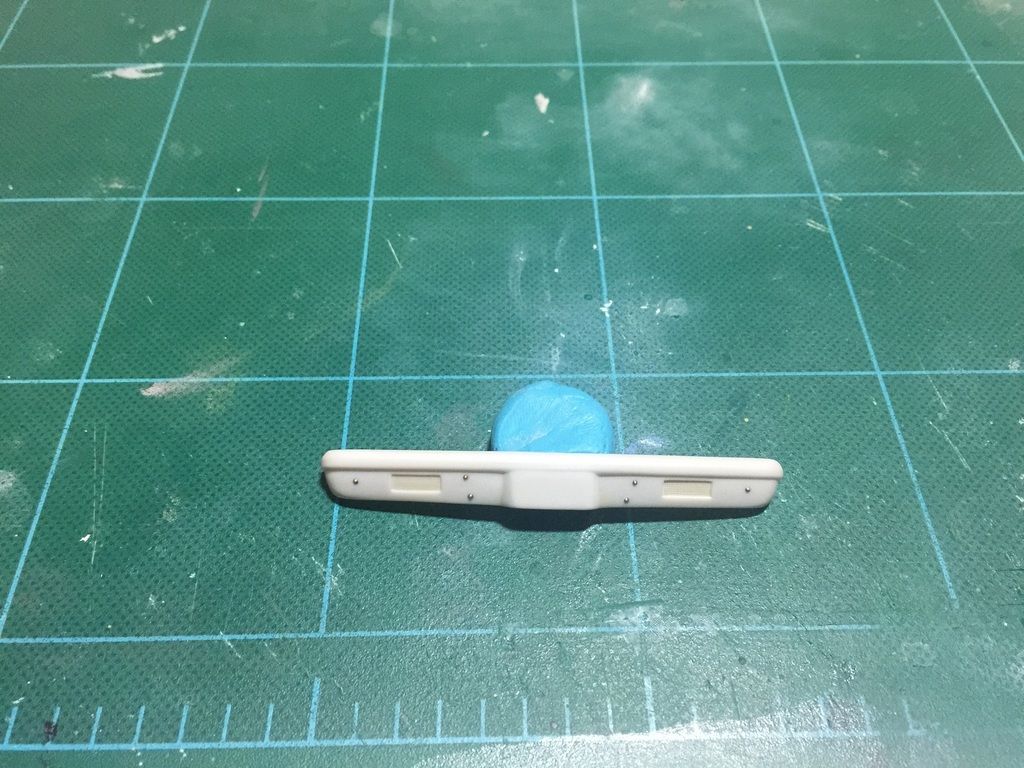
I also separated the one piece grill/bumper (which required two kits)
I haven't decided exactly how I want to handle the grill, but the bumper is almost ready for a mold. I thought the rivets in the bumper were a little to faint, so I drilled them out and put some Scale Hardware rivets in there.The reason I'm molding all these parts, is a: so I don't have to remake all these pieces as I plan on doing several of these builds... eventually..... maybe....
Also, it's tough to say with out seeing them on the truck, but I'd like some opinions on wheel sizes. My choices:
18x8 and 20x10
Or, 20x8 and 20x10
Well, thanks for dropping by if you did! If you didn't, you wouldn't know I typed this!
Thoughts, ideas, questions, all welcome!
") Time will tell if I stick with these or modify/redesign them. These were done in Autodesk Inventor and printed by Shapeways in the strong and flexible polished. I was a bit weary of that material as I've done a couple of pieced in the un-polished and they are ROUGH. At least for 1/25 scale they are. Anyways, I tried the polished for these and they are pretty smooth. Still will need some clean up I'm sure. I'll try and get some primer on them before I do any sanding to see how they look.
Time will tell if I stick with these or modify/redesign them. These were done in Autodesk Inventor and printed by Shapeways in the strong and flexible polished. I was a bit weary of that material as I've done a couple of pieced in the un-polished and they are ROUGH. At least for 1/25 scale they are. Anyways, I tried the polished for these and they are pretty smooth. Still will need some clean up I'm sure. I'll try and get some primer on them before I do any sanding to see how they look.


1/16 Pro Street 55 Bel Air Update! 1-19-16 New Parts have Arrived!
in WIP: Model Cars
Posted
Hey Chris, I sent you a reply. Basically, it depends on the part. Size, amount of material, what material you have it printed in etc.