Yenkocamaro
-
Posts
352 -
Joined
-
Last visited
Content Type
Profiles
Forums
Events
Gallery
Everything posted by Yenkocamaro
-

-
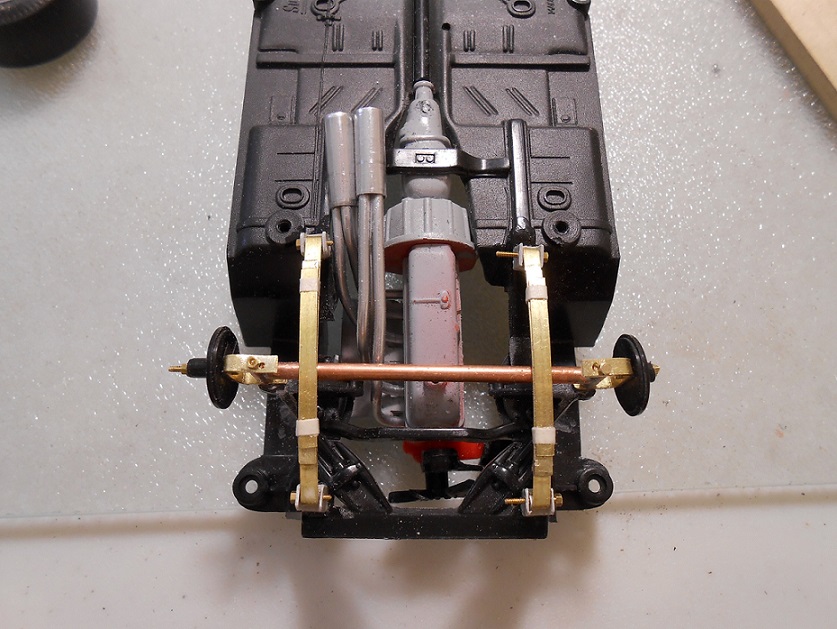
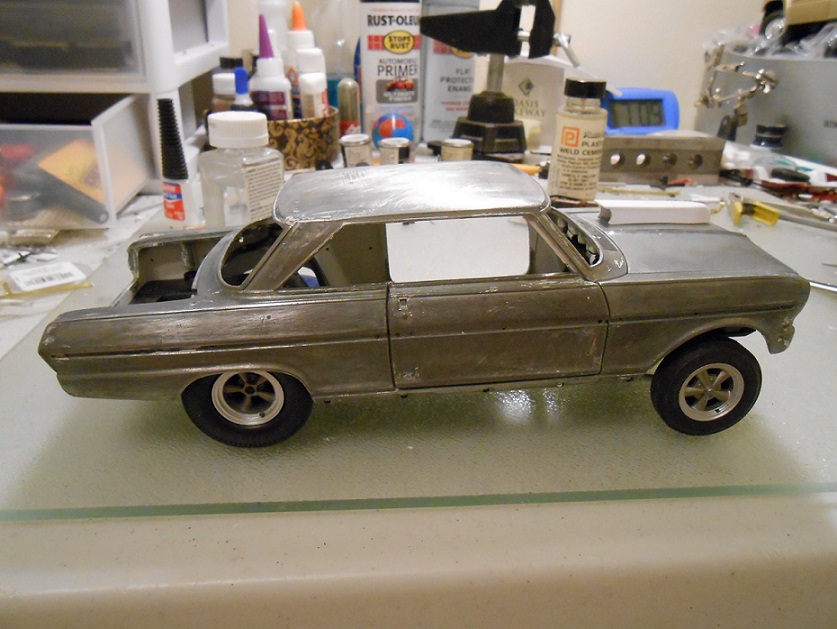
Hey Guys, been awhile since I posted here, but stop by once in a while to see whats going on. My latest project is a modified 1/18 Sun star 63 Nova drag car. I wanted to be different, so its powered by a straight six that came out of an early diecast pickup truck. At this point its sporting a 3 deuces modified shapeways manifold, scratch built headers, and a transmission from a Chevelle. Far from done, its been a bear just getting it to fit properly. I've been wanting to build a Gasser front suspension for a long time, and this one is entirely scratched from brass and copper, and using 00-90 brass nuts and bolts for construction. I added brass leaf springs to the Novas mono leaf rear suspension, including a shortened rear axle housing, and scratched shocks with mounts for them. I formed a hood scoop from plastic, and removed the dog leg hood hinge. I also scratched some hood pins from solid aluminum tubing. Long way to go, but hope to finish, before I can start another project LOL
-
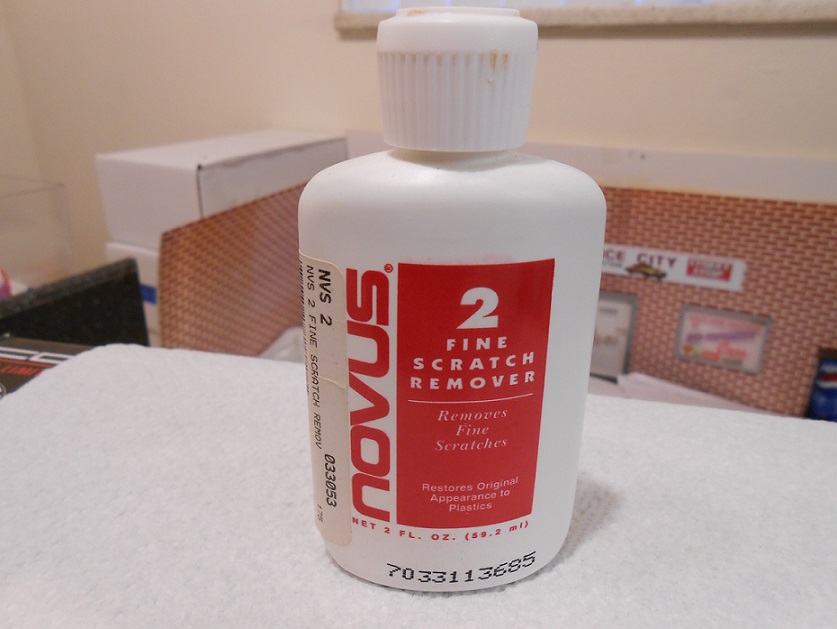
Novus has always worked for me.
-
Michael, I have used Kleen strip brand paint stripper for many years, it works on stripping paint almost instantly. I would warn you to follow the precautions on the can as it is caustic, and will harm plastic parts. Some Guys don't strip a car for repaint, but will sand the existing paint to prep it for a new color. It is important to mention that the paint on doors, hood, etc around the opening edges can be very thick from the factory paint, and should be sanded a bit to reduce the thickness to prepare for your coat of paint to reduce the chances of chipping the paint when you open these features.
-
Thanks Guys. A little more progress. Cheers, Lance
-
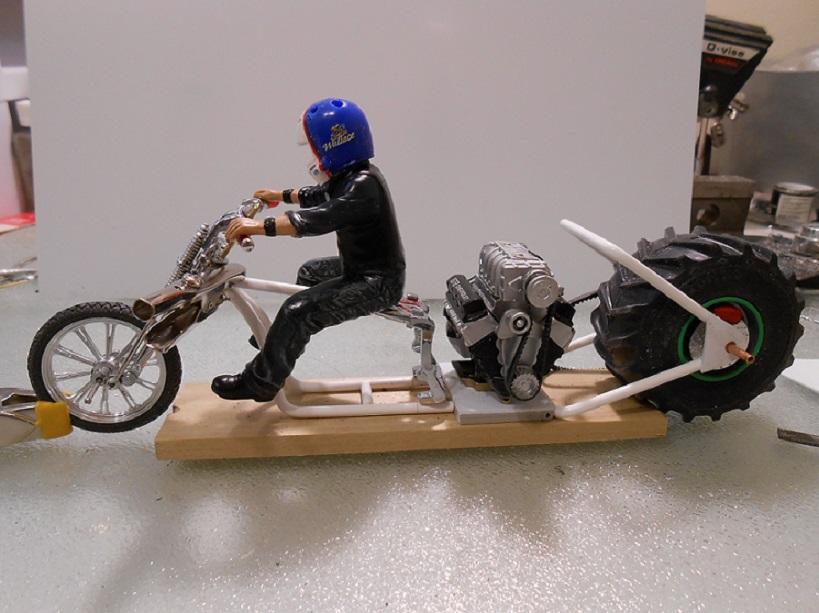
Hey Guys, just something different than the average build. I was at my work bench, and had a toy Gravedigger wheel/ tire sitting there, and a 1/18 Jada motorcycle on the other side. Hmmmmm...held up the wheel/tire to the Motorcycle, Oh yeah. Thought about a motorcycle puller like the tractor/truck pulls with the weighted sled. No such animal, but thought it would be a crazy build anyway. Using parts from the Jada motorcycle, and parts from a 1/9th OCC motorcycle, modified, I scratch built the rest of the frame. I'm using a GMP 572 for power. Had to use two rear tire/wheels cut in pieces to make the rear tire the same on both sides, and the wheel the same on both sides. Still a work in progress. Cheers, Lance
-
Depending on how current this kit is, you may be able to get Ban Dai to fax you a set of instructions. Cheers, Lance
-
Hi Riley, if this is your first Dio, then I think you did a good job. Every build you do after this, you should strive to make each one better than the last. Its attention to details and realism that results in how your work turns out. Things like the tarp you have on the roof of the 40, has a design stamped in it like paper towel, which would not be on a tarp. The way you weathered the car looks like you brushed it on. Check you tube for many How to's on modeling, weathering, etc, or check out some of the other Dio's here, for ideas. I even purchased a book on graveyard and rusted cars left outside for many years to see how the different shades of rust forms, and which areas rust out the most on certain cars. I have been a modeler for 40 years, and had to learn the ropes as well. I was a member of a model car club many years ago, and learned quite a bit from other modelers, as they learned from me as well. I hope you find this info useful, and am confident you will improve on your next project. You asked for feedback, and I was honest with you. Cheers, Lance
-

'55 Buick Century sedan..... modified from Maisto police car
Yenkocamaro replied to traditional's topic in Diecast Corner
Always a pleasure to see your work Cliff, no matter what scale it is. Cheers, Lance -
Arnie Beswicks Mystery Tornado GTO
Yenkocamaro replied to andy12646's topic in Model Building Questions and Answers
From everything I've seen, its black. Cheers, Lance
-
Constant paint can bulges, what to do?
Yenkocamaro replied to aurfalien's topic in Model Building Questions and Answers
Sorry, I'm not buying the explanation, other wise the top of the can would show the same dents. There is not enough room in the can(top to bottom)to get enough momentum, to create those huge dents. I looked up the reason for the concave bottom, of the can, and it said that its shaped that way for adding strength to the can. It would seem to me, that if it was that easy to dent a can of paint with the mixing ball, I would be afraid of the integrity of that can being compromised. I have 45 cans of model spray paint, new and used, and checked everyone of them, no sign of any damage. I have three cans of recently purchased(last 2 months)Tamiya spray paint. I shook them as hard as I could to get the mixing ball to slam into the bottom, after several minutes of torturing my arm, there was not the slightest dent in the bottoms at all. All I'm saying, is I don't think the mystery has been solved. Hey Brian, grab a can of your spray paint, that doesn't have any dents in it, shake it as you normally would, and let us know if the dents show up in the bottom. Is it literally every can you use that this shows up? Cheers, Lance -
Detailing - How far do you go with Bolts?
Yenkocamaro replied to CountryJoe's topic in Model Building Questions and Answers
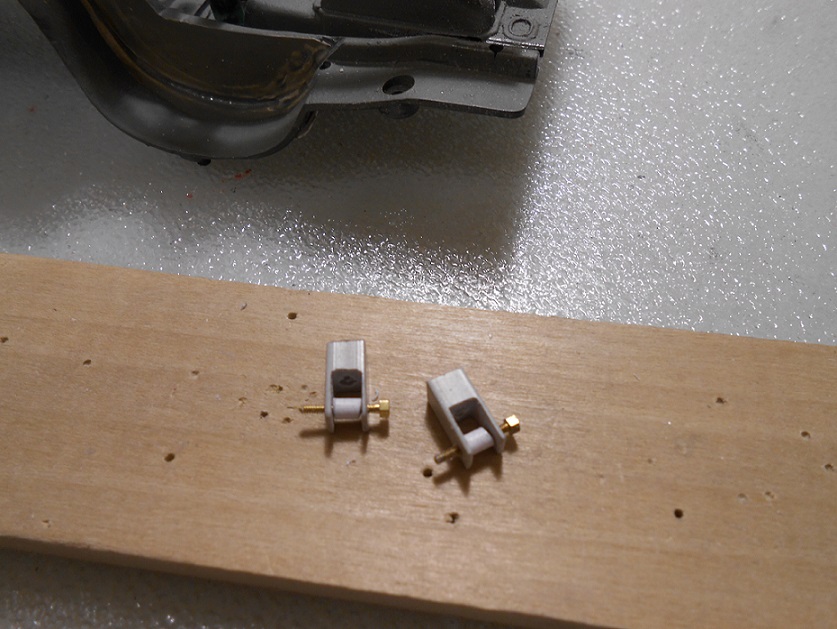
Some of you may already know about this, but Plastruct made Hexagon plastic rod in different sizes. From these rods, you can cut bolt heads, or nuts, if you just want those instead of a complete through nut and bolt. I purchased mine from Hobbylinc.com Check it out under building supplies. Check out the pic of the shock on the left, this has a nut I cut from the Hex rod. Cheers, Lance
-
Constant paint can bulges, what to do?
Yenkocamaro replied to aurfalien's topic in Model Building Questions and Answers
Thats what I was talking about, barometric pressure has no influence on a sealed can of paint, key word here is "sealed". The only other explanation would be you have a bionic arm, and your shaking the can too hard. I'm anxious to hear what the paint companies reply will be. Cheers, Lance -
Constant paint can bulges, what to do?
Yenkocamaro replied to aurfalien's topic in Model Building Questions and Answers
I know you are kidding....right? The only outer influence on a sealed spray paint can, is hot or cold. The propellant inside of your can, swelled it because the pressure inside increased beyond the can's normal temp range, too hot. Cheers, Lance -
Big difference, looks great! Hope you like the change as well. Cheers, Lance
-
That Edsel turned out pretty Kool My only suggestion would be to put chrome lake pipes on that are plain, with the cap on the end. The heat shield is too much, and takes away from the look. To me, it draws attention to itself, rather than complimenting the custom look of the other features all together. Nice Job Cheers, Lance
-
Looks like a little of every painting technique known to man Cheers, Lance
-
Yeah Snake, I'm an official Senior, and I have my membership card to prove it Cheers, Lance
-
I'll be 66 in a month, and the most trouble some problem I have is my sight. I wear glasses(all my life), and am a recent Diabetic. I've found that increased lighting at my workbench, has been a blessing. I also have one of those magnified headband lights that helps with fine detail work. I went from 1/25 plastic models for 35+ years, to modding 1/18 diecast, and the increase in the size of the model has helped. I have noted a slight shaking in the hands at times, as well as arthritis pain in my fingers, but so far its not affecting my build time. My biggest problem is, being retired, I thought I could get a ton of building done. HA! Cheers, Lance
-
Henry J Twin Turbo - Didn't see that coming..........
Yenkocamaro replied to Codi's topic in WIP: Drag Racing Models
Wow Tim, this is a tear jerker. I've been silently watching your amazing work, as there were no more words left to say, about your build, that had not already been said. Did you at least have the privilege of ending the offending Hornets life? Are you sure that Hornet was not your built prototype, for one of your projects? Cheers, Lance -
Hey Tom, I just did this test. I purchased the Ultra Bright Chrome about 5 years ago, but never tried it. In this test, it stuck fine for me. Although it seems hard to capture in photos, the Ultra bright is brighter, than the regular chrome foil. In the pics, the Ultra Bright is on the left, regular foil on the right. Please forgive the rough cuts, as I didn't change the exacto blade. Cheers, Lance
-
Gee Tim, you couldn't take a few more pics? Its going to take me a few days to view them all Thanks for posting these, its pure eye candy. Cheers, Lance
-
Where's the Cobra hiding? Cheers, Lance
-
While it may not be an exacting scale flake, I think its pretty close. Being 1/18th scale makes it more believable, than 1/25th scale would. Remember, this represents Metalflake, not Metallic paint. JMO Check out this site. https://www.metalflakecorp.com/metalflake-metalflake.html Cheers, Lance
-
Very Cool build, Charles. I applaud your creativity Cheers, Lance