YoungLuis
-
Posts
32 -
Joined
-
Last visited
Content Type
Profiles
Forums
Events
Gallery
Everything posted by YoungLuis
-
Sweet, what size drill you use on your pin vise?
-
heres a little progress of how the interior is coming along.

-
Tarkmucker, I used Model color's Amar Desert yellow and medium brown
-
This is kind of a early post sisnce Im still working on my charger, but I wanted to get as much advice/tips and reference material from you guys (if possible) waaaaaay before I start it, also where in the worls is this thing's paint guide?!
-
A little more work done today, almost done with the interior weathering. By the way, is all alcad paint airbrush ready?
-
Awesome! I want to try this too! I'll be learning as well.
-
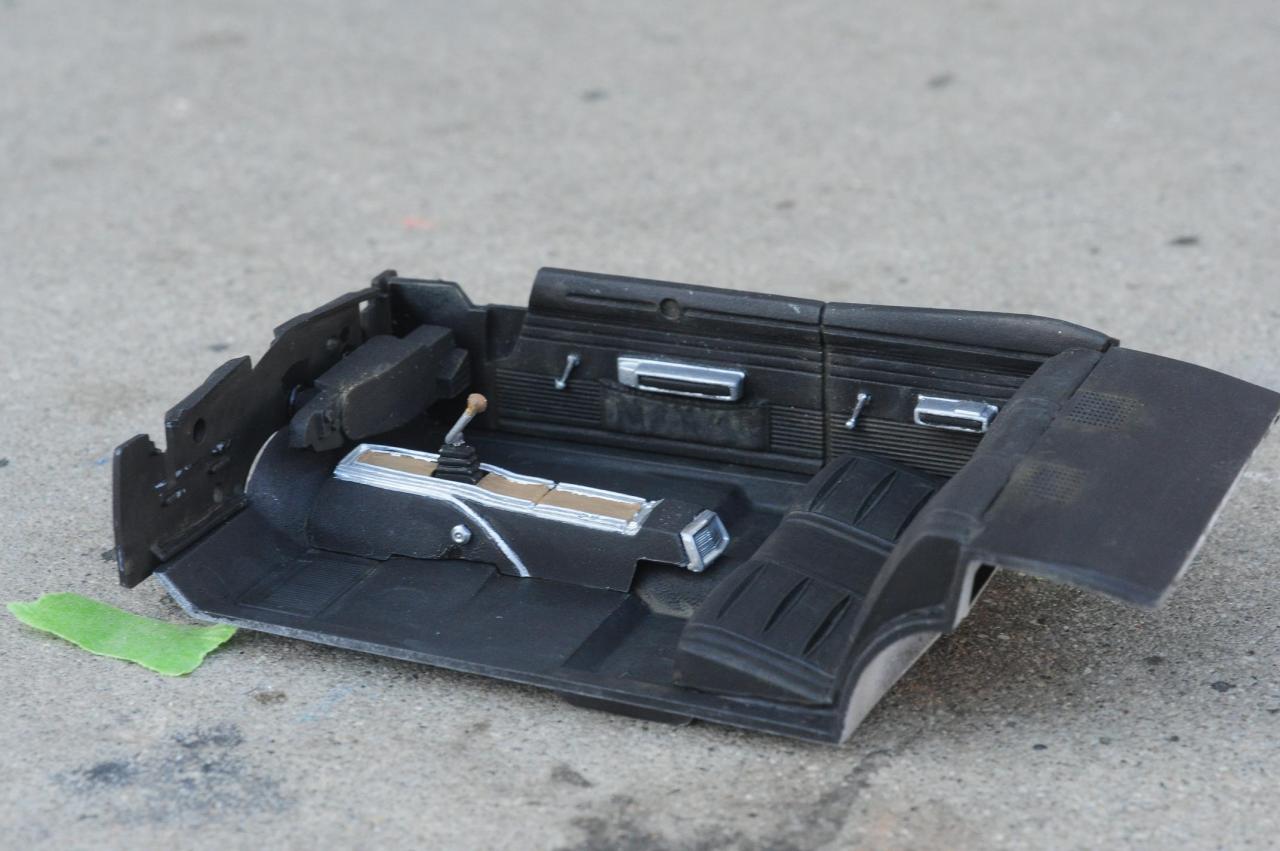
After a whole lot of struggling the interior was finally painted! I also started on a little weathering and highlighting of some of the parts. Sorry dor the shi#*% pic, I'll post better ones when I return from work!
-
Two words, bad assssss! Nicely build man
-
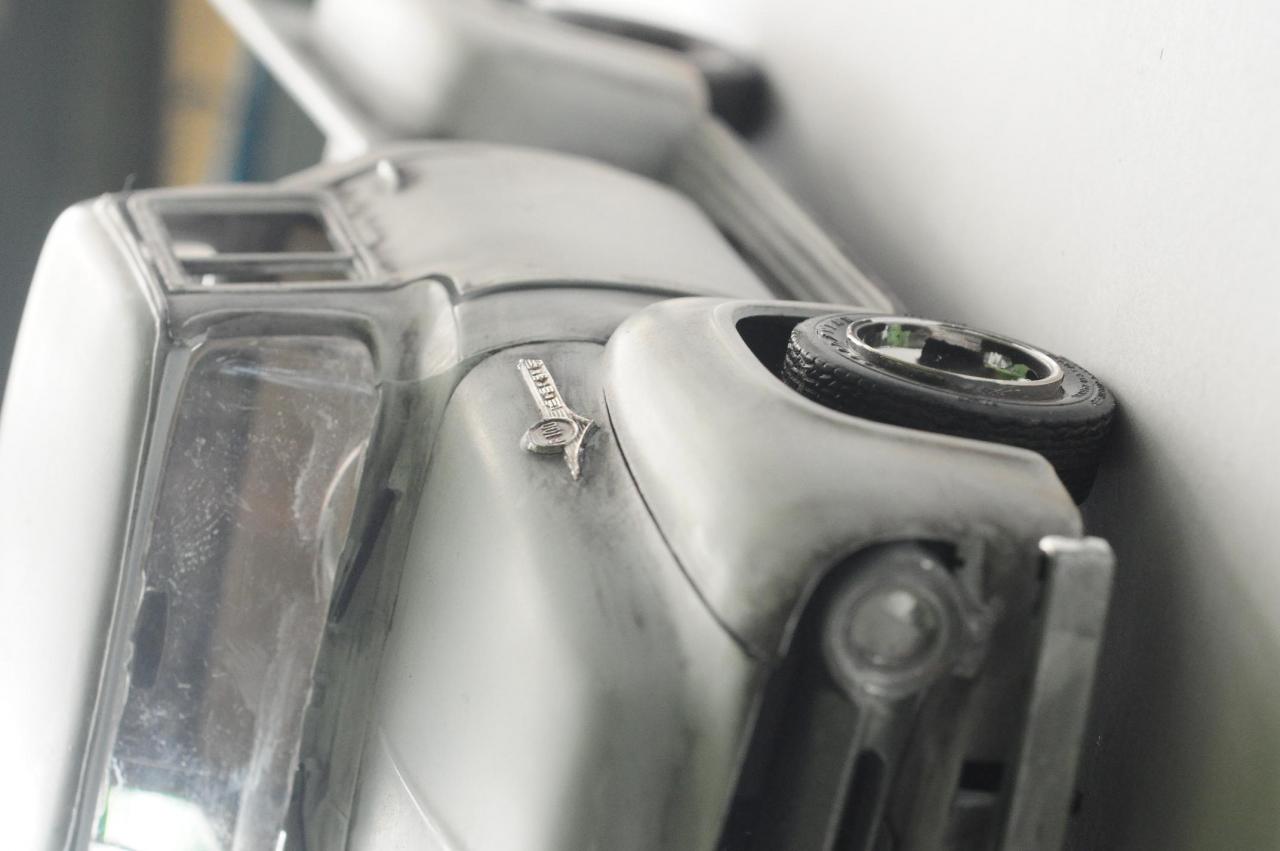
Thanks guys, really appreciate it! Thanks for the tip cj1971, I was actually trying to find a way to fix that awkward looking exhaust! The color scheme will be a red exterior on white interior, but ofcourse, they will be very very used and abused!c: Im thinking rust on most wheel openings on the fenders, maybe a bit of rust on the left quarter panel and a different color trunk door and the right door will be painted white with signs of rust, the hood will be the same red as most of the parts, Im thinking maybe mixing the right red with a but ofwhite to make it seem as if the color has faded a bit! Do you guys think Tamiya Chrome silver is a good color to paint the chrome parts? Im thinking that its a bit too dark!?
-
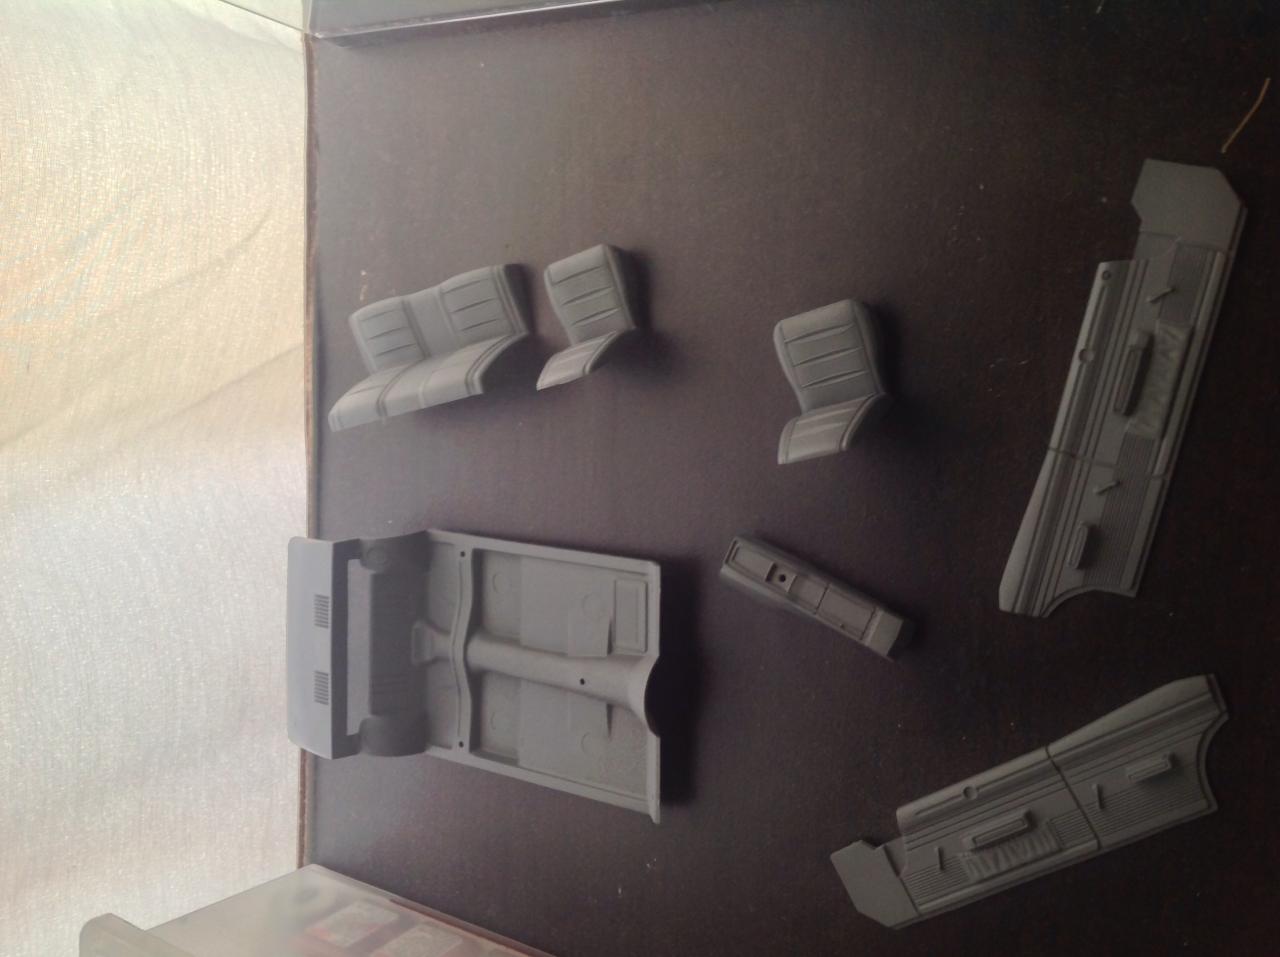
Actualy, the paint I used was a lot lighter prior to drying! but I like how that color looks with all the other weathered parts around it! I got a new lens for my sweet old momma so i got a little picture friendly, anyways, heres some more progress, finally getting ready to paint the enterior! thanks for sticking along, more progress to come soon!
-
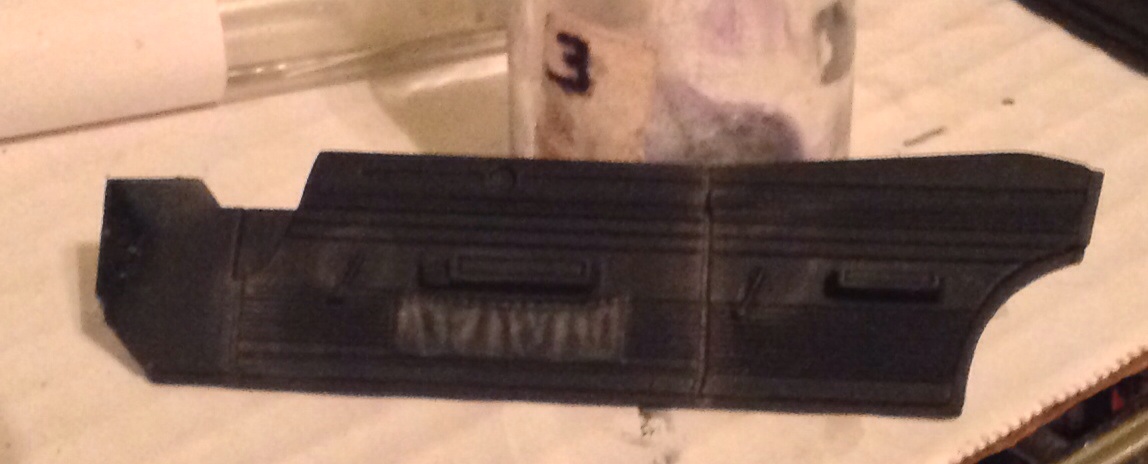
heres a picture with some other parts, the Revell patent writing on the gas tank is bothering me a lot so i'll probably go back and take that off
-
got some of the weathering down after work today, let me know how you think its coming along!
-
After a day or five....... Of figuring out my airbrush and compressor, It finally works! Here is some small progress from tonight, Im gonna weather the parts than post some pictures
-
Compressor and airbrush driving me nuts!
YoungLuis replied to YoungLuis's topic in Model Building Questions and Answers
The more I use the airbrush, mix paints, and spray numerous amounts of test bottle of cheap paint, I realize how important paint consistency is! To me probably more important than psi, since at the same psi I was able to shoot acrylics, cheap acrylics that are about as thick as they get, and enamel! But I was glad to see that I was able to shoot a bottle of testors Acrylic Flat Black straight from the bottle! These are the results! Now I can continue with the '68 charger! Thanks to all of you who helped!
-
Compressor and airbrush driving me nuts!
YoungLuis replied to YoungLuis's topic in Model Building Questions and Answers
I'm using a Paasche VL so double, regatding the paint I'm using that cheap apple barrel acrylic until I get the hang of the airbrush, and I'm mixing it 70% water 30% paint, and I'm sure I have the needles and heads correct but I'm guessing on which tip goes with what combination -
Compressor and airbrush driving me nuts!
YoungLuis replied to YoungLuis's topic in Model Building Questions and Answers
I was told by a fellow at work that the only way to actually get the preasure that you see on the gauge on your air brush is to get a tank, but anyways, I got the O ring and that solved everything, the psi it shoots at is normally 35 and 25-30 with the bigger #3 tip, now the question is......why am I getting half inch thick spray areas with the finest tip? Can I make it give me finer lines? -
Compressor and airbrush driving me nuts!
YoungLuis replied to YoungLuis's topic in Model Building Questions and Answers
Which O ring is the right one? VL- 207 or VL- 224? By the way the same presure decrease happened with the regulator, so I'm guessing its the O ring causing the problem! -
Compressor and airbrush driving me nuts!
YoungLuis replied to YoungLuis's topic in Model Building Questions and Answers
Ok, so I ran lots of fluids through the airbrush and this is what happened, with the size 1 needle tip and head, I can shoot water no problem, but I think the compressor doesnt make enough preasure because, A- there is no regulator , and B- the O ring that seals the air in the airbrush is missing, gonna buy both today, lets see how this goes! -
Compressor and airbrush driving me nuts!
YoungLuis replied to YoungLuis's topic in Model Building Questions and Answers
I just cleaned the needles and tips and as I cleaned the paint chamber there was alot of residue, so I'm gonna shoot some acetone and paint thinner through it. I'll let you guys know what goes on! -
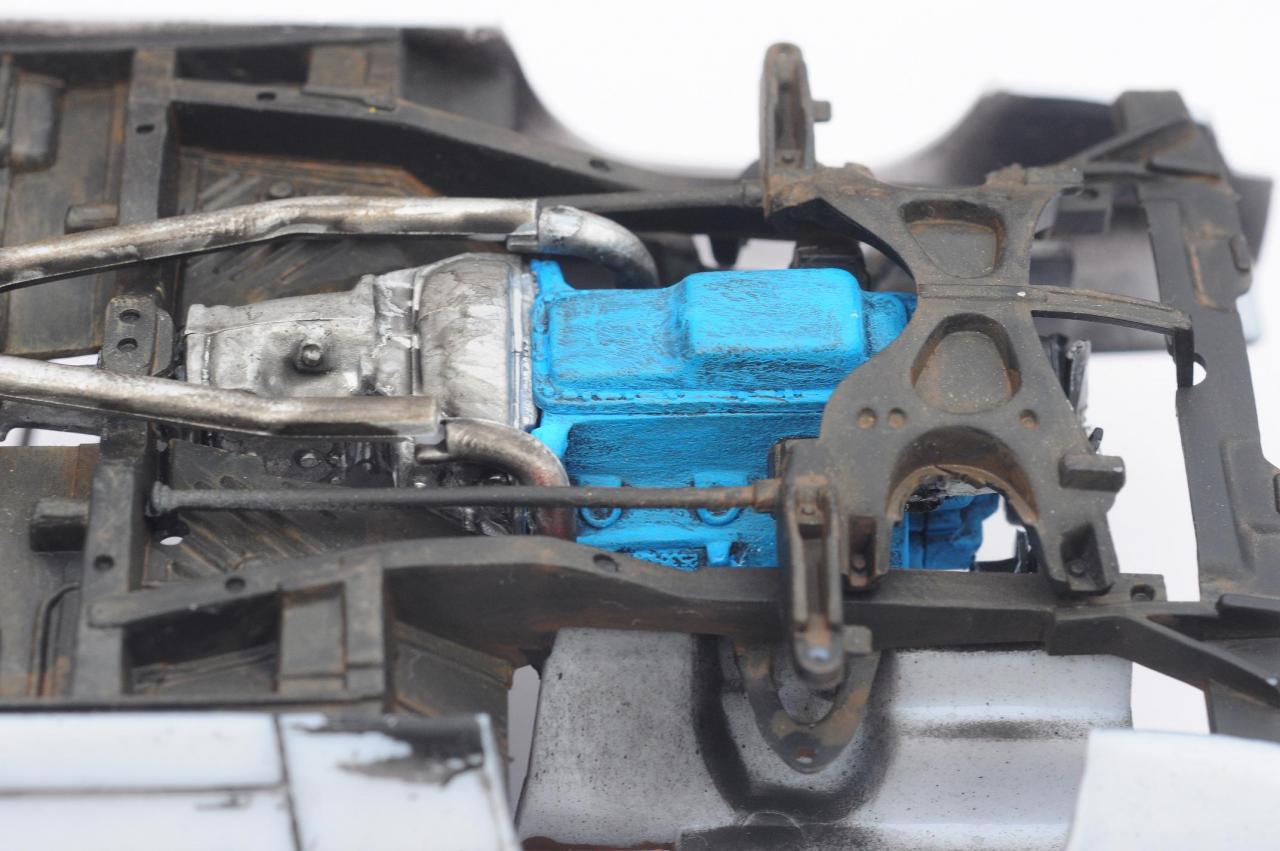
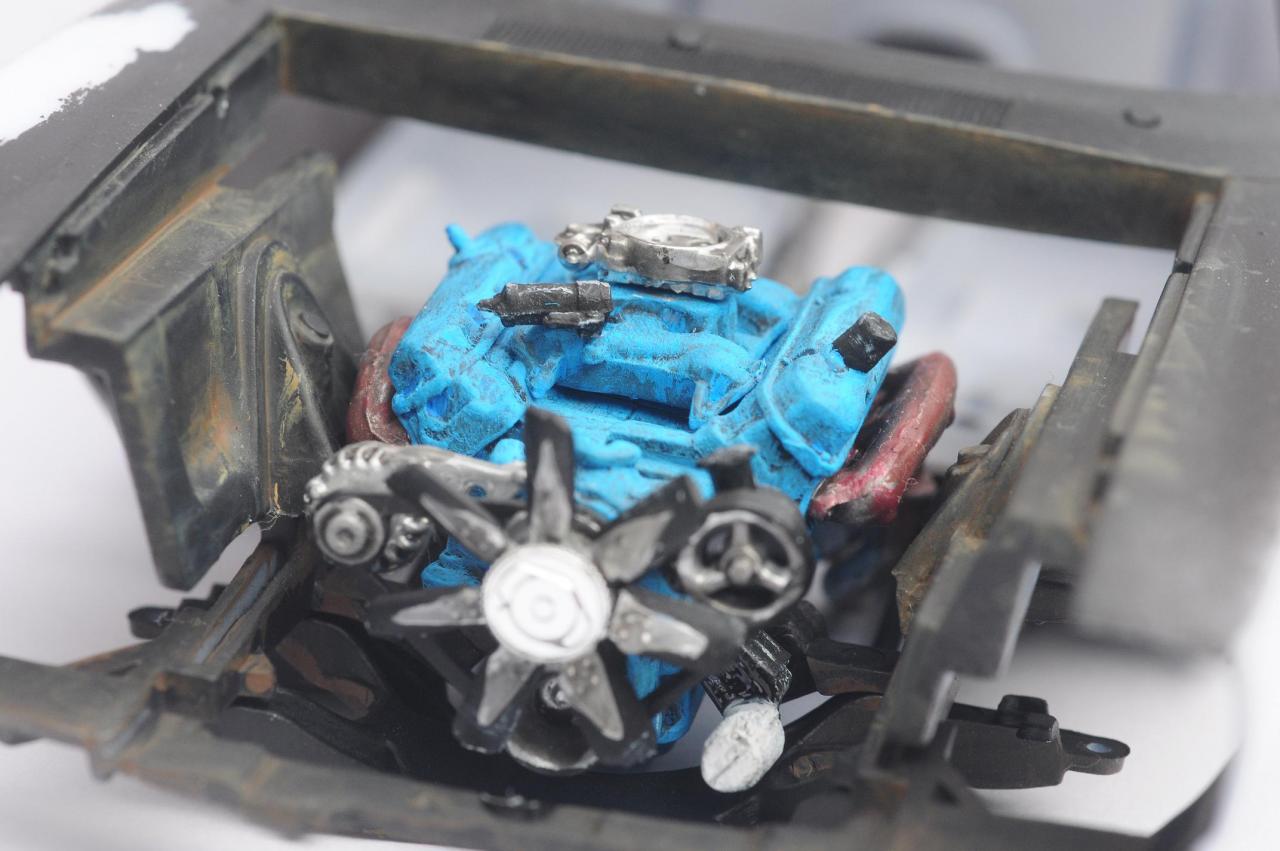
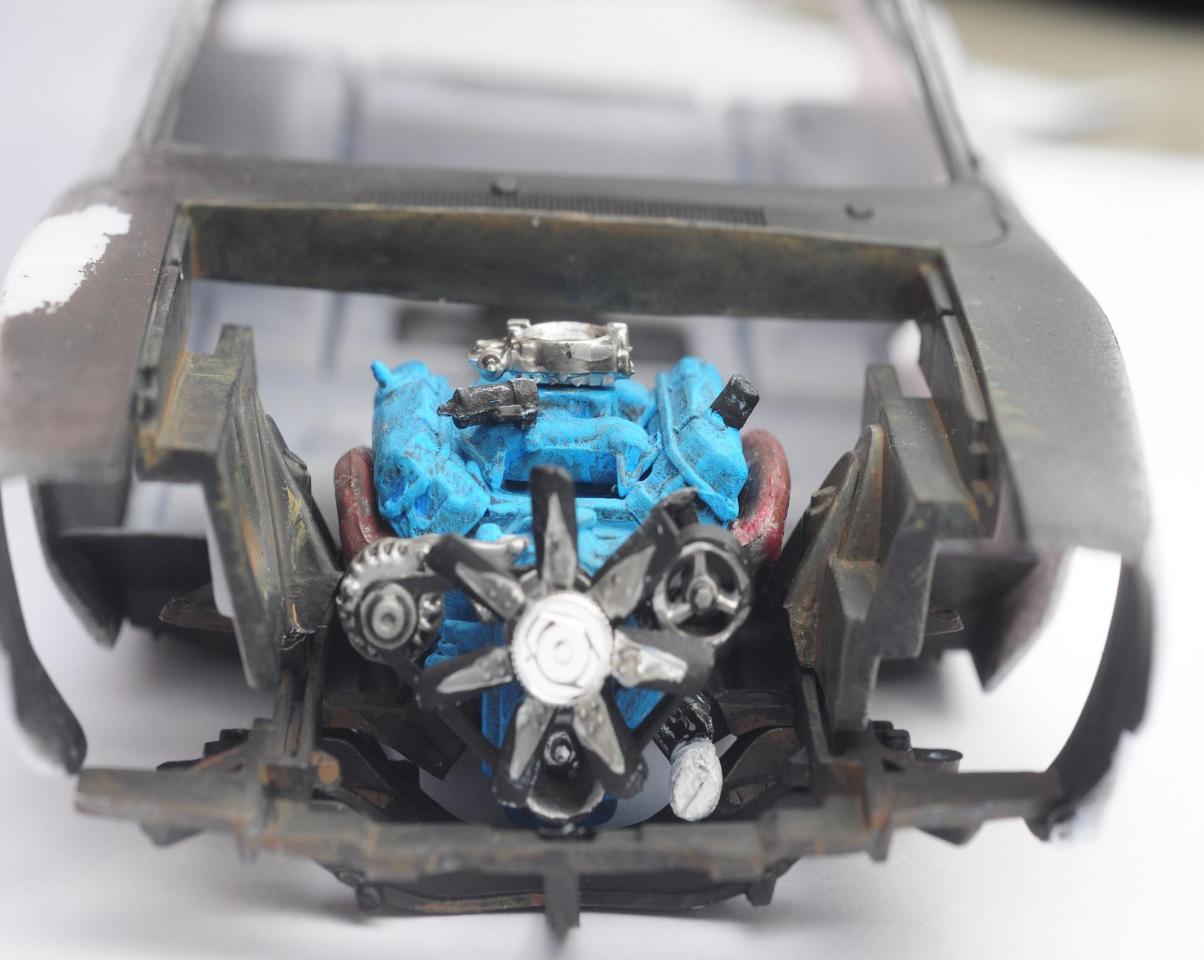
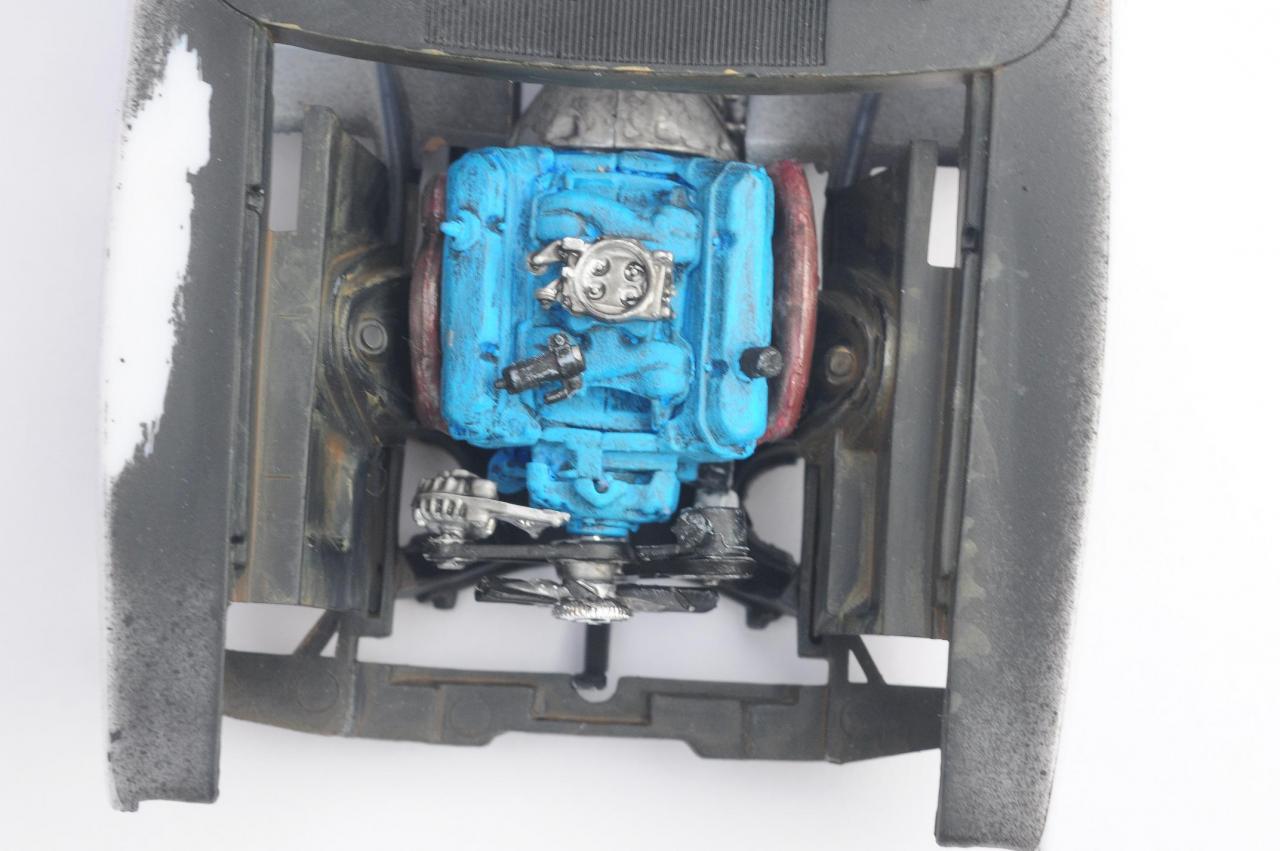
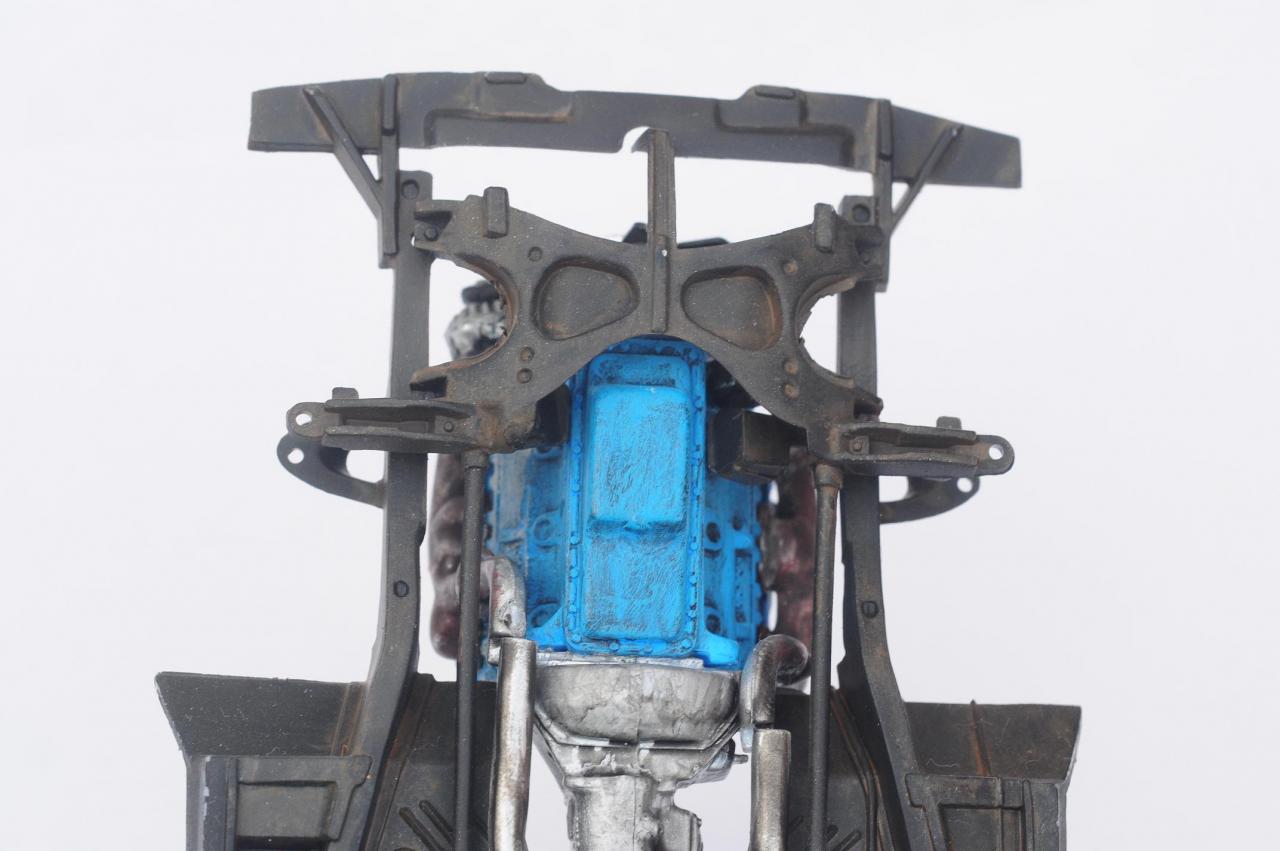
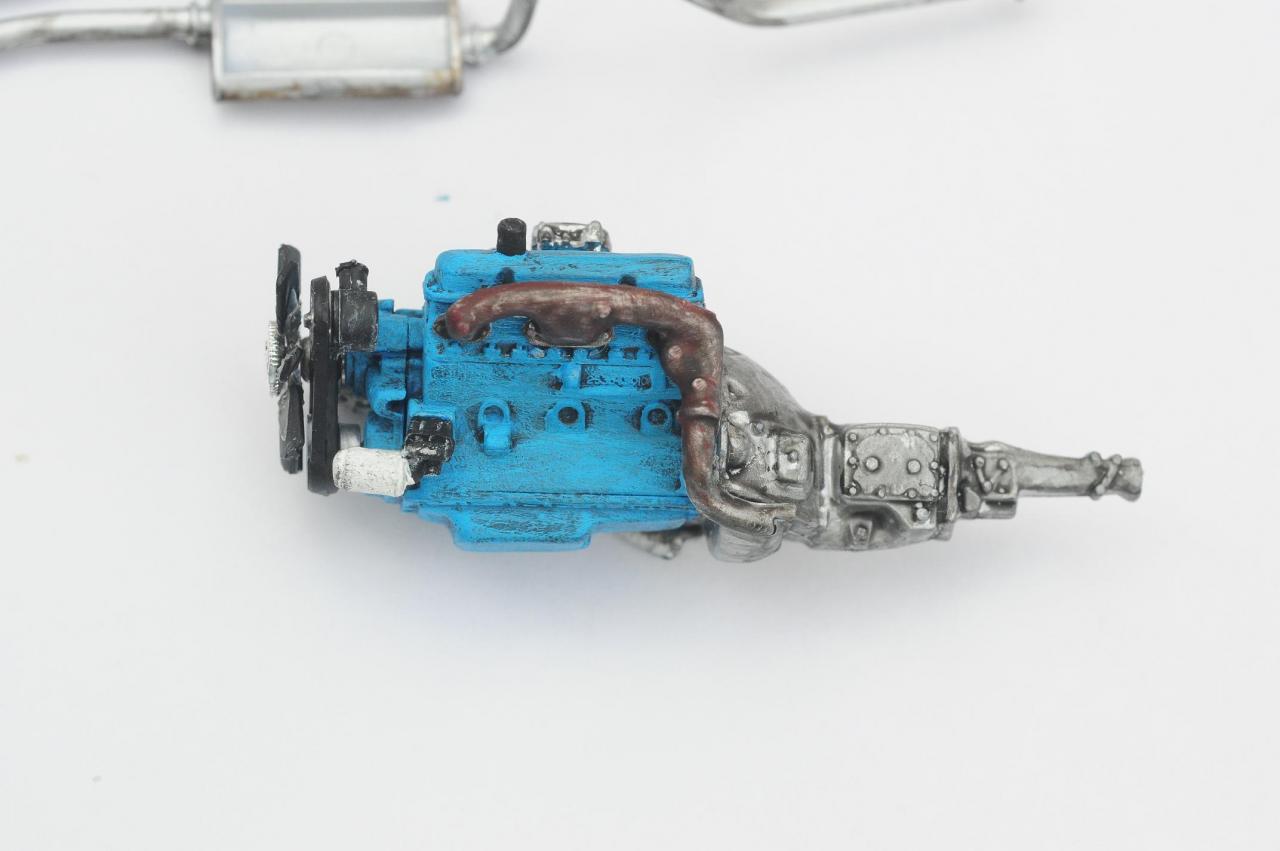
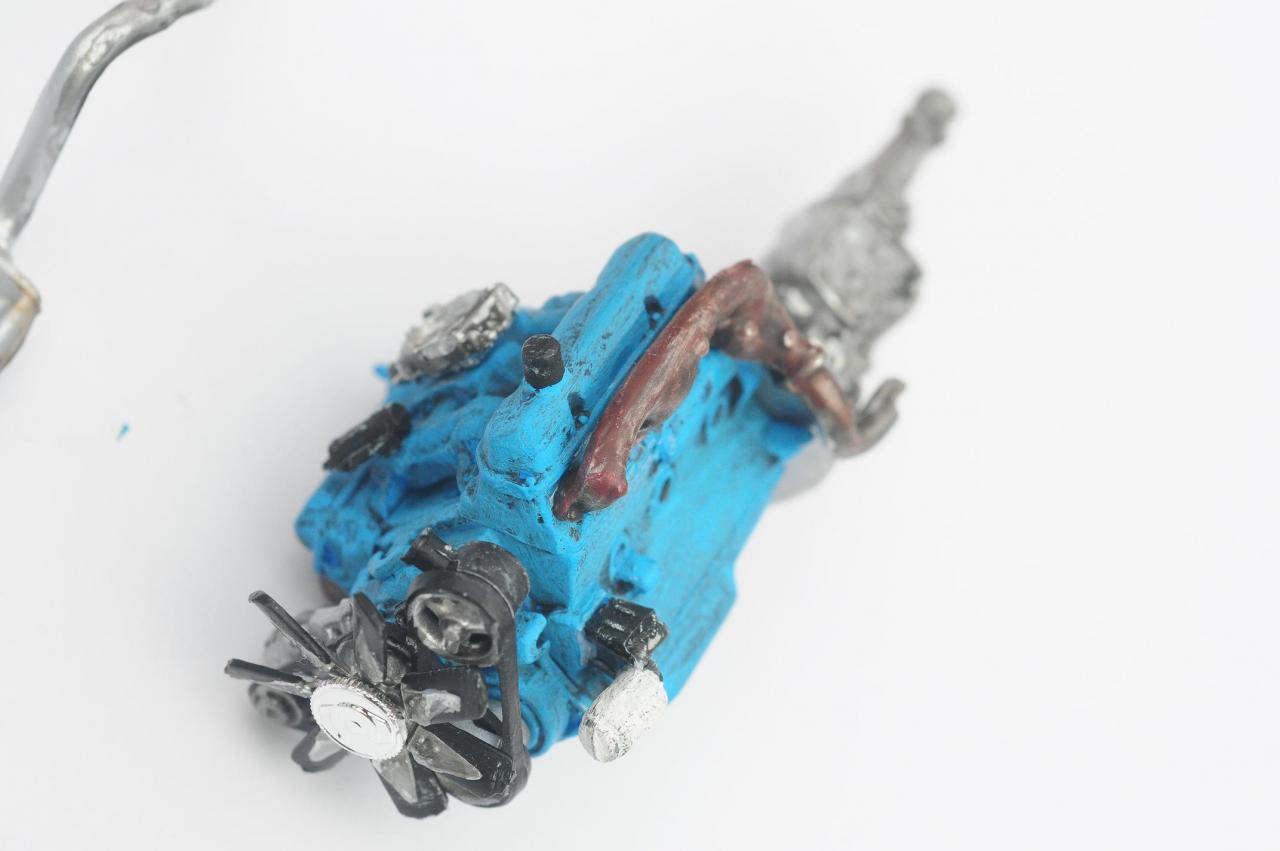
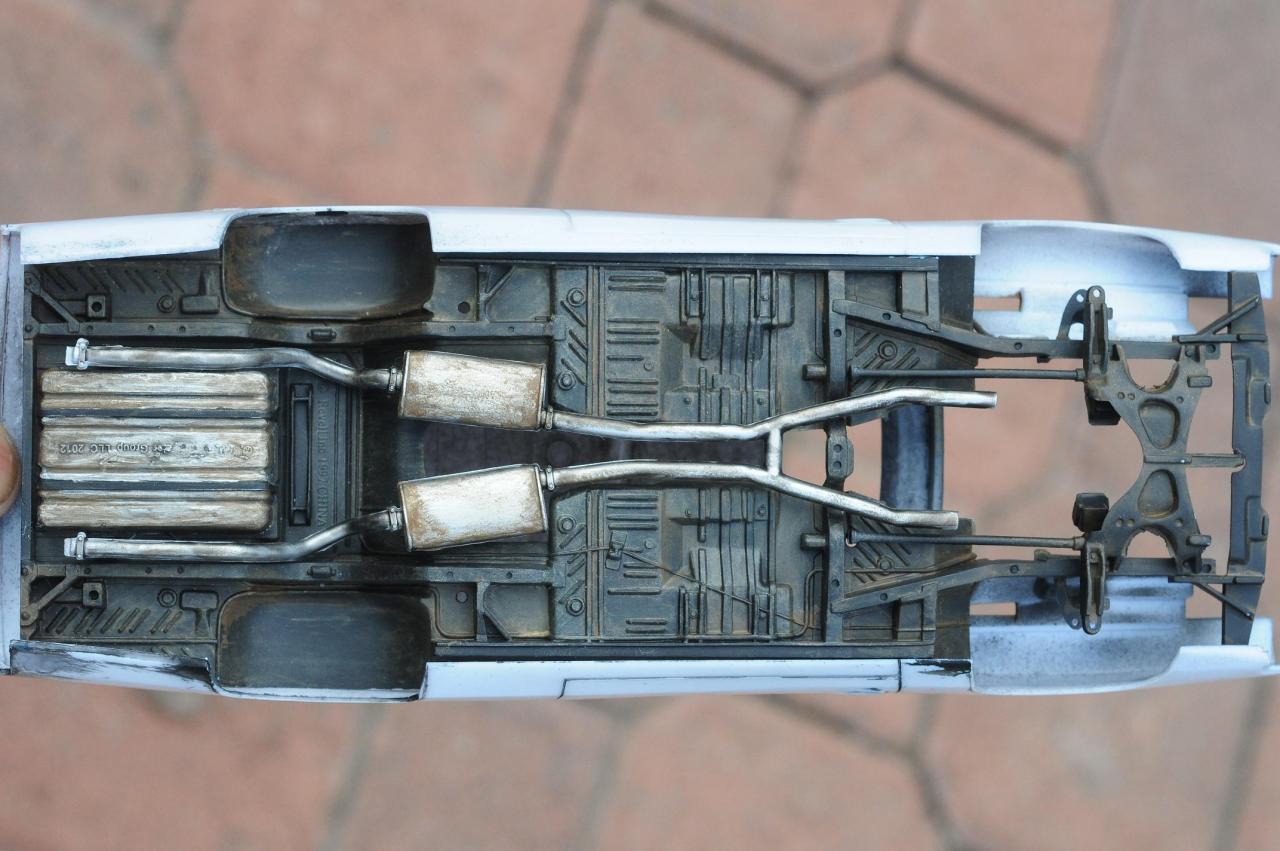
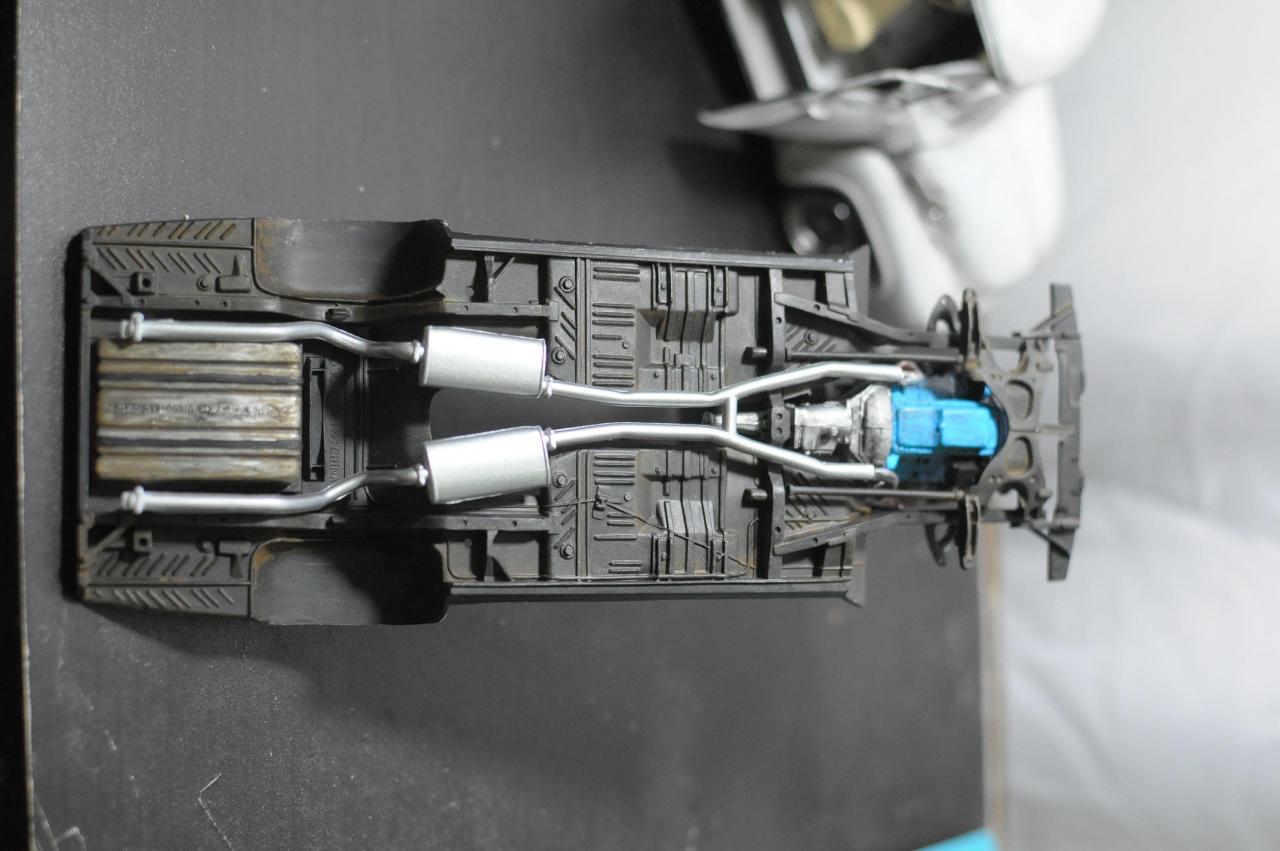
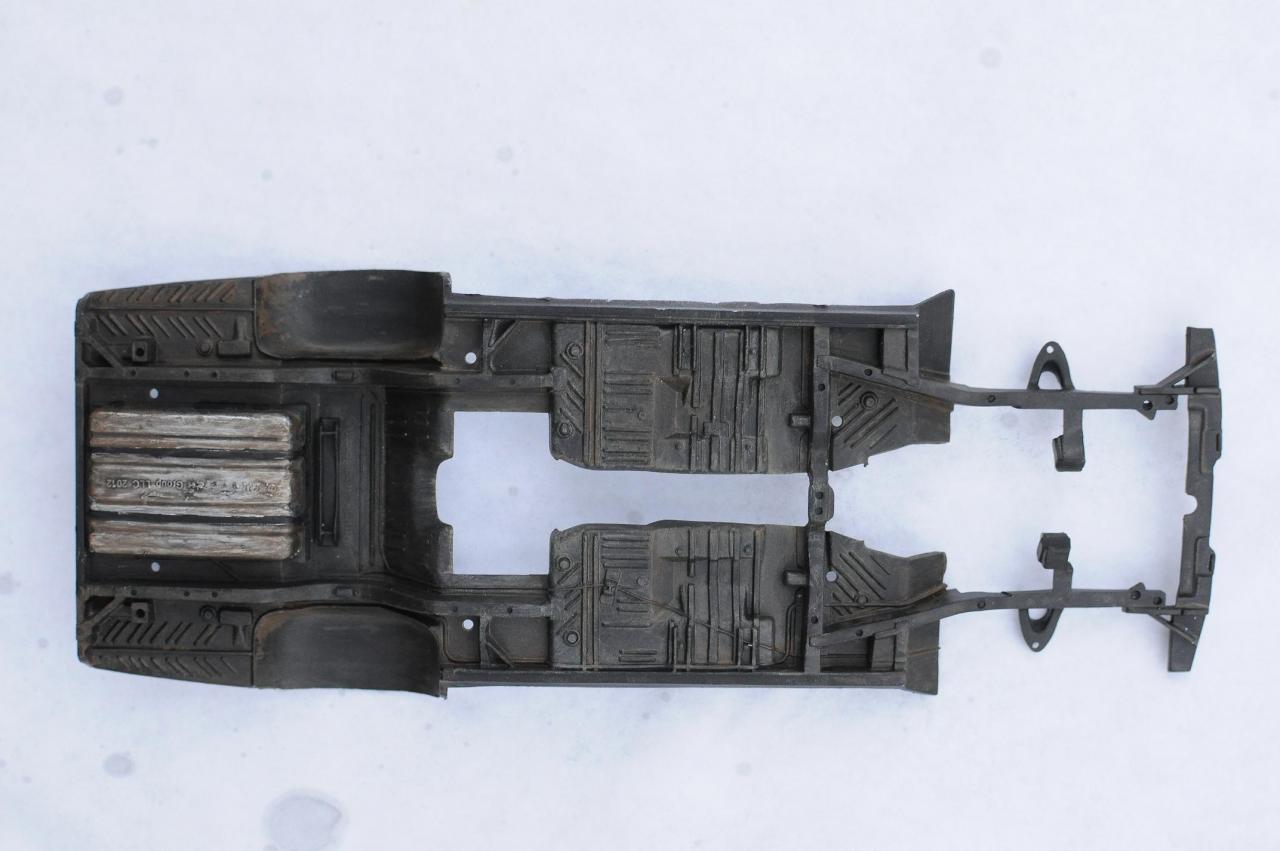
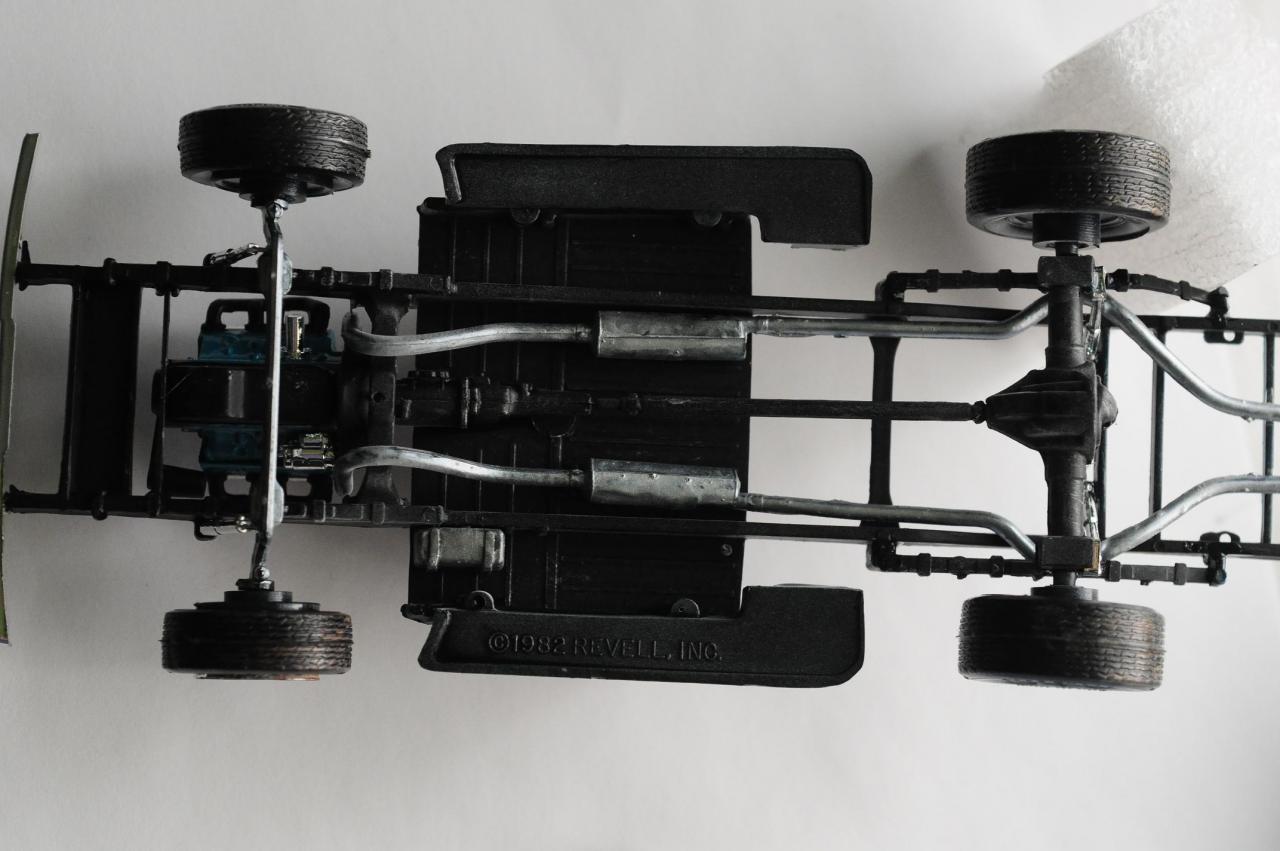
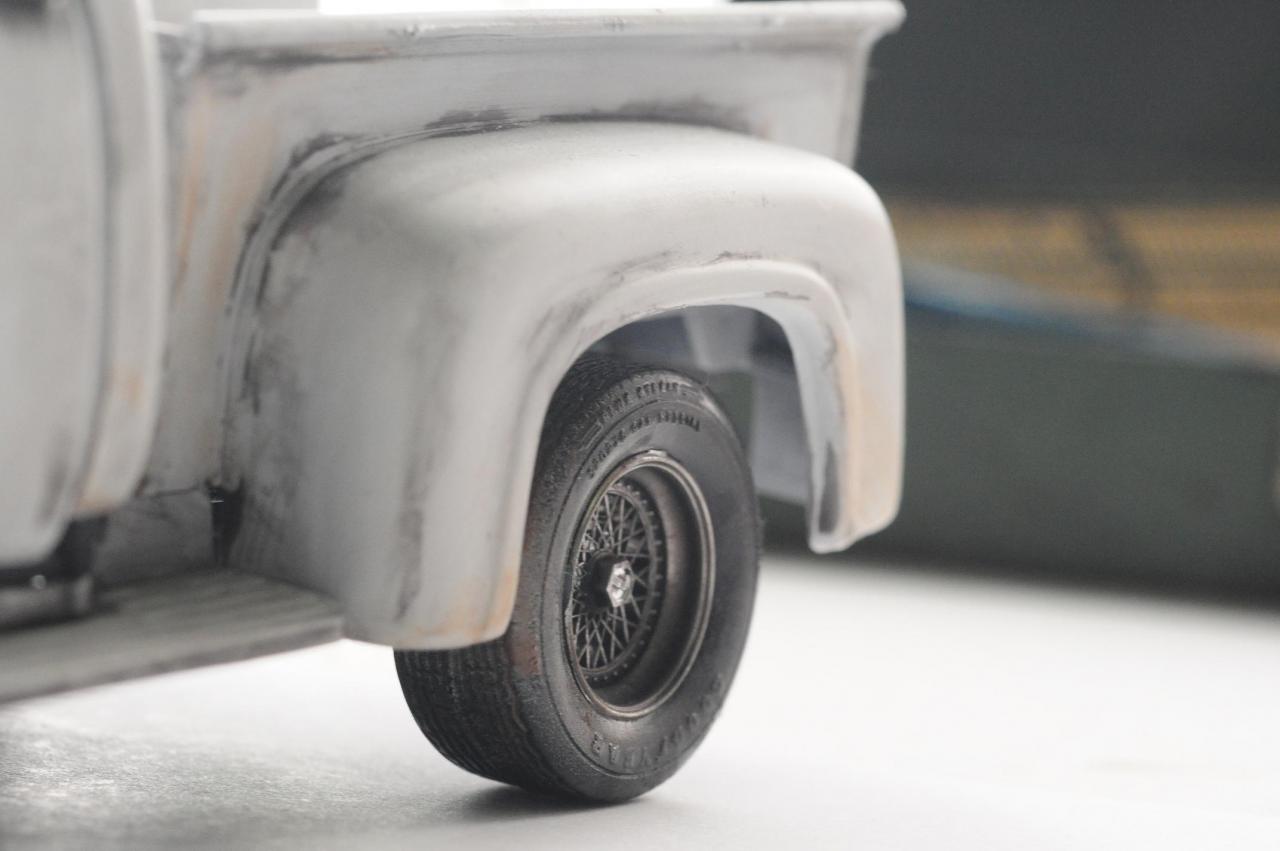
I've been working on the chasis of the ol' truck! here is the progress, I'd say a little more glue and a little more weathering and she'll be ready for the shelf!
-
Compressor and airbrush driving me nuts!
YoungLuis replied to YoungLuis's topic in Model Building Questions and Answers
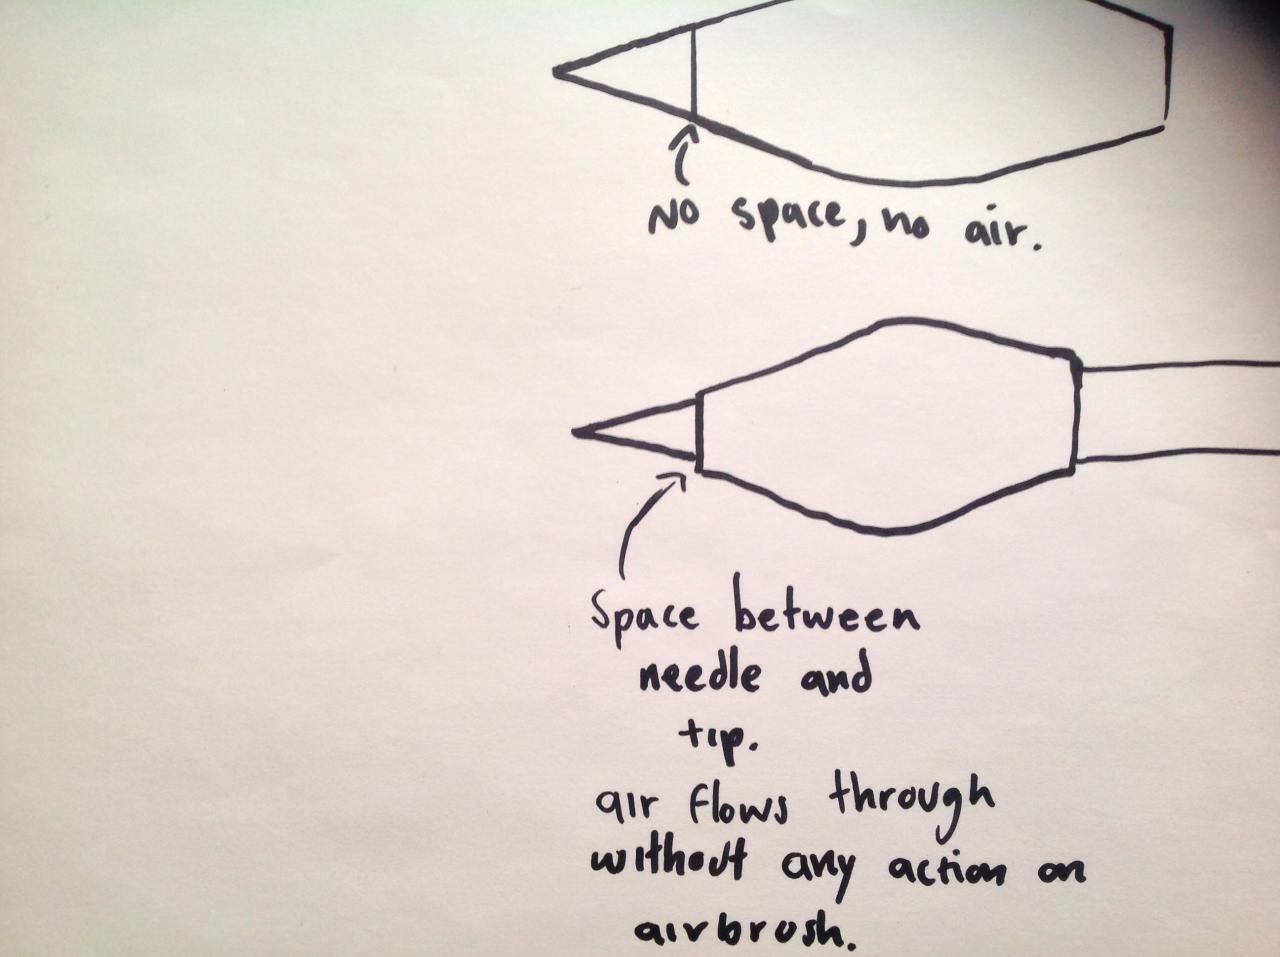
thanks for the help guys, really helping me out here! about the needles and tips I actually dont know which go together, I pretty much matched the number "3" head with the needle that had 3 grooves on it, but I don't know what tip goes with the combination, as to the needles being dirty, can I use some sort of wet sanding with thinner? I used water as a test, but than again the same thing happened, with no gap between the needle and tip, water barely comes out, with a gap between the two the water will come out, but air is constantly going through? by the way where can I get that preasure regulator? -
Compressor and airbrush driving me nuts!
YoungLuis replied to YoungLuis's topic in Model Building Questions and Answers
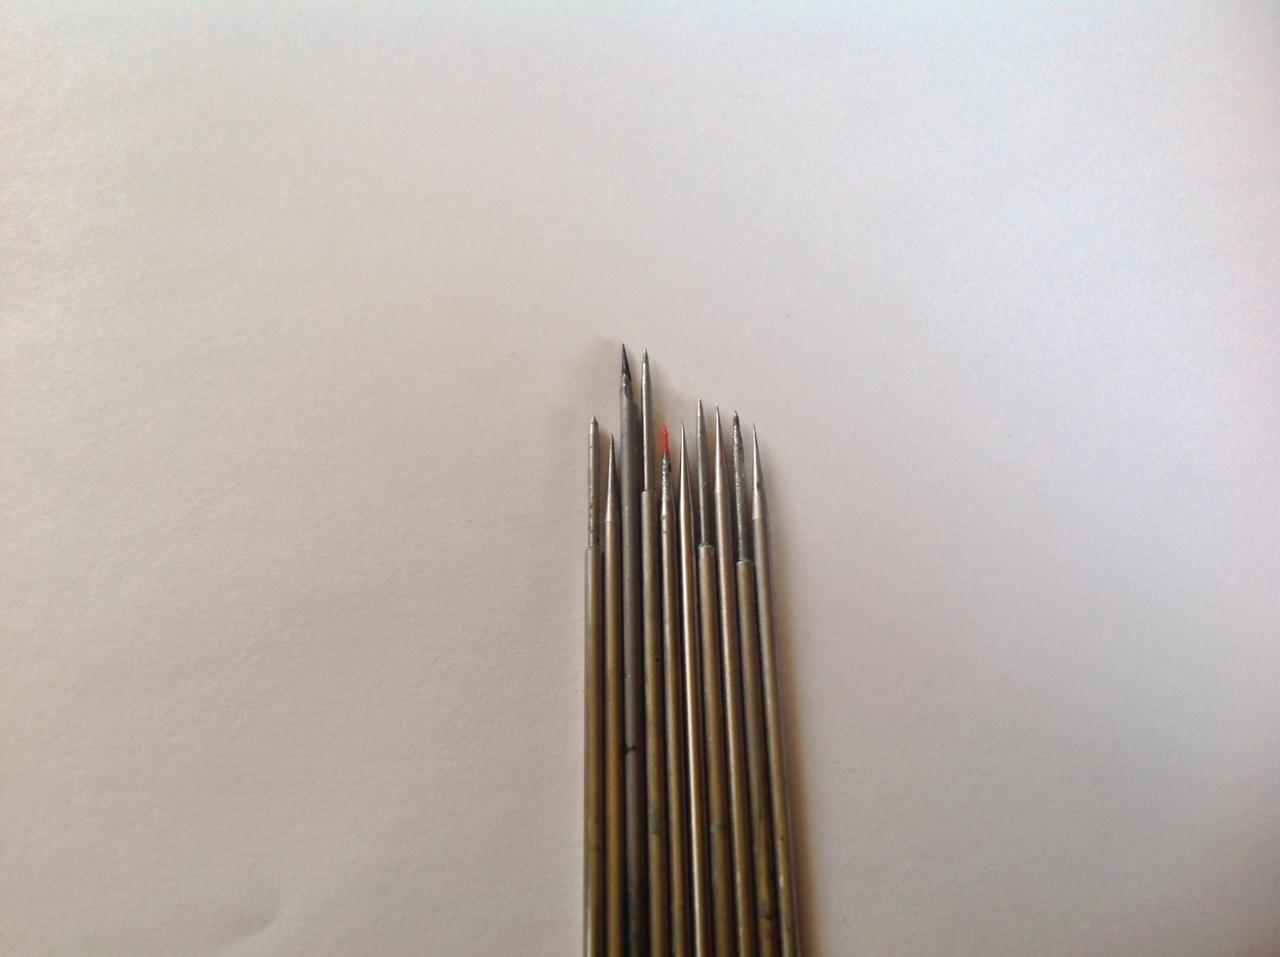
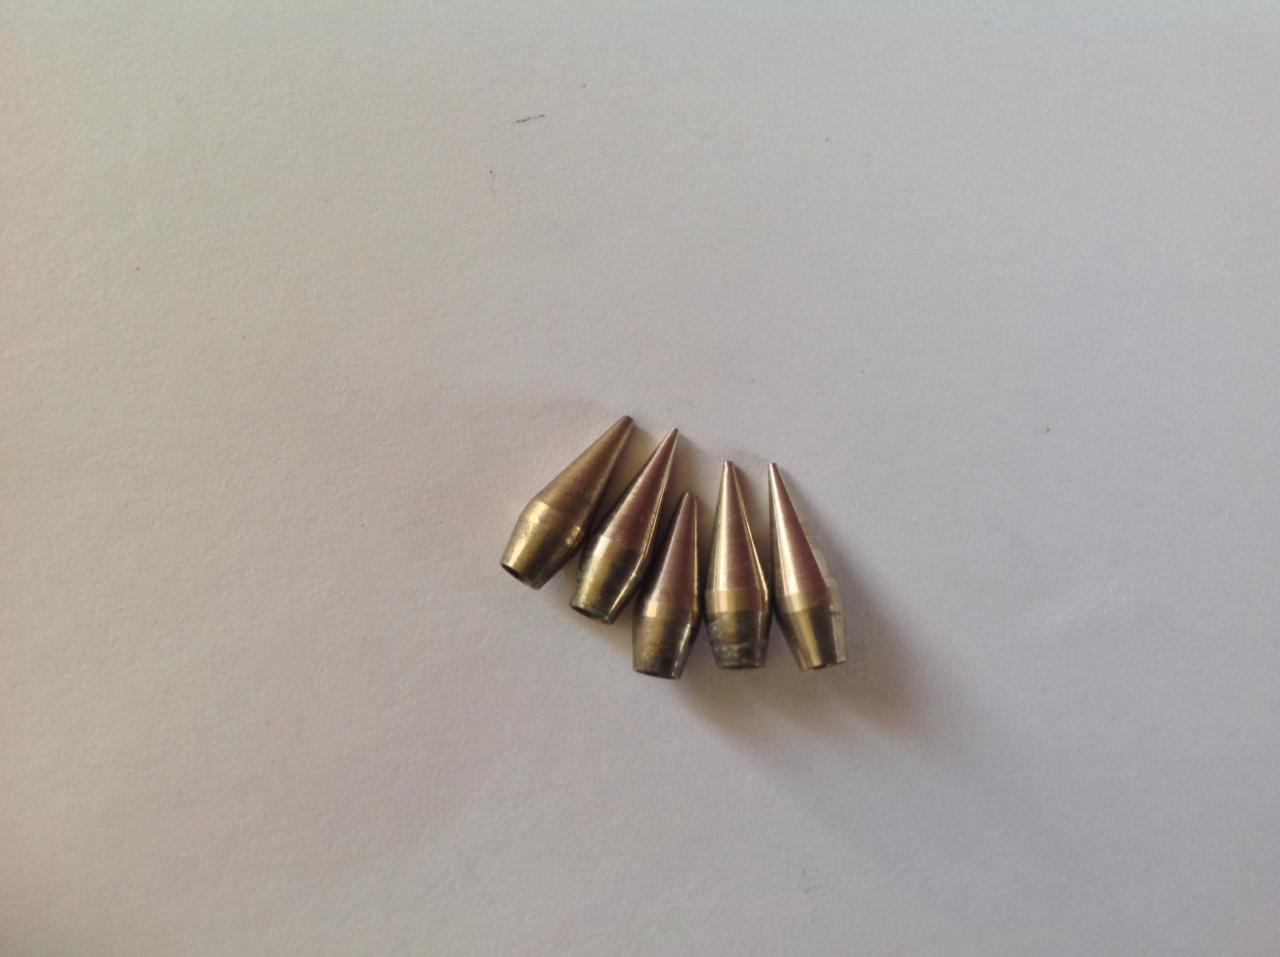
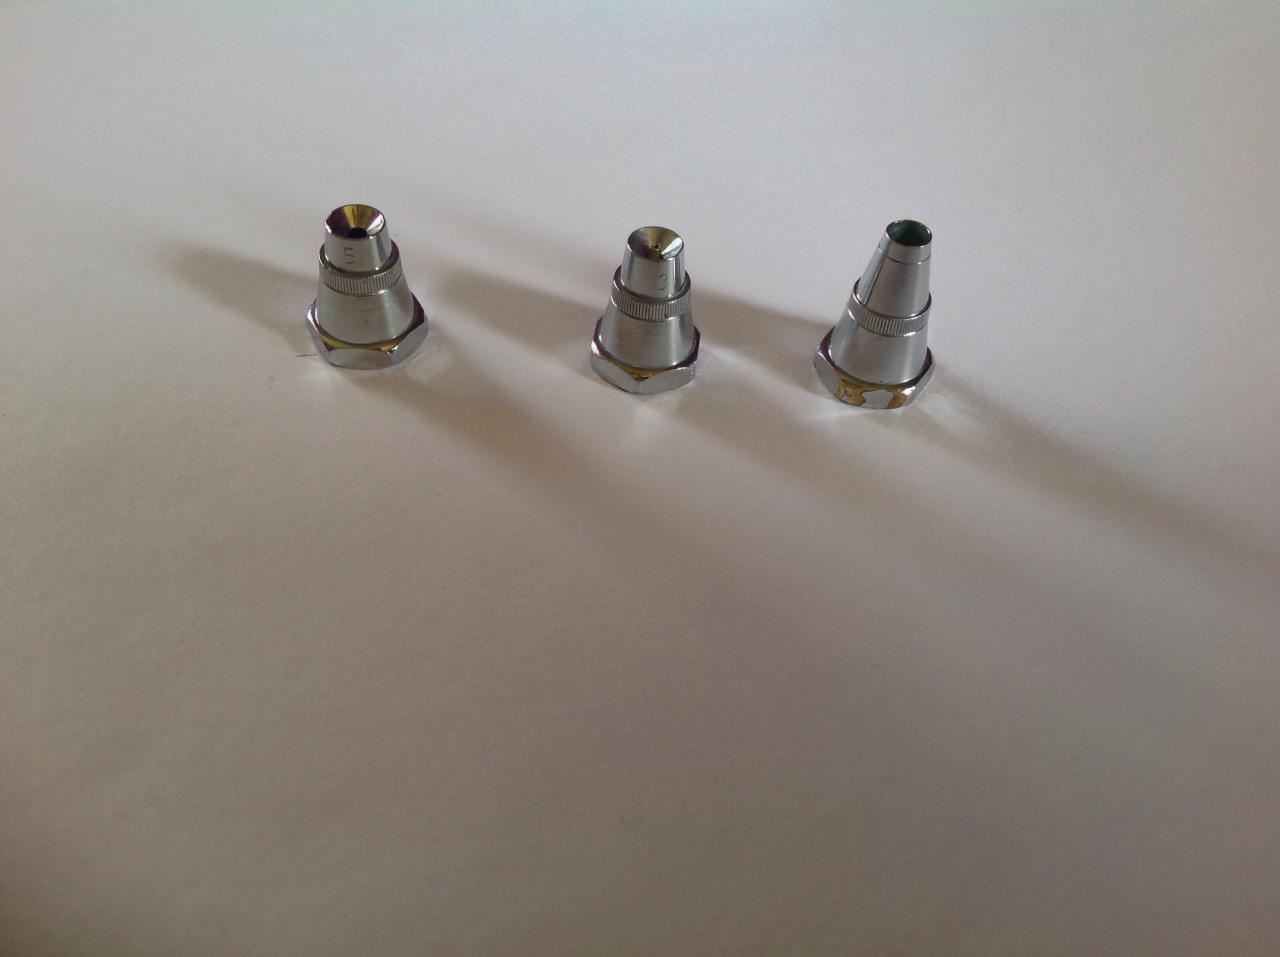
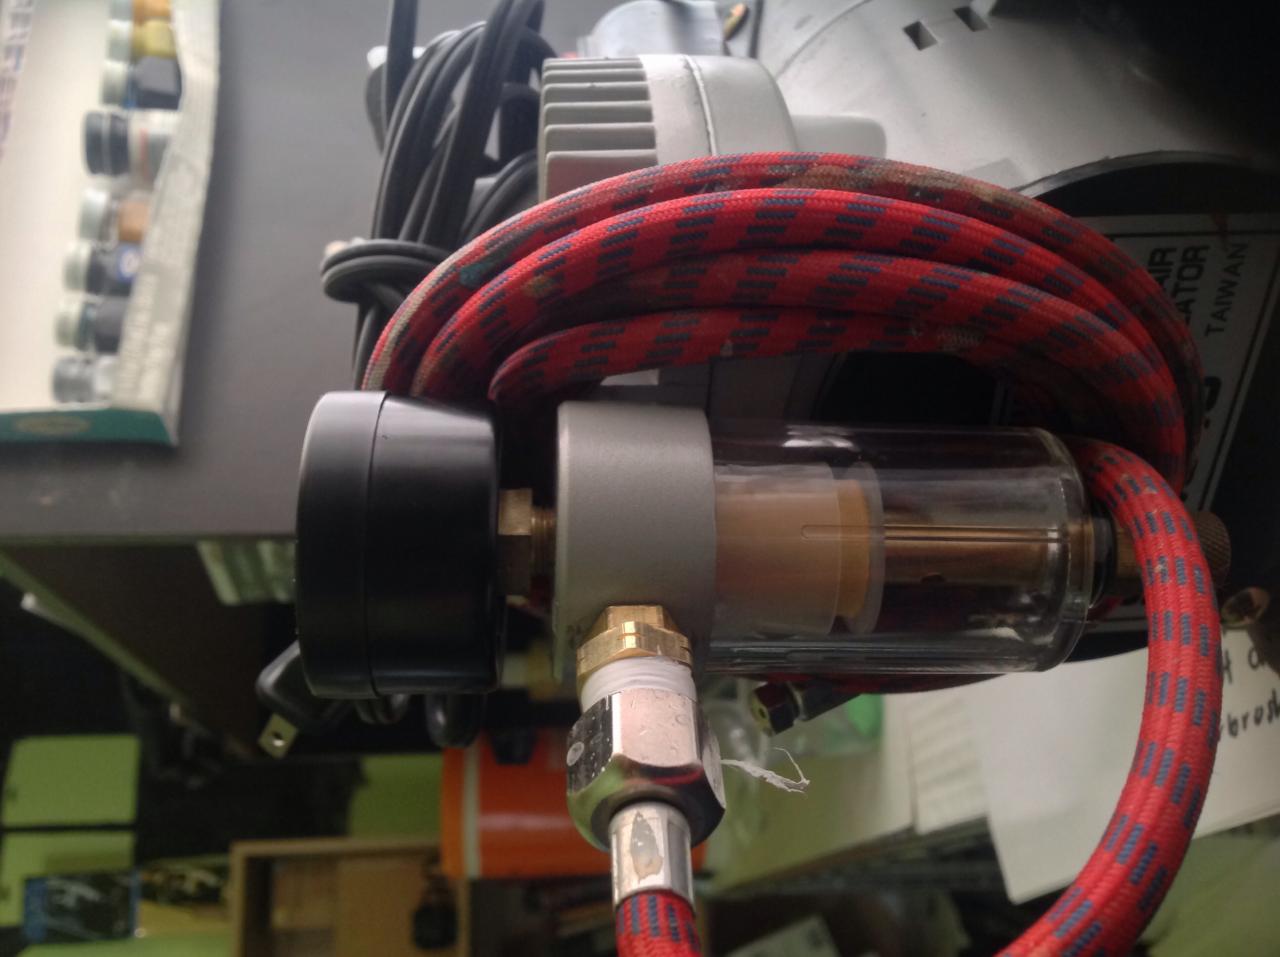
Ok, here are some pictures, the needles I have and the tips and heads, also on the drawn diagram, I was wondering if there is suppose to be absolutely no gap between the tip and needle? Or just a tiny bit? And the last one is the regulator, piece I was talking about! Thanks!
-
Compressor and airbrush driving me nuts!
YoungLuis replied to YoungLuis's topic in Model Building Questions and Answers
Awesome, I'll clean the airbrush again and try out thining the paint a bit more, and I dont think I can adjust the preasure, when I pull up nothing really happens! But it does have a small square that looks like a nut under the gauge, would this be it? -
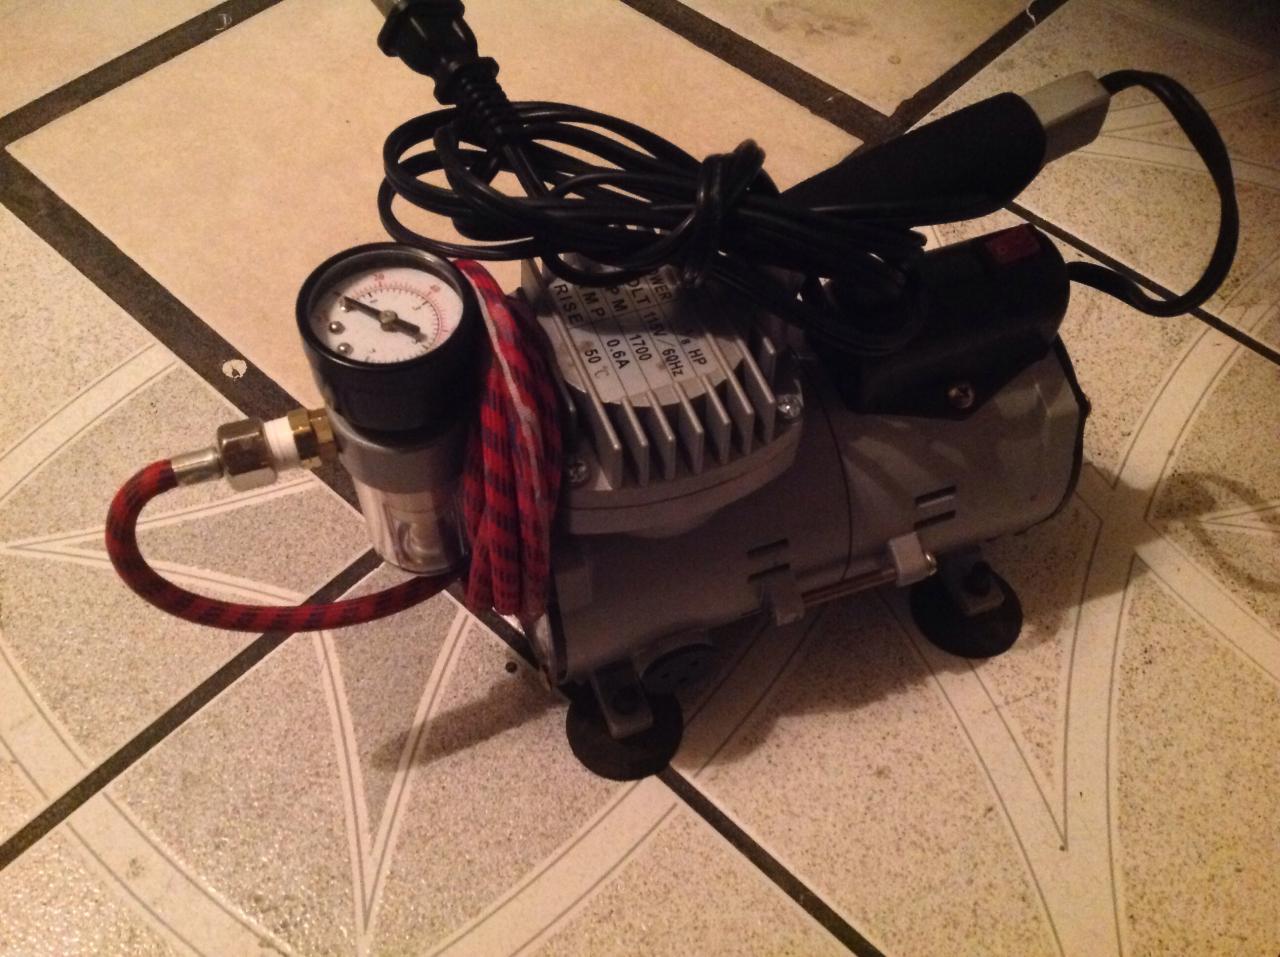
Ok, so I got a sweet deal (double thinking it now) on this comepressor a Paasche VL, the problems Im having are these. 1- the regulator reads about 40psi when I turn it on (hose and airbrush attached) but when I spray it almost immediately goes down to about 15psi, is this normal or is the regulator jacked up? 2- the paint wont always come out, I noticed that the paint doesnt always come out, and sometime when it does it come outs in irregular patter, like splash, sprinkle, splash, spray. Is it not coming our because the needle is too tight, because the preasure is too low, or do I need to use a bigger tip and thin the s*** out of the paint? Thanks for reading, if you can I really need the help! I got lots of body work to do! Hahaha
-
I have a bit of models to work on right now but since I was able to get this one for 1/2 off I just had to, anyways here is the progress. I'm gonna try and make it seem like an old daily driven car you'd see on the side of the road while going to some nice destination on your mini van with your family!