BDSchindler
-
Posts
381 -
Joined
-
Last visited
Content Type
Profiles
Forums
Events
Gallery
Everything posted by BDSchindler
-
C-1 Models "Shooting Brake" AKA Camaro Wagon
BDSchindler replied to BDSchindler's topic in WIP: Model Cars
A small update…calling the interior DONE!!!
-
Did anyone else notice the "curbside" 2021 Ford Bronco had a separate hood from the body on the box art showing the parts included? (25:05 mark in the video) This opens up some possibilities!
-
C-1 Models "Shooting Brake" AKA Camaro Wagon
BDSchindler replied to BDSchindler's topic in WIP: Model Cars
Not much **new** to report but I got a bit more dismayed on this C1 Models Shooting Brake Camaro. Test fitted the windshield after removing just the front part from the donor glass and noted that it didn't fit. The pillar is warped so it took a bit of creative grinding to make it so. Mind you, it is now painted...my fault for not test fitting the windshield before paint. Also noted the interior wasn't fitting well and found more body issues... Then, (and I don't know why I didn't see this before) the entire drivers side is warped and at least 1/4 of an inch off! This is starting to resemble "slush casting resin" and while I know it wasn't, I just find this kind of c r a p (and I am talking about ALL of the inconsistencies found so far) unacceptable for the price of this conversion kit where it is basically a body and everything else (including the hood) has to come from a donor kit. And I know that I had a choice not to buy, but I seriously think it was just the conversion kit I was sent as others from the same mold did not have all of the issues I have had. Poor quality control in my opinion. -
I do this also but once decanted, allow it to sit overnight so the frozen part from the decanting process dissipates.
-
I attended the Mid-Atlantic NNL that my club (Maryland Automotive Modeler's Association aka MAMA's) this weekend and saw a couple of lighted model vehicles. One of them was a Corvette Gran Sport that was well done. The owner had it outfitted with LED head/taillights and was well done. All that said...any opinions about lighting up our little gems of hard labor? I'm on the fence as to whether or not to attempt it.
-
Long Live Model Cars Magazine!
BDSchindler replied to ncbuckeye67's topic in Model Cars Magazine News and Discussions
I have agree with Jeff. While MCM has always been great, since the revamp of the magazine...it has become SO much better! Yes it would be nice to have it monthly but as one that has written for magazines in the past, it becomes a lot of pressure to hit deadlines with content that will keep readers coming back time and time again. Then there is the cost factor...a monthly publication effectively doubles the budget and that adds to the overall stress of getting the magazine done within the deadline. And trust me, if you miss a deadline by even a week, not only will readers be disappointed but you will NEVER get the next issue out on time and the classic snowball effect starts to happen. "Nuff said on that. As it stands right now, the content is great, the timing is on the mark, pictures are excellent and so on. The only thing I would like to see are more of the "How to" articles and new accessories/tools available. An old Writing professor from college once told me the best way to write a short story (and for those offended by politically incorrect analogies, stop reading now) is to envision a woman's hemline...the story (or article in this case) should be long enough to cover the subject but short enough to make it interesting. I'd say you guys hit the mark perfectly! -
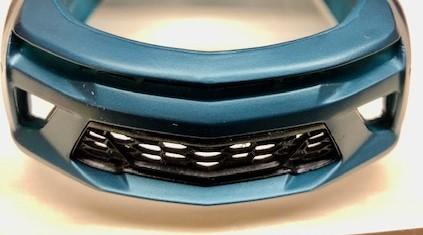
The donor kit I used is the 50th anniversary camaro...it came with a closed grill as well as the open one. so I used the open one as it saved tons of sanding work. I left a small lip in the opening so there was something to mount it to.
-
I did the same thing with the grill area. I just like having the open grill.
-
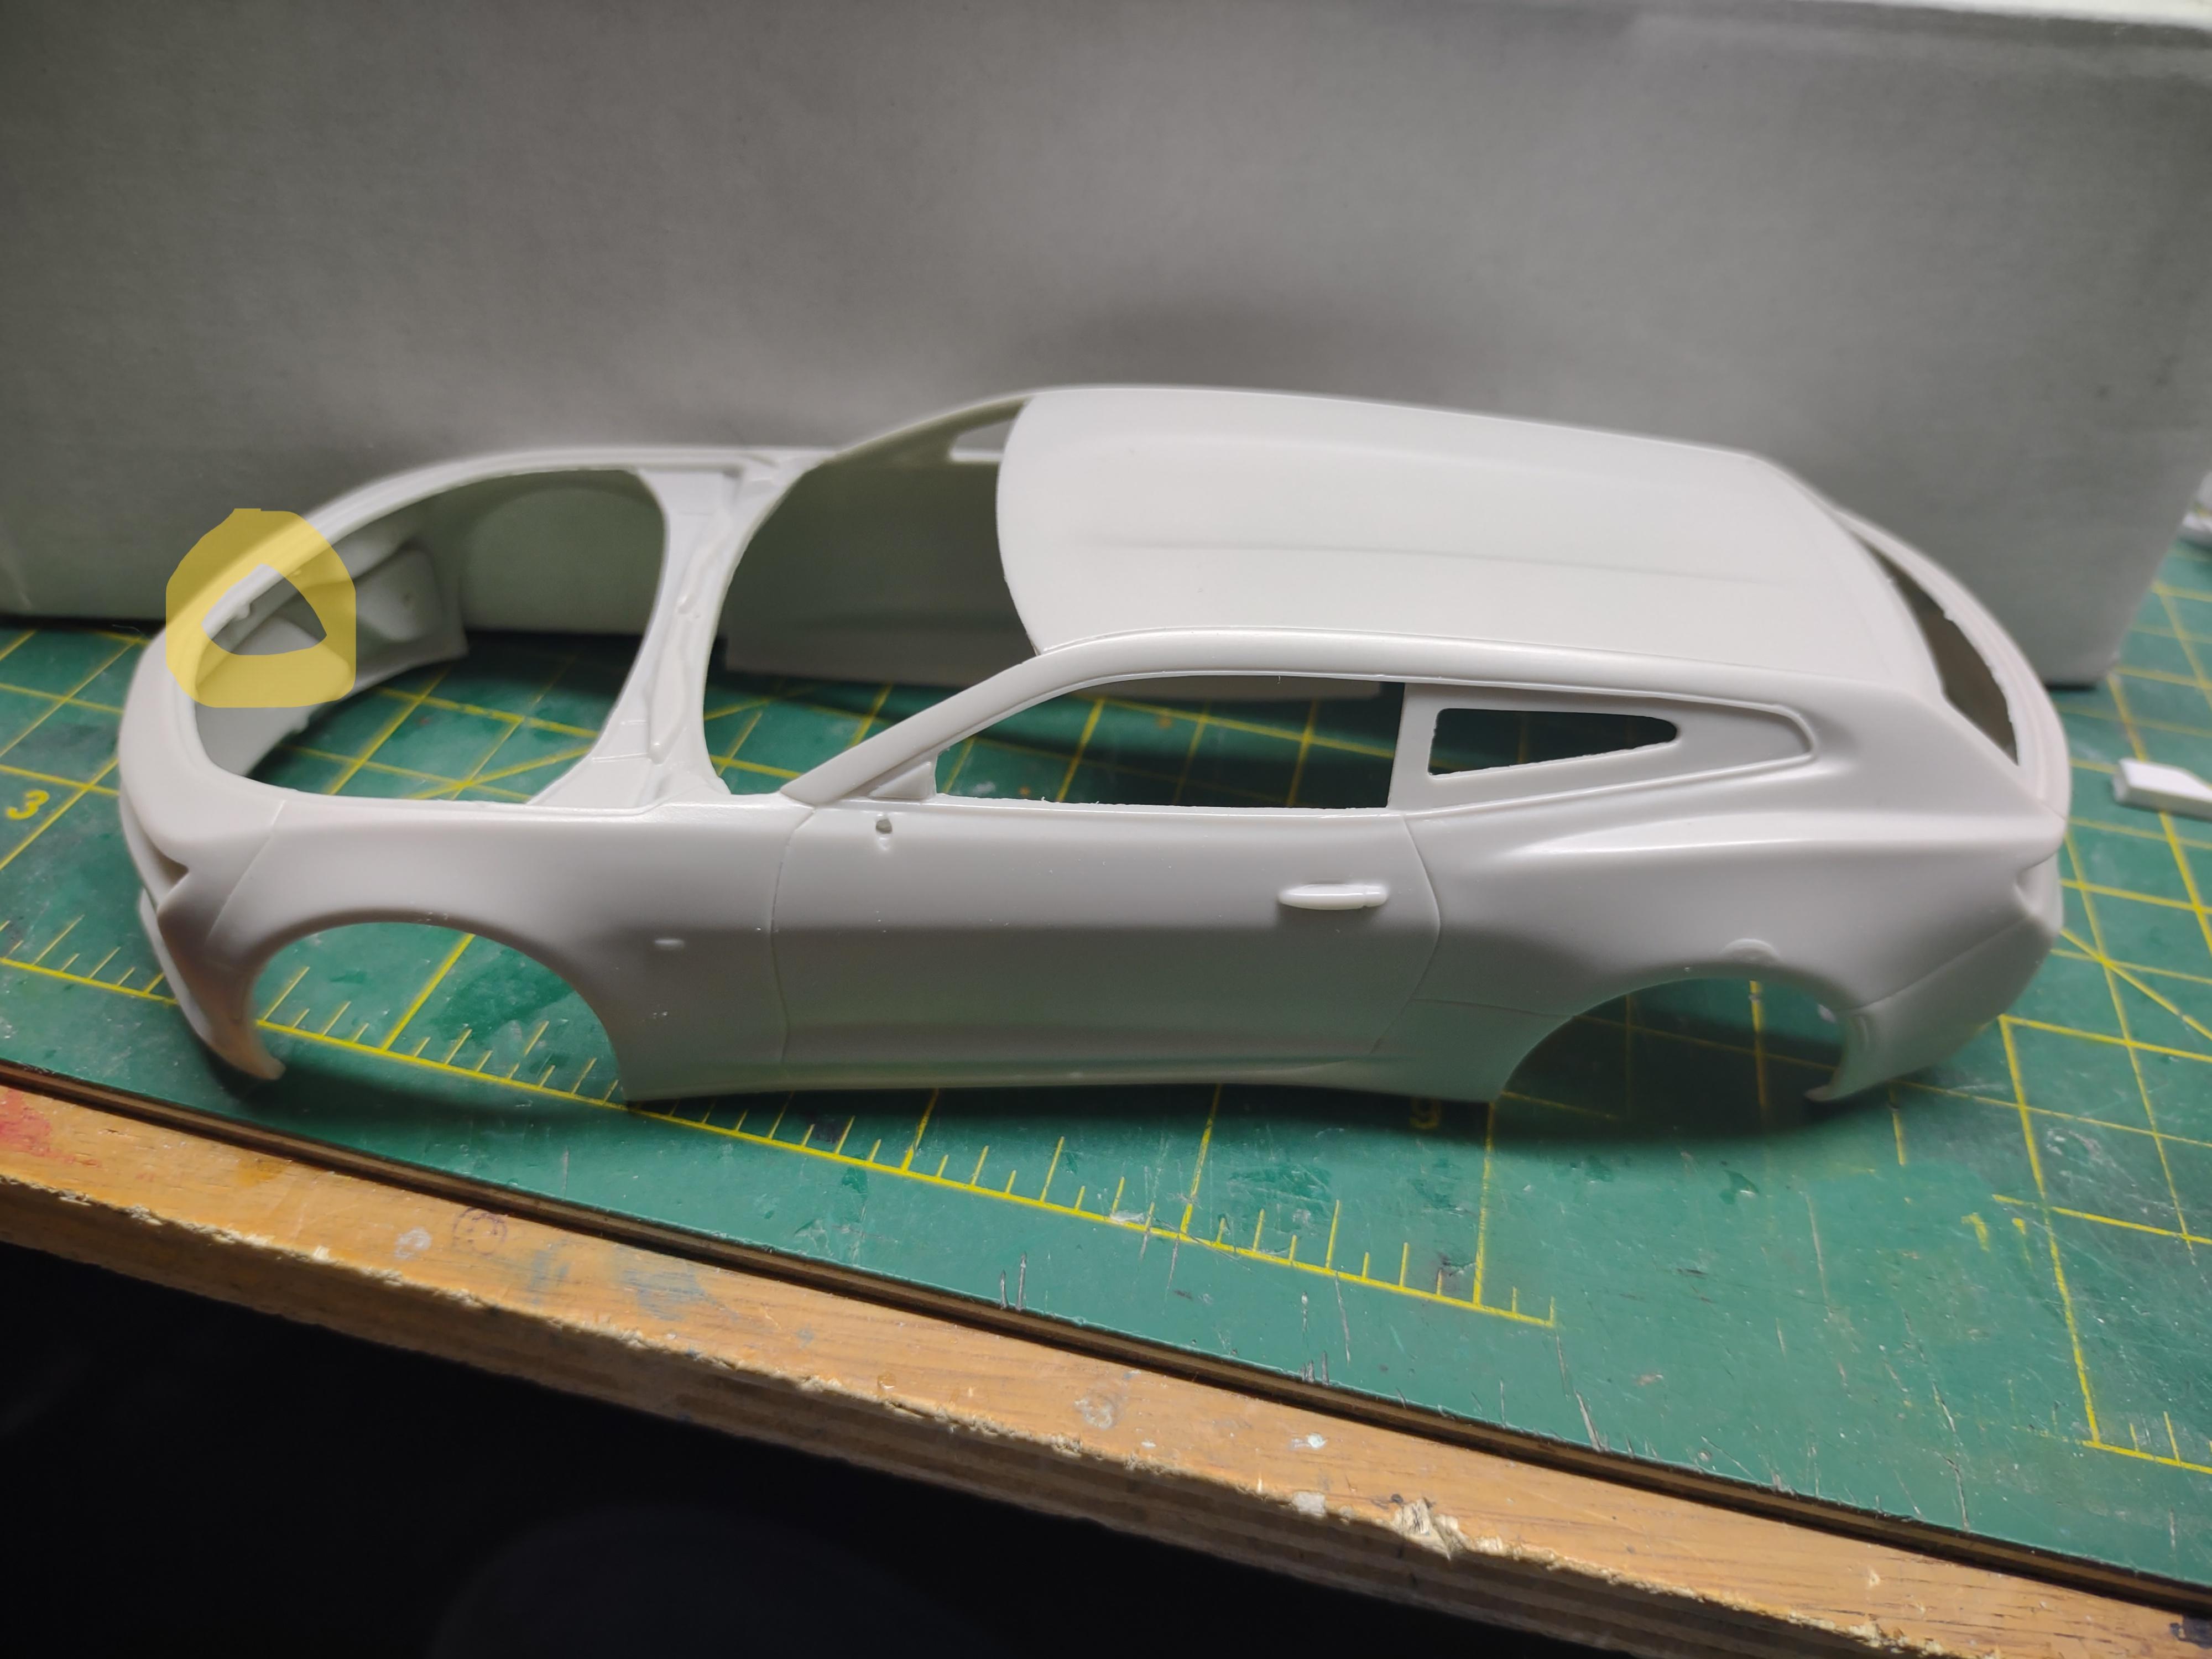
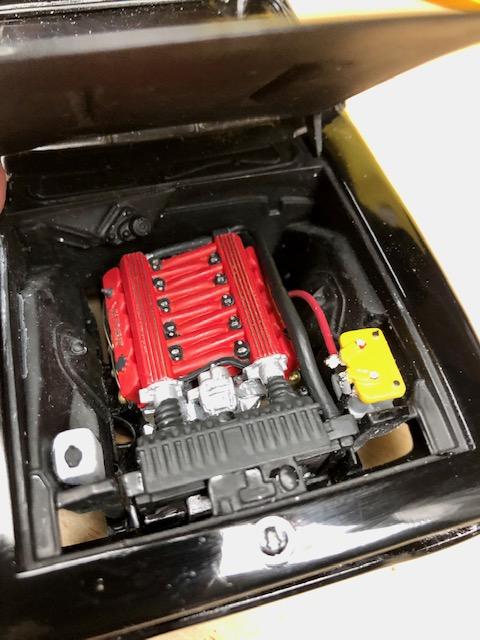
Interesting approach to the Cargo Area by removing the rear deck of the interior behind the seats and finishing it off. That's one I didn't think of. I assume you put a backing on the rear seats. I will probably steal this idea from you as I really like it! On the body just under the front in the engine bay are 2 tabs that need to be remove and sanded flat. If not, the tub for the engine bay will not fit correctly (see pic below area circled in yellow), It is on the right and left side...TEST FIT EVERYTHING before assembly! I found a lot of things that needed some sort of modification! Nice job!
-
Revell London Bus.
BDSchindler replied to H.A.K's topic in Model Trucks: Pickups, Vans, SUVs, Light Commercial
Beauty of a job! I reviewed a diecast version (I forget who manufactured it) of the London Bus for one of the magazines I wrote for in the past and as good as that was, this is so much better despite the use of the LED's. Your lighting just makes it perfect! Nice job! -
C-1 Models "Shooting Brake" AKA Camaro Wagon
BDSchindler replied to BDSchindler's topic in WIP: Model Cars
Thanks, I have some minor wet sanding to do on it before I clear it and since the hood needs repainting, I'll hold for now. I also have a couple of other bodies that need painting so I'll wait and clear them with Splash Paints 2K Gloss clear. Speaking of Splash Paints, hats off to Sam for straightening me out on what to order for the 2K Clear. I've never used 2K Clear before so this should be interesting. -
C-1 Models "Shooting Brake" AKA Camaro Wagon
BDSchindler replied to BDSchindler's topic in WIP: Model Cars
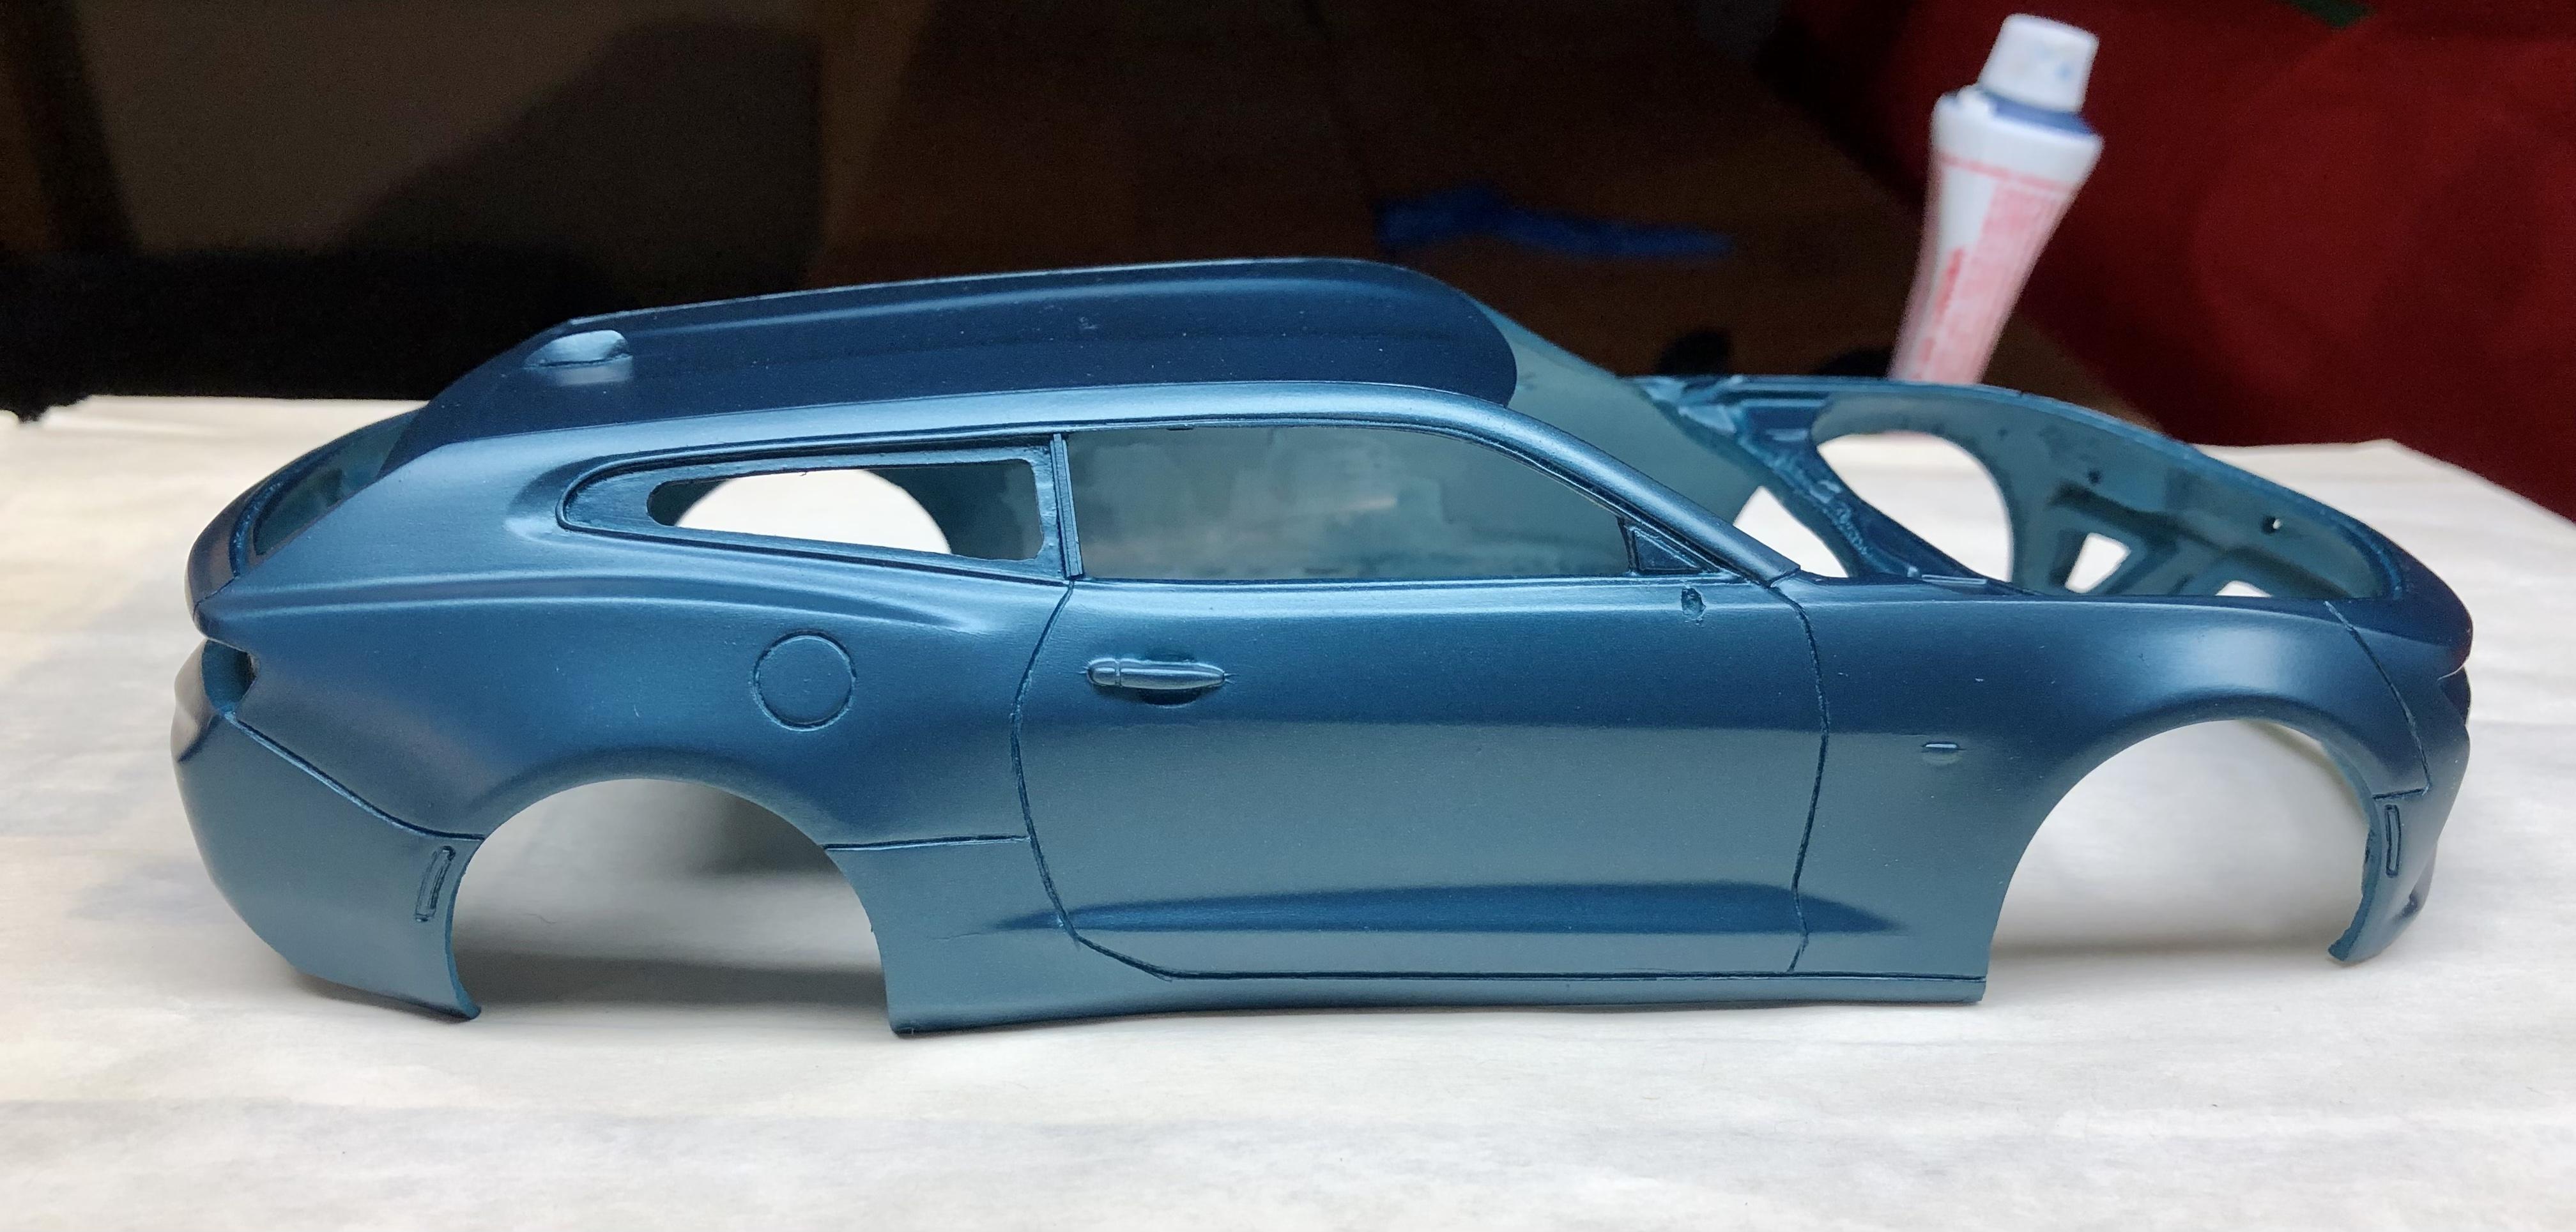
Finally an update, painted the Shooting Brake with Splash Paints Turquoise Blue Metallic. I need to lightly wet sand a couple of spots but overall, it looks good to me. The hood had some deep sanding scratches that I missed and became ever so evident when painted so that went into the purple pond and has since been re-primed.
-
1964 Pontiac Bonneville Convertible.
BDSchindler replied to StevenGuthmiller's topic in WIP: Model Cars
Well...for "shnits and giggles" I gave this a shot using black sprue from the AMT 2017 Camaro and it worked perfectly. When I tried it with Revell white sprue, it took a little more finesse to get it to stretch but I eventually got it to work producing 12" lengths consistently. I see a lot of use for this, Steve. Thanks for the tip! -
Love this build!
-
I use Firefox and have been experiencing the same thing since Aug 2021 but this is the only forum that it happens on. I just select the page I want, right click and open it in a new window. This does not happen with Edge and I hate Chrome
-
C-1 Models "Shooting Brake" AKA Camaro Wagon
BDSchindler replied to BDSchindler's topic in WIP: Model Cars
No worries, Joe! I'm retired now (as of December 2022) so I have plenty of time...well, when I'm not taking care of the never ending "honey-do" list my wife devised to keep me busy! I've been busier in the last 4 months than I was in the last 10 years in I.T.!!!!! Thanks again! -
AMT 2017 Camaro "Fiftieth" Anniversary Edition
BDSchindler replied to mustang1989's topic in WIP: Model Cars
Thanks, Joe! -
AMT 2017 Camaro "Fiftieth" Anniversary Edition
BDSchindler replied to mustang1989's topic in WIP: Model Cars
Joe...I'm currently working on this one but putting C1's "Shooting Brake" (aka wagon body) on it. I have noticed in some builds that the suspension looked too high. I suspect this is why you wanted to lower it just a bit. Just for reference, how did you go about lowering the front and rear suspensions on yours? -
1964 Pontiac Bonneville Convertible.
BDSchindler replied to StevenGuthmiller's topic in WIP: Model Cars
Holy C R A P! That is awesome work, Steve! I'm envious of your talent! Makes me wonder why I keep focused! Let's see...I got about 150 Kits, TONS of aftermarket parts and easily $2,000.00 in tools...$10.00 buys it all, any takers? (just kidding) -
I have had this same identical issue for a long time now and ONLY when using Firefox,,,any other forum like site and it works fine. I also found that only opening the second or more pages in another tab is the only way. Other browsers work fine, only Firefox is the issue it seems. Just a note, I have Java Script enabled on Firefox. If I disable Java Script, I cannot see pictures BUT I can scroll to page 2 and beyond I have cleared cache, cleared history made sure the software was up to date even did an Irish jig in my skivvies and nothing worked. It all started prior to August 15th 2021. https://www.modelcarsmag.com/forums/topic/164179-unable-to-open-secondary-pages-of-a-topic/
-
Just finished this week...
-
If I had built it stock, the front and rear valance would have been installed after the interior and chassis were installed. Since I integrated the valances into the body, I had to get creative with the chassis. I removed a but of the length from the front and rear as well as shaving the Wheel Wells down for easier installation of the chassis. It required flexing the side panels a fair amount. Since the body was going to be finished when installing the chassis, I was afraid of seams cracking where the front and rear bumpers were integrated. This is the reason I used plastic strips at the seams and melted the seams together using liquid glue thereby bonding the plastic for a stronger hold. Kind of like welding but using plastic instead of metal. Lots of sanding and reapplying melted plastic as needed. It also made it so less body filler was needed.
-
Everyone...thanks for the comments
-
No I don't but I'll try and get one up
-
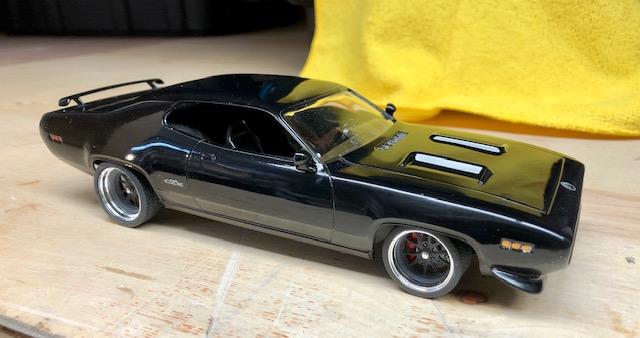
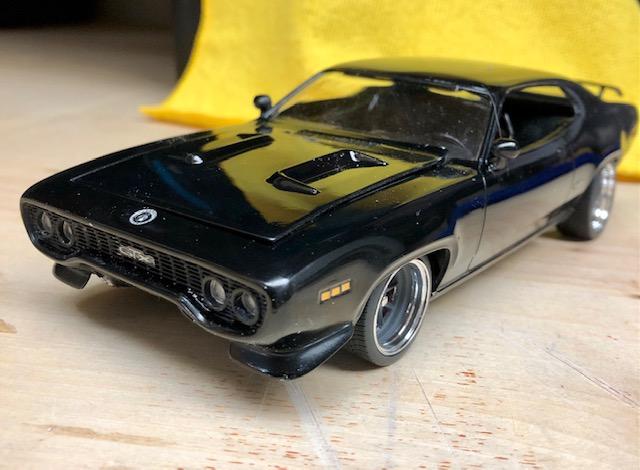
After a year and a half of on again/off again working on this...the 71 GTX is done! I opened the grill on this (4 hours worth of work! Remaining grill is paper thin!), dechromed and narrowed the bumpers then worked them into the body panels using melted plastic and very little filler. Removed the rear seats and tubbed the car. The seats and steering wheel from a Viper RT 10, shifter is from Shapeways. Engine, radiator and shroud are from the Viper. I BMF's the valve covers, painted them red then removed the paint showing the detail in the valve covers. The exhaust was separated from the rear end and I used plastic tube with beading wire stuffed in the entire length. This made the plastic tube bendable without kinking. I used larger tube for the tips and angled the opening. I also made the reveals in the rear valance for the exhaust to poke through. Front suspension was lowered about 2mm...Gives it a meaner look, I think (my opinion). Paint fought me all the way...my own fault. I got dust in the clear coat and wet sanded it then buffed it. I ended up buffing through the paint in 2 spots. Taped it off and fixed those areas but when I removed the tape, the adhesive melted the clear coat just enough to give it a rough vinyl top look. So I wet sanded that buffed it out again. When I was going to glue the radiator in (using Tenax glue as it fuses the plastic better) and of course, a drop of it landed on the nose. Touched it up and it will need some finishing once the paint cures but for now, from 4' away, you can't see it. Wheel and Tires from Steve Zimmerman Here's some pics...ANY feedback is appreciated! The hood DOES sit tight to the body, I forgot to tap it into place before I took the picture. *** Note...Driveshaft was installed since this pic. Originally I forgot about it!