drive4th
-
Posts
77 -
Joined
-
Last visited
Content Type
Profiles
Forums
Events
Gallery
Everything posted by drive4th
-
Road Race/Pro Touring Cuda - Project "HELL BOY”
drive4th replied to Mopar426's topic in WIP: Model Cars
That'd be swell mate! Do keep us posted. Would be good to see a process of how you start and how to make it all fit together -
looking real good man, good effort and it shows! keep it up
-
Road Race/Pro Touring Cuda - Project "HELL BOY”
drive4th replied to Mopar426's topic in WIP: Model Cars
i'll tell ya something i'm interested in.. modifying the darn suspension! I've tried and tried to modify suspensions of my builds, trying to get it lowered or sitting just right and its always a disaster. I dunno how you guys get them to sit so low but i sure cant get there. And they never post any pics!! I get that every build is different and depends on the car and the stance but how about some pointers or some steps to at least get started on lowering / modifying suspensions?? halp! -
badass! following this very closely, ive been wanting to build a pig nose for a while as well to complement my 90 hatchback keep it up
-
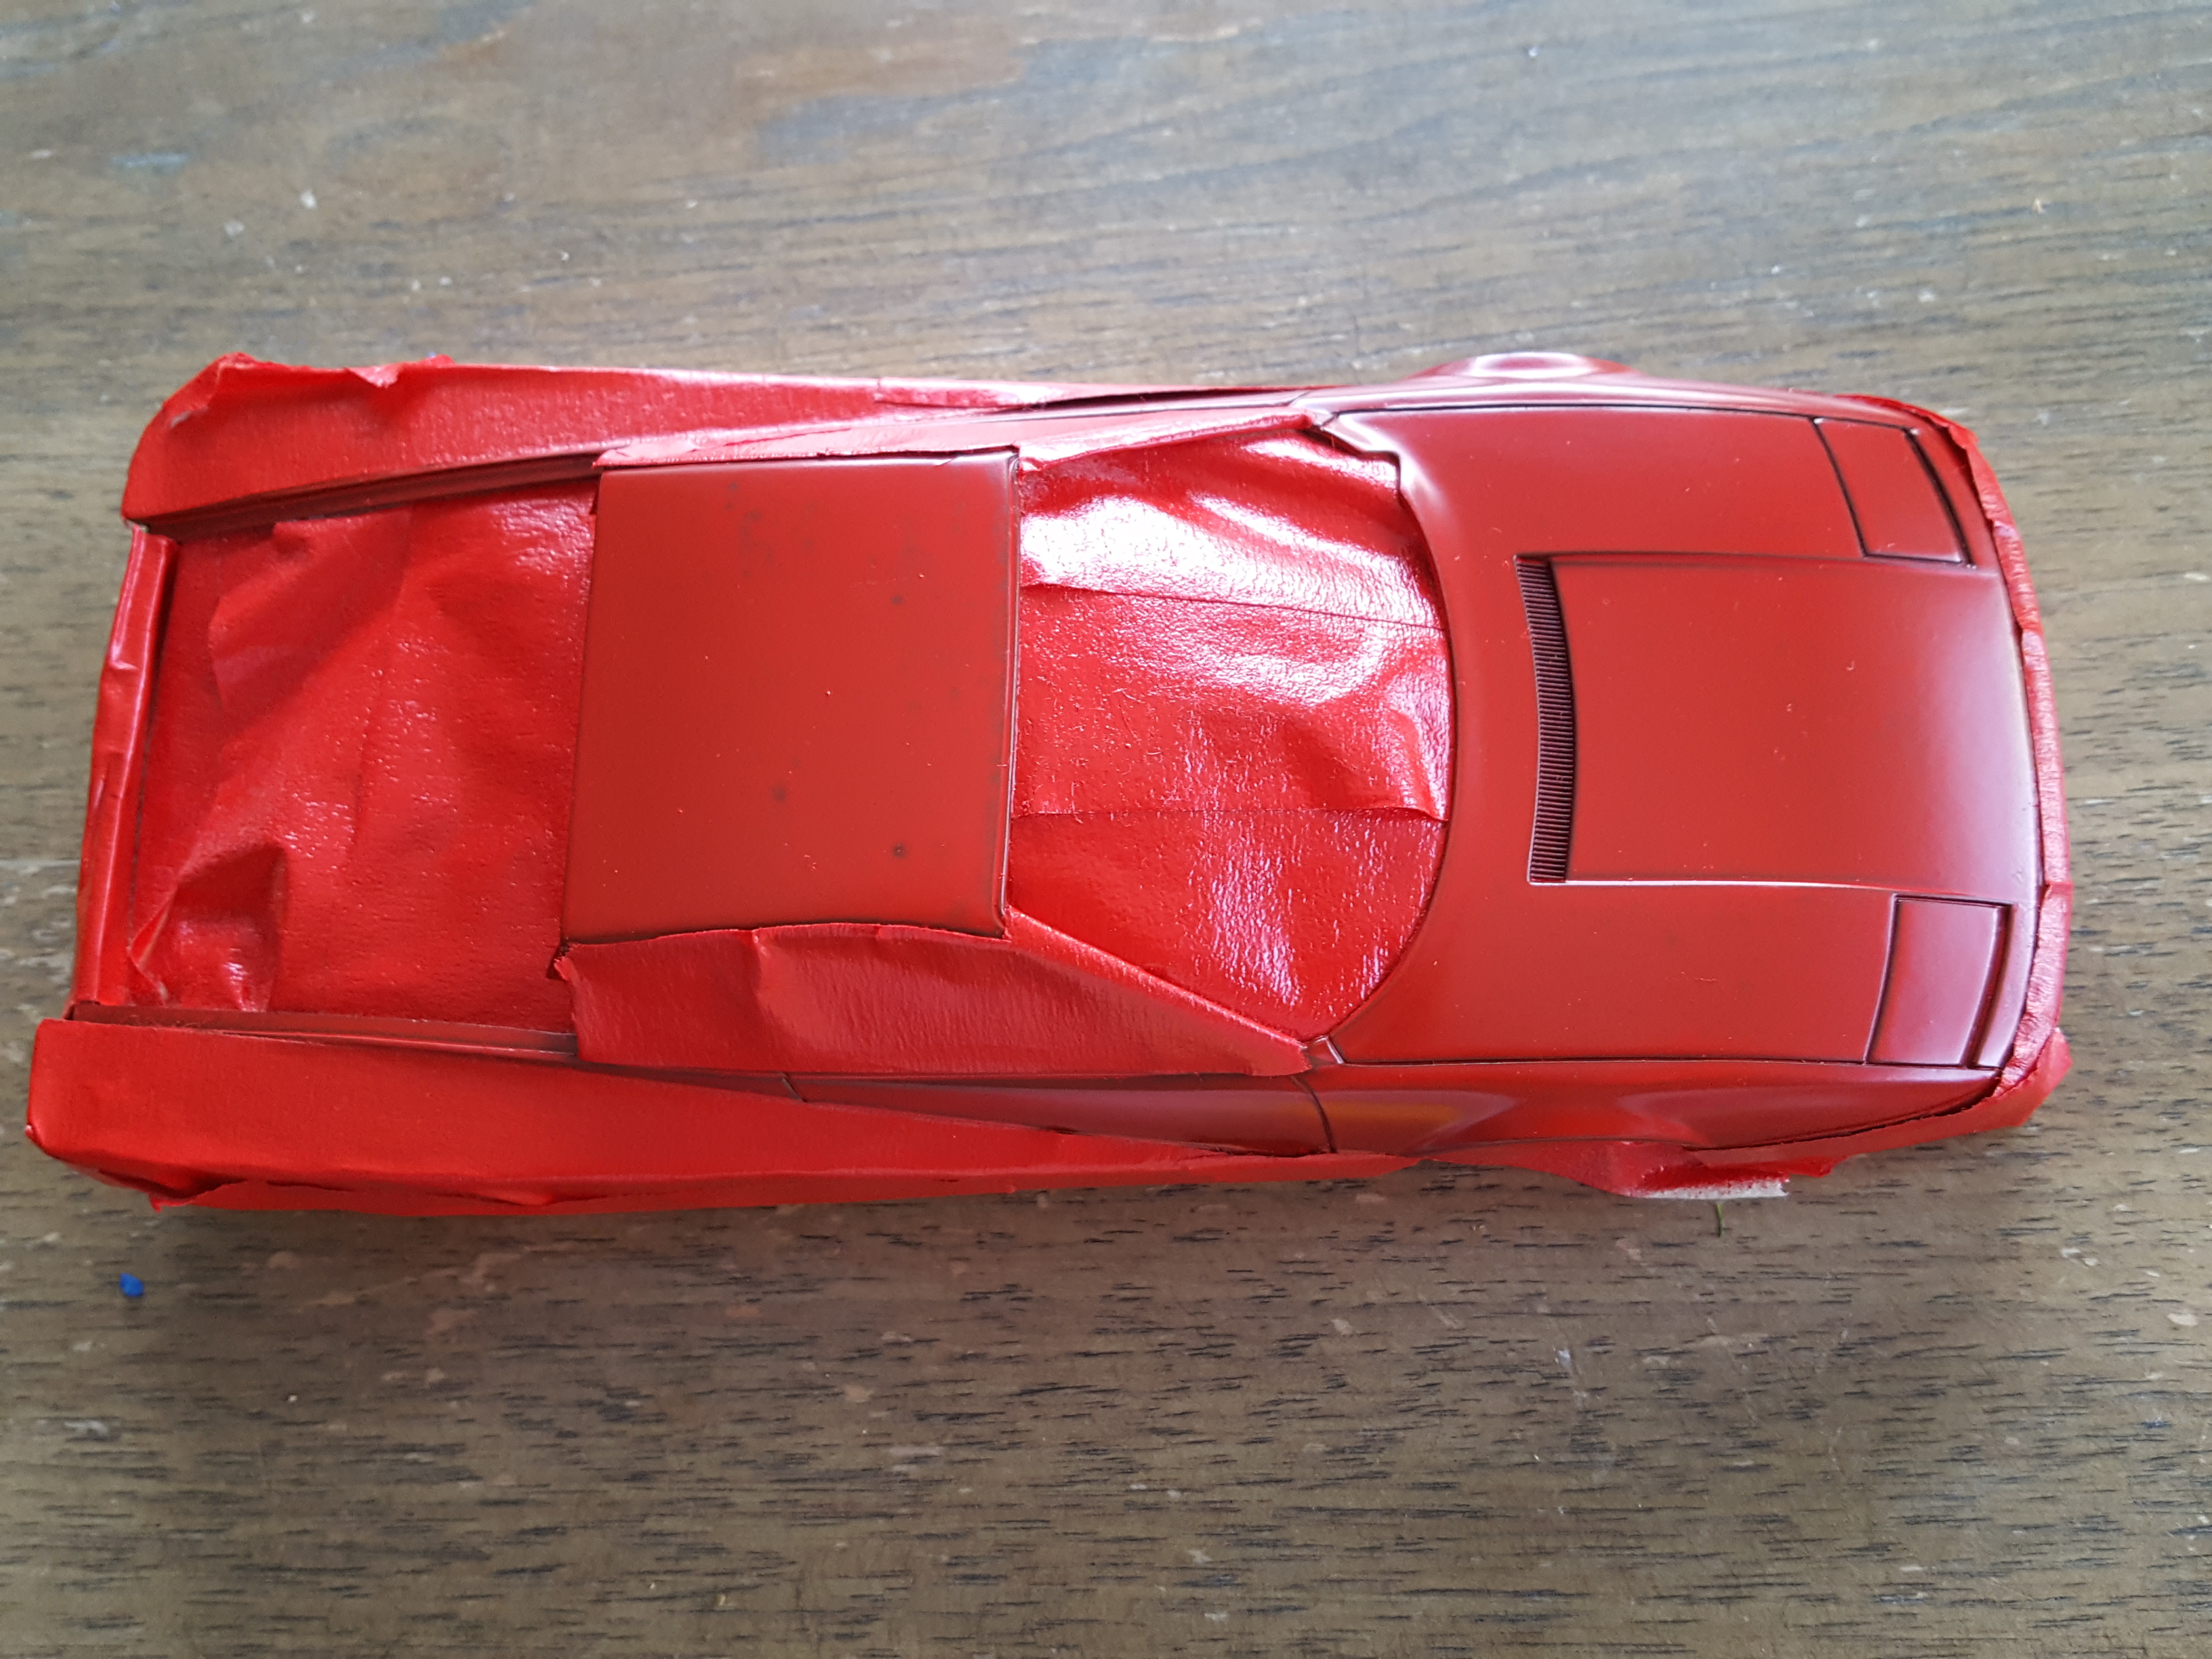
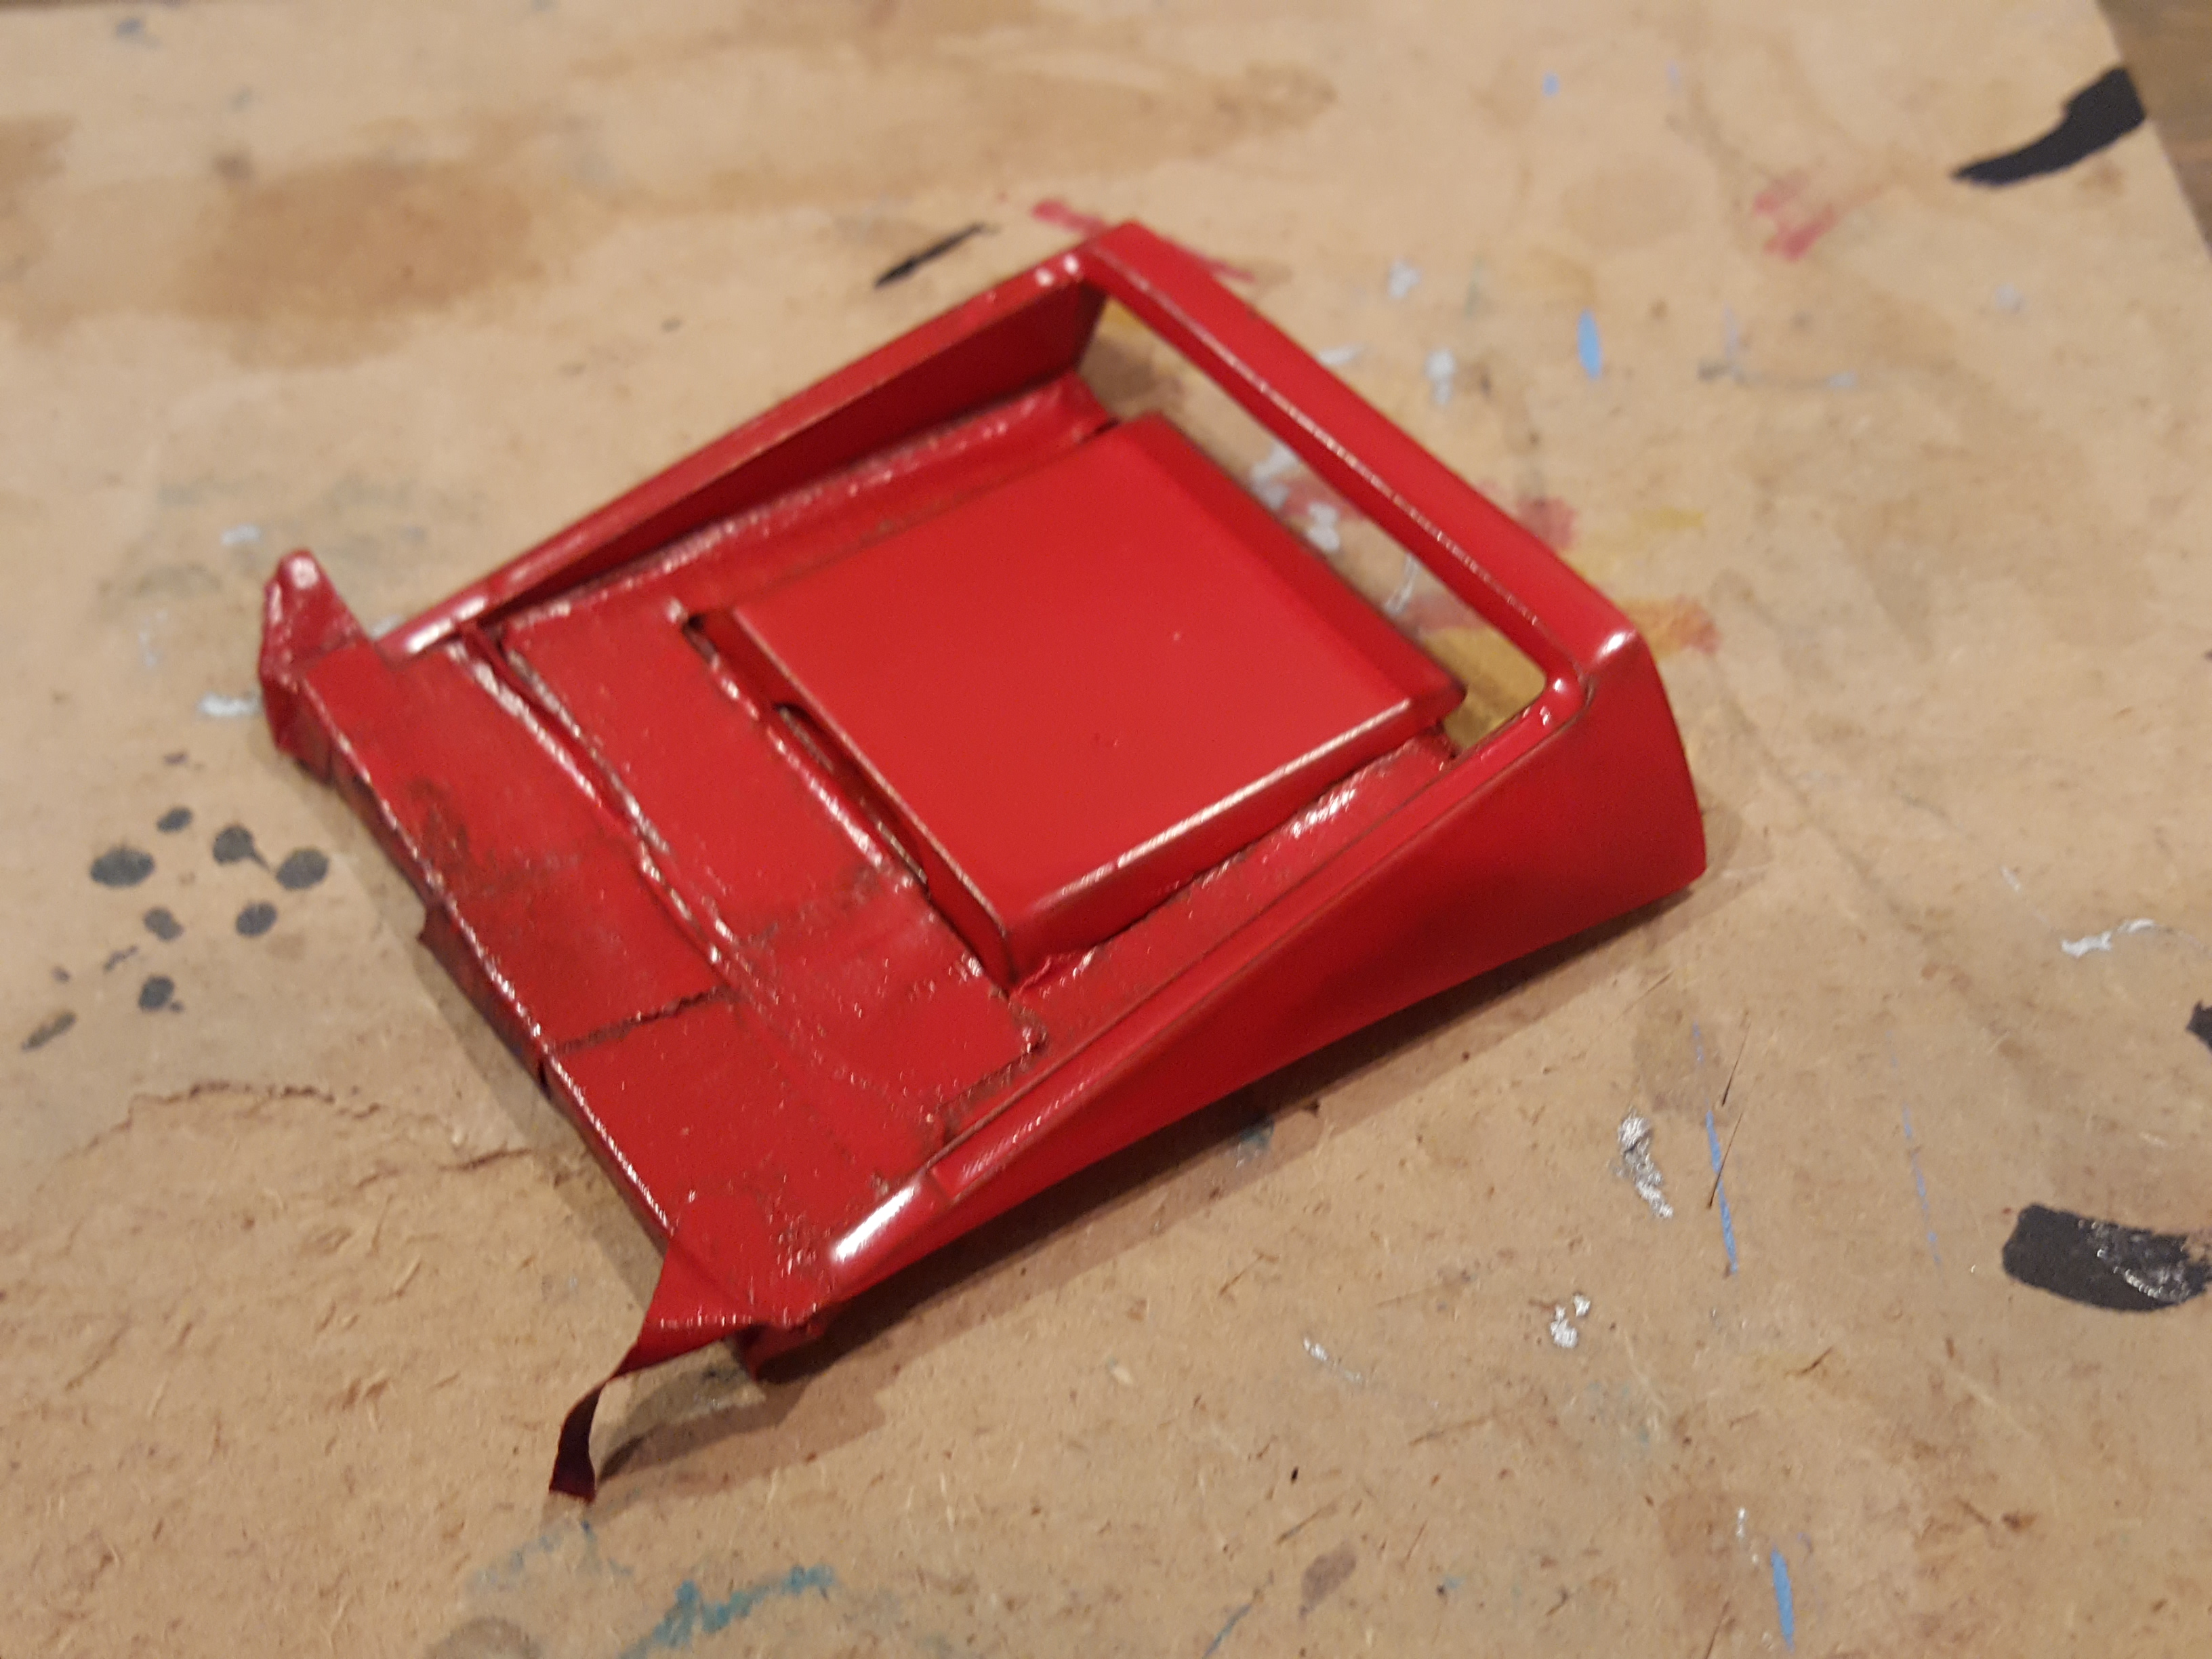
And now for the 2-tone body. You can see the effects of using BLAH_BLAH_BLAH_BLAH masking tape, so the paint will need some touch up and correcting but it's not too bad. Also, the back hatch had some issues so i re-sanded and repainted it, but i didnt take picks of it at this point. I will clean up and polish off all the paint before i put it all together. Now onto chassis and wheel fitment! stay tuned..

-
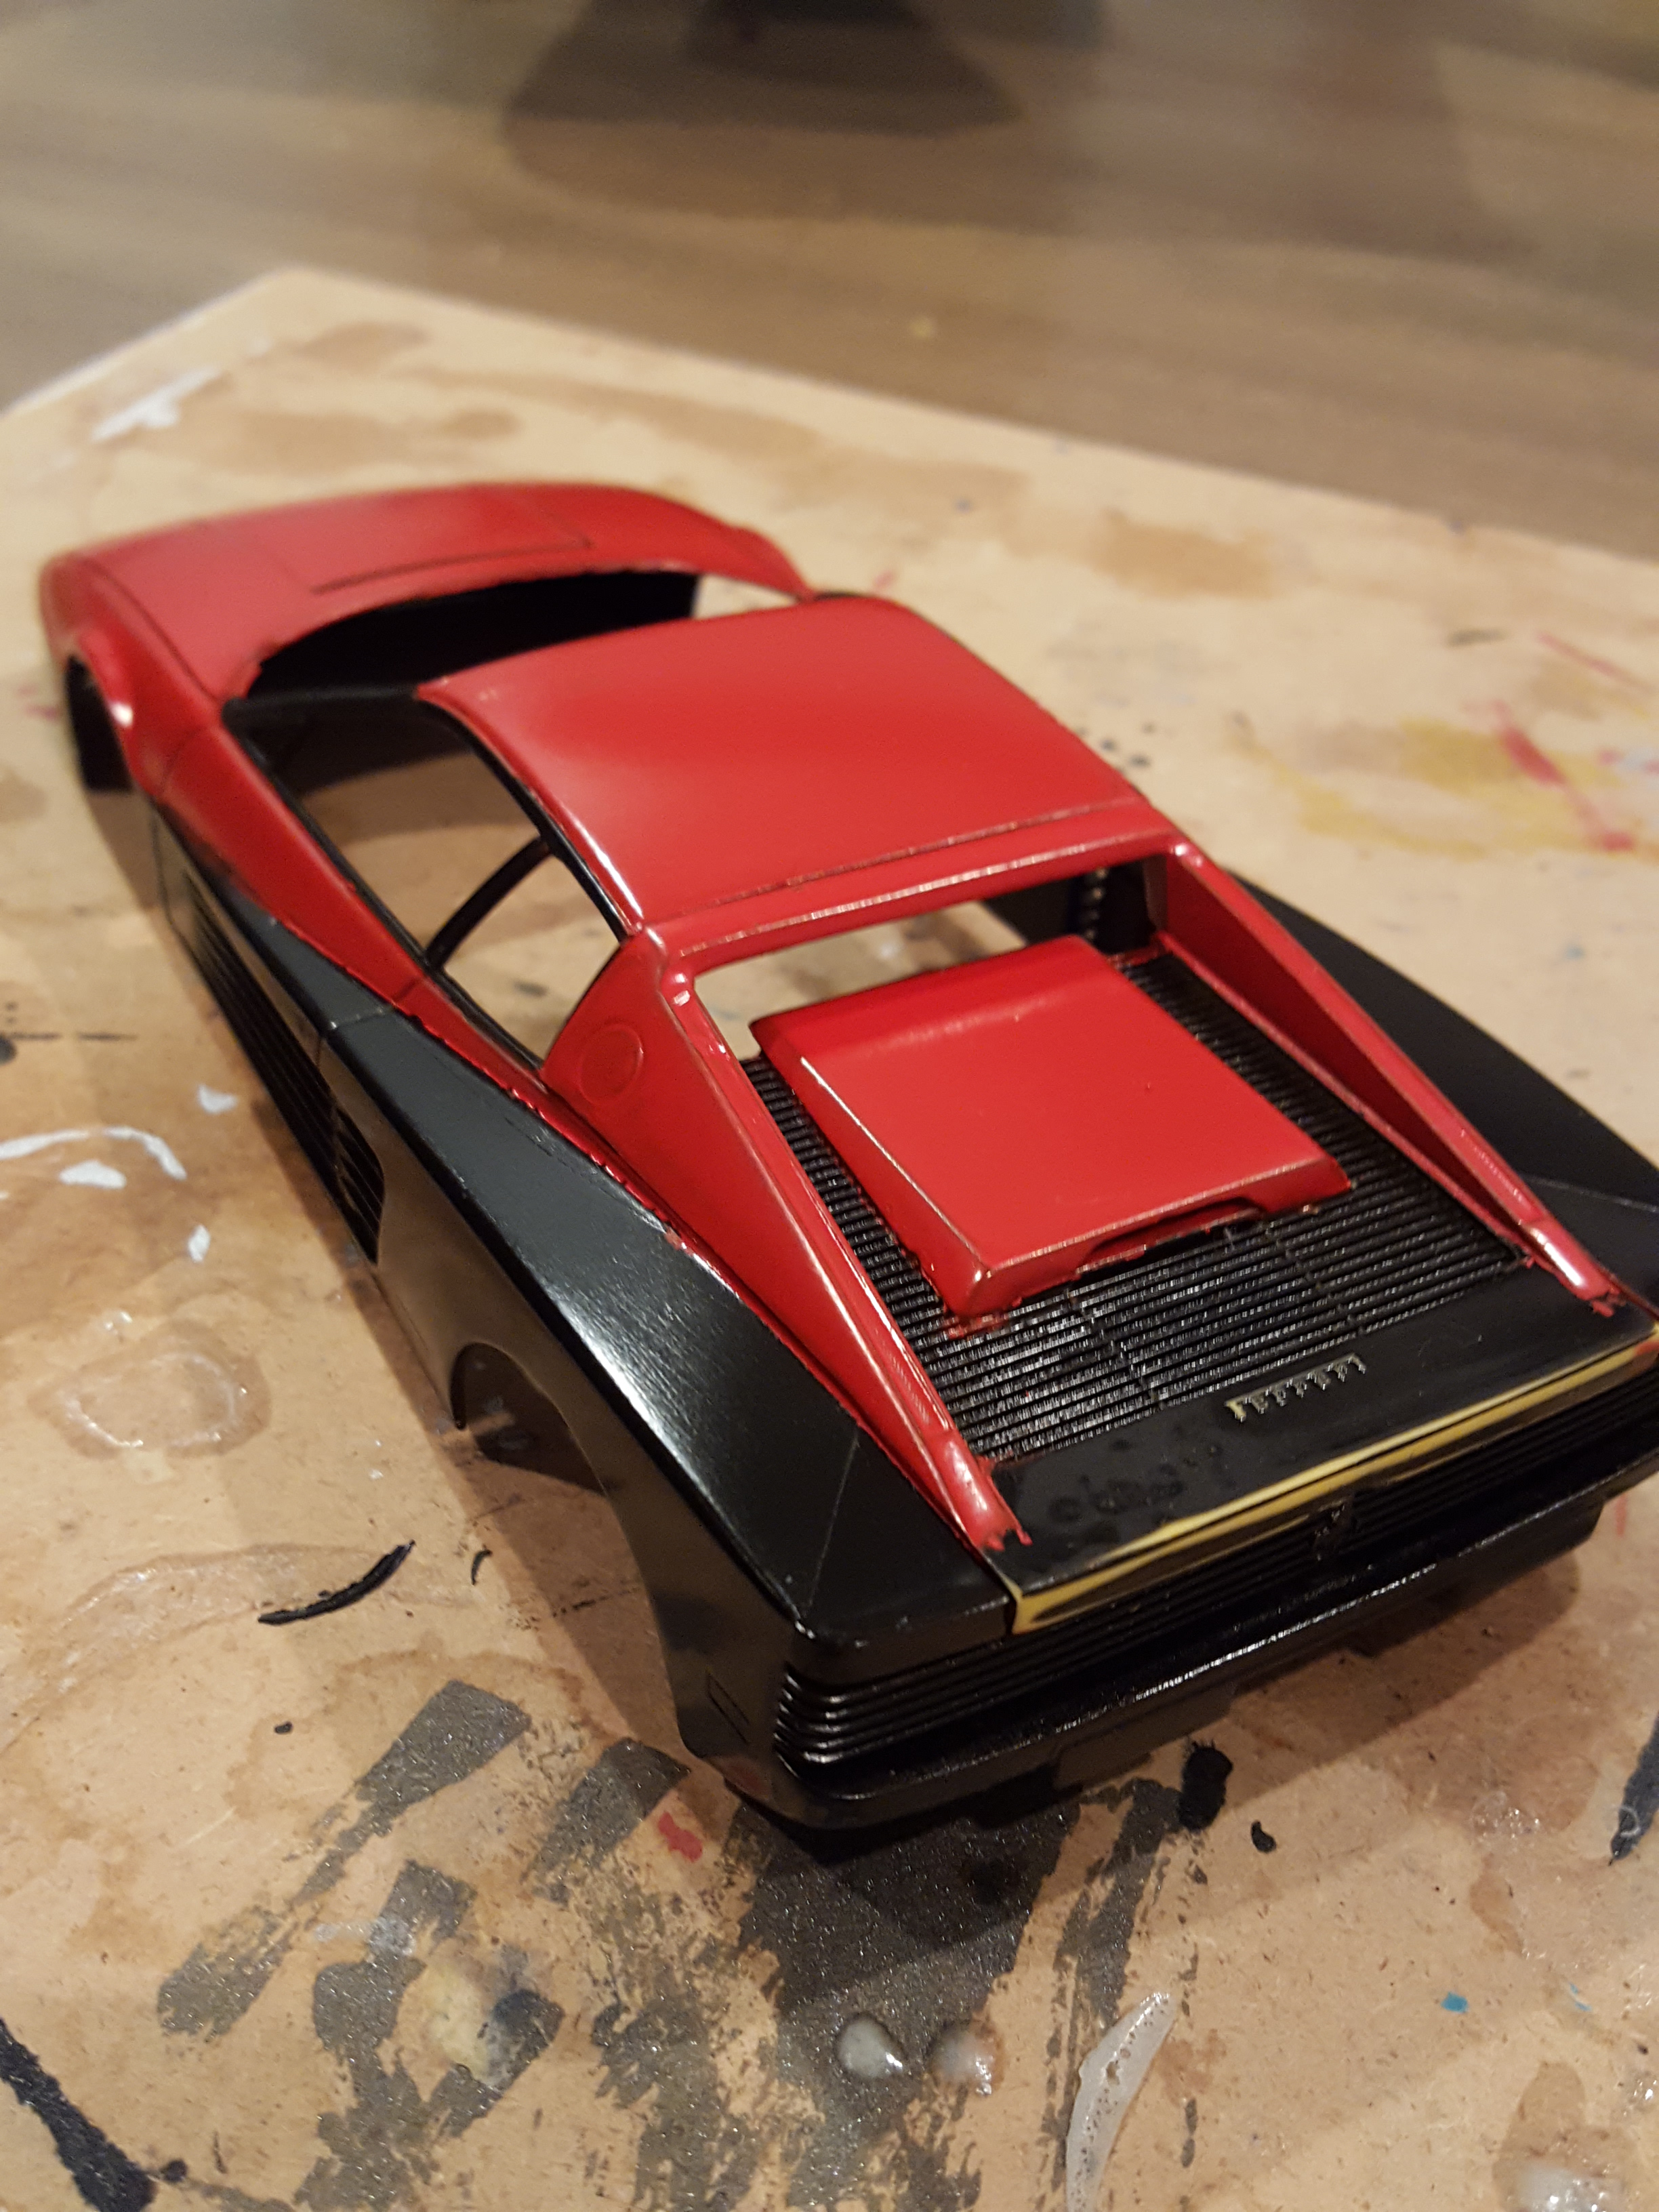
After the first coat of red, i had more orange peel and weird spots on the roof [??] but i wet sanded and resprayed it and the 2nd coat came out much better:
-
ok it's been a few months but i'm still at it. here's the update: SO i fixed up the suspension enough to get it to set even at least and just a bit lower than stock. Unfortunately this didn't allow room for the engine to go in since it would poke up through the rear hatch and it wouldn't sit properly in place. So i decide to leave the engine out of this and maybe try a rebuild later on. But i did get the body painted. Here are pics after the first coat of black which ended up with orange peel everywhere. I wet sanded it all smooth and resprayed it. I think it turned out well, you can see the lower half is a bit darker black than the top half. I let it set up a few days then taped it off to spray the red..
-
very cool custom. looking forward to seeing it finished. where'd this wacky idea come from anyway?
-
hah this is excellent and needs to be done! good luck
-
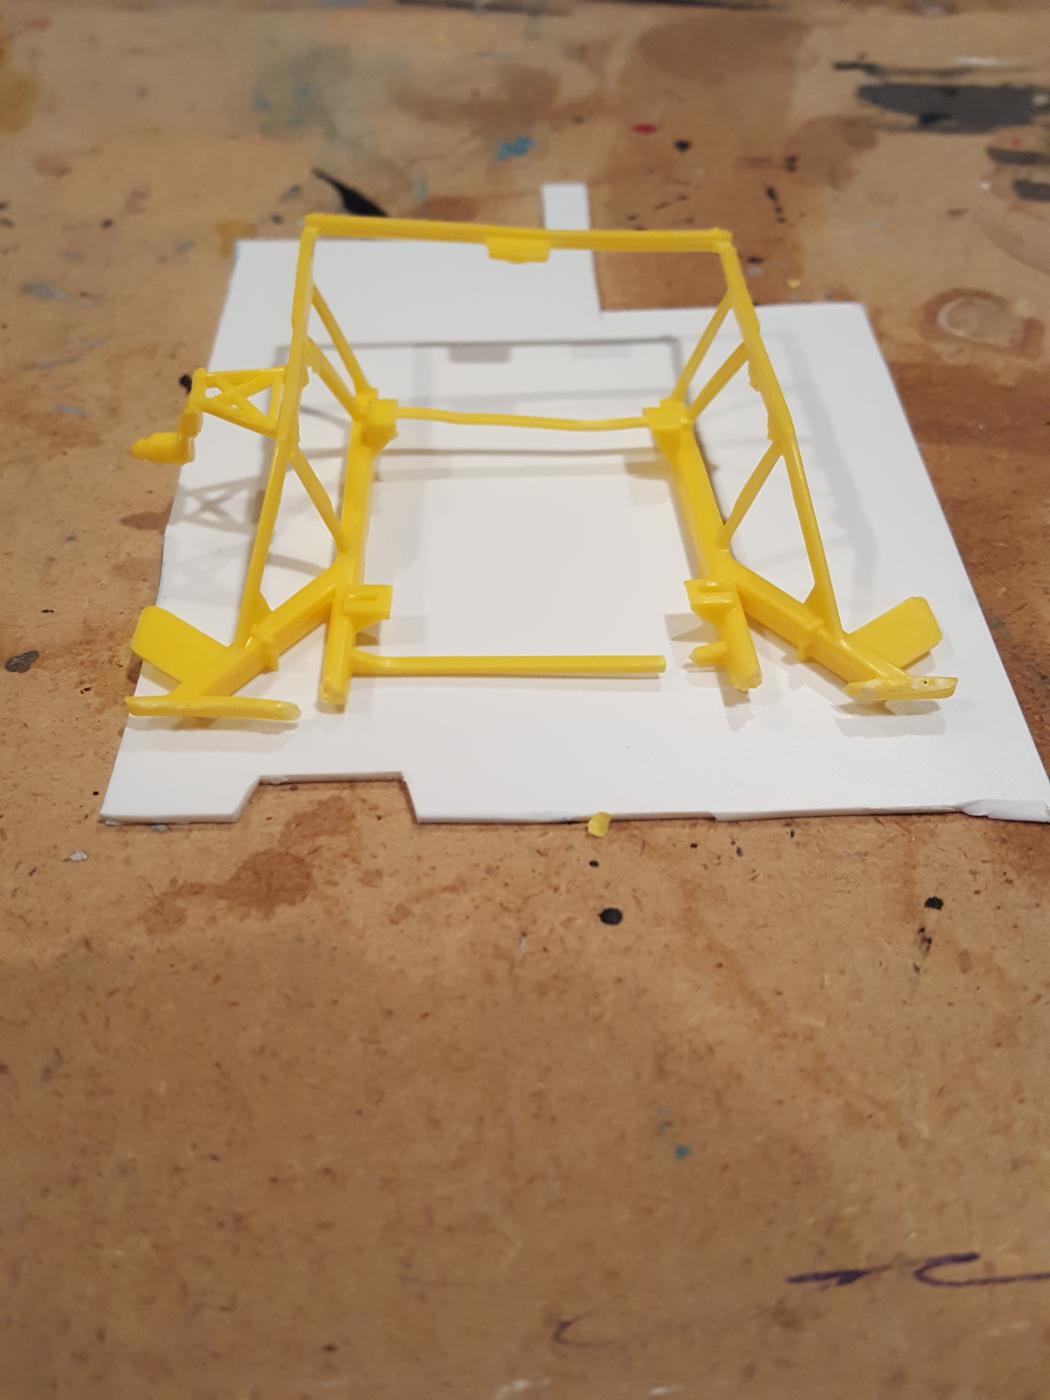
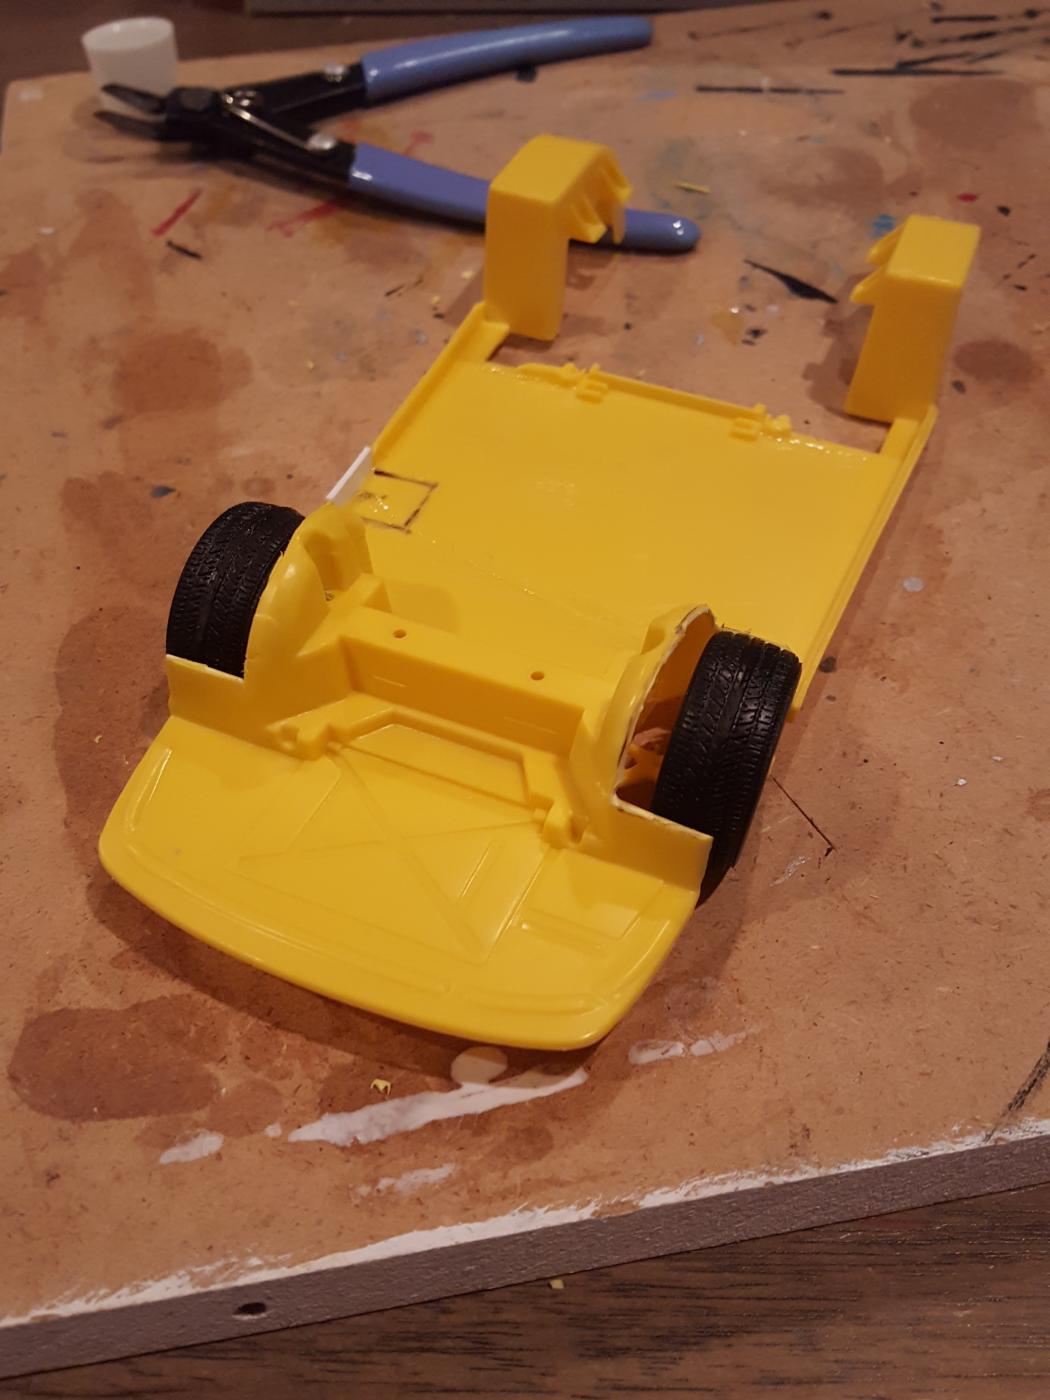
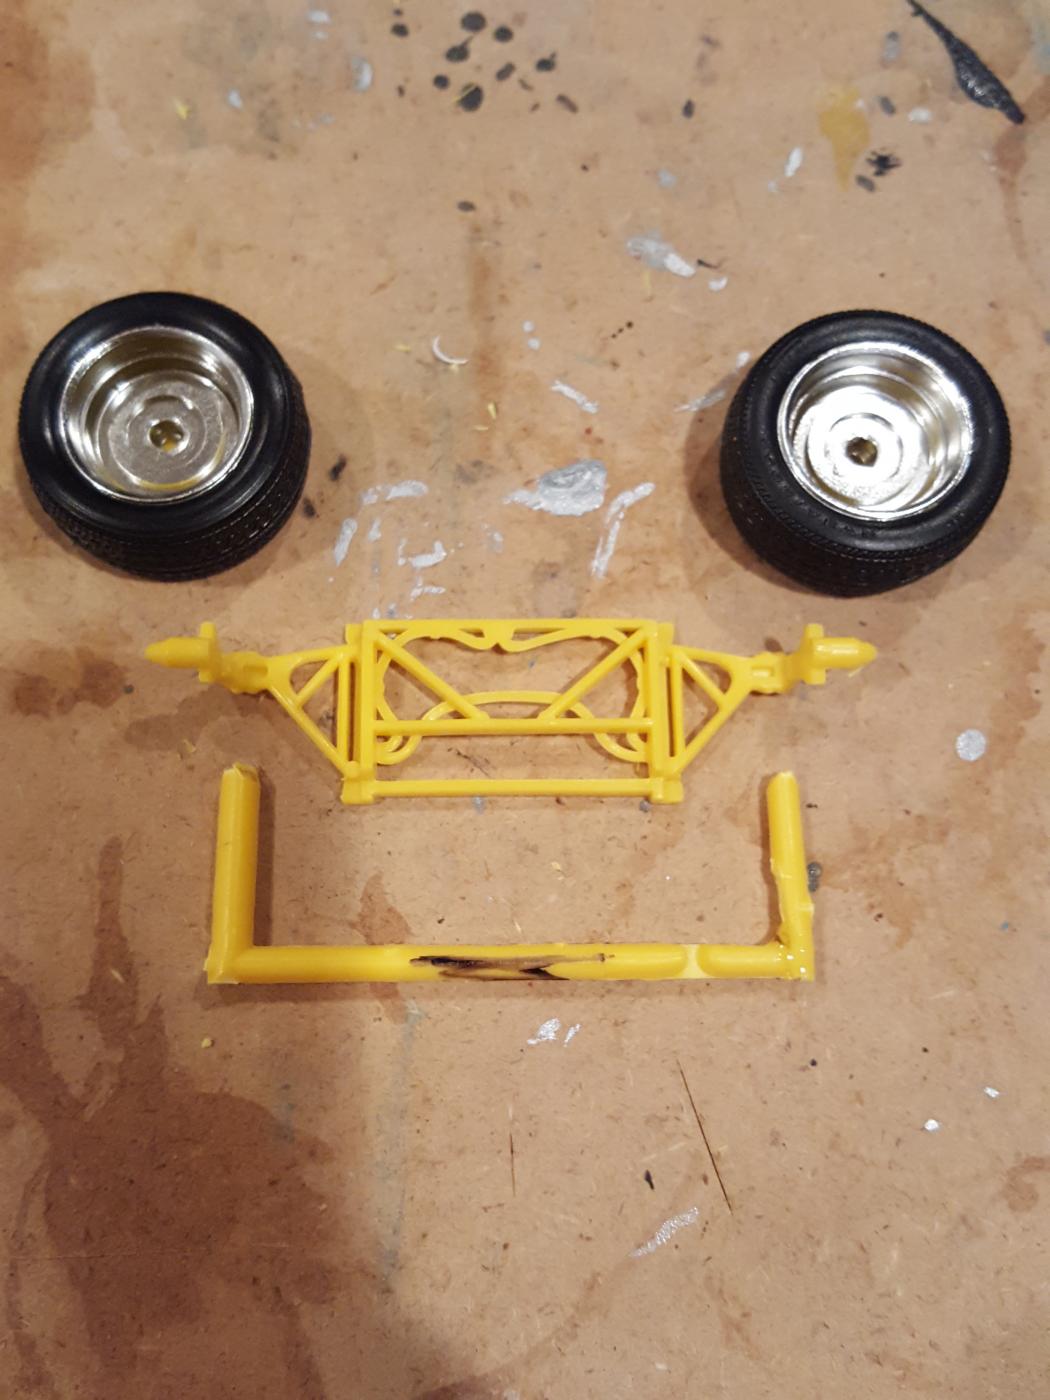
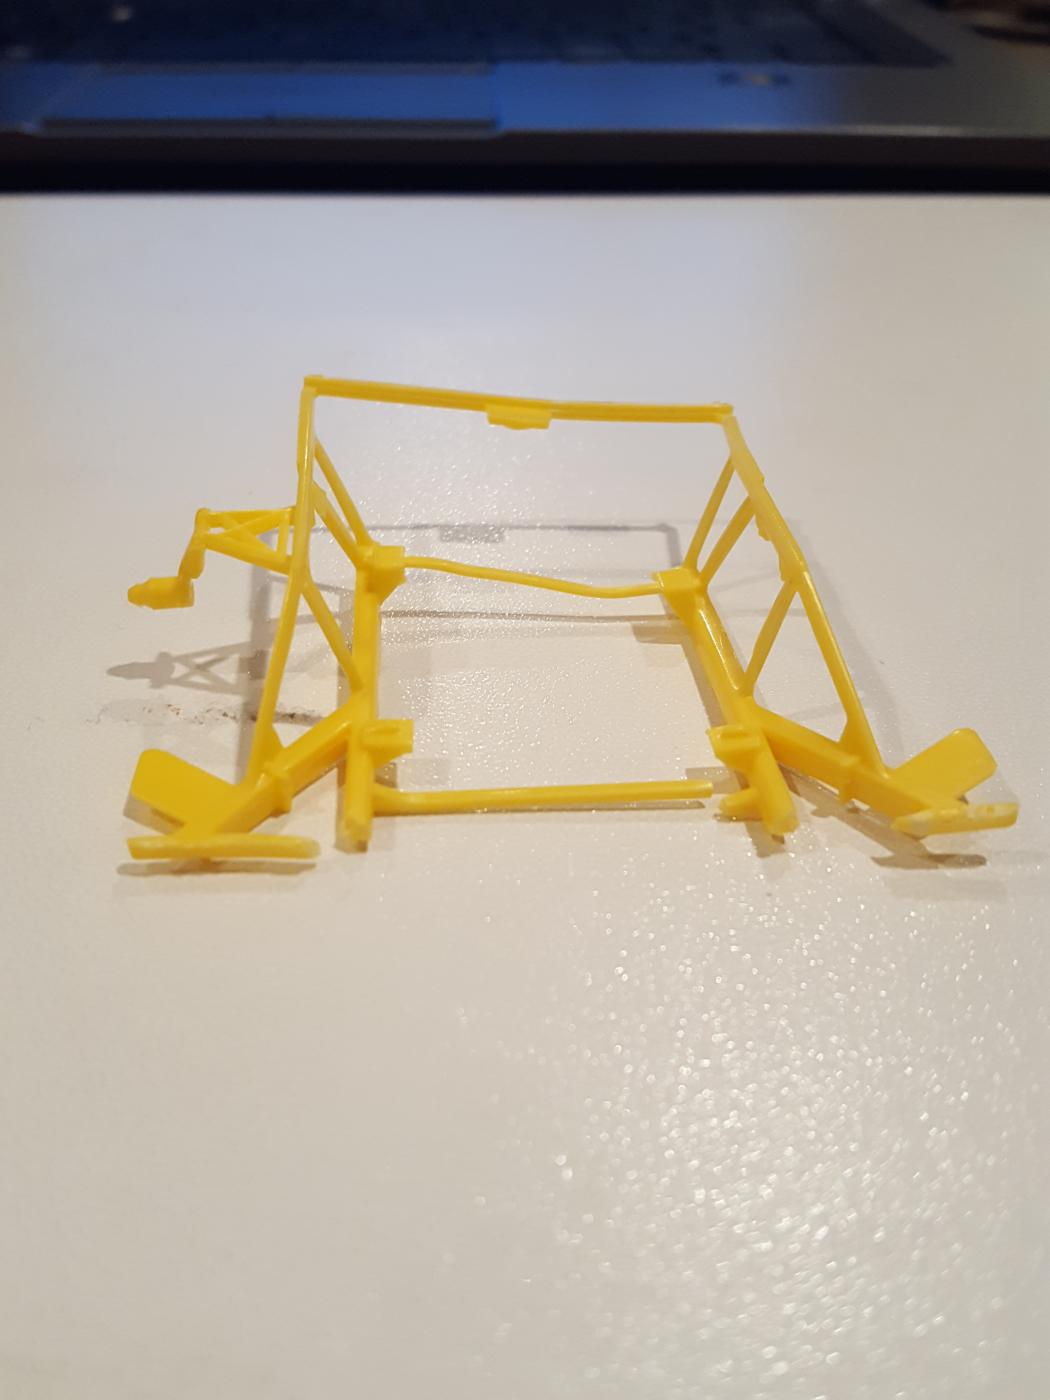
Update: started working on the suspension. Both front and rear have their own issues so we'll start with the rear. The frame was all bent to hell and broken at all the ends that should connect to the chassis. looks like it got stepped on or something. this part is also the engine subframe. so i decided to reinforce the frame and cut out all the bent pieces. this will allow me to mount the engine and support the suspension parts, but it will take some finessing. while this sets up i moved to the front. This side is almost the opposite. the suspension is good but the chassis is covered in glue at all the mounting points so i cant fit anything. The tires rub inside the wheel wells so i cut them out partially. i also think its riding too high so im going to make a custom front suspension bracket and see what i can fit in there. back soon!
-
Very cool, great work so far keep it up
-
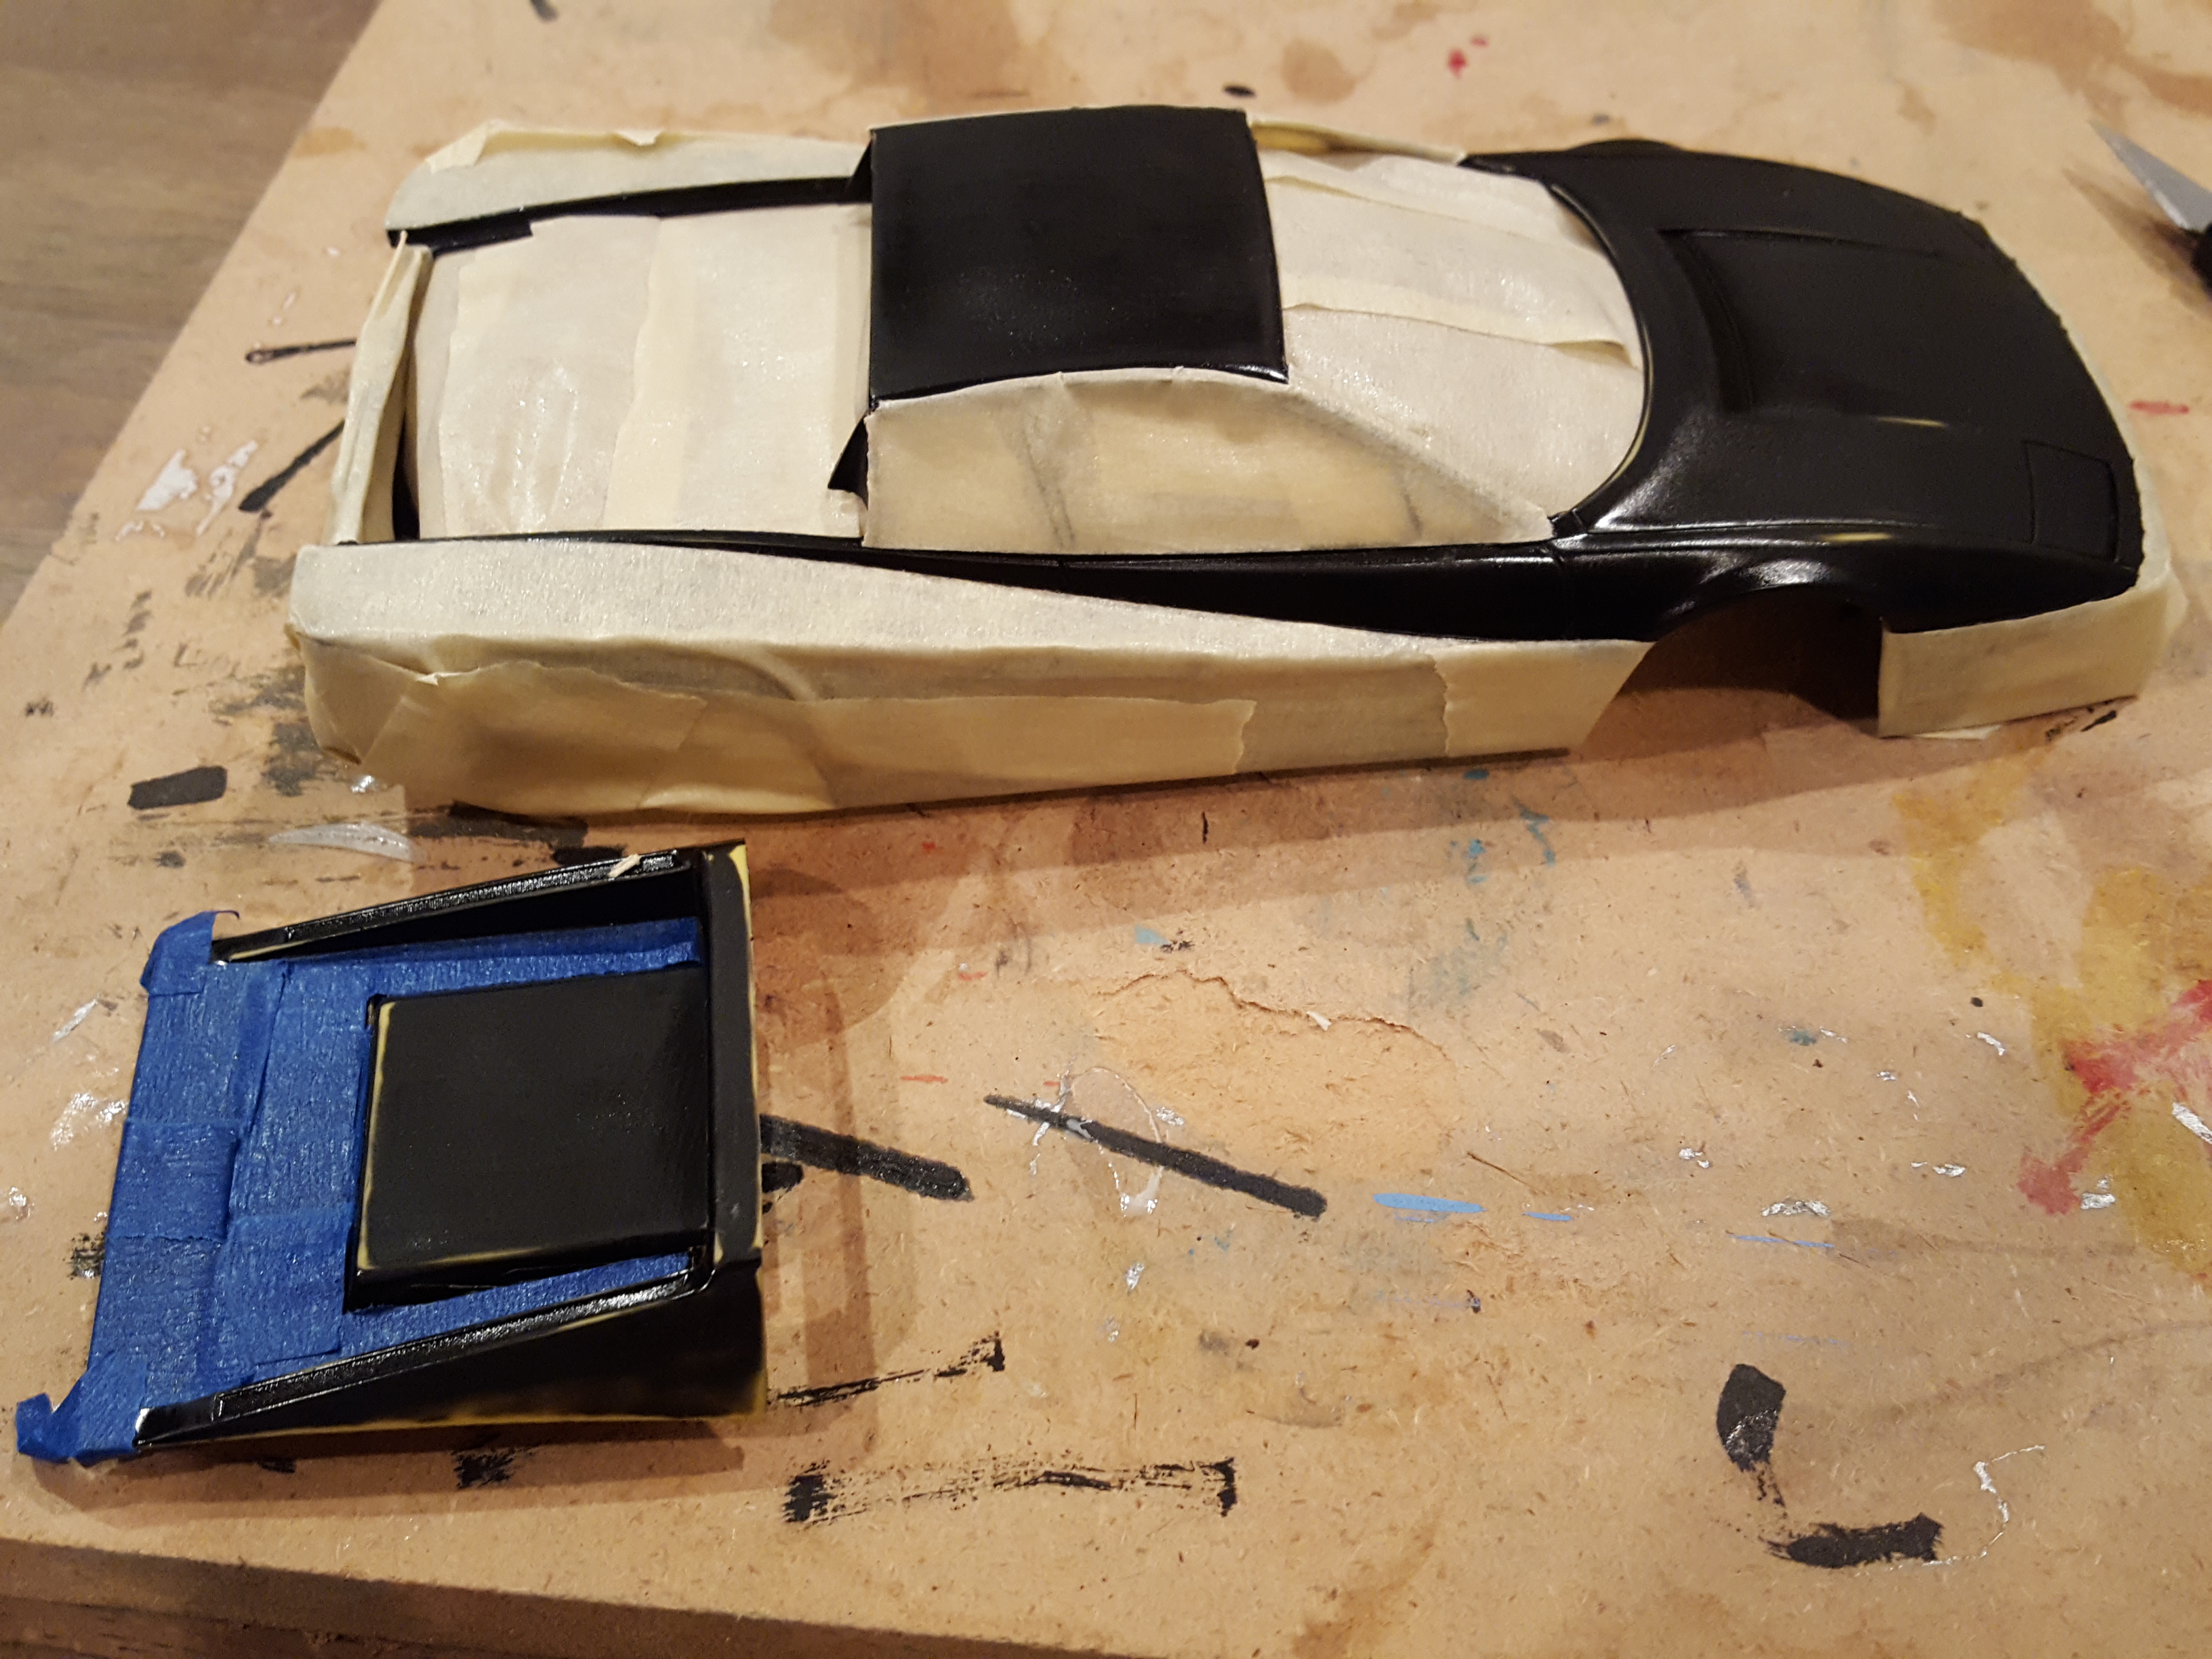
So i can find other kits like this all over ebay but they're about $25 each.. i was lucky to score this one for just $6 but if you can find any of those for cheaper do let me know. Here's a small update: Over the weekend i was able to get a little table time in and cut out that nasty notched section where the chassis had broken. It's not the prettiest thing but it'll do and i can fill it in later and sand it back to shape. Also, i did try messing with the suspension pieces and that's just not going to happen , it's pretty wasted. The front suspension pieces will not go on due to the amount of glue that's in there. Any attempt to remove it will leave gaping holes instead so id rather not do that. The rear sub-frame is so bent and warped i tried bending it back to shape but 2 other pieces broke from it so it's basically scrap now. Im going to have to fab my own suspension for this. back with more soon
-
I'll try to post regular updates but at the moment im really debating on whether this is salvagable or if i just build a suspension from scratch. Im open to sll commens and advice. back soon and thanks for looking
-
I made a couple of quick renderings of where i'd like to take it, but given the state of it and all the broken or glue drenched pieces i may have to get creative to get it there. What do you guys think.. am i crazy?? haha!
-
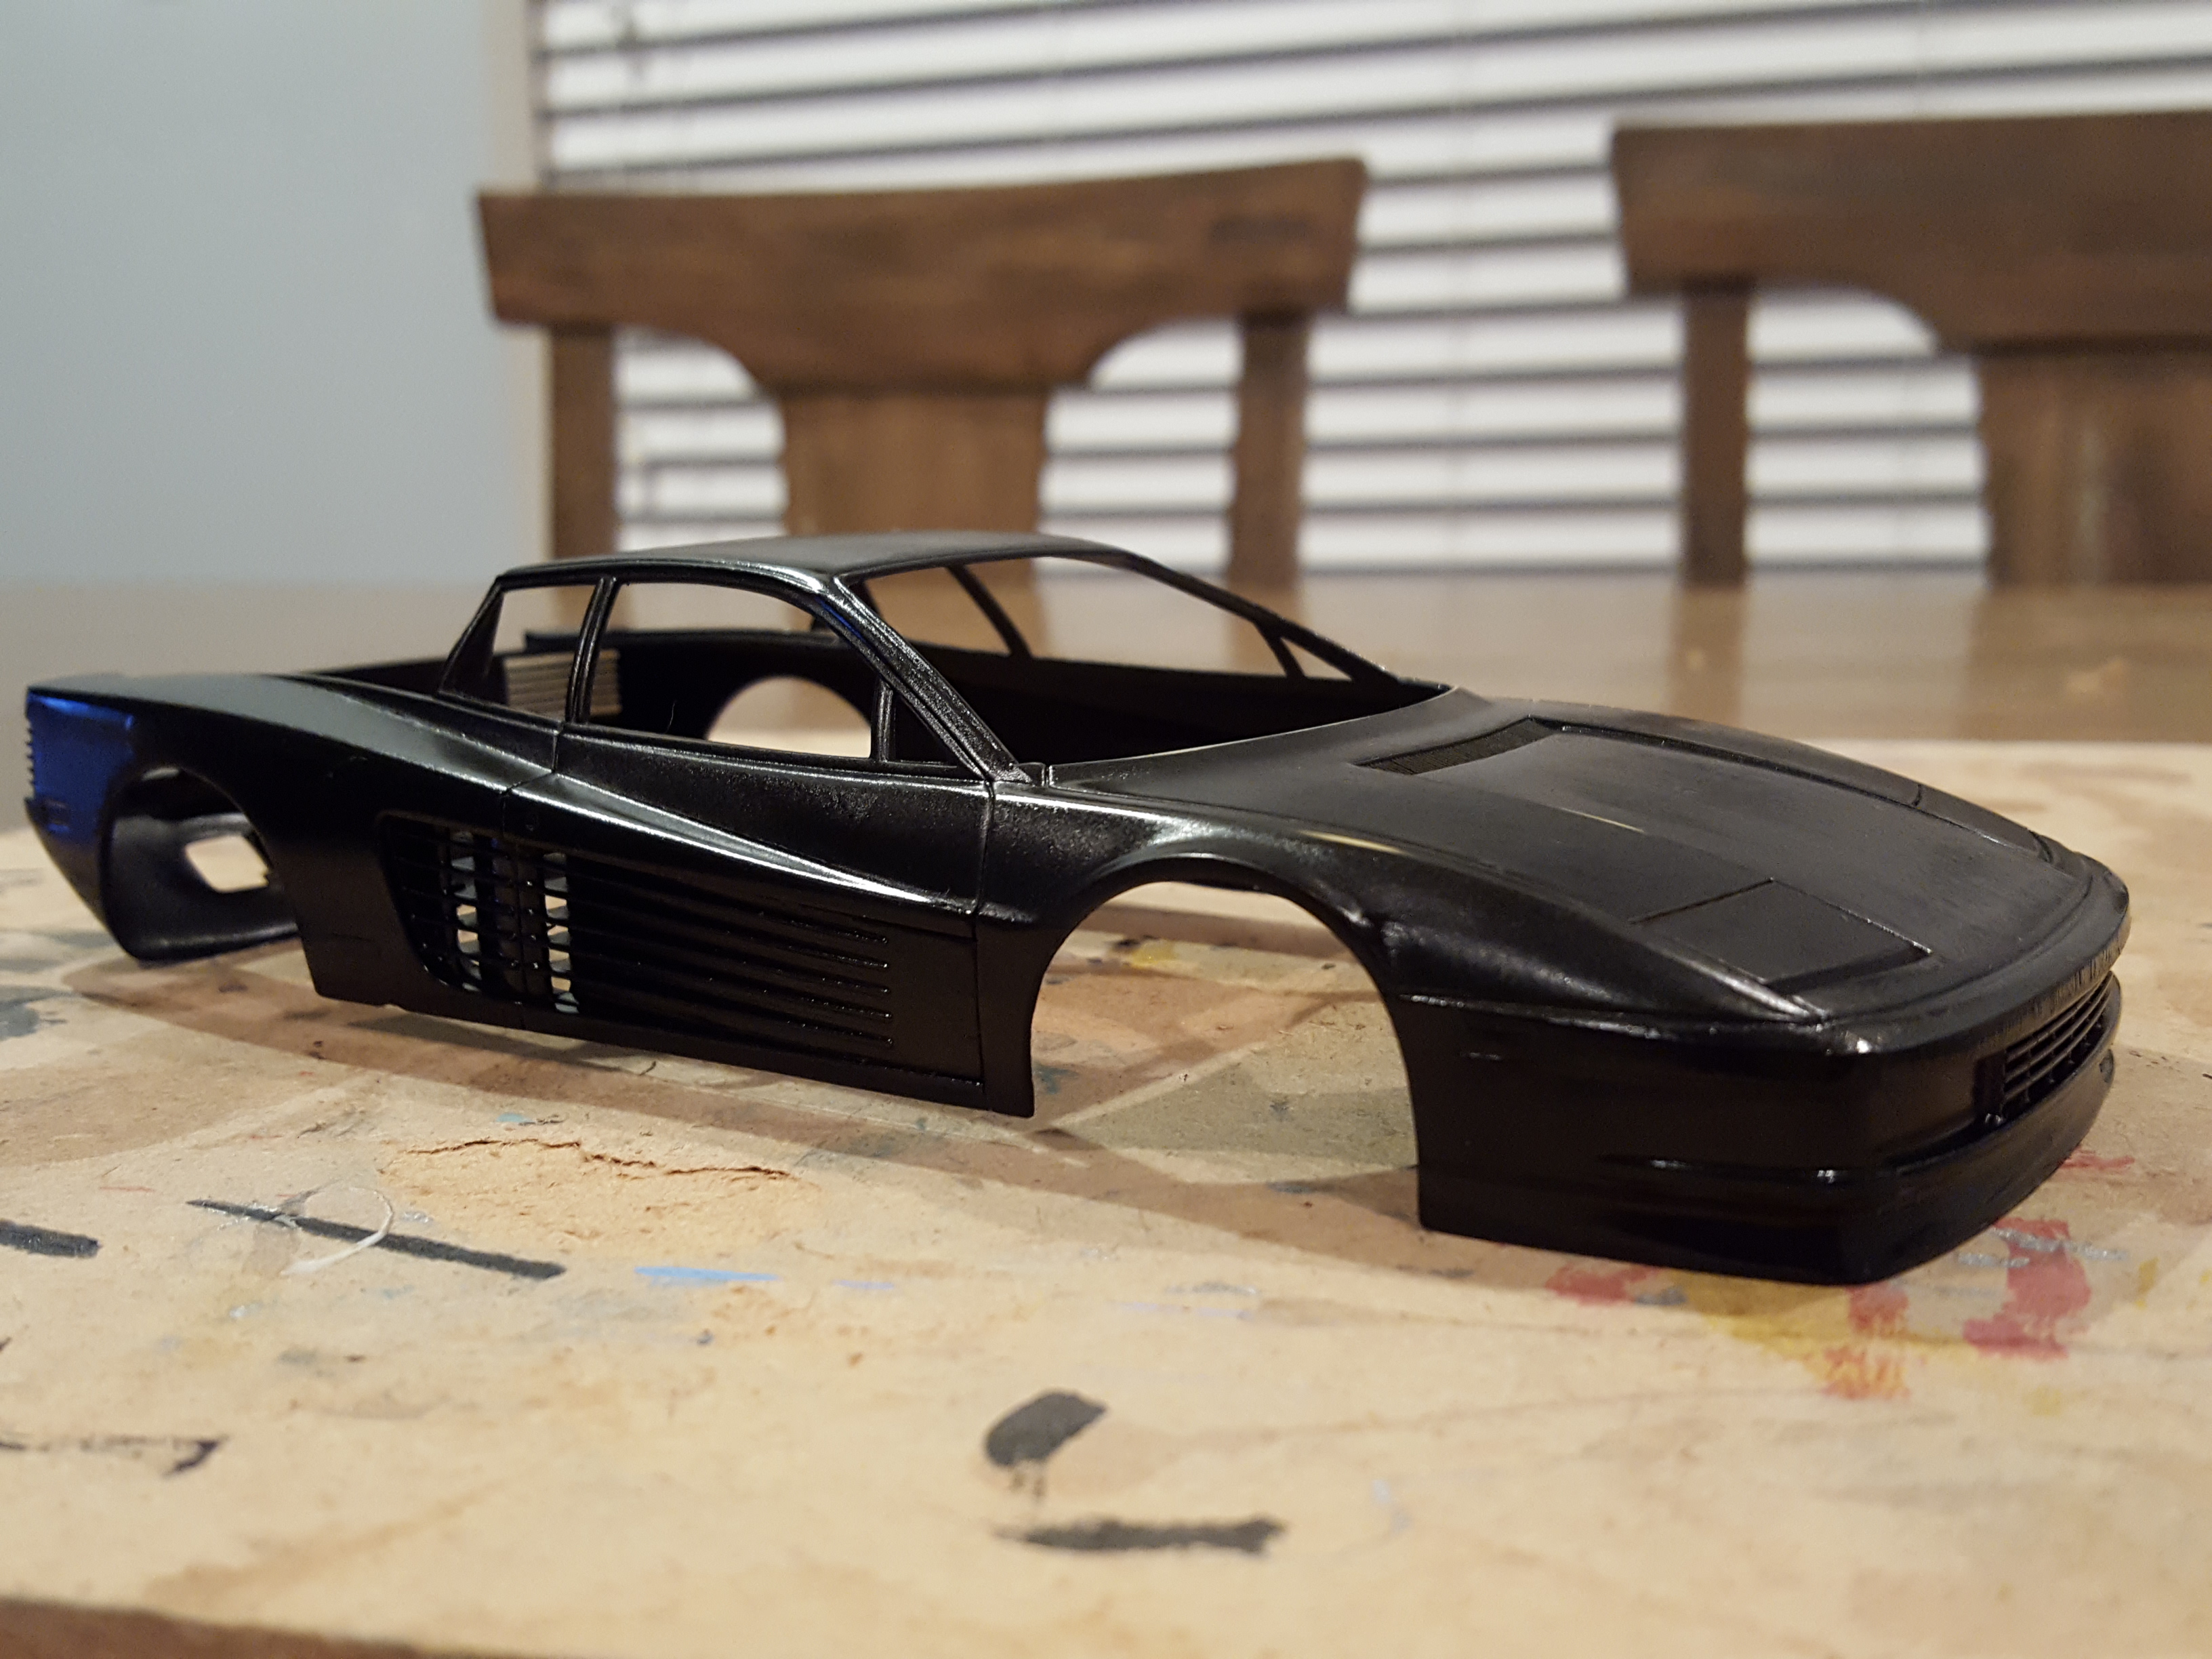
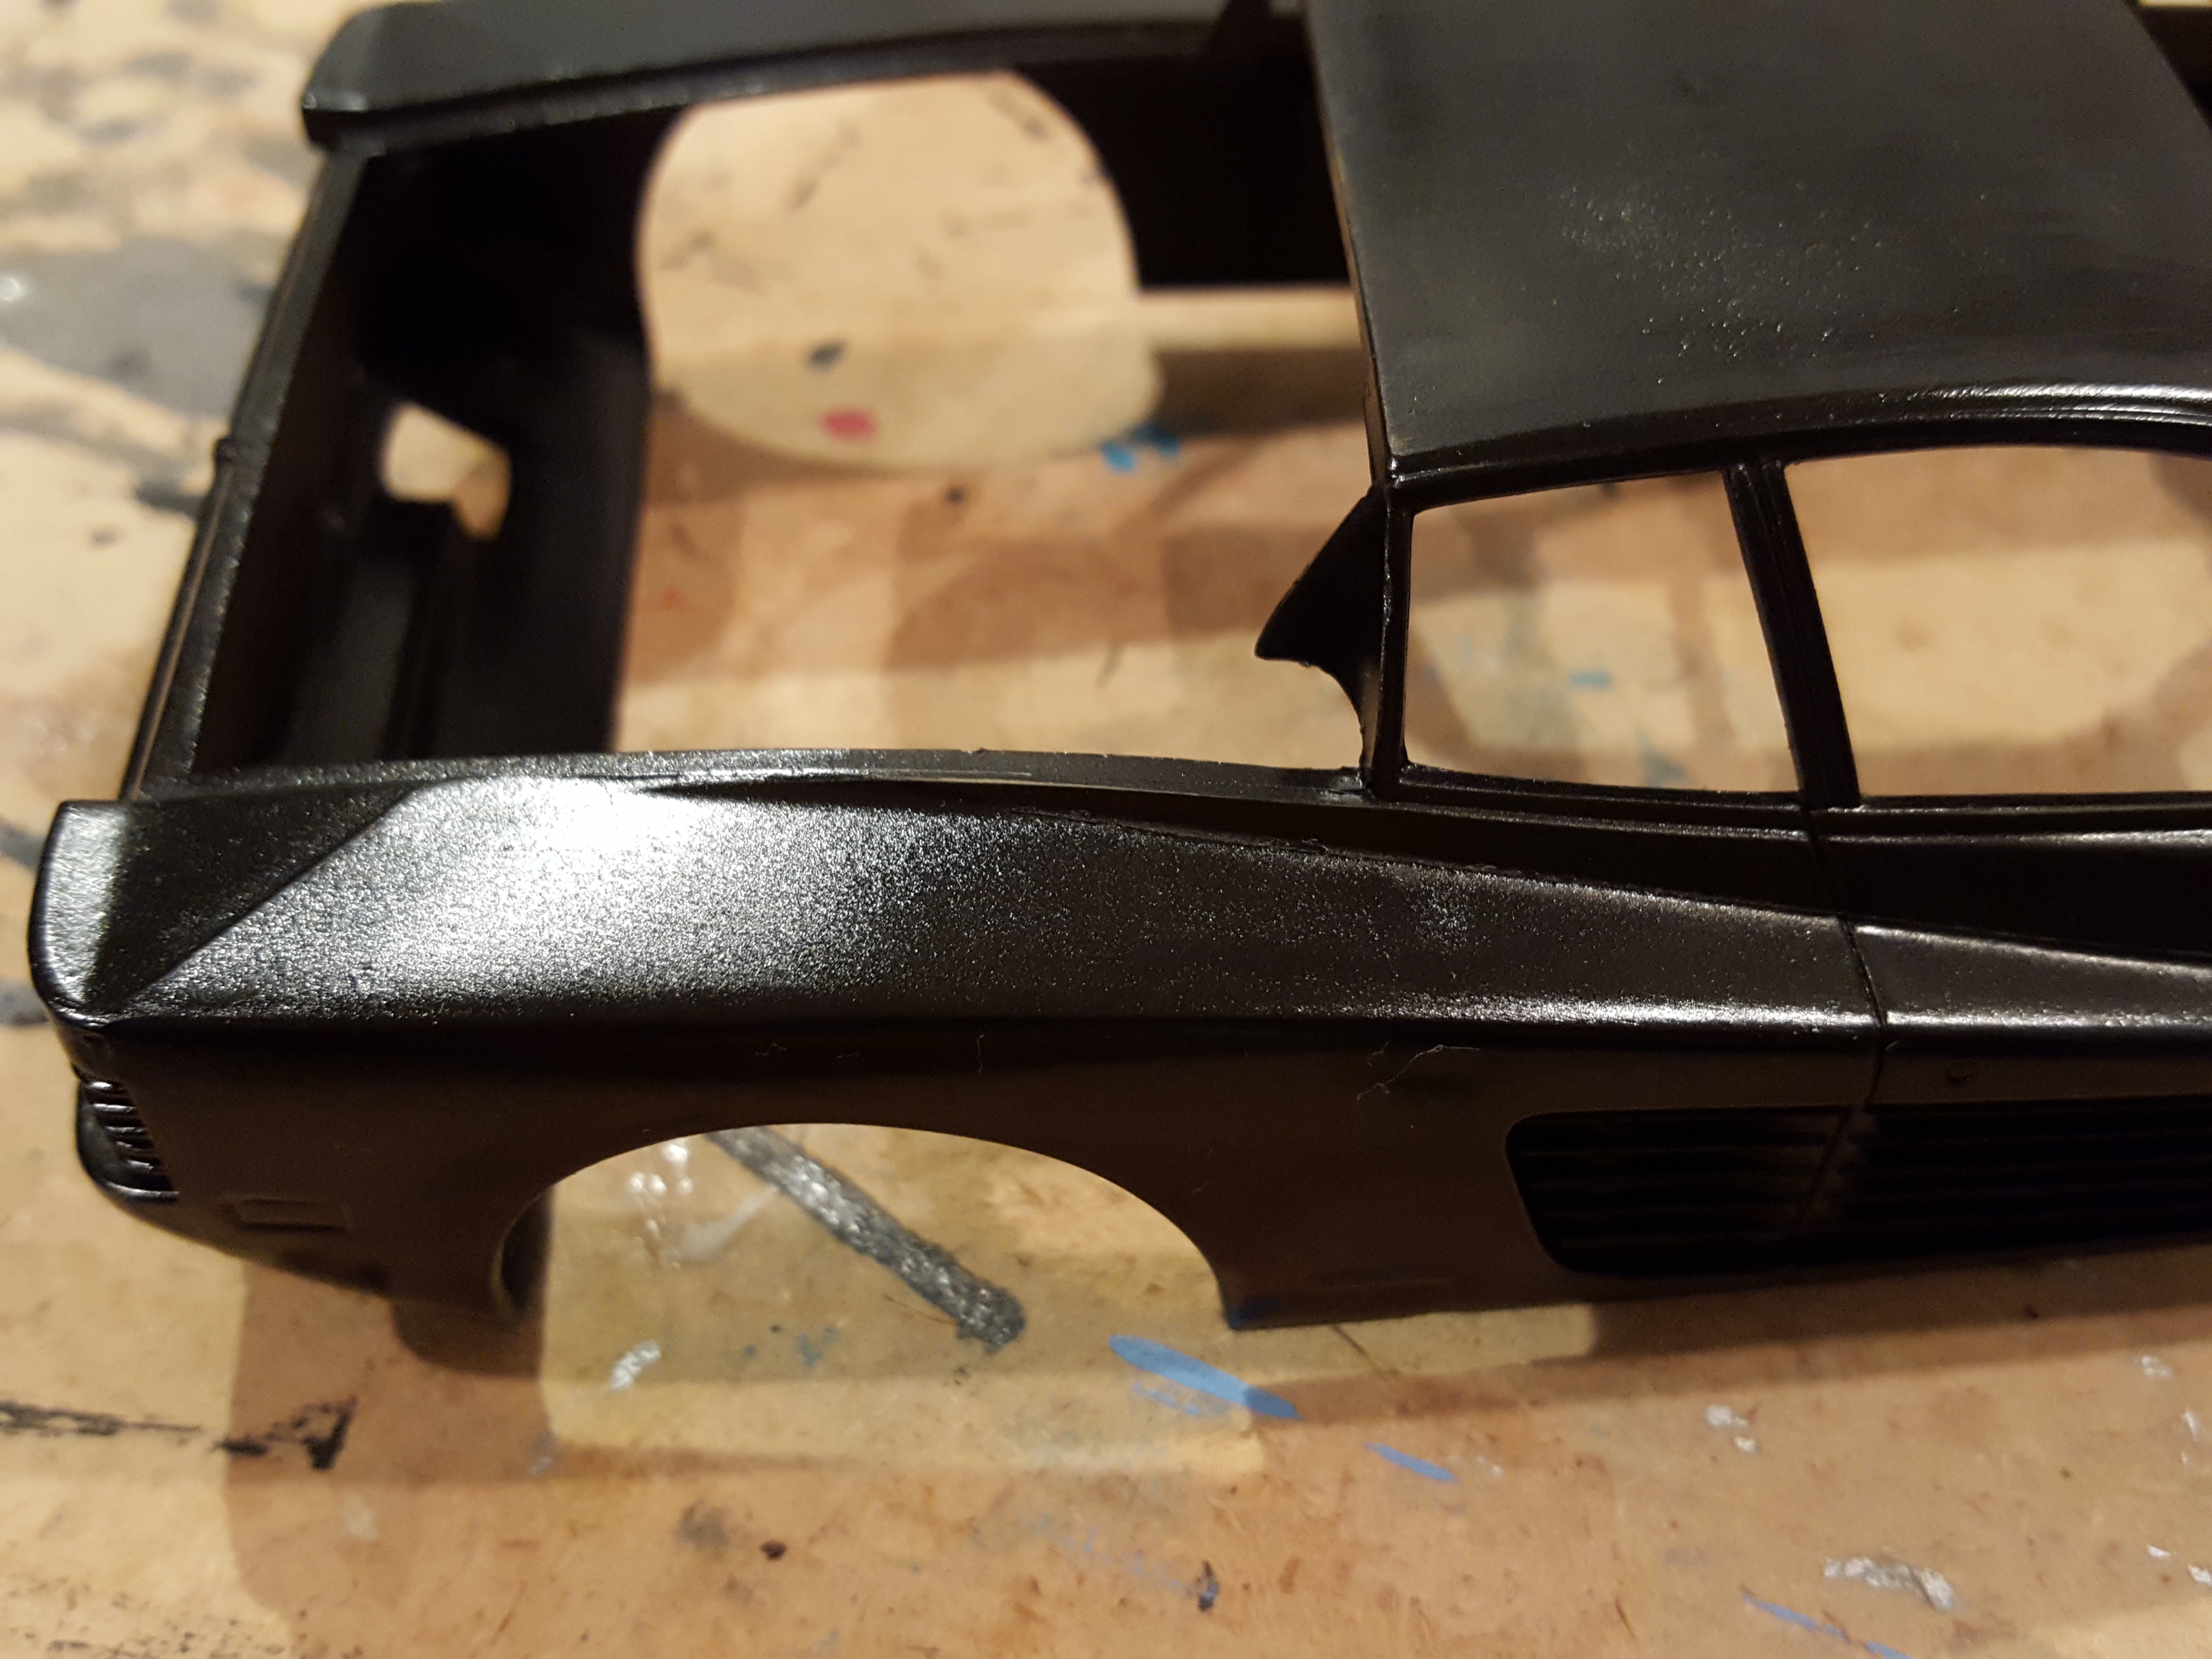
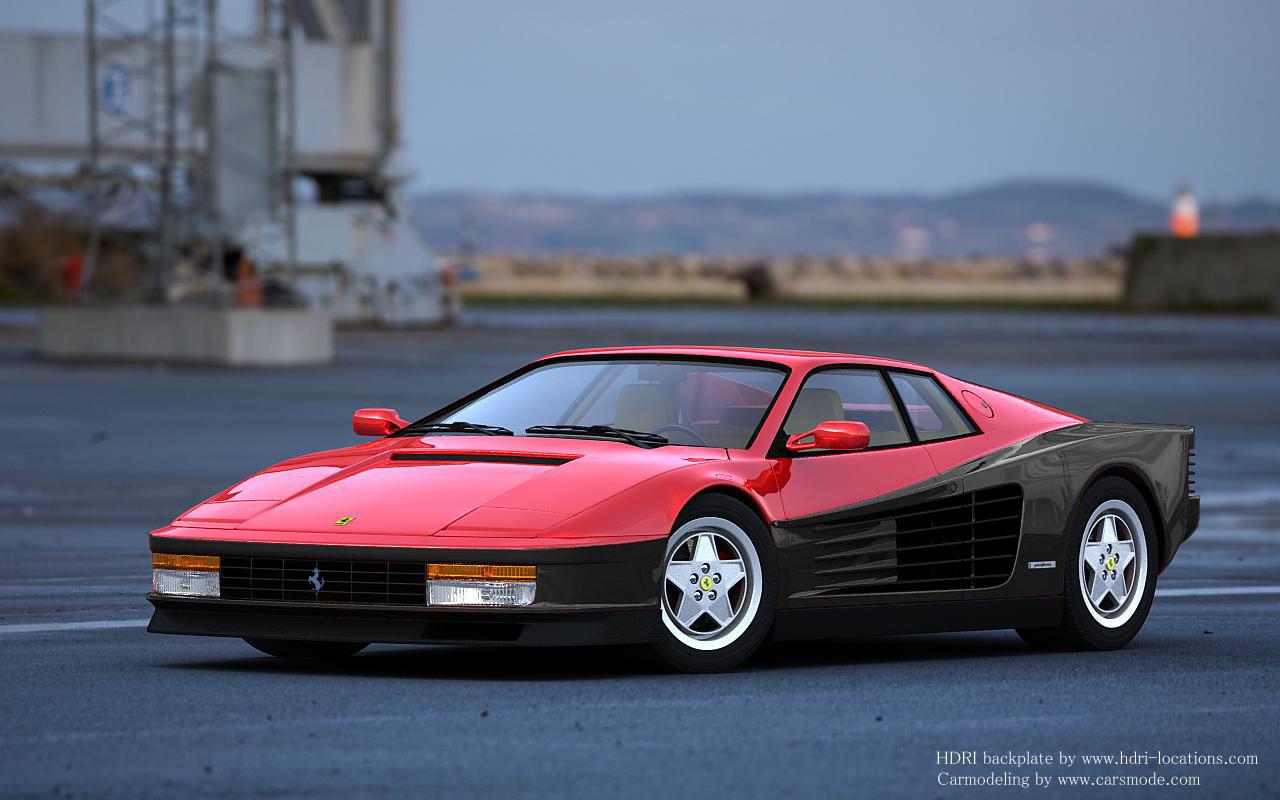
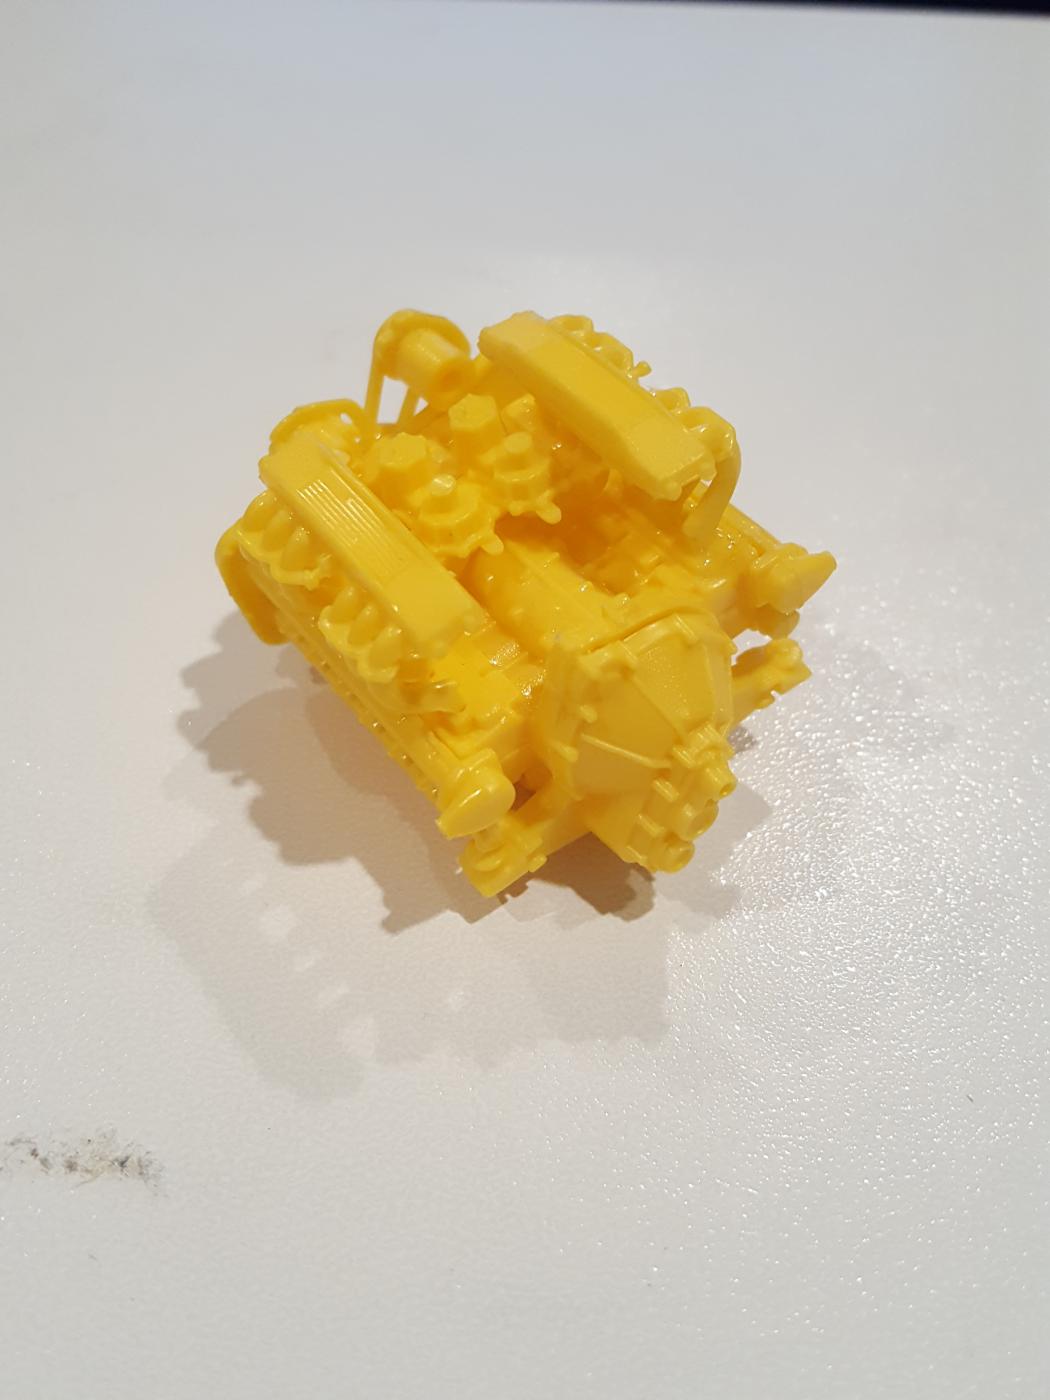
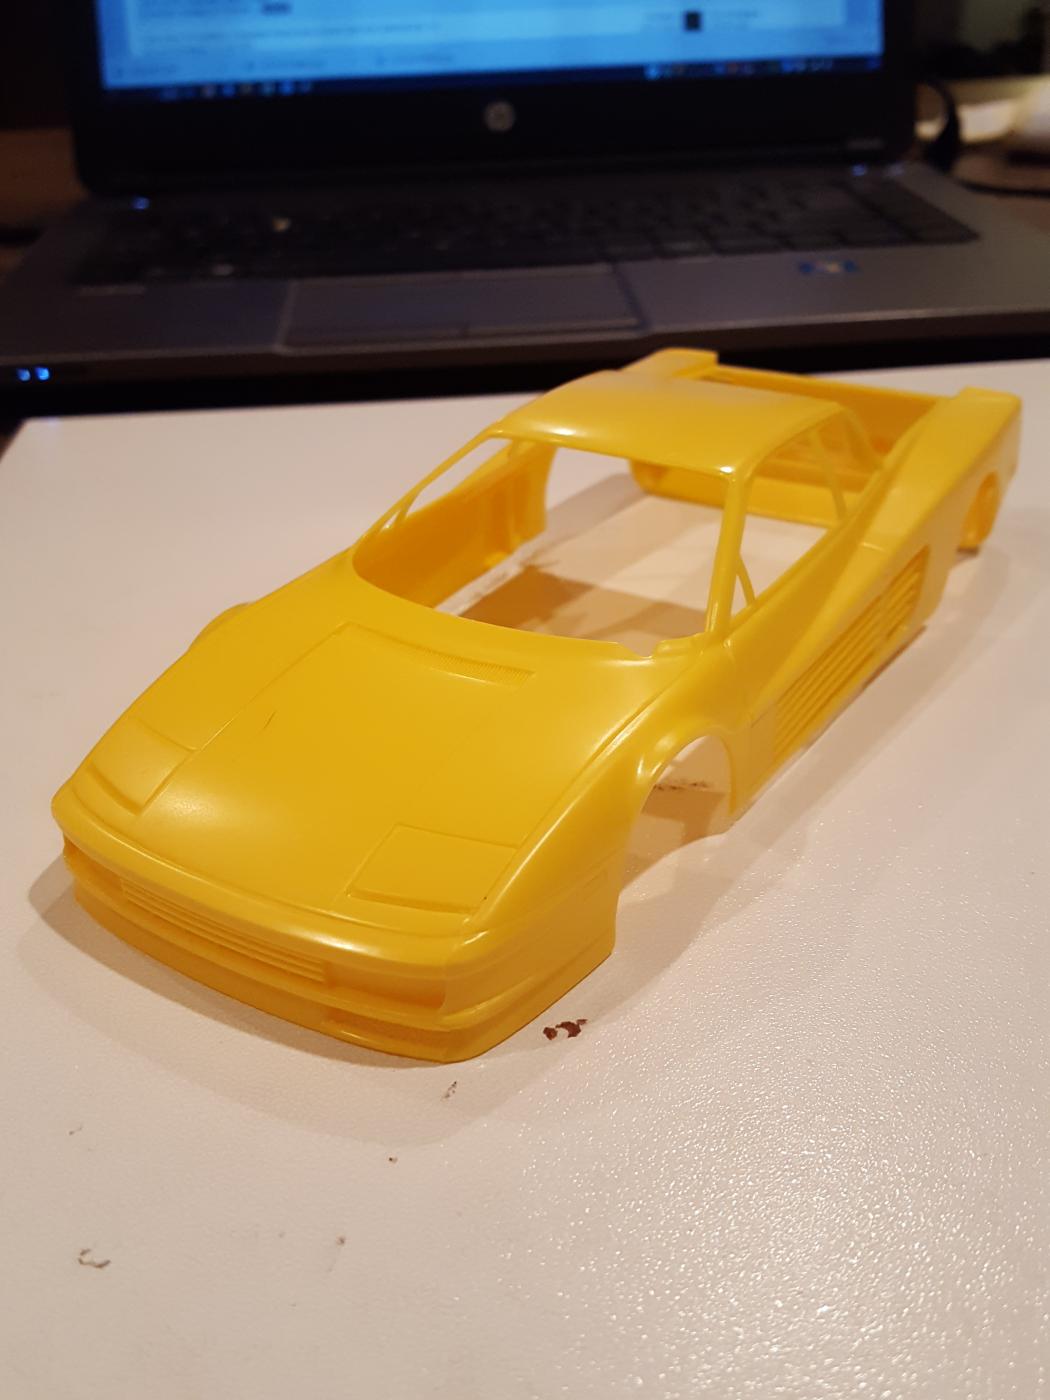
Hey folks! it's been quite a while since i've had a chance to work on anything over here but i've been quietly lurking on the forums keeping tabs on all the sweet projects going on.. and i gotta say they got me fired up so i just had to do something. I came across this on ebay, a Monogram Ferrari Testarossa kit that had been started then abandoned. Scored it for $6 bucks so i wasn't sure what to expect when it arrived, but i was in for a surprise. Let's say it wasn't in good condition.. This thing is a wreck. The chassis was cracked in two pieces, the engine and interior tub were already assembled and encased in glue, and most of the suspension pieces were damaged or broken and there were globs of glue in various places. I think i bit off more than i can chew but you know what? i'm going to use this one as a good practice run and see my skills at repairing this and bringing it back to some form of life. I started by straightening and glueing the chassi back together to see if there was any hope at all. The body though is in really great shape! See the pics below for how it sits now
-
outstanding work Mark! the VP challenger will always be one of the baddest cars around. Even though it wasn't anything special, it showed how much attitude and general badassness it could throw at you and the cops keep it up, looking forward to completion!
-
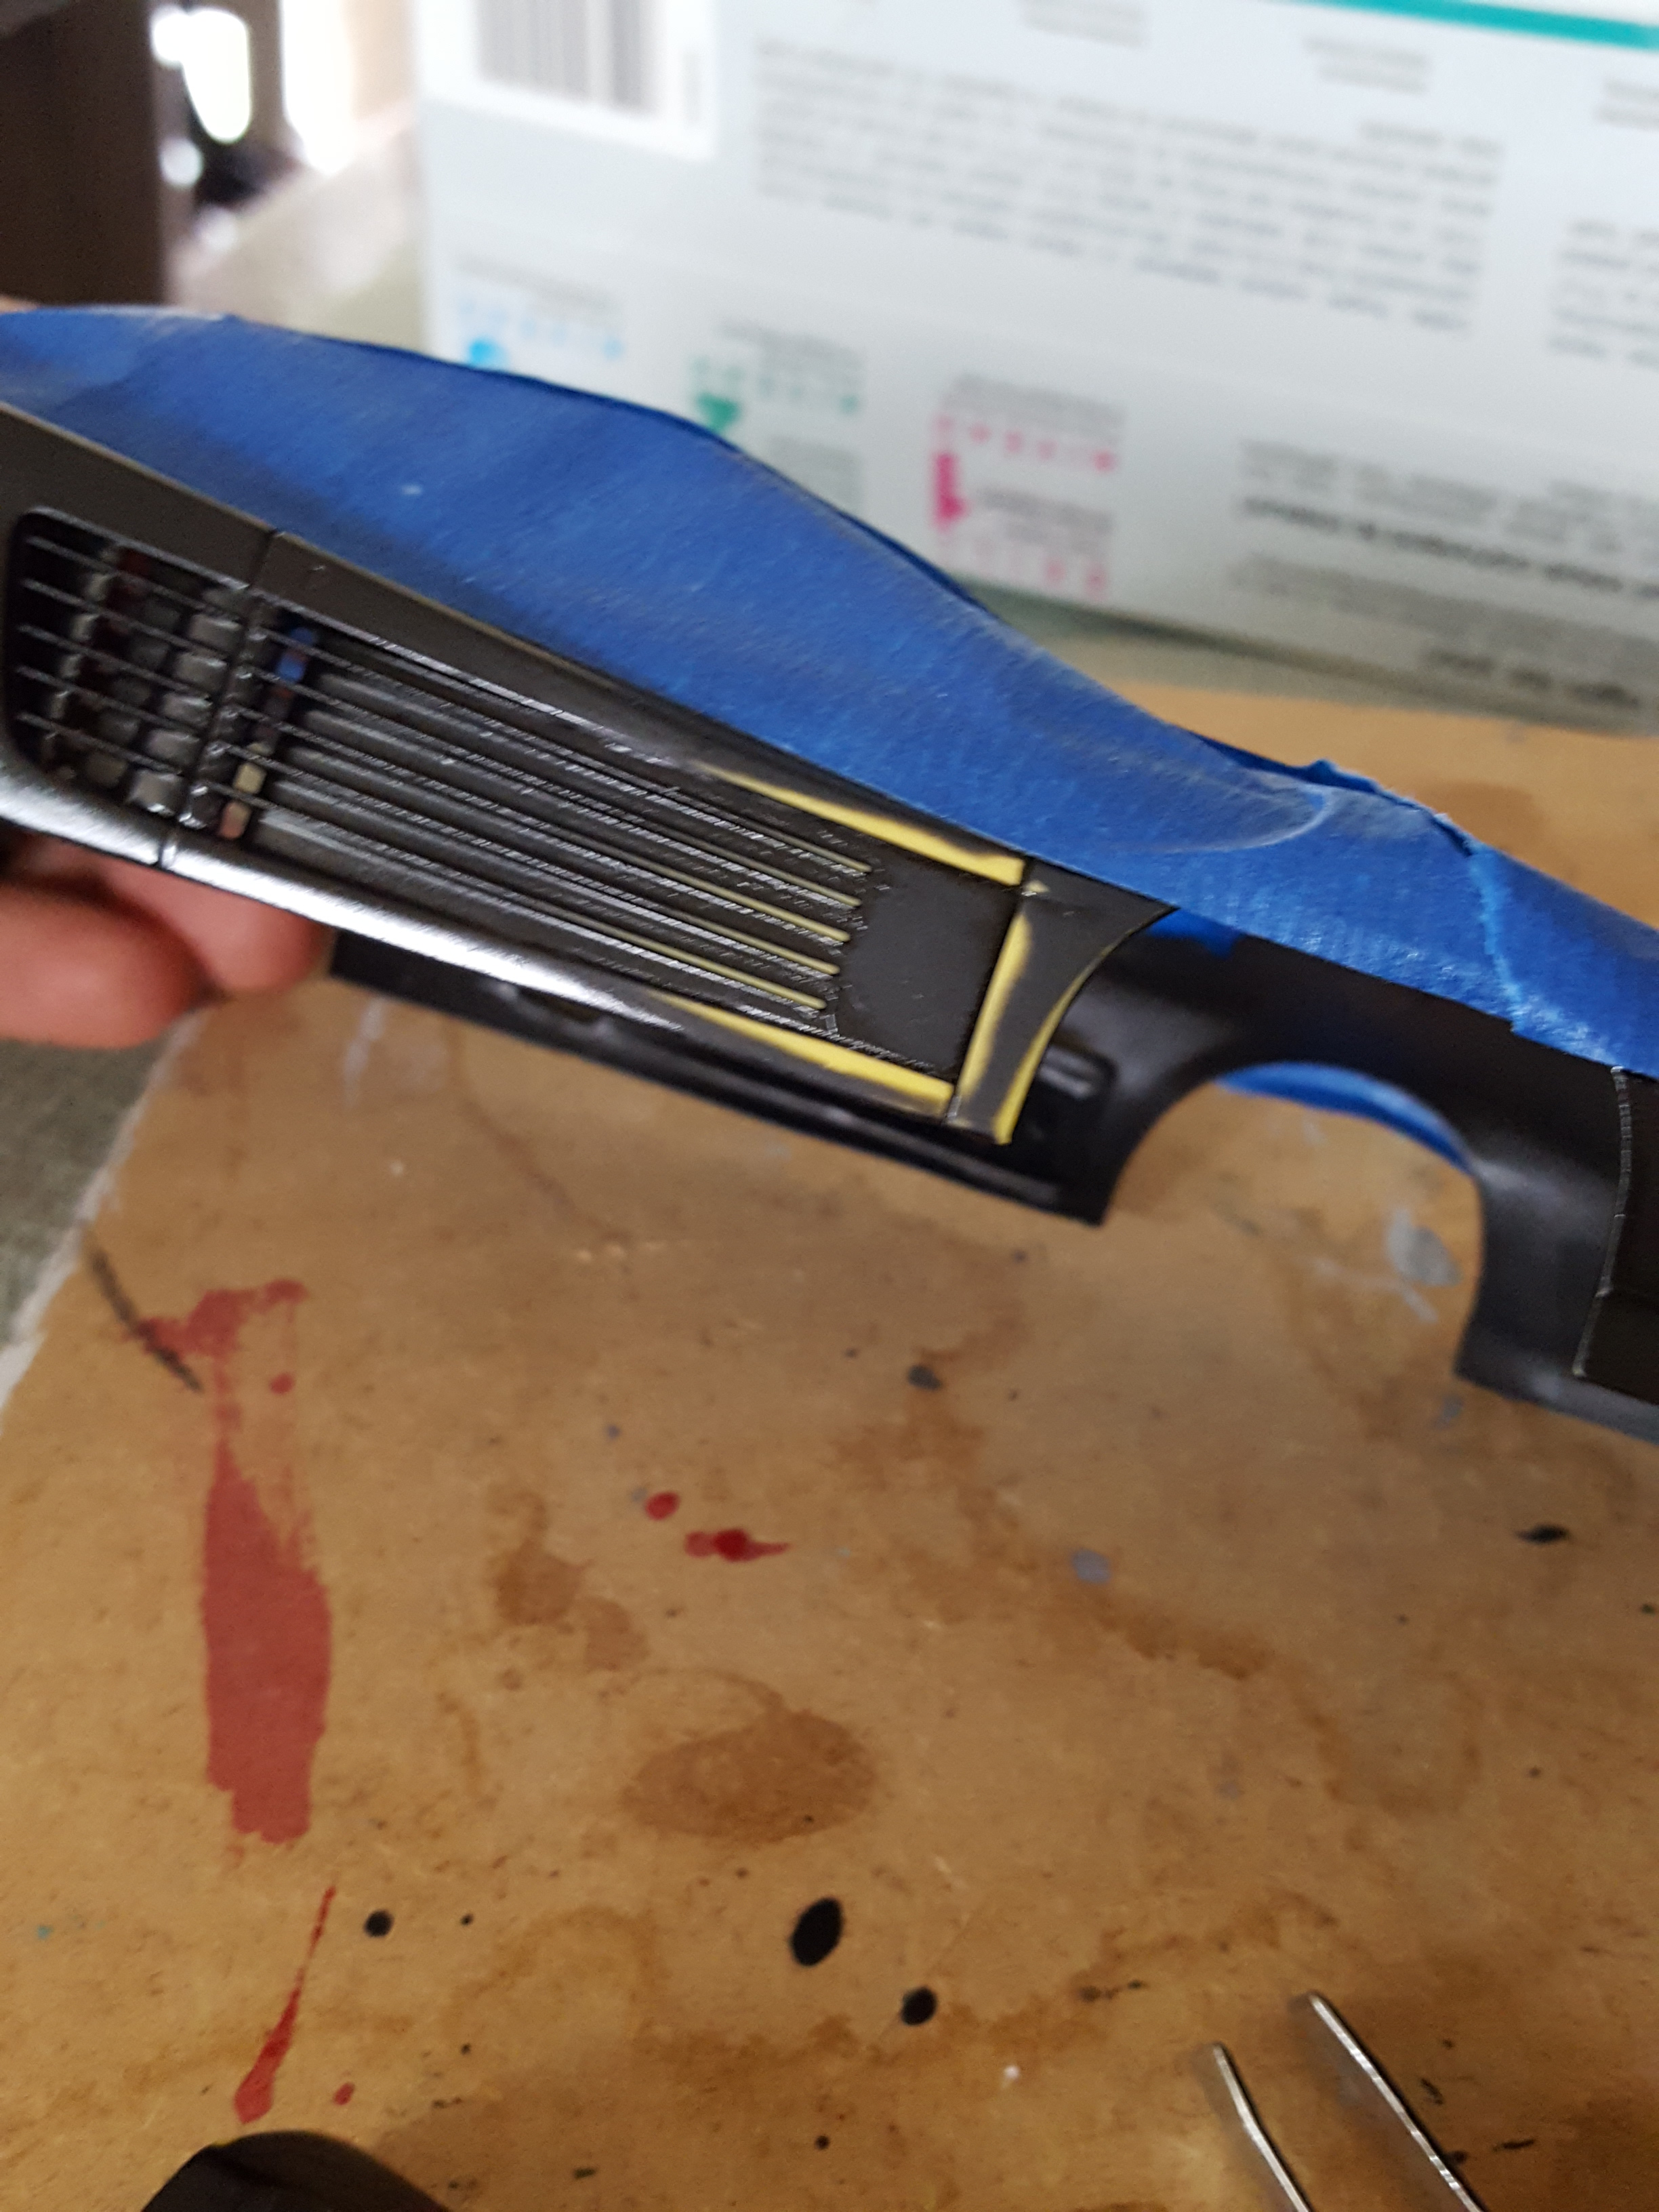
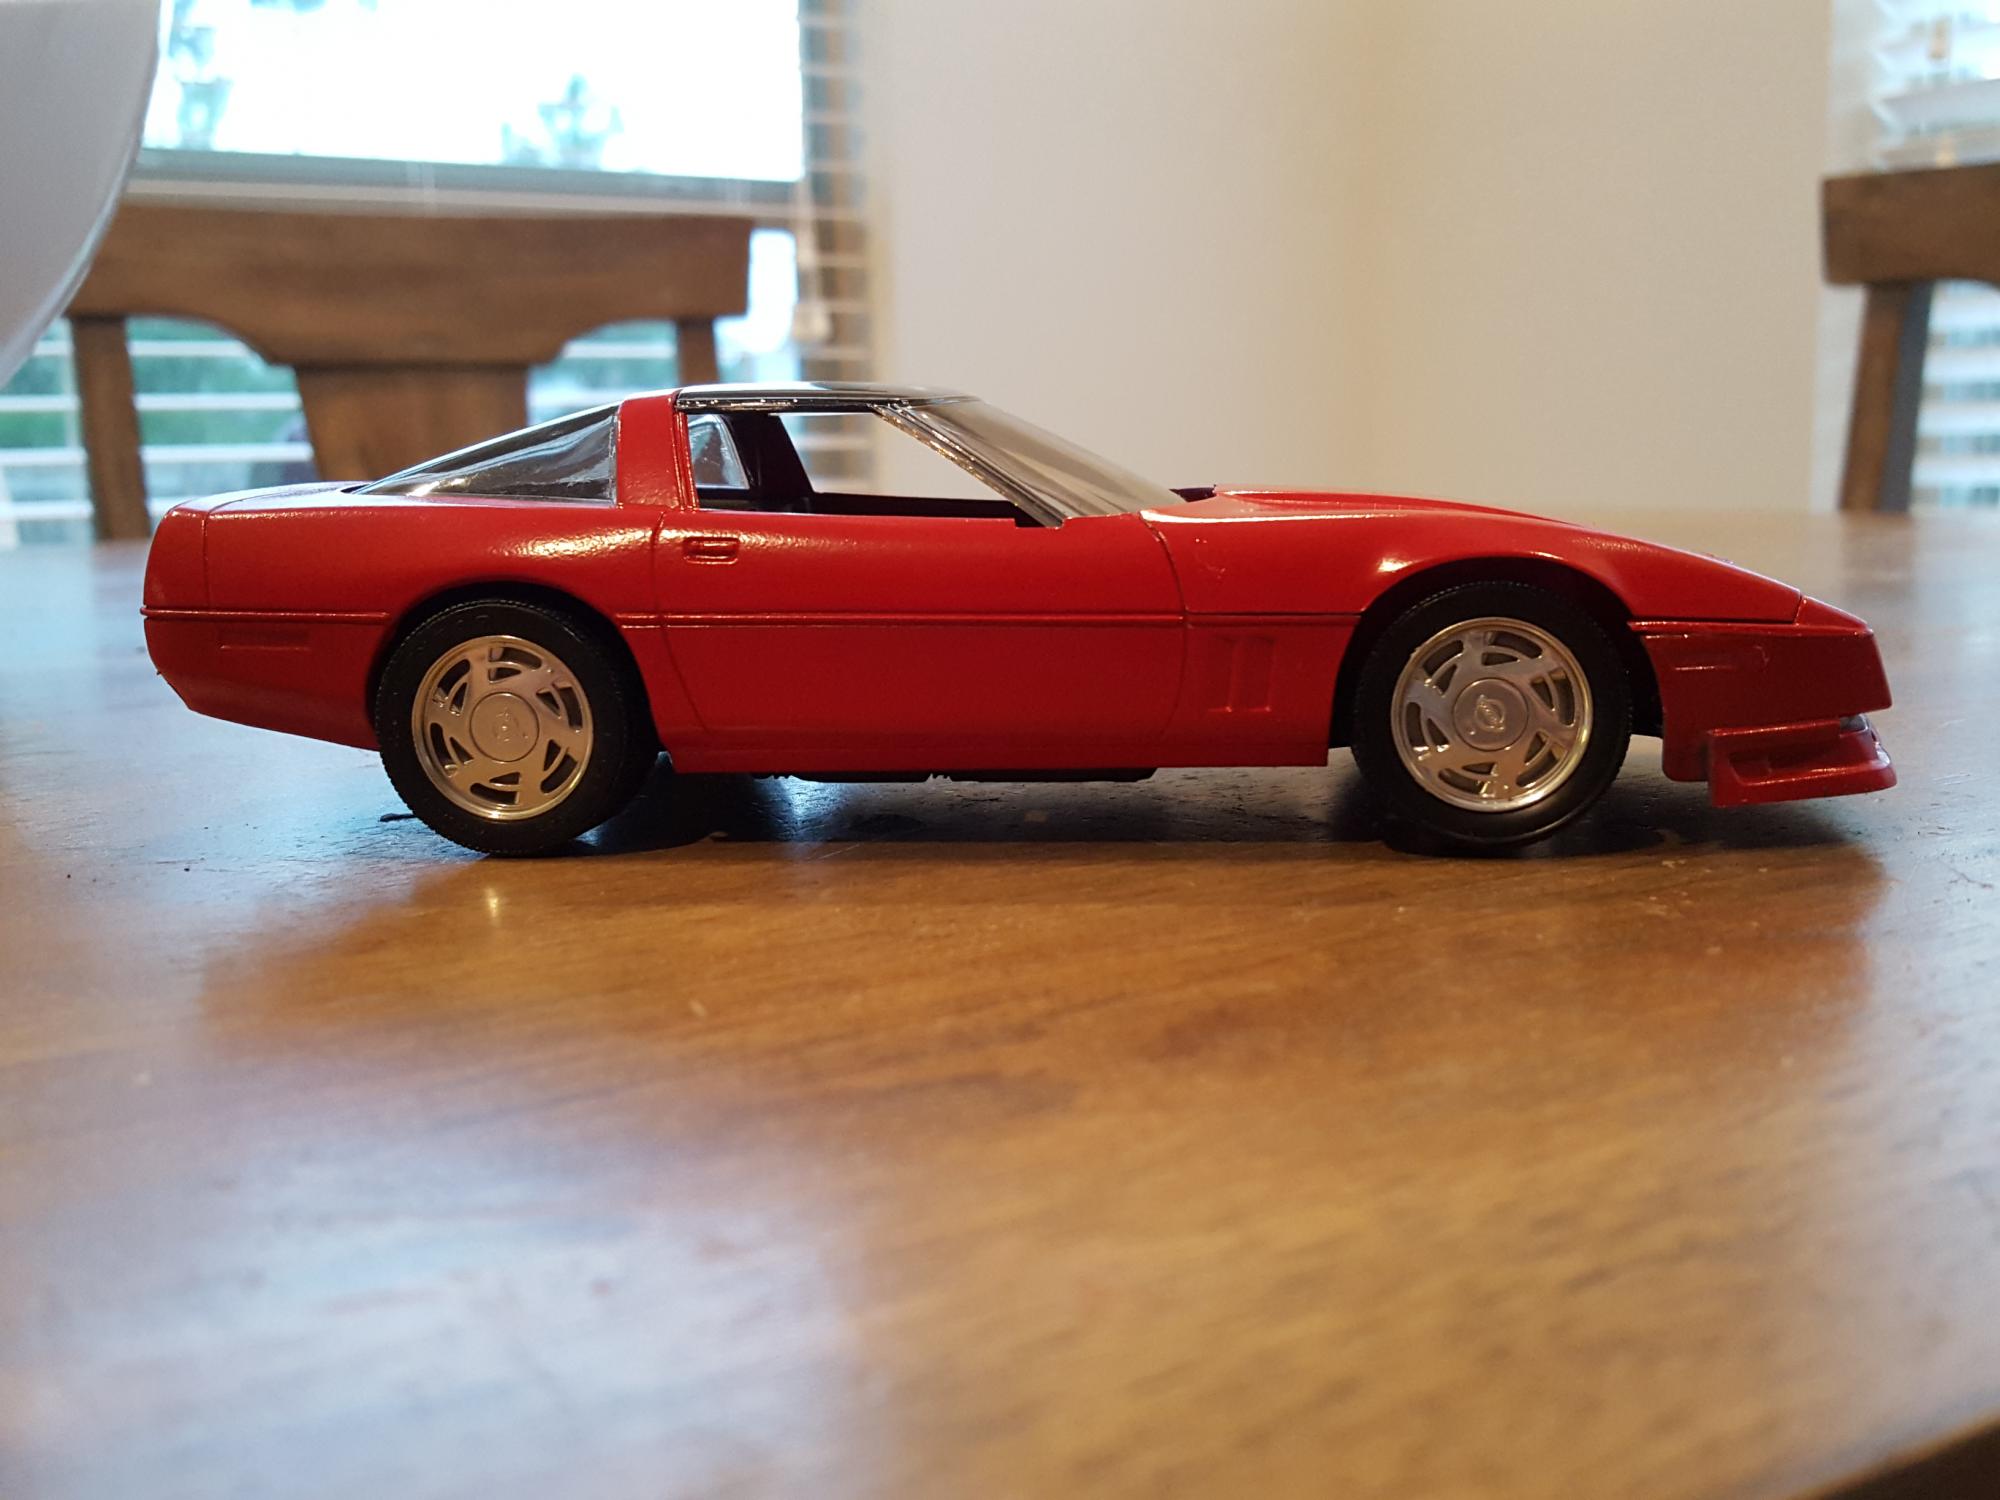
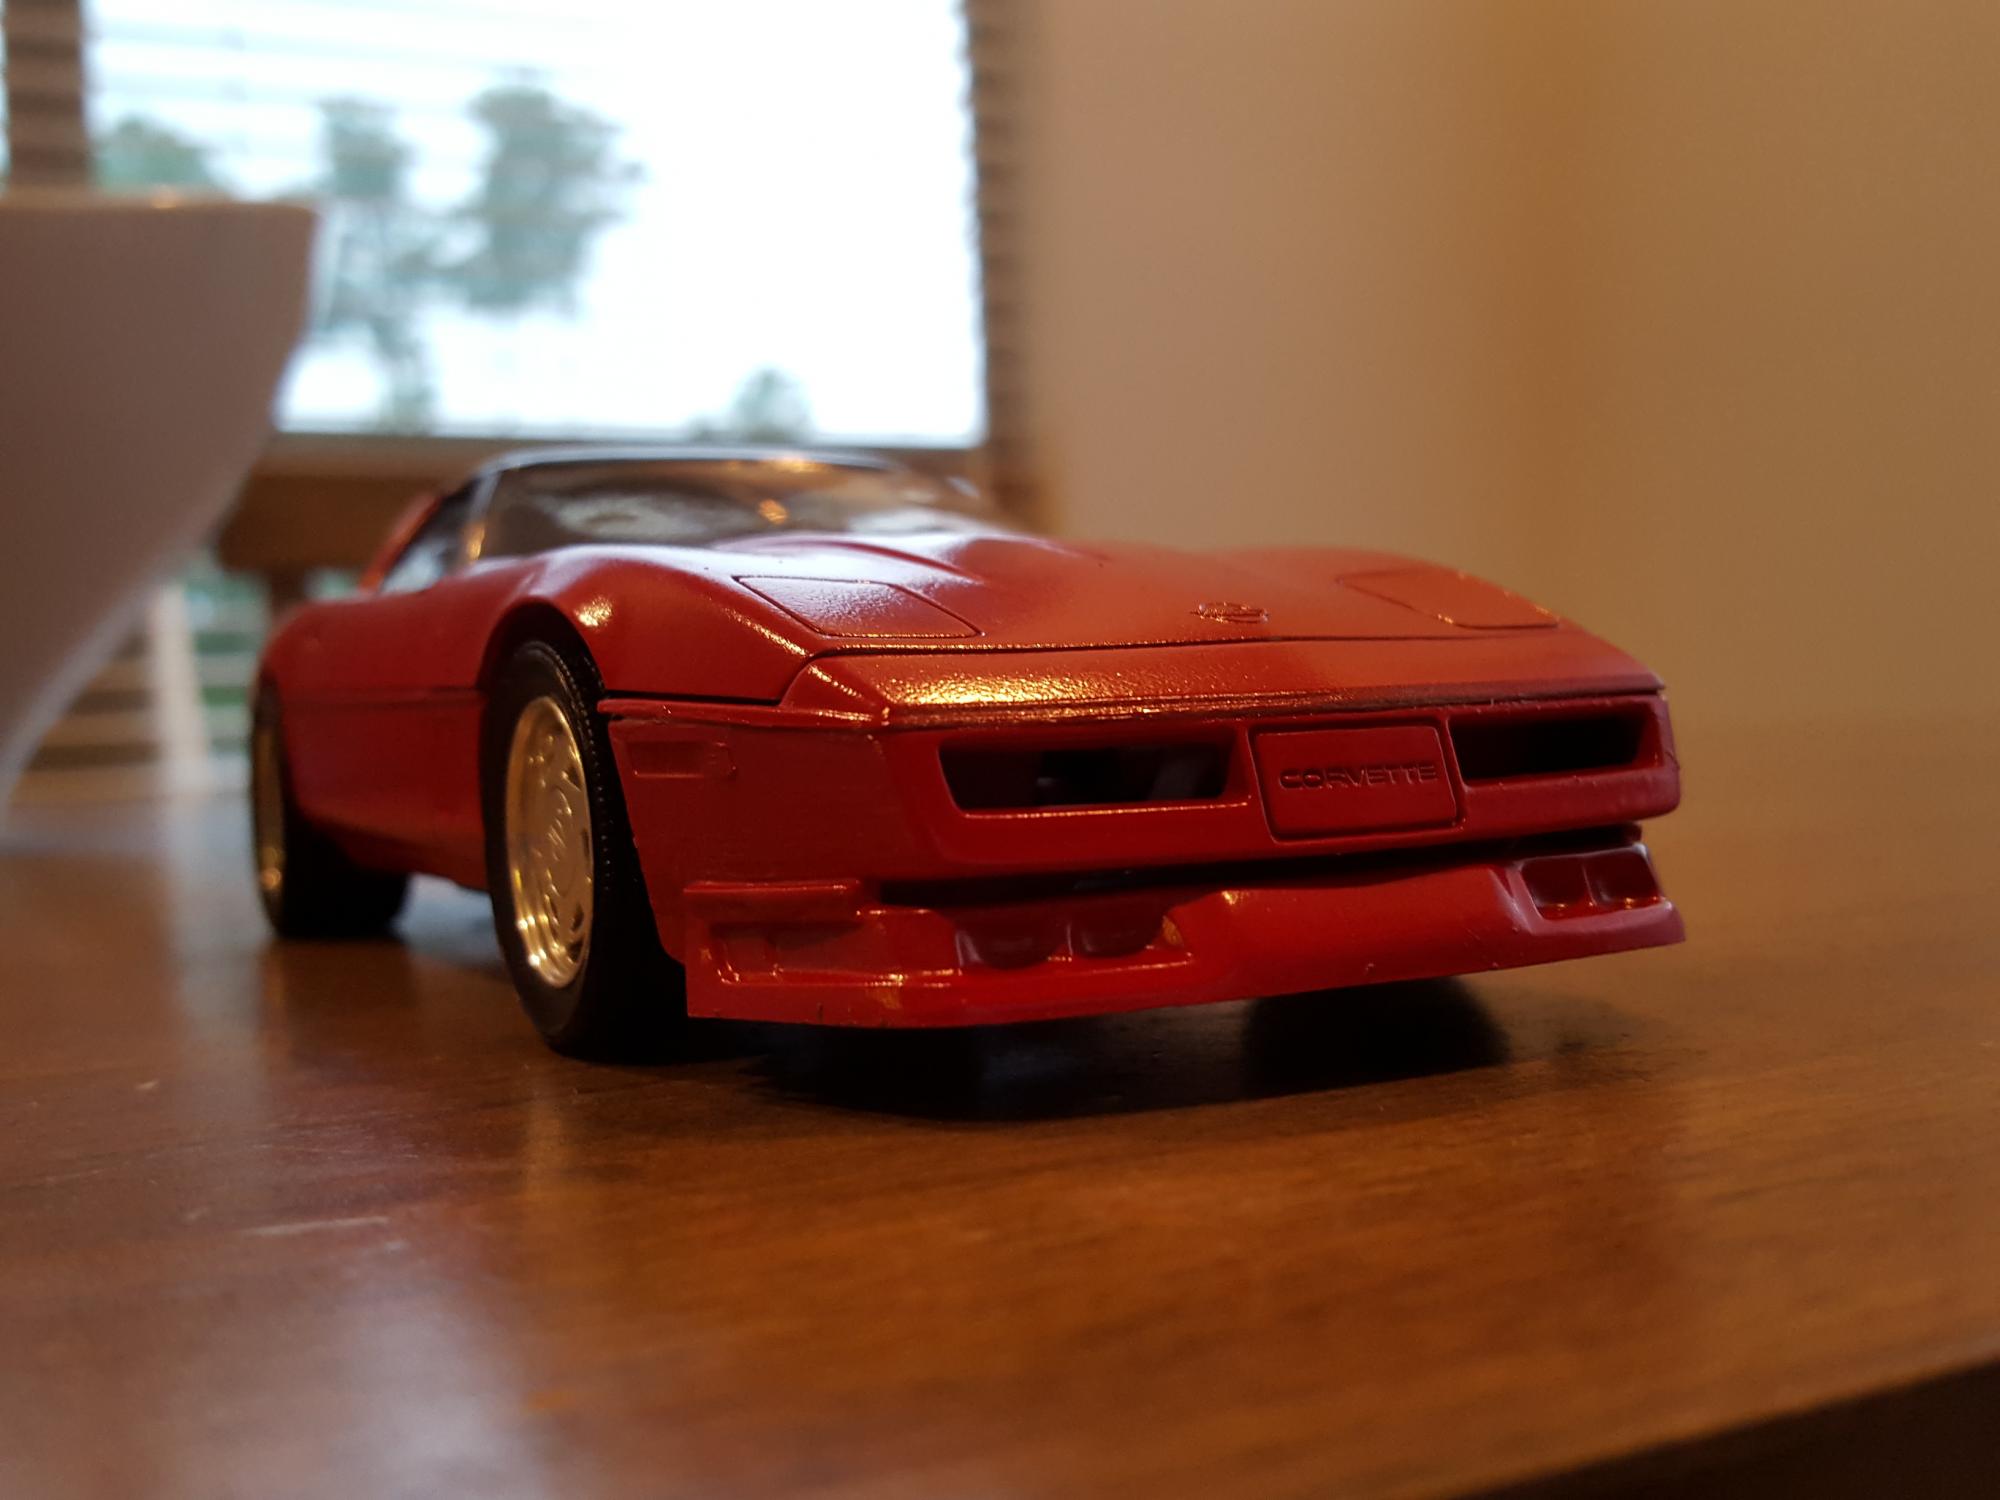
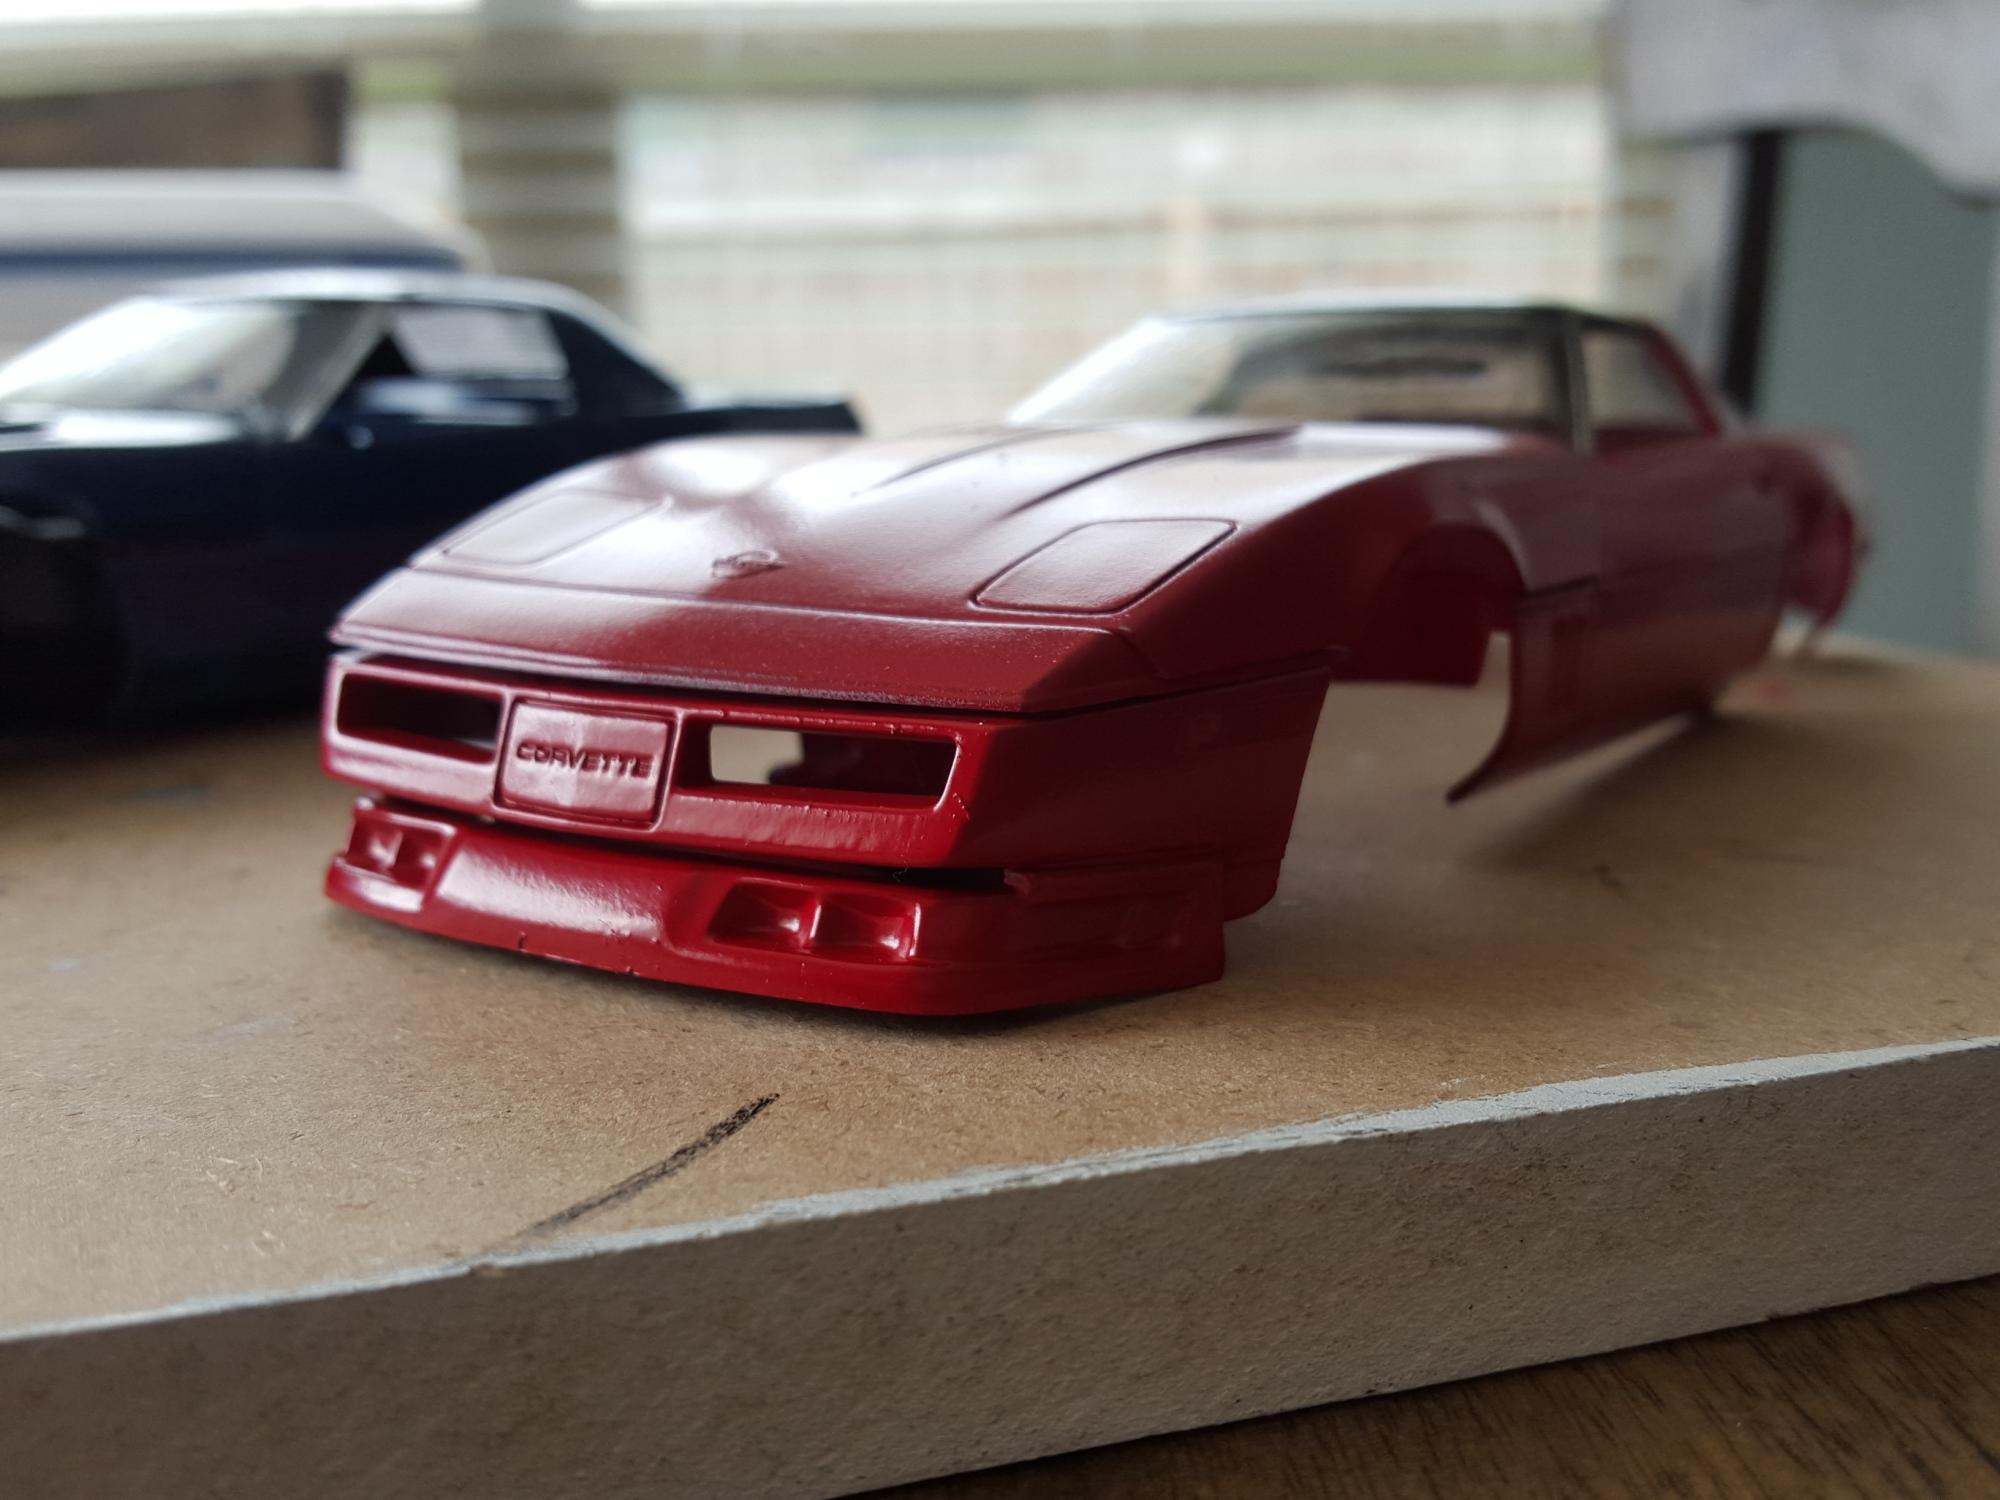
and now the red coupe! this build was a lot easier and rather quick actually. the only mod was the front lower 'spoiler' just for fun but it's clear now that it offsets the balance of the car and is too heavy now in the front. i have already ordered some styrene sheets and the plan is to make some side skirts and rear diffuser to even it out. Decided to keep the wheels stock for now but i may upgrade to larger wheels and maybe lower the suspension after i put the mods on it. we'll see. Enjoy the pics and comments are welcome
-
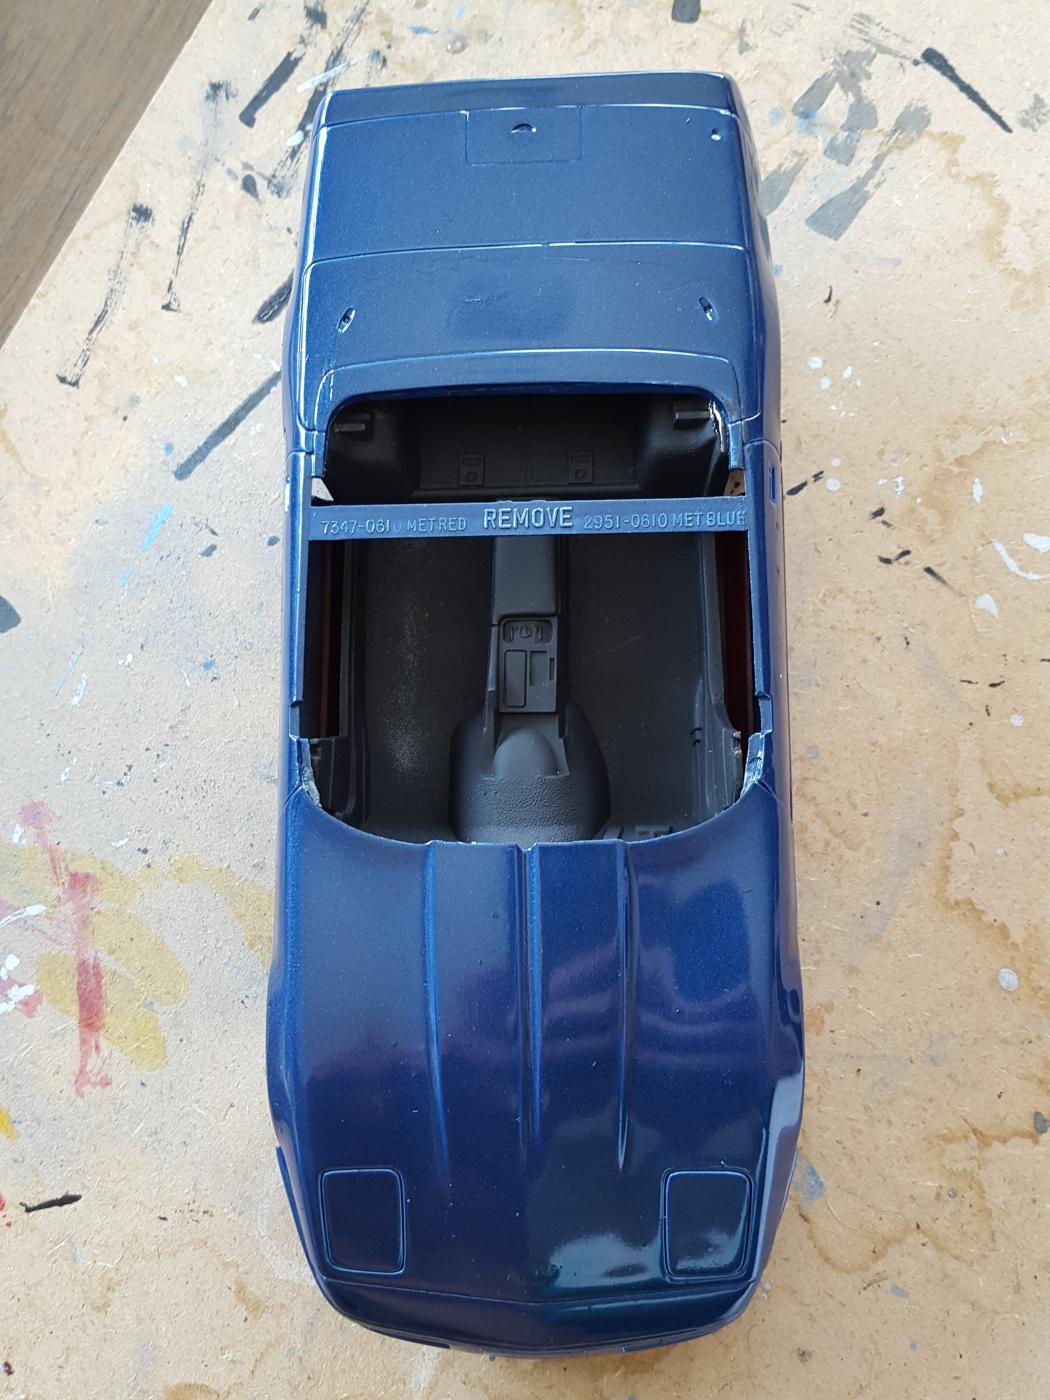
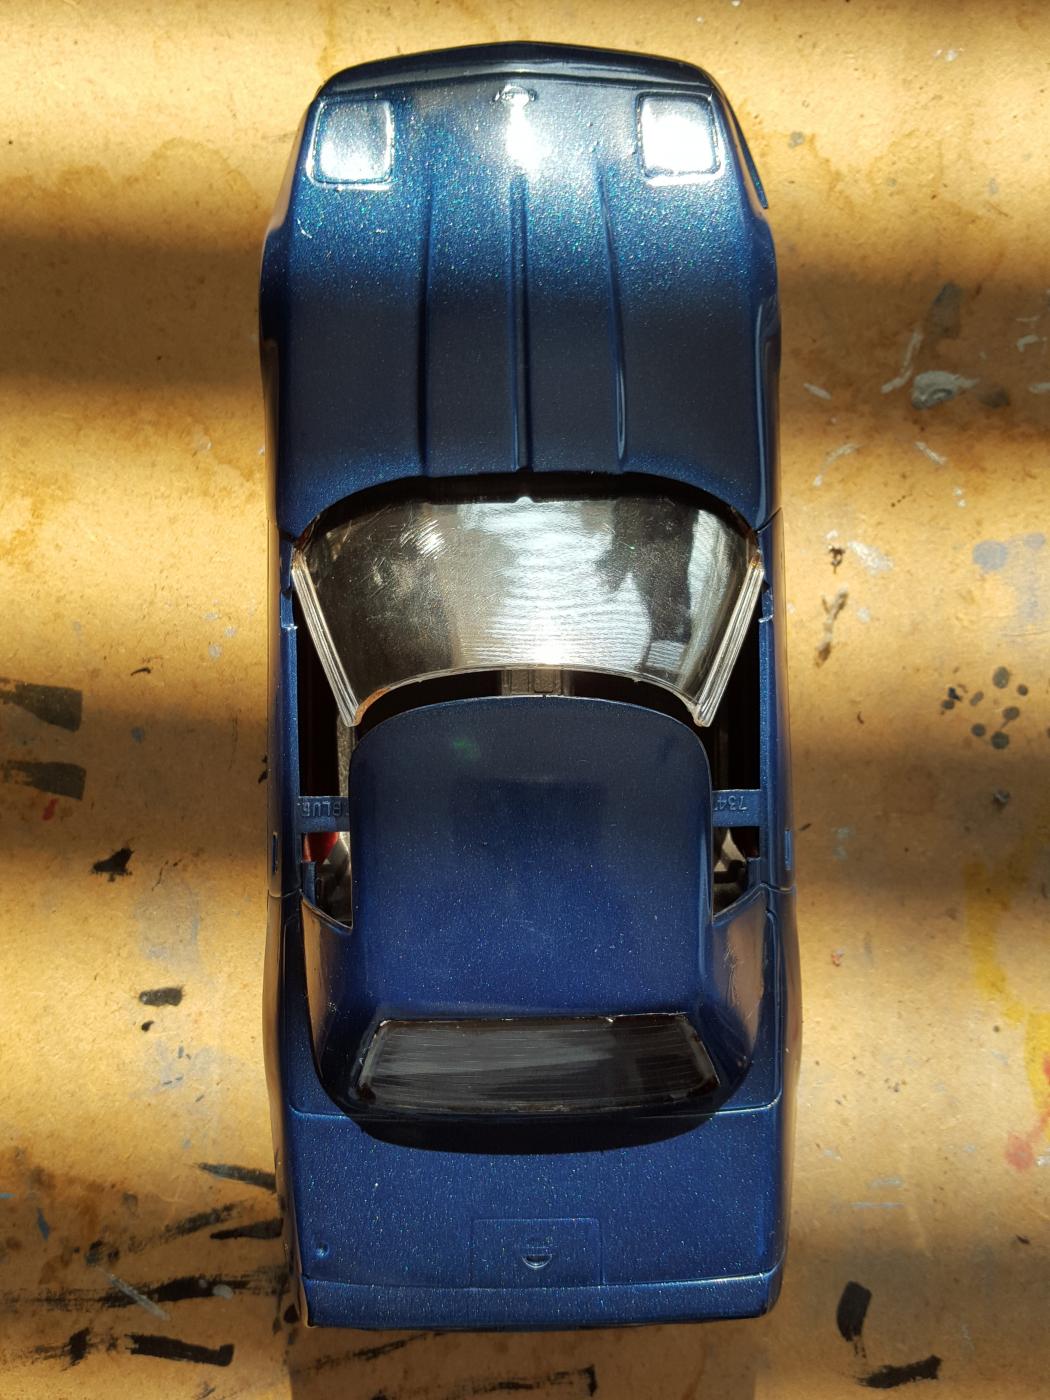
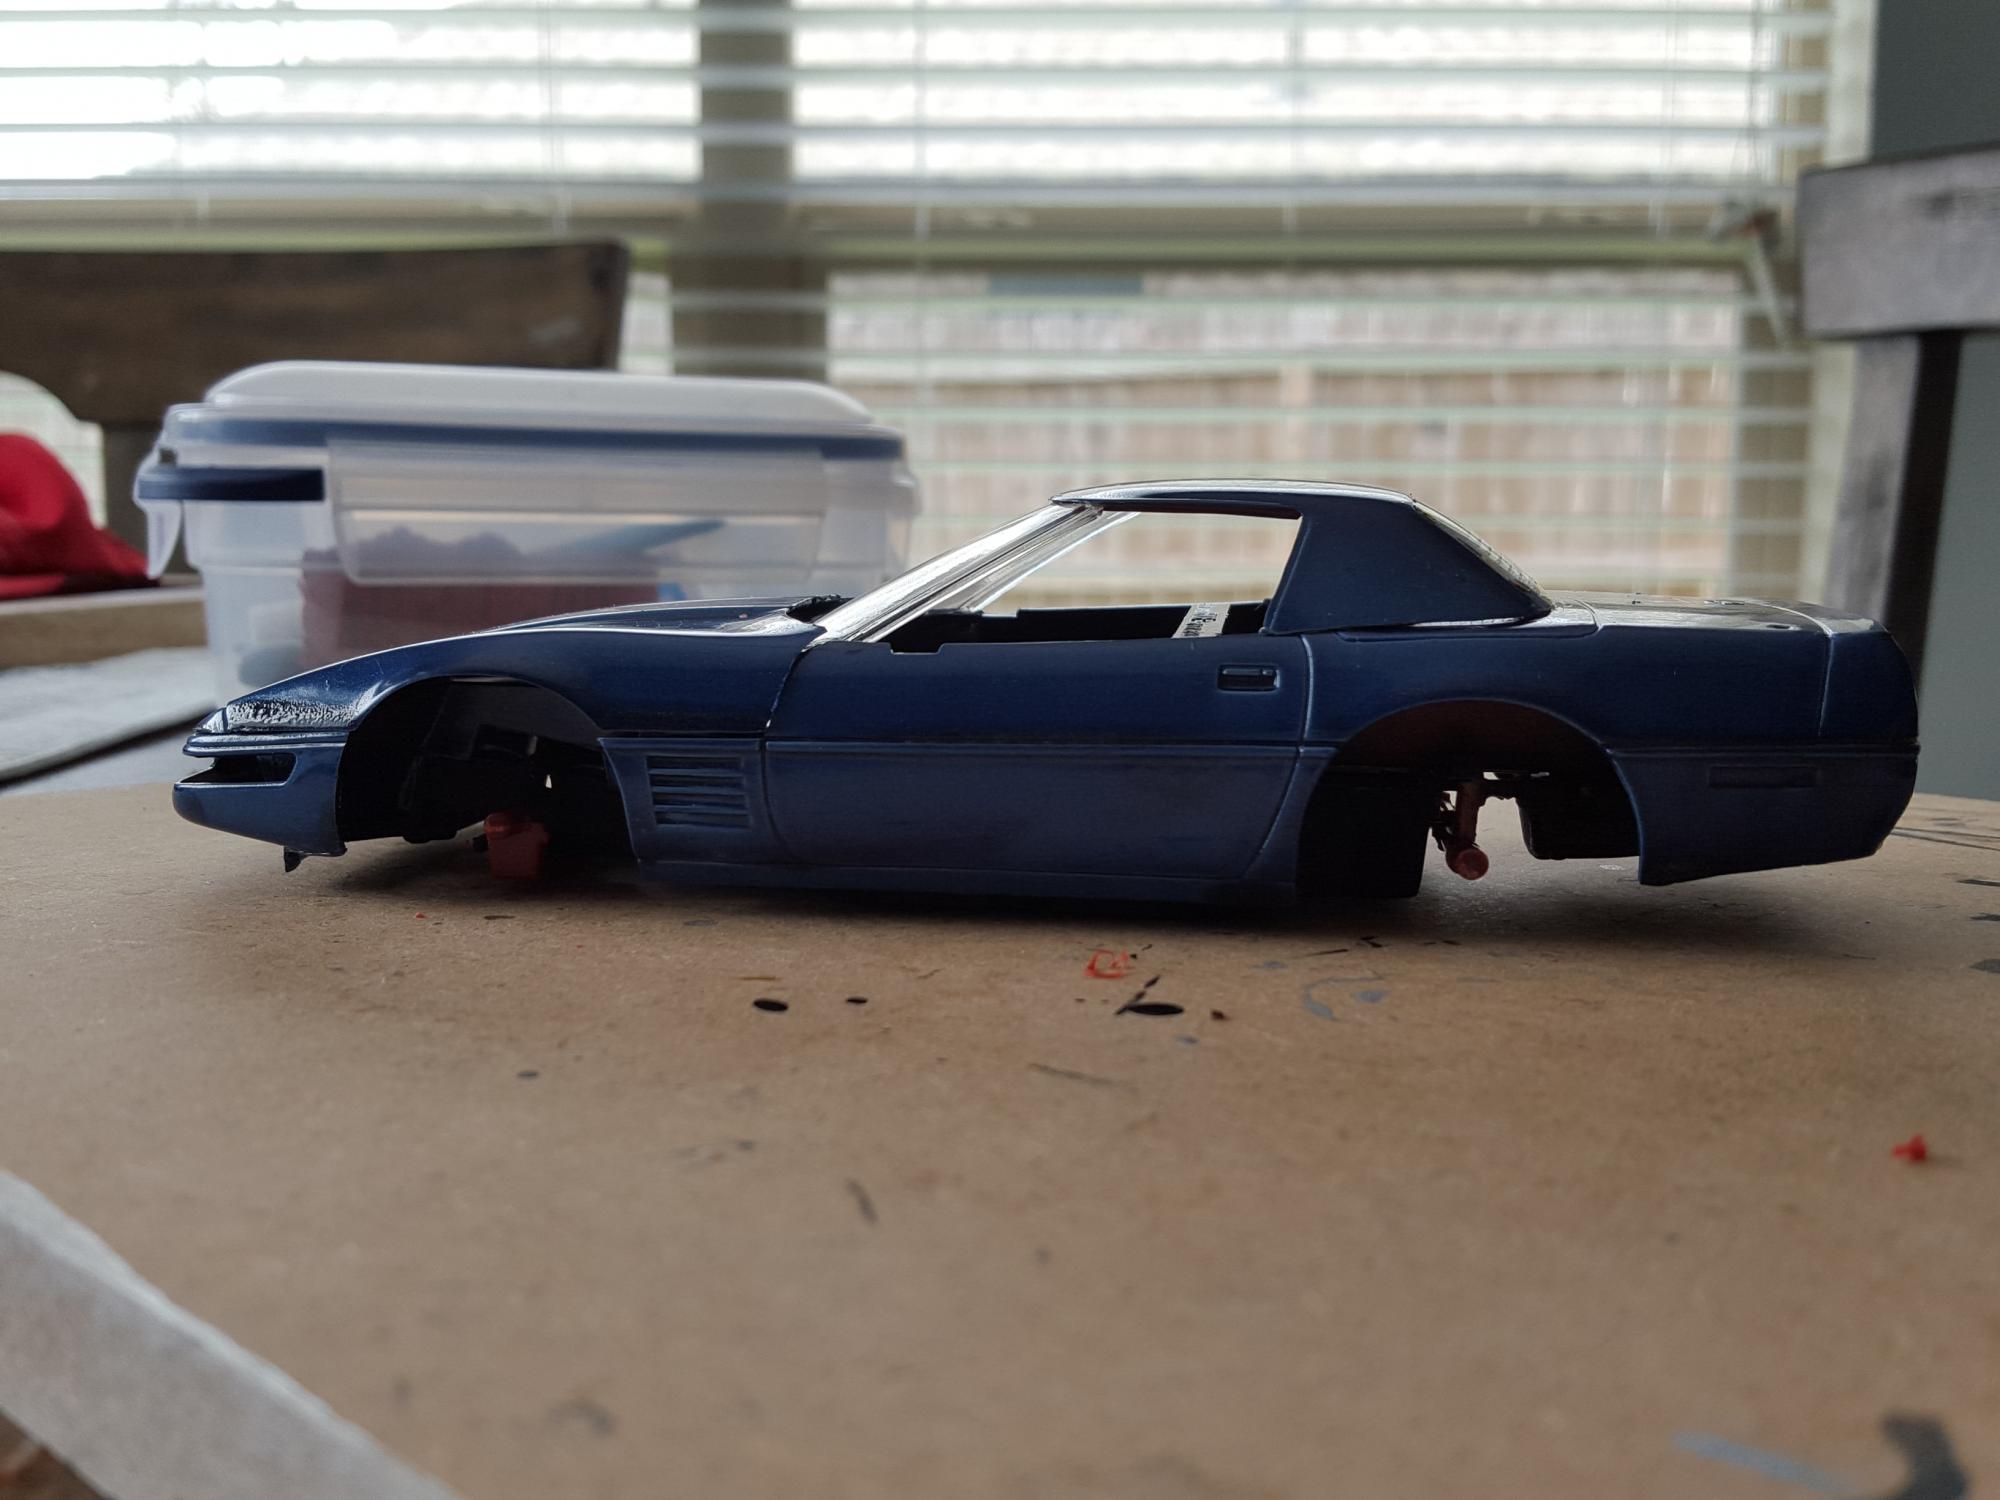
Ok so i wet sanded the entire car, worked out some really rough spots and removed the roof because it was actually out of correct position. I didn't take photos of the sanding work because i just didn't remember to, but here is the re-panted corvette convertible. I liked the way the it turned out after the wet sanding, and i took the time to thin out the spots where paint had pooled. But i realize now that i over sprayed it [again] and it pooled.. again. I guess it's my heavy trigger finger that's the real problem. Also, the roof and windshield no longer line up and it's because i did not install the dashboard for this. The windshield should sit over the dashboard but without it it's too far forward. I now realize it really is better to glue before paint and did a much better job at masking things for the respray. Ah well im ok with it as is, it's been good practice anyway. Think i'll leave this one as is and get to the red coupe to finish it up soon. Wet sanding, respray and wheels left to go. Comments welcome
-
pure awesomeness! well done!
-
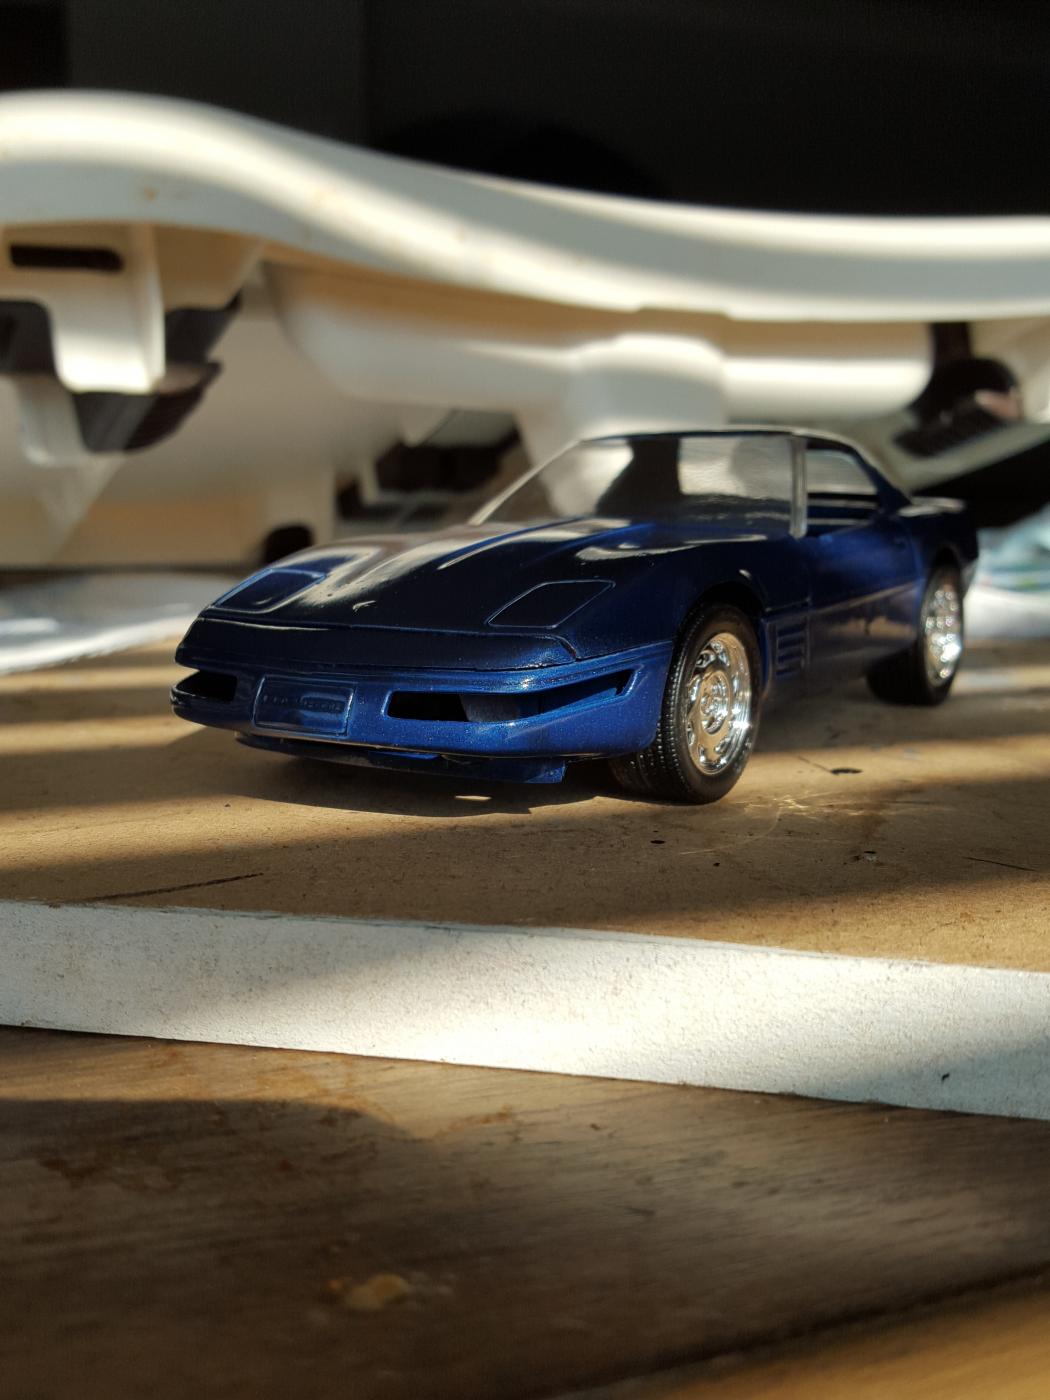
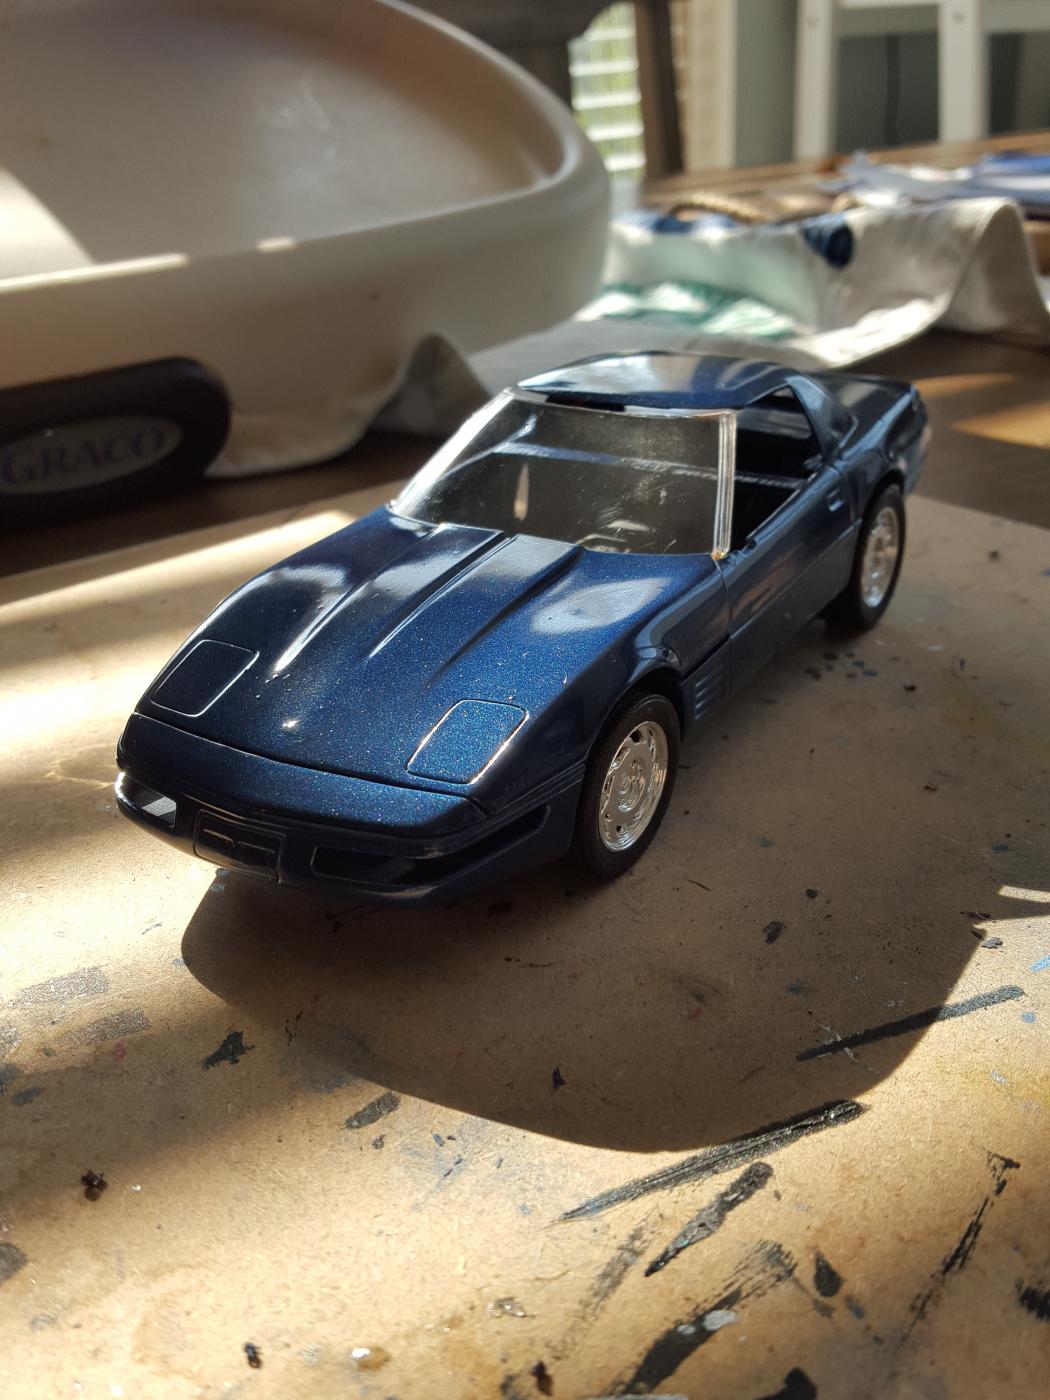
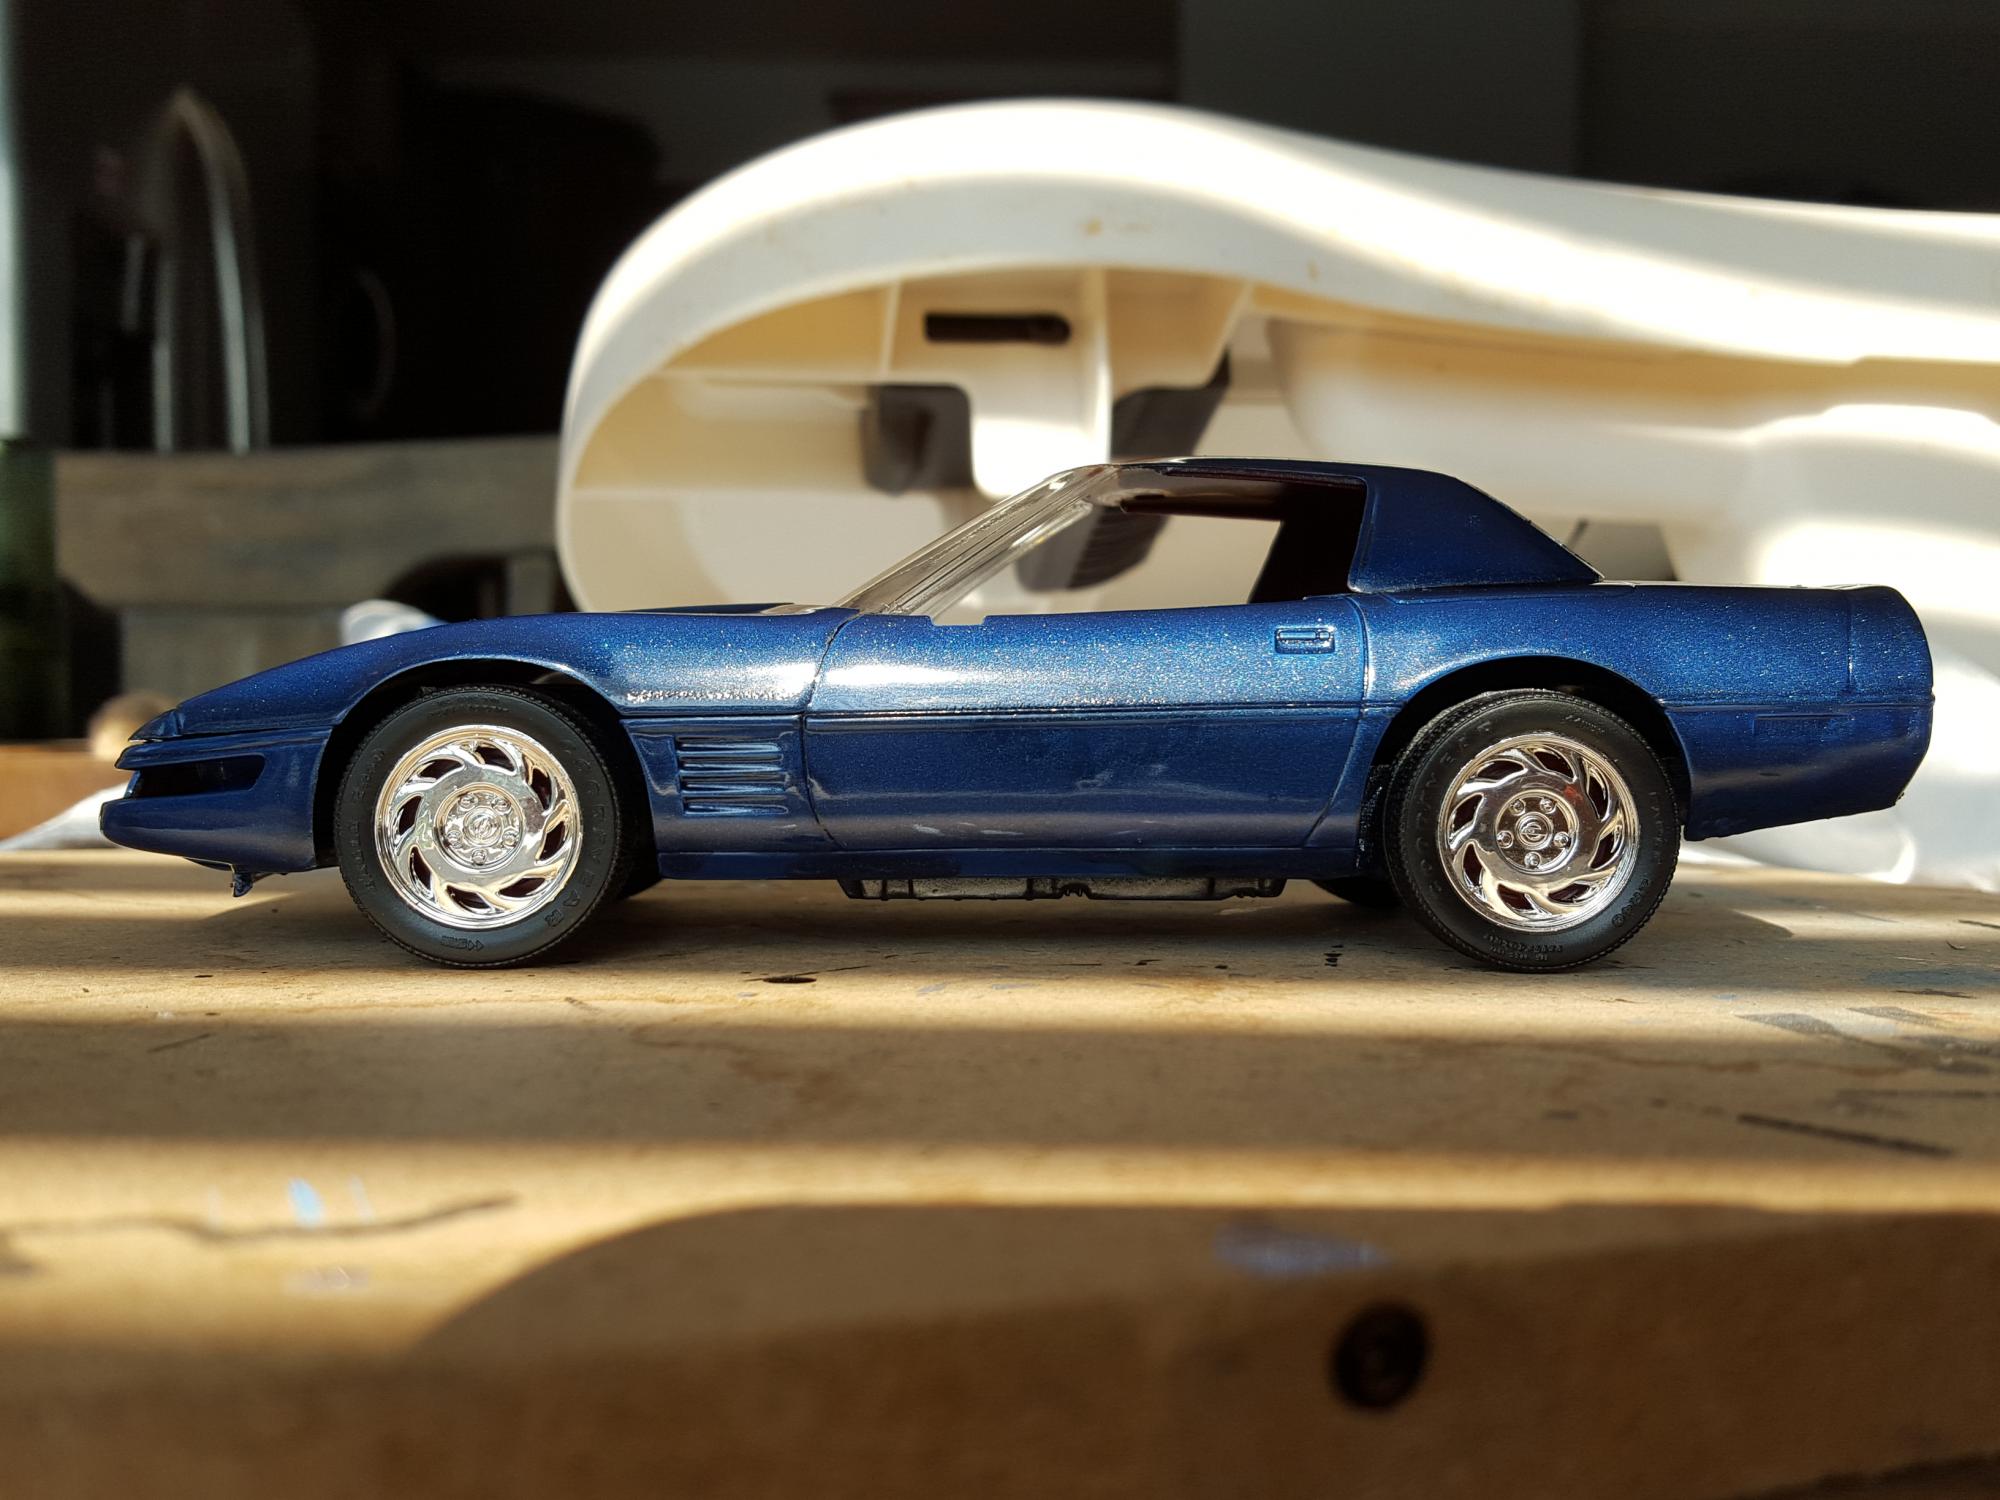
Thanks! I've been looking over them and already see several paint issues, like some spotting and building up on the blue vette. :/ But that's ok cuz now i can try some sanding and re-spray techniques. Need to fix the driver's side of hood where the paint pooled, need to reposition the hard top and then give it a final coat of paint if possible. I was never a huge fan of chrome wheels but i like the way these look with the blue vette. The red coupe paint turned out ok but i want to wet sand it and give it another coat to really make it smooth, then clear coat. More mods to come!
-
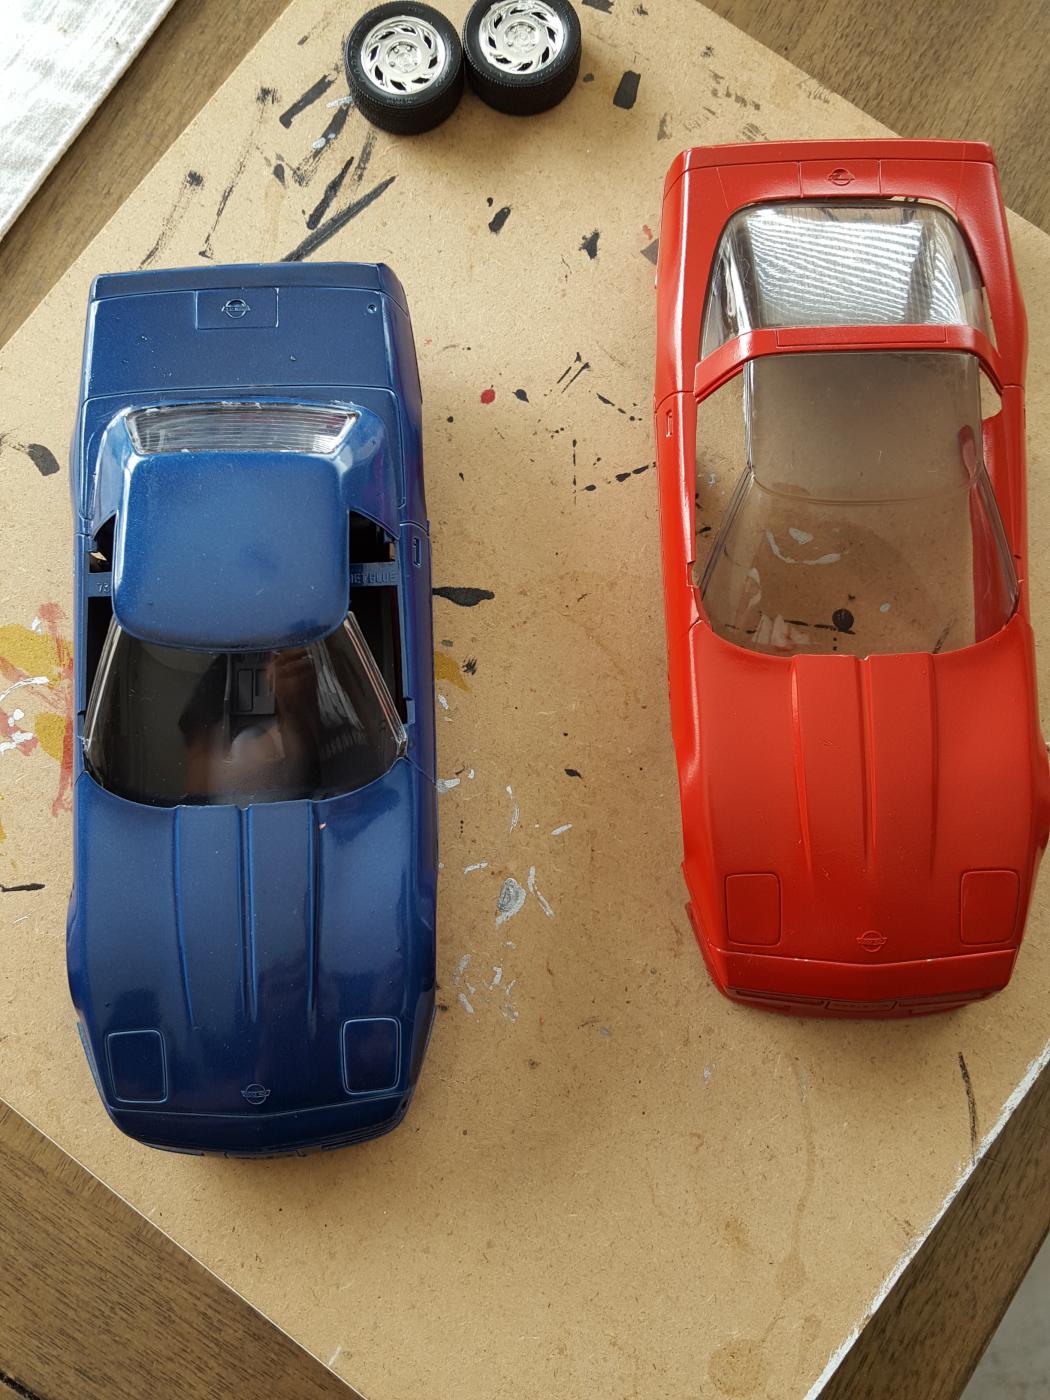
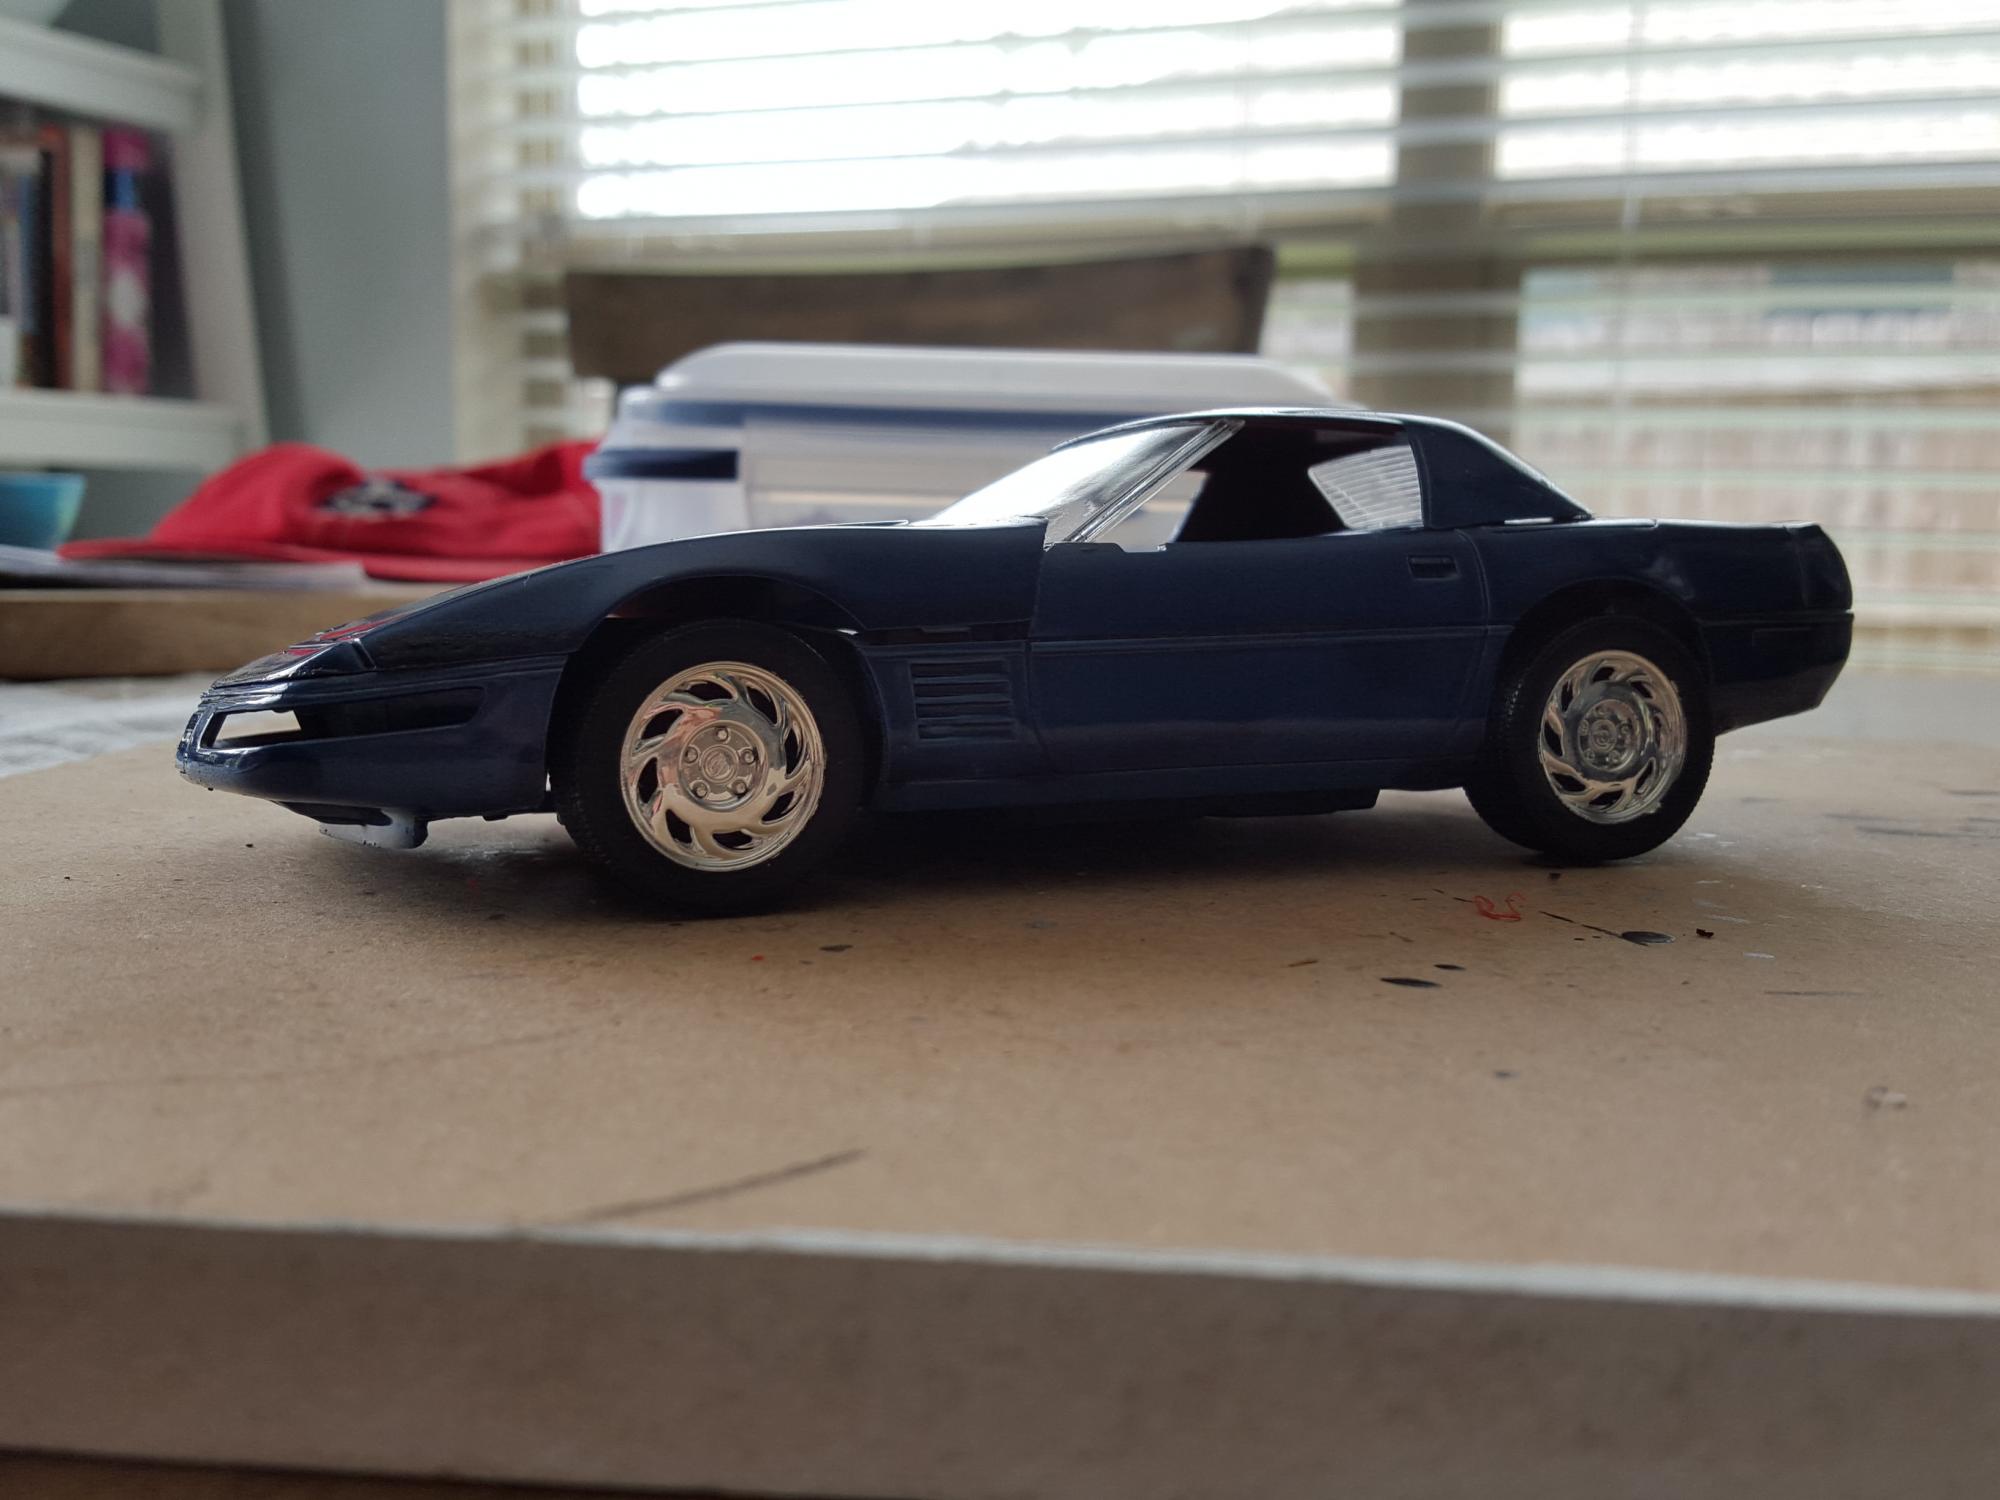
Hey all! it's been a while but it's good to be back. Some of you may remember my last project of that 70's Baldwin Motion camaro, well a lot has happened since then. Namely, the birth of our 2nd boy and a new job! So needless to say, i've been a bit busy and not much free time for modelling. But things are finally stabilizing and i thought i'd jump back in the saddle with some practice cars. I learned a lot from the camaro [which was basicaly my first attempt] and i wanted to practice a few of those things on some sacrificial cars. I scored a couple of C4 corvettes for $5 each and thought i'd just experiment with stuff. i didn't get ay pics of starting them though but really not a whole lot happened in the beginning anyway. So here they are now: So the quick story is i wanted to focus on better painting techniques. I really loused up the previous one by not sanding the body and not using primer. I also got a little trigger happy with the spray paint so i really focused on getting better at painting overall. Also, just for fun, i wanted to try some simple mods. For the blue cpnvertible vet, i lowered the suspension for a tighter ride. That was a learning experience in itself and i dont think it turned out very well but that was the point, to try it out and learn from it. For the red coupe i tried a simple body mod and took the chrome headlight insert, painted it and installed it as a lower air dam just for kicks. I'll add some more photos shortly.. Here are more photos of the vettes. Next up is to tidy up the bodies and add the wheels. I used the stock wheels for the blue vette and have some custom wheels i painted gunmetal for the red coupe. Also trying to decide on the blue vette what way to set the wheels, with the spokes forward facing or rearward. I plan to just keep exploring with these two, and learn more along the way. And i won't feel bad about destroyig them since they were only $5 each anyway Will be sure to post the progress more regularly, and already thinking ahead to the next project! Feedback is more than welcome, let me know what you guys think!
-
looking good so far man, great color choice
-
Build of my 1:1 2013 Mustang - Updated 4/11
drive4th replied to SterlingStang13's topic in WIP: Model Cars
very good work so far man. i hope it all turns out just like your car. keep it up! -
indeed the flagship ferraris were always my favorite of the bunch.. cant beat F-RWD will be watching as well, good luck
-
oh man this looks great! i always loved that styling, nice work!