DoctorLarry
-
Posts
954 -
Joined
-
Last visited
Content Type
Profiles
Forums
Events
Gallery
Everything posted by DoctorLarry
-
Thanks, Mark. I have the hardest time with photos on Randy's site. They have to be loaded in url form from a secondary site. I used to have a Photobucket site and then they got crazy so I went to another free site and it is hard to get the loads right. This site is much easier because I can upload directly from my computer. I also love these obscure builds and I just thought this looked cool.
-
I was waiting for the master's evaluation. Thanks!
-
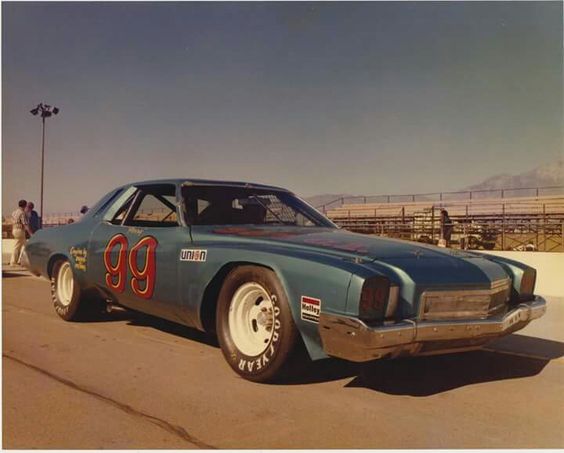
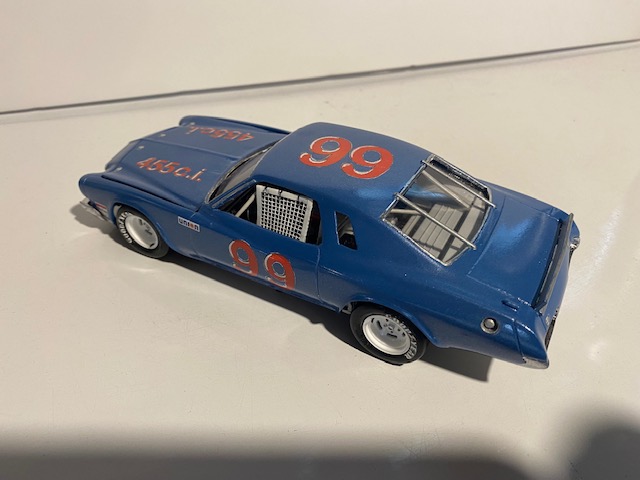
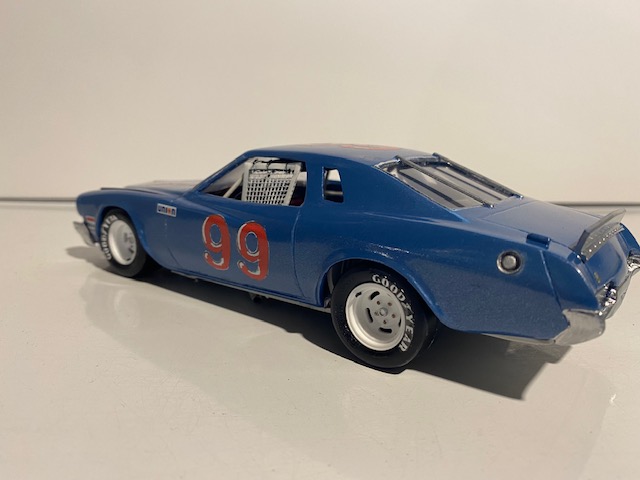
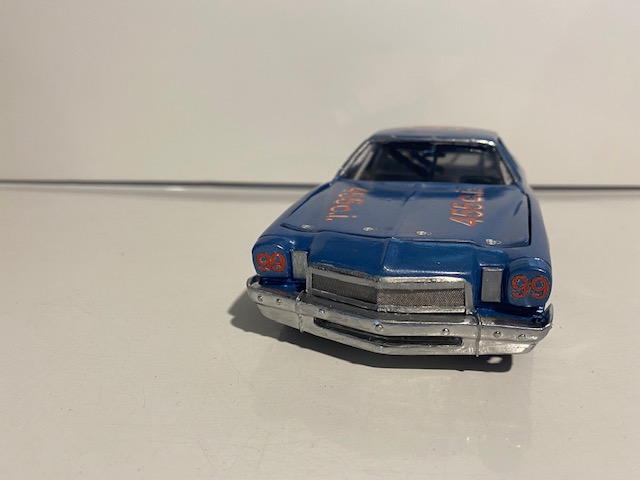
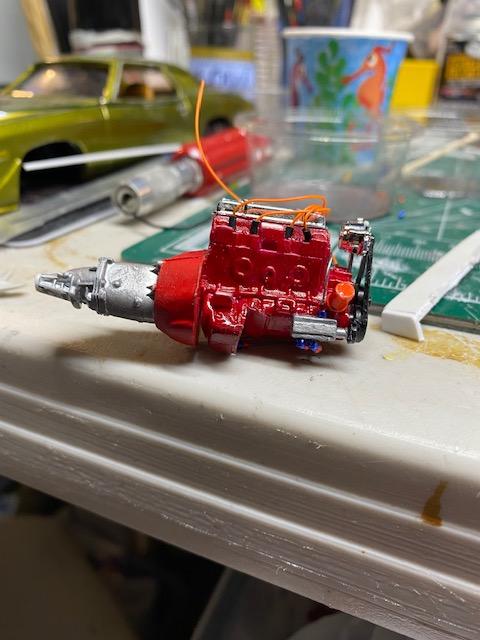
This one started as one picture of a 73 or 74 Buick Regal raced out west by Perry Cottingham. Some of his cars used Kenne-Bell Buick engines from what I've read. This is the only picture we know of of the car so some poetic license is here. My own 73 Buick Century resin body with a modified front end to look like a Regal. Coors T Bird chassis stretched. Seat modified to look like earlier models. The dash was modified to fit. Buick 455 from a Monogram Buick GSX. Resin B-O-P bellhousing and Muncie trans from Forward Resin. Acetate windows. Scratch built plumbing. PPP wheels and Monogram tires. Ink Jet decals I printed (which don't look great). As close as I can get with one picture.

-
Elliott Ford Thunderbird Coors Light cars. Cheap and plentiful on EBAY or at shows.
-
Last post here. Last details-throttle cable and return spring. I'm calling it quits on this and moving it to the NASCAR board.
-
99% done. A few minor things left. Decals were a pain and did not turn out great-that's why graphic artists do them!
-
We are about 95% done. Home printed decals, which don't look great. I need to finish the hood, put in one more radiator hose, carb return spring and some paint touch up.
-
One more
-
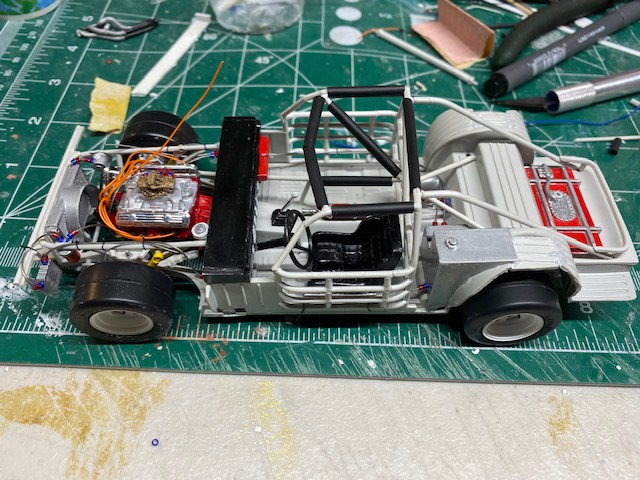
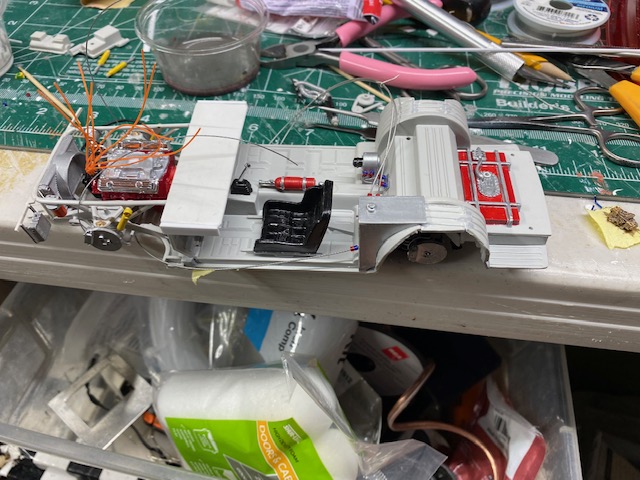
Getting down to the final details. Made a window net, added some more plumbing, fitted mesh on the front grille and detailed the front bumper. I made up some decals printed on clear decal paper. When they came off the backing they did not show up so back to square one on those. The chassis is almost done. I need to do exhaust, which is always a pain on these cars. If you don't use the Ford engine in the chassis, no exhaust wants to fit so it usually means meticulously bending styrene rod to make headers. What a pain.
-
Got it on the wheels. Down to finishing touches and coming up with some decals.
-
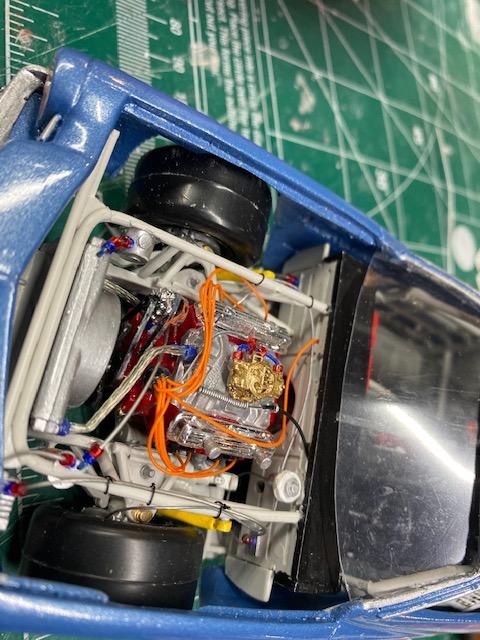
Closing in on the end. Last night after class I did some more plumbing work and tied up some lines. They use a ton of zip ties on these cars! Finished the brake lines and oil cooler and remote filter lines. Set the engine in place. A few more details and the chassis work is done. The wire sticking up is the coil wire that goes to the ignition box. It gets done last.
-
Thanks, Carl. I got some more done in the last few evenings. Assembled the cage and began to tie up the plumbing. Put the steering wheel and column in and painted the dash. I need to decal the dash gauges and build a headrest for the seat. I need to do the harness as well. I tucked the front bumper and removed the rub strip. I need to put the welds on the bumper and sand the bolts down a bit. The engine is ready to go in and finish the plumbing for oil lines and brakes. I scratch built a master cylinder and need to install the brake lines. Then make a window net. Lots of little stuff to go.
-
Got some plumbing done on the engine. Dry sump pump oil lines, fuel lines and some touch up paint.
-
One thing you can use is the mesh screen from coffee filters. If you look at them in your neighborhood grocery store they have them for Keurigs and other machines. I cut the screen out with a hobby knife and cut it to shape with scissors.
-
Thanks! More work tonight.
-
1974 Camaro , continued
DoctorLarry replied to MarkJ's topic in WIP: Other Racing: Road Racing, Land Speed Racers
Mark, why not just use resin Minilites? There are several sellers that make them. -
Chugging away a couple of hours a night. Wired up the plugs and put the dry sump pump on. Attached the Fireball Holley. We are getting there.
-
Did some more work. Did some more chassis work and modified the oil pan to drop the engine in. Fitted a wired distributor and the pulleys. Wiring is in place but needs to be finished.
-
-
Started plumbing
-
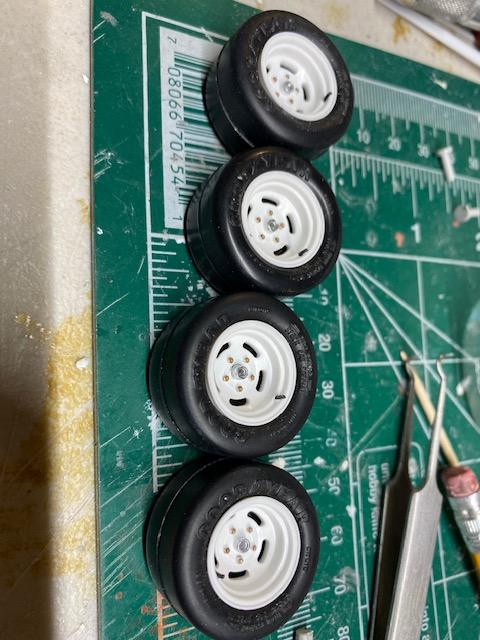
I could not find a lighter shade of paint, so I just am going with this one. I detailed the body with some Molotow and silver paint, started detailing the suspension and detailed the wheels with paint and valve stems. I'm starting the plumbing and other engine details as well.
-
Shot some paint. In the light inside it looks a little dark but outside lighter.
-
Is this a knock-off?
DoctorLarry replied to DoctorLarry's topic in Car Aftermarket / Resin / 3D Printed
Probably should not have used the term "knock off" because it has a negative connotation. It is obviously different. -
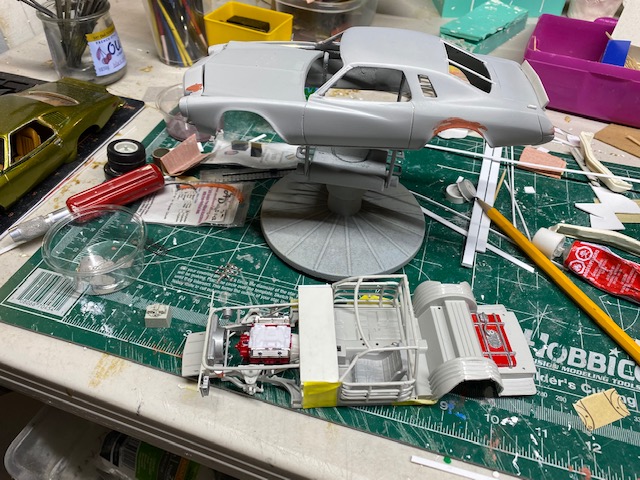
More progress last night. Fixing the last zits on the body so I can shoot some paint. I cut off the molded on automatic transmission from the Buick engine and glued on a B-O-P bellhousing and Muncie that was an EBAY resin purchase in my parts stash. I modified the TBird seat to resemble an earlier model by cutting it down and reshaping the sides. I have to modify the oil pan and attach a dry sump pump to the engine and figure the oil lines out. I have a Fireball resin Holley double pumper to go on the engine, which I painted with the Buick dark red. I also painted the oil tank and some other small parts.
-
Is this a knock-off?
DoctorLarry replied to DoctorLarry's topic in Car Aftermarket / Resin / 3D Printed
It is a nice looker-but no interior! It would be interesting to see that.