Conway1979
-
Posts
42 -
Joined
-
Last visited
Content Type
Profiles
Forums
Events
Gallery
Everything posted by Conway1979
-
wheres the x-straps on that load?
-
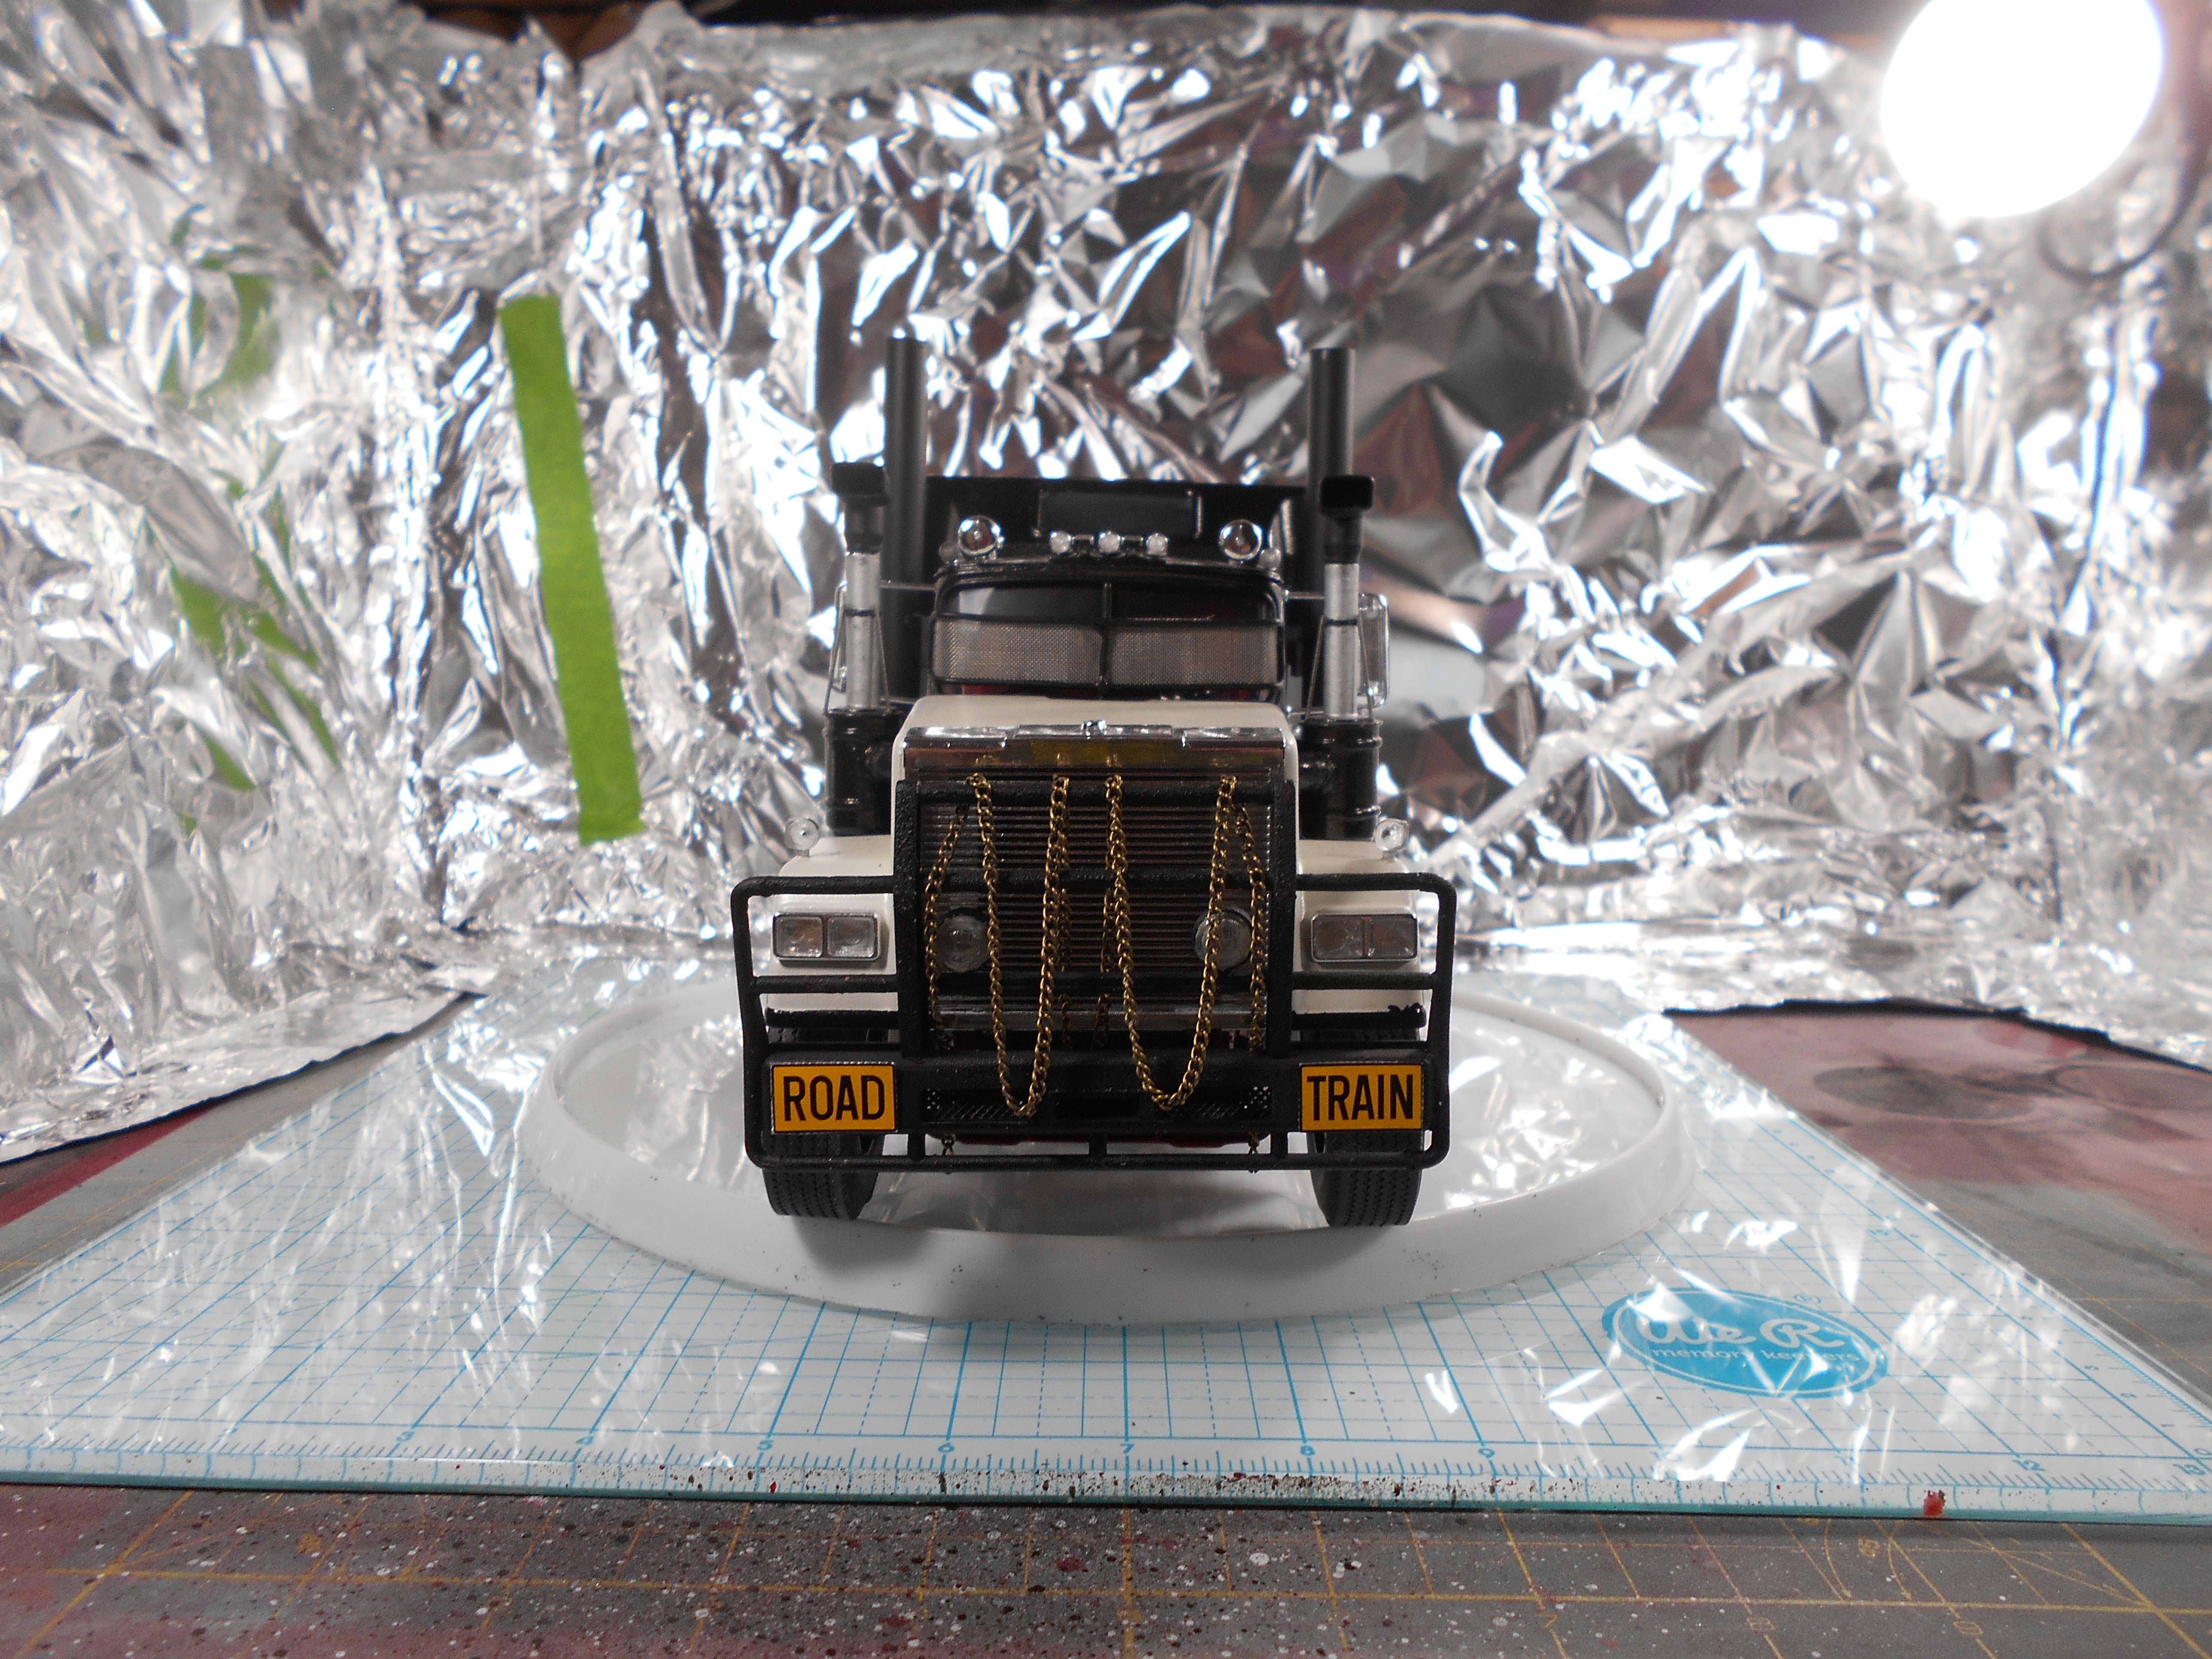
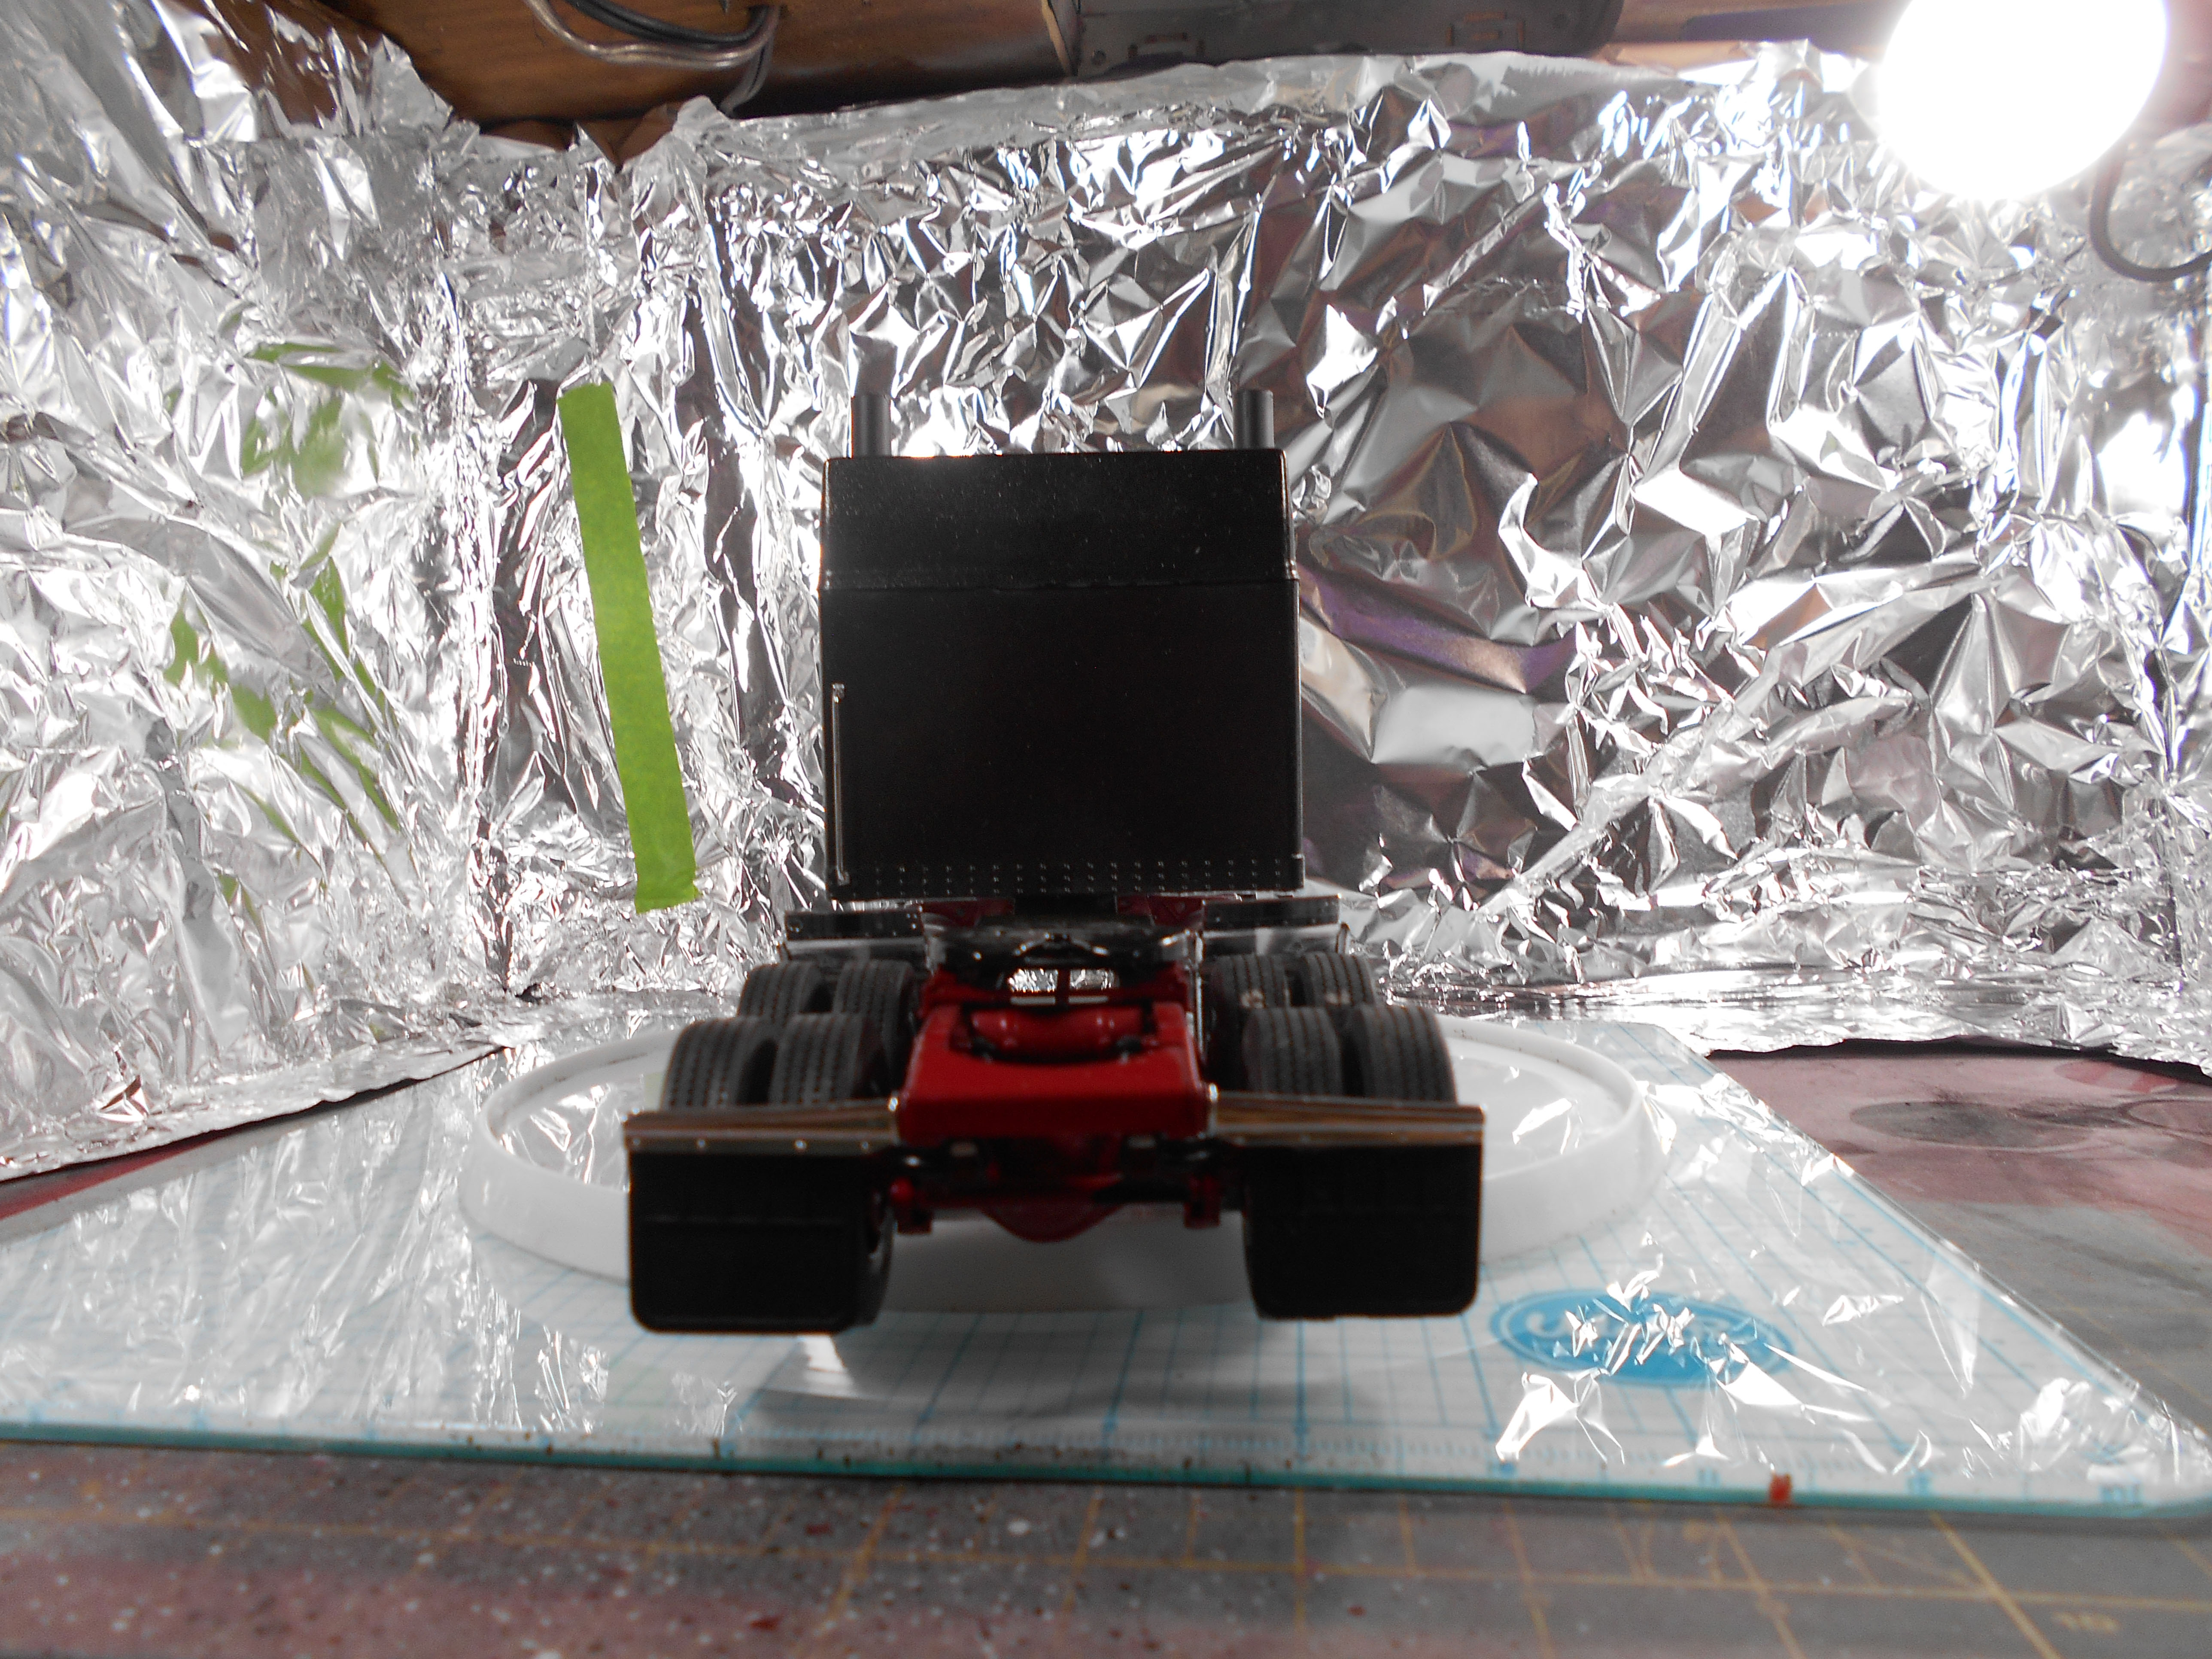
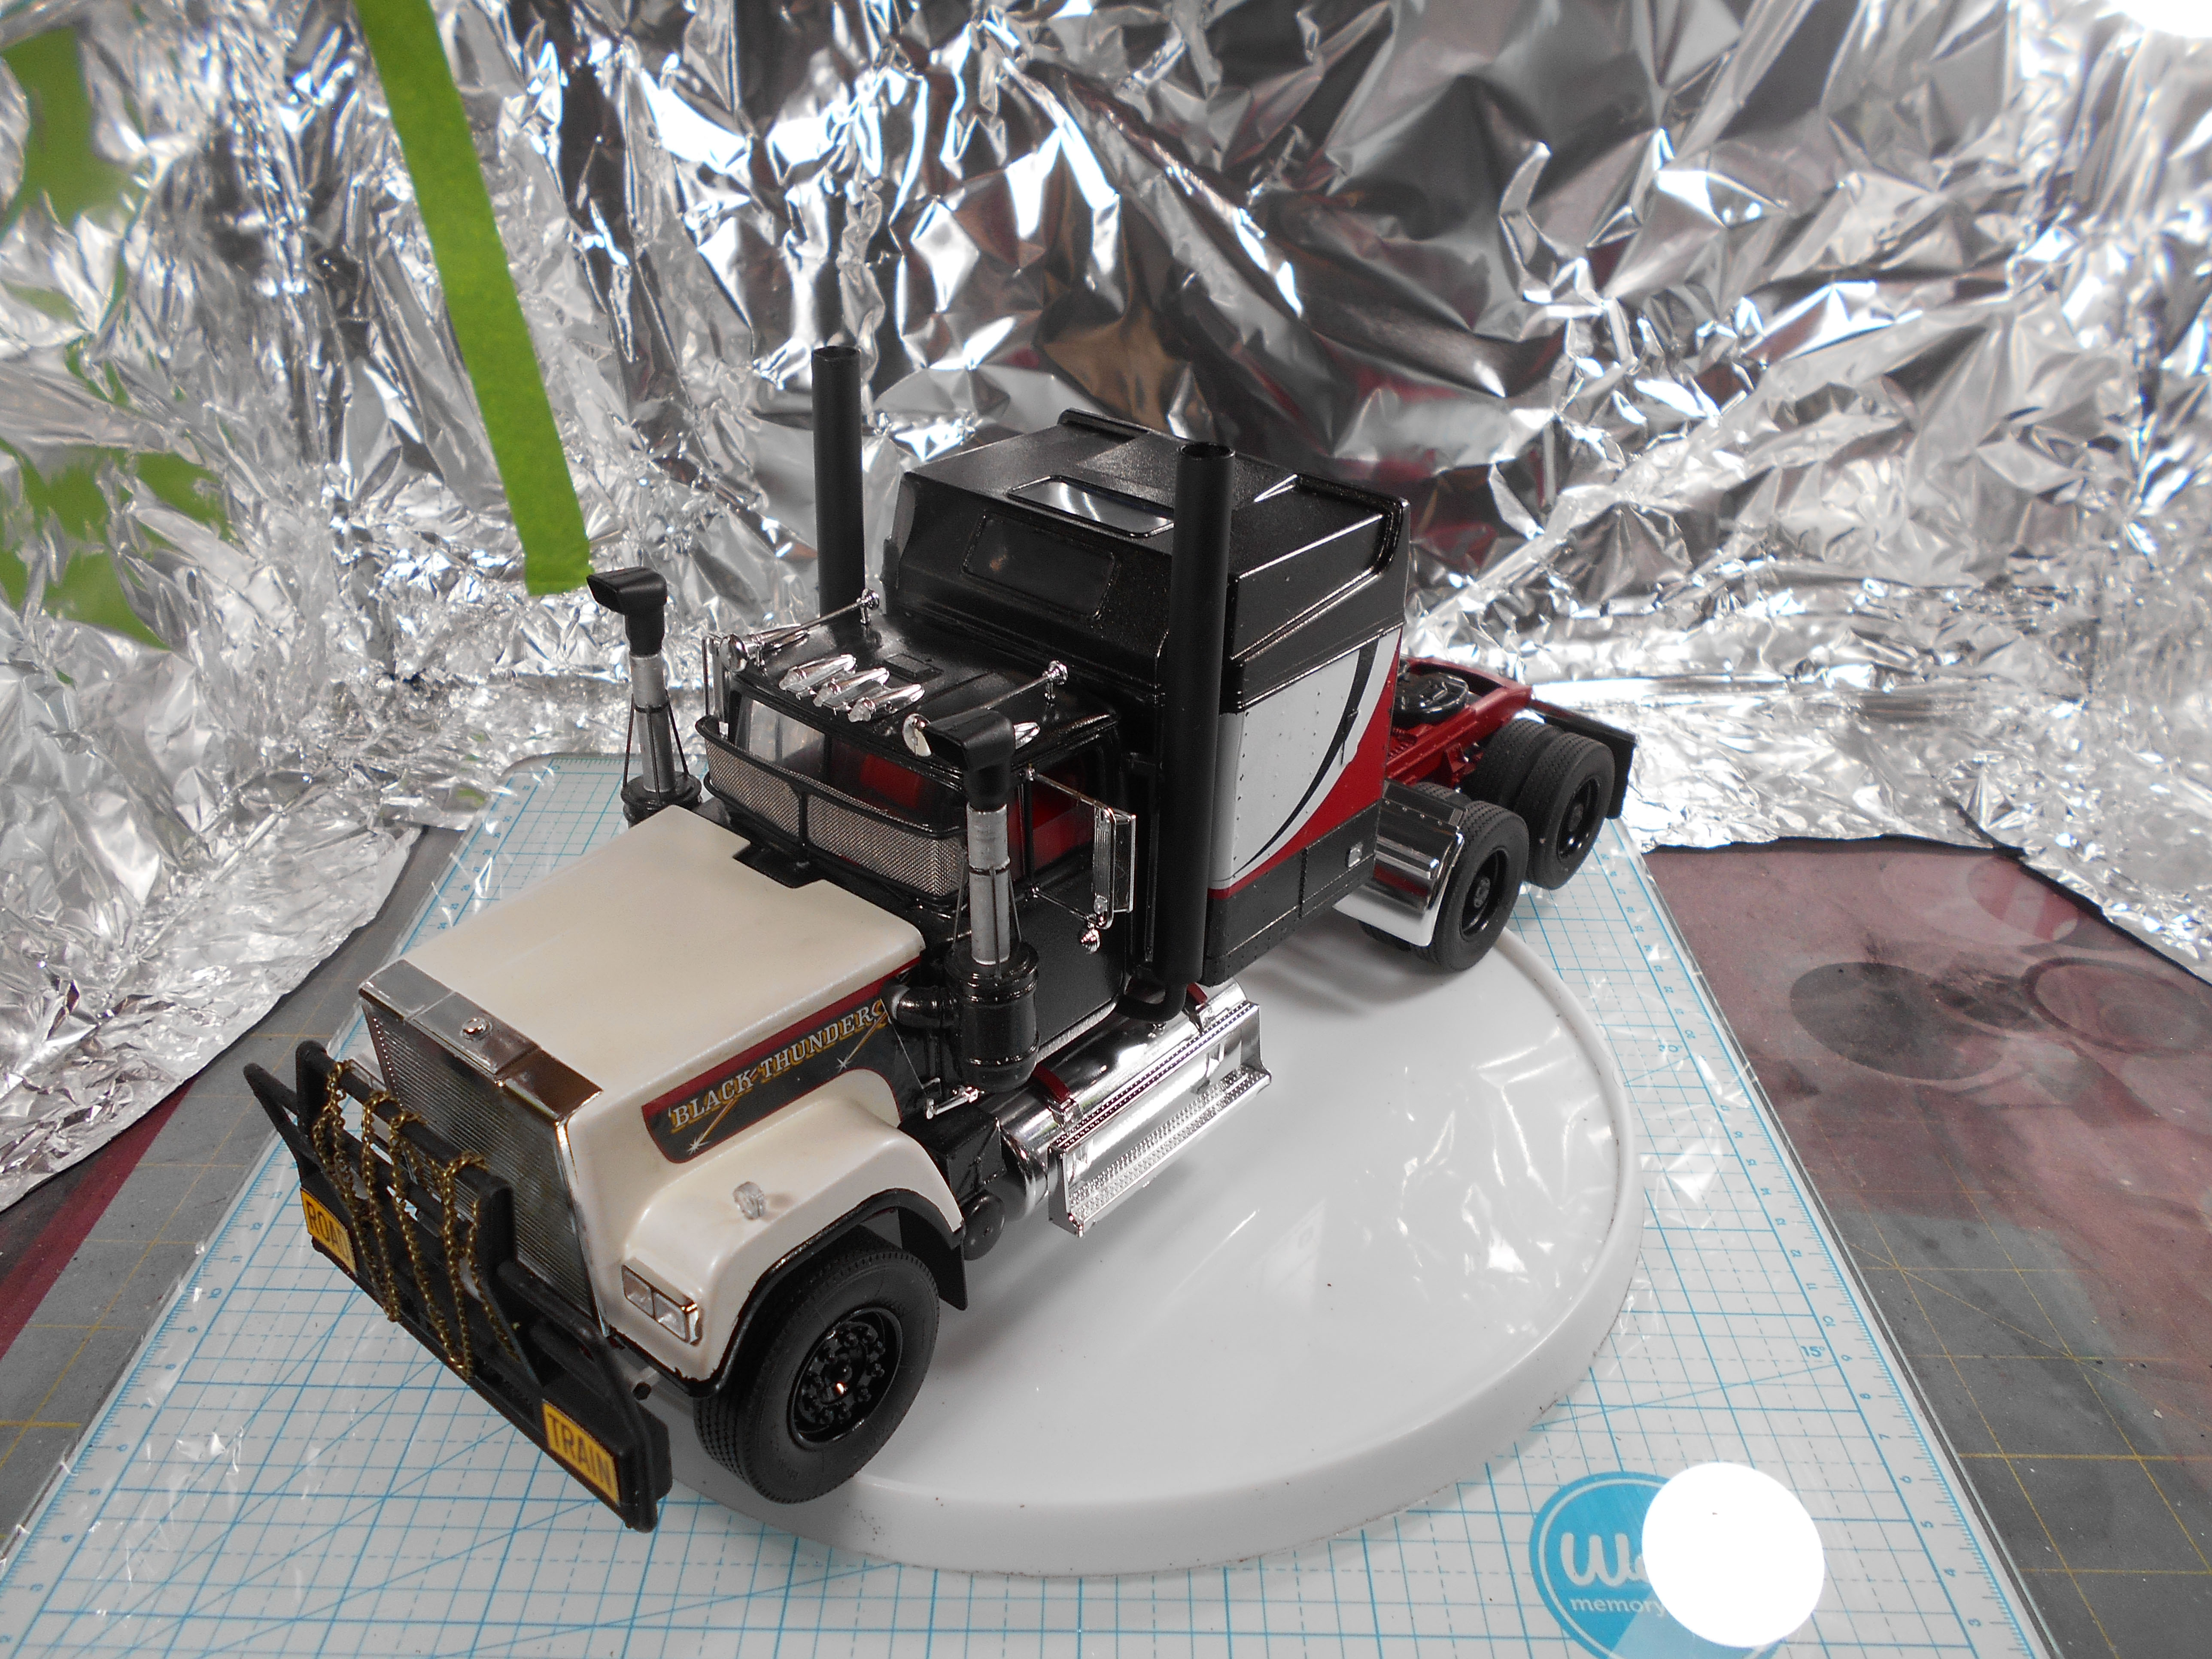
Mack Superliner Black Thunder
Conway1979 replied to Conway1979's topic in Model Trucks: Big Rigs and Heavy Equipment
Thanks for that link Ken, pictures are up. -
Mack Superliner Black Thunder
Conway1979 replied to Conway1979's topic in Model Trucks: Big Rigs and Heavy Equipment
Looks like Photobucket wants me to upgrade, I'll get it figured out and get them up. -
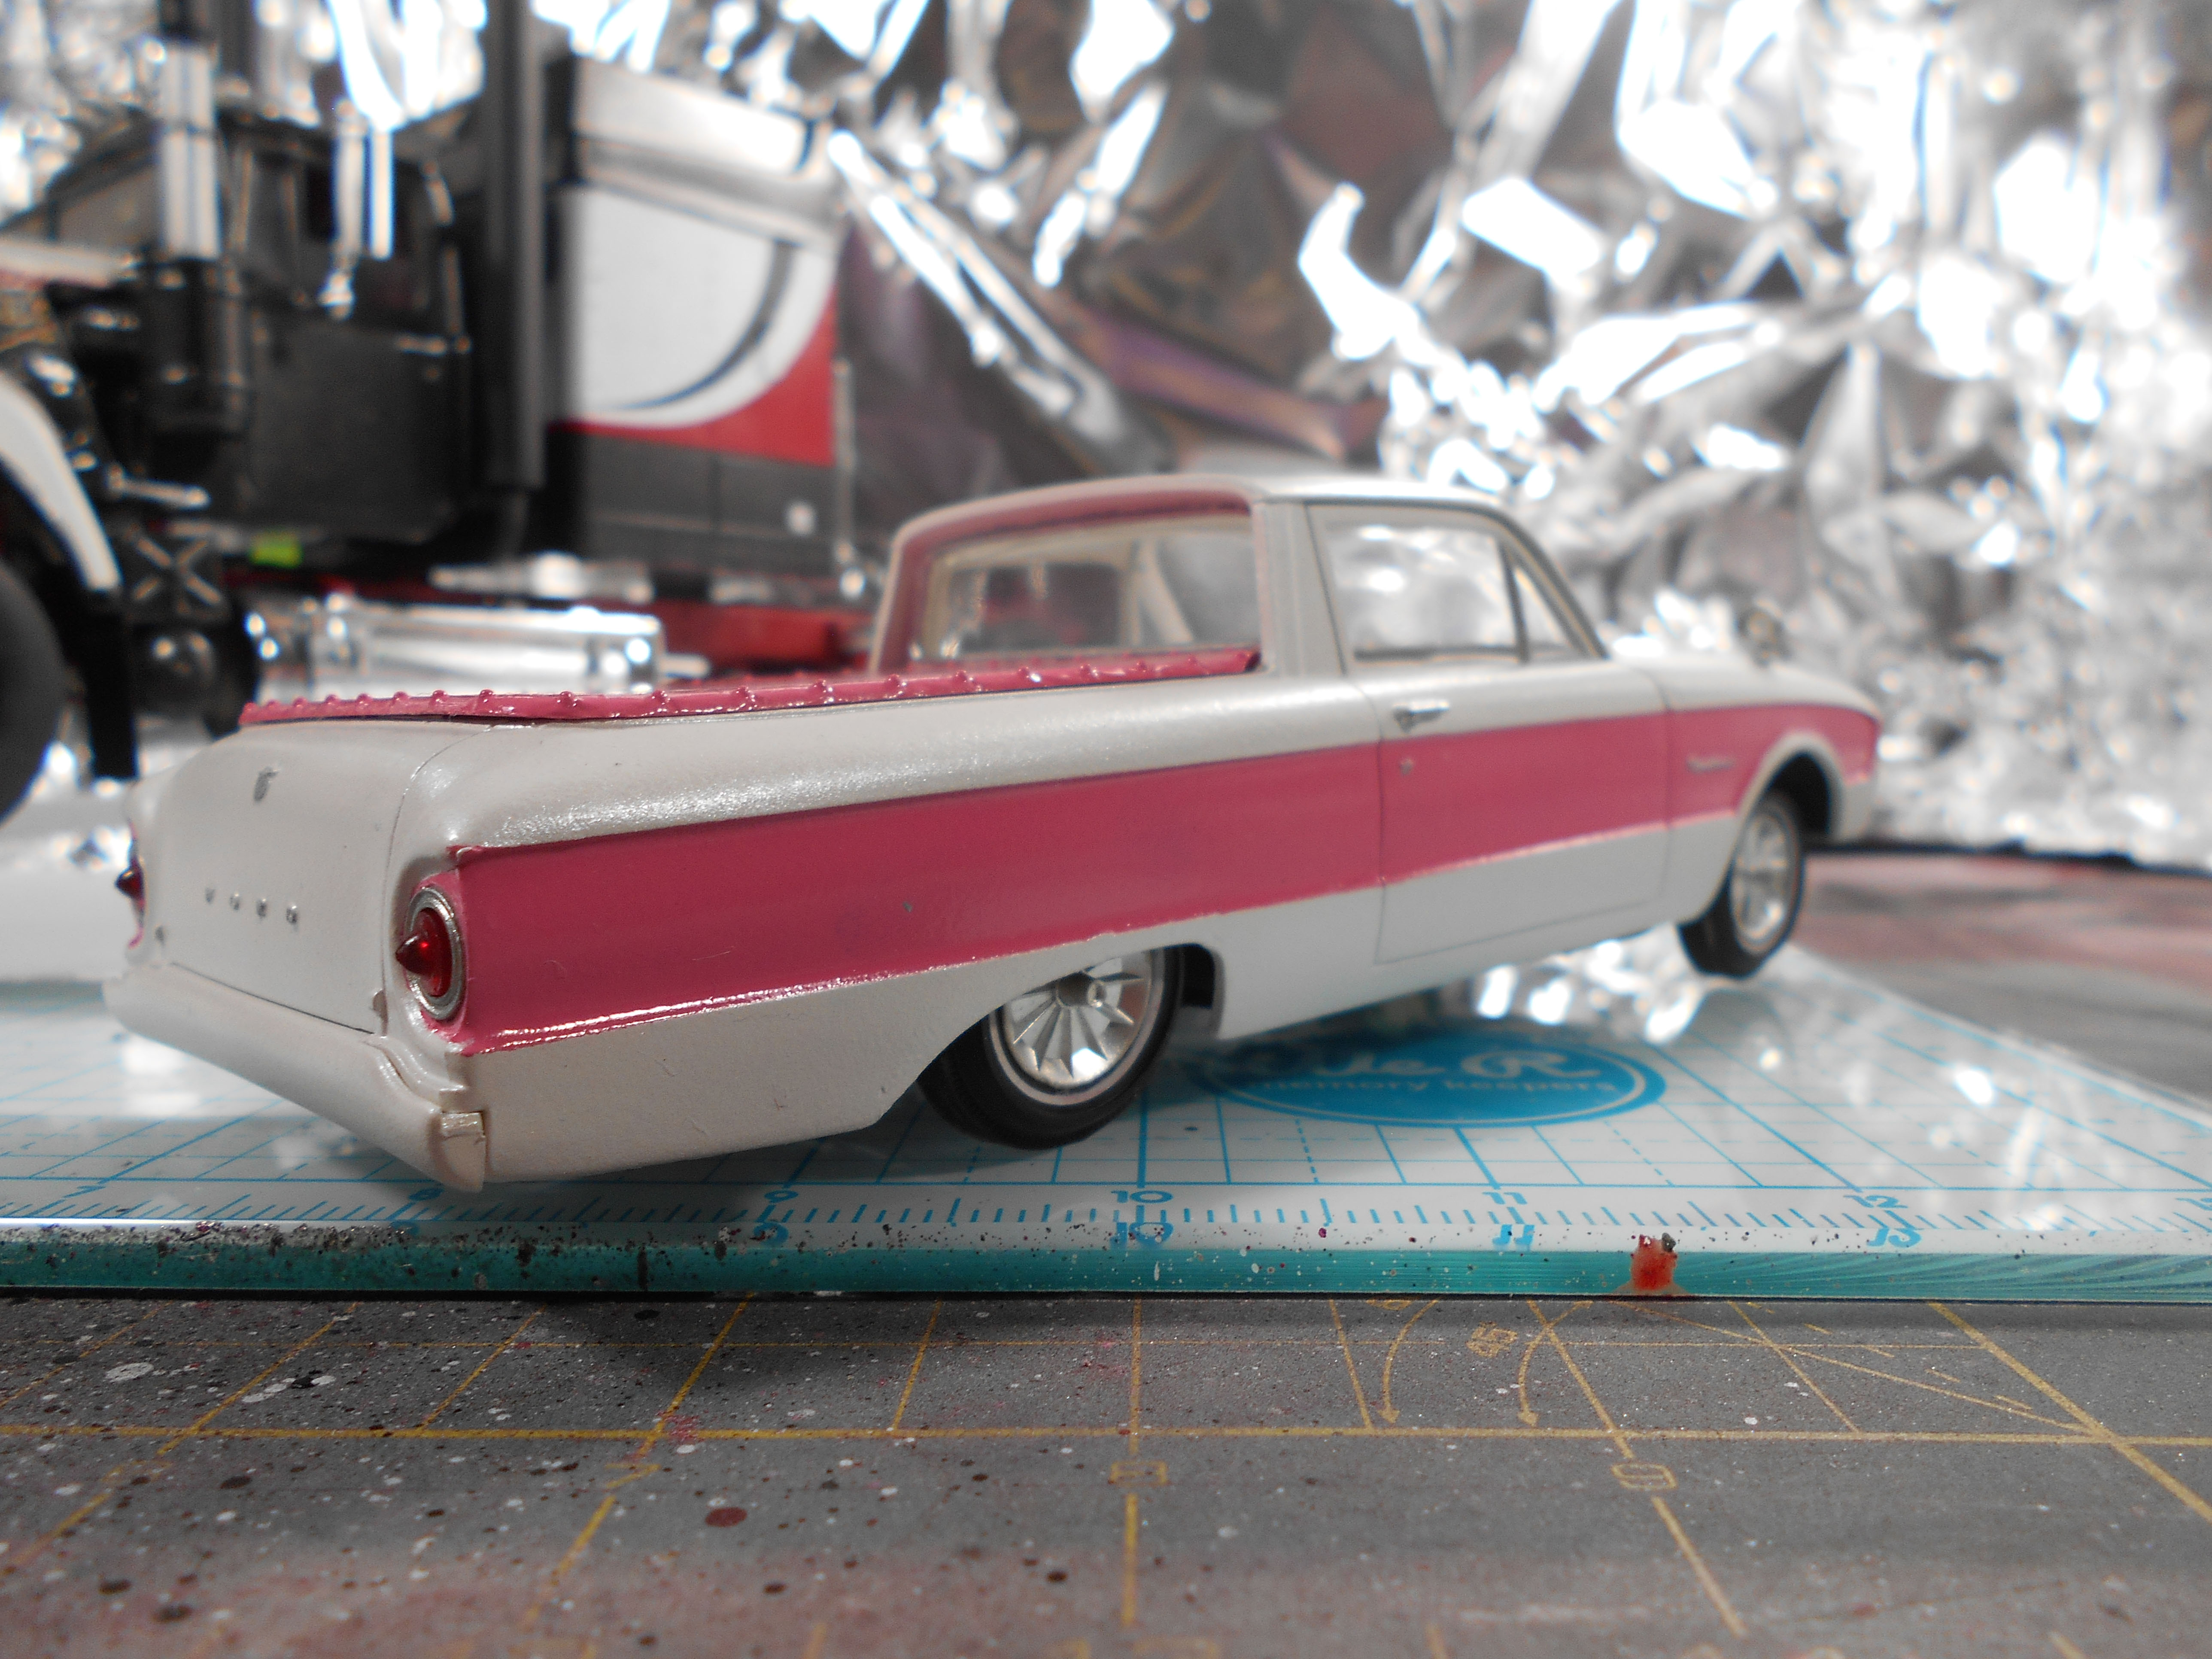
I finished this one up recently, may come back a little later and weather it up. Also restored a 1961 Ranchero to break up the build a little bit, I just tried to keep this one a little classy. Enjoy.

-
Mack Superliner Rebuild
Conway1979 replied to Conway1979's topic in WIP: Model Trucks: Big Rigs and Heavy Equipment
Thanks gator, I pretty much have it done. It is under the glass now. -
Mack Superliner Rebuild
Conway1979 replied to Conway1979's topic in WIP: Model Trucks: Big Rigs and Heavy Equipment
Thanks guys, didn't do everything I wanted to try, but so far I like it. -
Mack Superliner Rebuild
Conway1979 replied to Conway1979's topic in WIP: Model Trucks: Big Rigs and Heavy Equipment
It has been a little bit, but I have a little more completed on the truck. Decals were a pain, but that just might be from them being so old. I think they will blend in a little better after I brush some thinned out paint or chalk and water on it to dirty it up a little. I'm also going to brush on some dry chalk to dirty inside the cab too. -
Mack Superliner Rebuild
Conway1979 replied to Conway1979's topic in WIP: Model Trucks: Big Rigs and Heavy Equipment
Thanks Rich, after I put the picture up here. I started messing with the fuel tank, the liquid tape will make the plastic soft, as it eats into it a little from the solvents. Just something to be aware of. But this could also be the type of tape I was using, hopefully the flex seal is not as harsh. -
Mack Superliner Rebuild
Conway1979 replied to Conway1979's topic in WIP: Model Trucks: Big Rigs and Heavy Equipment
Thanks for the info Rich, showing a few more things I've done on the truck. I think the soundproofing came out pretty decent on this, I'm still going to use some aluminum tape to cover the seam line up between the bottom of the cab and the firewall. I did realize when I did my flocking, I should have done the detail work first, then flocked. Make sure to do that next time. The dash cap is going to be painted red, and I still need to add the gauges to the dash. I used some rubber tape to simulate the rubber gasket between the cab and the sleeper, needs a little trim so the cab and sleeper line up better. I think this will work fine for that portion. Just some testing on the fuel tank to try and make tank covers, I dipped it in some liquid rubber electrical tape. I'm going to try some flex seal next time to see if I can avoid the air bubbles that this one got, at least it can be peeled off and redo it. -
Mack Superliner Rebuild
Conway1979 replied to Conway1979's topic in WIP: Model Trucks: Big Rigs and Heavy Equipment
Thanks for the compliments guys. So I did some painting on the cab today, it was going well until I started on the upper portion of the cab. After I laid down the first coat from the top, I noticed on the cowl and the top part of the tunnel to head to the sleeper, the paint started to wrinkle. Of course I got impatient. Good thing is, it was just those two spots. So a question for you all, I'm not a truck driver, so I don't really know the answer. I just always liked trucks and wanted to get pretty close to a real one. The section between the cab and the sleeper, is that a solid piece, or is it a rubber donut gasket? I have some heat shrink I was going to cut and wrap the outside of the tunnel to the sleeper so it can mimic a rubber look, if it is supposed to be rubber. Another question is, for the cowl. I was thinking of making a non skid type of paste out of talcum powder and black paint, to place on the cowl. My thinking was if for some reason the marker lights on the top of the cab or something up there needed to be attended to, the driver wont slip and fall on his/her butt. Another thought is to paint the cowl and the top of the hood a satin black. Opinions would be appreciated, I'm going to give the paint a few days to cure so I don't mess up the good portions of it. I already did a mall amount of wet sanding to it, and kind of started to get the mentioned ideas. -
Mack Superliner Rebuild
Conway1979 replied to Conway1979's topic in WIP: Model Trucks: Big Rigs and Heavy Equipment
Here is some work I have done for the air cleaner brackets, the snap Kenworth brackets worked out pretty good I think after a couple alterations. A few more adjustments and they should sit pretty straight once finally mounted. I know the tape kinda takes away from it a little. -
Mack Superliner Rebuild
Conway1979 replied to Conway1979's topic in WIP: Model Trucks: Big Rigs and Heavy Equipment
Here is a couple of pics with the hood, cab, and the sleeper mocked up still waiting to be worked on. You can also see my attempt to making a frame for a new windshield screen, I still need to cut the lower portion and solder in the center post. I am still looking into fabricating air cleaner mounts for the sides of the cab since I am having issues registering with Auslowe to order their brackets. Maybe some brackets from the snap Kenworth kit might work, now to see if I have a couple. -
Mack Superliner Rebuild
Conway1979 replied to Conway1979's topic in WIP: Model Trucks: Big Rigs and Heavy Equipment
Thanks all, I have been trying to load up a couple more pictures with the hood, cab and sleeper mocked up, but I am having some trouble getting them uploaded. Might be too big. -
Mack Superliner Rebuild
Conway1979 posted a topic in WIP: Model Trucks: Big Rigs and Heavy Equipment
I bought this one a little while ago and started redoing it last month. The original build wasn't the greatest, so this is what I've gotten done so far. I still plan on going back through with some thinned out black to weather a little more on top of the chalk dust I already applied. I still need to finish building the windshield screen and patch the missing pieces from the sleeper. Wish I could have saved the rivets, but with the paint scheme I am planning on doing. I think it will be good. I plan to mimic the original decals for the sleeper but have the paint wrap over the top and the back of the sleeper. Luckily I was able to find replacement decals online. I am also looking to use some black felt covered with aluminum foil to simulate an insulation/sound dampener for the front of the firewall, and under the cab and sleeper. One other thing I would like to try is to use some vinyl I have and make some tank covers for the fuel tanks, I'll have to see how that goes.
-
Spray Paint Fogging
Conway1979 replied to Conway1979's topic in Model Building Questions and Answers
That would explain the blushing issue, I used to live in CA and didn't have this problem there. OH, definitely has humidity. -
So, I am trying to figure out why my spray paint is fogging up after application. I just bought it yesterday from Auto Zone, Dupli-color perfect match. I have shaken the can for several minutes and hold the can back about 10 inches, the temperature is about 75 indoors where I am spraying. I have used the paint before when respraying the mirrors on my car, with no issue. Just curious who has run into this before and what did you do to solve the problem? The last time I had this issue, I think it was because it was too cold, but 75 degrees shouldn't be a problem. The only other thing I can think of is the propellant in the can is causing the issue. Thoughts would be great.
-
Western Star Log Hauler
Conway1979 replied to yh70's topic in Model Trucks: Big Rigs and Heavy Equipment
Nice looking truck, now I need to find some of the photo etch like whats on the grill. -
I saw these during the Woodward run up in Pontiac MI last month. Kinda cool to see them in person. Be cool to have a model of this Western Star, maybe in the future.
-
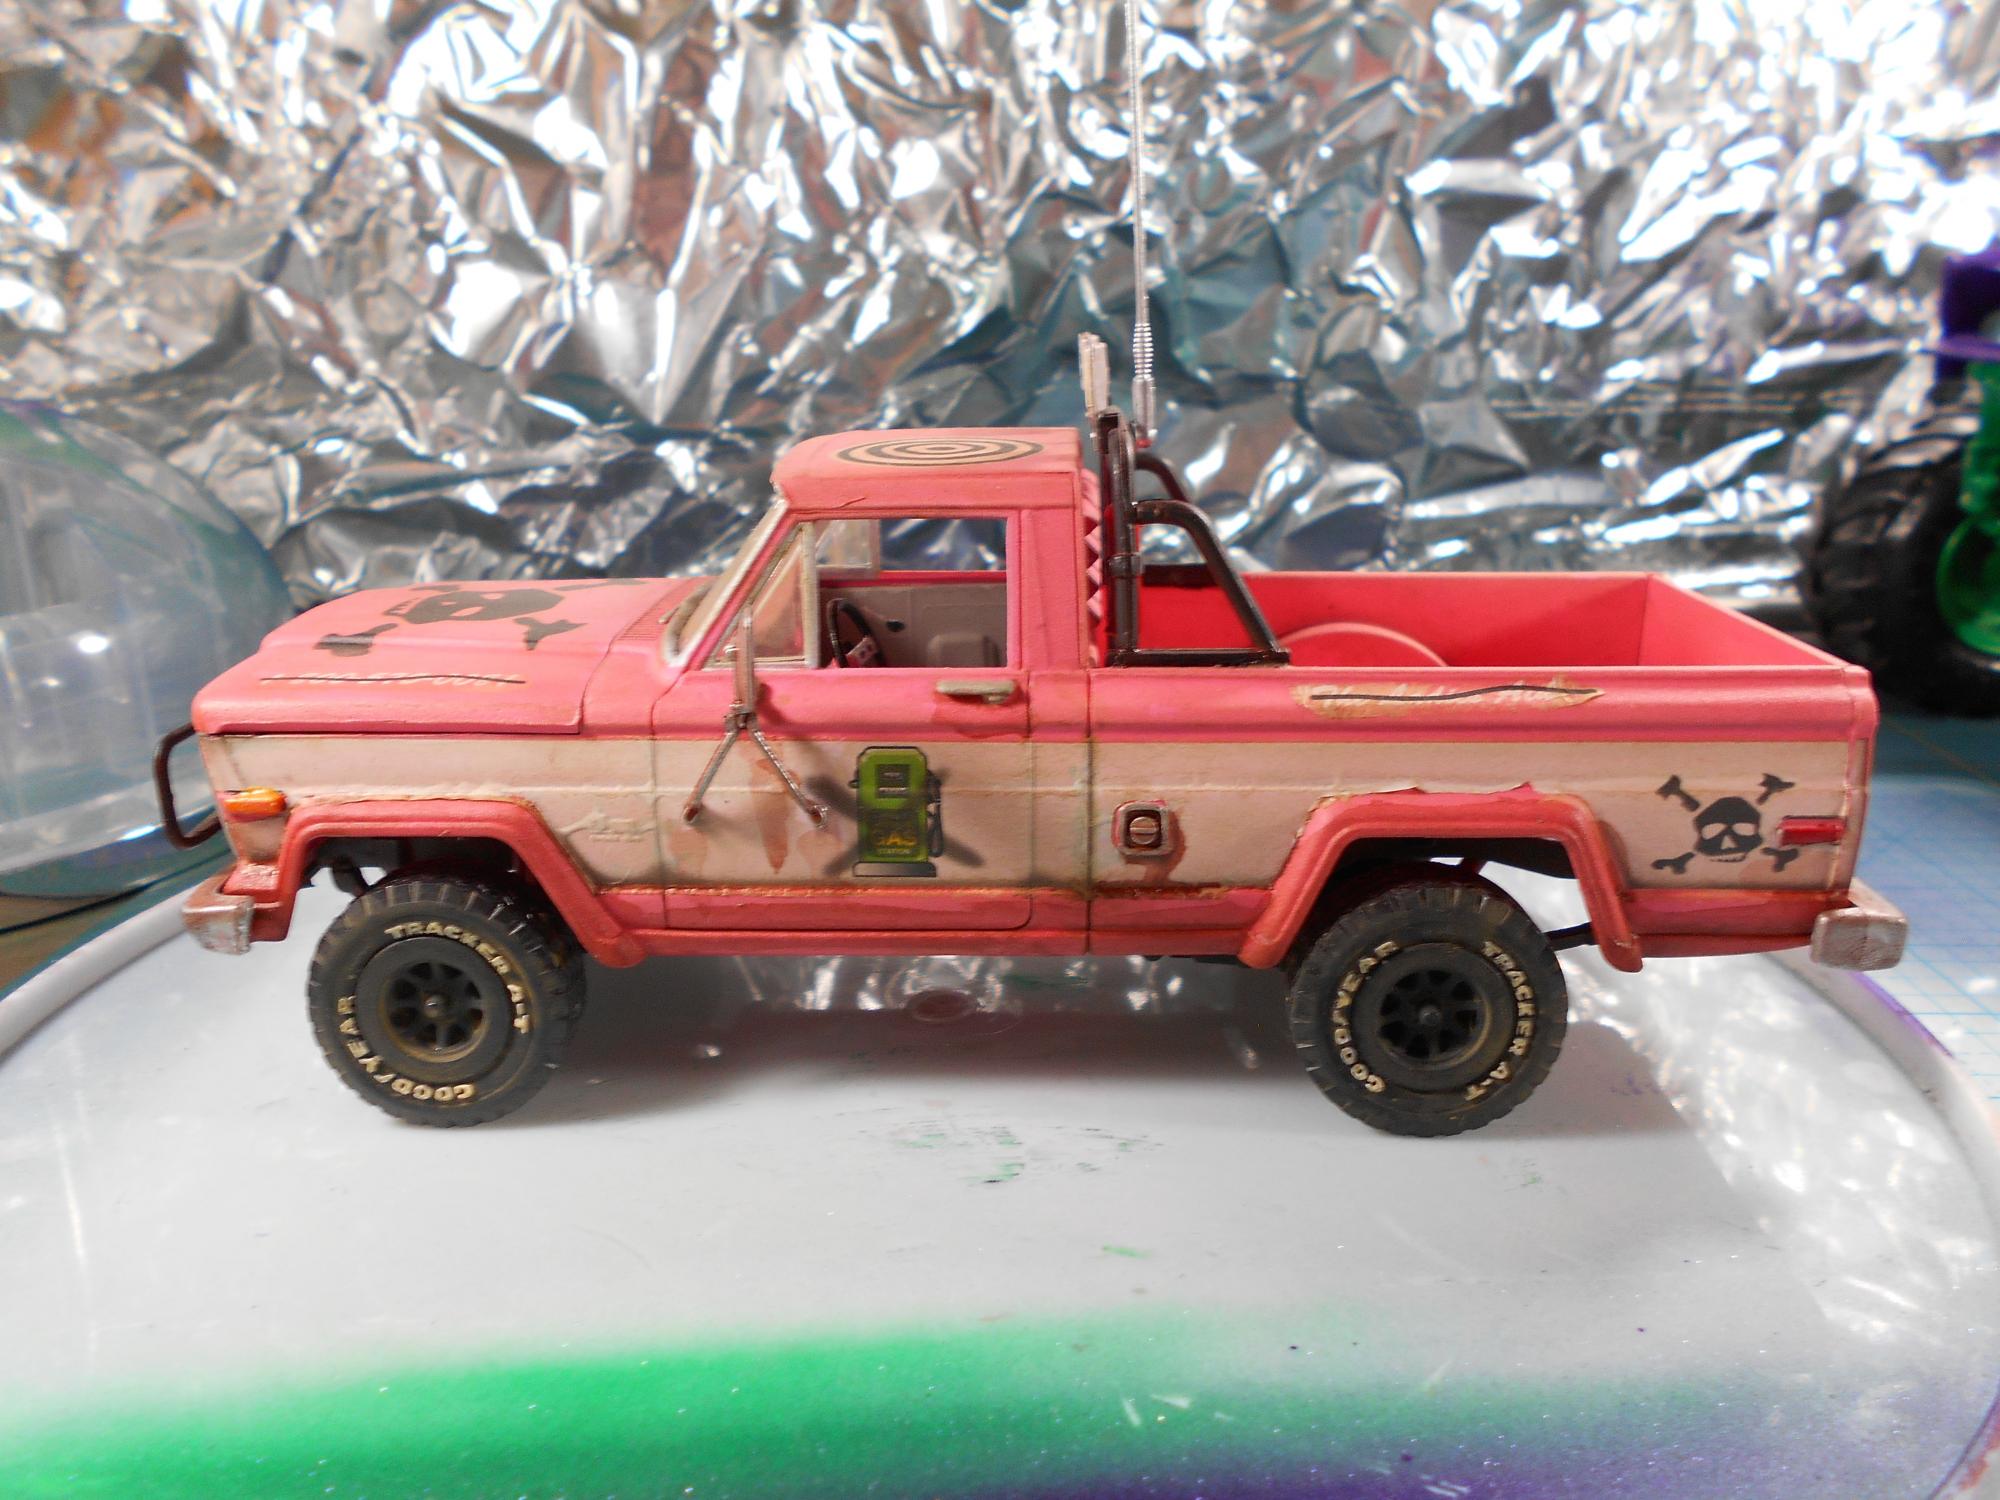
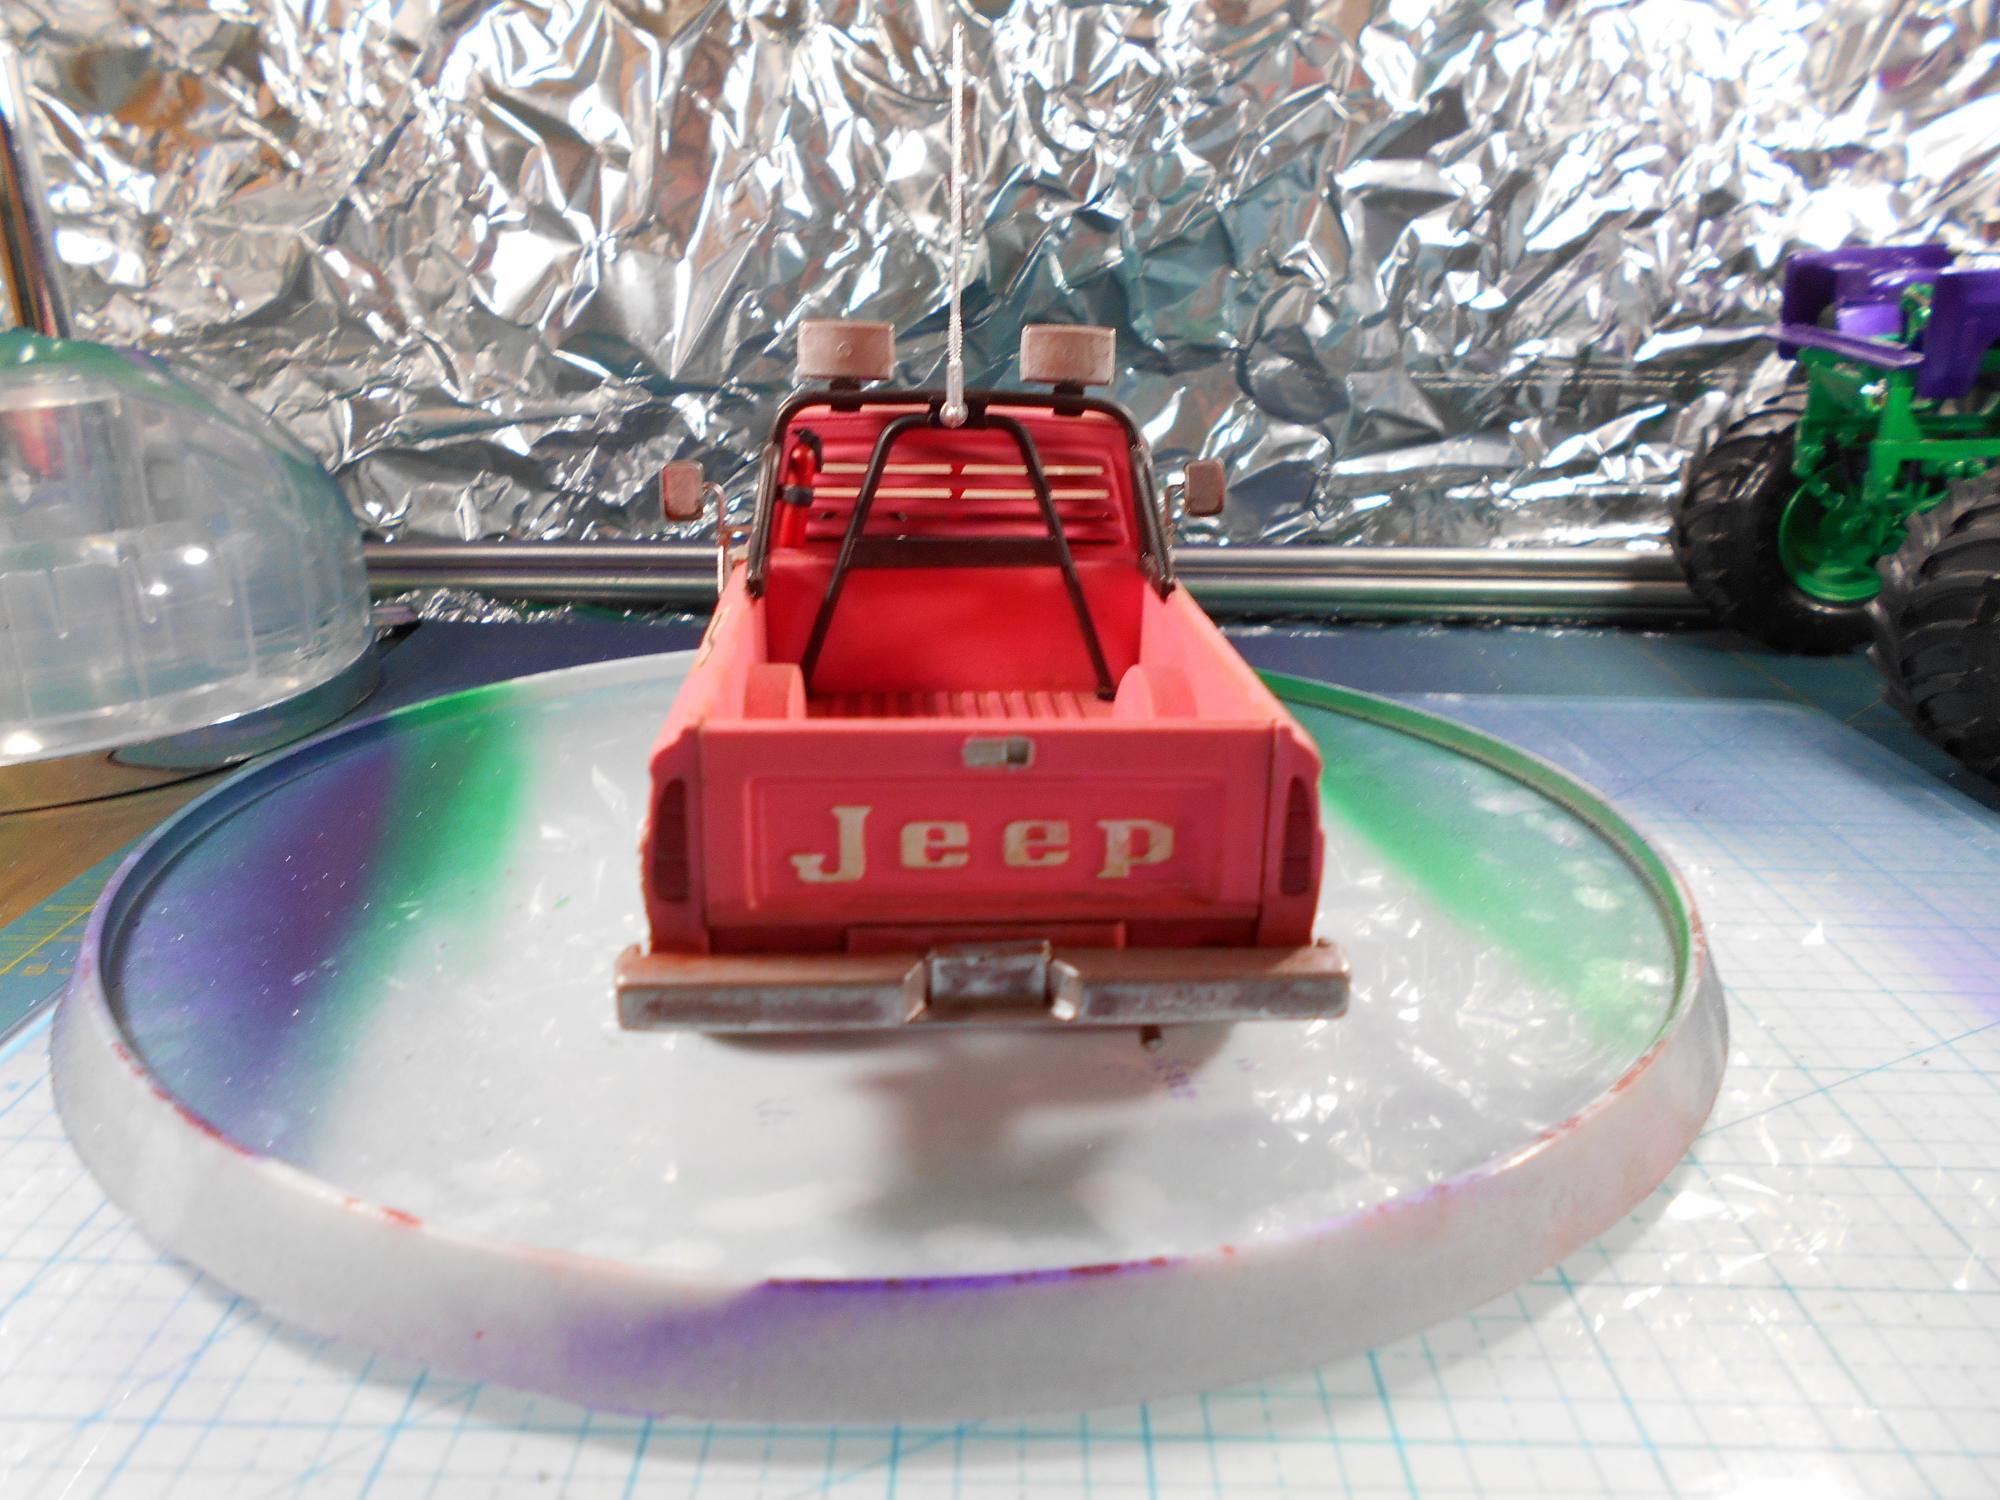
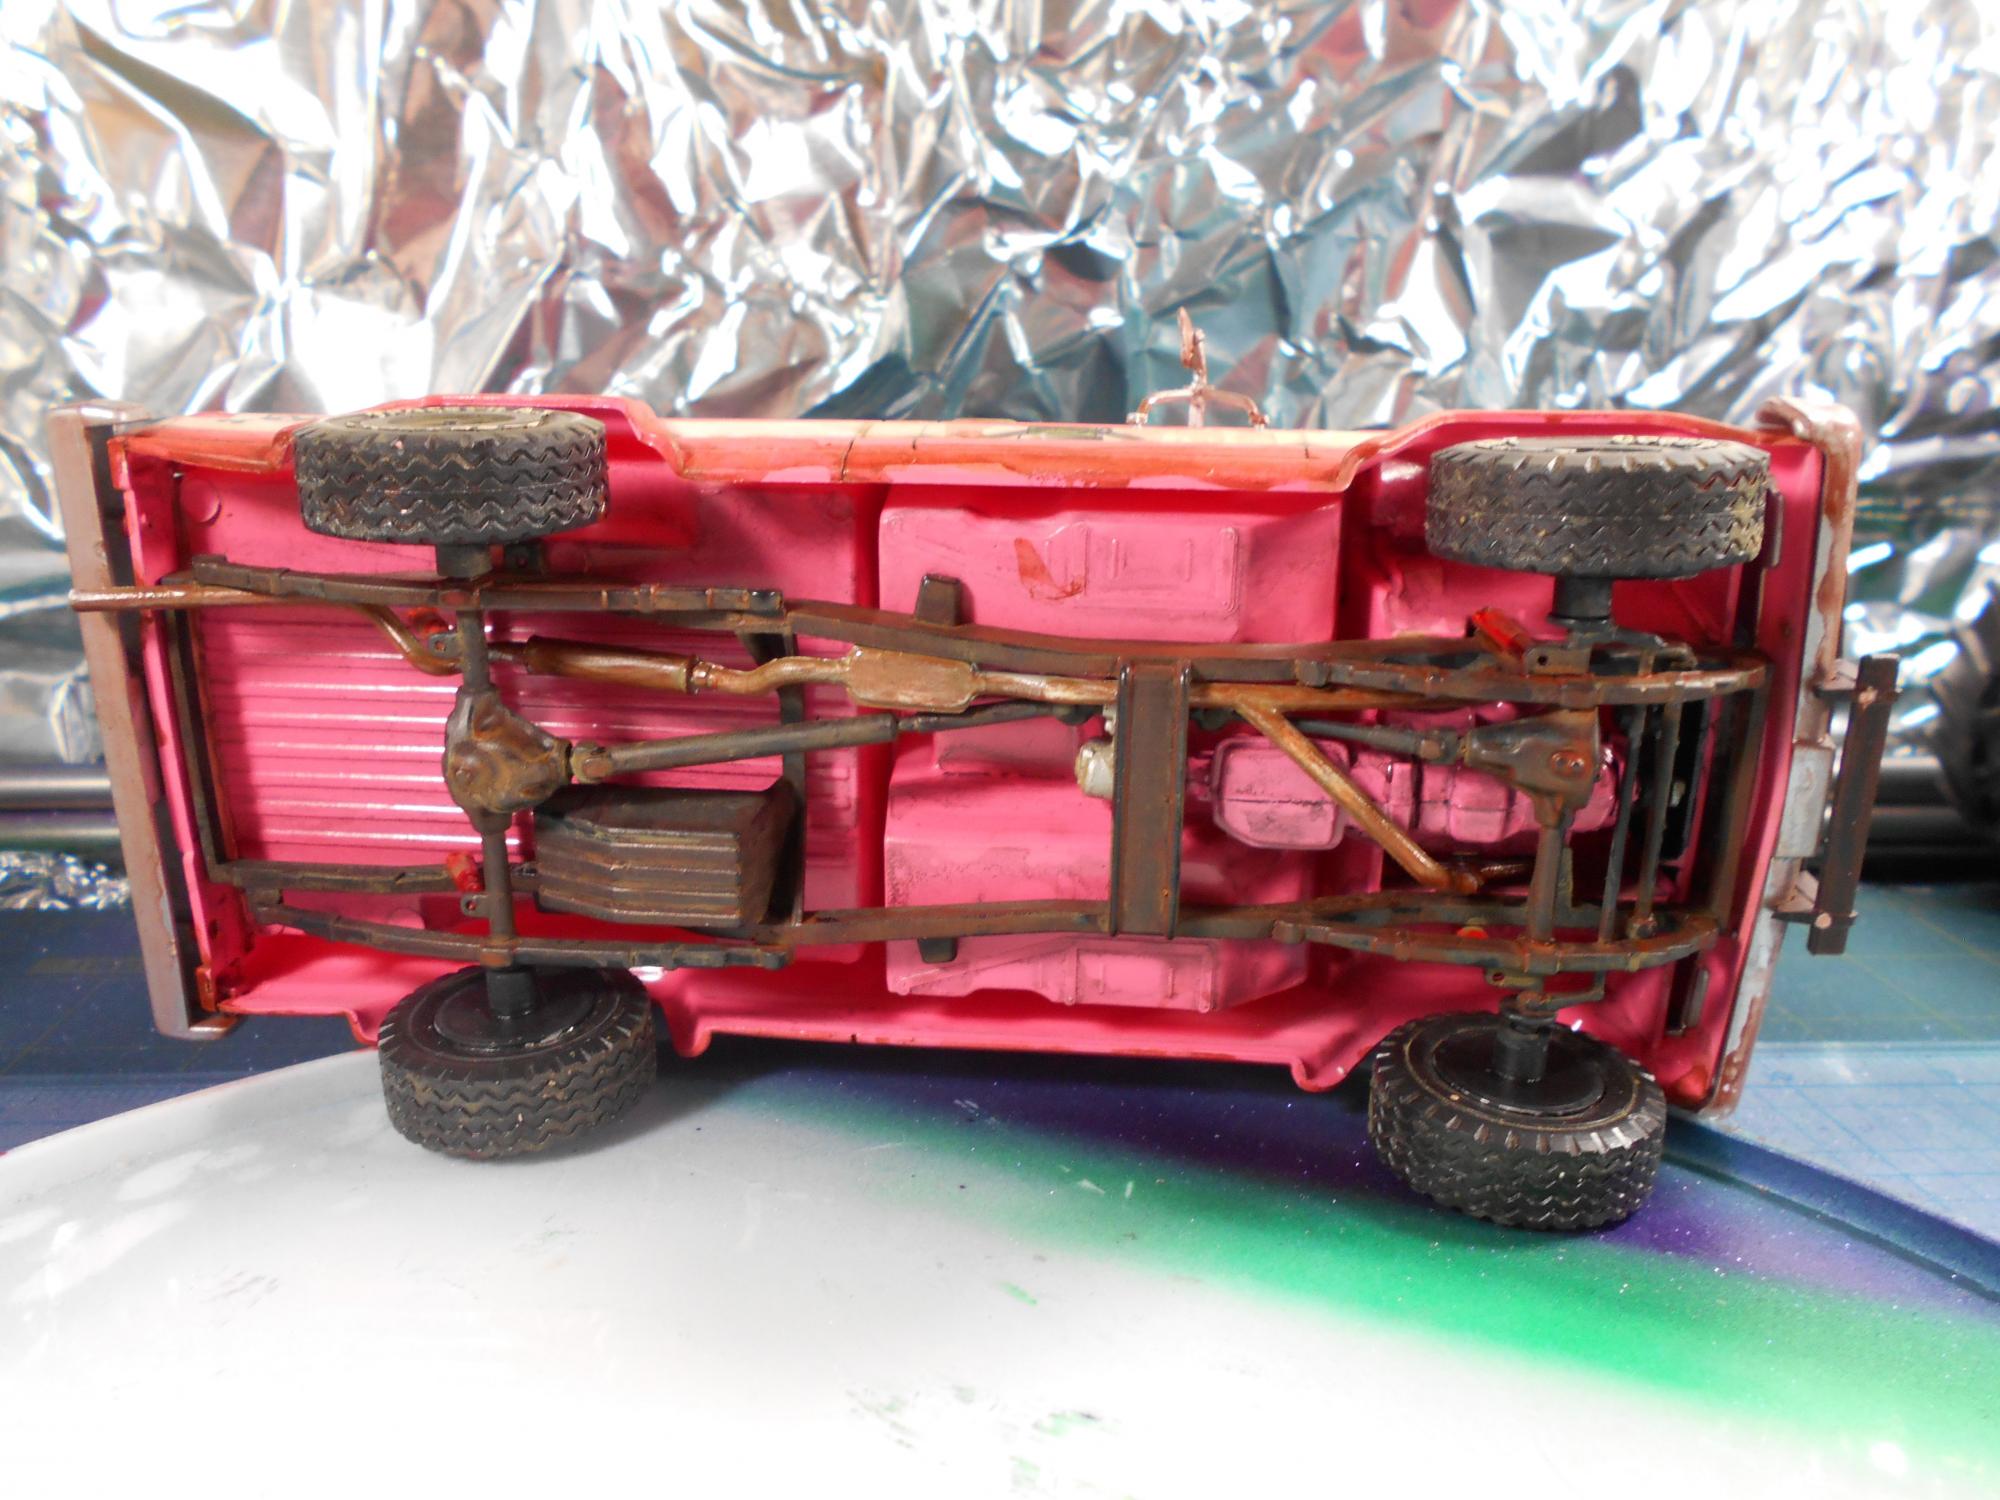
Pink Poison Done
Conway1979 replied to Conway1979's topic in Model Trucks: Pickups, Vans, SUVs, Light Commercial
I just used extremely thinned out brown acrylic paint, and went over a couple of times. I didn't like the way the decals looked for the windows. -
Pink Poison Done
Conway1979 replied to Conway1979's topic in Model Trucks: Pickups, Vans, SUVs, Light Commercial
Thanks Jesse, I lucked out on it as it was partially built. I have been getting some junkyard stuff so I can tear it down and work on rebuilding them. I'm slowly working on learning how to do some of the detail stuff so they can look a little more real and repair the other components. This is really the first time in 18 years that I have gotten the time to do more modeling. -
Pink Poison Done
Conway1979 replied to Conway1979's topic in Model Trucks: Pickups, Vans, SUVs, Light Commercial
I never even noticed that Dmitry, that's awesome. -
Pink Poison Done
Conway1979 replied to Conway1979's topic in Model Trucks: Pickups, Vans, SUVs, Light Commercial
Thanks Mark, all I did was use the Testors chrome spray paint, and thinned out some Testors rust. I can never get the chrome spray to look right when I use it, it has always looked weathered for me out of the can. How are things going? I kinda still wish I was on the ship. This desk job is so slow, but at least I get to work more on some models. Next year, that retirement letter is getting dropped though. -
Volvo VN670 Warrior
Conway1979 replied to Conway1979's topic in Model Trucks: Big Rigs and Heavy Equipment
This was a Revell of Germany kit for the trailer, I'm looking to pair the truck up with an Italeri longhorn trailer when I can find one that isn't too crazy high on a price. -
Volvo VN670 Warrior
Conway1979 replied to Conway1979's topic in Model Trucks: Big Rigs and Heavy Equipment
Thanks for the compliments, the trailer measures out to 17", so scaled up it should be around 35'. seems kinda short to me. -
This was my first attempt at trying to make something look weathered, I don't think it came out too bad. Have to get the Alley Rat done to go with it now.