RestoModGuy
-
Posts
632 -
Joined
-
Last visited
Content Type
Profiles
Forums
Events
Gallery
Everything posted by RestoModGuy
-
I've ordered twice from Jeremy and the first time, my error in NOT reading his very CLEARLY posted international shipping. He was very nice in response to me and included his shipping policy, which I felt bad after him having to take time to show me what I should have checked on my own when I placed my order. He makes all the parts for the two-weeks of orders he receives, sends all as a bunch to an associate in the US, who then creates all the separate shipments to us US folks. All that can take 4-7 weeks actually, bear in mind the Holidays too, he's not a machine working everyday. Understand the reason for all this is to keep the shipping cost way down for us. If he were to ship to each of us from Canada to the US it could cost $25-$35 each order. This method he has works best, just order well in advance for your projects. His castings are awesome and very high-quality, well worth the wait.
-
Stunning workmanship
-
1965 Corvette Stingray 2016 Revell RoG issue
RestoModGuy replied to The Creative Explorer's topic in Model Cars
Stunning, well done -
Wow! Love it! perfect stance and overall finish and build looks great
-
Well thanks everyone to comment. I appreciate the feedback and yes, it's my build and this is my build style although I have done closer to stock builds in the past as tribute cars. One example is a 67 Grand Prix convertible tribute my dad owned from new until the late 90's. He did take off the factory 8-lugs and replaced with an American Racing Western wheel with whitewalls, which I personally think really looked great on that car

-
One of my first builds after a 40 year hitus about 2 years ago. I know many of you will not appreciate that I didn't build this with stock wheels, my build style is more custom than stock, sorry if this offends the stock purists, with larger custom wheels.
-
I love this design and you did an outstanding job with this. I built the AMT version a couple of years ago and struggled with fitment issues, may need to pick up a Tamiya version
-
Wow! that is simply awesome and just like it would be built as a 1:1 car. Fantastic detailing.
-
This is tuning out really nice so far.
-
Wow! Extra nice looking build, Top Shelf model
-
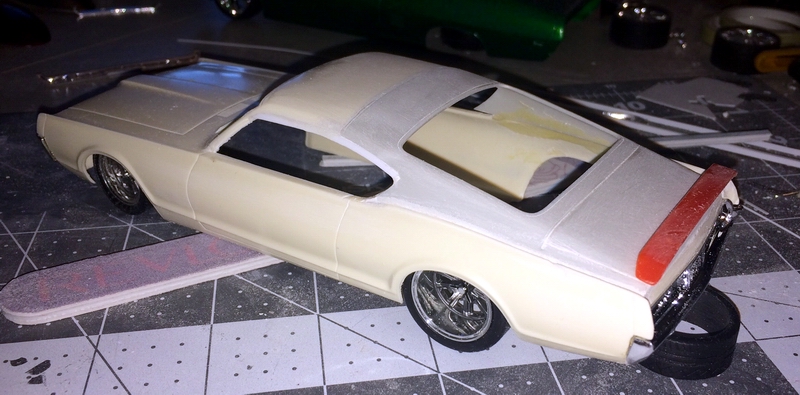
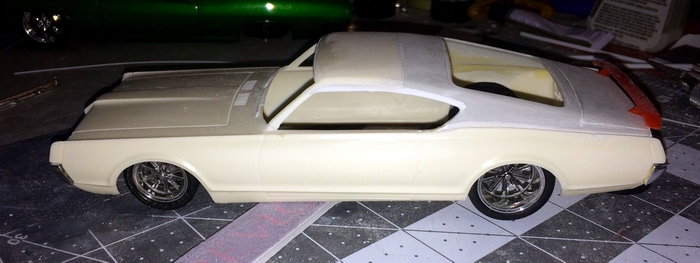
Thank you for your comments, and I agree completely, especially after spending time with this quick roof bash on the 67 Cougar. I'm not sure I'm liking how the larger wider Torino's roof sweep is sitting on the trunk area of the Cougar, it's too high and either I need to do some surgery to correct it ot find a junk-yard 67-68 mustang to transplant. I'll save the 69 Torino roof sweep and transplant to a 69 Cougar as you suggest, which is a better fit that I can tell. Look for an update of the switch-a-roo in the next few weeks. Thanks James2, No I don't have any layout pics for this one, I'll try on the regraft I'm planning on. I did a very simple layover and used tape to mark my cut lines and had some dremel grinding that could not be cut out due to the thick resin material of the backend of the Cougar. It's not easy when working with resin as you may know, its super soft and cuts and sands/files quickly.
-
That's just plain cool... I've never done a weathered finish yet, but seeing yours is pushing me to try it out. Nice work!
-
Dan, the paint job and special effects are perfectly fitted to this car. Liking this a lot. I have two of the orginal MPC release of this kit in my stash, this made me pull one out and look at it and add it to my 2017 build list. Keep posting update pics, I'm following it
-
Nice work on this build. All aspects are looking great. I am curious where the 4-Link kit is from. I see the bags of parts you showed but can't seem to find where you got them
-
Road Race/Pro Touring Cuda - Project "HELL BOY”
RestoModGuy replied to Mopar426's topic in WIP: Model Cars
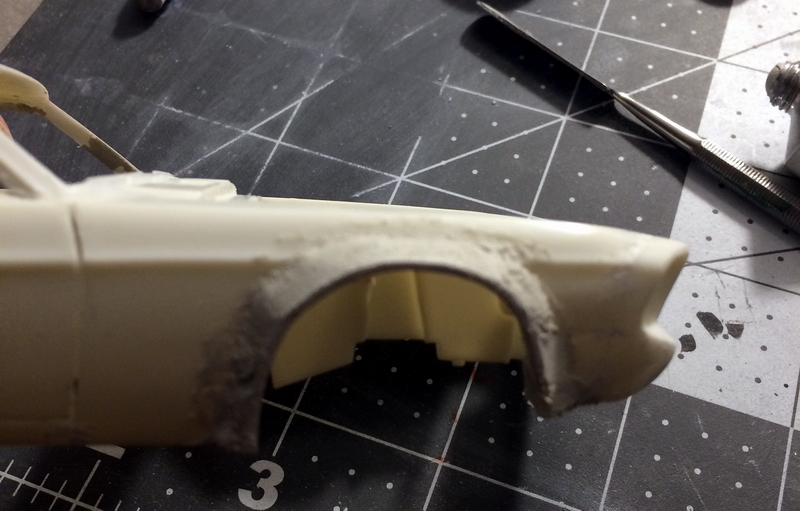
Cool, nice to know you were inspired to join the group. Here's some pics of the basic how to flare. I'm sure others have different methods, but this has worked for my builds since the 70's After you have opened the wheel wells use plastic strips glued in the rim like this. These will become the support for the "bondo" putty and can be sanded filed to create the form. Then you need liberal amount of putty, I like the Squadron White for first heavy build coats. Then with a popsickle stick or tool or even your fingers, spread it around. Don't need to be perfect or exactly even, you will want some material putty to work with to form with filing sanding. After this initial layer and forming you will need to apply another thinner coat of putty tofill in the shapes more than likely. Hope this helps
-
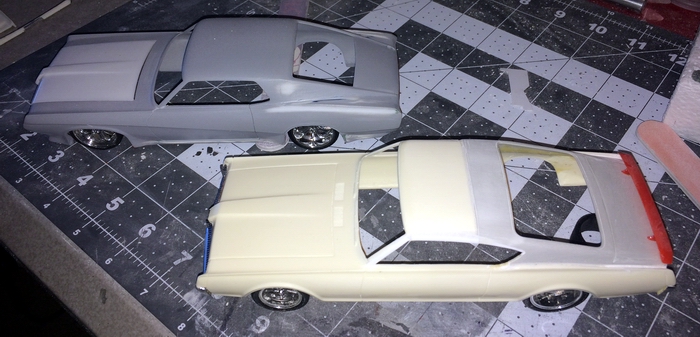
Yeah, I agree. I did a 68 Mustang roof sweep on a 70 Cougar and I think the Mustang would have looked better on the 67 Cougar and the Torino might look better on the 70 Cougar. The rear window is substantially larger of the Torino sweep as you can see next to the 68 Mustang rear window However, the reason I did the Torino on the 67 Cougar to tribute the Kaucher design I've admired. I thought about a 70 Torino sweep and I think it might look better on a 69-70 than the 67-68 Cougars You can see the green 70 Torino in the background, more of a dip line, I'll probably try that mash-up on a 69 or a 71-72 Cougar I have several of. Joe, I think your idea is great, but honestly, I don't build "stock", I'd love to see this concept done in stock though, just not my build style I know, I'm only playing with the spoiler, it's just "tacked" on. Probably not go with it, of course it all speaks what it wants as the build moves forward. Almost needs something to break the massive flat area, maybe a tail flip like 67 Shelby has. Juyst playing with it for now
-
Road Race/Pro Touring Cuda - Project "HELL BOY”
RestoModGuy replied to Mopar426's topic in WIP: Model Cars
Nice build concept and for your first model car build... impressive... To get the fat tires to sit correctly with the wide-body flares you will need to open the wheel-wells up, a lot... look at the red cCuda rendering and you'll see just how agressive you'll need to be and to modify the suspension as well for the lower stance. I did this to a Mustang I'm working on, the result will pay off.
-
so cool, nice work
-
just happened to me too... go to your My Attachments, find that at the top dropdown box at your profile name. You will need to delete pictures from old posts to make space for uploading more. I deleted almost an entire 2 pages of old pics to make file space for more
-
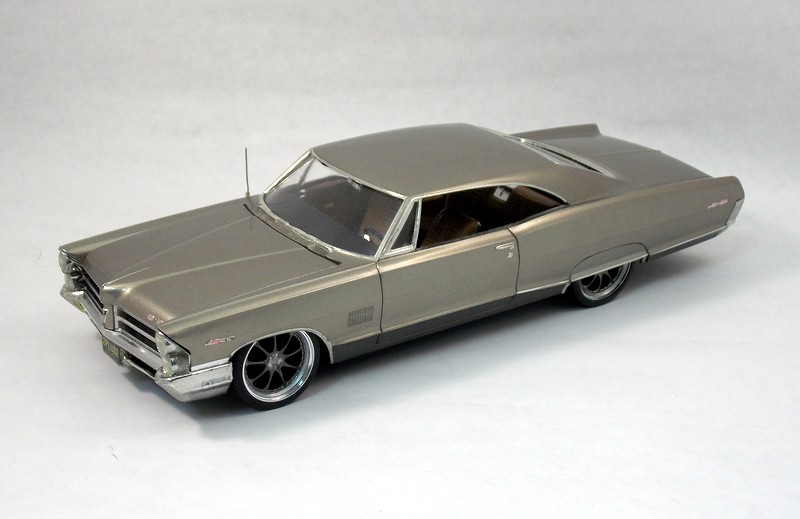
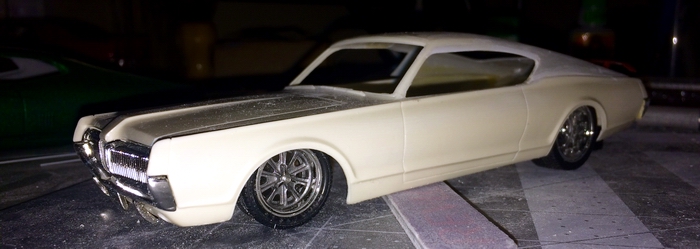
The car that should have been considering the era of design in the later 60s of the swept back roof-lines with the Mustang, Charger and so many others, surprising the new Mercury Cougar wasn't given a sporty fastback option like the Mustang. First, cudos go to Kaucher Kustoms as to the photo-shop rendering of a 67 Cougar with a 69 Torino roof sweep. Just received 4 of the 67 Cougar resins from one of my last orders from Modelhaus and I have wanted to tribute one of them to this fastback style. Just started this project late last night about an hours worth of quick mock up work, still have much more refining to do. Next to a 67 fastback mustang, this Cougar is long!
-
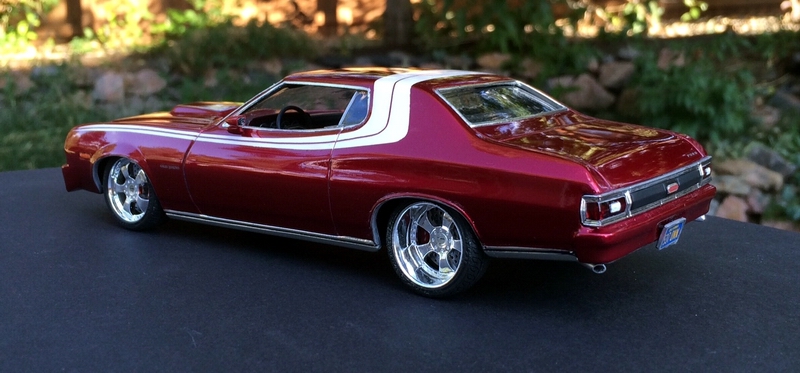
Cool thread... all these good looking builds of a car that I don't actually think is a good looking car, other then the subject matter of the new kit as a S&H is cool. I wanted to do a build of the famous S&H Torino if the show was back on in 2016, here's my concept of the 74 Torino updated a bit with front airdam, hood scoop so no more sliding across the hood! Updated the stripe design and gave the boys new Recaro seats.
-
Thats awesome looking
-
1929 Model A Roadster ArtDeco/Coachbuilt/Streamliner -DONE!
RestoModGuy replied to Impalow's topic in WIP: Model Cars
I'm watching this build in complete awe... Great design and craftsmanship... -
Thank you Eric, coming from a master craftsman as you that's a high complimant. Yes, I'm so impressed with his designs and have collaborated on a build of his design the ZR59 last year with another builder in California who we showed the build to both Ragle and the cars builder and owner. I was at SEMA 2016 for the first time and yes, many top builders had cars there that were his design concepts. I am also working on his radical designed Corvair as well.
-
Thanks everyone for the feedback on this PSYCHO build, I'm having a lot of fun with this one so far. Worked on the front nose this weekend. I like the llok of the 67 and 68 Shelby's and the front of the 69 GT Mustangs. So decided to bash them together, a little from each and came up with something a bit more alike the rendering. Note the center grill is from a 68 GT500 - I sloped the bumper area and headlight recesses like the 69 GT and the hood of course is a modified curved front to better flow with the 68 grill center. Swept the headlight recess at more of an angle that stock, matching the grill angle now. A very different look if you know your Mustangs. Still have to make the lower scoops and splitters. Molded in the reduced height sail-scoops and painted the gold in the rims, and scored the doors to open up when I finish all major bodywork. Thanks for looking and your feedback!